
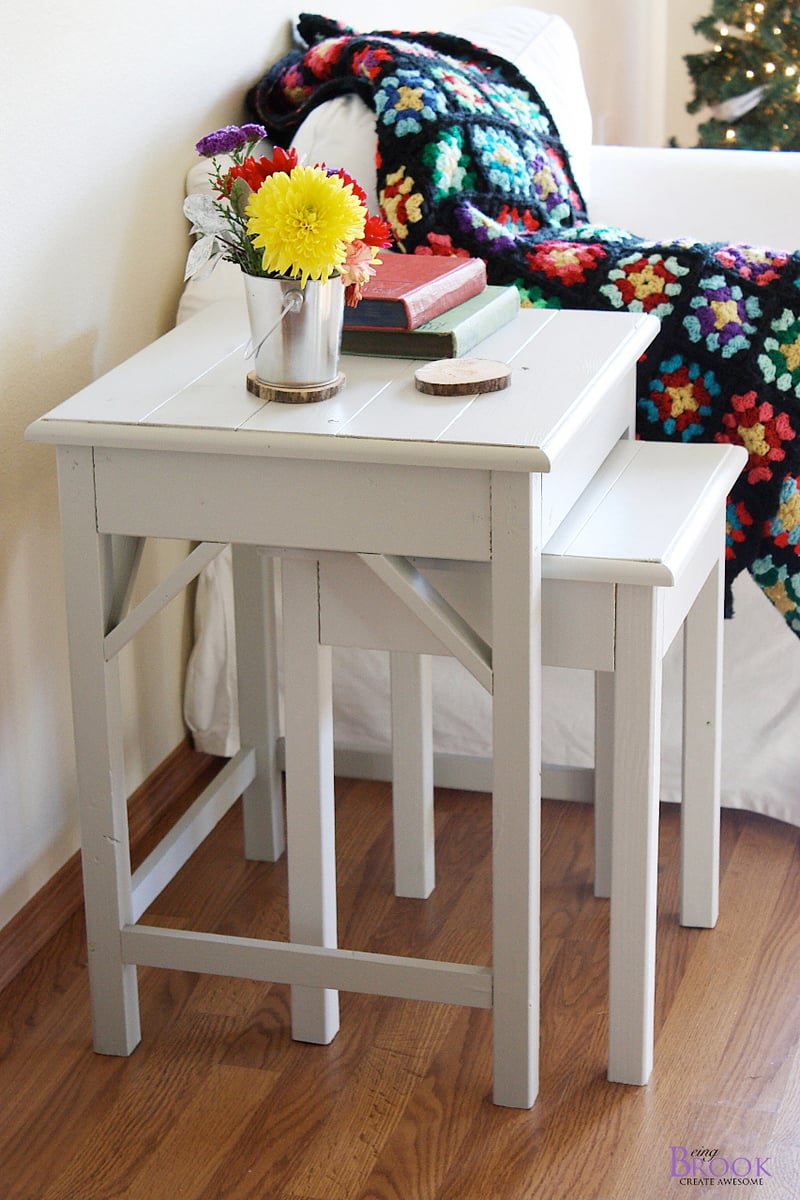

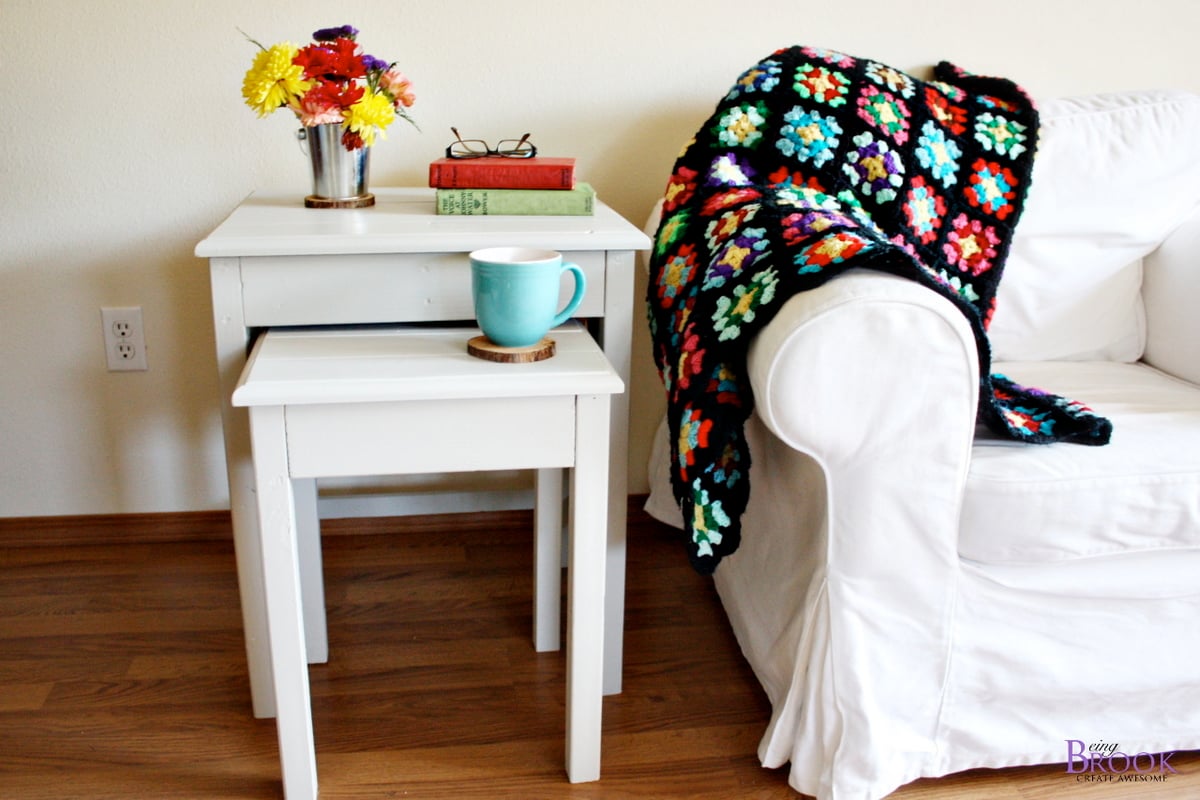
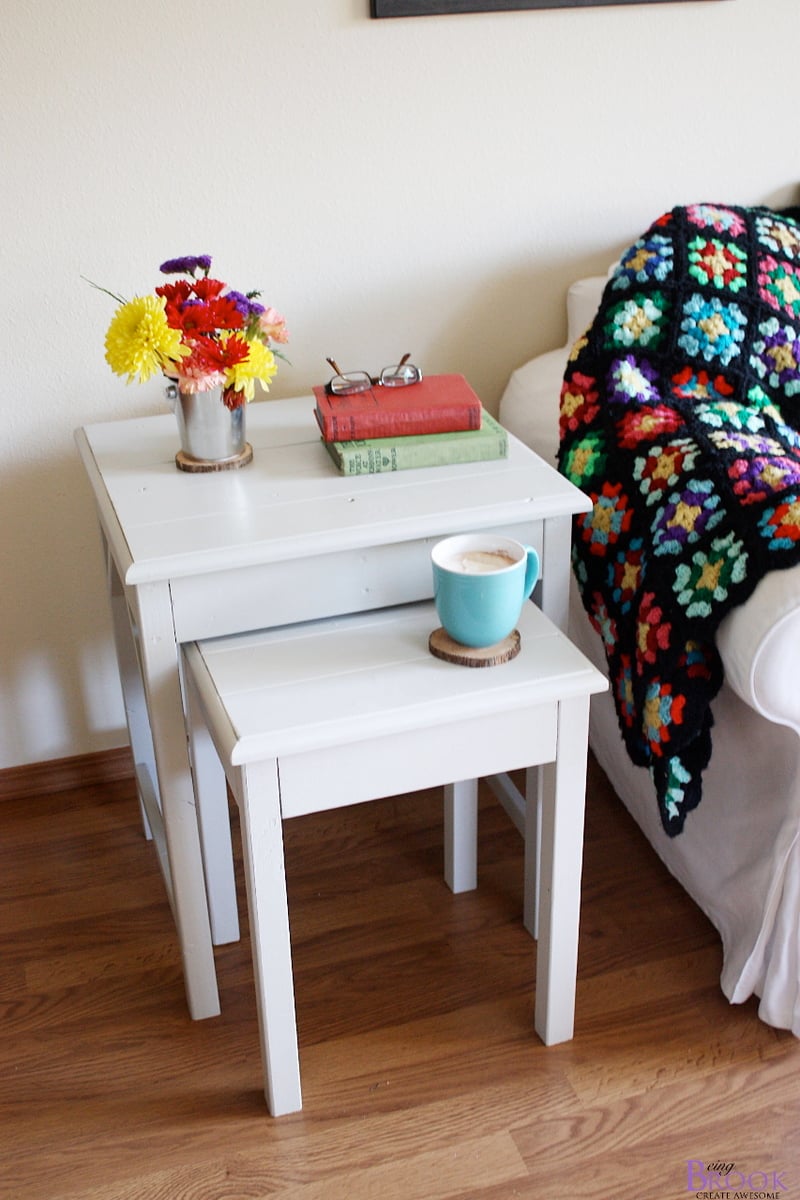
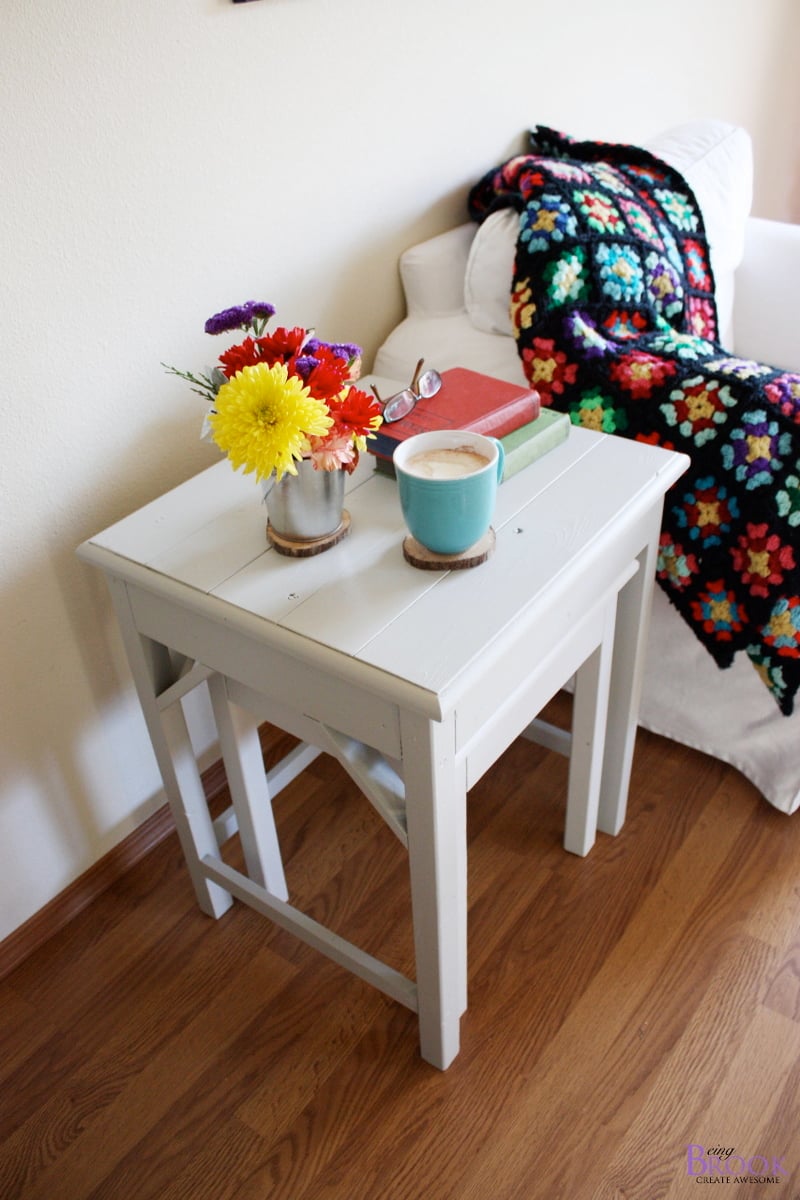
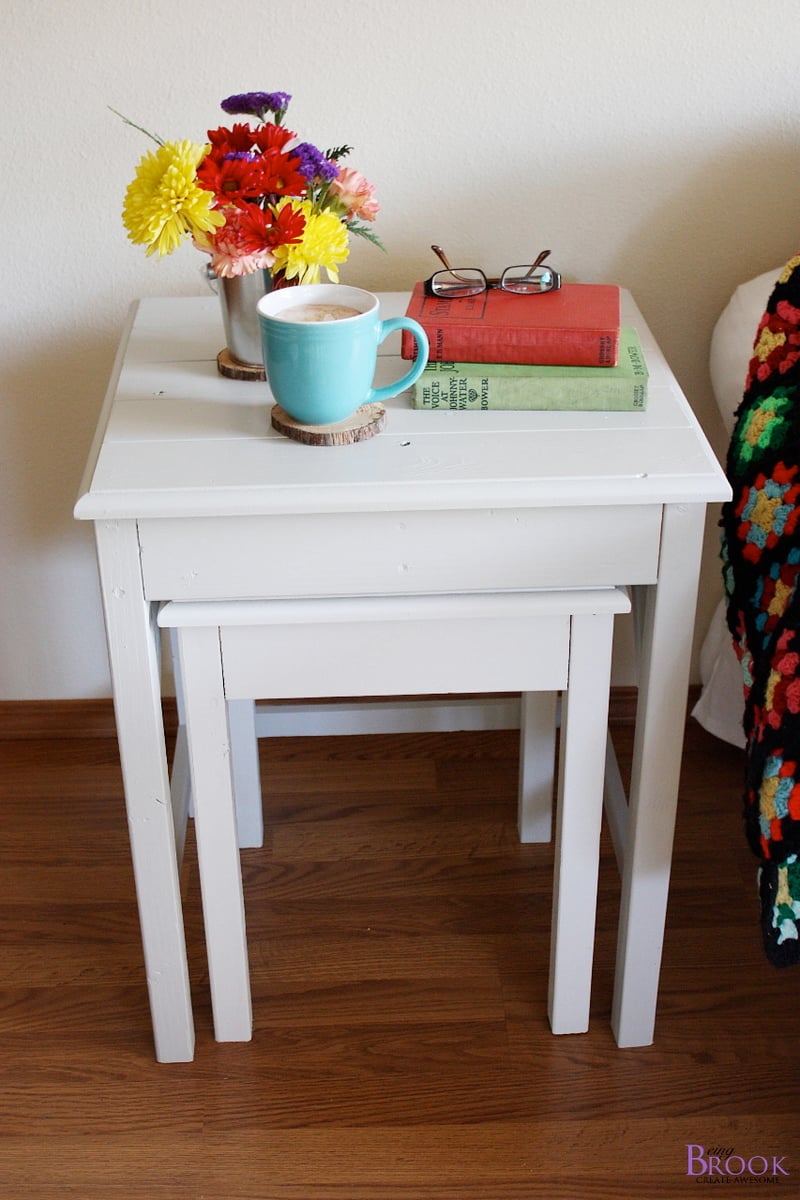
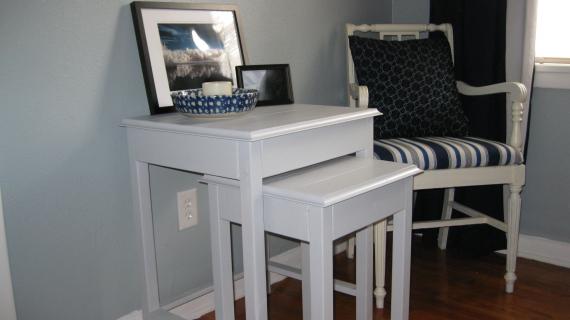
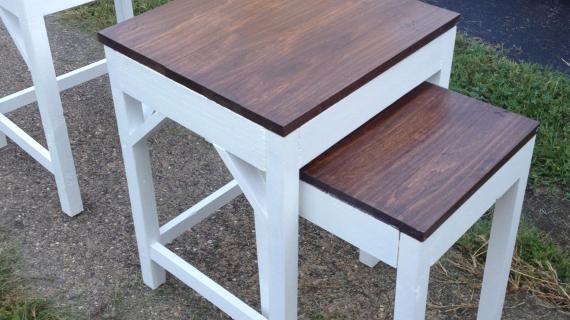
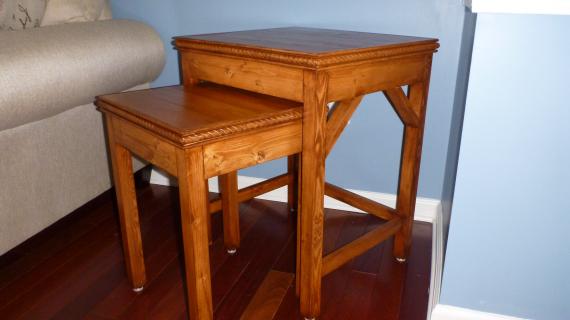
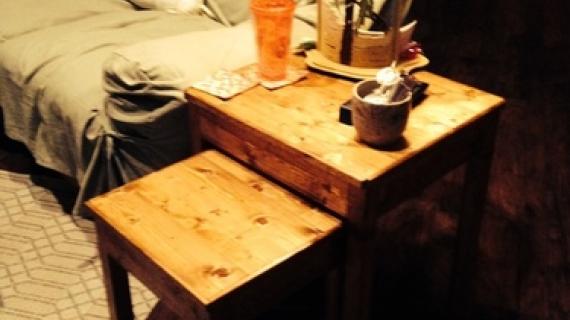
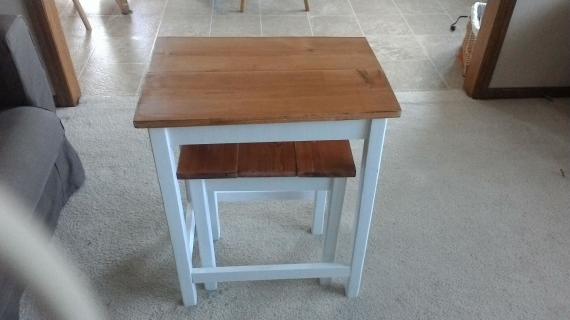
Nesting side tables with cute cottage charm for your living room! DIY plans to build these nesting end tables inspired by Pottery Barn Pratt Nesting Side Tables.
Do you ever get excited when you see a new plan, excited to see photos and read how the project is put together? Yeah?

Preparation
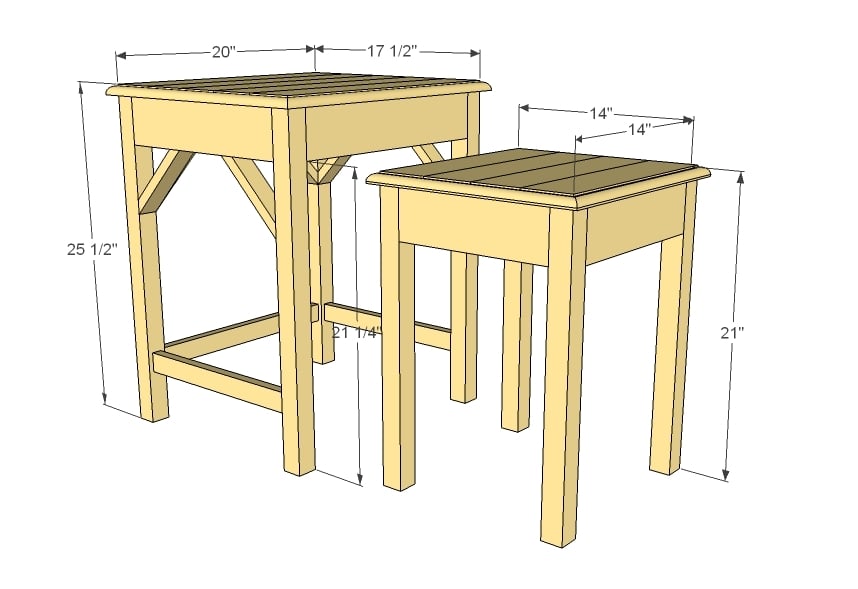
SMALL TABLE
2 - 2x2 @ 8 feet long
1 – 2x4 @ 4 feet long
1 – 1x4 @ 8 feet long
1 – stick 5/8” cove base moulding @ 6 feet long
LARGE TABLE
1 - 2x2 @ 8 feet long
1 – 2x4 @ 8 feet or stud length
1 – 1x4 @ 10 feet long (if you are building small table, you can buy an 8 footer and use scraps from small table)
1 – stick 5/8” cove base moulding @ 6 feet long
1 – 1x2 @ 8 feet long
FOR BOTH
2” screws
1 ¼” finish nails
SMALL TABLE
4 – 2x2 @ 20”
2 – 2x4 @ 12”
2 – 2x4 @ 11”
4 – 1x4 @ 15”
5/8” cove moulding cut to fit4 – 2x2 @ 24 3/4”
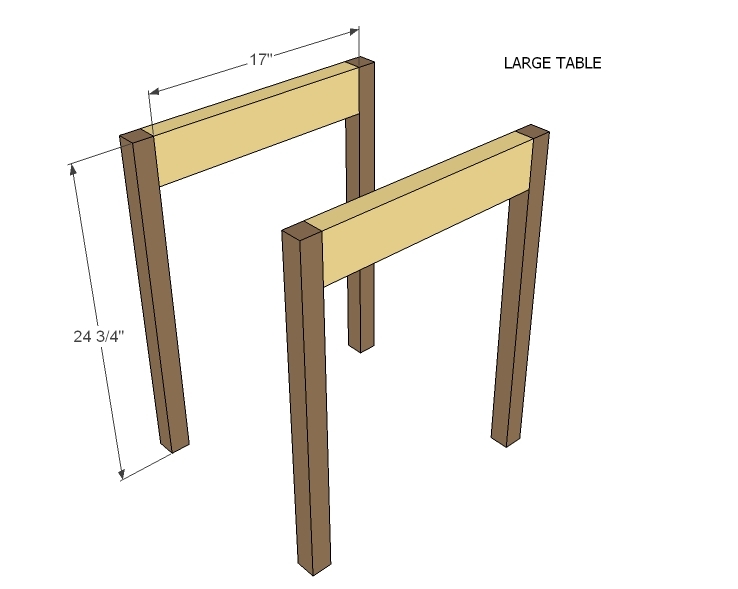
LARGE TABLE
2 – 2x4 @ 17”
3 – 2x4 @ 14 1/2”
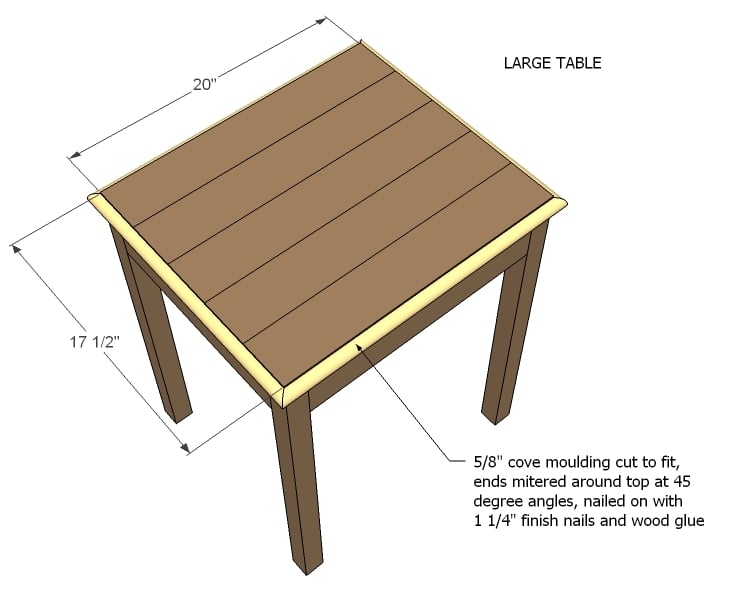
5 – 1x4 @ 20”
5/8” cove moulding cut to fit
6 – 1x2 @ 7” (Longest point to longest point, both ends cut at 45 degrees off square, ends NOT parallel)
2 – 1x2 @ 14 ½”
1 – 1x2 @ 17”


Please read through the entire plan and all comments before beginning this project. It is also advisable to review the Getting Started Section. Take all necessary precautions to build safely and smartly. Work on a clean level surface, free of imperfections or debris. Always use straight boards. Check for square after each step. Always predrill holes before attaching with screws. Use glue with finish nails for a stronger hold. Wipe excess glue off bare wood for stained projects, as dried glue will not take stain. Be safe, have fun, and ask for help if you need it. Good luck!
Instructions
Step 1
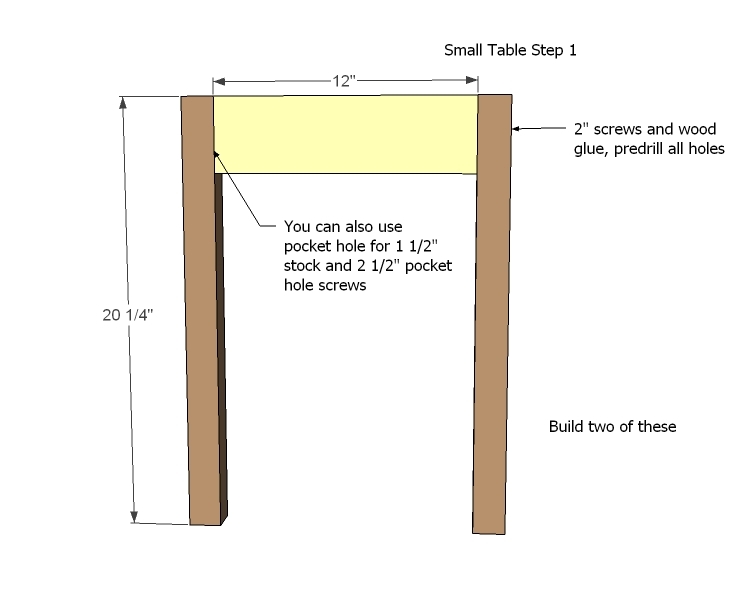
Attach legs to aprons to create two leg sets.
Step 2
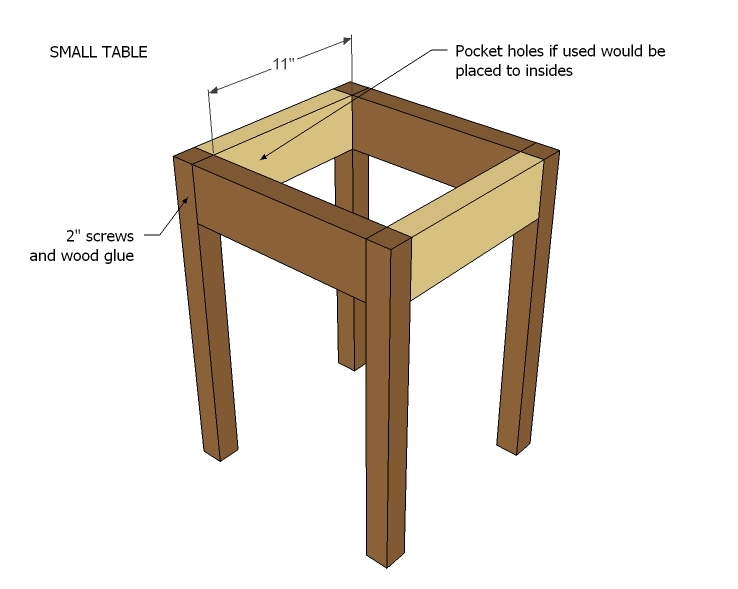
Then attach the remaining aprons to the leg sets to create a table! How easy is this???
Step 3

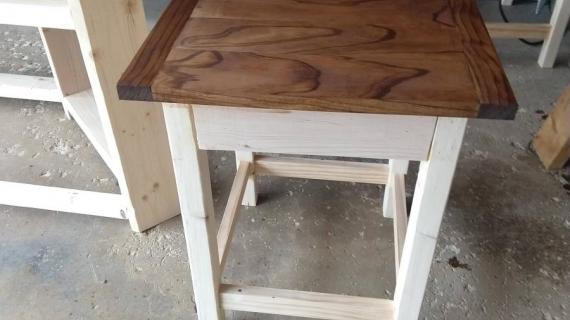
Add planking to the top for a rustic look. Go ahead, ding up the top with a hammer - it'll just add to the handmade vintage rustic appeal.
Step 4
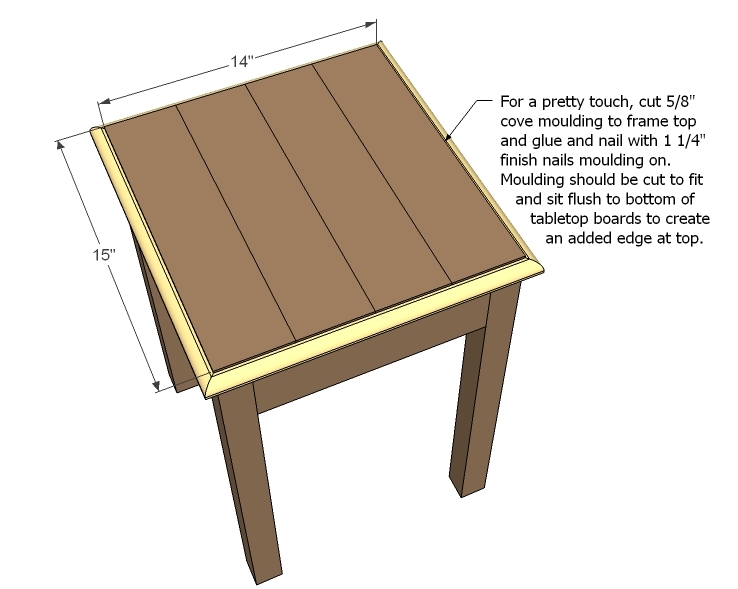
This is optional, but I'm so glad Brook put the moulding around her tables. It's just such a nice touch. Glue and nail on. If using a hammer, nail with a nail set to push nails below surface of wood. Corners should be mitered at 45 degrees off square.
Step 5
Step 6
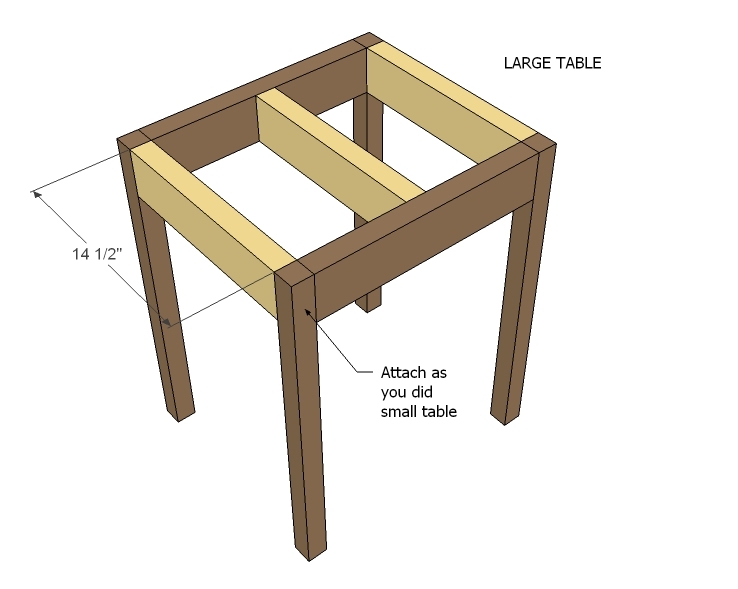
Only difference is we add a center support on this one.
Step 7

Planking for the top ...
Step 8
Moulding if you are going that route.
Step 9
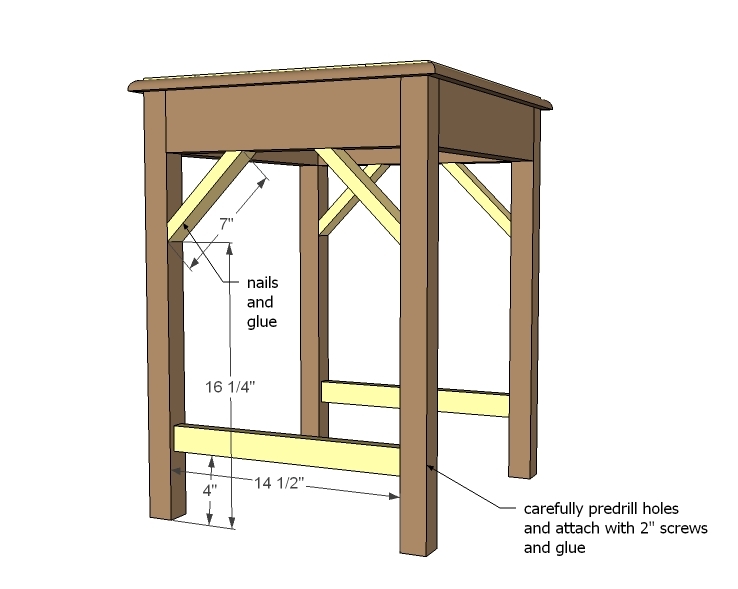
And now the fun part. Add the stretcher and angle braces.
Step 10

And then on the back. And that's it!!!
It is always recommended to apply a test coat on a hidden area or scrap piece to ensure color evenness and adhesion. Use primer or wood conditioner as needed.

Comments
Dene (not verified)
Wed, 11/30/2011 - 20:05
Love these side tables
Awesome project!
meganleiann (not verified)
Wed, 11/30/2011 - 21:09
I have been looking for
I have been looking for reasonably-priced nesting tables for about 2 years! It even autofills on Craigslist! This just got moved to the top of my list!
spiceylg
Thu, 12/01/2011 - 02:54
Yes!
Been waiting for these! Question, do you absolutely have to have the angle braces?
In reply to Yes! by spiceylg
Ana White
Thu, 12/01/2011 - 04:45
Would be fine without!
Would be fine without!
In reply to Would be fine without! by Ana White
spiceylg
Thu, 12/01/2011 - 05:18
Yay!
That's great news, thanx for taking the time to answer Ana!
Kate (not verified)
Thu, 12/01/2011 - 06:40
I'm very excited! We
I'm very excited! We recently got a loveseat to complete the rest of our living room (we moved from an apartment to a house and needed the extra seating that we now have room for) and have been trying to figure out what to do for a side table. I think this would work well and help with the modern cottage look I (sort of hope to) have going.
jigganancy
Thu, 12/01/2011 - 06:58
wood coaster
hey brooke .. beautiful table!
I still love this site but I have a pause on building while I decorate and complete the spaces that I've built.
So ... what caught my eye was the coaster made out of tree branch. I love it. What type of saw did you cut it with?
In reply to wood coaster by jigganancy
beingbrook
Thu, 12/01/2011 - 07:16
Saw
The coasters were cut with a chop saw. I actually just posted last night how to make the coasters-so easy. http://beingbrook.com/easy-log-coasters-nesting-tables/. Have to protect my new tables!
bhoppy
Thu, 12/01/2011 - 07:19
looks great
Love the tables and coasters. Great tutorial for the coasters on your blog link too. Although I was surprised you guys didn't mention the nesting table plans already on the brag board from Karen at the "The Quaint Cottage".
http://ana-white.com/2011/07/diy-copy-cat-nesting-tables
In reply to looks great by bhoppy
beingbrook
Thu, 12/01/2011 - 09:52
Cute!
I love Karen's tables! The turquoise is fabulous. Thanks for linking them.
In reply to looks great by bhoppy
spiceylg
Thu, 12/01/2011 - 10:19
Agree
I thought the same thing!
Kate (not verified)
Thu, 12/01/2011 - 16:20
My mom is getting me a miter
My mom is getting me a miter saw for my birthday/Christmas. I think this will be a perfect project to try it out! Great way to start before I jump into building a farmhouse bed.
Alaskan Bev
Thu, 12/01/2011 - 20:19
miter saw
You will love your new miter saw! I have three of them at school and one or two are in use all day, with me no more than 2-3 feet away. Remember all safety rules - good work gloves, hearing and eye protection, and a mask is a good idea, too. Clamp/support your wood. I have students building strong stools, 12 X 12 X 6" wooden boxes with lids, all kinds of smaller boxes, mail holders, tabletop bookracks, assorted toys, shadow boxes, picture frames, "problem solvers" (any kind of wooden creation that meets a need), etc. Have fun with it - good luck!
Jami H
Fri, 12/02/2011 - 10:44
I built these last night.
These tables are ADORABLE and simple and I had enough scraps left over from other projects so they were FREE!! They are exactly what I was needing for my living room re-do project.
**Ana, on the cutting instructions; instructions for the larger table legs are missing.**
I used 1x4s instead of 2x4s because that's what I had on hand. They took me two hours.
Also, I pre-cut everything because I wanted to assemble everything at the same time, so I didn't measure as I went along. But my smaller table was too tall to fit under the larger. I had to cut the legs with my circular saw, so I'd go 1/2" shorter on the small table legs (or measure for the smaller table after you've built the taller table).
Also, I fit the planks for both tops last. I did customize it a little, so that made the measurements change a little for the tops.
I'll post pics after they're painted Robin's Egg Blue. :)
GUEST (not verified)
Tue, 12/06/2011 - 07:26
Size
I want to build just the smaller table for my Mom. She has been looking for a table with a unique set of measurements; The top needs to be 16x12. Would these plans work if I change the measurements of the table top?
Kate (not verified)
Sat, 12/10/2011 - 16:27
My husband and I went and got
My husband and I went and got wood for these tables today! I went with cheap furring strips for most of the wood, but splurged on nice 1x4's since I wanted a flatter surface for the top. I can't wait to get started on building tomorrow!
Jenni1026
Sun, 12/11/2011 - 11:48
Love these !! I think I am
Love these !! I think I am going to make these for our bedroom as nightstands !
Angel Rose
Tue, 03/13/2012 - 07:37
Ummmmm Rookie Mistakes... HELP
So... this was the first project I attempted. I adjusted the size to make one of these for my mom who wanted a side table with very weird/specific measurements. It is completed . . . and I learned A LOT as a rookie, but I still have some questions. I had major issues trying to make the aprons straight or flat or whatever the terminology is. I had to restart twice because once I had the two aprons they were so "out of whack" that the other side pieces would not match up to attach. This might have something to do with keeping things "square" . . . which I am still confused about. I don't have the Kreg Jig yet, which I assume makes life 1billion time easier. I just used plain ole drill and screws.
Don't get me wrong, I am SO stoked to have made something! I ran around the house with the hammer screaming at my fiancé, “look, I made a table, a TABLE". Just want to make my next project even MORE successful
Any info would be great! Thanks!
BrandyK
Wed, 02/24/2016 - 20:03
Small rectangle
Has anyone varied these plans to make the tables smaller or rectangular? I have a need for some end tables in my small living room. I have a spot next to the couch to store the tables that is 14 inches wide. I would love to have a second table that can be pulled out and temporarily used. That is why I love these stacking tables....plus they look beautiful. Any suggestions?