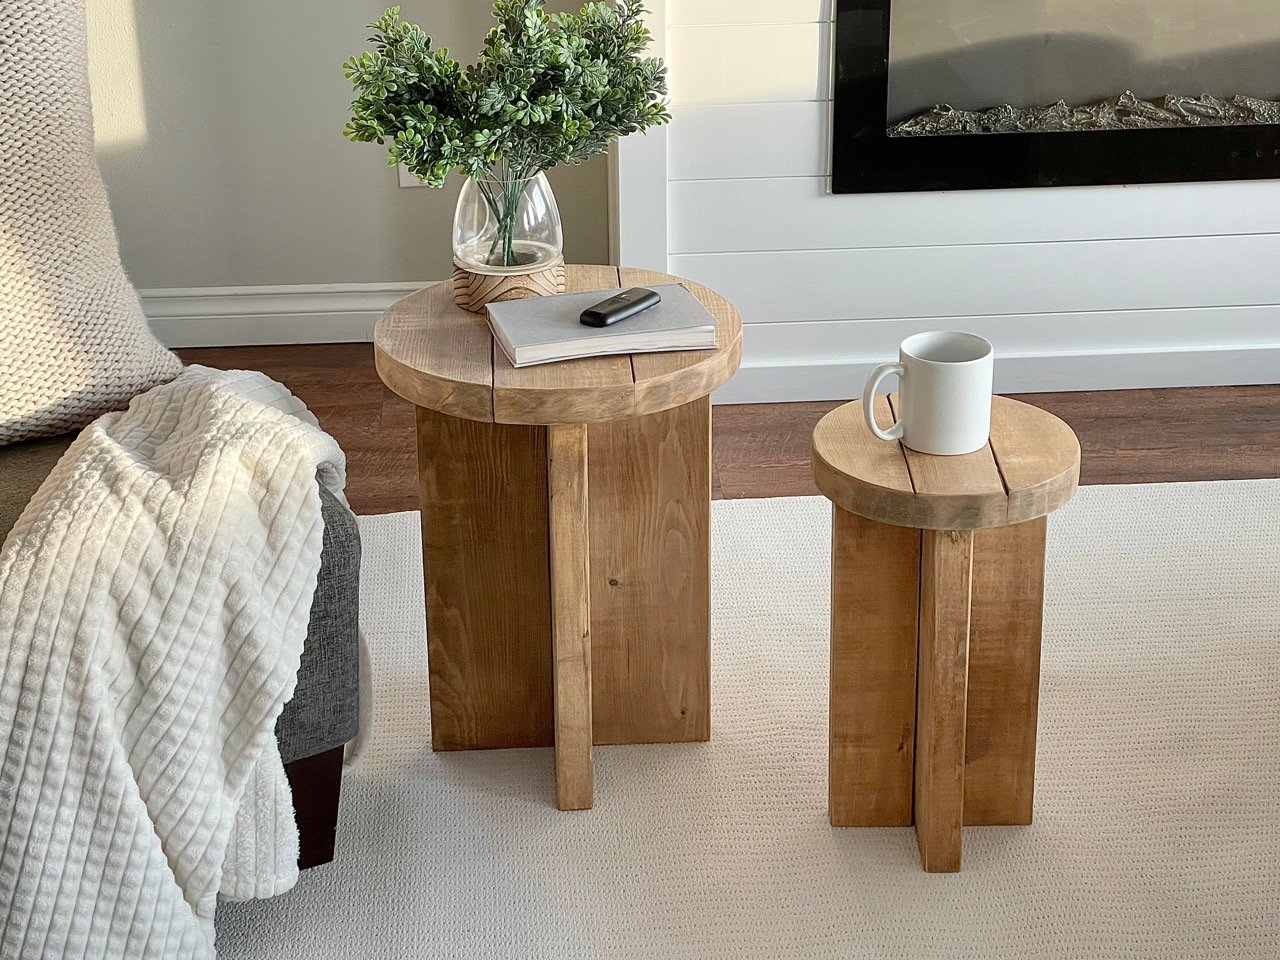

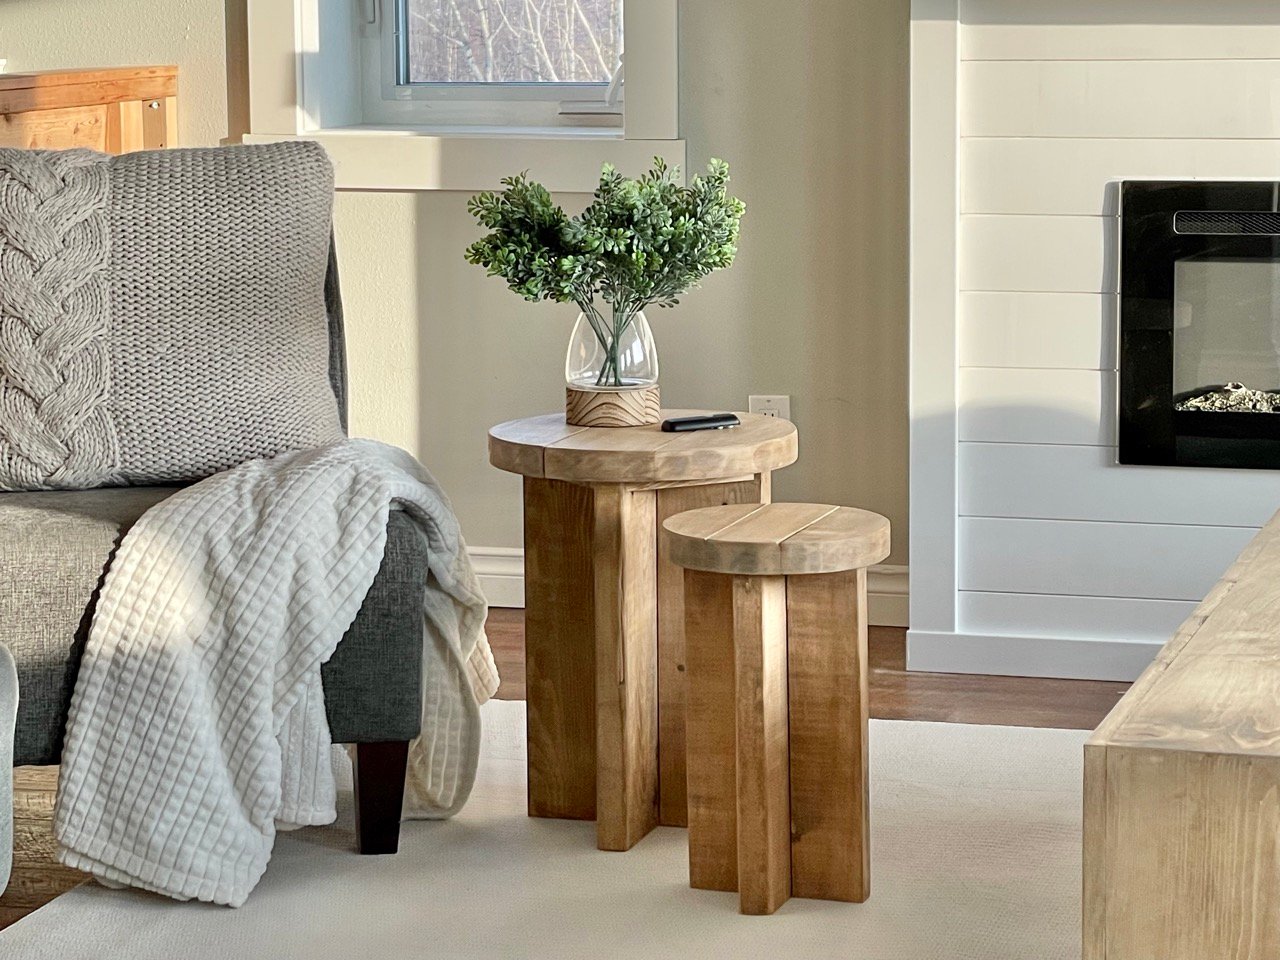
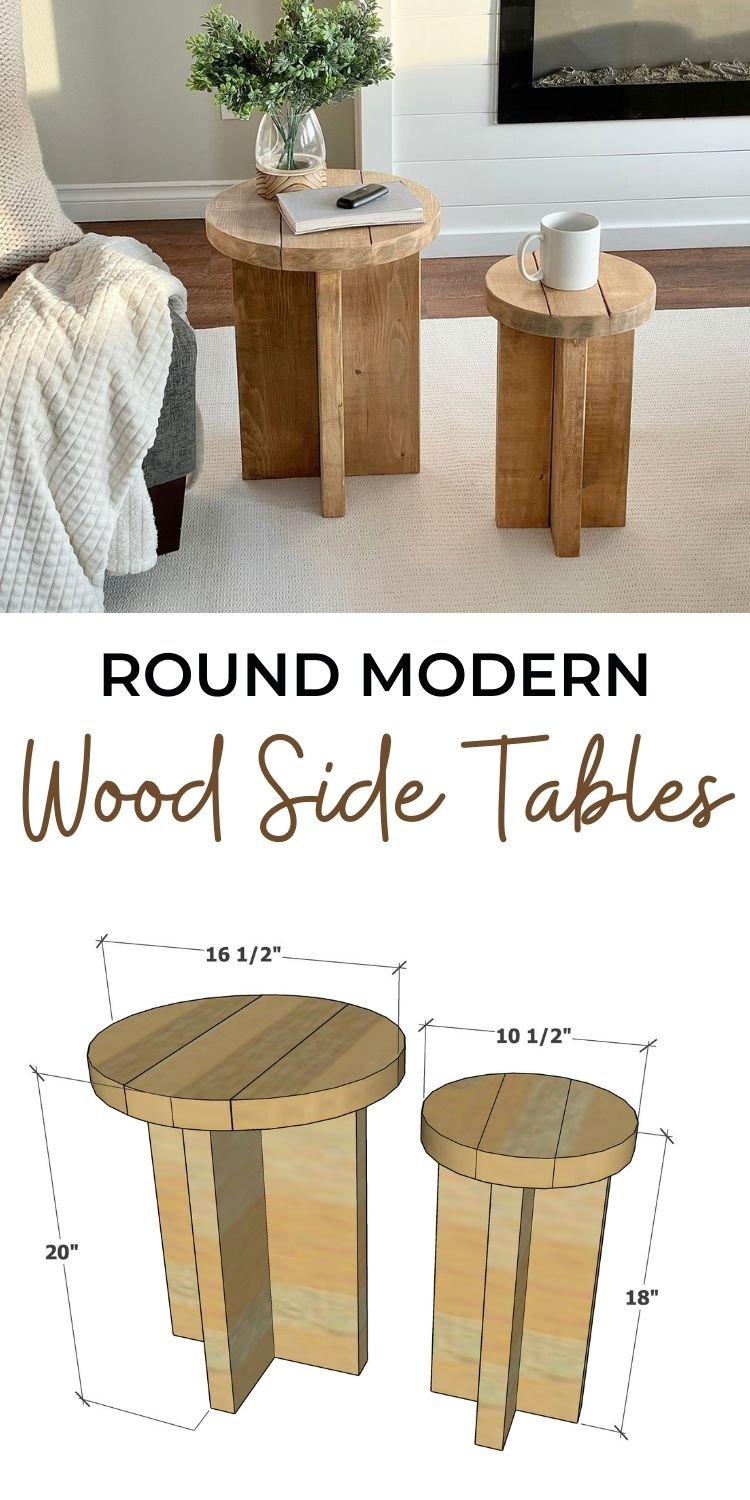
These beautiful side tables are DIY! For about $20, you can build your own with our free, step by step plans with video, detailed diagrams and lots of photos. From Ana-White.com
Why I Build These End Tables
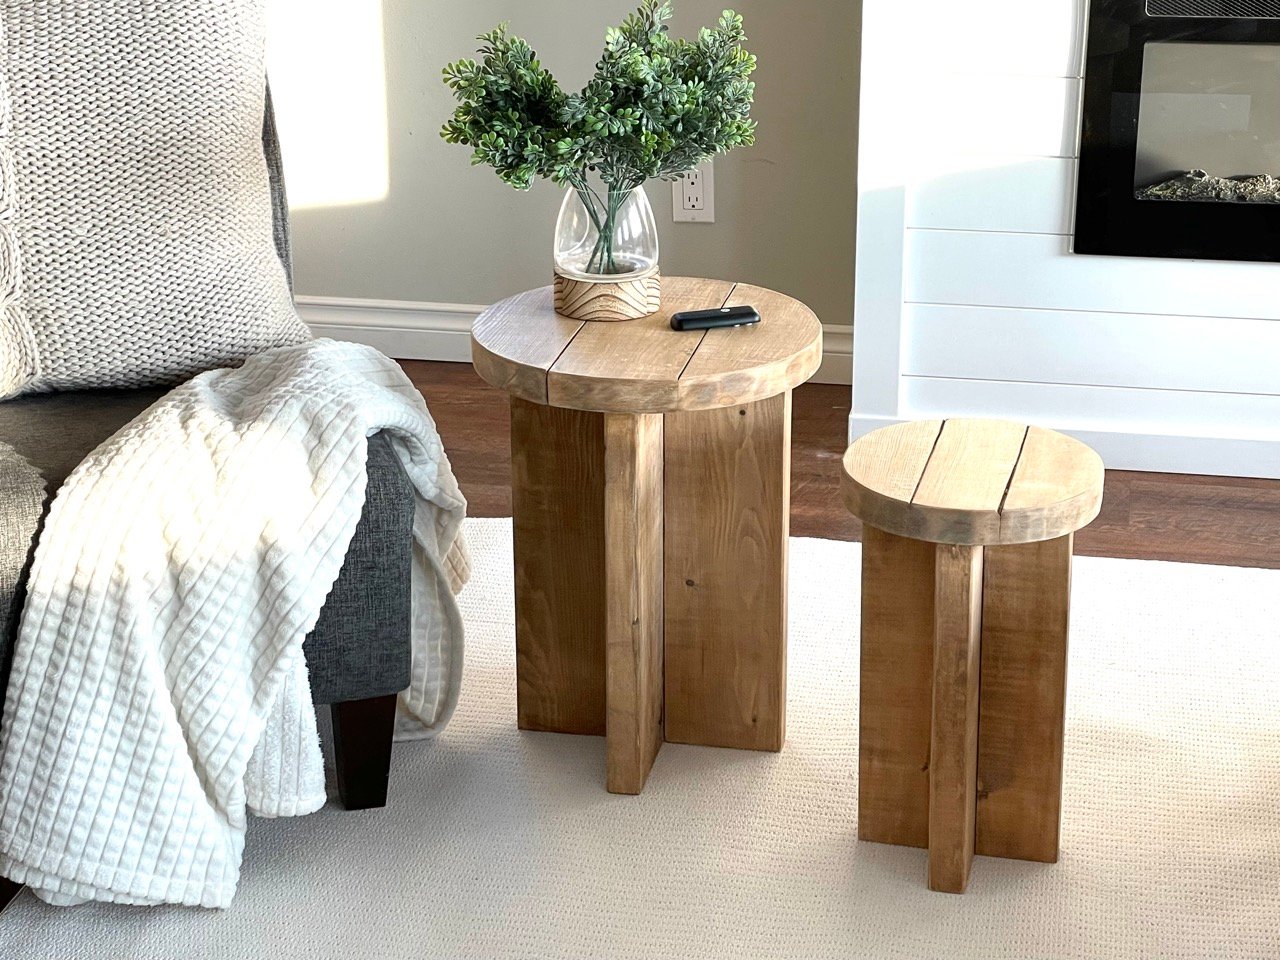
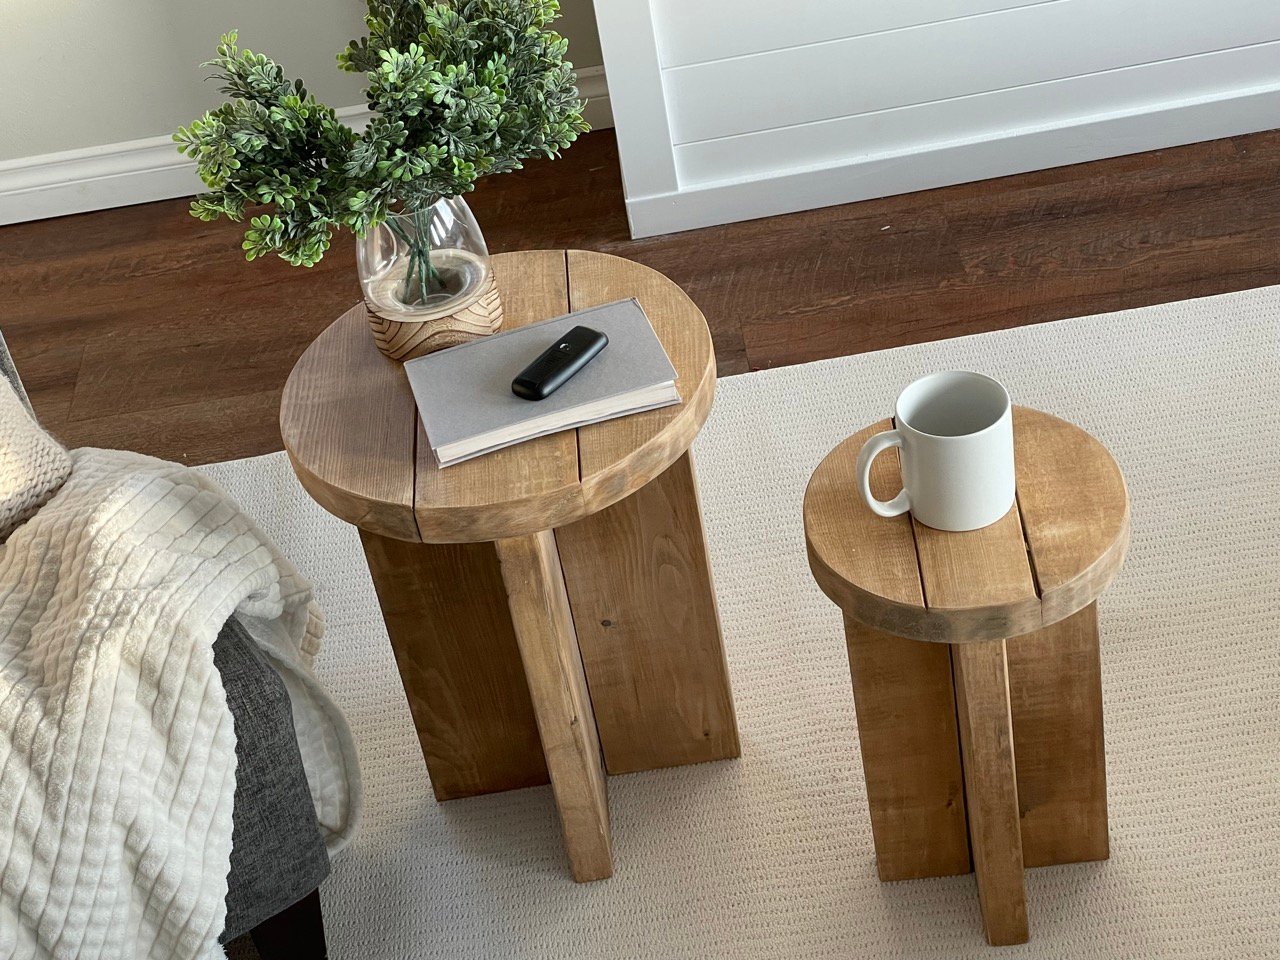
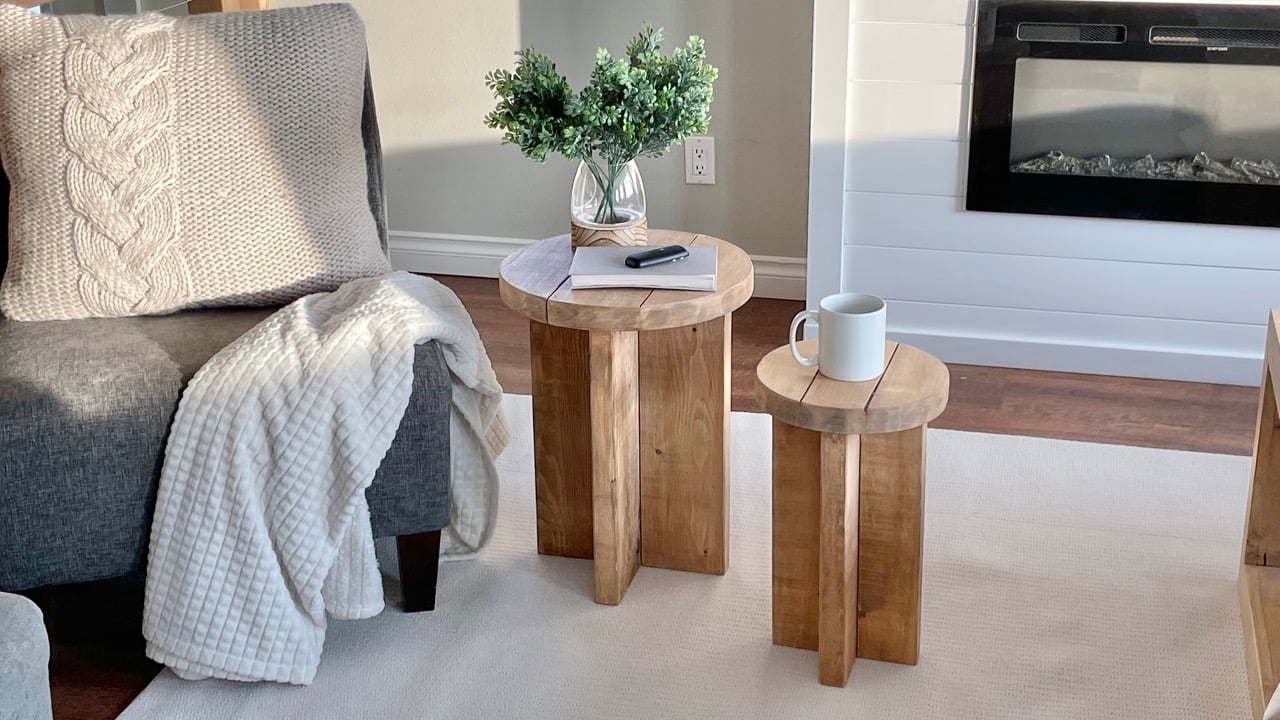
It's always nice to have a nearby tabletop surface to set a coffee cup on or a remote. I've been loving the trend of more modern, chunky shapes, especially the extruded X shape.
These little end tables turned out so well and cost between $15-$20 to build! I love the rustic wood tones with the modern shape.
VIDEO: How to Build These End Tables
This is a free project plan. Please take a second to watch the video tutorial on how to build them - there's a few tricks that make all the difference with these end table builds.
FAQ About These End Tables
Can I build in different heights? You could build these shorter, but taller might be too easy to topple over.
Can I build bigger (wider, etc) - I haven't tested yet, but I'm really hoping to get a 2x12 coffee table build done. I don't see why it wouldn't work, but need to do a test before sharing plans.
Can I cut the tabletop circle with a jigsaw? Yes, but it is super hard to keep the jigsaw blade level vertically, especially when cutiting smaller, tighter circles, the blade tends to bevel out. So the circle saw is a cleaner option. You can also use a tablesaw or router.
Pin For Later!

Preparation
For 2x4 Side Table
- 1 - 2x4 @ 8 feet long (soft pine, yellow toned boards with minimal knots, cracks and warps)
- 1 - 2x2 @ 20" long (must be 1-1/2" x 1-1/2")
- 2" self tapping trim screws (16)
- 1 - 1/2" pocket hole screws (4)
For 2x6 Side Table
- 1 - 2x6 @ 12 feet long (soft pine, yellow toned boards with minimal knots, cracks and warps)
- 1 - 2x2 @ 24" long
- 2" self tapping trim screws (16)
- 1 - 1/2" pocket hole screws (6)
For 2x4 Side Table
- 4 - 2x4 @ 16-1/2"
- 2 - 2x2 @ 9" - long point measurement, one end cut at 45 degrees
- 3 - 2x4 @ 10-1/2"
For 2x6 Side Table
- 4 - 2x6 @ 18-1/2"
- 2 - 2x2 @ 10" - long point measurement, one end cut at 45 degrees
- 3 - 2x6 @ 16-1/2"


Instructions
Step 1
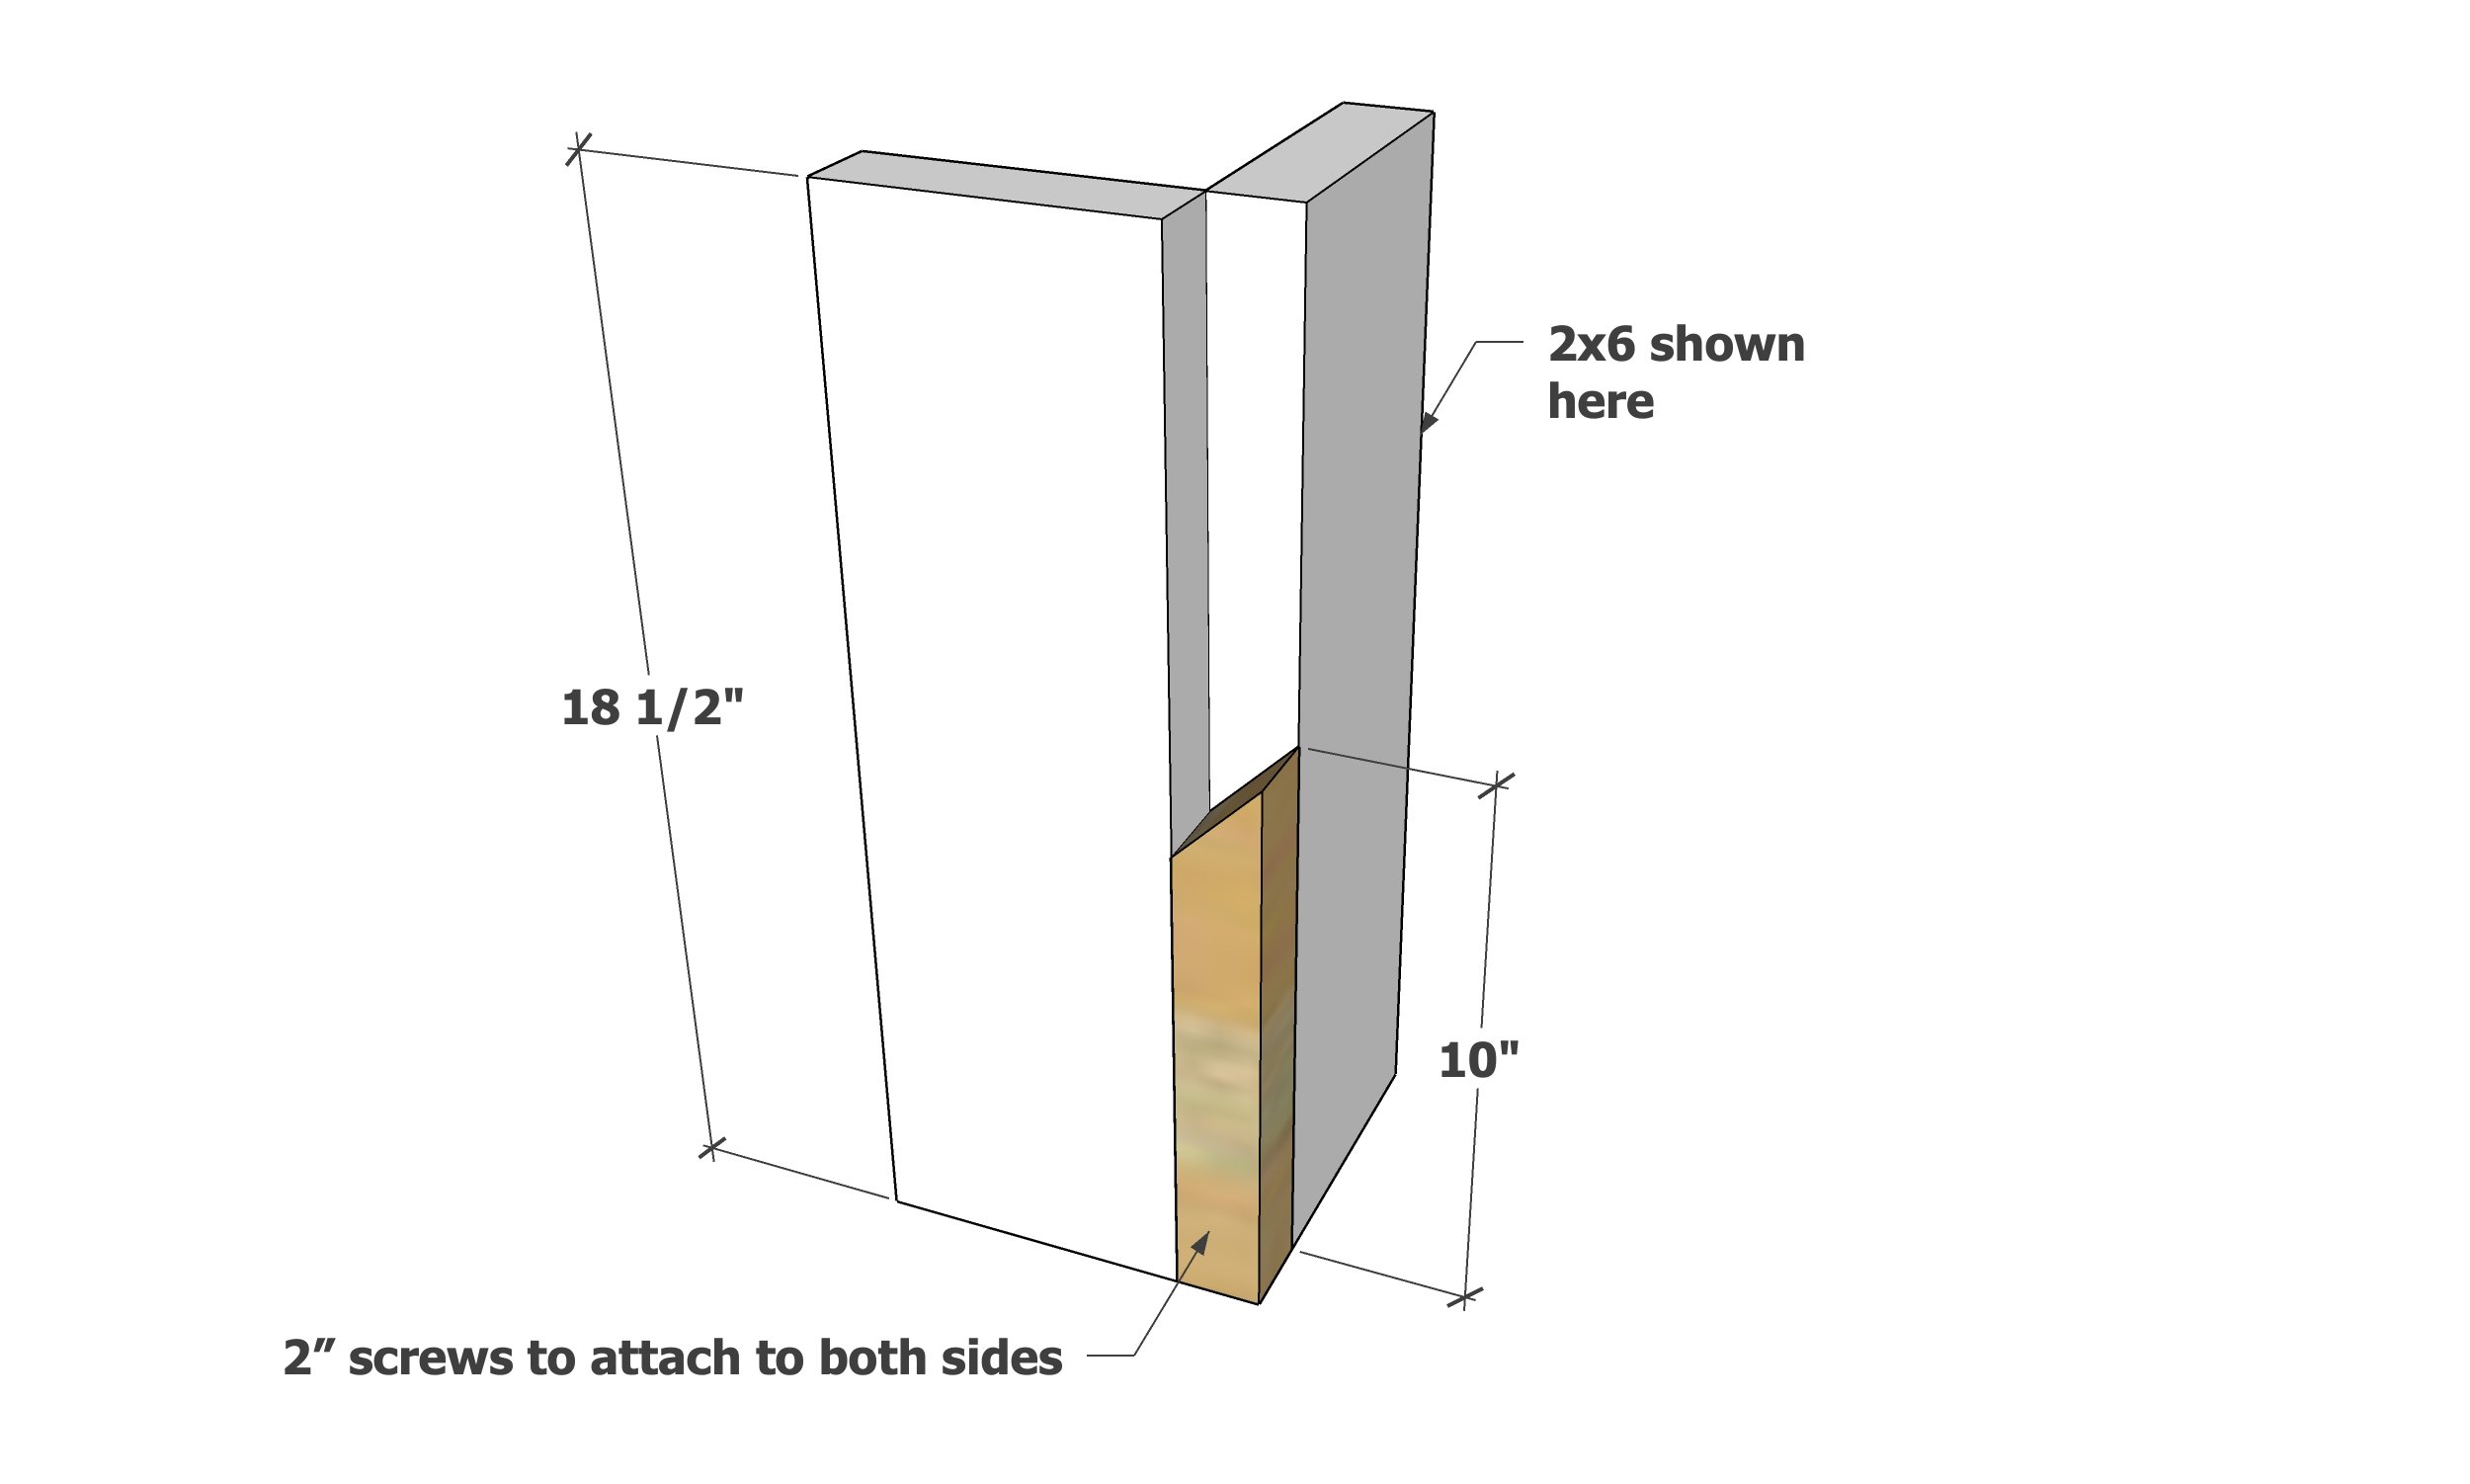
Attach one of the 2x2s to two of the legs as shown using the 2" trim screws, a total of four screws (2 per leg) to attach.
Be careful not to split the 2x2.
Make sure the 2x2 long point is facing outward and is flush to the bottom.
Step 2
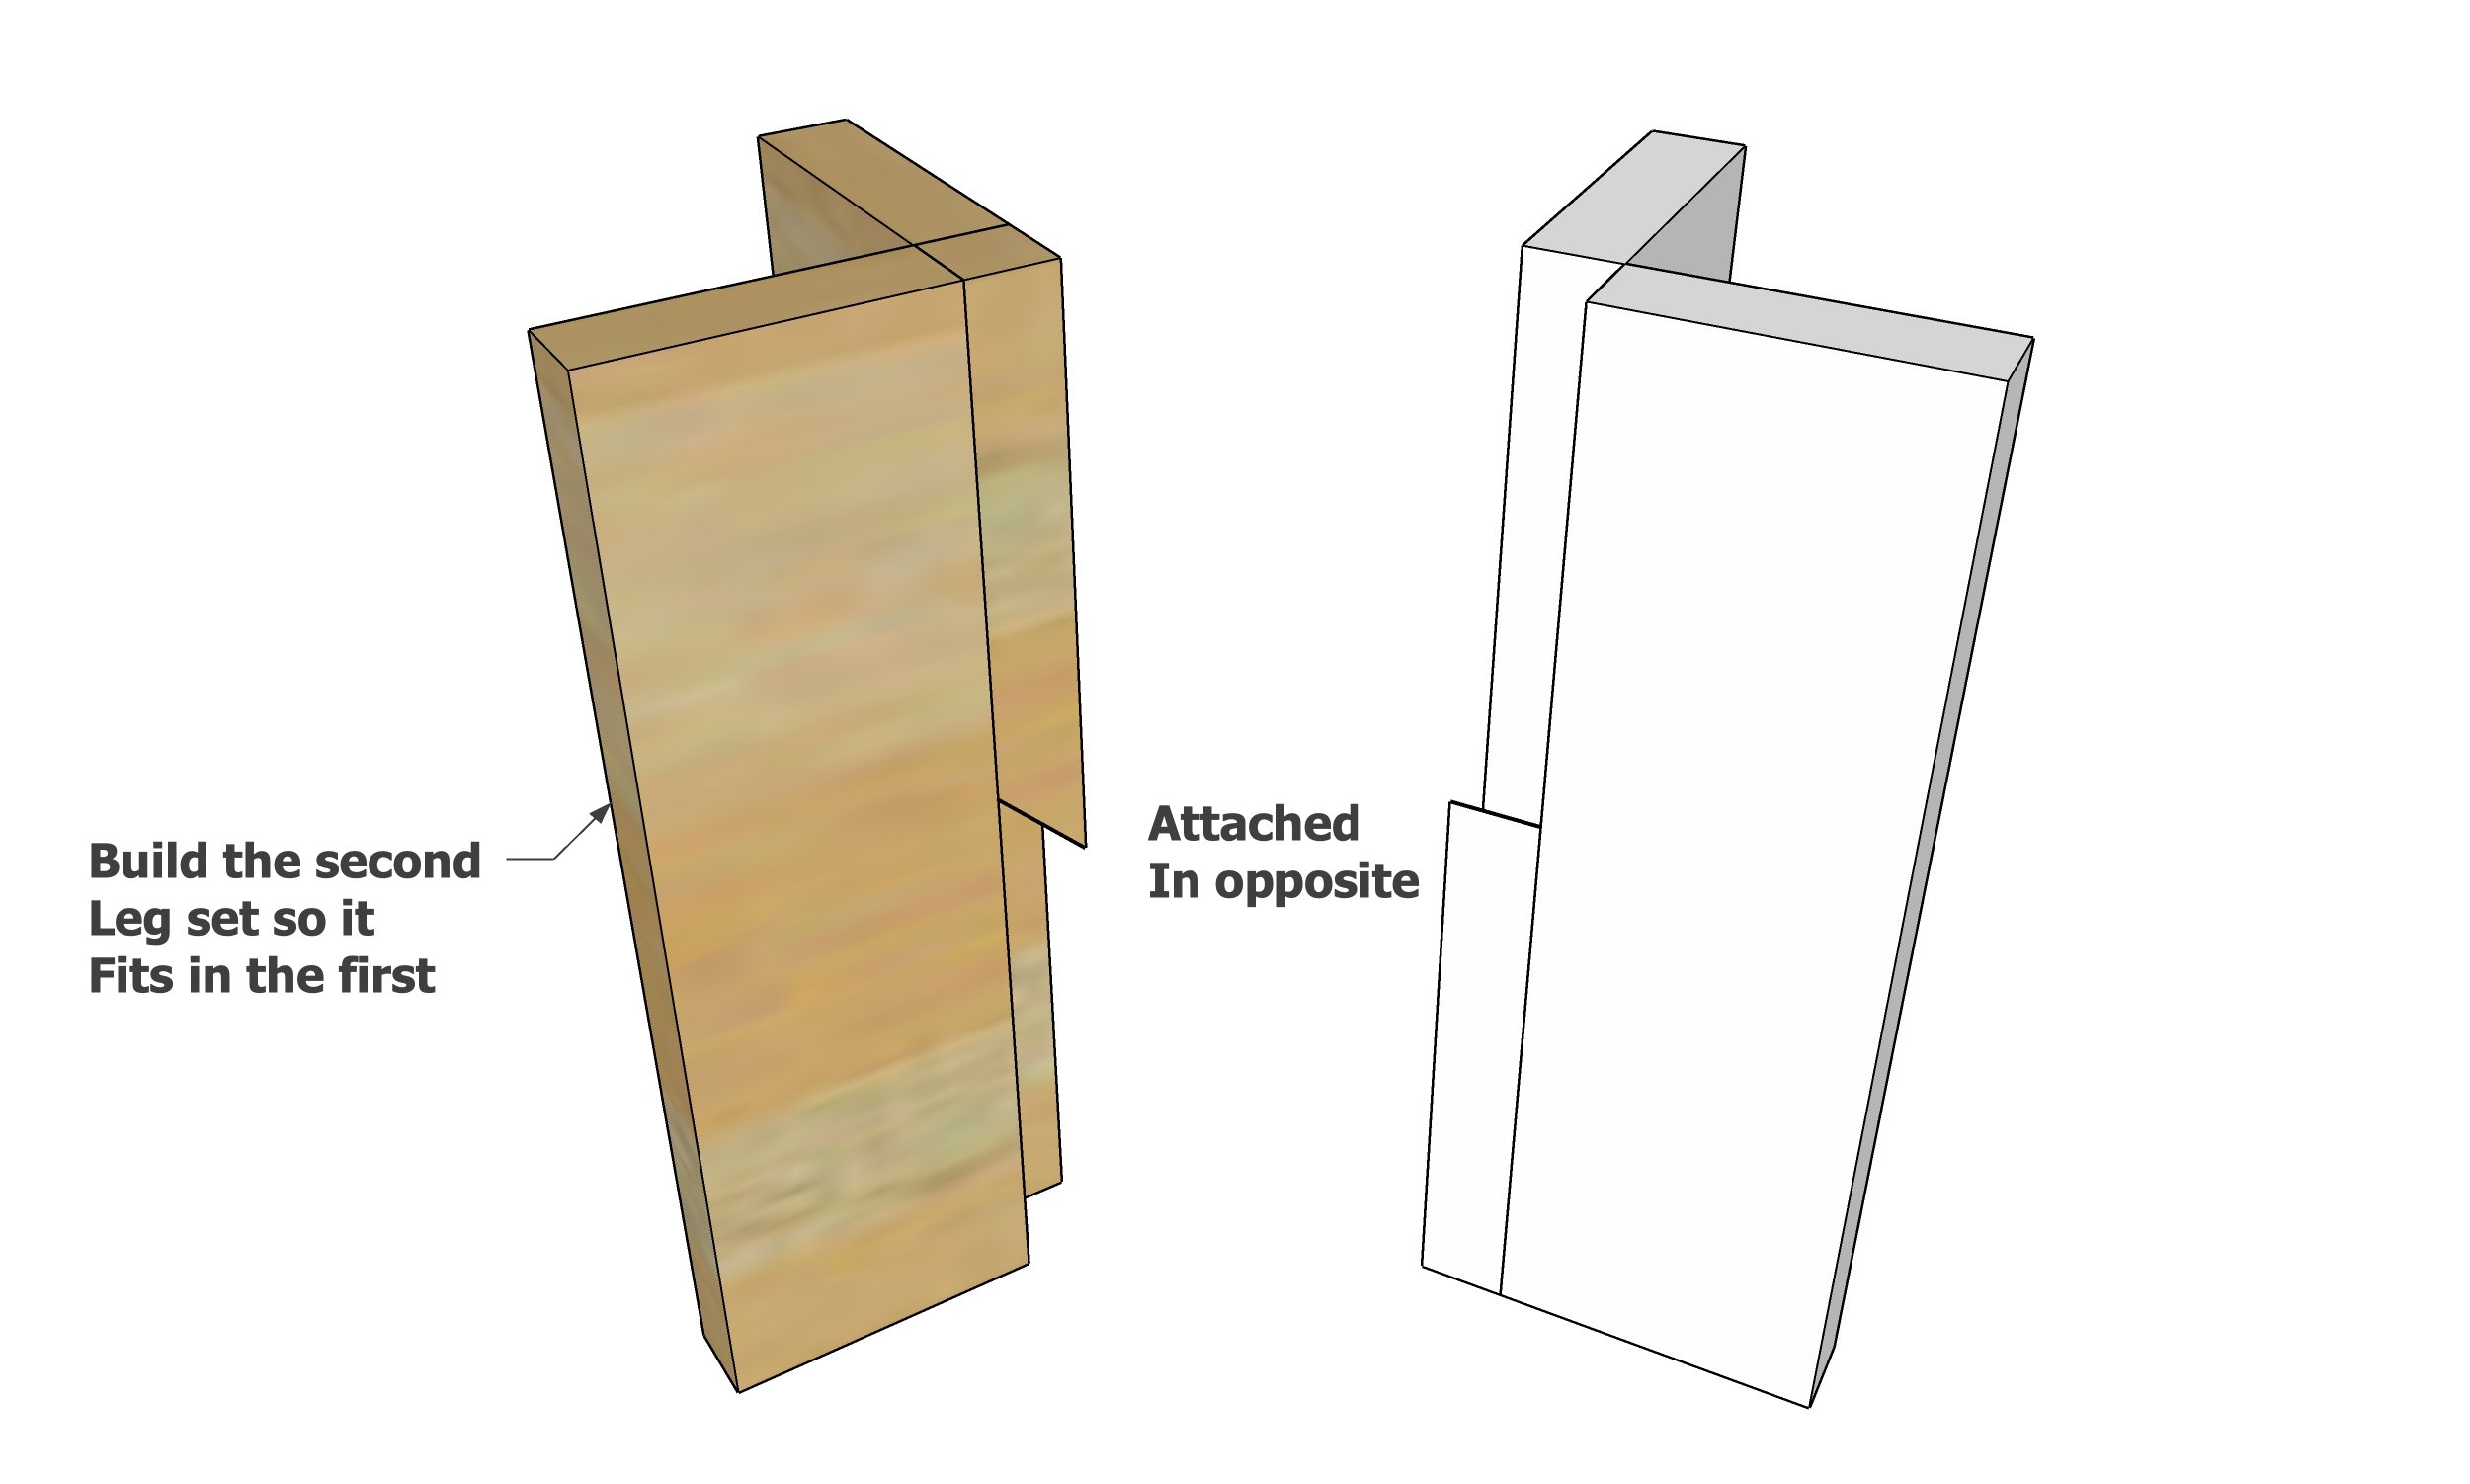
Repeat the steps for the second leg set, but make sure the 2x2 is orientated so it fits with the first 2x2 piece.
Step 3
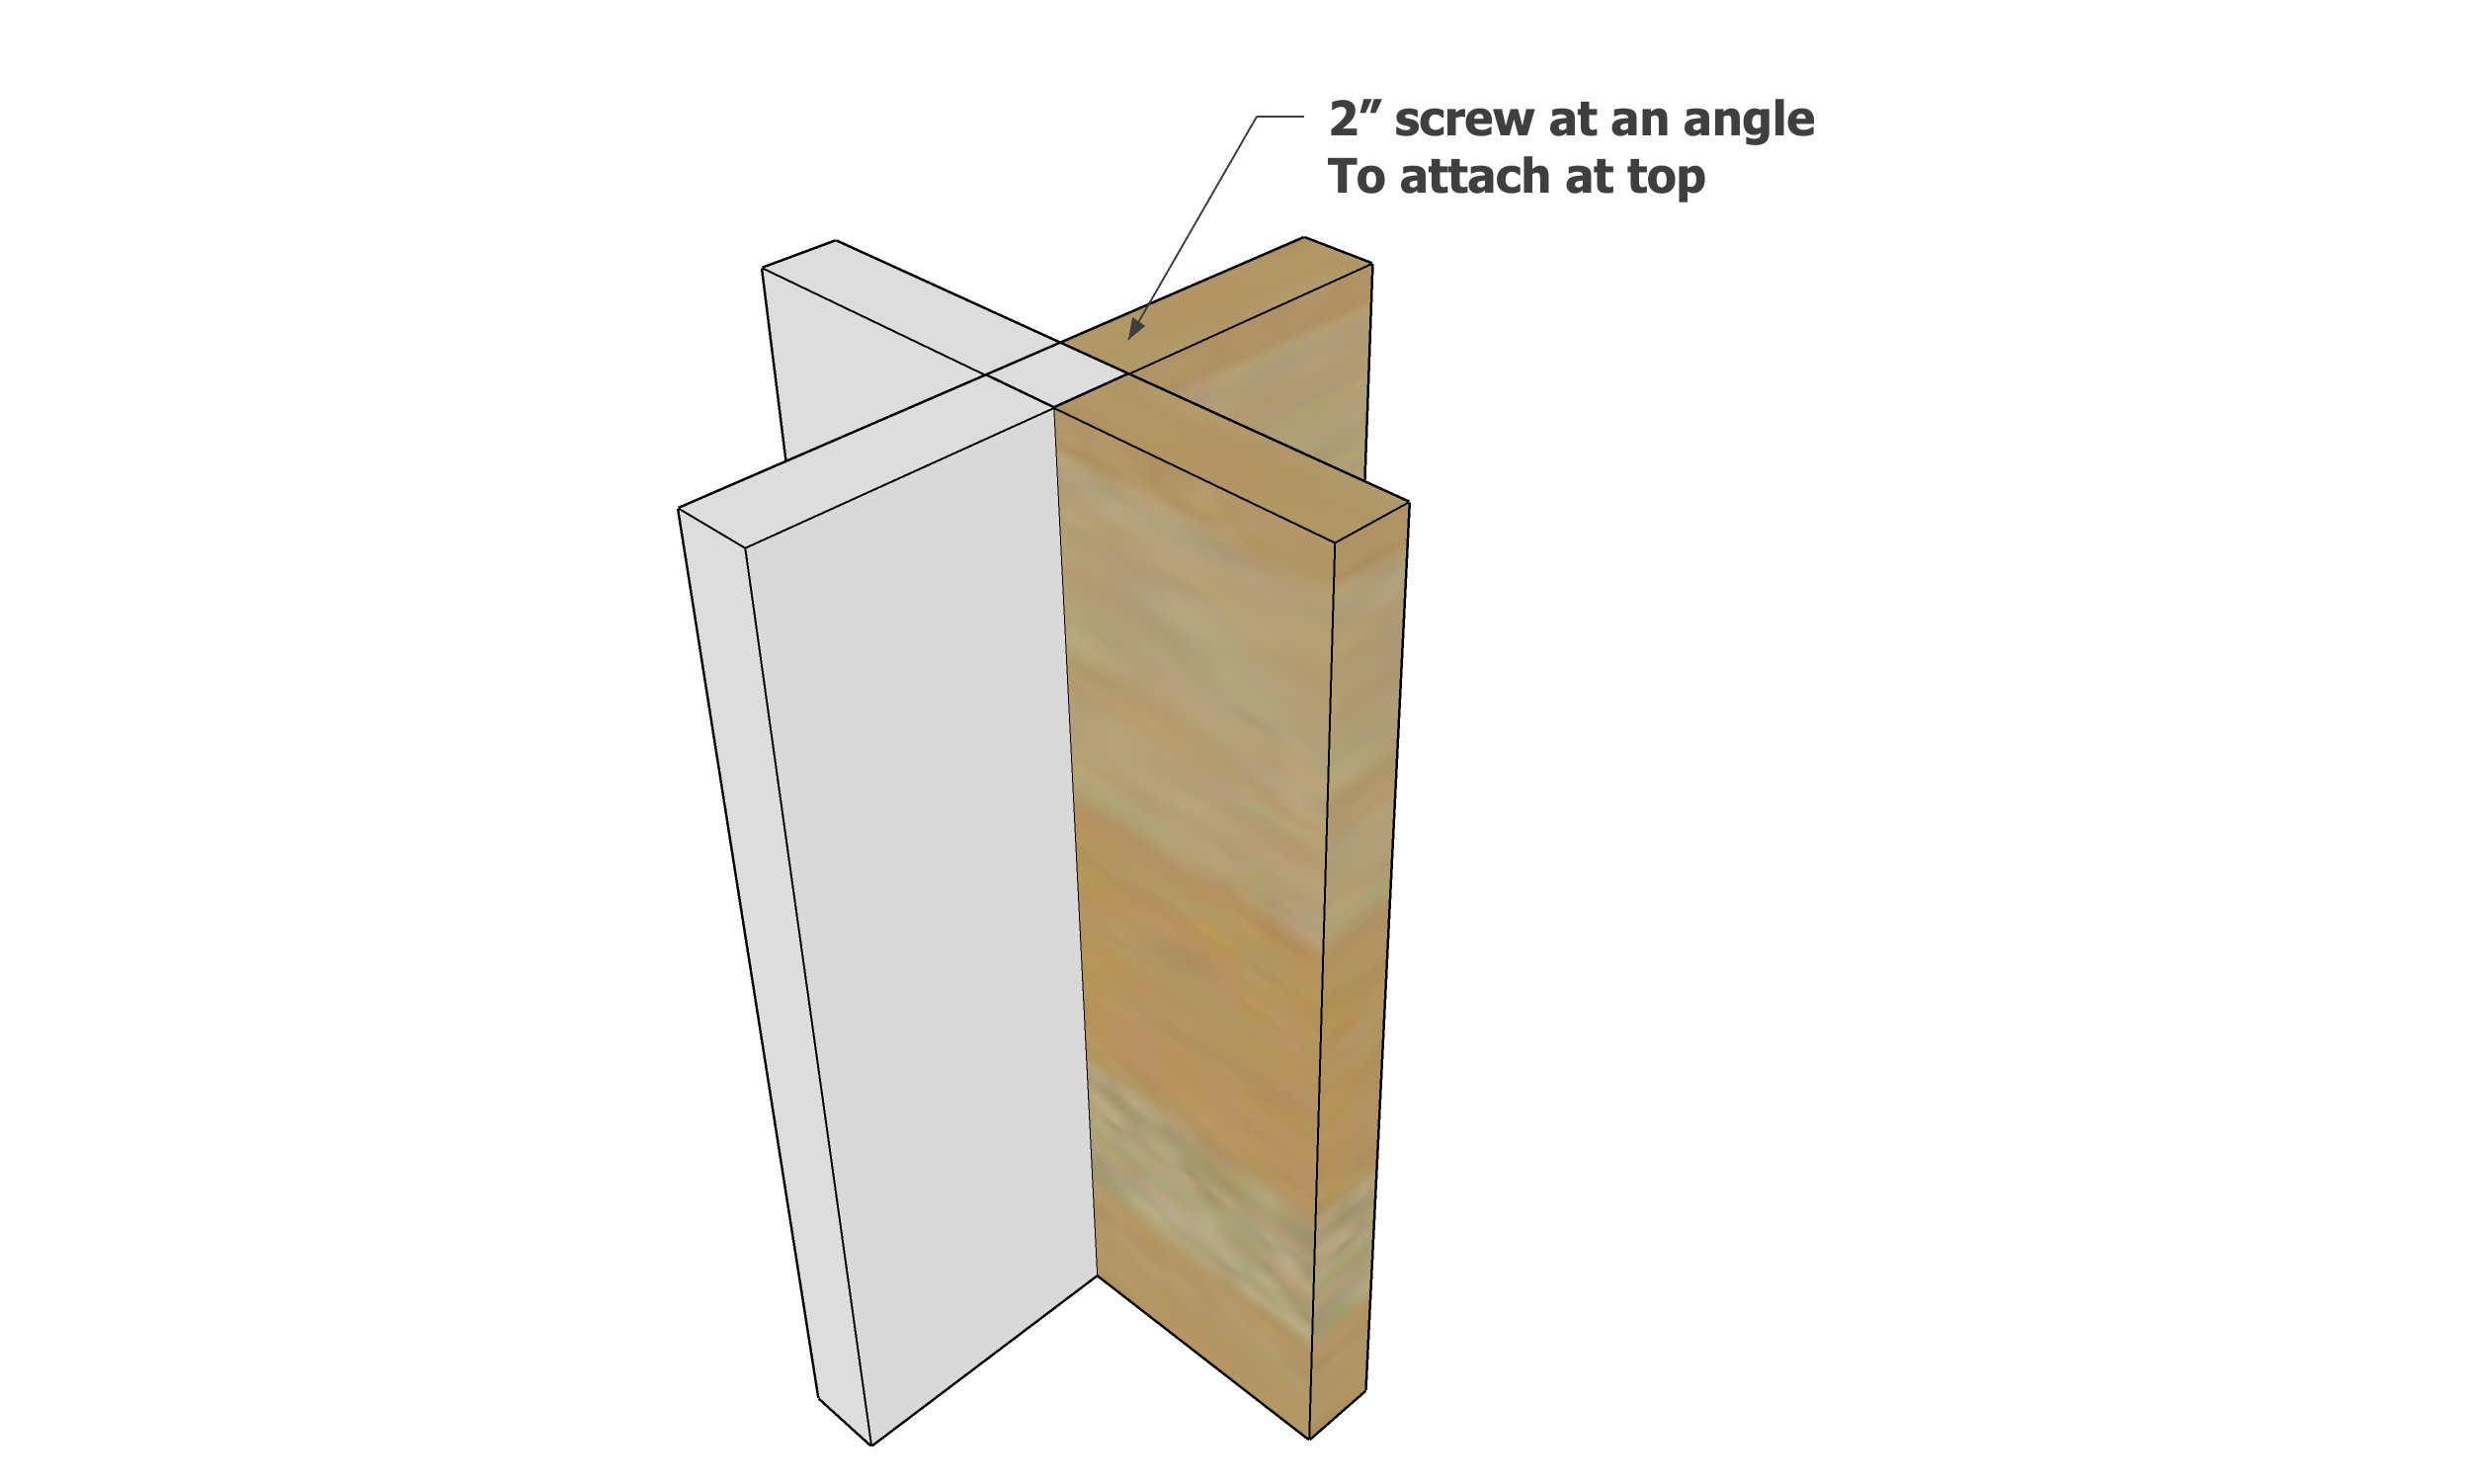
Set the two pieces together and lock in. Then attach at the top and bottom with 2" trim screws at an angle.
To attach the screws at an angle, first start the screw as normal, but once the screw is about 1/2" in, begin to rotate it as you drive the screw so it finishes screwing in at a 45 degree angle. Practice this technique first on a scrap wood piece.
Repeat the screws for the bottom of the legs set.
Step 4

Cut the tabletop boards. Then layout and mark out the circle cuts. Carefully place pocket holes so the pocket holes won't show when the circle is cut.
Drill 1-1/2" pocket holes and attach together with 2-1/2" pocket hole screws.
Cut the tabletop - in the video I used a circular saw, but a jigsaw, bandsaw, router or tablesaw could also be used.
Step 5
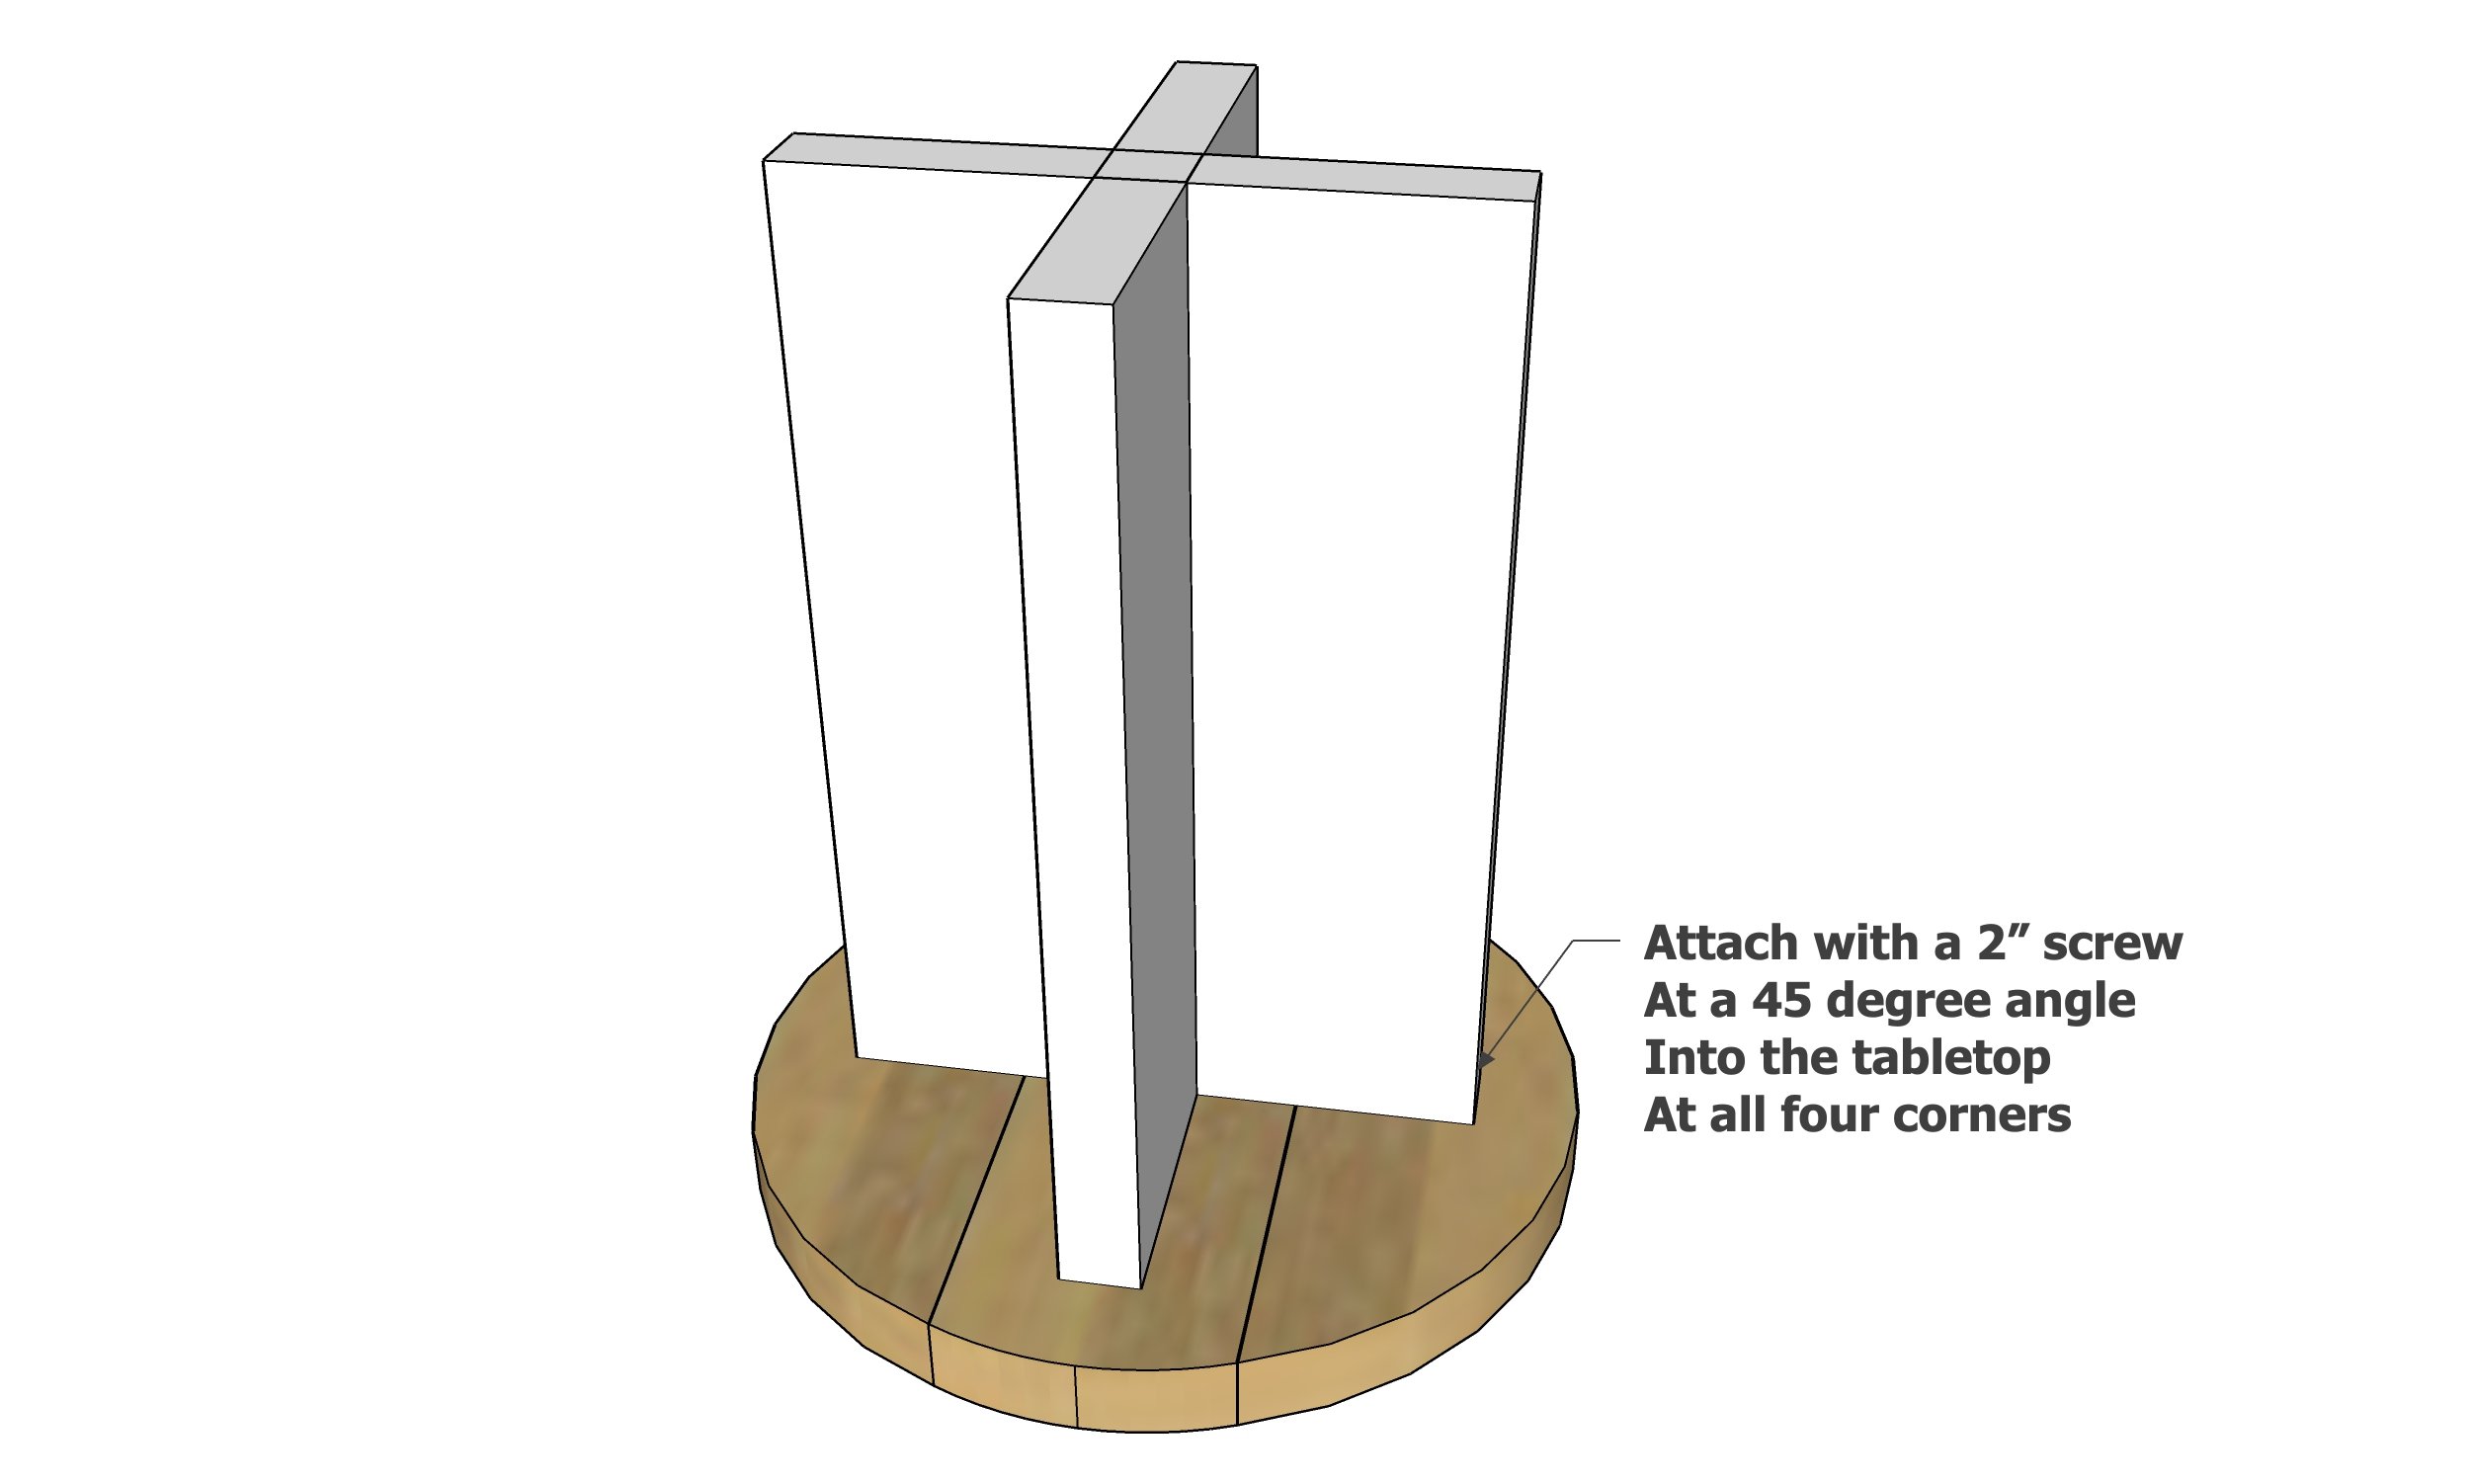
Attach the base to the top with the screws at an angle at the outsides.
Add the protective leveling feet to the bottom of the base to level if needed.
Remove all sanding residue with a vacuum and then wipe off any remaining with a damp, lint free cloth.
It was too orange and transparent, so I added a layer of whitewash (white paint watered down and wiped off)
I finished with a coat of polyurethane.
A final 220 grit light sanded was done to make the project super smooth.