Side Table or Nightstand [Super Simple Collection]

diy nightstand plans white nightstand open shelf nightstand
Difficulty
Beginner Projects
| Print this plan

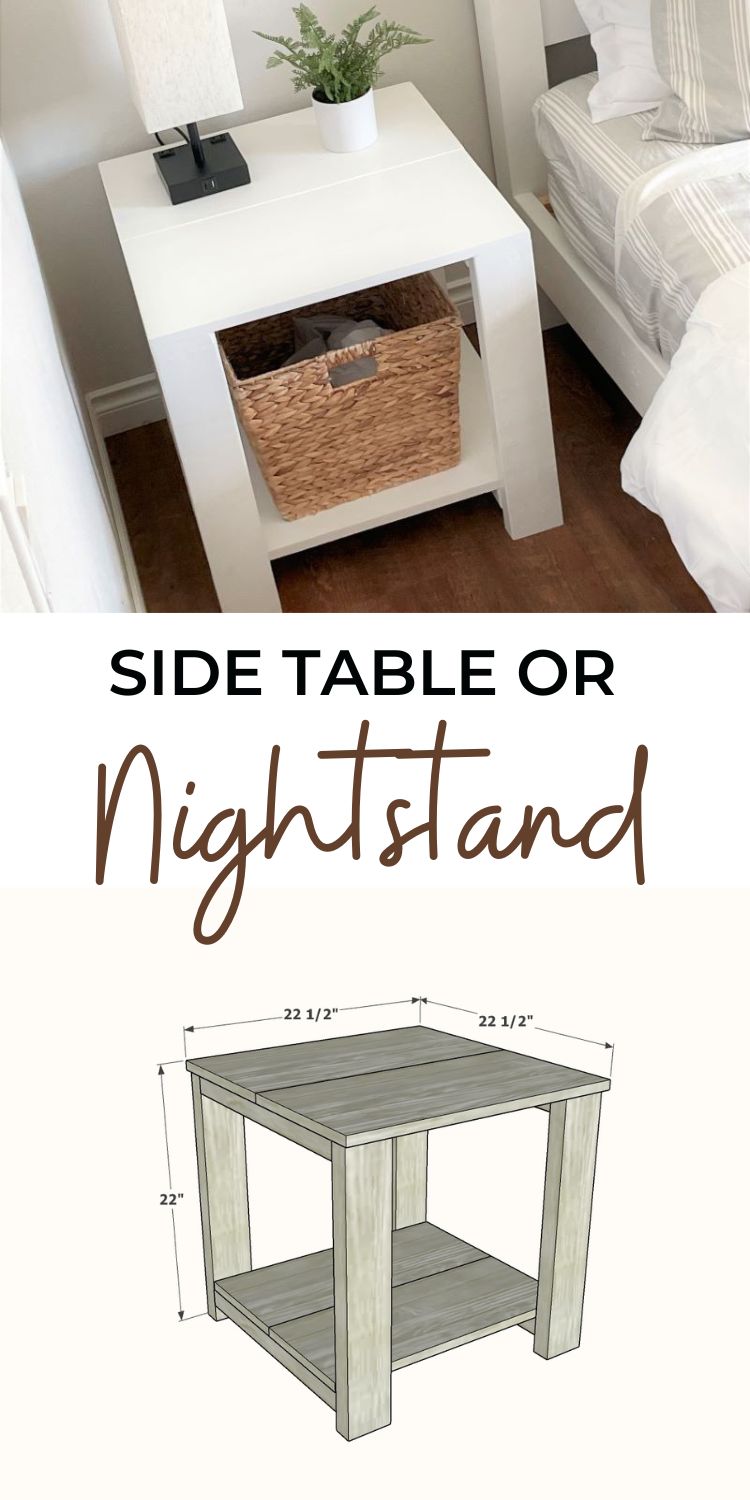
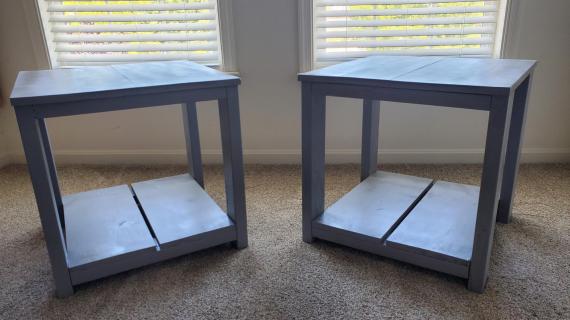
If you need an inexpensive and easy to make nightstand or side table, try this super simple end table or nightstand.  Generously sized and sturdy, with a low bottom shelf for easy access, the clean lines blend with almost any style or decor.  Solid wood construction, paint or stain any color. 

This is our easiest to build end table, side table, bedside table or nightstand plan. Free step by step plans with diagrams, shopping and cut list from Ana-White.com

Related: Compact Modern Farmhouse Bed Plans

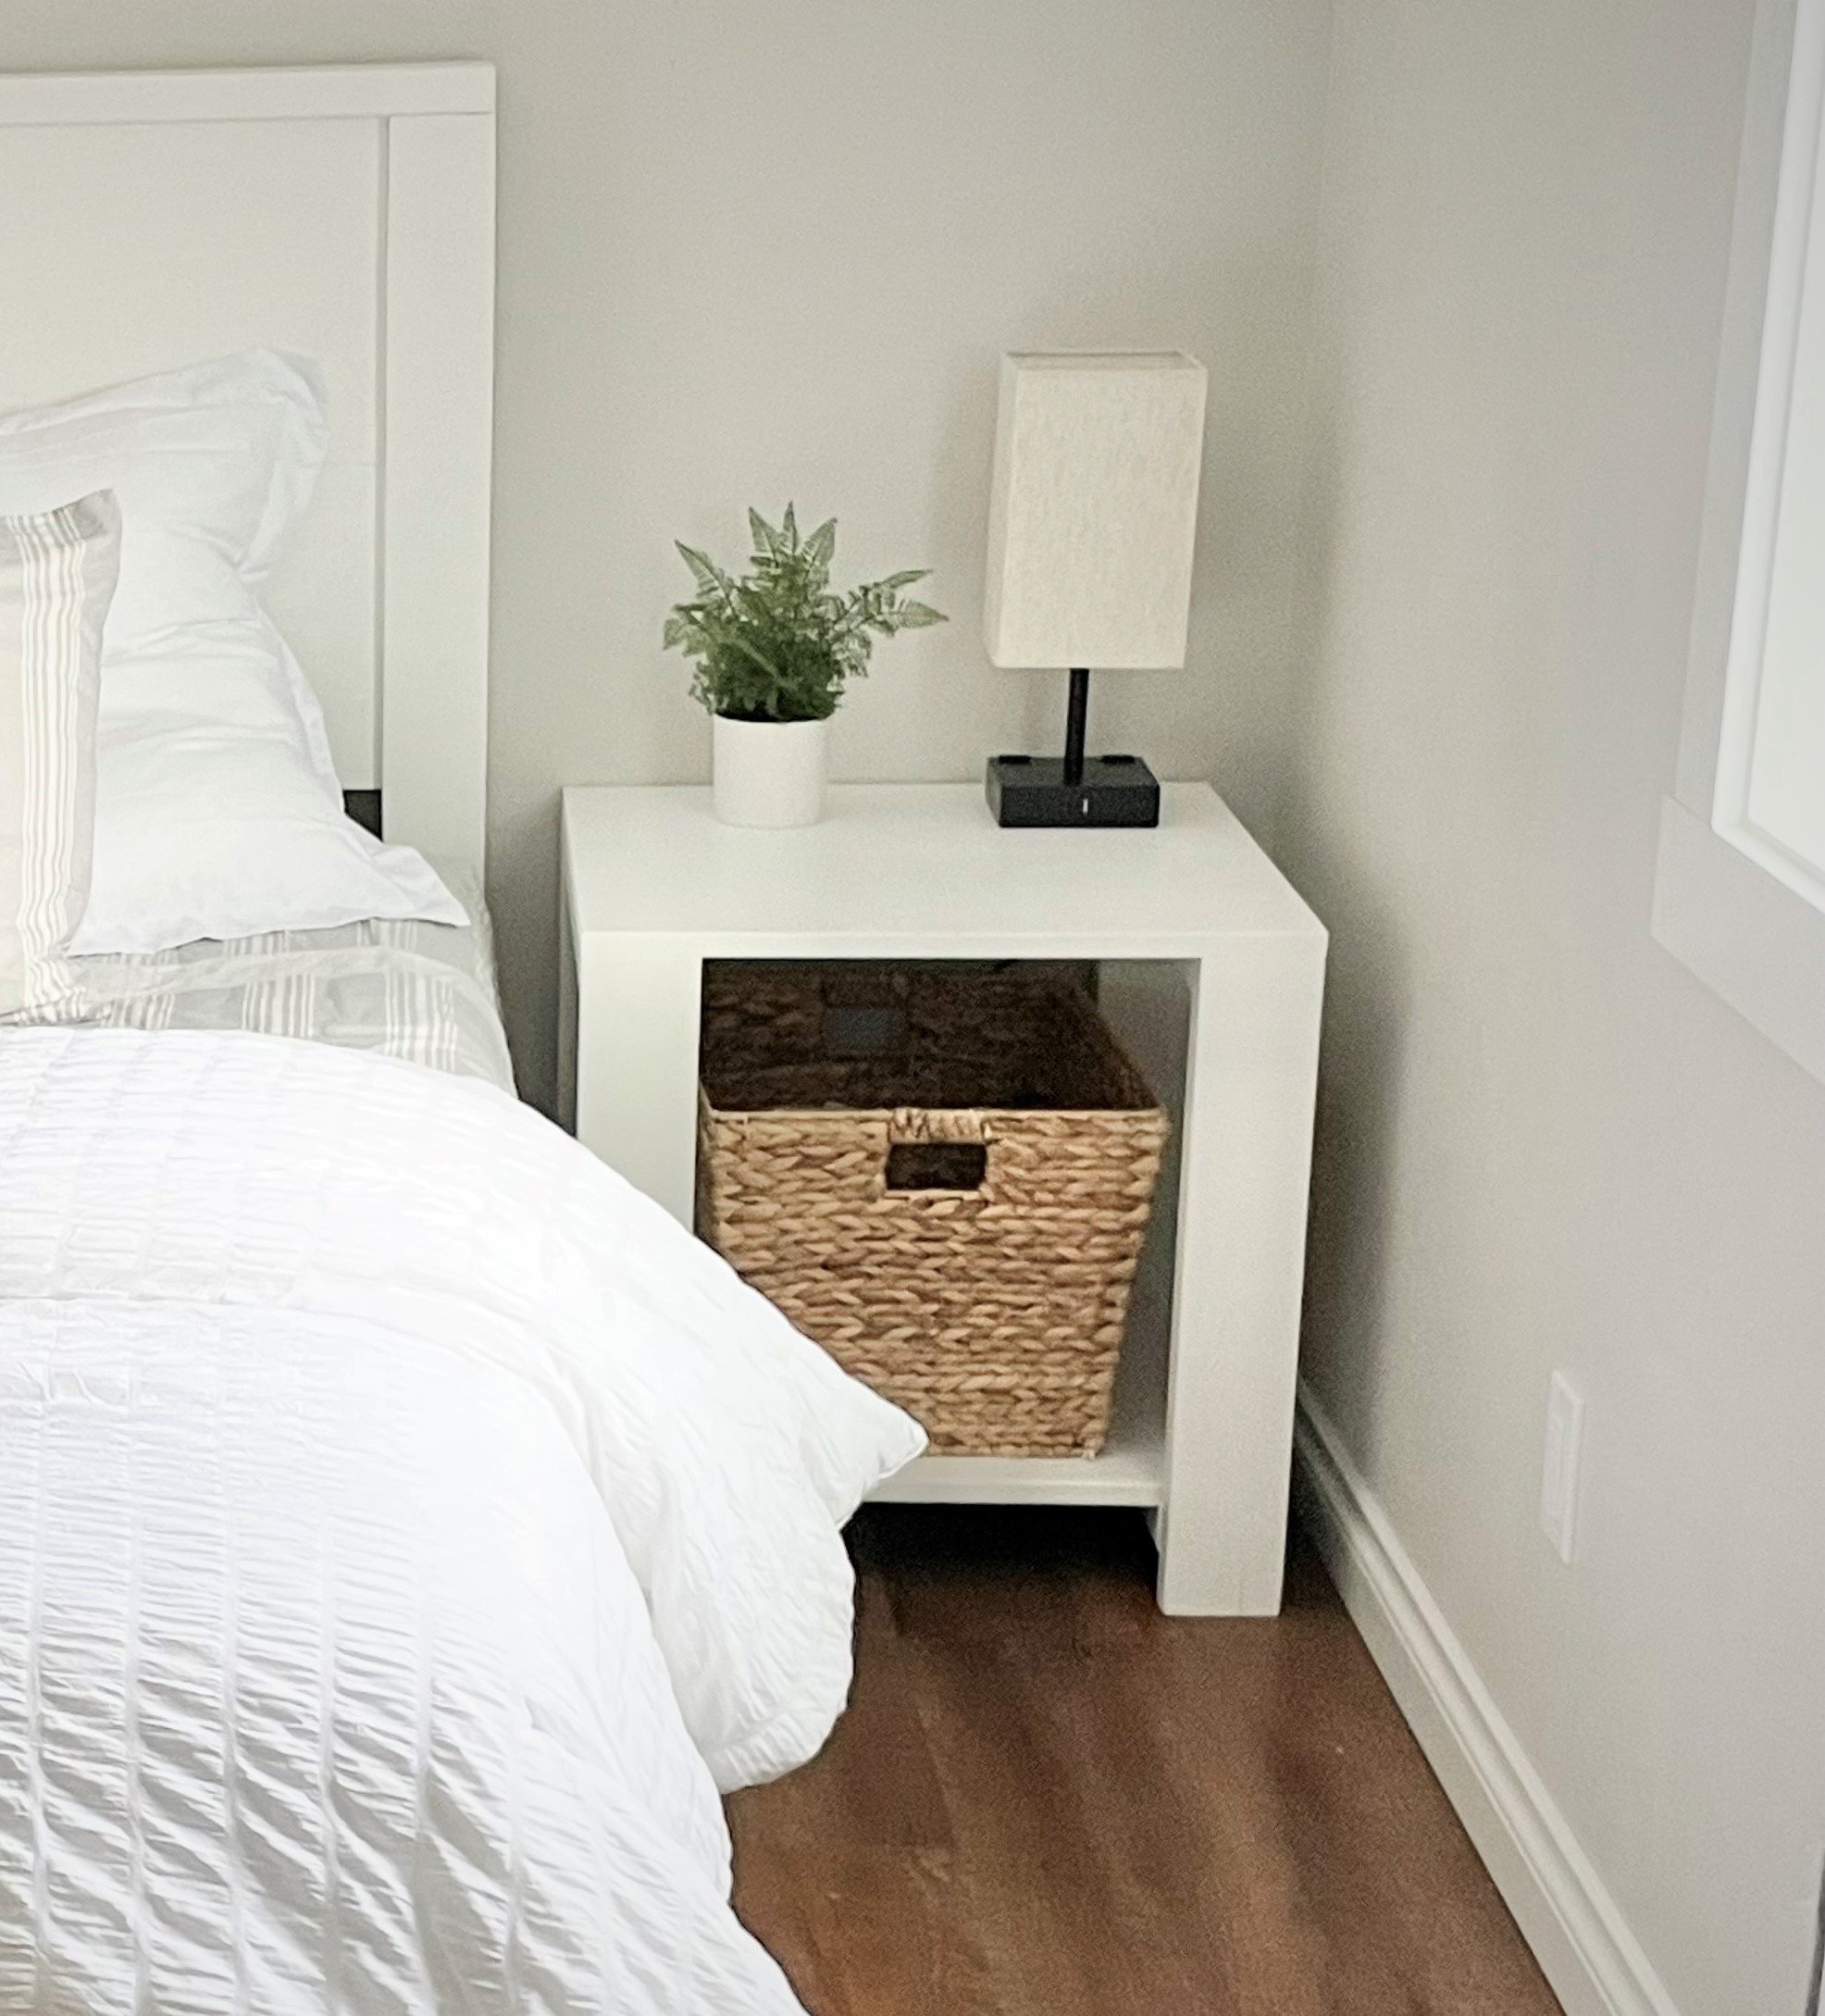
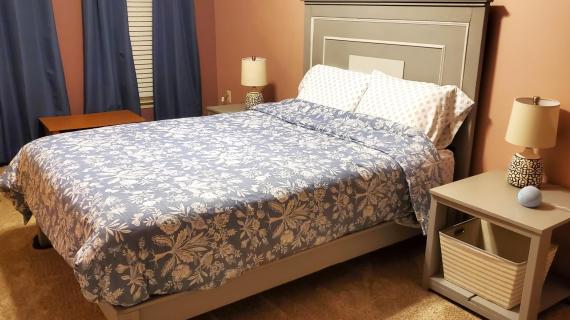
We are working on an Airbnb project.  For the bedrooms, I need sturdy, great looking, but simple nightstands to match the Compact Modern Farmhouse Bed I just built.  

white bed

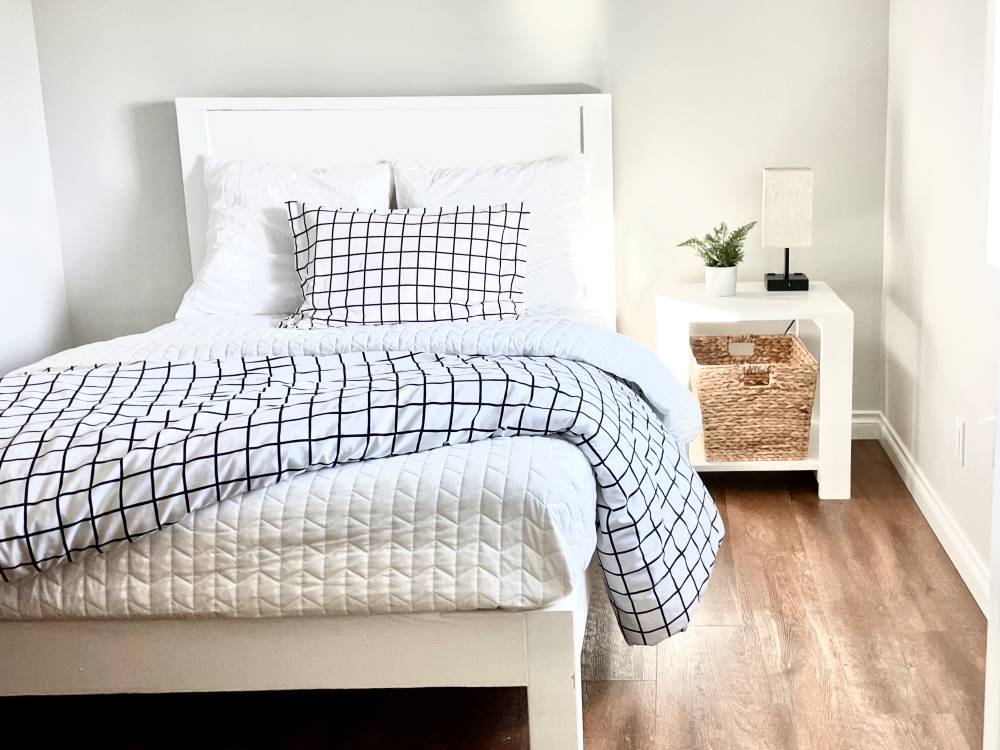
The nightstands or bedside tables don't need to be fancy.  They just need to be a good sized surface for guests to set things on top.  

Super Simple End Table or Nightstand Plans Features

  • Very easy to build, faster to build than assembling flat pack furniture
  • Generous sized, so feels expensive and substantial
  • Can be painted or stained any color
  • Sturdy and strong
  • Bottom shelf for large basket or extra pillows and blankets
  • Simple style blends with farmhouse style, modern style, or with existing pieces

bedside table plans

Video Tutorial of Building this Nightstand

Here's a quick video of me building this nightstand.

More Plans in this Collection

If you love this project, we've got you covered with matching coffee table, narrow end table, console table, and many more plans that match.  Here's the link to the entire collection of plans.

Free Plans for Super Simple Side Table 

This is our easiest to build nightstand, end table or bedside table.  No special tools are required.  Here's the step by step plans:

Pin For Later!

Side Table or Nightstand

Dimensions
dimensions for super simple side table plans
Generously sized, 22" tall x 22-1/2" x 22-1/2" top. Bottom shelf is about 19" x 19" x about 17" tall

Preparation

Shopping List
  • 2 - 2x4 @ 8 feet long or stud length
  • 1 - 1x10 @ 4 feet long
  • 1 - 1x12 @ 4 feet long
  • 16 - 2-1/2" long self tapping screws, star bit like SPAX or GRK brands
  • 32 - 1-1/2" to 2" long self tapping screws, star bit like SPAX or GRK brands, OR use 1-1/4" brad nails and wood glue
Cut List
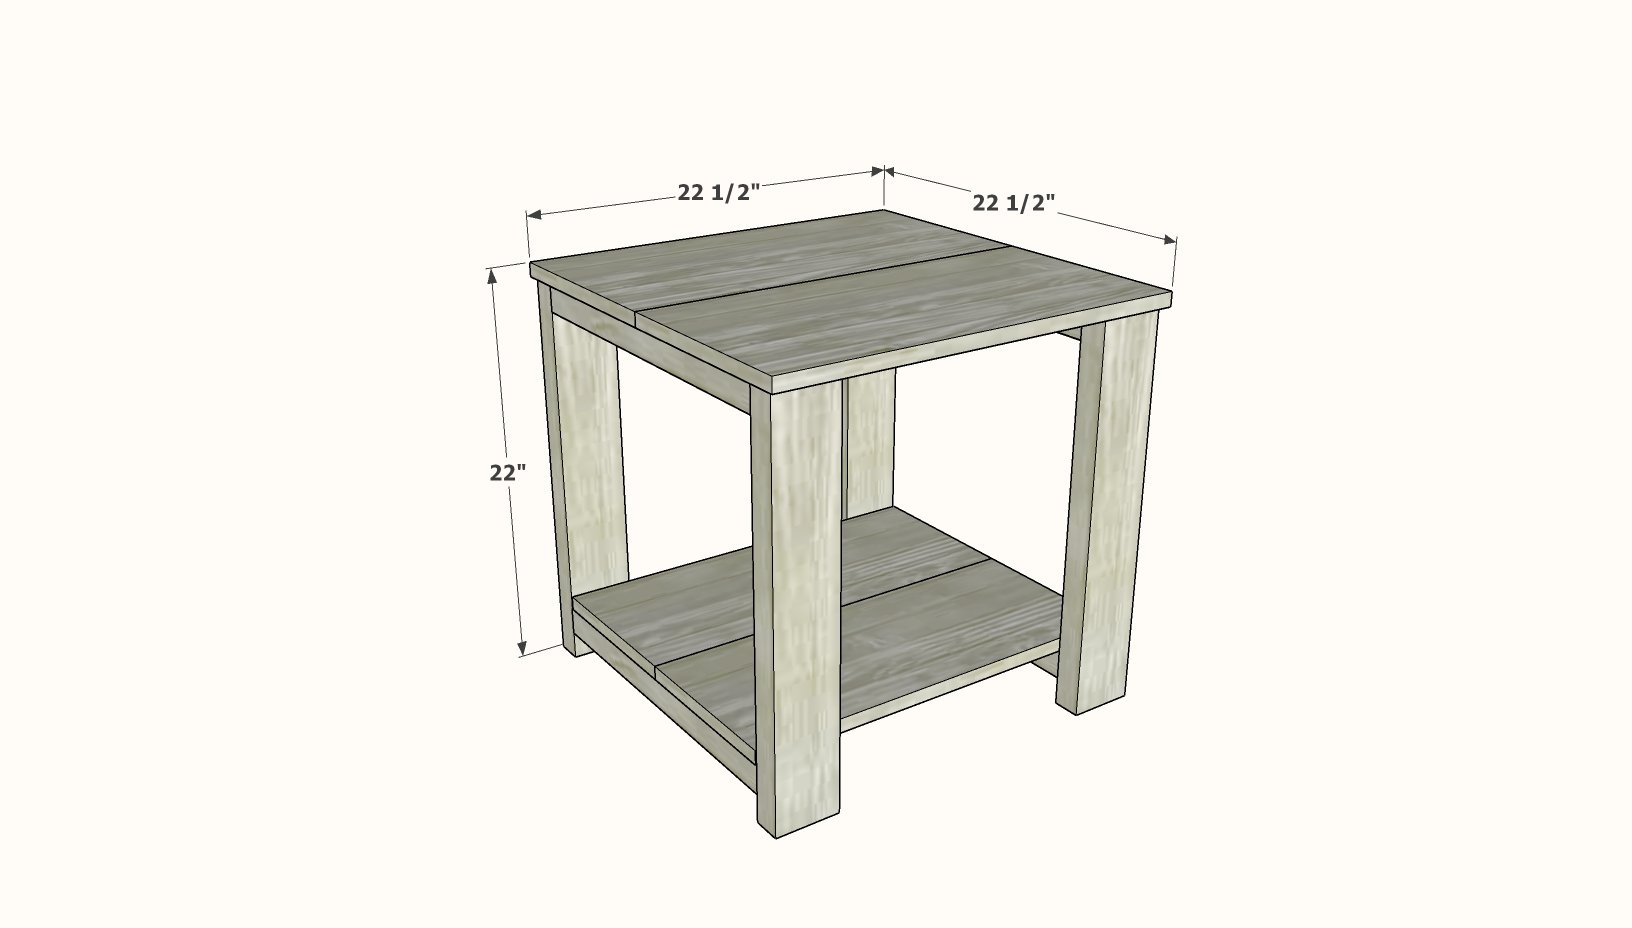
  • 4 - 2x4 @ 21-1/4" - legs
  • 4 - 2x4 @ 19" - side supports
  • 2 - 1x10 @ 22"  - bottom shelf
  • 2 - 1x12 @ 22-1/2" - top shelf

Cutting Instructions

For professional looking furniture, good, straight cuts are very important.  Use a miter saw or chop saw, or a circular saw with guide to make cuts first.

Measure and cut each piece.

Tools
Tape Measure
Speed Square
Pencil
Safety Glasses
Drill
Miter Saw
Power Sander
General Instructions

Use a flat, level surface to construct the project.

Instructions

Step 1

Build two of the leg sets using the longer screws, two screws per joint.

Step 2

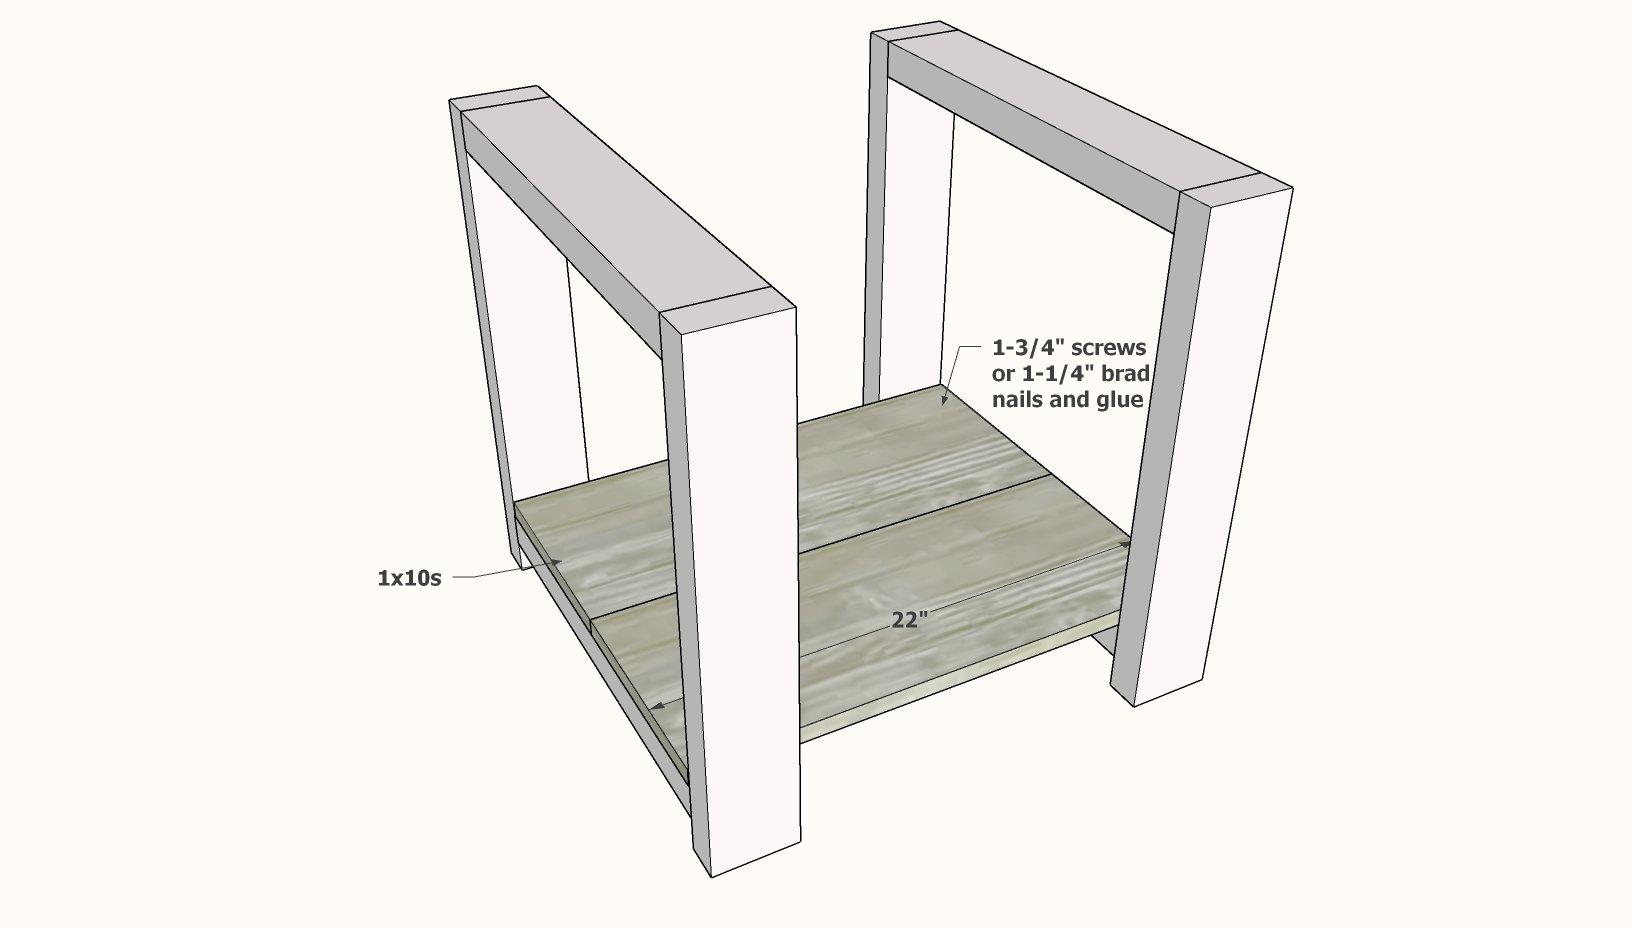
Attach the bottom shelf 1x10 boards inside the leg sets, so the edges are flush on the outsides.

Use either glue and 1-1/4" brad nails to attach, or shorter star bit screws.

For paint grade, star bit screws are easy to fill with wood filler and hide and will be a stronger joint.

For a stain finish, nails are easiest to hide.  Just use a good amount of glue.

Be careful to make sure the legs are square to each other, you will know if the edges of the 1x10s aren't lining up right.

Step 3

Repeat for the top 1x12s.

NO Top Overhang Option - I cut the 1x12 top pieces at 22" long.  Since this was a bedside table (where the back is against a wall), I started at the front 1x12, flush on the front and sides.  Then I added the back 1x12 and let it overhang about 1/2" on the back.  For a floating side table or end table where the back is visible, you can trim the back edge with a circular saw.

Finishing Instructions
Preparation Instructions
Fill any fastener holes with wood filler, overfilling as the wood filler will shrink as it dries.

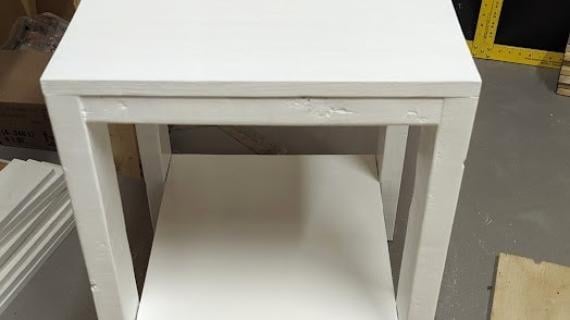
When dry, sand entire project with 120 grit sandpaper. Remove all sanding residue with a vacuum with soft bristled brush. Also wipe clean with a damp cloth.

A good sanding will make a huge difference in the overall success of the project.
Finish Used
I painted this nightstand with a semi gloss white paint. I used two coats. I did a very light sanding with 220 grit sandpaper between coats.

Comments

Jason Sokoloski

Thu, 12/29/2022 - 21:49

I am currently working on the Super Simple Side table and have noticed a few discrepancies with the measurements given for the side supports. In the cut list is says 19" and in the drawing of Step 1 it shows 18 3/4".
Unless you want a gap where the 1x10 goes on the bottom shelf, you would need to cut your side rails to 18 1/2" (width of a 1x10 is 9 1/4" and doubled is 18 1/2" . Otherwise, great easy plan...I'm making 4 at once!

Frequently Asked Questions

Wood Questions

What kind of wood should I use?
Most of our plans use standard construction lumber like pine or fir. It's affordable, easy to work with, and easy to find. It's also rapidly renewing and biodegradable, so a great eco friendly choice!

Can I use hardwoods instead?
Yes—just keep in mind they're heavier, cost more, and can be tougher on tools and harder to join together and finish. I recommend not tackling a hardwood project until after you have built several softwood projects.

What if my boards are warped?
Choose the straightest boards at the store. You can often work around slight warps by cutting them into shorter pieces.

What wood should I use for outdoor furniture?
Use red-toned or pressure-treated 2x lumber for framing, and cedar or cedar fence pickets for the decking. Outdoor furniture should be built like a deck—your local home center can help recommend the right wood for your climate.

Will my wood move or warp after I build?
Potentially, especially in humid climates. Let your wood acclimate indoors before building. Once acclimated and kept in a stable environment, movement should be minimal. Remember, most houses are built using framing lumber - it's all about keeping moisture down indoors.

Cutting Questions

Do I need a miter saw?
A miter saw is great, creating fast, safe, and precise cuts, even for beginners. But most plans can be built with a circular saw and a straight edge. If using a circular saw to cut, take time to practice, and get good at making cuts, before cutting your project boards.

How do I get clean cuts with a circular saw?
Clamp your board, measure twice, cut slow, and use a sharp blade. This takes practice, so spend some time making cuts. I go through becoming proficient at freehand cutting in my course, it is worth taking if you want to master this skill.

Will the store cut my wood?
Yes—most stores will do rough cuts to help you transport your materials home. But from store to store, the quality of cuts could greatly vary.

Joinery Questions

What screws should I use?
We recommend star-head self tapping screws for framing, most common sizes are 2-1/2", 1-3/4". Pre-drill if close to the edge or you find your wood is splitting.

Do I have to use pocket holes?
Pocket holes are the cheapest, easiest and fastest way to do some joints - like edge to edge or a hidden fastener joint. There are other methods, but these can be time consuming and expensive. We recommend using pocket holes as indicated in plans for best results.

How do I keep things square?
Use a speed square and measure diagonals after each step. Always clamp joints before screwing to keep them tight and flush.

Finishing Questions

Stain or paint before or after building?
A quick sand before and a full finish after gives the best results. Pre-finish if you're doing two-tone or detailed finishes.

What type of finish?
Use oil-based or water-based stain. For paint, cabinet-grade latex or enamel works great. High use surfaces on indoor projects should get a coat of polyurethane, I recommend a Helsman or Spar or other flexible poly that won't crack or peel with wood movement. For exterior projects, use a finish suitable for exterior fences.

How to get a smooth finish?
Start with a well sanded project. Sand between coats (220 grit), wipe clean, and apply light coats with a foam brush or roller.

Plan Questions

Can I change the size?
Many people do, and that's the great thing about building your own furniture! But do keep in mind going bigger might mean more supports are required, and often plans are optimized for minimal material waste.

Are these beginner-friendly?
Yes—plans are written with simple tools and clear steps in mind, with every effort to make plans as simple as possible.

Can I sell what I build?
Absolutely! Just don’t resell or repost the plans themselves.

General Questions

What tools do I really need?
A drill, circular saw, tape measure, square, and a few clamps will get you through most projects.

Do I need a workshop?
Nope! A driveway or small patio is plenty to get started, just make sure you have a level place to work. If you find you are building several projects a year, creating a small workbench is a great way to store tools and have a dedicated workspace.

What if I mess up?
Wood filler, sanding, or flipping boards goes a long way. Mistakes are part of the process!

What can I do to make my projects look more professional?
Start with straight boards, make accurate cuts, clamp all joints, and line up everything neatly. Sand thoroughly, use a neutral finish, and apply it in light coats for a clean look.

I've never built anything before. Where should I start?
Start with a few smaller softwood projects to get hands-on experience. Or if you're tackling a big project, buy a little extra lumber and practice your cuts and joints first. If possible, work with someone who has a bit of experience.

Care & Maintenance

How long will my furniture last?
With good joinery and regular care, your DIY furniture can last for decades. I have pieces in my own home that are over 20 years old and still going strong! One of the best parts about DIY furniture is that it’s easy to repaint, refinish, or repair—so your projects can grow and adapt with you.

How should I care for outdoor furniture?
Lightly pressure wash or hose it down once or twice a year. Tighten screws and reapply finish as needed to protect it—just like a deck or fence. A little upkeep goes a long way in extending the life of your furniture.

How about indoor furniture?
Regularly dust or wipe with a damp cloth. If it starts to look worn, a light sanding and touch-up paint or stain can refresh it in no time. DIY pieces are meant to be durable and fixable—so don’t be afraid to give them some love now and then.

Want to Build with Confidence?

Check out my ebook: 12 Skills to Build Your Own Furniture
It walks you through the core skills every builder needs—measuring, cutting, joinery, and finishing—so you can build beautiful furniture that lasts.

Still Have Questions?

Email us anytime at [email protected] and we’ll be happy to help!