
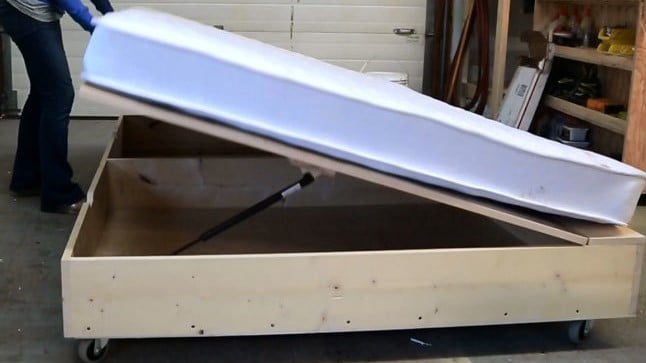

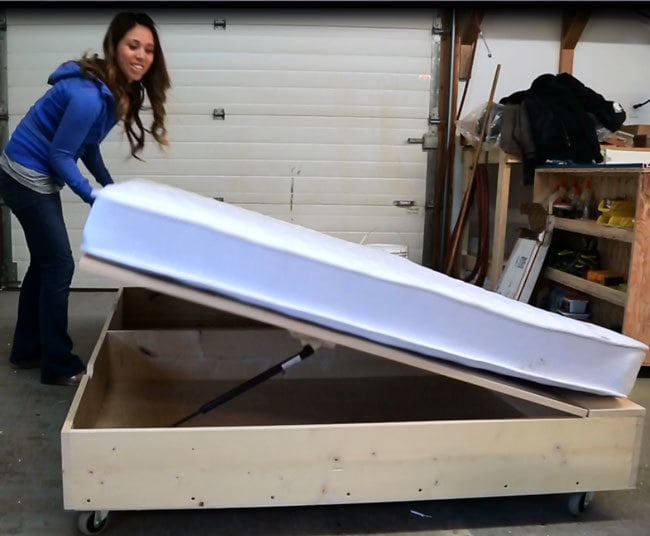
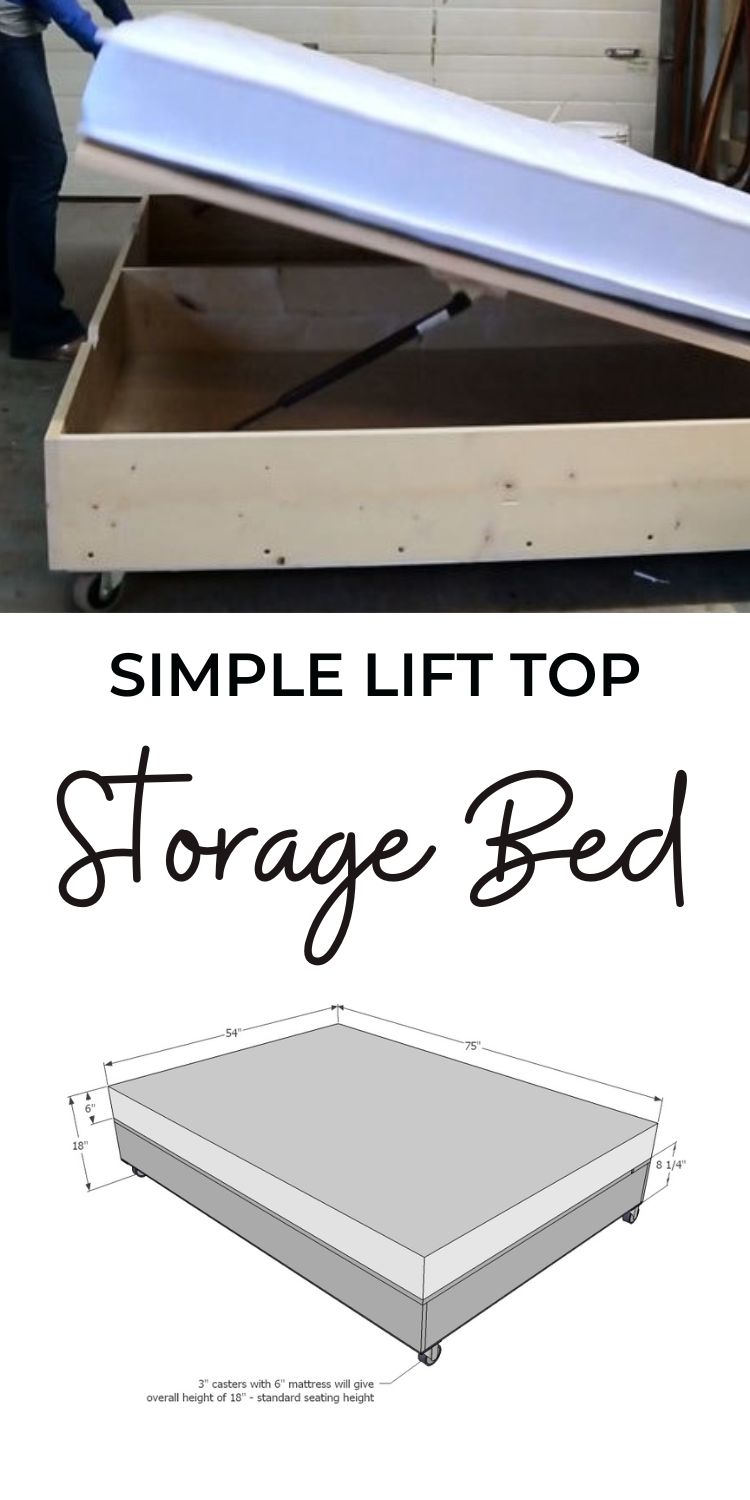
Add extra storage to a room by building a simple lift top bed frame. This wood platform bed creates easy access to lots of storage.
Optional caster wheels, legs, or can be set directly on the floor. Free plans in full and queen size.
Why a Lift Top Bed?
A lift top bed is an easy way to create maximum storage in a bedroom, without the bed appearing complicated with storage drawers or shelves.
- The storage is not as easy to access as a drawer, but with the assist of the lift top hardware, it is not difficult.
- This becomes a great place to store out of season items, extra blankets, or just things that you don't need everyday but can't part with.
- There is also more storage in a lift top bed than a traditional captains bed or storage bed, since the entire inside of the bed is accessible.
- This bed is actually pretty easy to build too - much easier than a bed with drawers or shelves.
- It does become cumbersome to move into a room when fully completed, so do consider how you will move the bed into the room before final assembly.
Why I Built This Bed
A few years back we built a tiny house and everything inside it. Here's the link to the loft system with bed and storage video and project and the Tiny House series if you want to catch up.
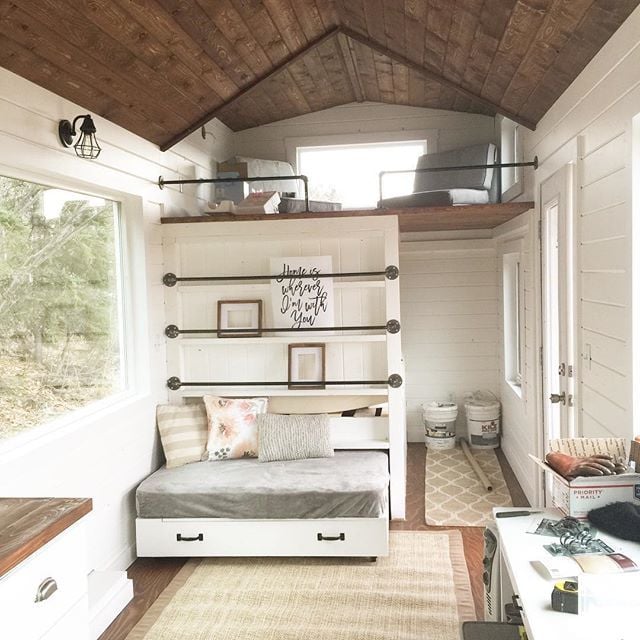
Instead of a sofa, I decided to use the foot of a bed as seating.
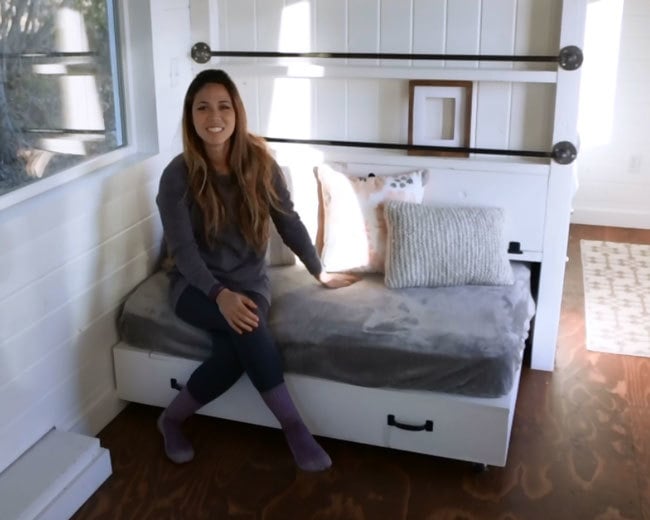
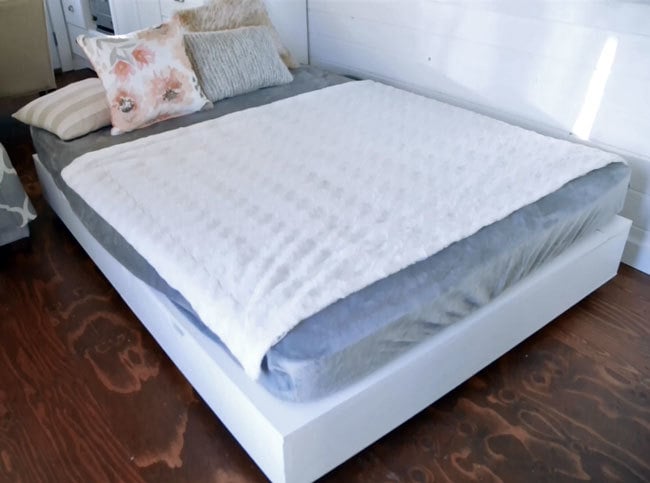
The bed can be pulled fully out and becomes a full size bed. So basically, it's a trundle bed, but it is never fully pushed under the main bed.
To create storage for the bedding, the trundle bed is actually a lift top storage bed.
Here's the video on how we built it and use it -
Pin For Later!
Preparation
FULL SIZE SHOPPNG LIST
- 2 - 4x8 sheets 1/4" plywood for the bottoms
- 1 - 4x8 sheet 3/4" plywood
- 1 - 1x6 @ 8 feet long
- 2 - 1x8 @ 8 feet long
- 3 - 1x8 @ 6 feet long
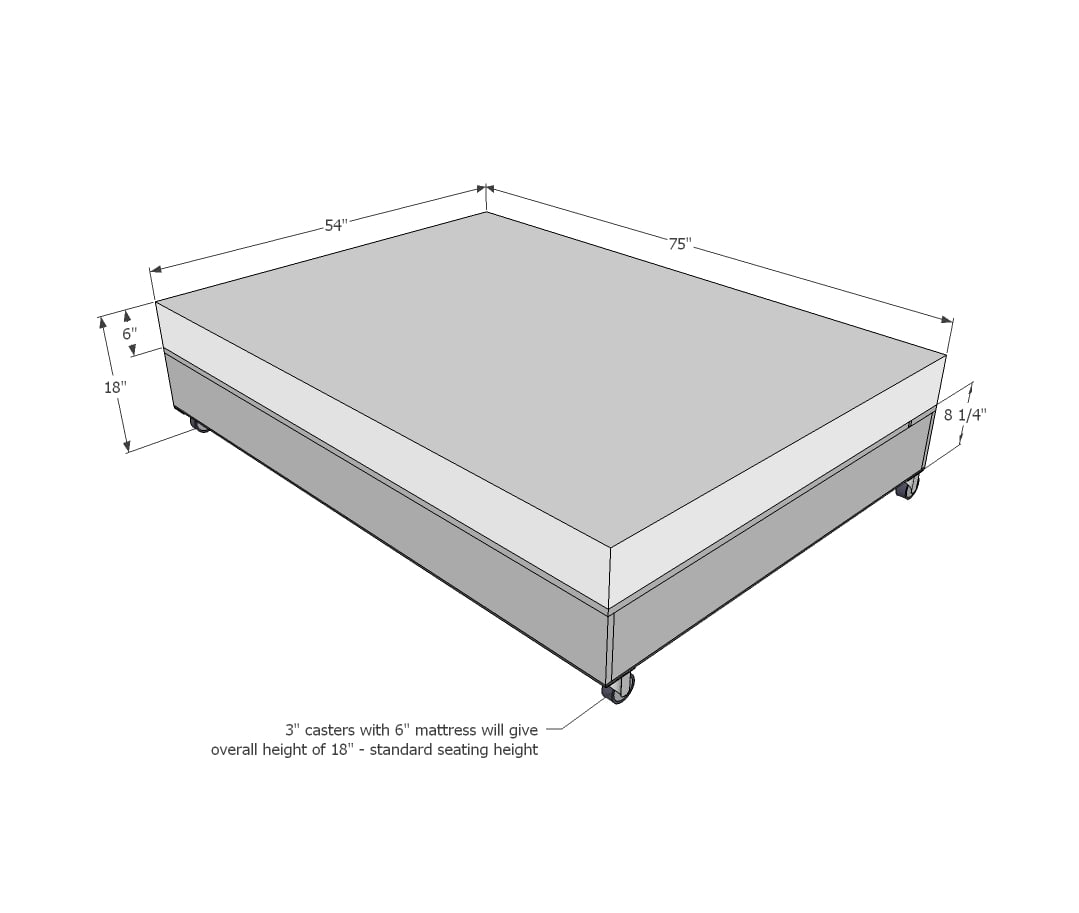
- 5 - 2-1/2" caster wheels (we did three swivels and two locking) or furniture feet o
- 3 - hinges
- Bed lift kit suitable for full size mattress (we used this one)
- Edge banding for finishing plywood edges
QUEEN SIZE SHOPPNG LIST
- 2 - 4x8 sheets 1/4" plywood for the bottoms
- 1 - 4x8 sheet 3/4" plywood
- 1 - 1x12 @ 8 feet long
- 2 - 1x8 @ 8 feet long
- 3 - 1x8 @ 6 feet long
- 5 - 2-1/2" caster wheels (we did three swivels and two locking) or furniture feet
- 3 - hinges
- Bed lift kit suitable for queen size mattress (we used this one)
- Edge banding for finishing plywood edges
TIP: If setting directly on the floor, use a 1x10 instead of the 1x8s for more storage. Furniture glides or levelers on the bottom will help protect the floor.
FULL SIZE CUT LIST
- 2 - 1x8 @ 75"
- 3 - 1x8 @ 52-1/2"
- 2 - 1/4" plywood @ 54" x 37-1/2"
- 1 - 1x6 @ 75"
- 1 - 3/4" plywood @ 48" x 75"
QUEEN SIZE CUT LIST
- 2 - 1x8 @ 80"
- 3 - 1x8 @ 58-1/8"
- 2 - 1/4" plywood @ 60" x 40" - bottom
- 1 - 1x12 @ 80"
- 1- 3/4" plywood @ 48" x 80"


Instructions
Step 1
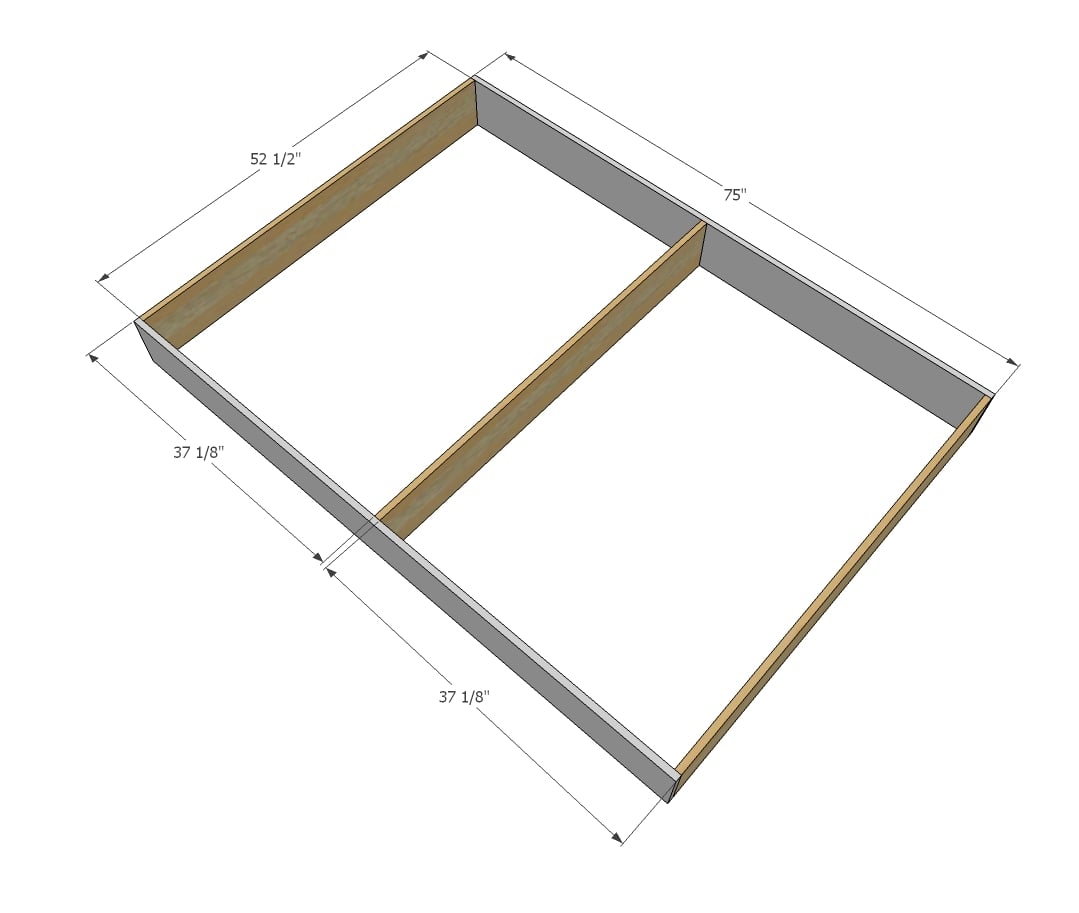
Build the frame out of 1x8s.
You can build in a number of different ways. We used 3/4" pocket holes and 1-1/4" pocket hole screws, but you could also use 2" self tapping star bit screws, or glue and nails with reinforced corners.
Step 2

Attach 1/4" plywood to the bottom with 3/4" brad nails or staples and glue. Use the plywood factory edges on outsides to help you square up the project as you attach it.
Step 3
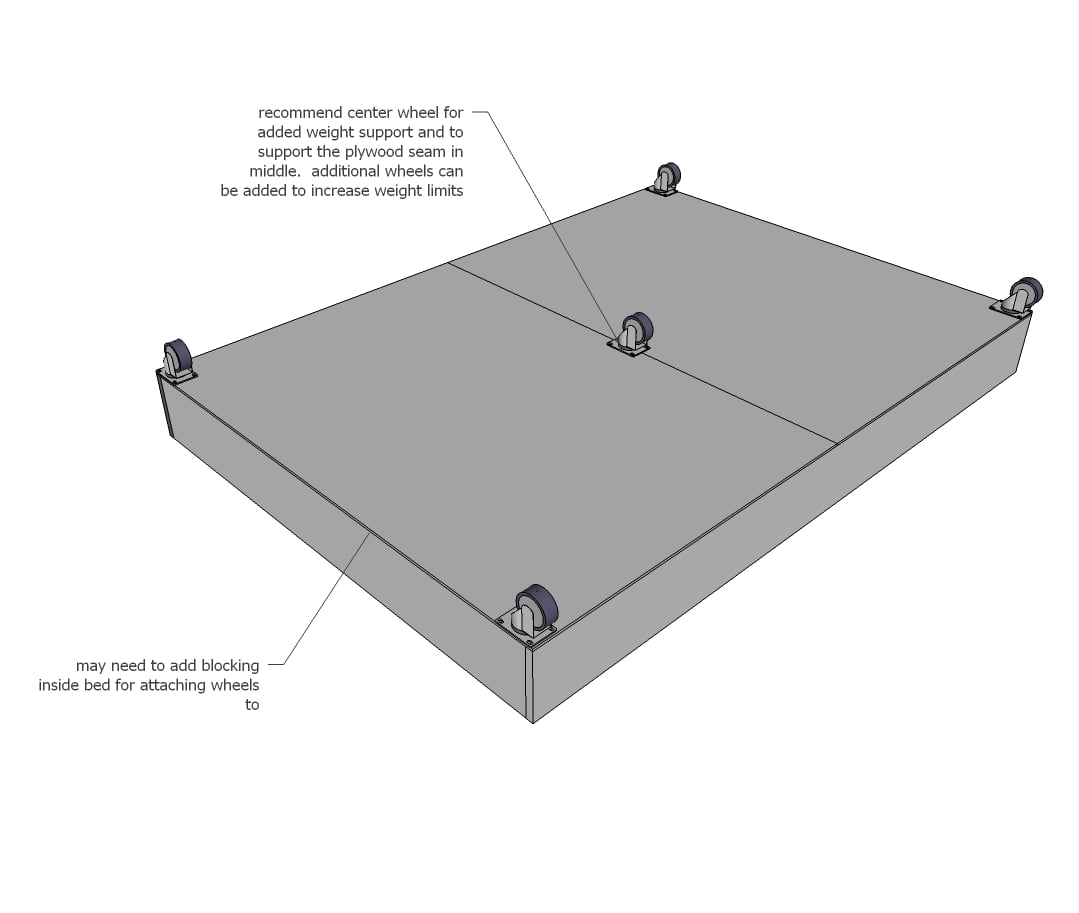
Attach caster wheels to the base. You may need to add blocking inside at the corners to the 1x8 boards to support the caster wheels.
You can alternatively use a bed leg , just make sure the weight is transferred from the 1x8 sides to the bed leg. Hairpin legs or metal legs would be great choices. Just make sure the center is still supported.
Another option is to set the bed directly on the floor. I do suggest a furniture glide foot to help protect the floor like these.
Step 4
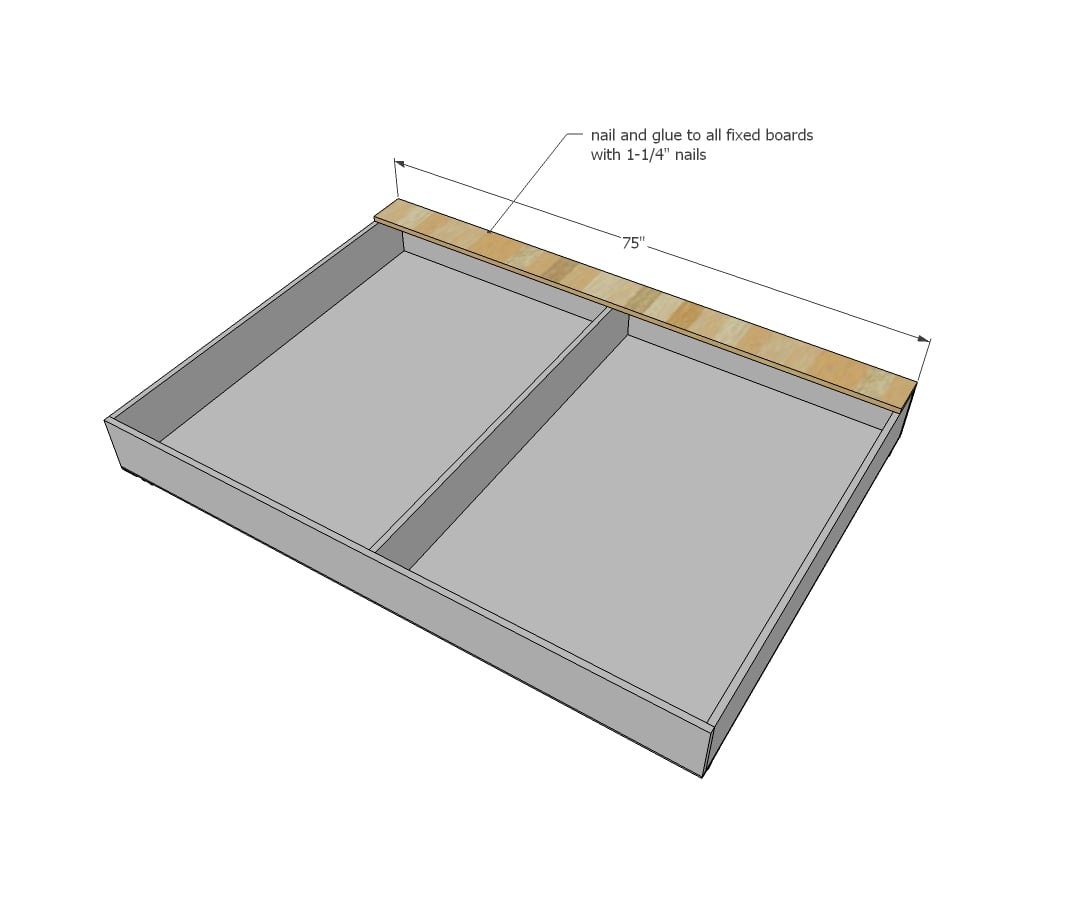
Now nail to the top the 1x6 or 1x12 board.
Step 5

Apply edge banding to the outside edges of the top.
Attach with hinges to the top.
Step 6
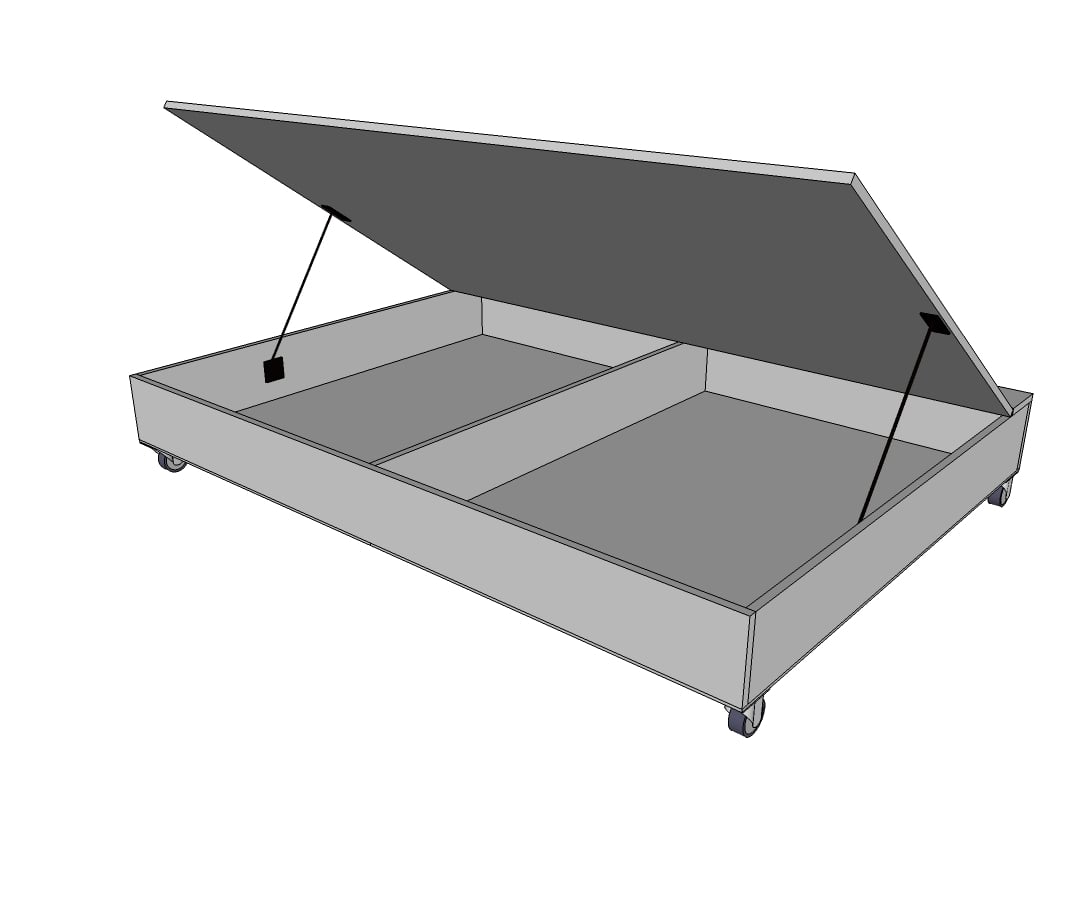
Follow directions on bed lift kit for attaching the springs to the plywood and bed cavity. We adjusted ours quite a bit to get it just right.

Comments
solomonson
Sun, 04/24/2016 - 14:41
Could this be converted to a
Could this be converted to a queen size?
hughsmith
Mon, 04/25/2016 - 13:56
Bathroom...
I love your Tiny House... No that you've actually lived in it, if you were to modify your Tiny House to fit a bathroom and a shower, where would you suggest putting it? Any ideas?
Thanks.
- Hugh
In reply to Bathroom... by hughsmith
Ana White
Tue, 04/26/2016 - 13:30
Stay tuned for our tiny house
Stay tuned for our tiny house with a bathroom design:)
mconrad
Wed, 01/04/2017 - 19:57
Loft bed and lift storage bed
Anna, thank you so much for your site and plan sharing. We will be building the lift bed and storage bed at our lake house (it has vaulted cieling] what kind of wood do you use? Pine? I just want to make sure it is sturdy. What about your outdoor furniture? Is it a harder wood?
Love all the plans I will post pic when we are done.
Margie
In reply to Loft bed and lift storage bed by mconrad
Ana White
Thu, 01/05/2017 - 15:00
We use mostly pine and
We use mostly pine and douglas fir, can't wait to see it!!!