
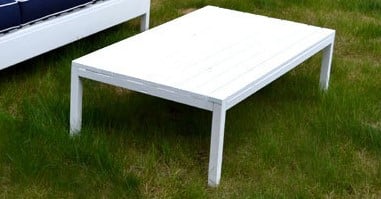

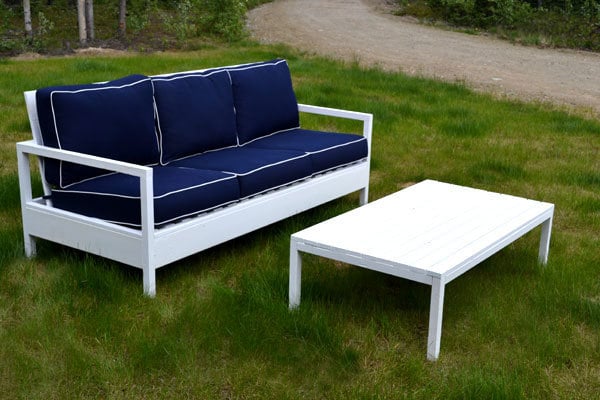
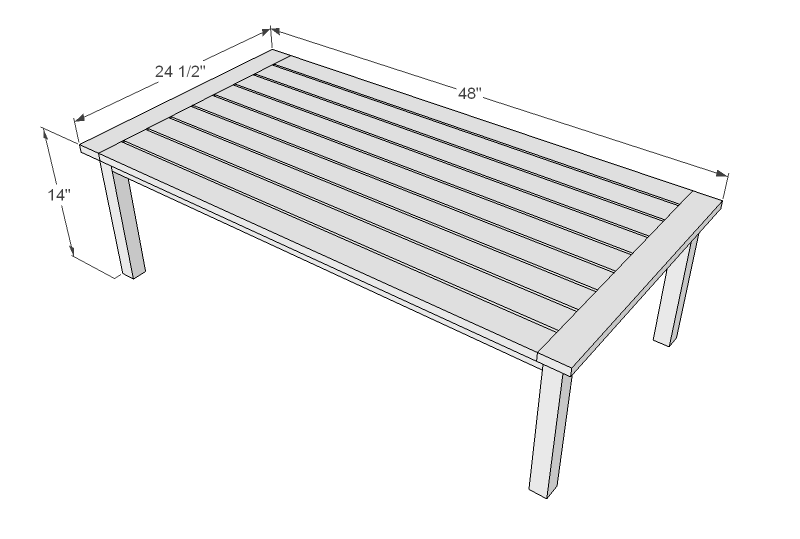
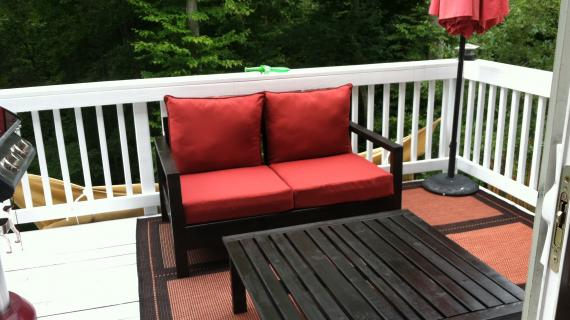
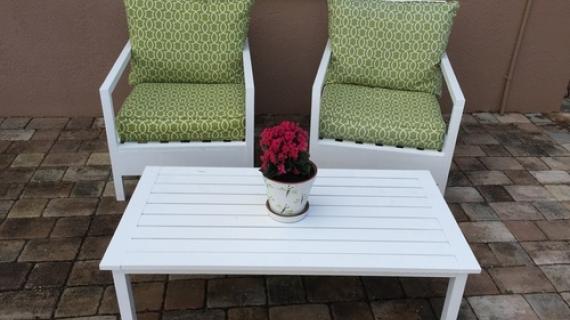
Project plan for a DIY Outdoor Coffee Table. Features simple styling, a lower height- Uses off the shelf lumber.

Preparation
- 5 - 1x3 @ 8 feet long
- 3 - 2x2 @ 8 feet long
- 9 - 1x3 @ 43" (Tabletop Boards)
- 2 - 1x3 @ 24 1/2" (Breadboard Ends)
- 2 - 2x2 @ 43" (Side Aprons)
- 5 - 2x2 @ 19 1/2" (Supports)
- 4 - 2x2 @ 13 1/4" (Legs)


Please read through the entire plan and all comments before beginning this project. It is also advisable to review the Getting Started Section. Take all necessary precautions to build safely and smartly. Work on a clean level surface, free of imperfections or debris. Always use straight boards. Check for square after each step. Always predrill holes before attaching with screws. Use glue with finish nails for a stronger hold. Wipe excess glue off bare wood for stained projects, as dried glue will not take stain. Be safe, have fun, and ask for help if you need it. Good luck!
Instructions
Step 1
This project can be built with either countersunk screws or the Kreg Jig. I give directions for both in the diagrams. You can click on any diagram for an expanded view.
Step 2
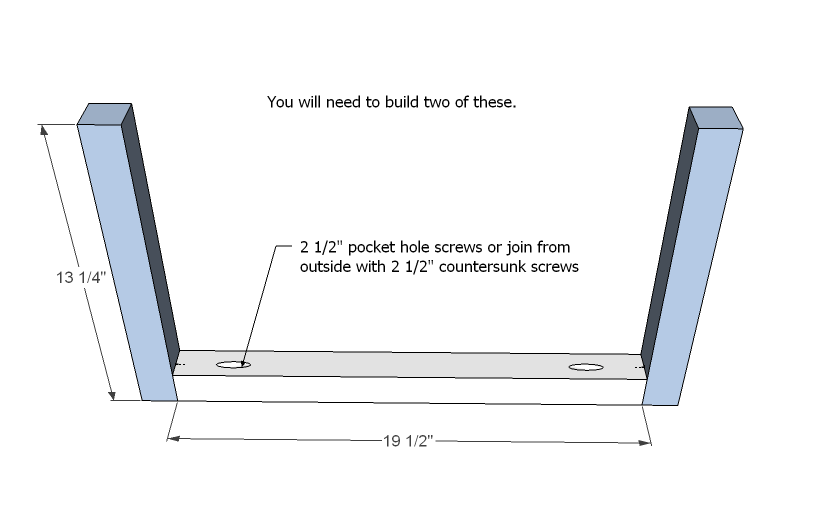
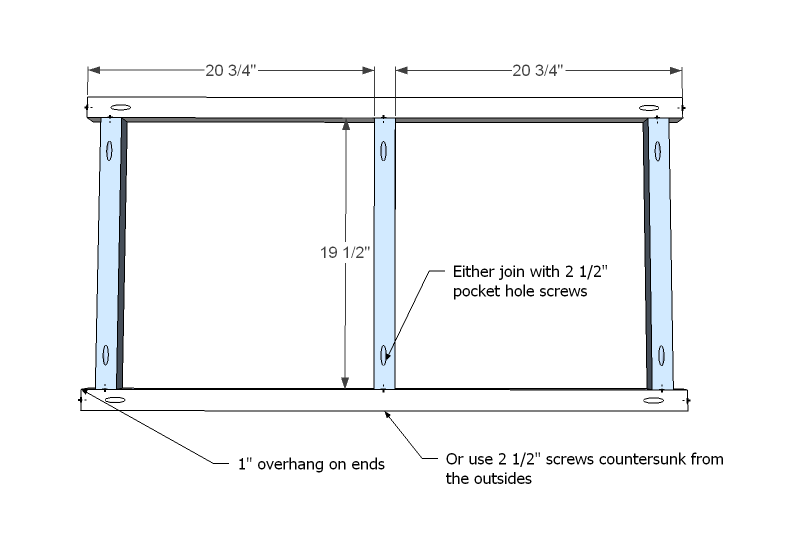
You will need to build two legs as shown above. 2 1/2" screws and wood glue.
Step 3
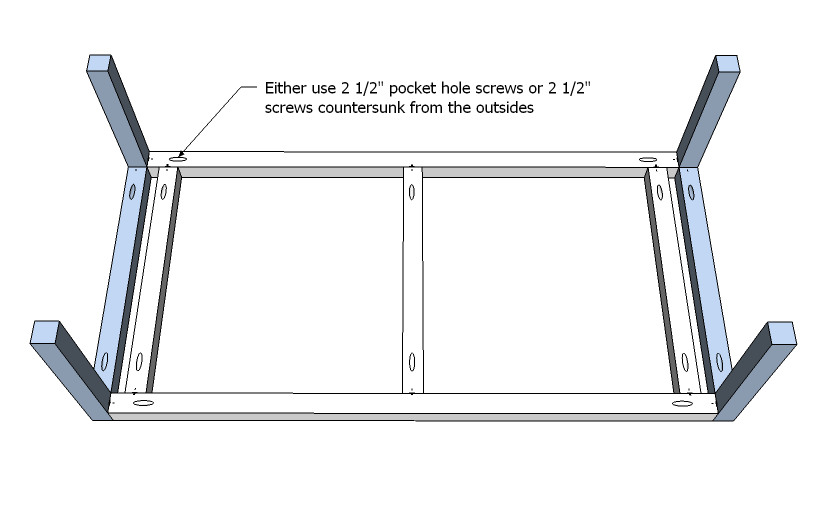
Attach leg sections to tabletop section as shown in diagram. Adjust for square.
Step 4
If you have a Kreg Jig, please skip to Step 6.
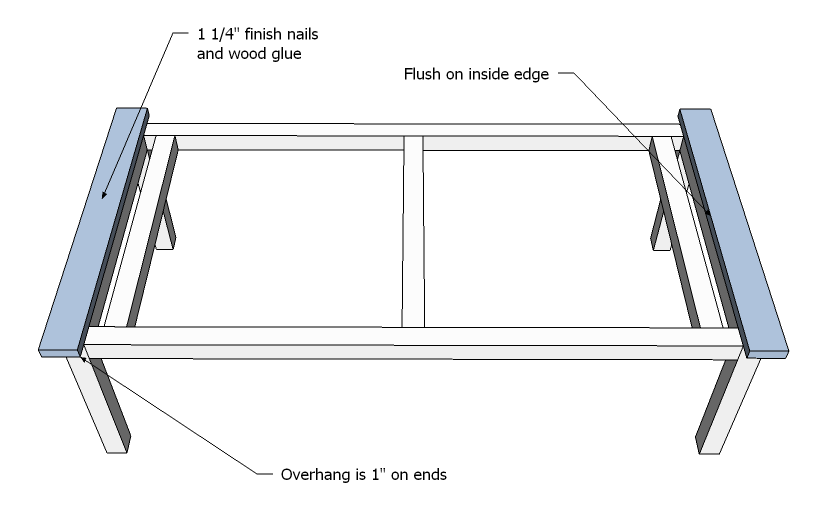
I used 2" finish nails and glue to attach the breadboard ends first. Ends overhang an inch, inside is flush to leg section inside.
Step 5
Step 6
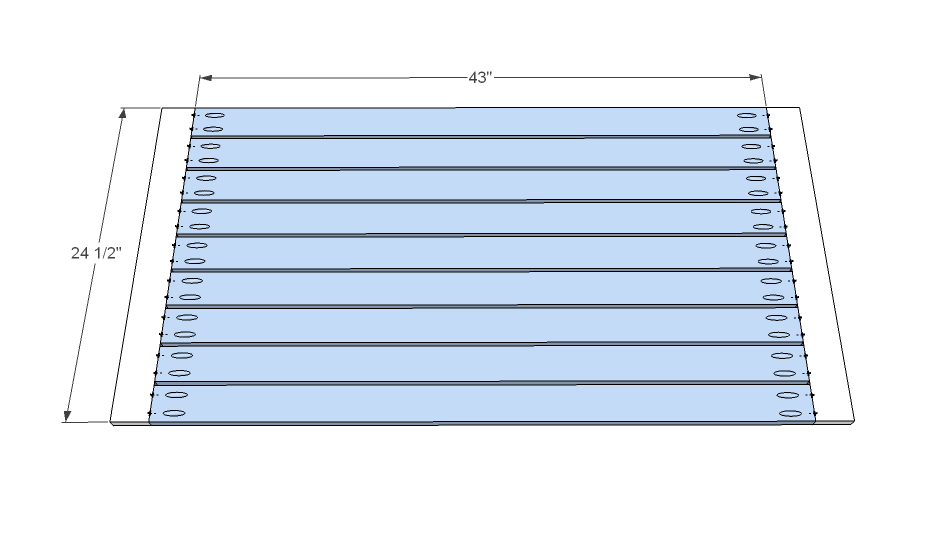
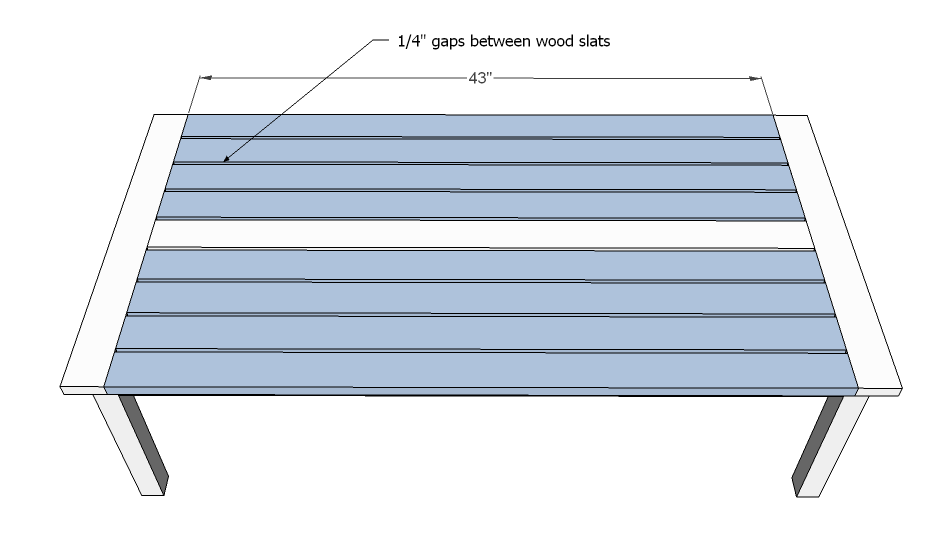
For Kreg Jig users . . . drill pocket holes in all tabletop boards as shown above, set for 3/4" stock. Use 1 1/4" pocket hole screws and wood glue to fasten tabletop boards to breadboard ends. Make sure the tops are nice and flush.
Step 7
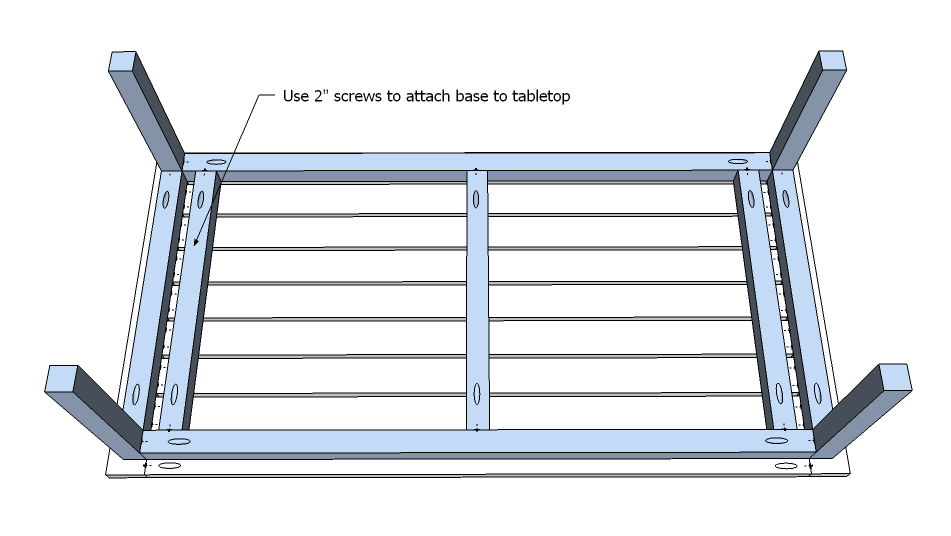
Once your tabletop is built, position the base centered on table, with 1" gap around all sides. Screw base to tabletop with 2" screws and glue.
It is always recommended to apply a test coat on a hidden area or scrap piece to ensure color evenness and adhesion. Use primer or wood conditioner as needed.

Comments
bhoppy
Wed, 06/08/2011 - 06:58
breadboard ends
Are there breadboard ends on your table Ana??
In reply to breadboard ends by bhoppy
Ana White
Wed, 06/08/2011 - 07:51
I made mine without :( and
I made mine without :( and regretted it. Just has such a nice touch with the breadboard ends. Just finished up the end tables, and will post shortly, and they look so much better with the breadboard ends. If you choose not to make the breadboard ends, simply cut your tabletop boards to 48" lengths.
PA PA B
Wed, 03/28/2012 - 06:42
type of wood
Anna, Looks great. What type of wood did you use? I am concerned about using a non treated wood for the outdoors. Is there a special finish needed if the wood is pine?
Thomas Johnson (not verified)
Mon, 04/09/2012 - 10:42
PDF link Simple White Outdoor Coffee Table
Link error.
herzo1852
Wed, 07/31/2013 - 10:18
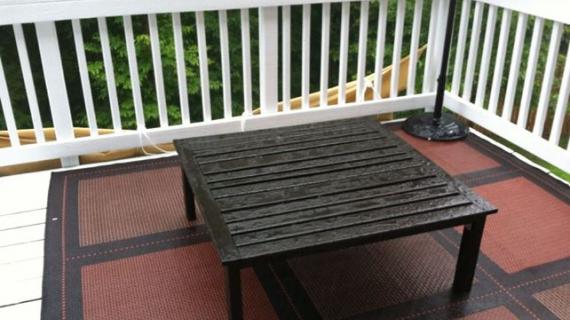
Finished my slightly altered table!
It looks so good, I can't thank you enough for this plan. I did change it to a 3 ft x 3 ft table and I varied the thickness of some of the top slats too, which was partially me wanting to be different and partially me having some 1x4 spare that I really didn't want to throw away, but it was too short for pretty much everything else I tried except the table top slats! Now working on 2 loveseats - having a BBQ on Aug 17th, going to be all done by then!