
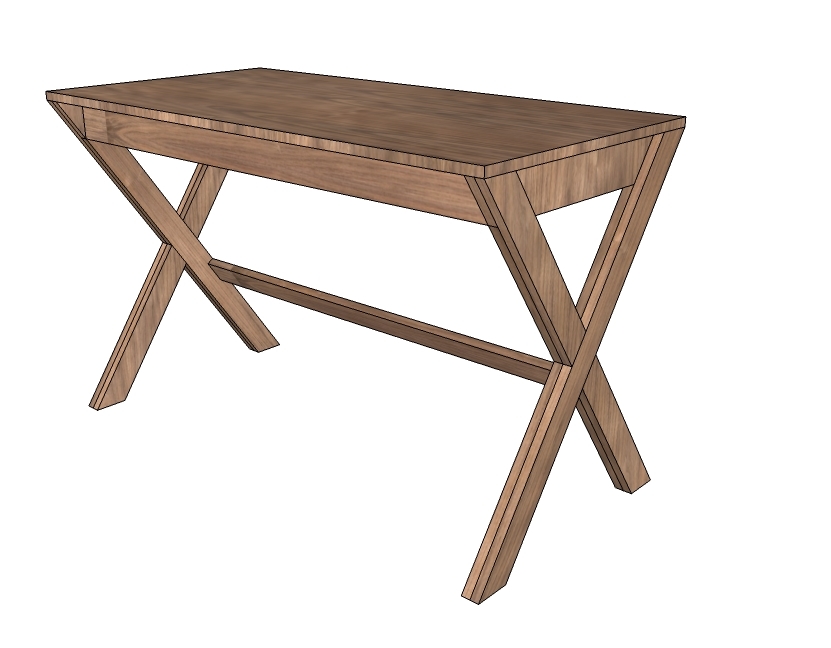

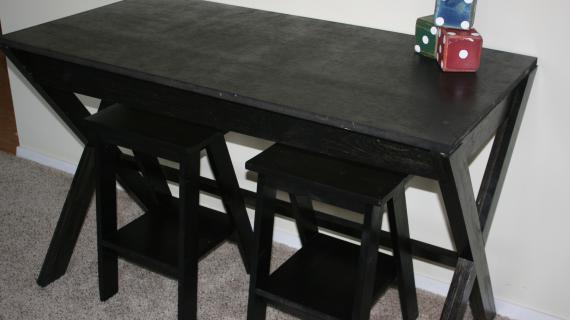
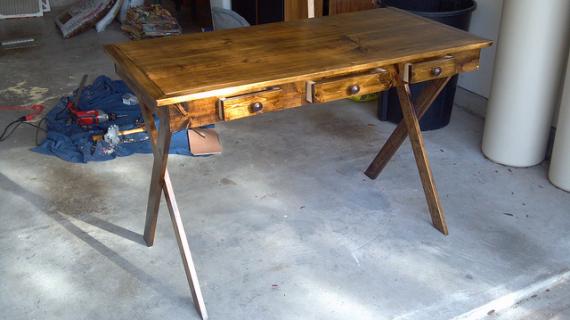
Build a X desk with these free easy do it yourself plans! Features step by step instructions, detailed diagrams, cut list and shopping list.

Sometimes the simplest plans are the most difficult to explain - sorry bout the 18 diagrams! But I'm giving my best effort to simplify the every popular X Desk with drawer for you - so you can build it with ease and confidence.
Preparation
6 - 1x3 @ 8 feet long - Shop around for 1x3s with very sharp, square edges
1 - 1x4 @ 12 feet long
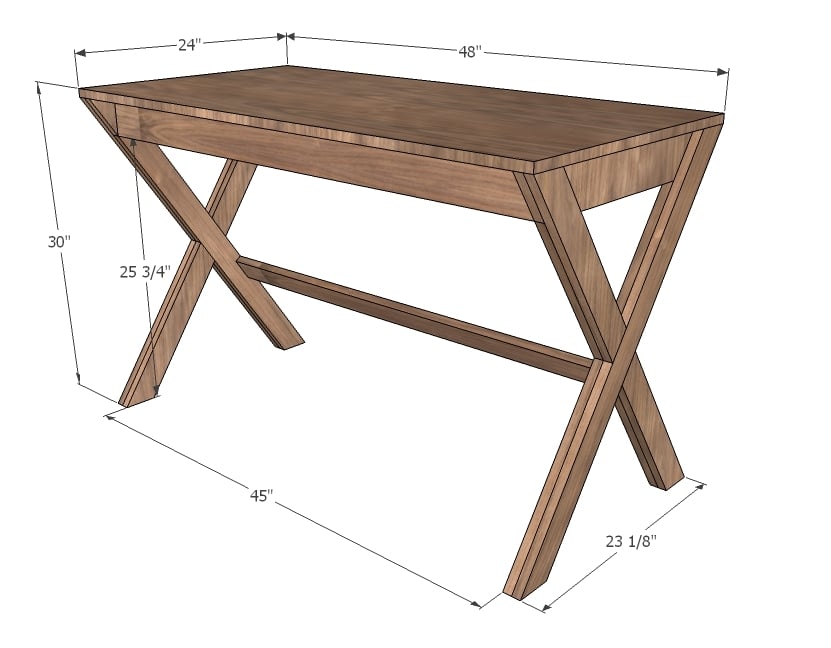
1 - 3/4" plywood or other project panel 24" x 48" suitable for desktop use
1 - 1/4 sheet 1/4" plywood or hardboard
2 - 16" Euro style drawer slides (the cheap white ones that attach to the bottom corners of the drawers)
2 - 1x3 @ 35 3/4" - Both ends cut at 35 degrees off square, ends are parallel to each other
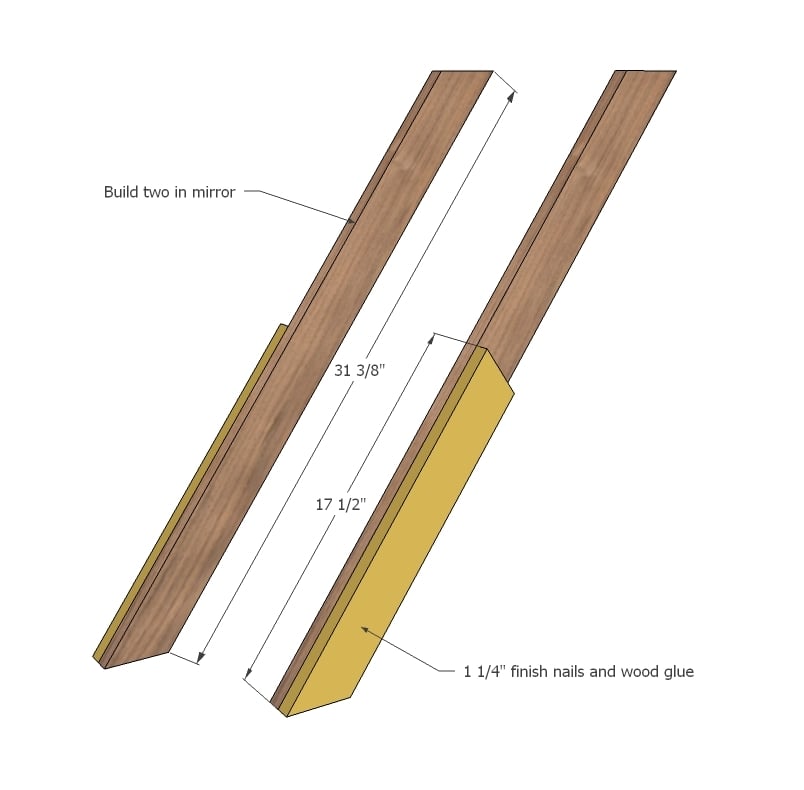
2 - 1x3 @ 31 3/8" - Both ends cut at 35 degrees off square, ends are parallel to each other
4 - 1x3 @ 17 1/2" - One end cut at 20 degrees off square, other end cut at 35 degrees off square, measurement is longest points - SEE IN STEP 1 AND 2
2 - 1x3 @ 14" - One end cut at 20 degrees off square, other end cut at 35 degrees off square, measurement is longest points - SEE IN STEP 4
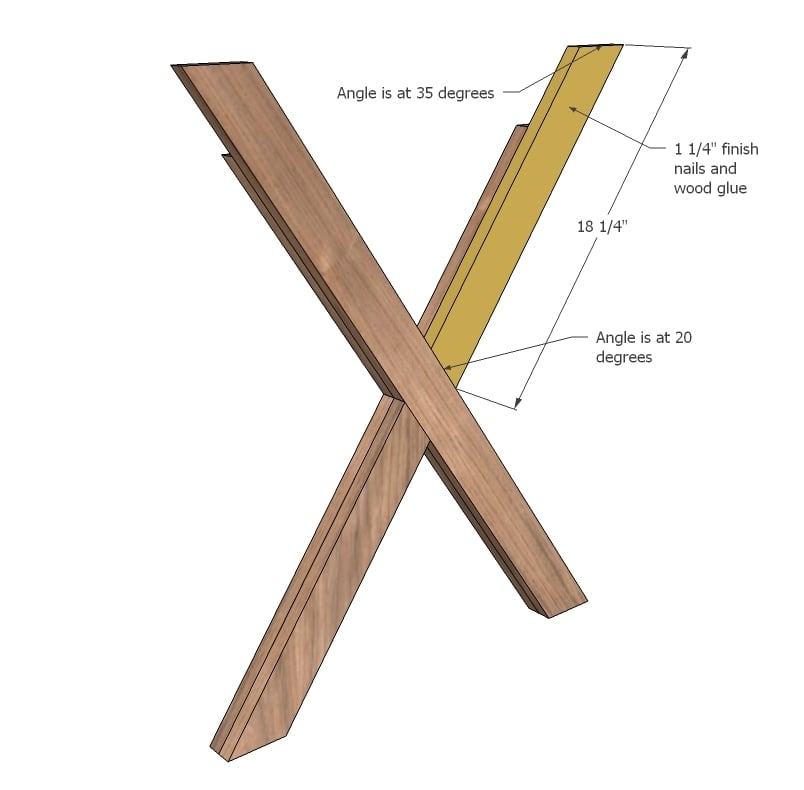
2 - 1x3 @ 18 1/4" - One end cut at 20 degrees off square, other end cut at 35 degrees off square, measurement is longest points - SEE IN STEP 5
2 - 1x4 @ 24" - Both ends cut at 35 degrees off square
2 - 1x4 @ 45"
1 - 1x3 @ 45"
1 - 1/4 sheet plywood or other project panel 48" x 24"
Drawer
4 - 1x3 @ 15 1/4"
2 - 1x3 @ 12"
1 - 1x3 @ 44"
1 - 1/4" plywood or hardboard @ 44" x 16"


Please read through the entire plan and all comments before beginning this project. It is also advisable to review the Getting Started Section. Take all necessary precautions to build safely and smartly. Work on a clean level surface, free of imperfections or debris. Always use straight boards. Check for square after each step. Always predrill holes before attaching with screws. Use glue with finish nails for a stronger hold. Wipe excess glue off bare wood for stained projects, as dried glue will not take stain. Be safe, have fun, and ask for help if you need it. Good luck!
Instructions
Step 1
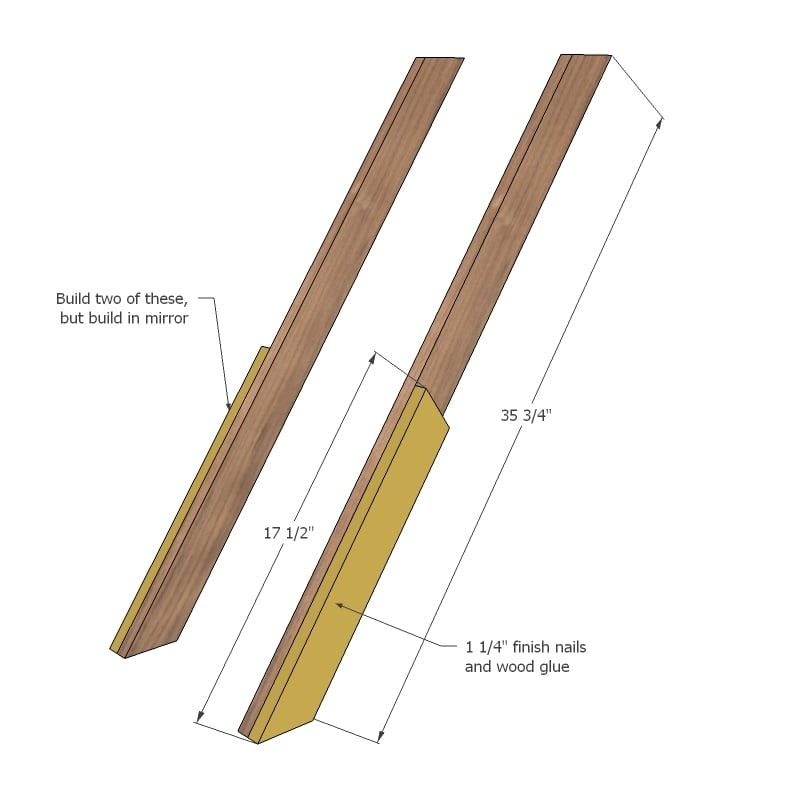
It would be a good idea to lay out your legs first. A dry run will minimizes mistakes later.
Start with the two longest leg pieces. Notice you will need to build two leg sets that are mirrored. Attach the 17 1/2" long leg pieces to the bottoms with 1 1/4" finish nails and wood glue. Take great care to line edges up - you want to create the illusion of a solid wood leg here. This will save you sanding work later!
Step 2
Do the same for the shorter full legs. Note that the middle angles are all 20 degrees off square, but top and bottom angles are 35 degrees off square.
Step 3

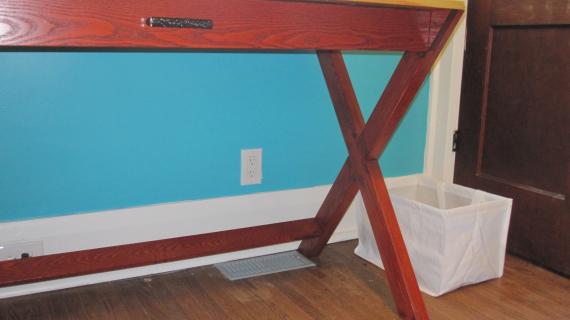
Position a leg set including one short and one long leg, crossing in the middle. Check to make sure the bottom overall spread is 23 1/8" exactly. Glue and nail down when satisfied. Build remaining leg in mirror.
Step 4

Fit the long top leg with the remaining short filler piece. Nail down.
Step 5
Step 6

Position the side aprons in this notch and glue and nail down.
Step 7
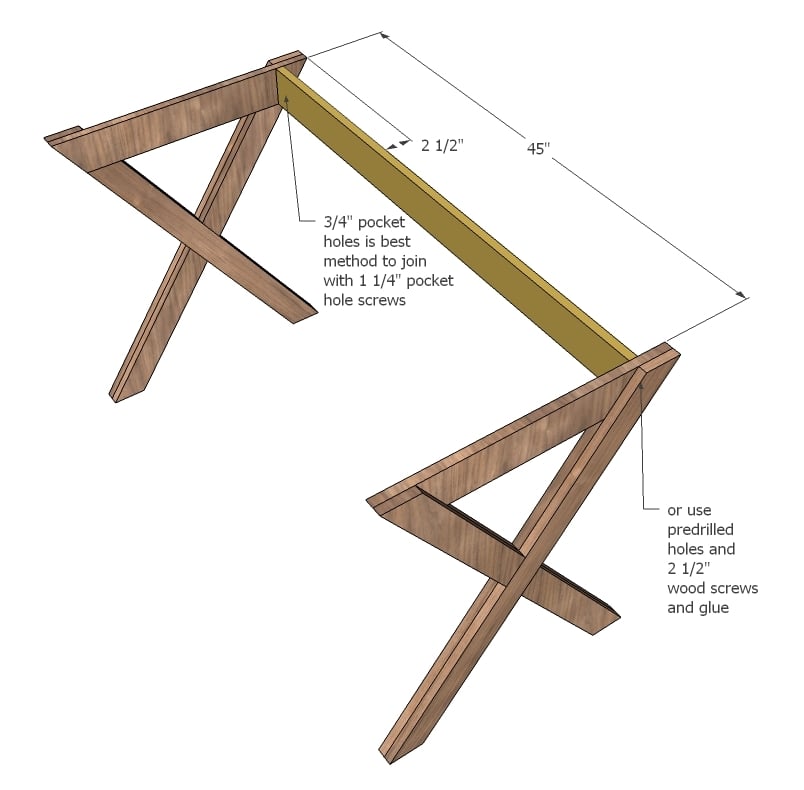
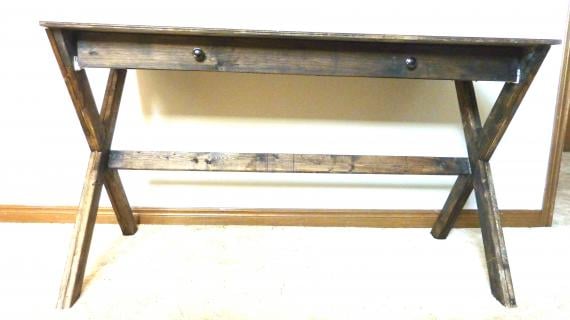
Notice the side aprons both sit to the inside. Attach back apron as directed in diagram.
For a drawerless desk, simply add the front apron too.
Step 8
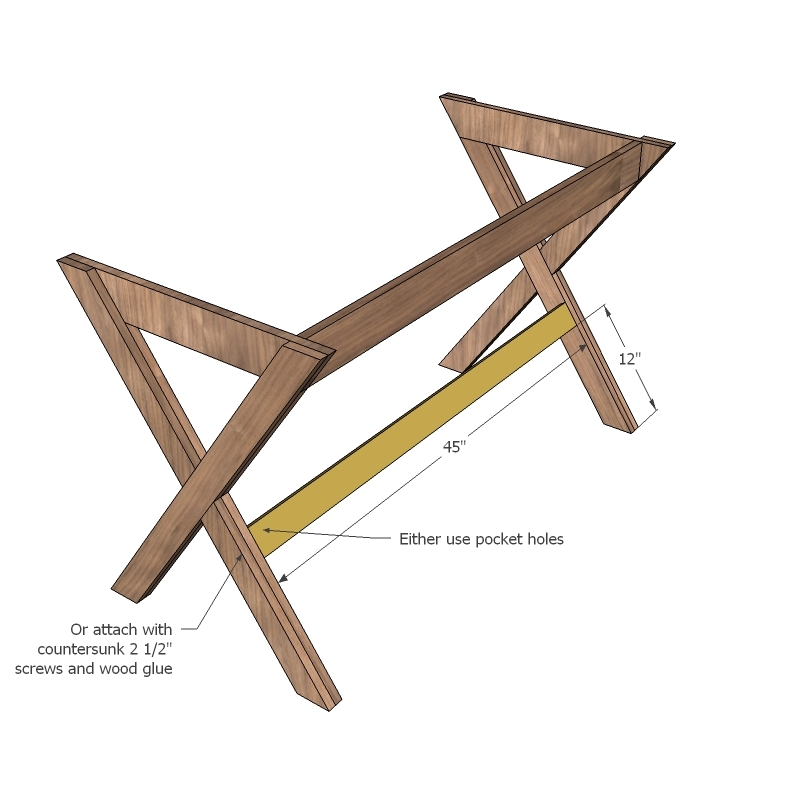
Bottom stretcher is a 1x3. Attach same as back apron.
Step 9

Followed by the tabletop. If you have a pocket hole jig, you will want to attach through aprons with 3/4" pocket holes and 1 1/4" pocket hole screws (drill pocket holes PRIOR to step 7). Otherwise, nails and glue down with 2" finish nails.
Step 10
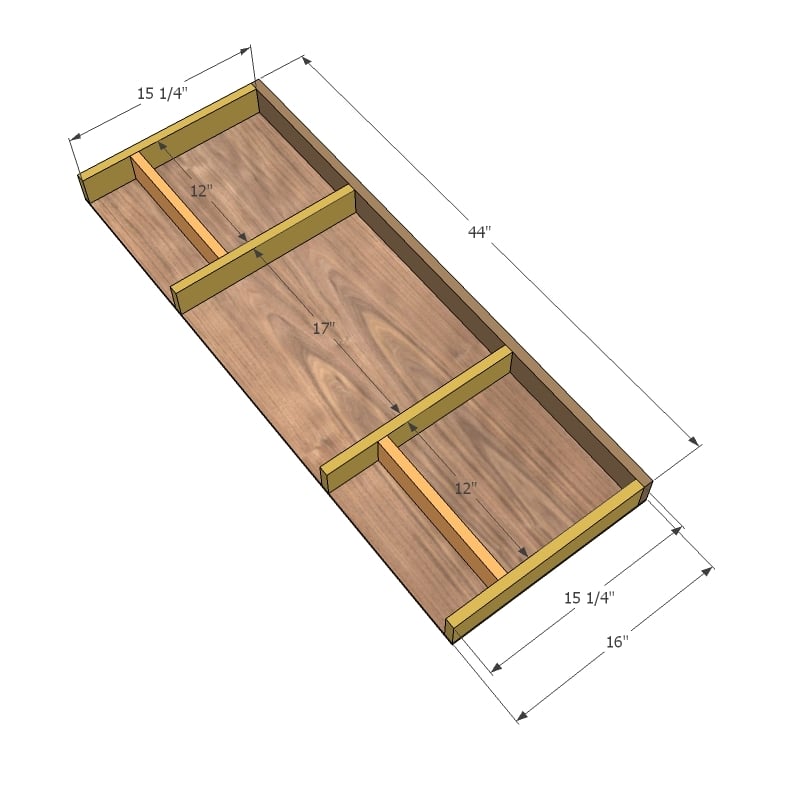
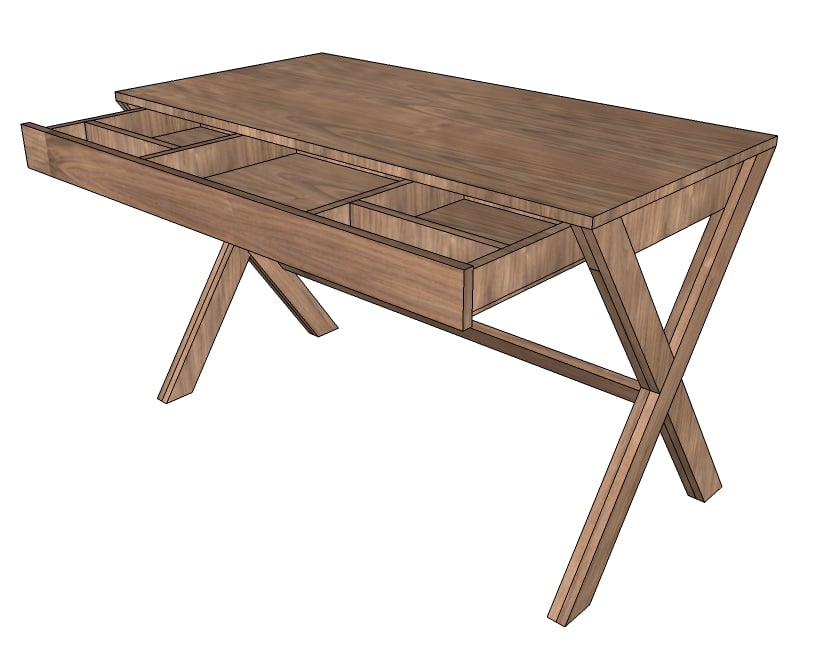
For the drawer, build as shown above. Attach plywood to the bottom with 1 1/4" finish nails and wood glue. Check to make sure your drawer is square and overall 1" less in width than the opening in the desk.
Step 11
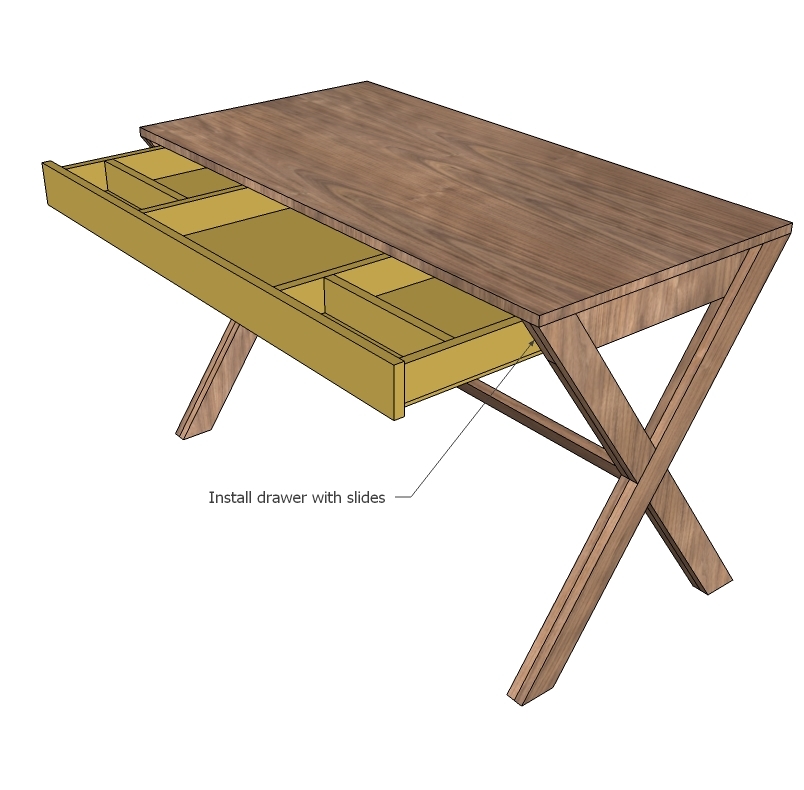
Attach drawer members to drawer bottom side corners. Attach cabinet members to insides of desk. Follow the instructions in this plan for installing drawers.
Step 12
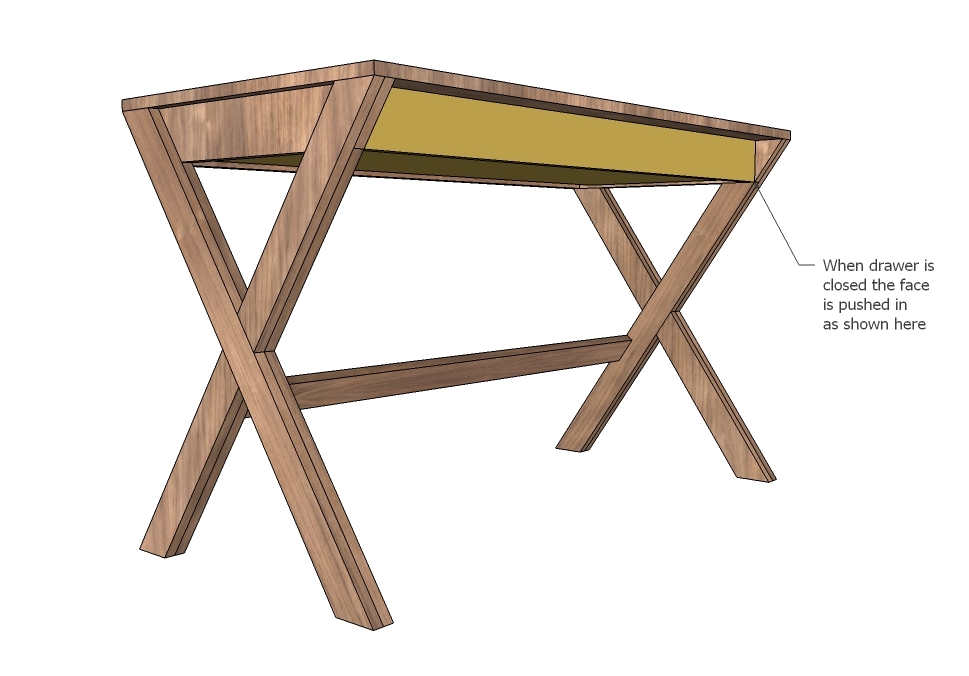
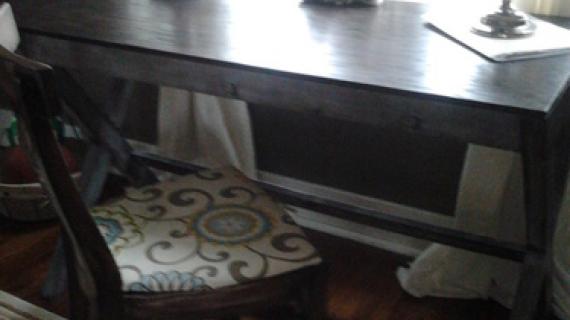
When the drawer is closed, it sits inset on the desk as shown above.
It is always recommended to apply a test coat on a hidden area or scrap piece to ensure color evenness and adhesion. Use primer or wood conditioner as needed.


Comments
Lady Goats
Tue, 10/18/2011 - 11:07
YAY! I've LOVED this!
But was never really motivated to figure it out because it looked too tough! THANK YOU!
RHgaijin2
Wed, 10/30/2019 - 19:53
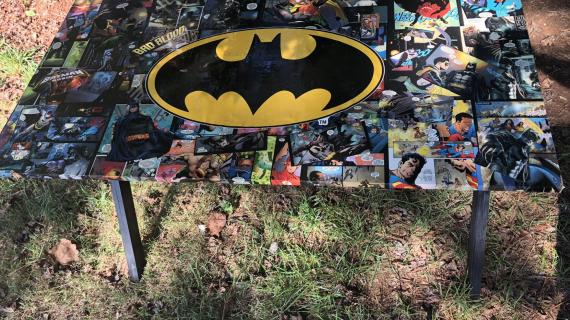
I just completed this and…
I just completed this and made a step by step video. I also posted my brag post too. Mine is the one with the Batman Theme
https://youtu.be/-1gZv50vfN4
Francoise
Tue, 10/18/2011 - 16:49
My dream desk!
I am thrilled. I am delighted. I love this Crate and Barrel desk but couldn't stand the idea of paying over $600 for it. It's the reason I decided to take up woodworking again and then I couldn't find any patterns. Thank you!
LAMD (not verified)
Tue, 10/18/2011 - 18:17
Glass Top?
I've been looking for a table with "X" legs and a glass top and am so excited about this plan. Do you think this would support a glass top? If not, any way to reinforce it so it does? Thanks!
Hillary (not verified)
Tue, 10/18/2011 - 18:39
Glass top
I bet it would be fine if you used at least 1/4" glass and did both the front and back aprons. Maybe even one more support across the middle, parallel to the aprons? You could probably show the plan to your local glass store and get a good answer.
In reply to Glass top by Hillary (not verified)
Ana White
Wed, 10/19/2011 - 09:51
Couldn't say it better than
Couldn't say it better than Hillary did!
LAMD (not verified)
Tue, 10/18/2011 - 18:48
Good idea, thanks! I checked
Good idea, thanks! I checked and a 1/2" thick piece would weigh about 70 lbs. Will definitely look into it.
Stephen (not verified)
Thu, 10/20/2011 - 18:36
PDF file
Rut Roh, I think something went wrong. The link to the PDF file is throwing this error.
TCPDF ERROR: [Image] Unable to get image: file:///home/anawhite/public_html/dev/acquia-drupal-1.2.33/sites/default/files/x%20desk%20pottery%20barn%20crate%20barrel%20plans%203.jpg?1318959564
BTW, I love this desk. I can finally gift this cheap Walmart one I've been using and make a REALLY good and sturdy one.
Thank You.
Guest (not verified)
Sat, 11/05/2011 - 05:51
hey id like to modify the
hey id like to modify the design a bit because i already have the panel for a desktop but im a first timer and quite terrible at design. the size of my board is 29 1/2 x 61 (inches)and i dont know how this affects the angles of the legs which is mymain problem
jesmith11 (not verified)
Fri, 06/08/2012 - 21:04
Adding a plank top
Hello! I love this plan for a desk and think I may have to craftsy soon! Just curious, would there be anyway anyone could think of to make this desk with planks across the top? As a novice builder, I wasn't sure if you could just attach planks to the top without taking away the look of the desk. I am looking for a farmhouse top to the desk I guess. Any thoughts? Thank you for the design!
Jennifer@The C… (not verified)
Fri, 07/27/2012 - 14:51
Brilliant Carpentress
Ana, if you lived in Boston, MA instead of AK I'd track you down and kiss you right now! I love building furniture from scratch and have been working on a set of x-leg stools the past few days and the assembly part has been giving me fits. Just couldn't get the legs together sturdily enough to bear weight. And then I came to this plan, and ah-hah! There is the solution! Thanks so much for sharing your expertise with the world - you've saved me a weekend full of frustration and brain wracking.
anniemar
Thu, 01/22/2015 - 08:04
Love this plan
I love the look of this desk and trying to decide between this and the fancy X desk. Is this desk sturdy? Any wobbling? I'm also think about doing 3 drawers across the front instead of just one large one. The drawers would probably make it a bit more difficult though. Thank you for the feed back!
Phhiggins
Tue, 08/18/2020 - 09:21
X Desk with Drawer
I love this desk and all of Ana White's plans! I may be missing something, but photo of the drawer only shows 3 sides and I did not see anything in the cut list for the front of the drawer box. I also didn't see anything for the drawer front. Is there not a drawer front cut piece?