DIY Mattress Size Porch Swing
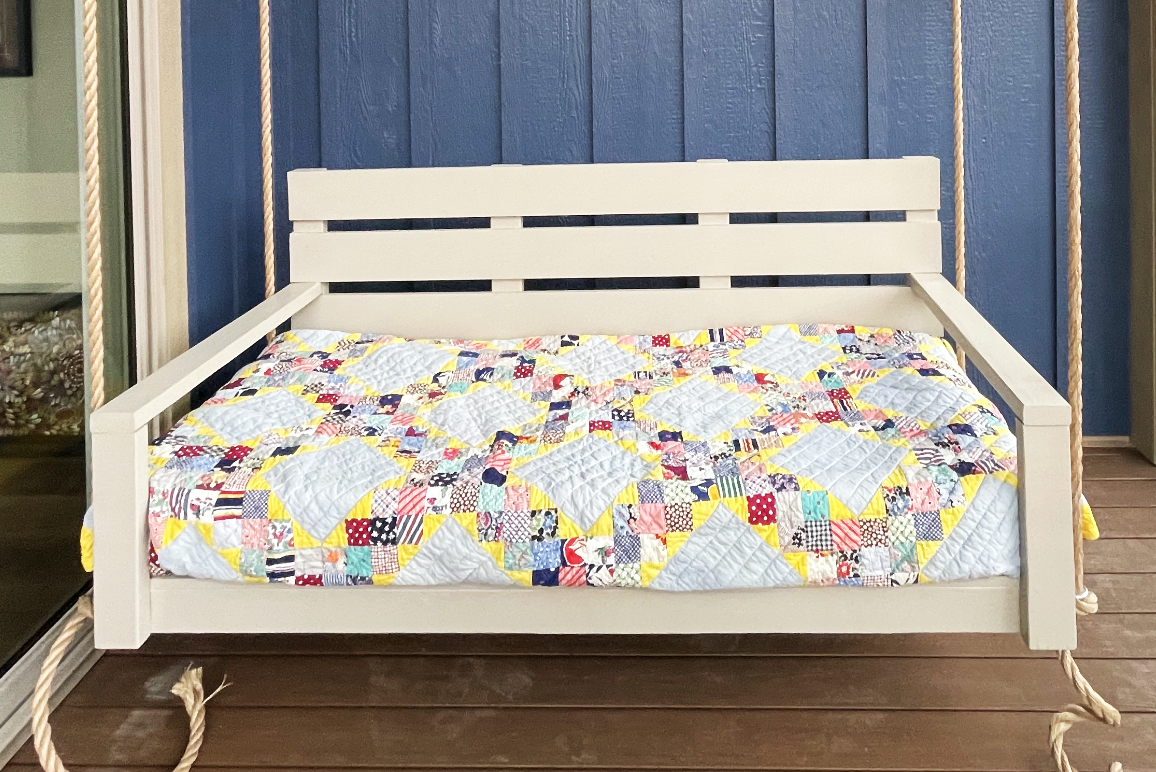
I altered the plans to fit a twin mattress. It’s a bonus sleeping area on the porch. My second project. I’m a 69 year old female and enjoying the building.
Lou Ann

Built from Plan(s)
I altered the plans to fit a twin mattress. It’s a bonus sleeping area on the porch. My second project. I’m a 69 year old female and enjoying the building.
Lou Ann
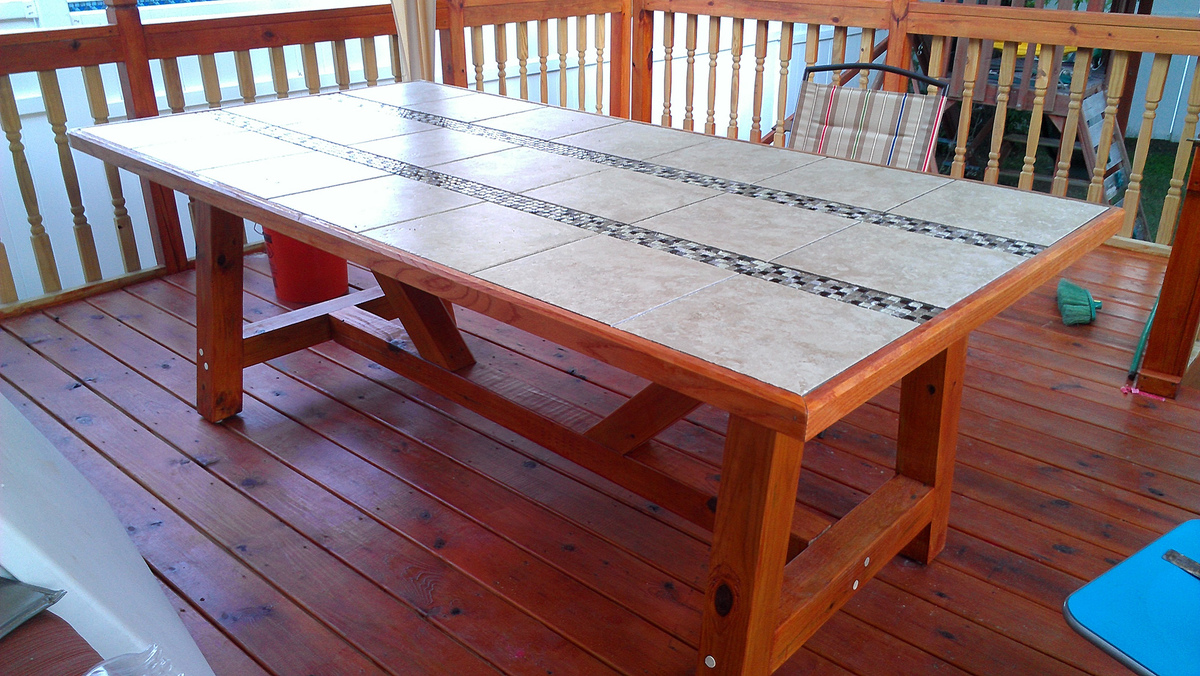
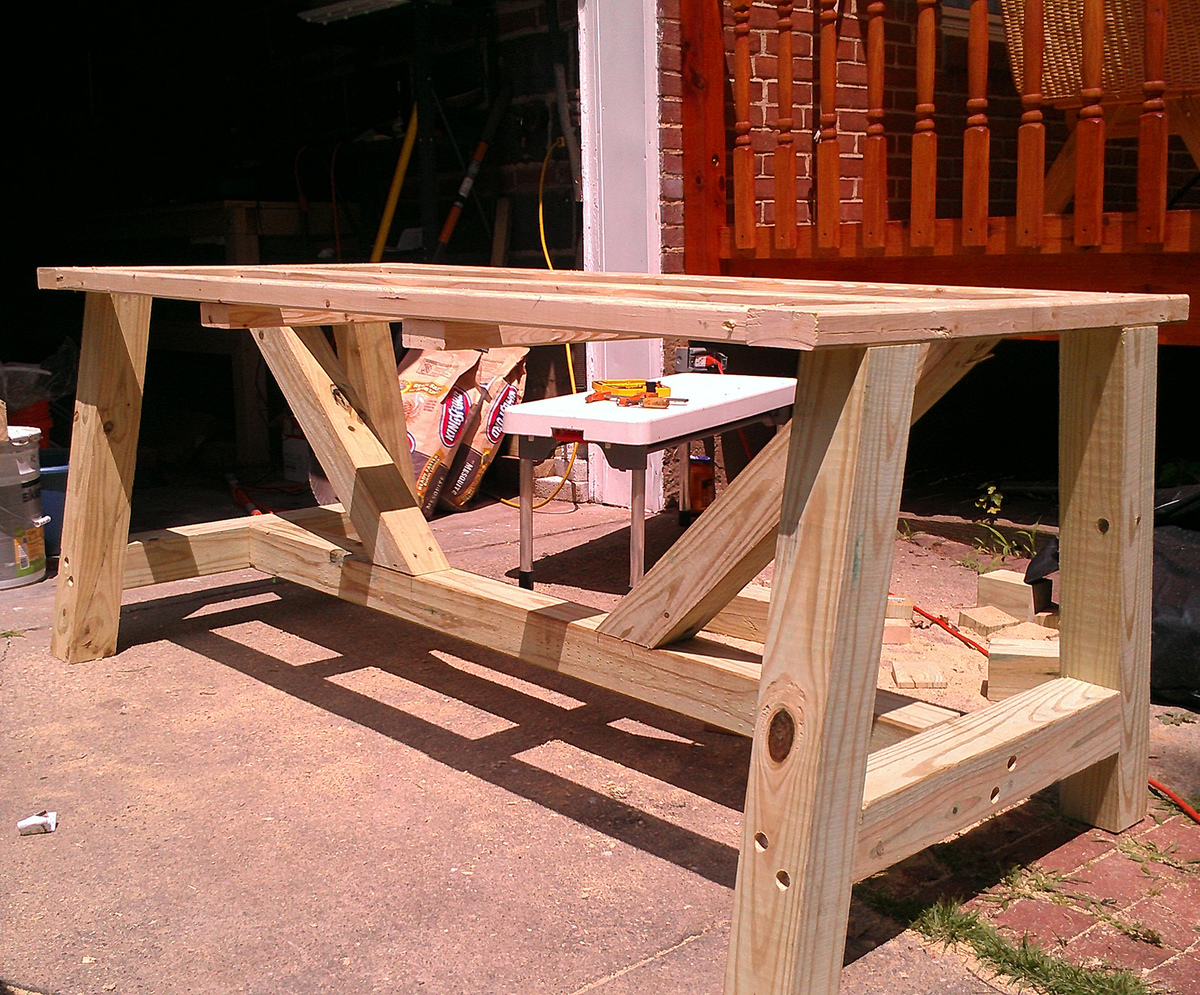
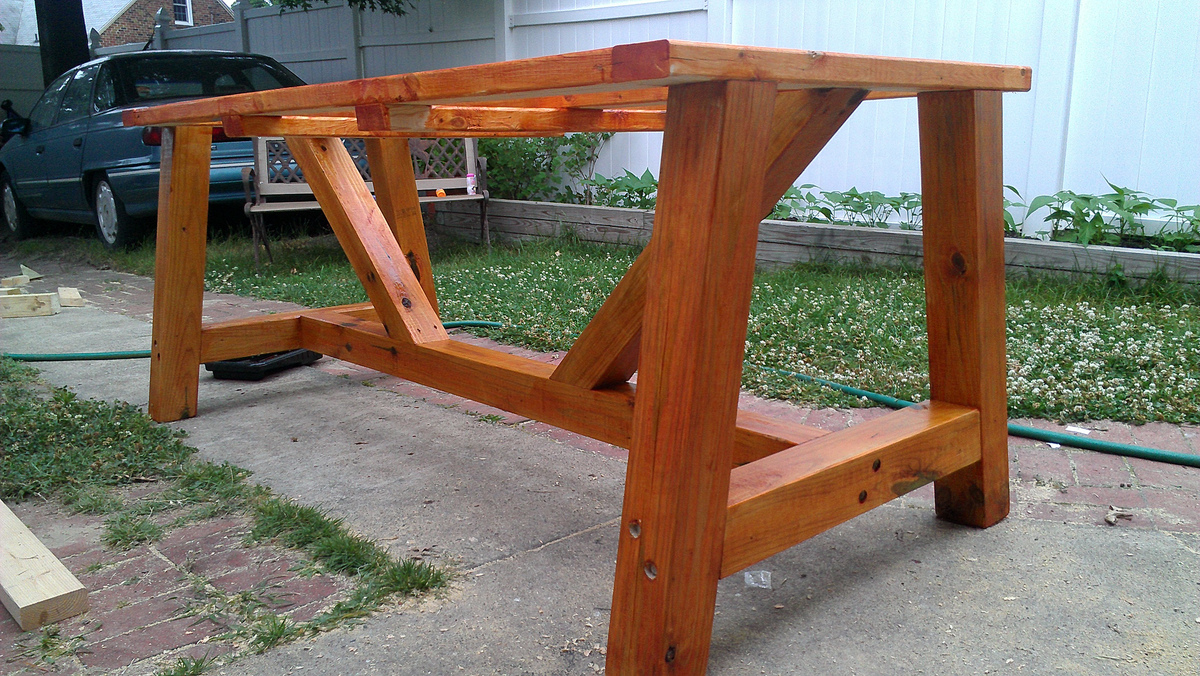
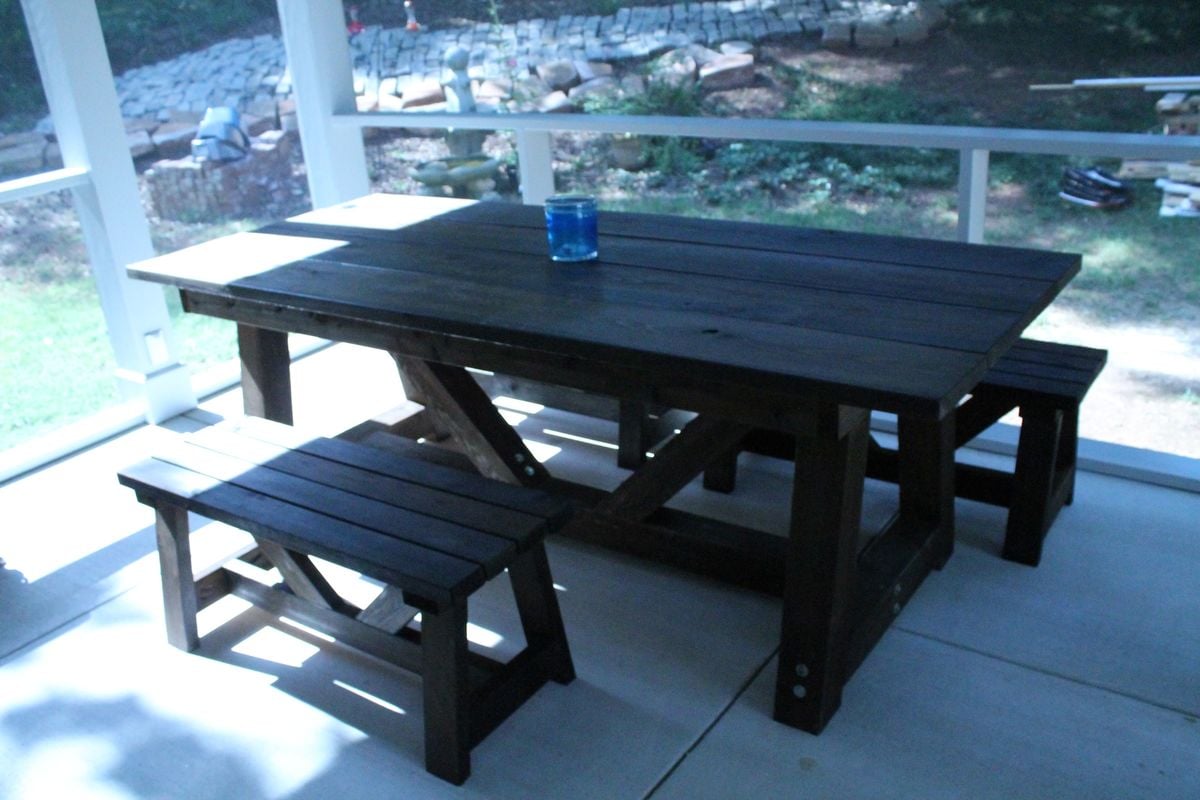
Wanted a nice big table, but couldn't find one in local stores. Decided to build one after seeing a small tiled table at Home Depot. This is my first project like this. I am a network engineer not a carpenter, but the table turned out great.


Thu, 06/28/2012 - 17:49
could'a fooled me! The table looks amazing!
Fri, 06/29/2012 - 06:14
This is my first ever project like this... but I just found out that I like doing this kind of stuff.
Already have some more ideas in mind, and once the weather cools down from the upper 90's we are having right now, I will probably do many more projects.

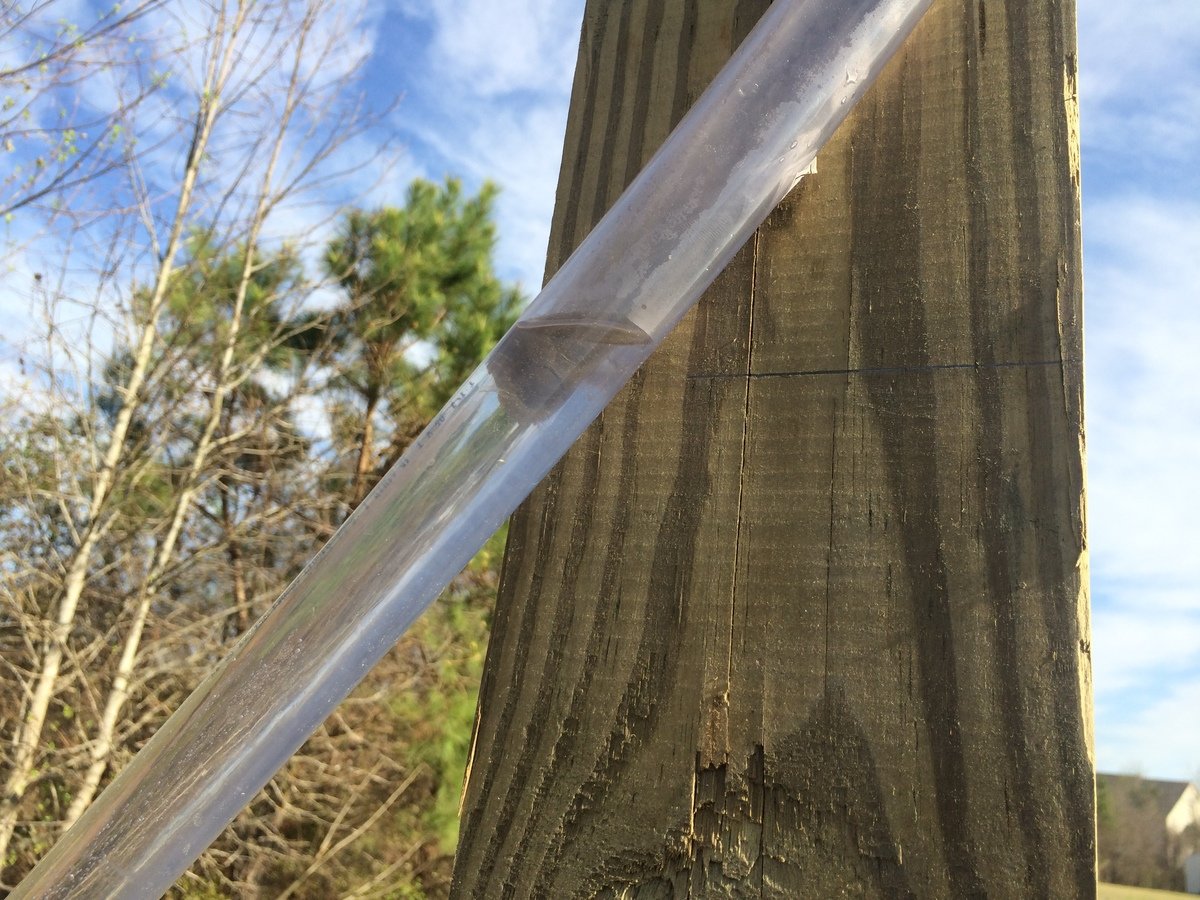
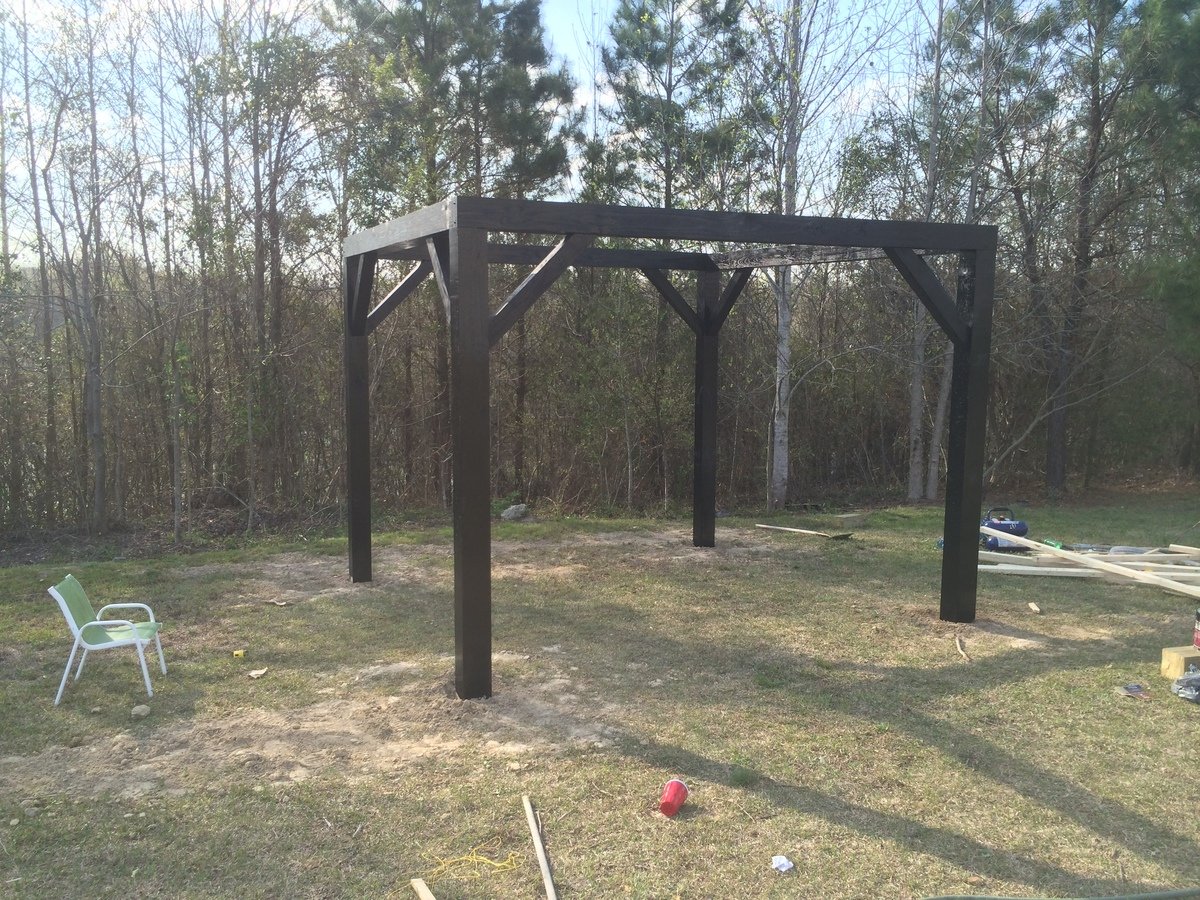
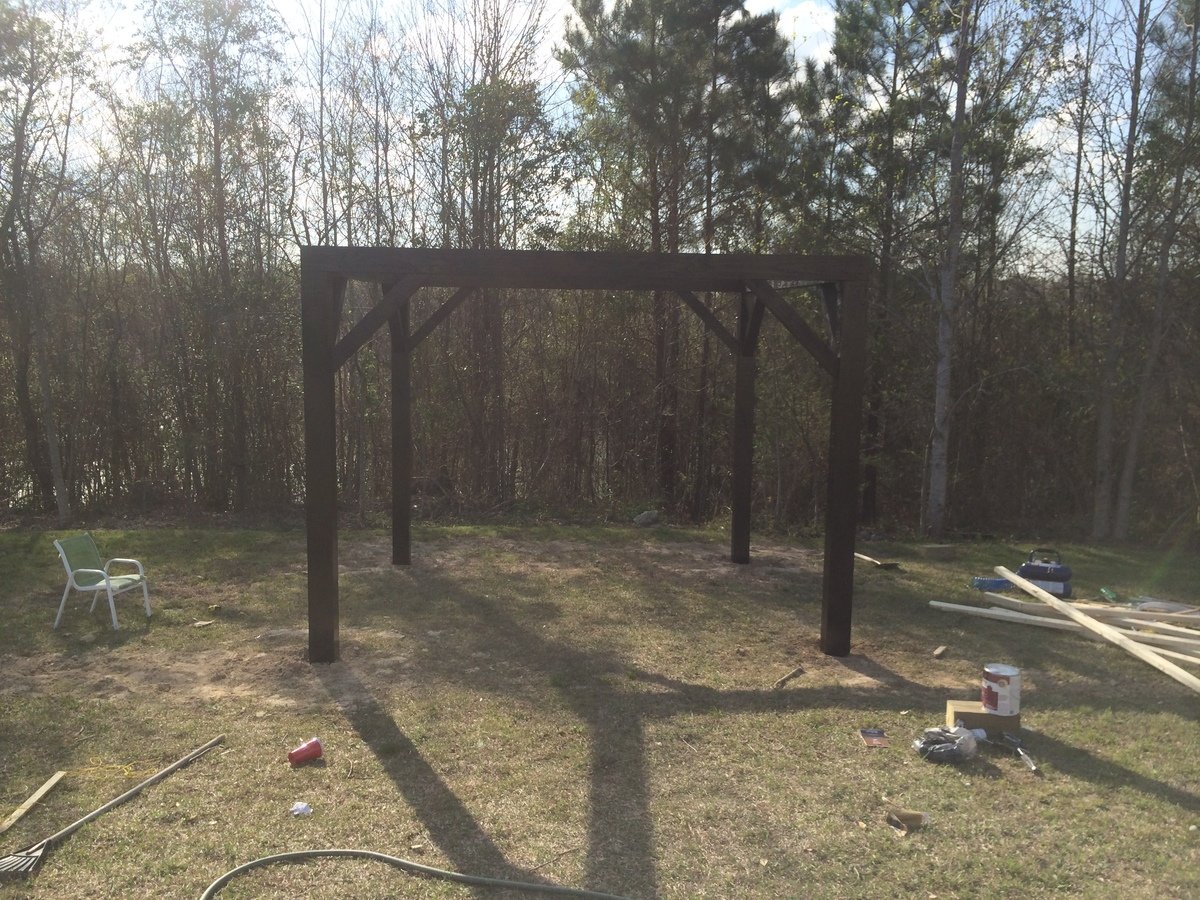
My wife saw something like this on Pinterest and desperately wanted one. The one she saw was hexagonal in shape. We didn't need as many swings so we went with just a plain square shape. We used 6x6s for the legs and posts across the top and used 4x4s for the angled support pieces. We built the swings using the plan from this website. All the materials can be picked up at the blue and orange stores. However when it came to the springs for the swings, the blue store was 1/3 of the price of HD. The legs are 12' long and buried 4' under the ground and cemented in for strength. Luckily I am retired military and was able to rent an auger for 1/2 the price of HD or the blue store. You could do it by hand but it saved us hours and lots of back pain. We found our dimensions for the size we wanted and spray painted dots on the ground where the posts were going to go. We dug the holes and stuffed the 6x6s in them. Using a post level we made sure they were plum. We braced them and added the quickrete and left them to setup over night. The next day we had to make sure all the tops were level with each other. This is where having some knowledge of physics paid off. I took clear tubing and screwed it above the height that I wanted on one post and then screwed the other end to another post. Fill it with water until the water level on the first post is where I wanted it (8 feet high) and it will automatically fill it level on the other end. There is a picture of this above. Water will always level itself out. I had to do this because my yard is at a slight down hill grade. We marked it and cut the tops off to make it level. After attaching the 6x6s on the top with 8" lag bolts it was time to paint. After painting was done we built 3 swings from Ana's plans. We shortened them by 6" to give room to walk between the legs and the swings. All in all it was a great project that only took two dedicated weekends. My wife still has to paint the swings though.


Wed, 05/27/2015 - 07:42
How did you attach the 6x6's to the top? Is it a miter cut at 45 degrees and then put together with the lag bolts. I'm kinda confused. Thanks.
Wed, 05/27/2015 - 22:38
It sounds and looks like the top 6x6s are mitered and sit on top of the end of the vertical posts. I'd say at least one lag bolt each way to hold the mitered corner together and then at least one in each piece down into the vertical to hold it in place.
Sun, 07/19/2015 - 16:26
I have looked at several versions including the hexagon pergola's, but this is exactly what we want. Do you have plans that you can email me? [email protected]
Sun, 04/19/2020 - 12:33
If you recurved plans can you please send to me?
[email protected]
Sun, 04/19/2020 - 12:33
If you recurved plans can you please send to me?
[email protected]
Wed, 04/29/2020 - 16:18
I was looking for material list and plans if you have any please send to [email protected] thanks
Mon, 04/27/2020 - 10:24
WOW, LOVE!!! This is simply gorgeous! What a warm and welcoming addition to your yard. And thanks for sharing your method of finding level for your posts on your sloped yard. I absolutely love it!
Thu, 10/22/2020 - 06:53
Love this, can you please email me the plans @ [email protected]
Fri, 03/26/2021 - 05:58
This is beautiful. Would love to see the plans for this. How small can it be made?
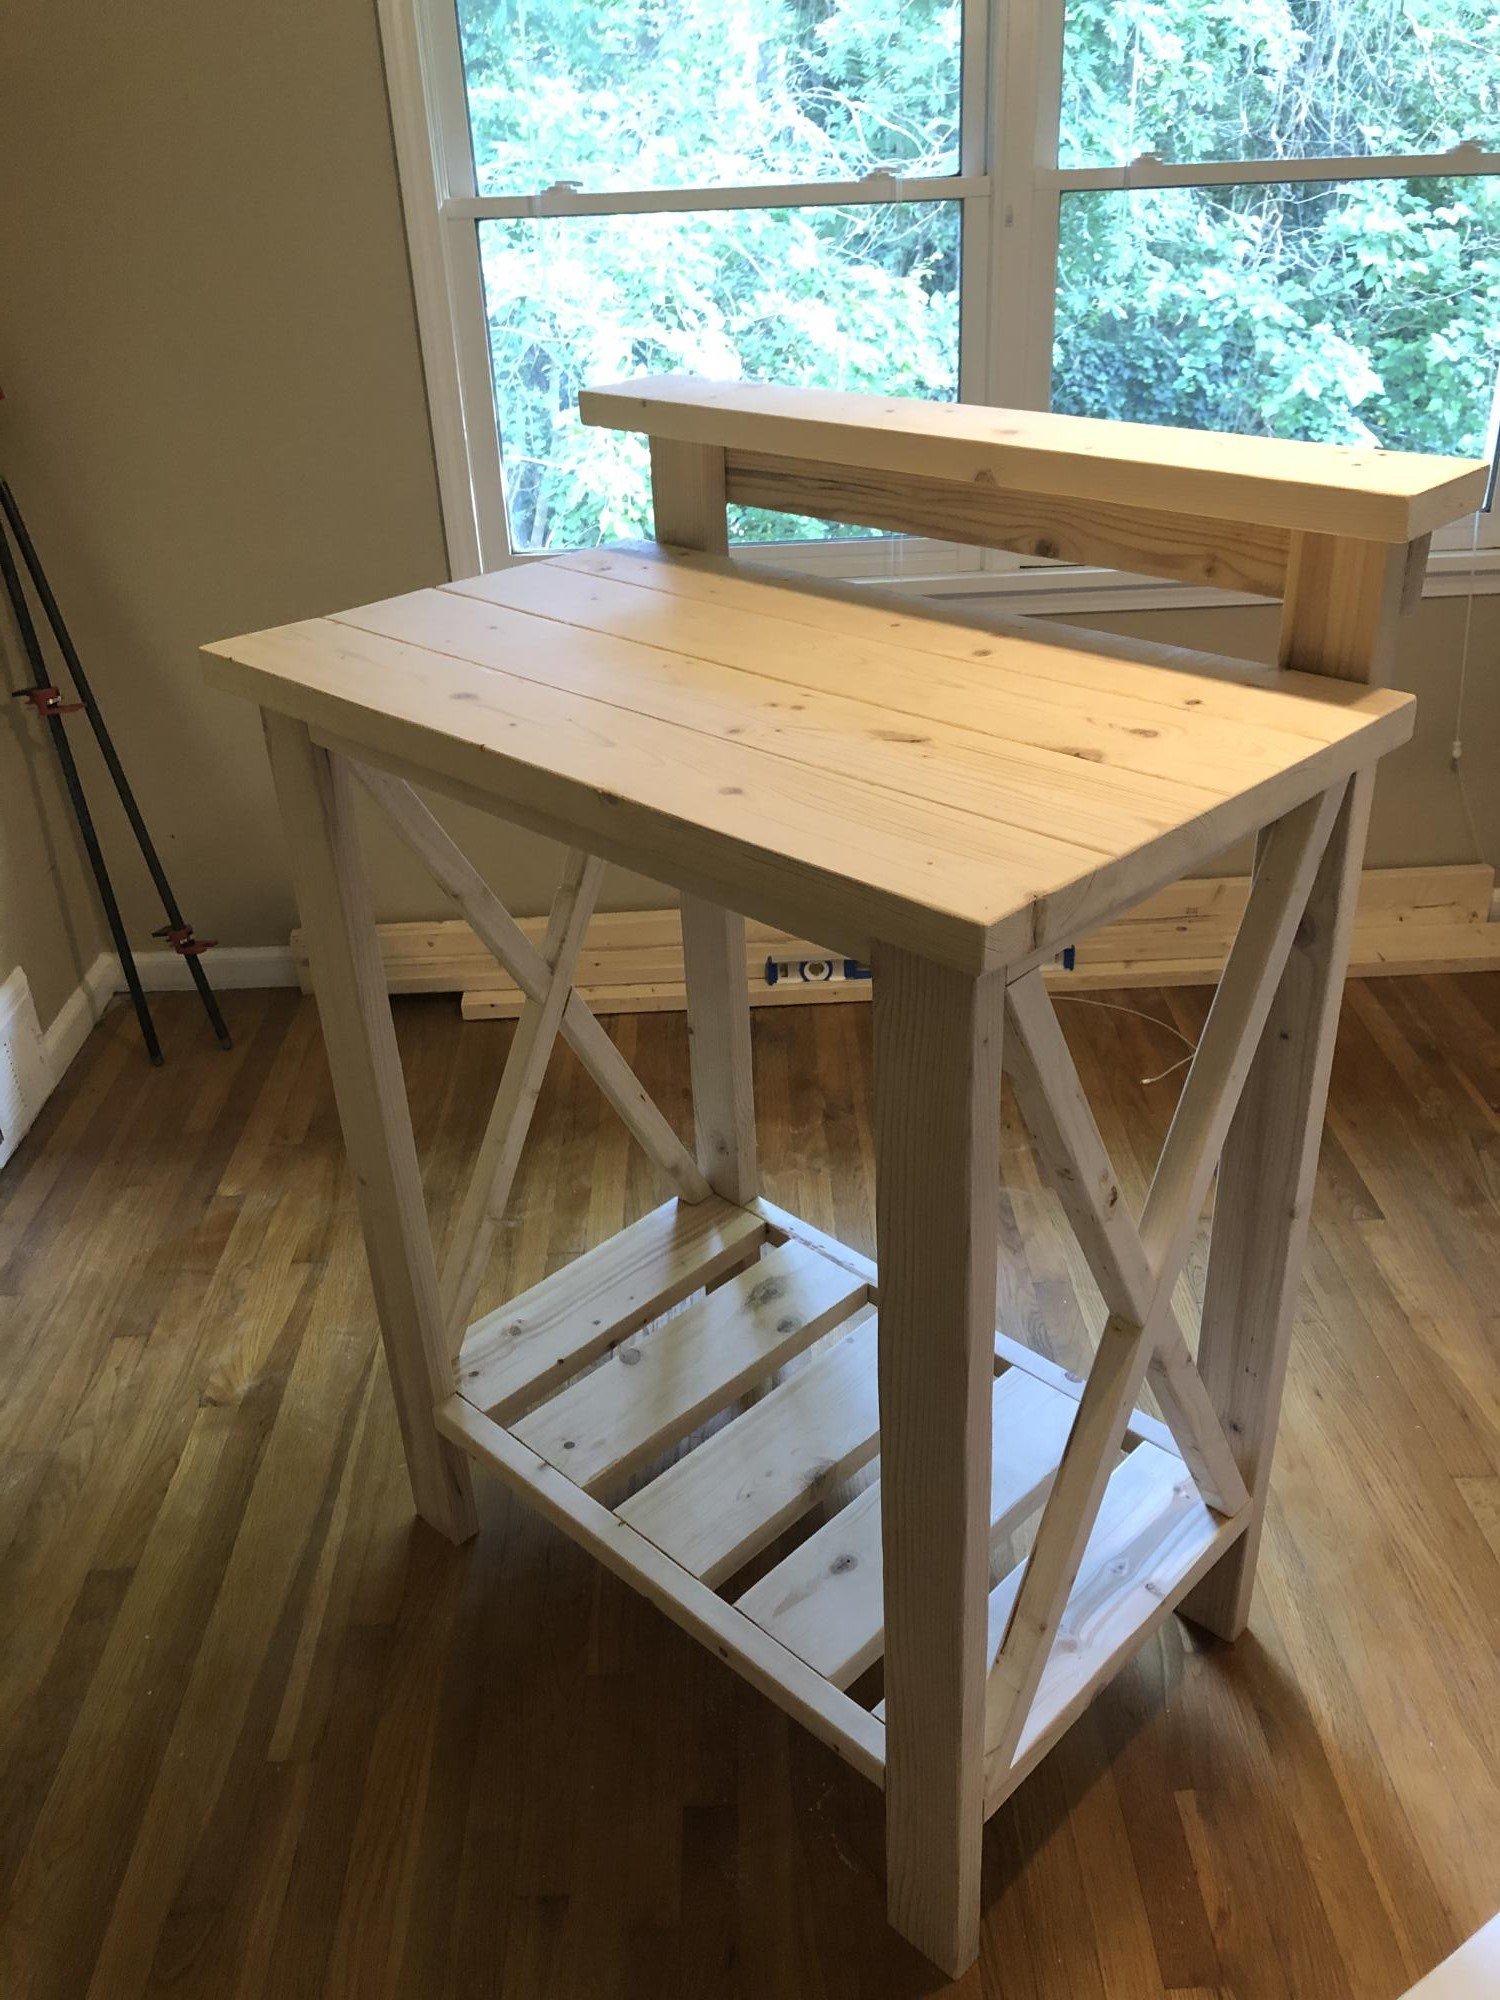
Hello! I used the plans for the Farmhouse Potting Bench and modified them to make a standup desk. This has been awesome for making a simple but effective desk during the quarantine.
Tue, 07/14/2020 - 07:10
This is great! I was thinking of modifying the potting bench plans as well, to build a kitchen unit. My stove recently bit the dust, and seeing as I never use the oven anyway, I'm hoping to build a convection plate cooking unit to put in the old stove's place. I'll probably pop some doors onto it and have closed storage underneath.
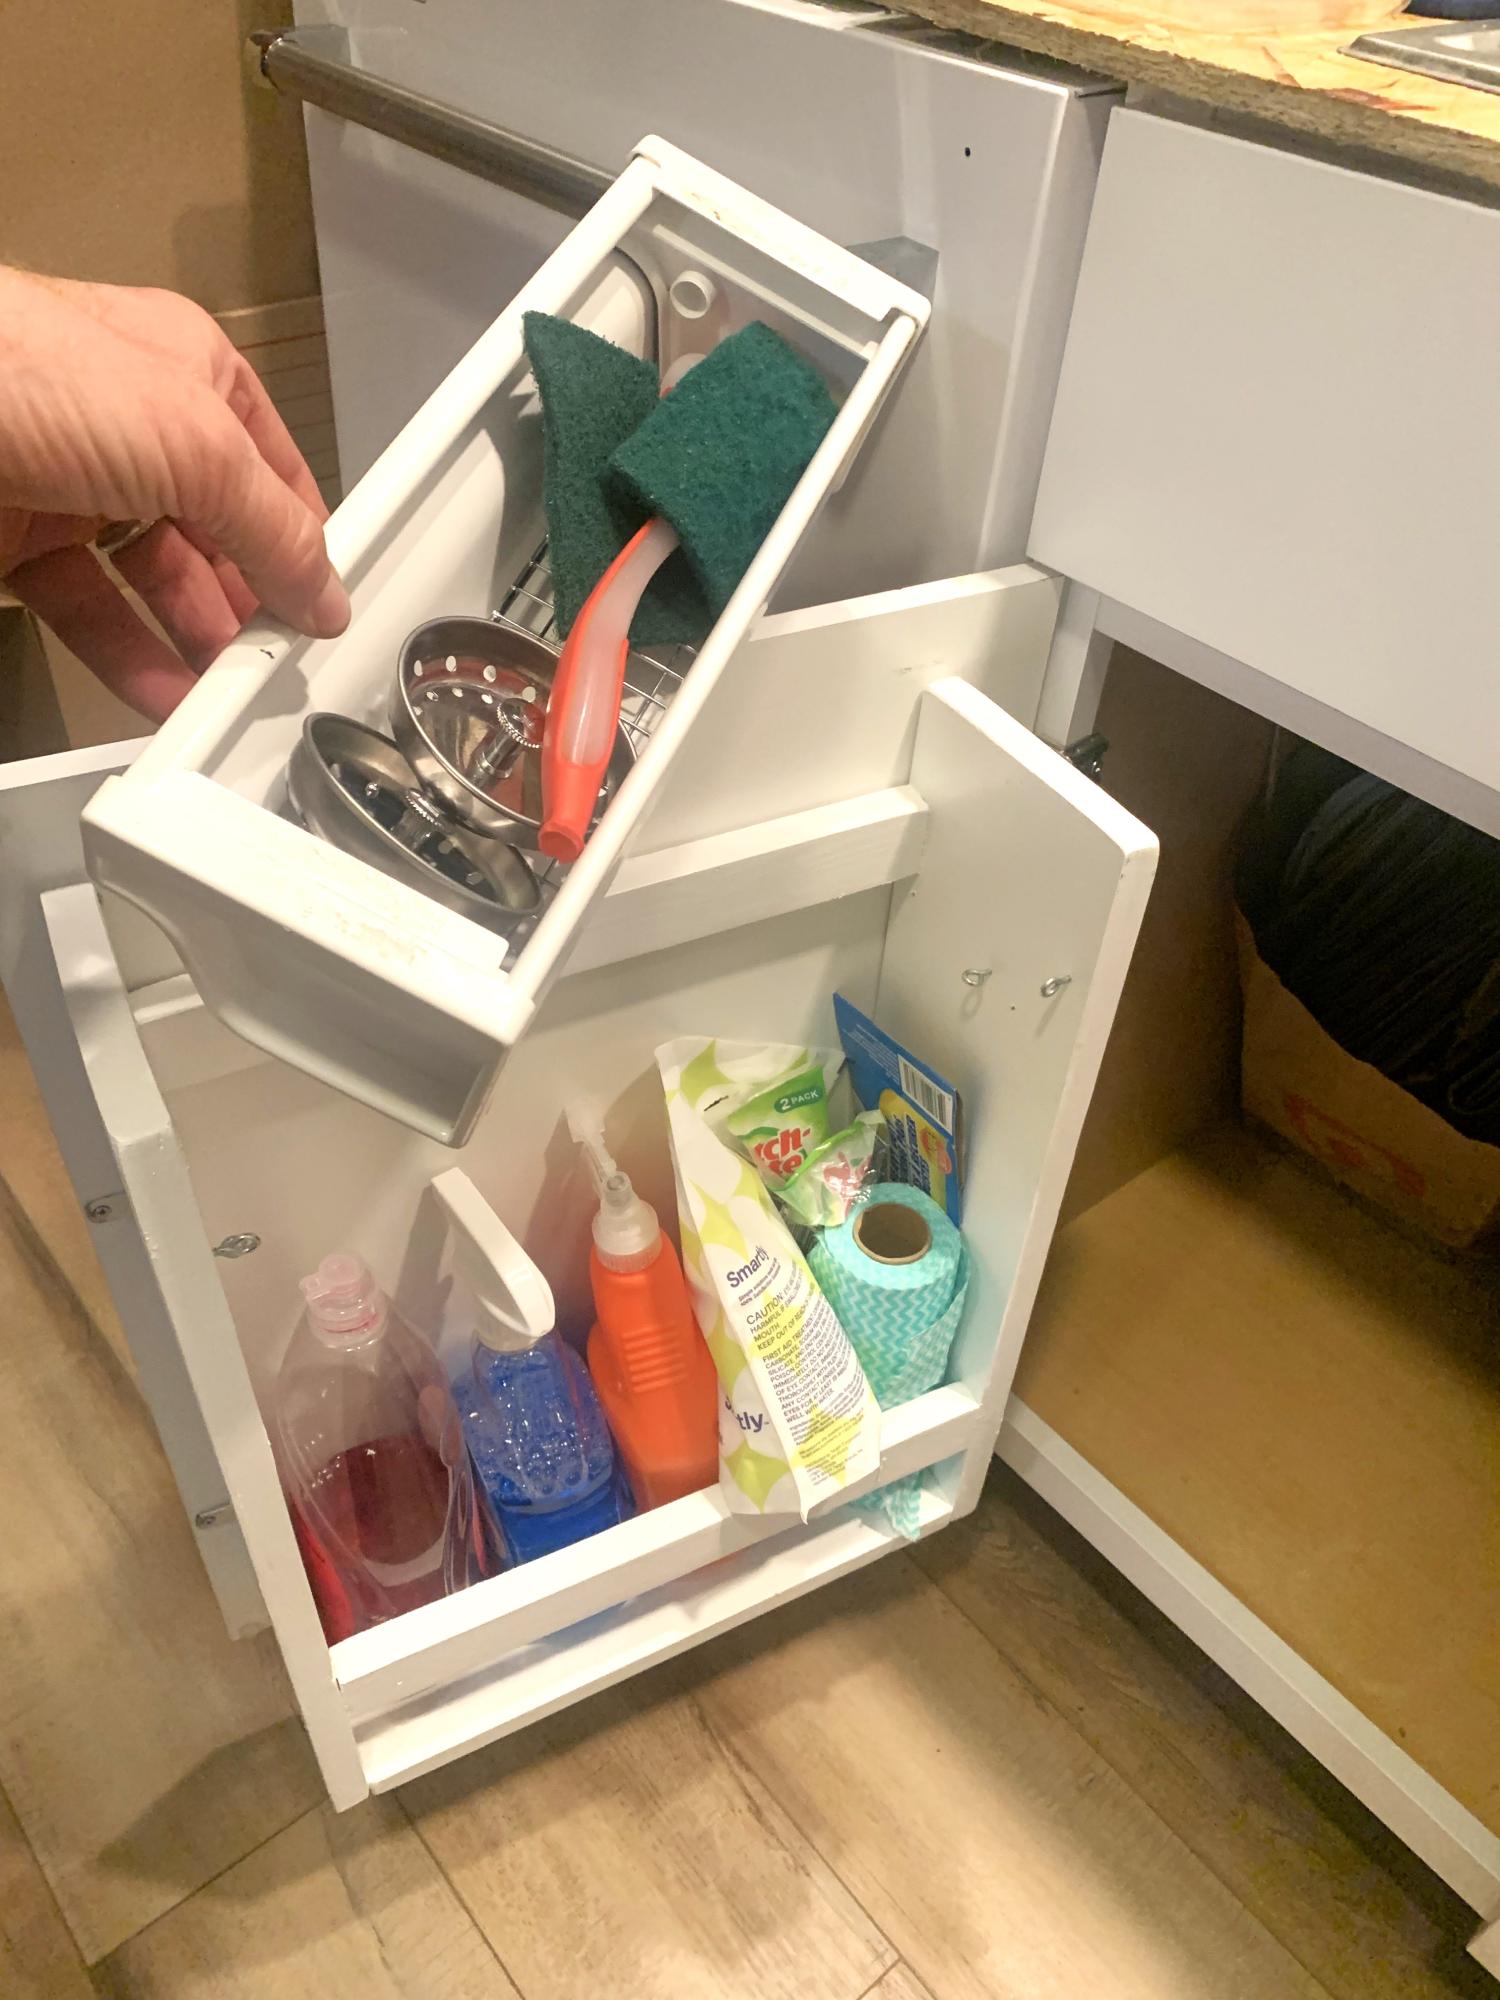
I wanted to get my nasty pot scrubbers out from behind the kitchen faucet, so I thought this was an ideal solution. I substituted the paper towel rack for a length of vinyl rain gutter. I cut a piece of a baking cooling rack for the bottom of the rain gutter, so the wet pot scrubbers would not sit in dampness. I also made the rain gutter removable, because I knew it would get nasty and need to be washed occasionally.
kuyaLars

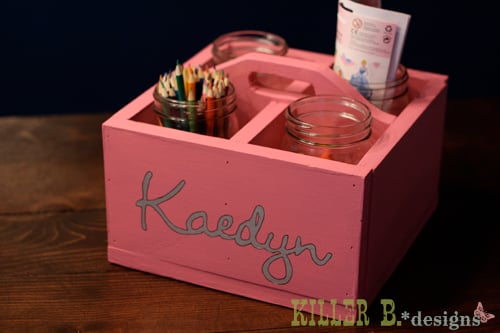
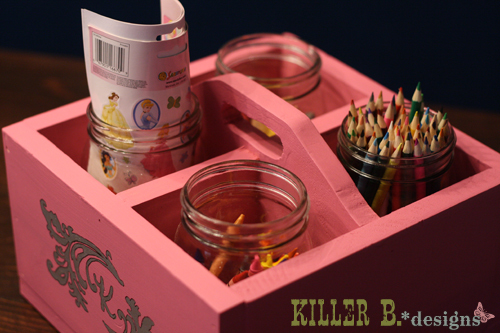
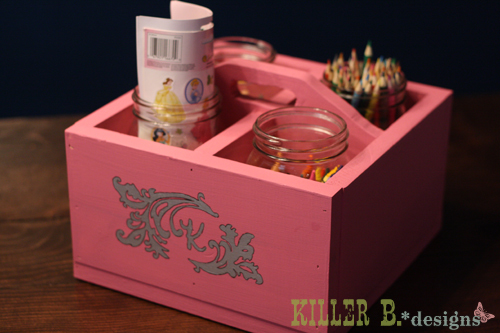
I built this caddy to celebrate a 4th birthday party for a sweet little girl. I used pine scraps, painted it with some leftover pink paint, and then created some name artwork and a little logo with her initial. I made the art on my computer (in Adobe Illustrator) held up a piece of notebook paper to the screen and traced it with a pencil. Then I held it on my caddy and used a mechanical pencil with the lead down to press the indent into the wood. Filled that in with a silver paint pen and traced it with a fine tip black sharpie. Then filled each cubby with a large mason jar from Walmart (about 50 cents each) and filled them with art supplies. It turned out so cute! And it's a great way to use up some scraps.
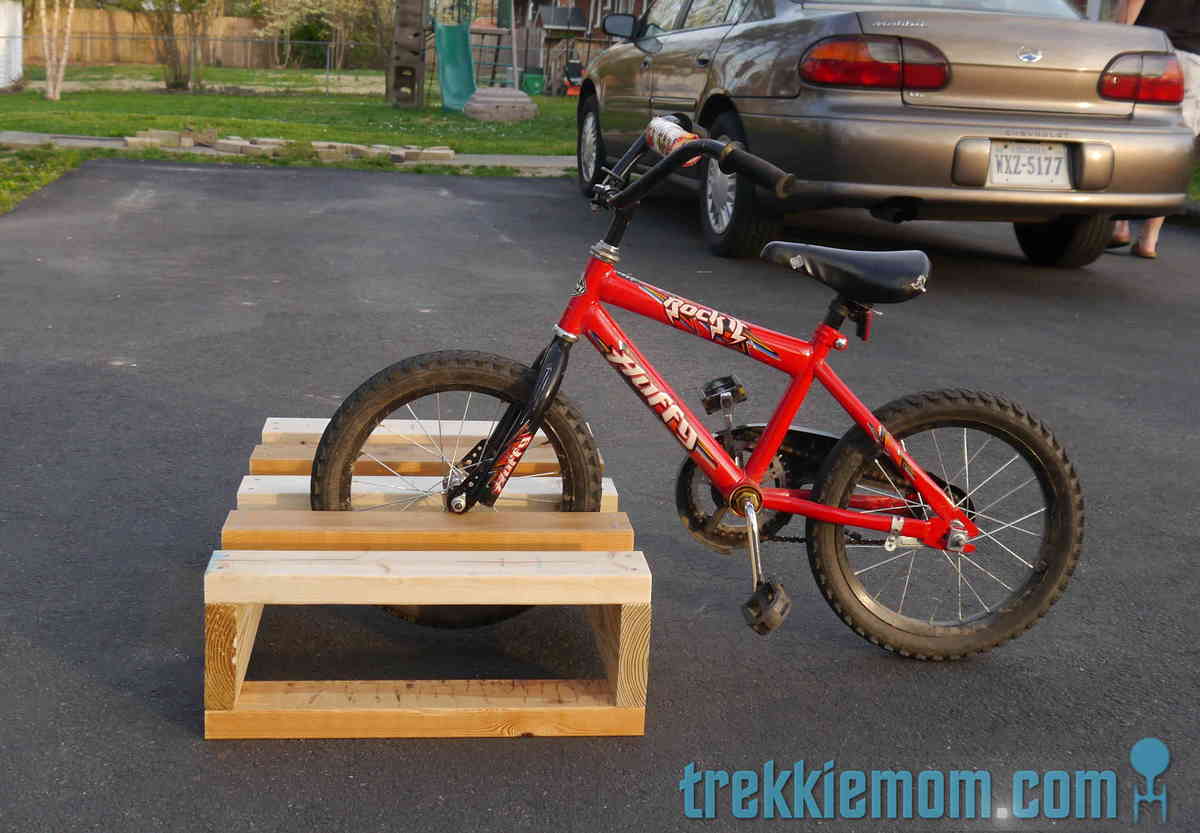
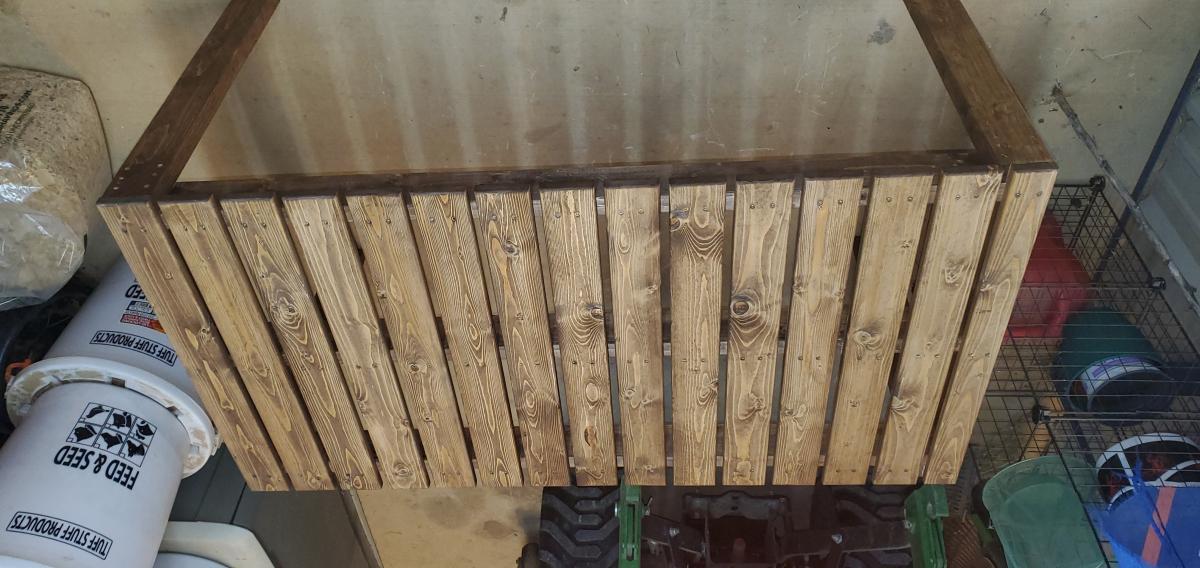
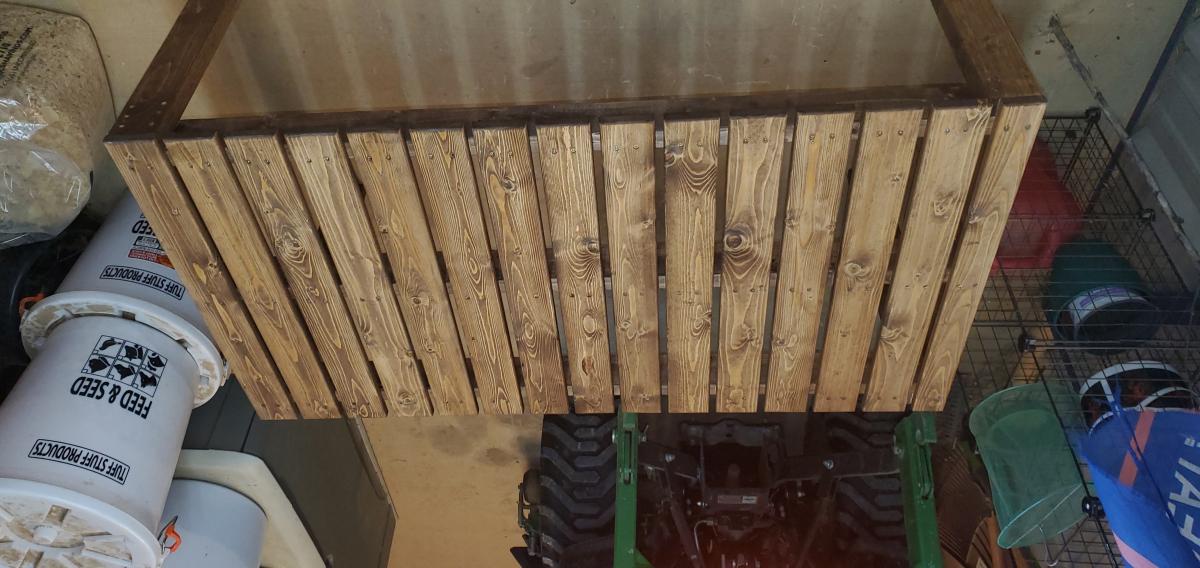
A few weekends ago, I went into our tool house to get my bike out so I could ride to work, and I had to remove so many obstacles, that I was too late to ride to work, and as a result, boiling mad. Several of the objects I had to move out of my way were my kids bikes that don't have kick stands, which my kids just haphazardly dump on their sides on the floor of the shed.
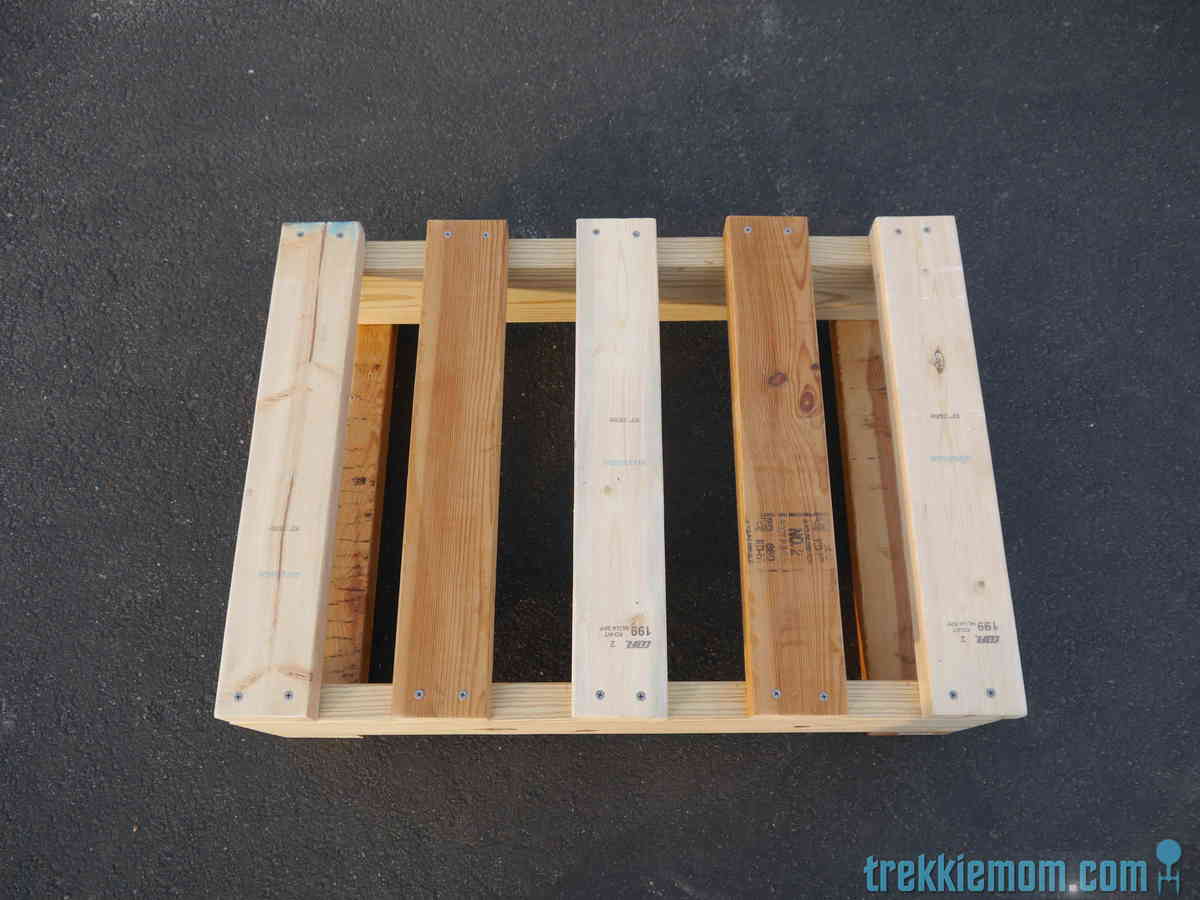
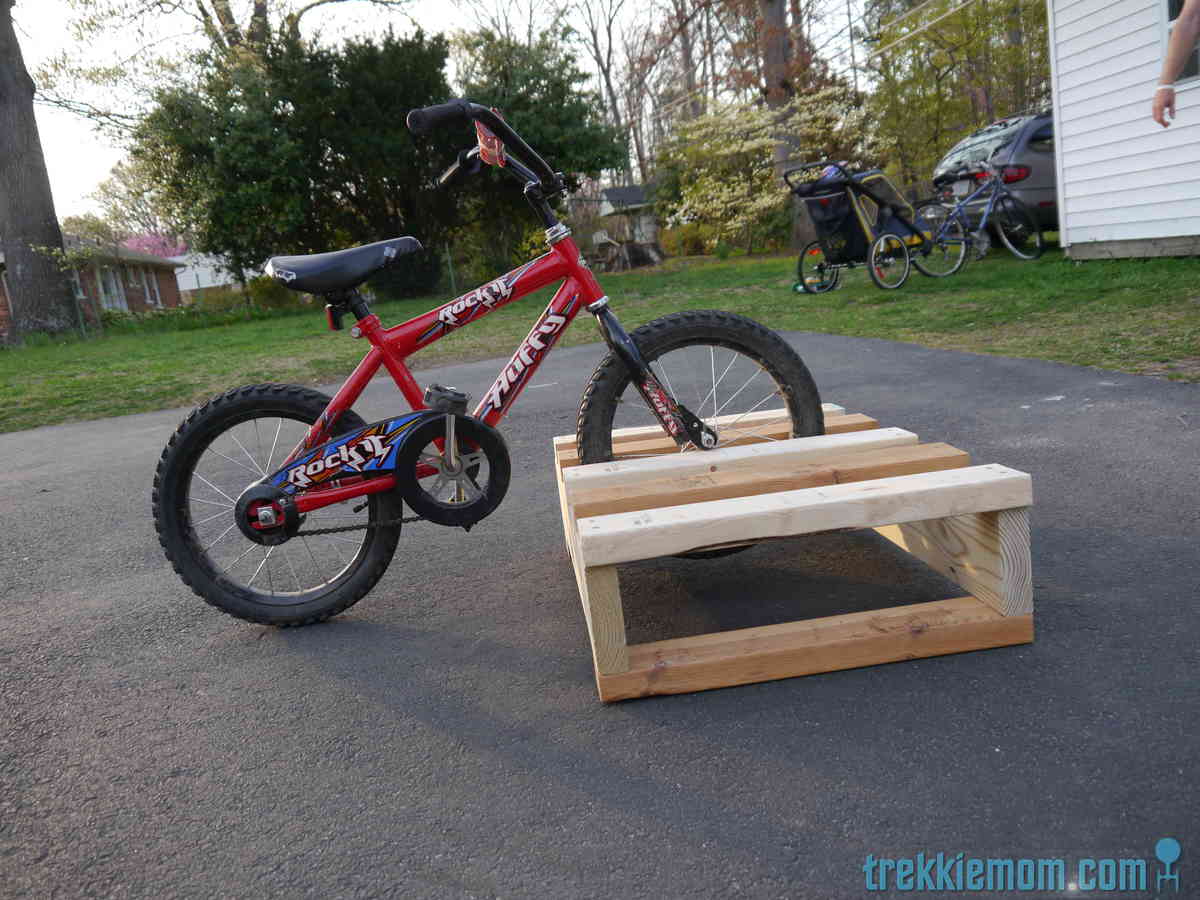
I had had the idea to build a bike rack out of spare 2x4s for the kids' bikes for a while, but this incident cemented my resolve to finish it quickly.
I had some scrap 2x4s and 2x6 wood left over from another project, which I used to compose my bike rack. It has 4 slots for 4 bikes.
I did some light sanding to prevent splinters, but I did not apply any finish because of the way it was going to be used and it would not be exposed to the elements.
It took very little time to put together. If I had more claps, I could have done it more quickly.
If you are interested in making something that looks just like mine, stop by my blog to get the details.

This was a fun and relatively easy weekend project. Shaping the legs and getting the rounded header and footer were the only challenging parts. A good stretch project for the novice DIYer.
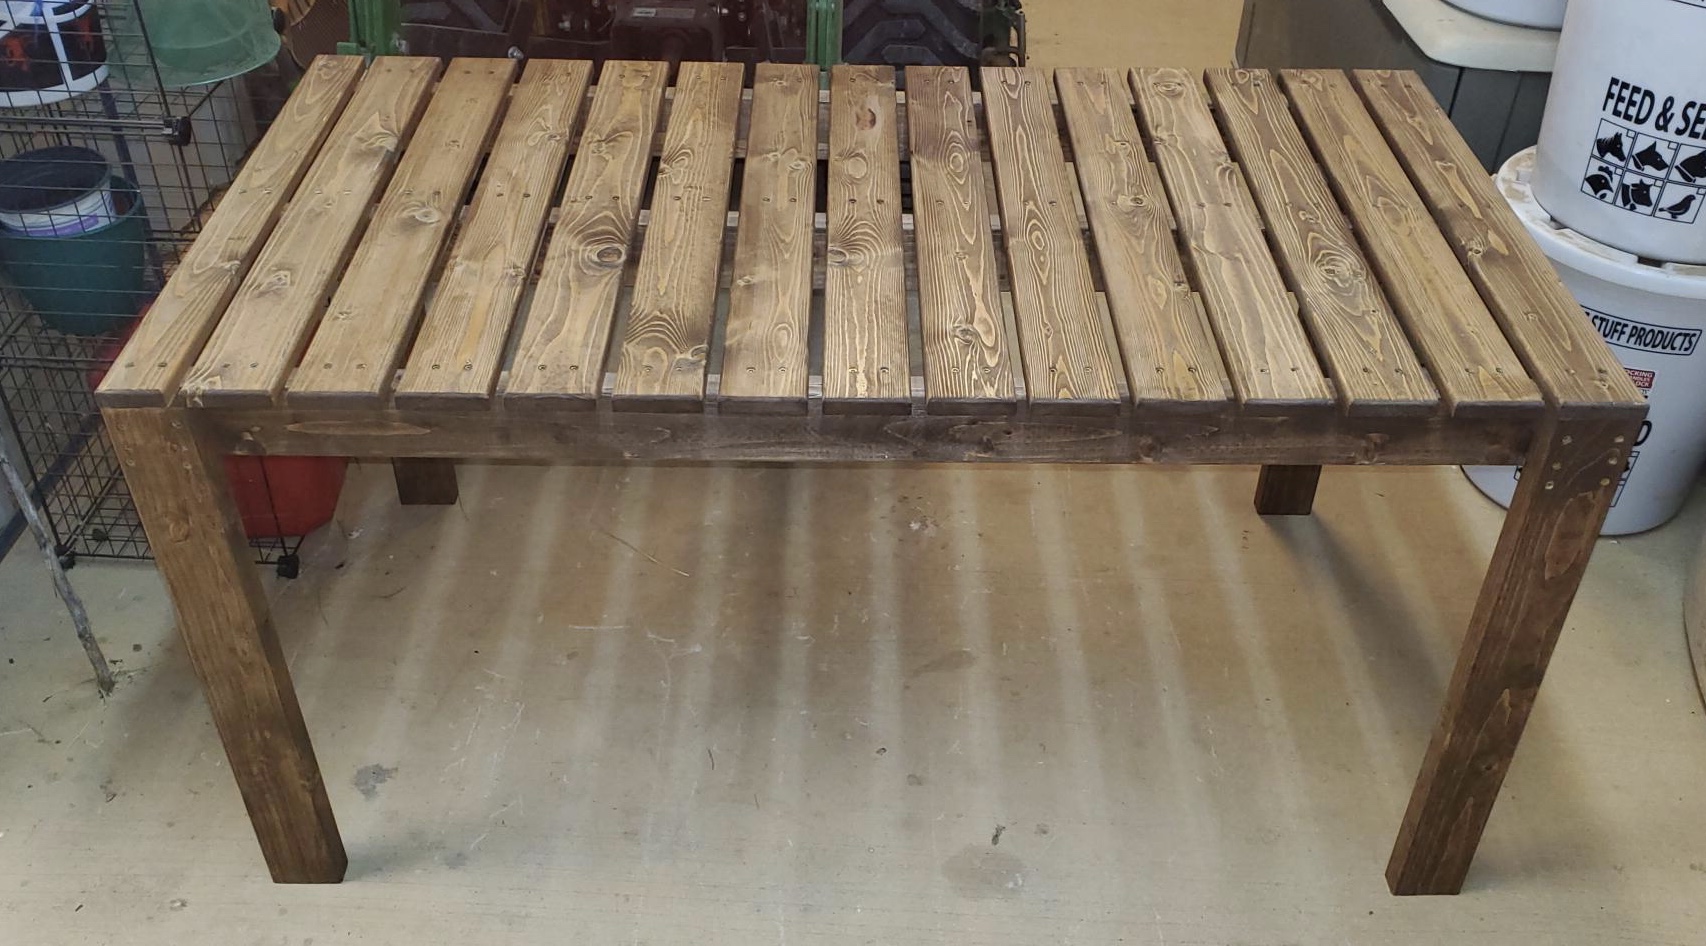
This table is very nice and so simple and inexpensive. Just choose your lumber selectively. I used prime 2x4's for higher quality.
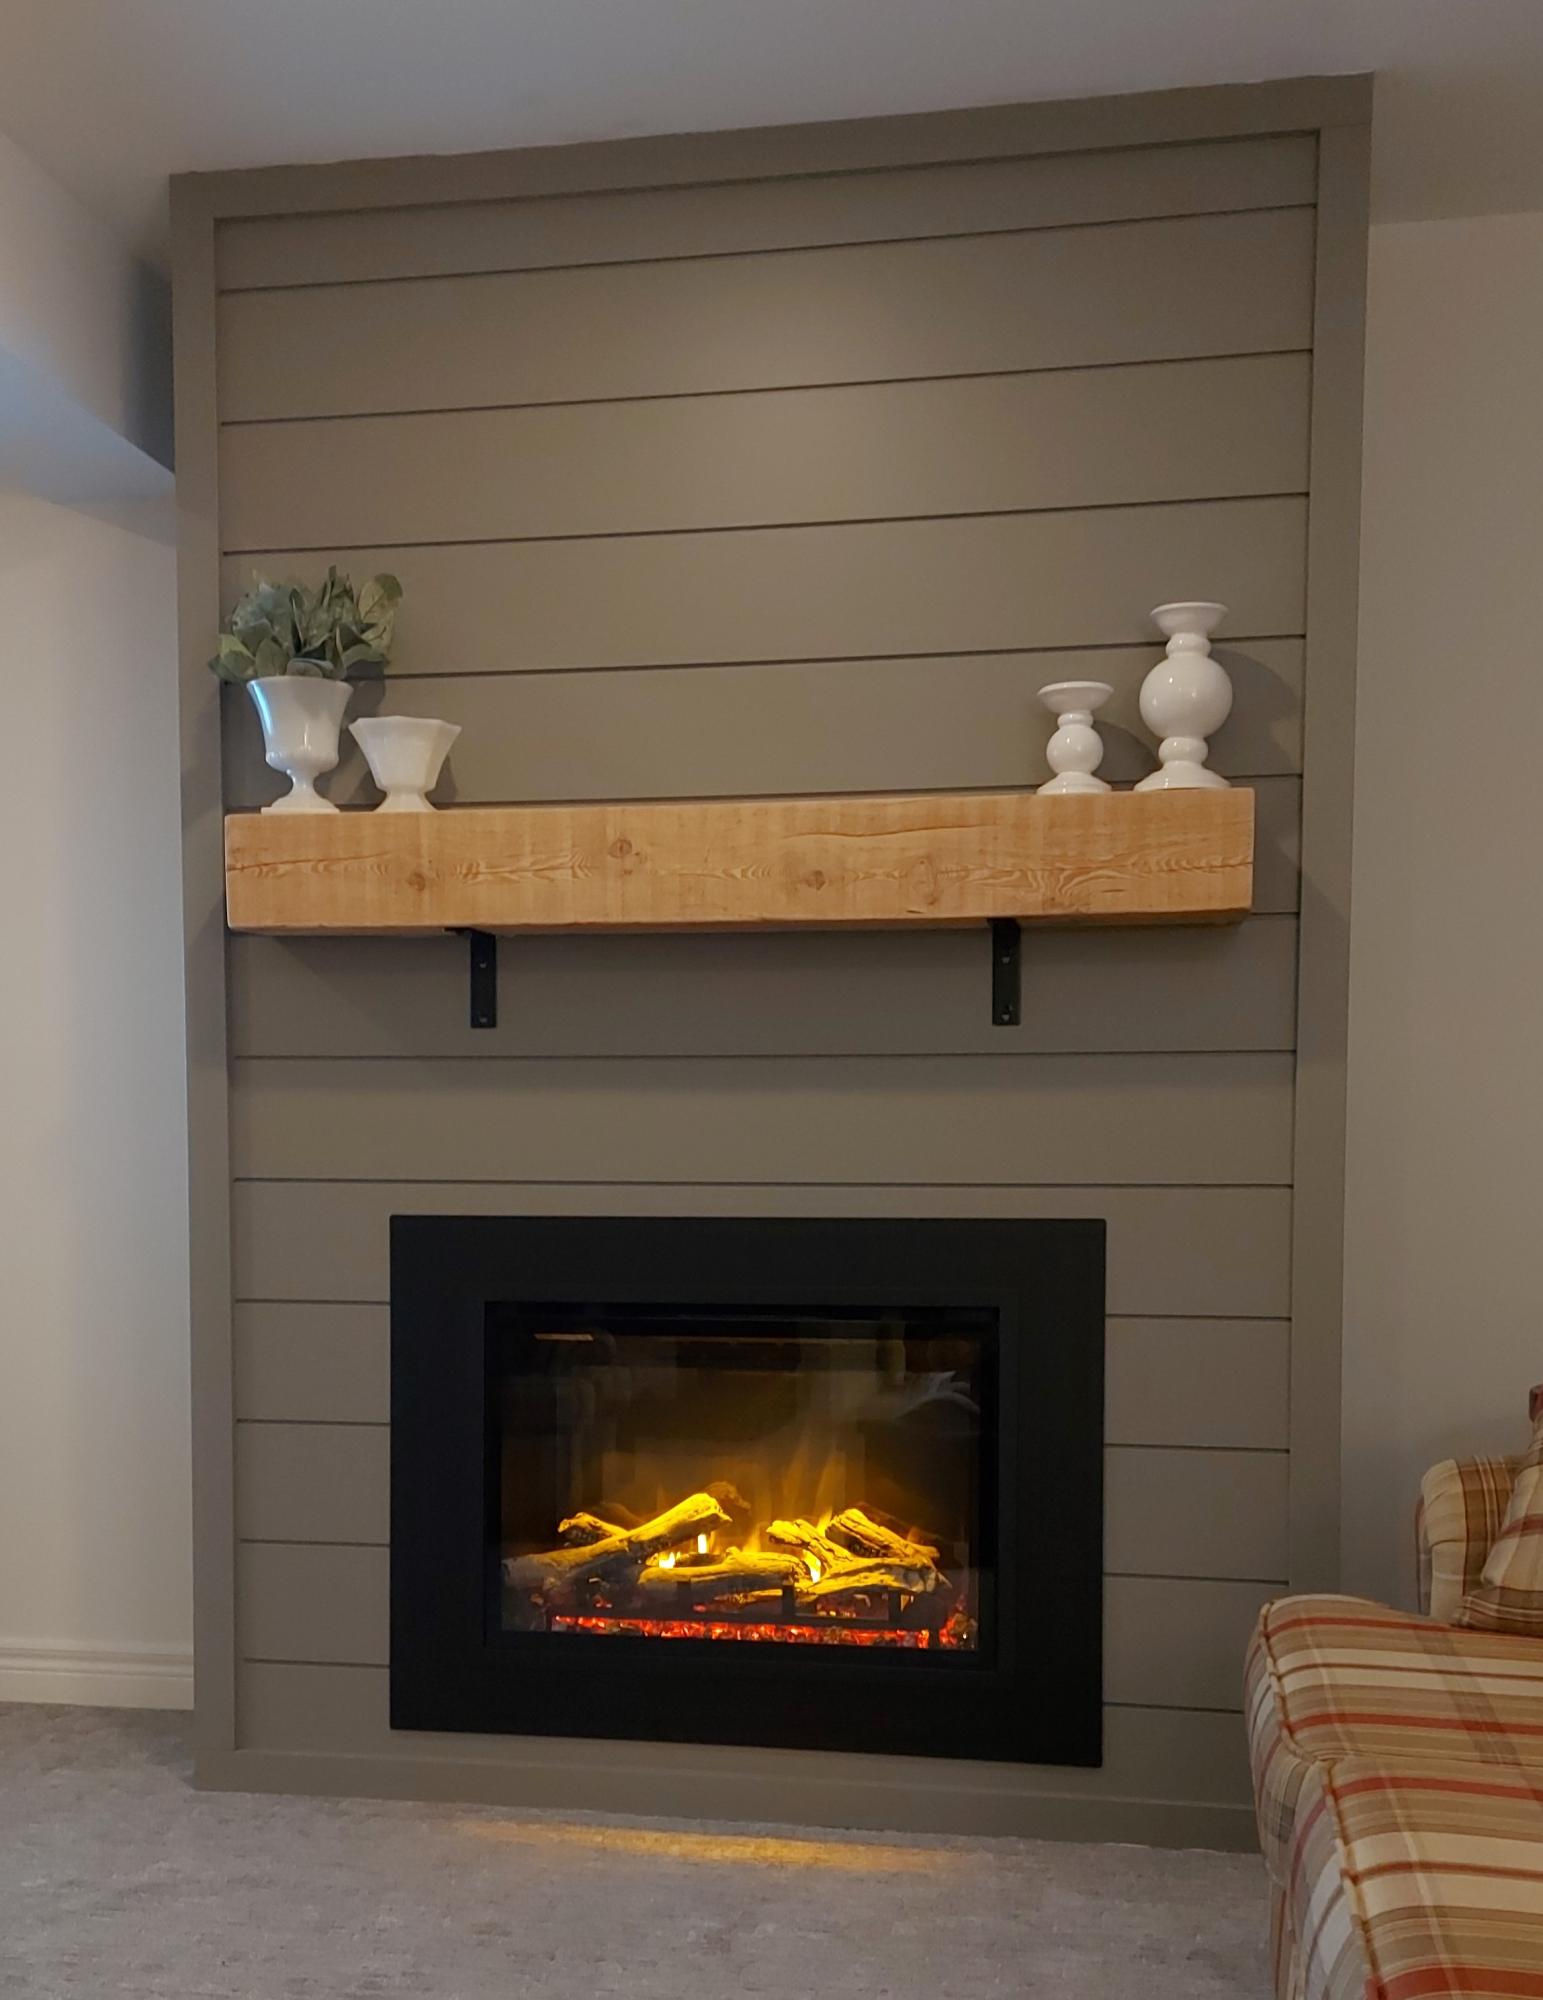
We built this fireplace where nothing existed before. The instructional video was very helpful. We are so proud of how it turned out.
Jim and Susie Jacob
Wed, 02/28/2024 - 19:20
Hello! I’m wondering if you think this could be built as a temporary piece that could be moved? I live in apartment and wouldn’t want to leave something like this behind after spending time and money to build it. Maybe if I built in some removable access panels (a few of the slats?) to be able to attach it to studs (and later remove it) after building the entire piece. Thoughts? TIA!
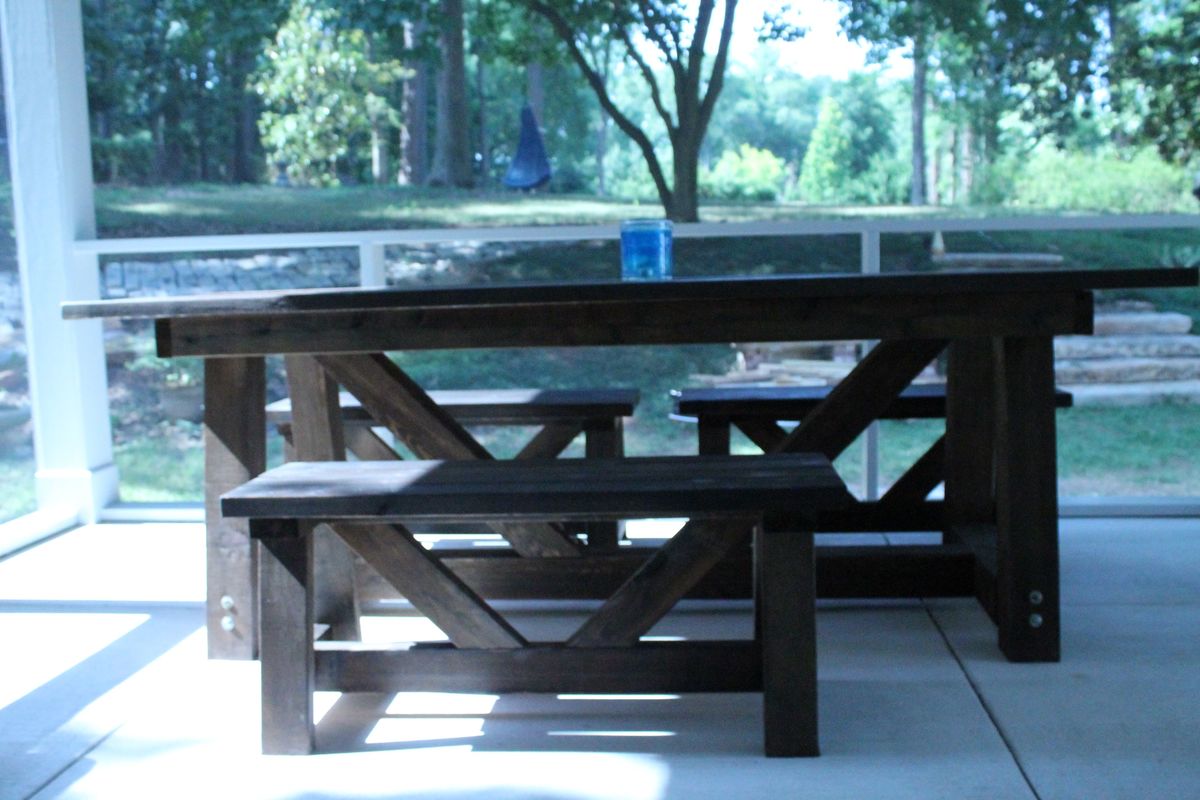
Provence table knockoff from restoration hardware (aka: providence) with 4x4s and providence benches
table modified to 90 inch length, benches to 42 inches
used lag bolts with a washer on 4x4's that show, kreg pocket screws everywhere else
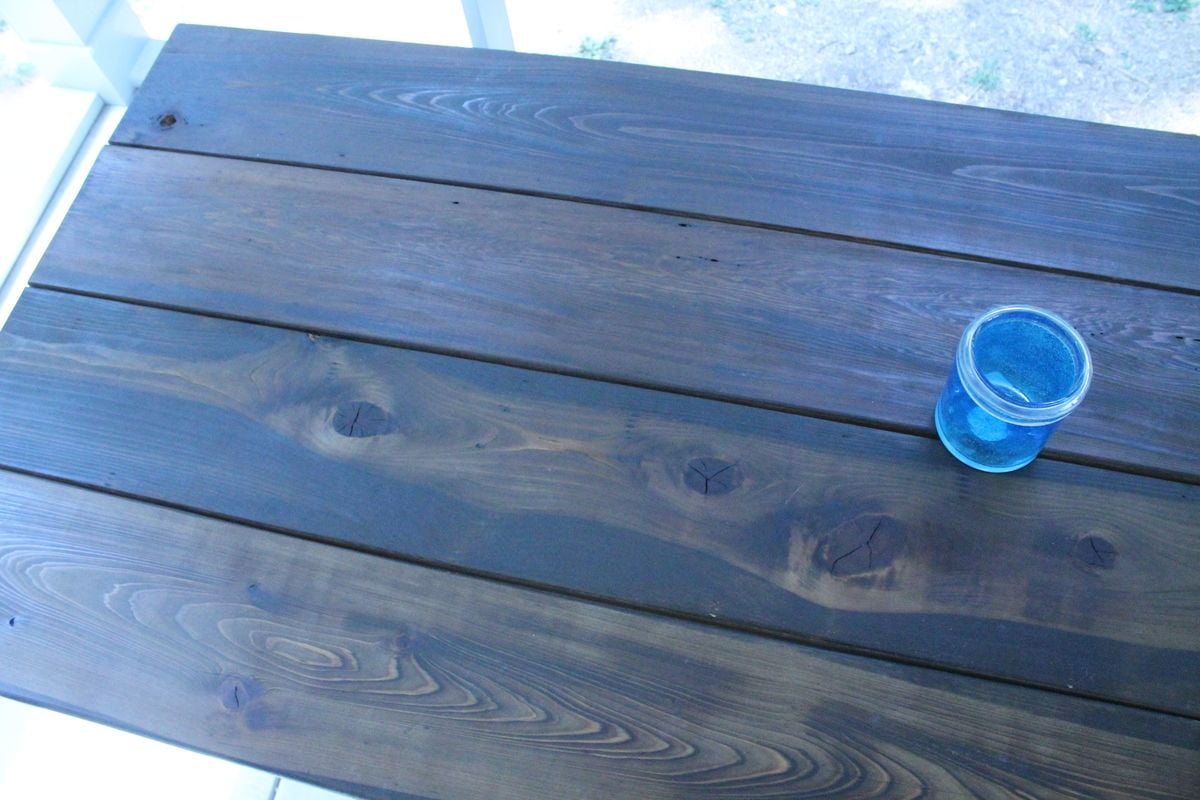
note: the free-diy plans listed last have an issue with the table height. It came out 1 1/2" too high, so we made a change that I like better: we modified the table top to have a 2x4 skirt held together with kreg pocket screws that drops over the 2x4 frame above legs. we left about 3/8" gap between the skirt and framing so the framing would fit in easily. The top actually just sits on the frame so it is possible to move it in two pieces. It is so heavy and stable that we didn't worry about screwing it together.
we love it! perfect for 2 families to eat dinner together. my husband calls it Thor's table because it looks so tough.


Thu, 07/05/2012 - 11:35
This is gorgeous! I definitely prefer the chunkier leg you used and love the hardware showing as well. That was smart the way you made the top for easier moving, too. Great job! I think you should have added the link for the plans, this way your picture will always show up above the plans in order for everybody to see it each time. :)
Thu, 07/05/2012 - 19:22
thanks so much. I have now attempted to link the plans to my brag....let's see if it works!
In reply to thanks so much. I have now by Anne in Decatur
Fri, 07/06/2012 - 05:46
It worked, yay!
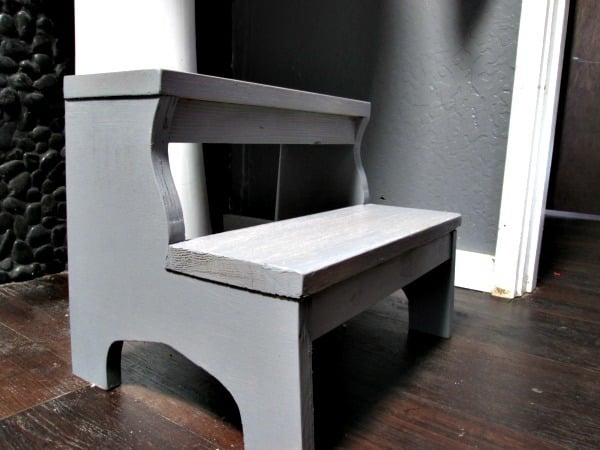
My daughter needed a step stool to reach the sink in our bathroom. I simplified the jigsaw cuts for this design to accommodate my learning curve. :) I used leftover plywood for the sides and 1x6s for both steps because it was what I had on hand in my garage. It was fun to make and is something we use every day!
built by Instagram: @sawdustandperfume
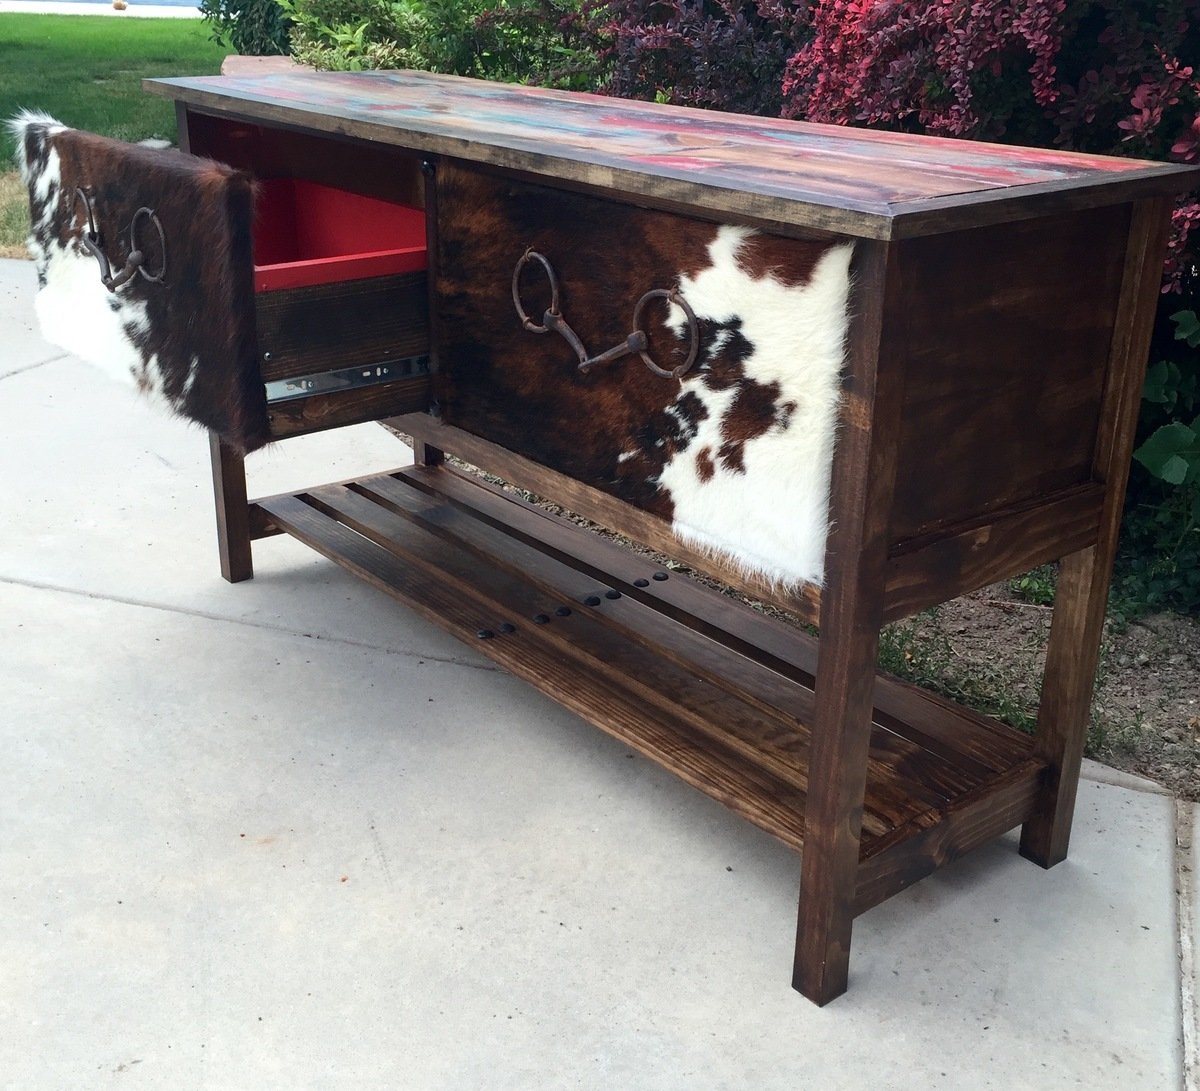
built to be used in an buisness office that a former cattle rancher conducts buisness.

My first Ana White project. My friend Shelley and I are RN's, and she got me hooked on woodworking. I started with cushions from Lowes ( in the sizes that you recommended)to see if I loved the sectional for a few years. I loved it so much I decided to have custom Sunbrella fabric ones made. Even though the custom ones were more expensive, it has been worth it. They go perfect with my California Mission style home. Now I want to add the armless one and make it a U-shape. I did add a piece at the bottom back of each sofa to hold the cushions in. The seat cushions would slide out the back when sitting on the sofa. I made the coffee table to match. Our family loves it!
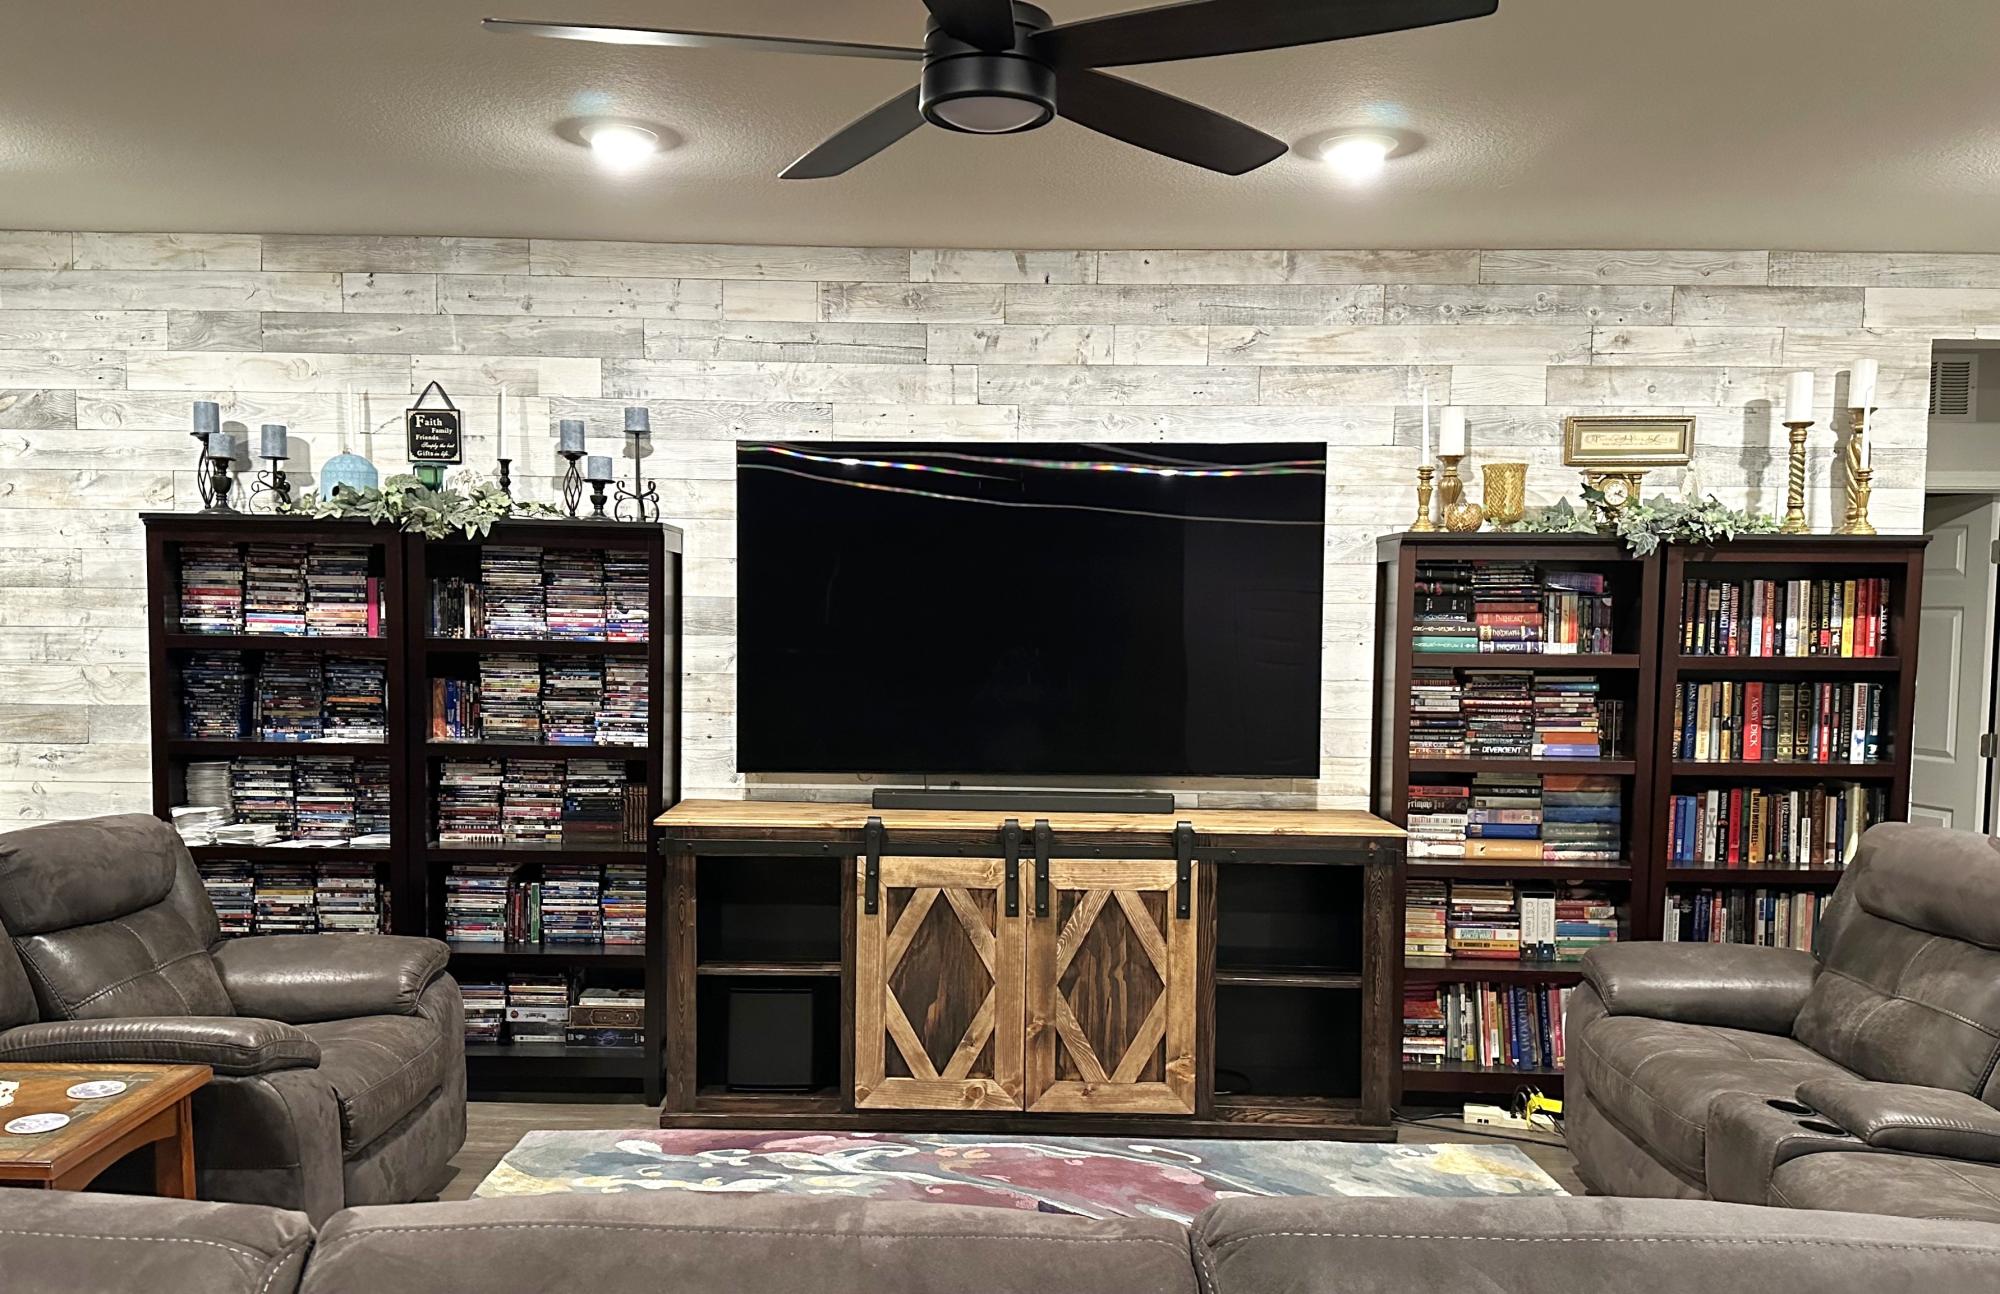
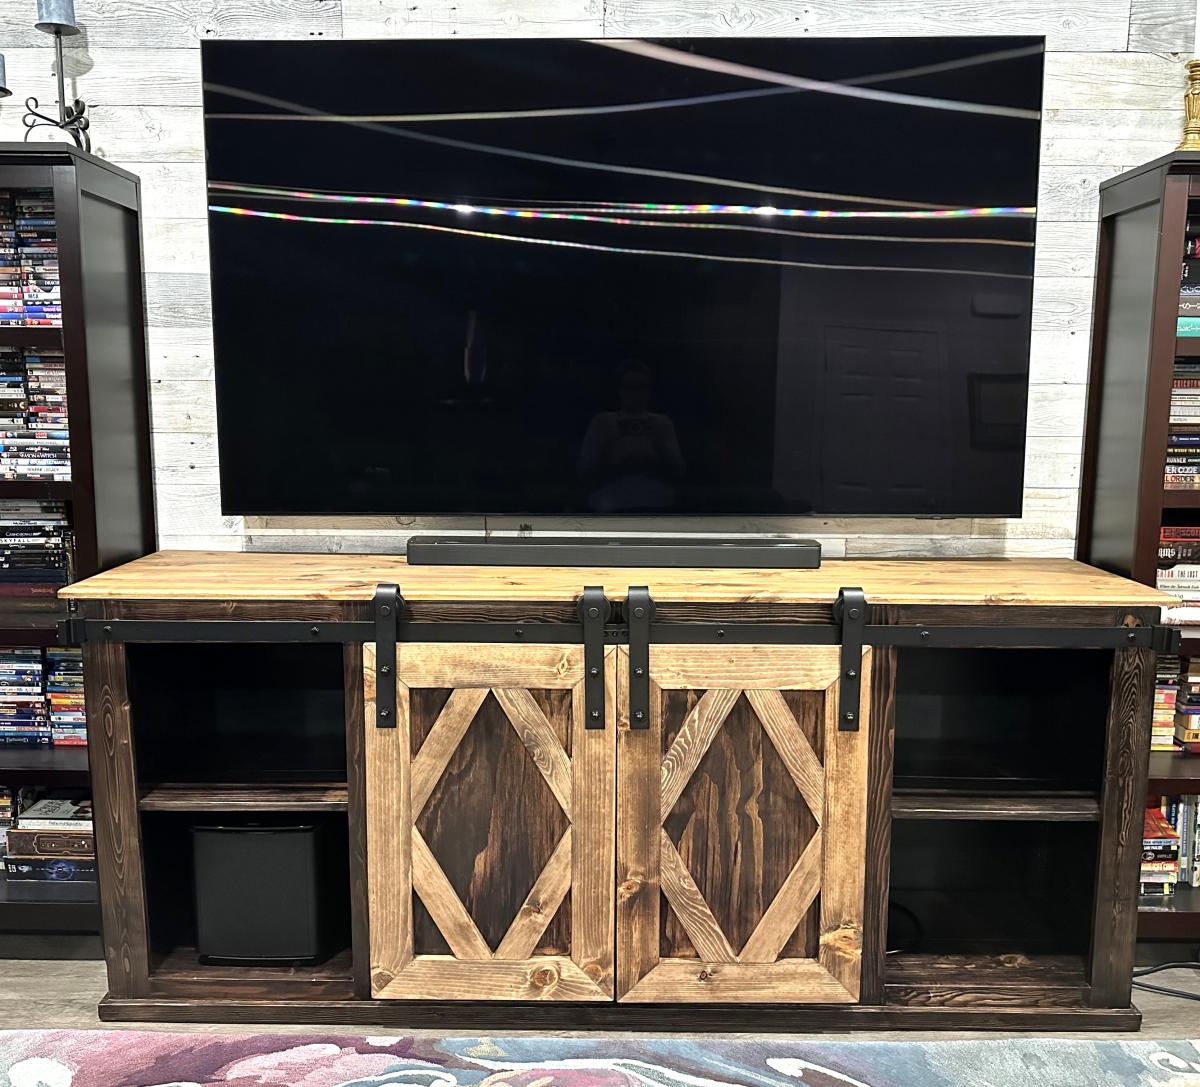
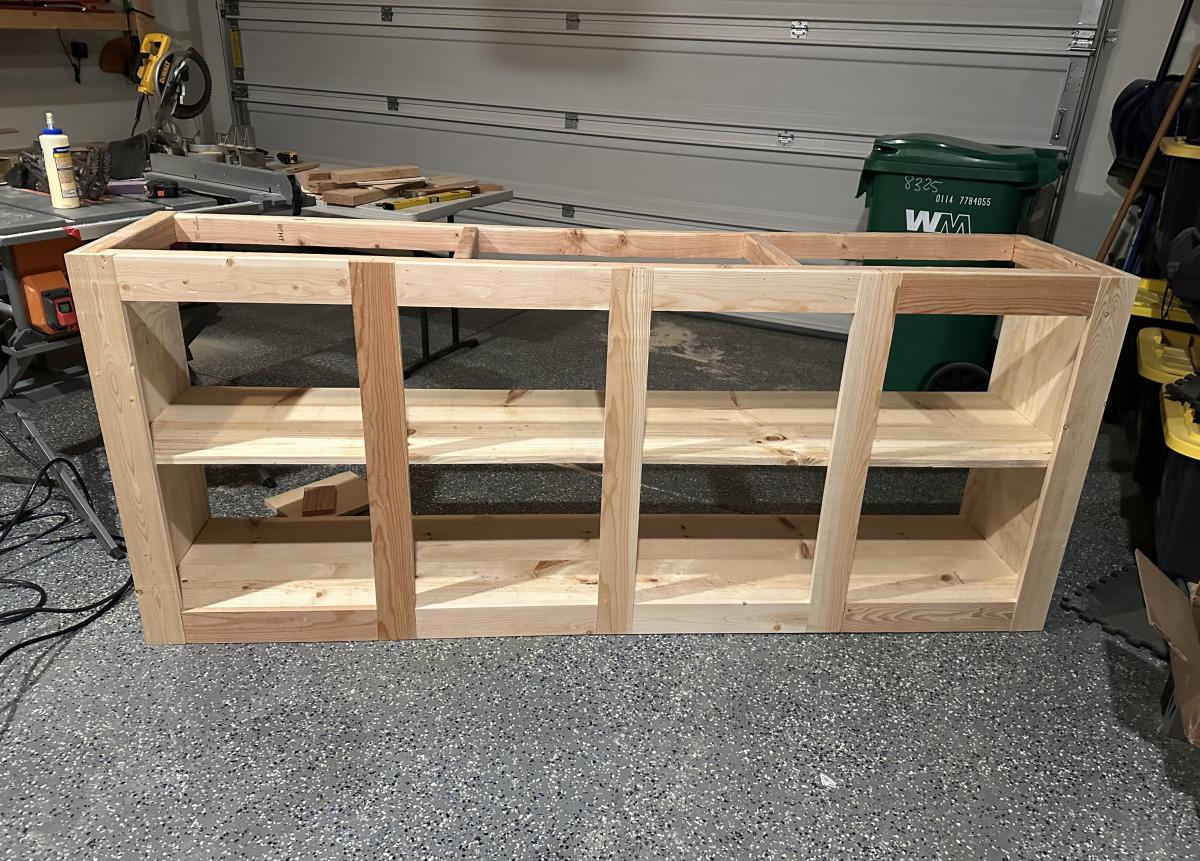
We have been looking for a TV console for the last couple of years, but couldn't find anything we liked. My husband said, "Why don't we build it ourselves?" We found the Simplified 8' Barn Door Console plans! The rest is history! We LOVE this console. And we loved making it together!
Janet Pulleyn
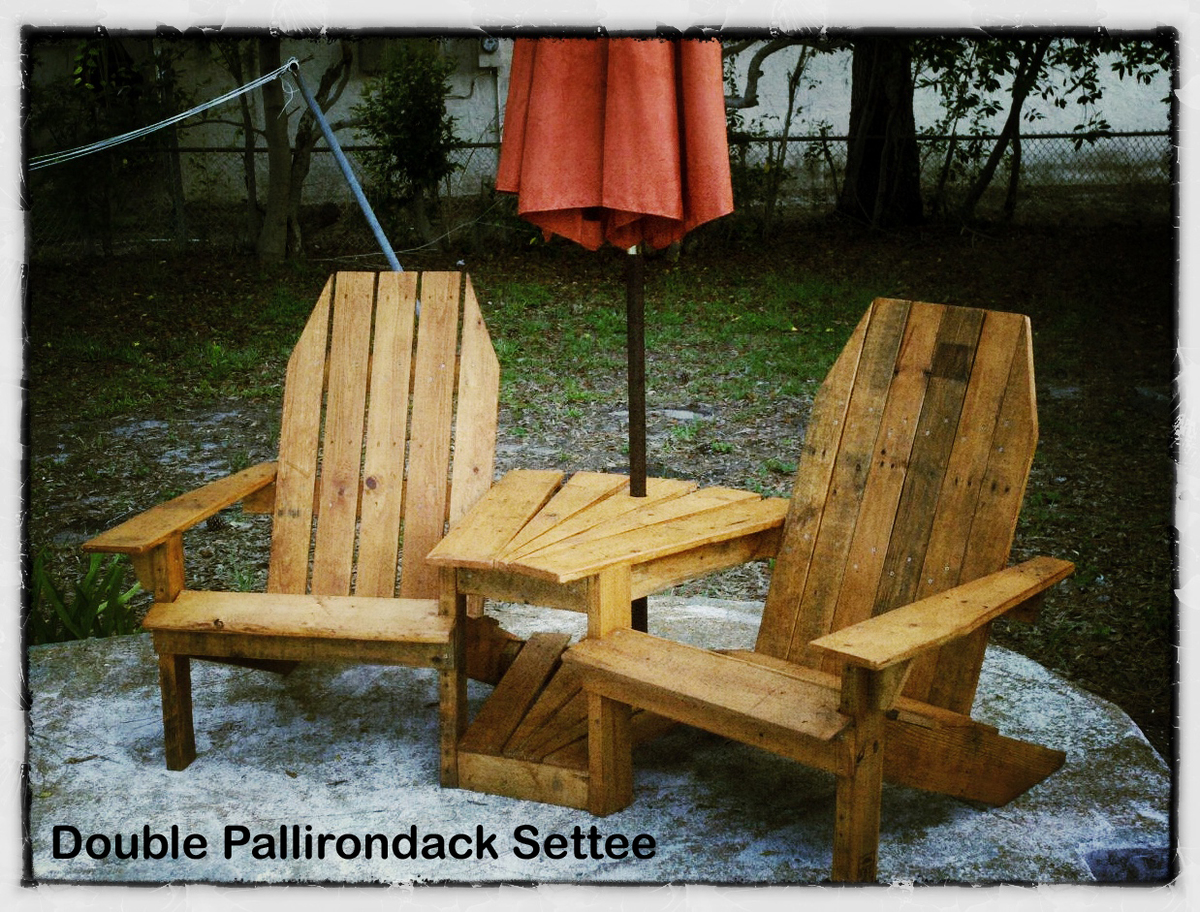
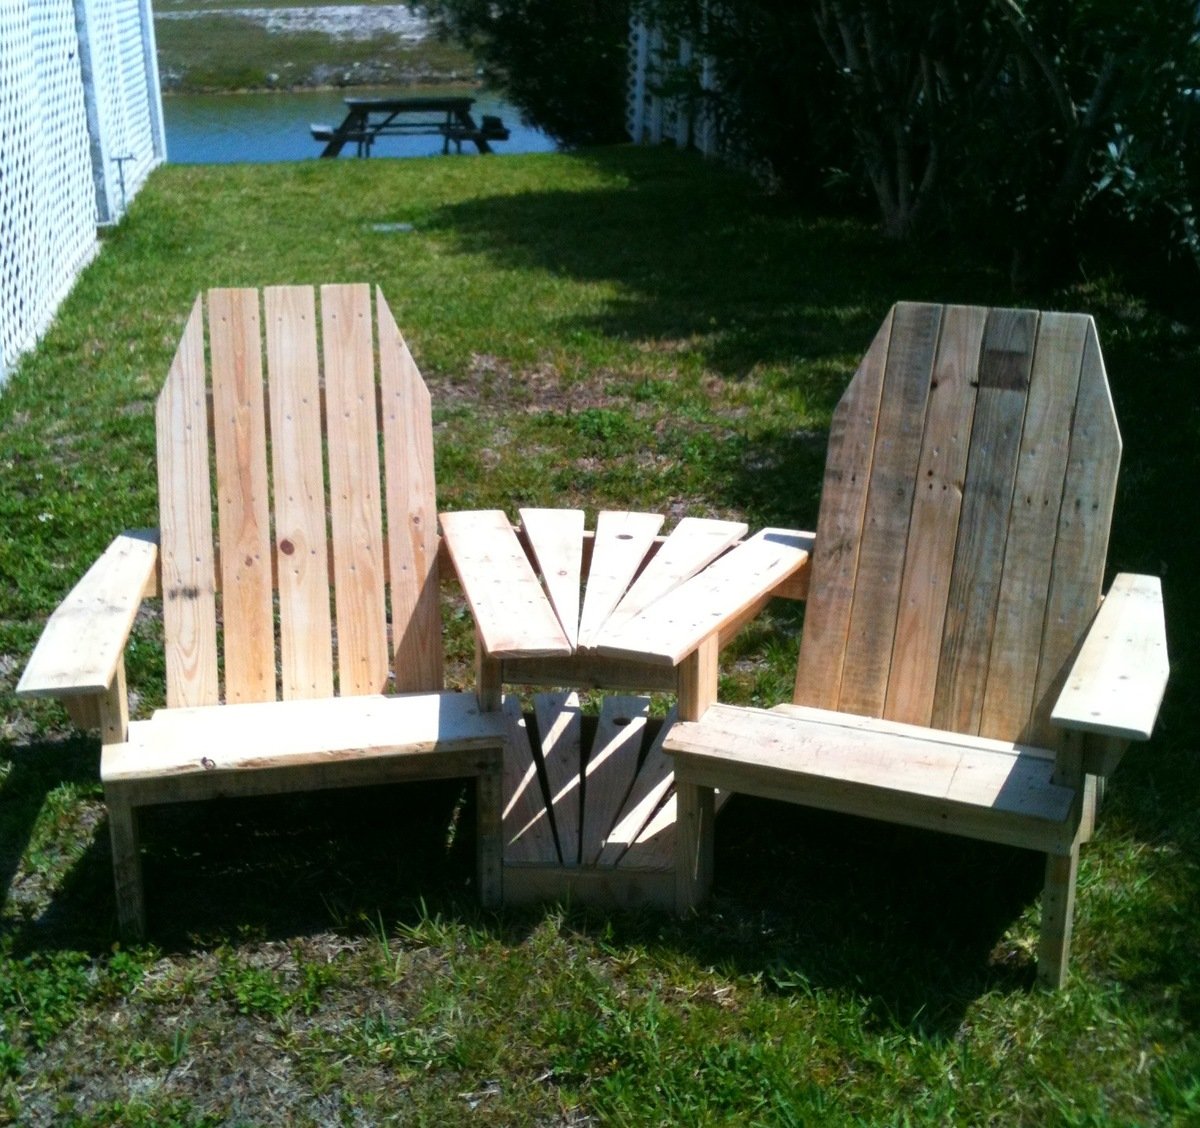
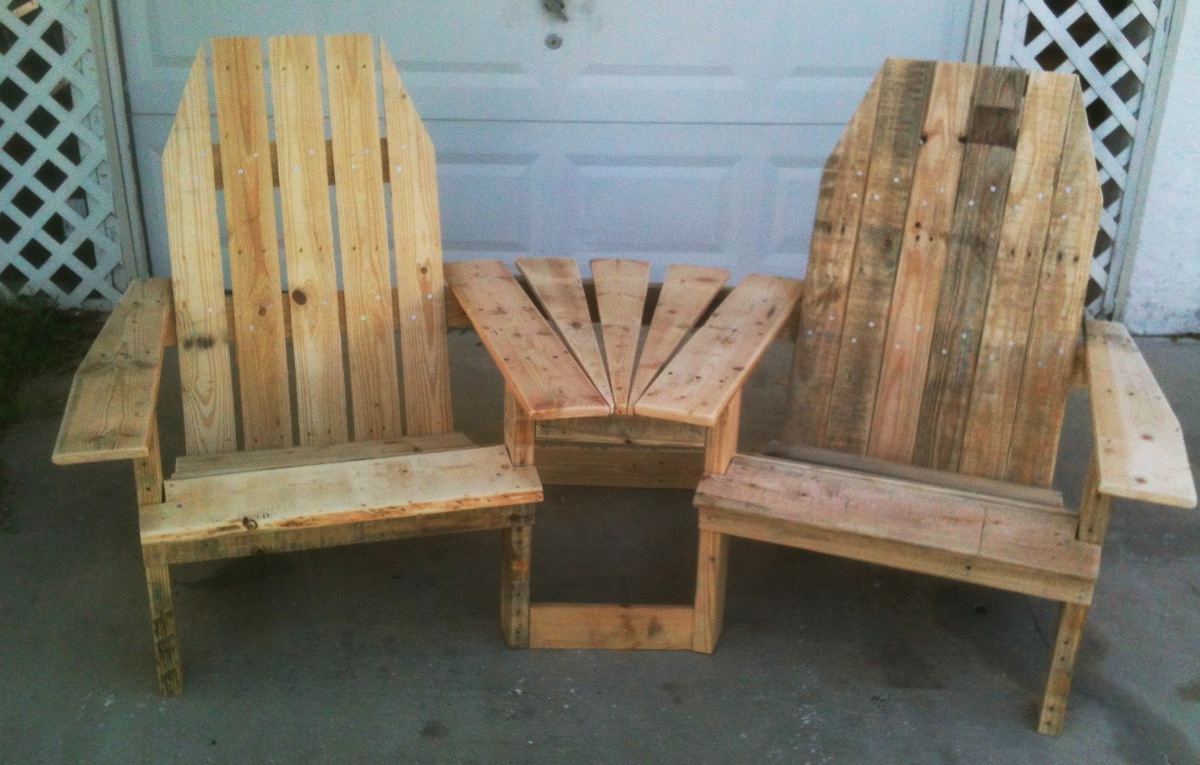
This is a Double Pallirondack Settee, an Adirondack-styled set of chairs connected by a two-shelf table that is also an umbrella holder. It is made 100% from recycled wooden pallets (thus the name). It took approximately four full pallets to make the settee. The finished picture was taken by its new owners after they stained it with a cedar-colored sealer and added an umbrella.
The other two images show it before I had added the bottom shelf of the table and it finished before staining. I just finished a second settee and will be selling that to someone who saw the original one at a party.
The design is based on a couple different plans -- one for the chairs and one for the table/umbrella holder. I modified both plans to make them work together. Great fun. If I could have worked on it straight through, it probably would have taken 2 full days, starting with pallet deconstruction, then cutting pieces, sanding, assembly of chairs and, finally, assembly of the connecting table.
Thu, 07/12/2012 - 10:16
Is it possible to get plans for these??? This would be awesome to build..
Thu, 07/12/2012 - 10:17
Do you happen to make plans for these?
I would love to build this!!
Thu, 07/12/2012 - 13:51
Unfortunately, no. I actually took the plans for a chair and mixed it with the plans of another settee. Essentially, the "inside" arms of the chairs do not get shaped at all. The front of the chairs are 12" apart (15 degree miter) and the backs are 27" apart if I remember correctly. I added 4" 2x4 blocks to the outside of the bottom back legs and that is what the bottom back table support is attached to on the settee. The the three center boards are cut to fit (1/2" in the front, 5.5" in the back and spaced equally. 1.5" hole for the umbrella holder in the center board, top and bottom.
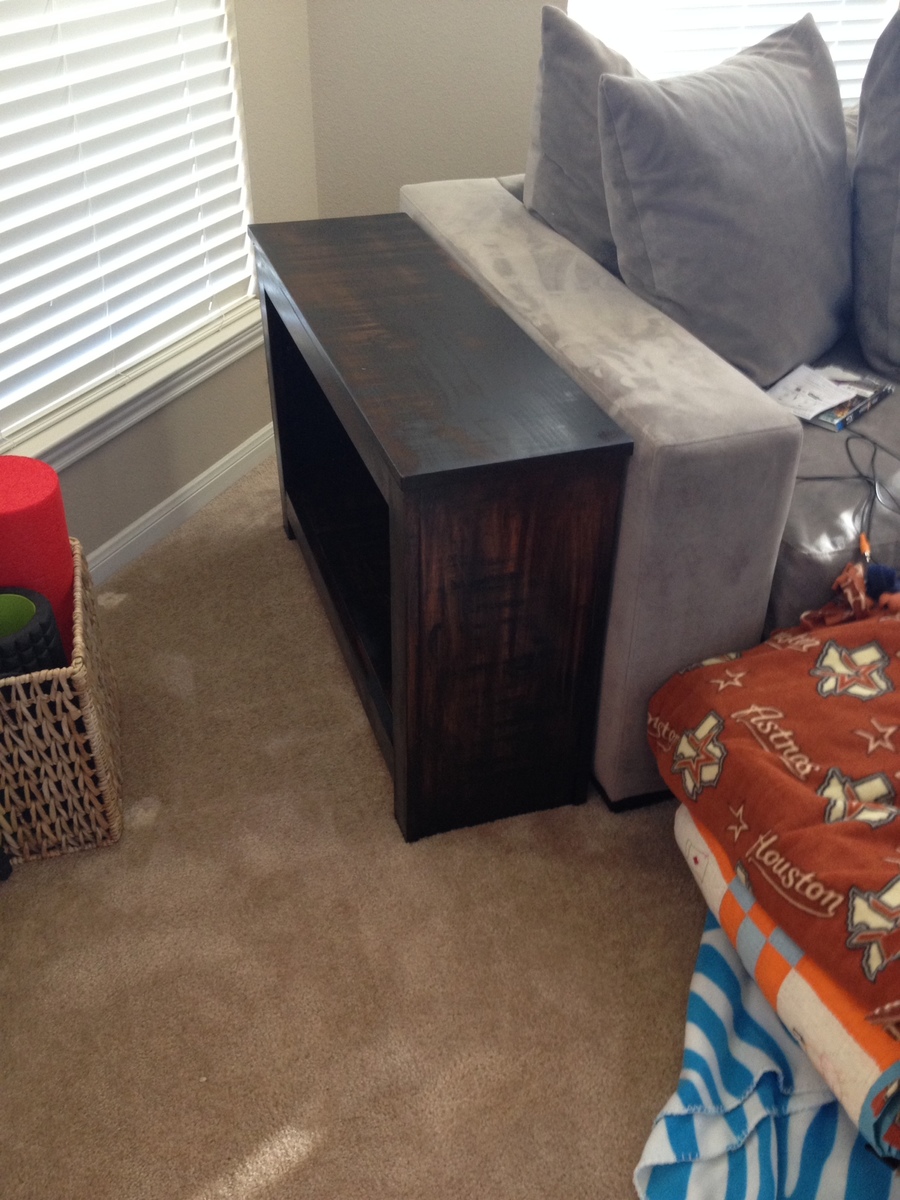
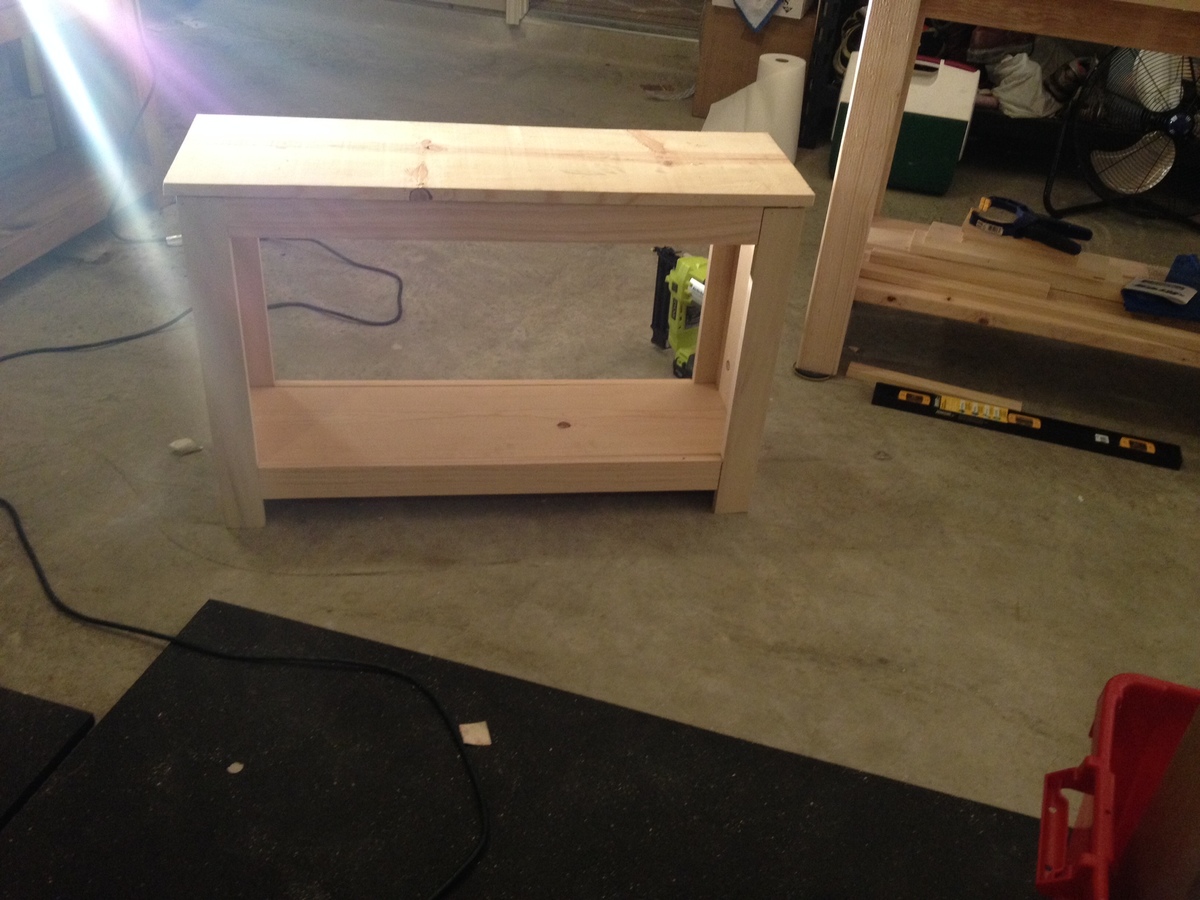
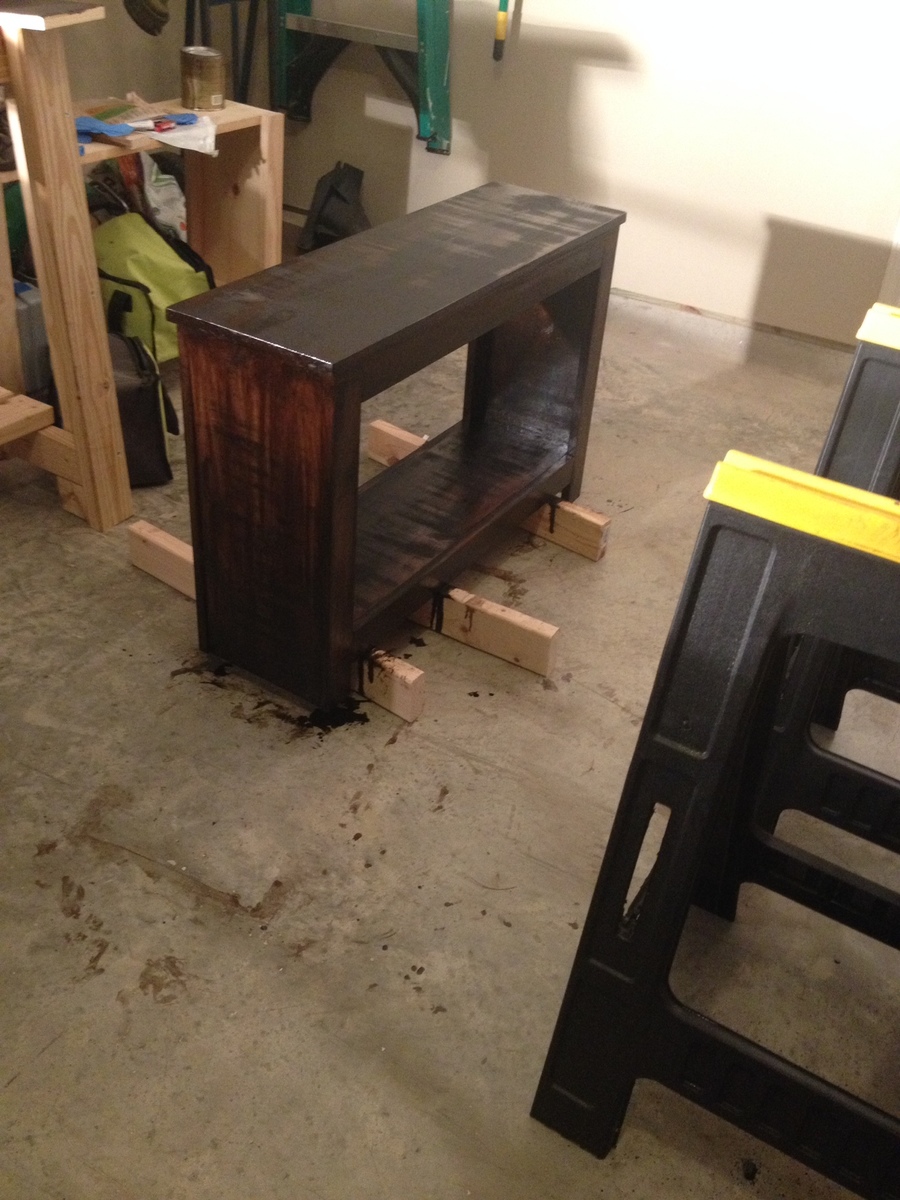
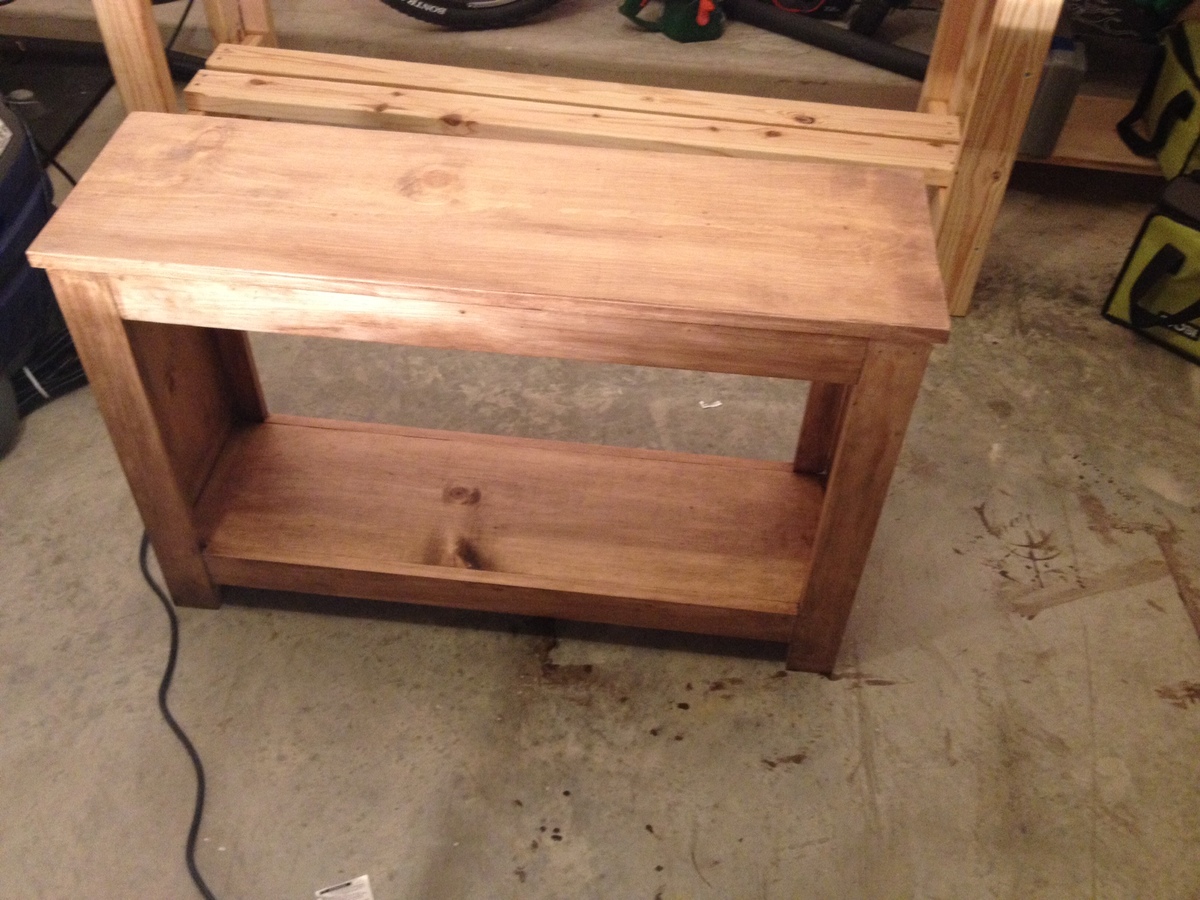
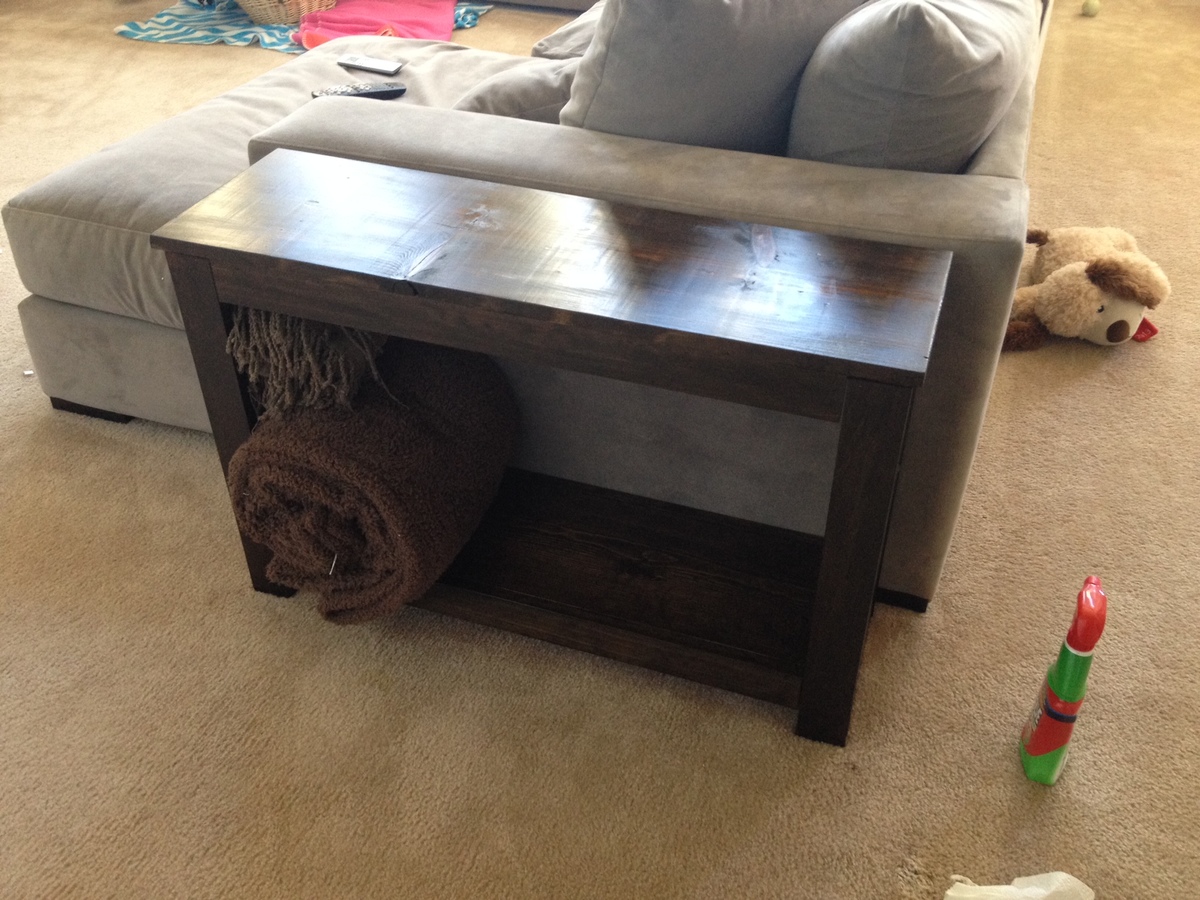
I was wanting long, skinny end tables for my couch and when I came upon the spa bench plan I knew it was perfect length and size for what I wanted. I only altered the plans by making it taller to fit my couch. This was my second build and I learned a lot through the process so these are not perfect but I love the imperfections. I also didn't like the first stain that I put on the tables and when I tried taking it off my sander made weird marks but it gave it a more rustic look which I ended up loving. (Which I could never recreate on purpose)
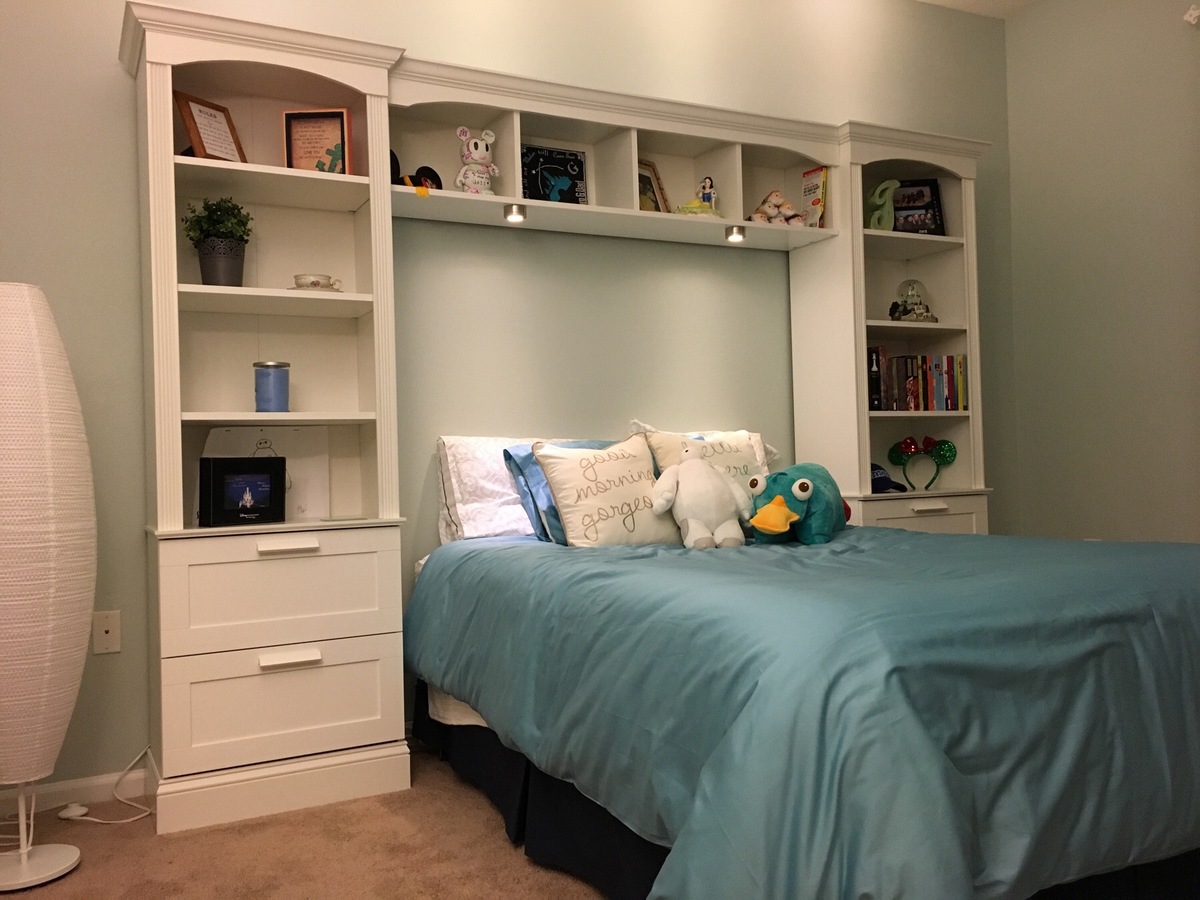
I hacked three IKEA bookcases into this beautiful bed for my princess of a daughter who was getting her first apartment in Orlando, FL, because she got a full-time dream job with Disney. Full details at http://handydad.tv/ikea-hack-bed-bridge-bookcase/.
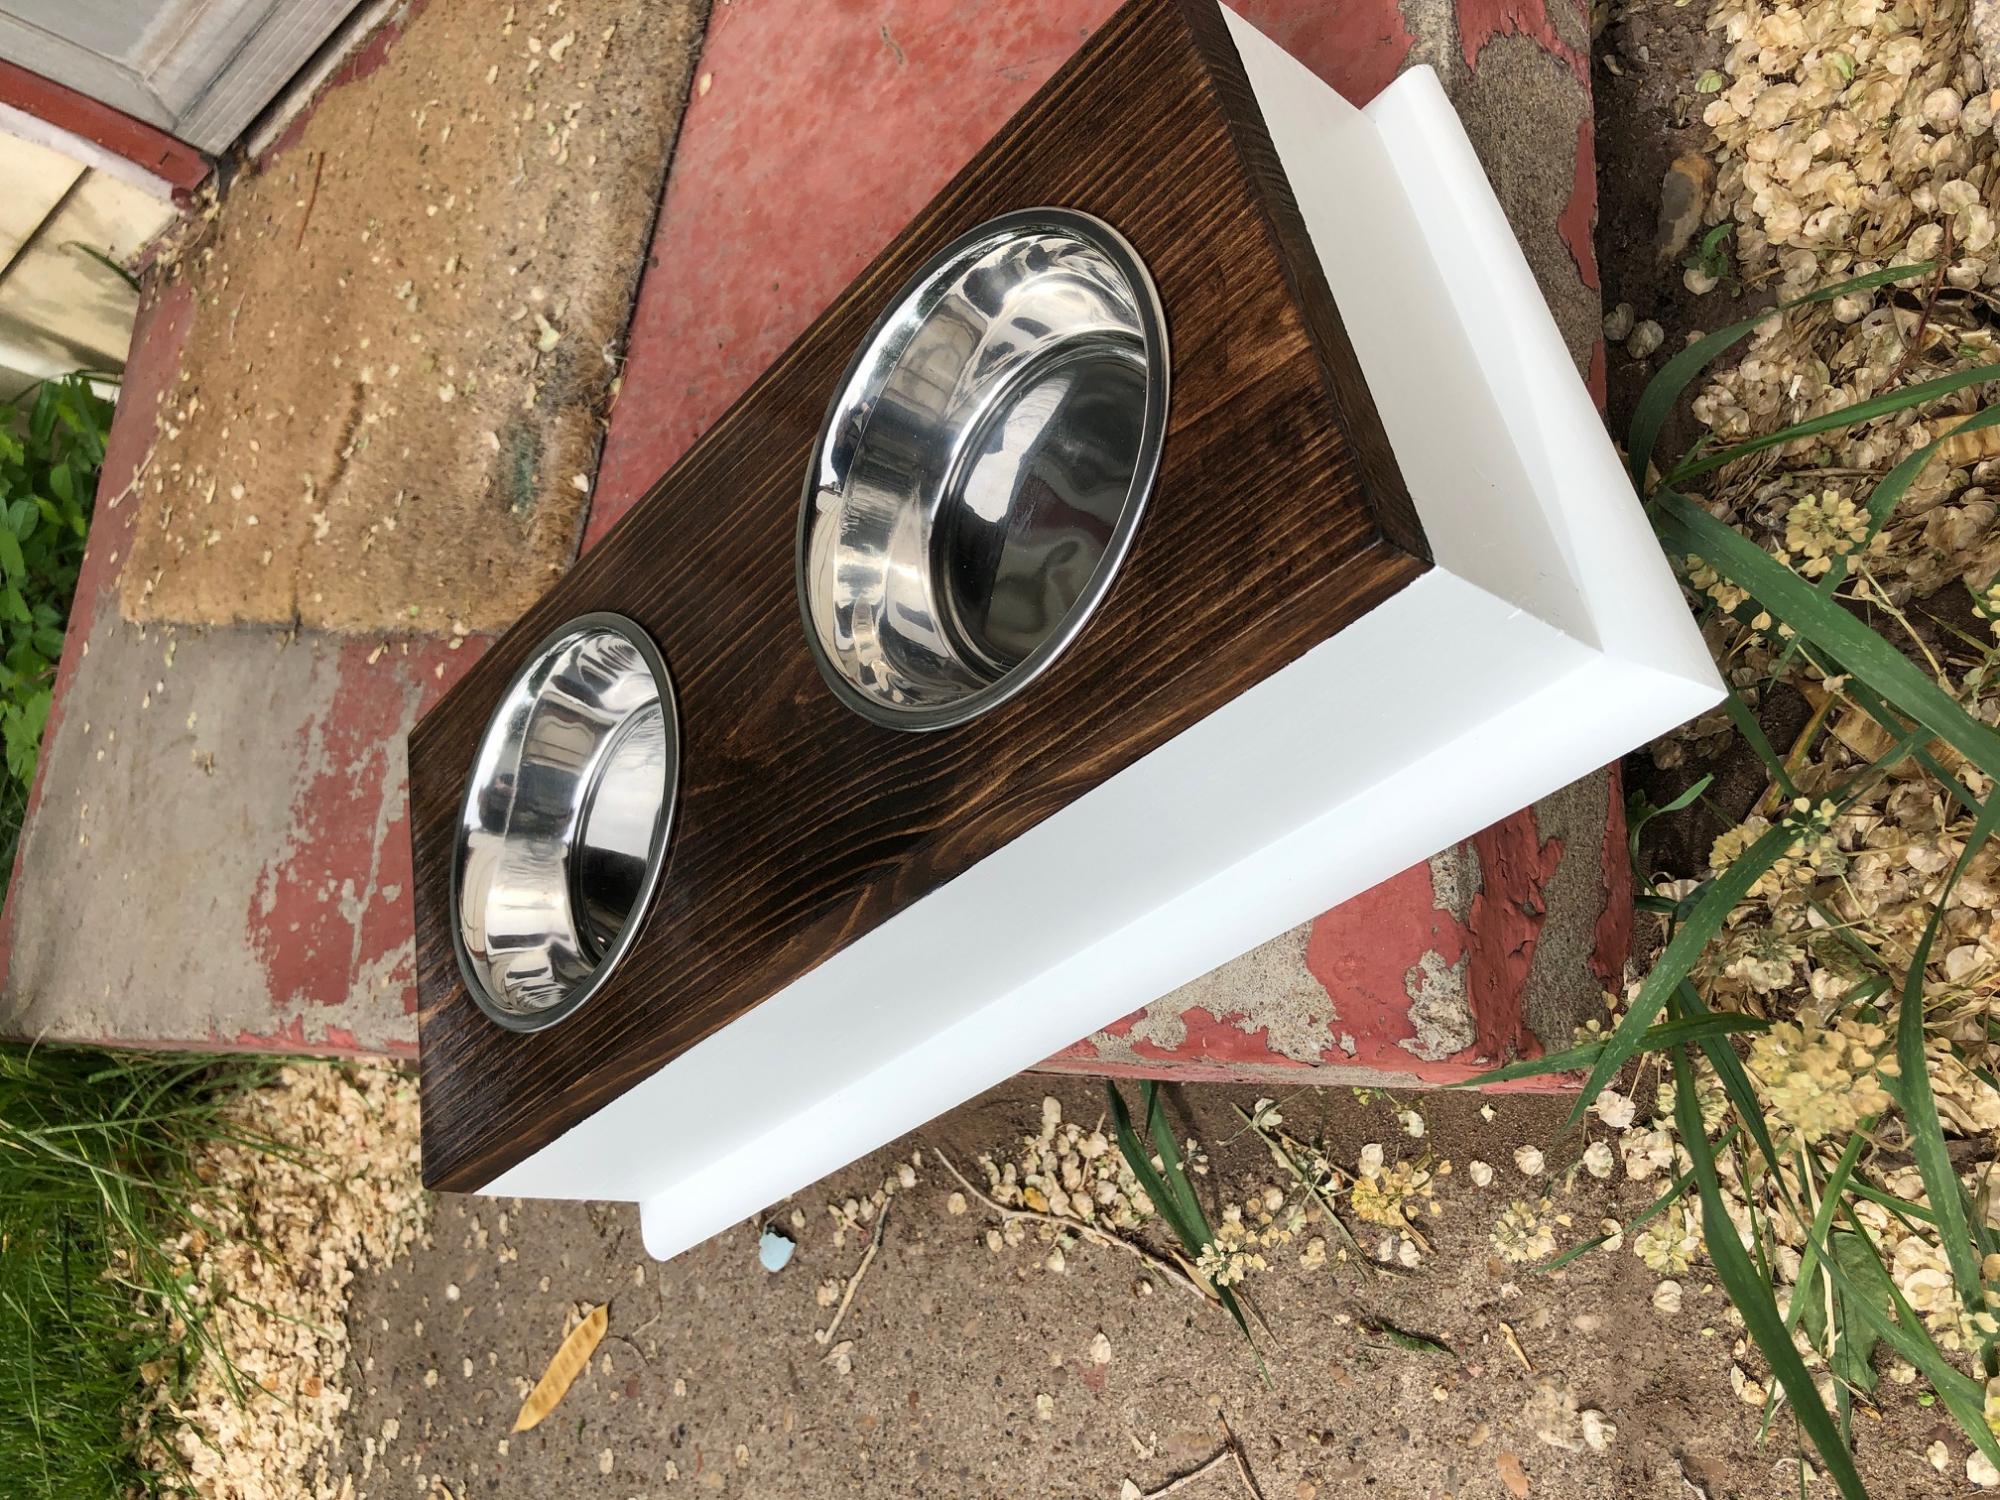
This was one of my first wood working projects. It taught me so much and it also helped me to realize that I really do love wood working! I think in the future I'd probably paint the bottom more of a light grey color to cut down on the contrast between the stained top and the painted bottom. Overall, I love it and my Sadie pup will be happy to have some new bowls to eat out of!
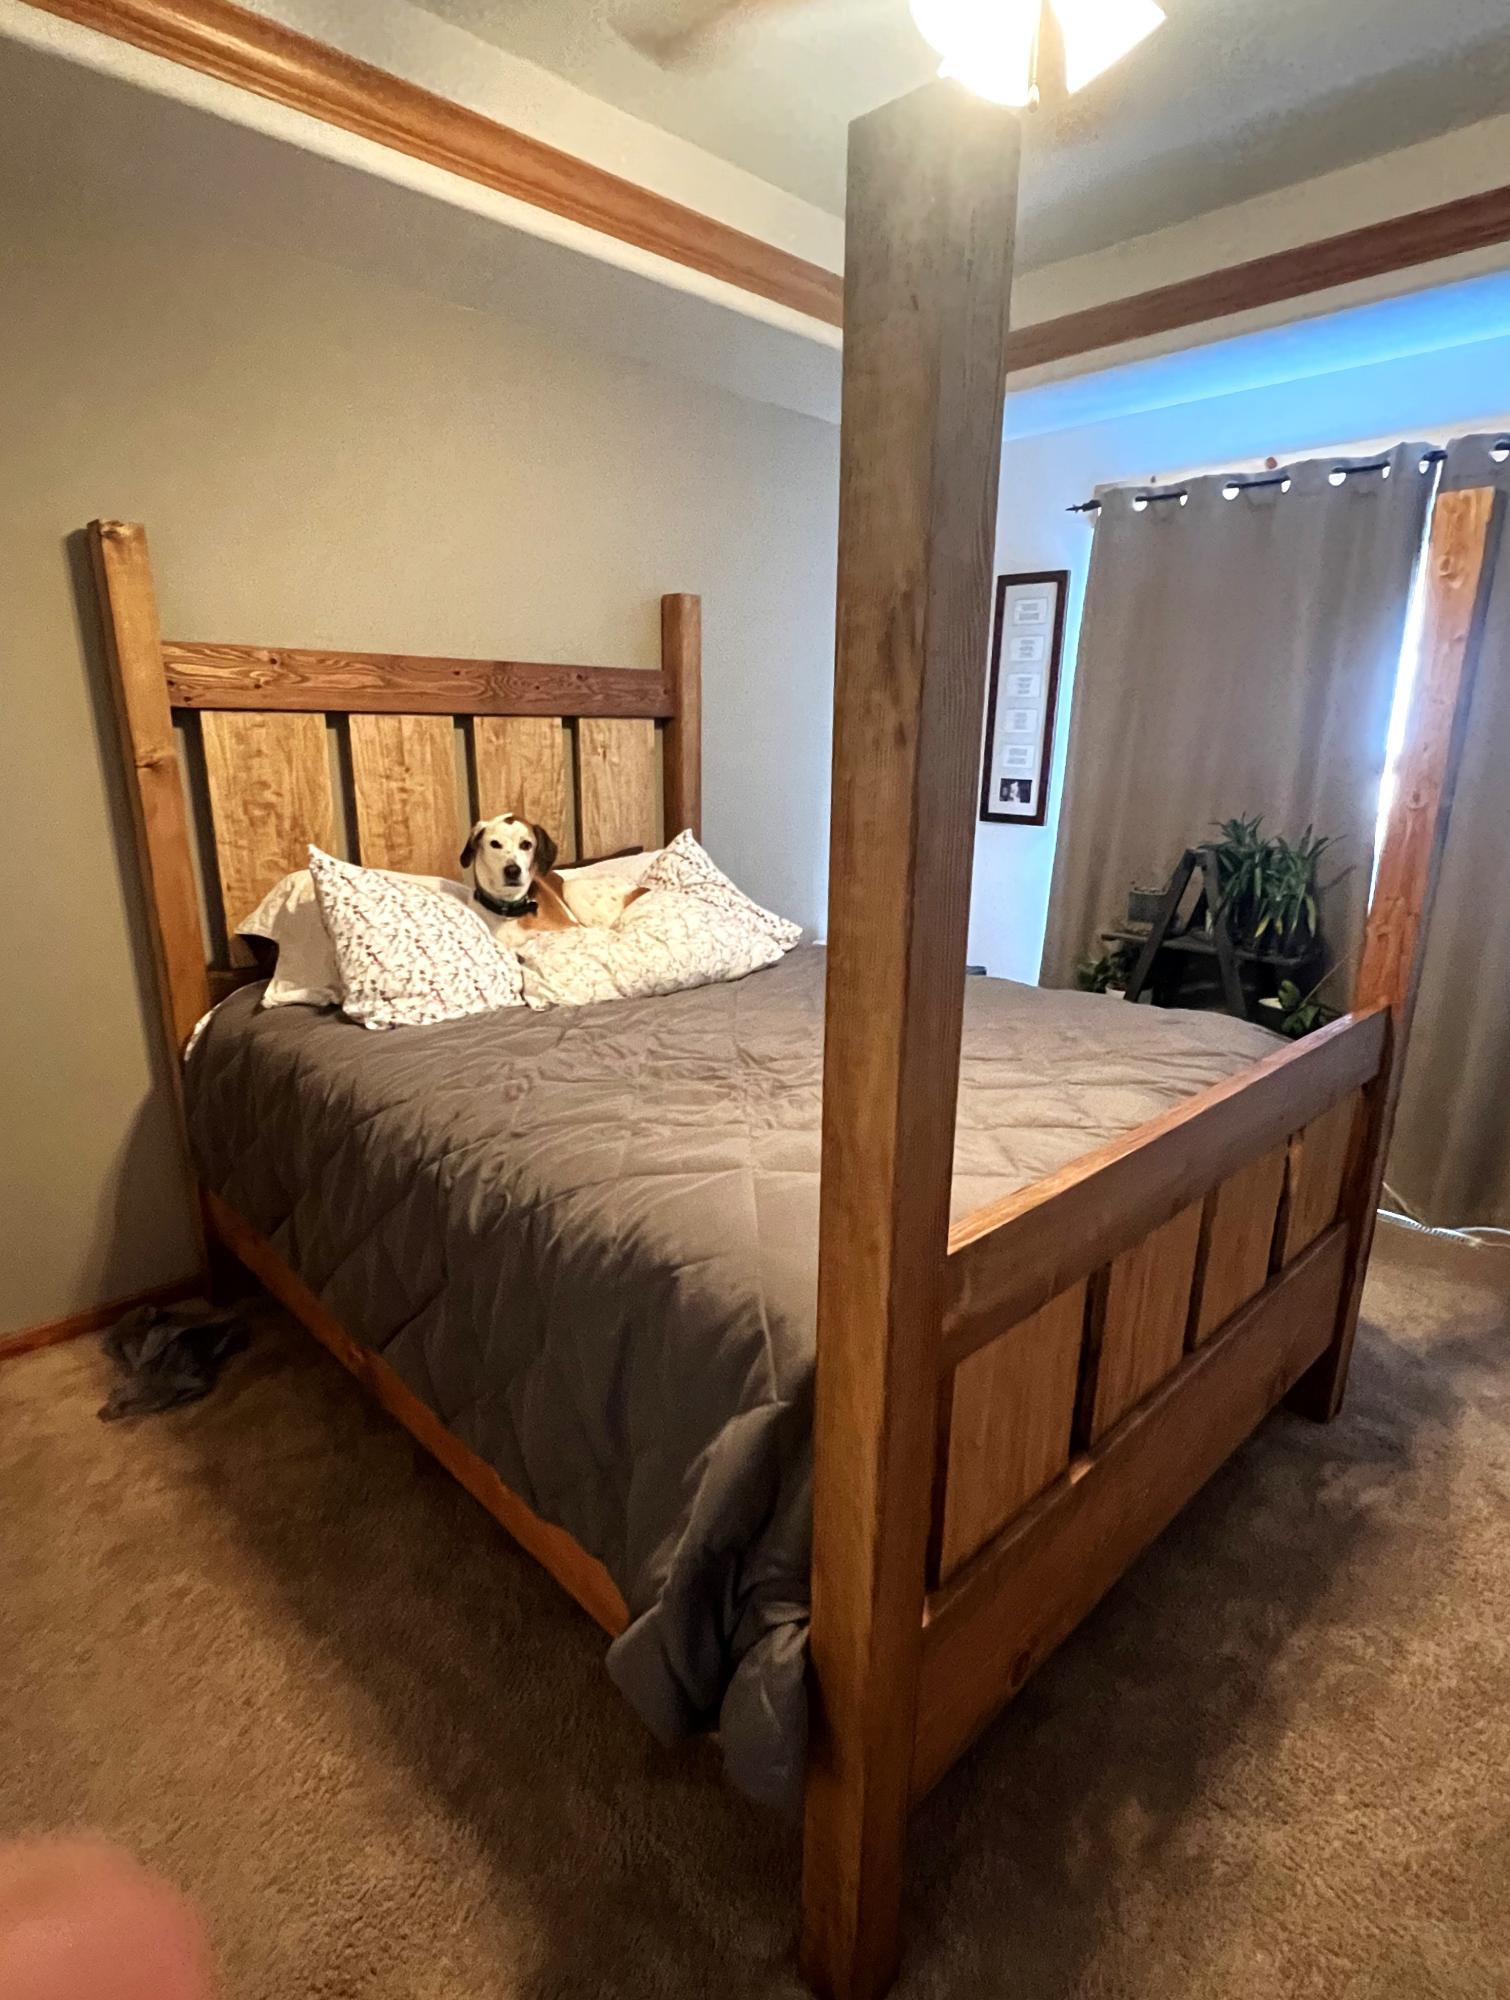
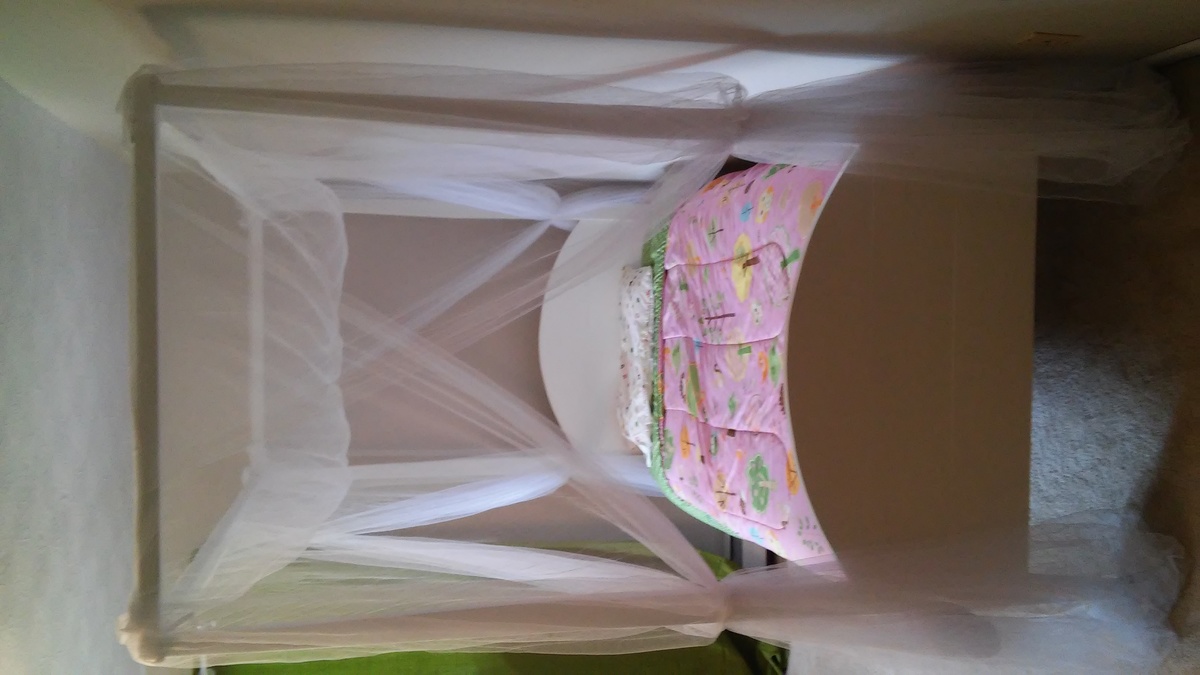
Slatted four posted bed and I adore my new bed!
It was a big project, and my husband did all the main stuff!
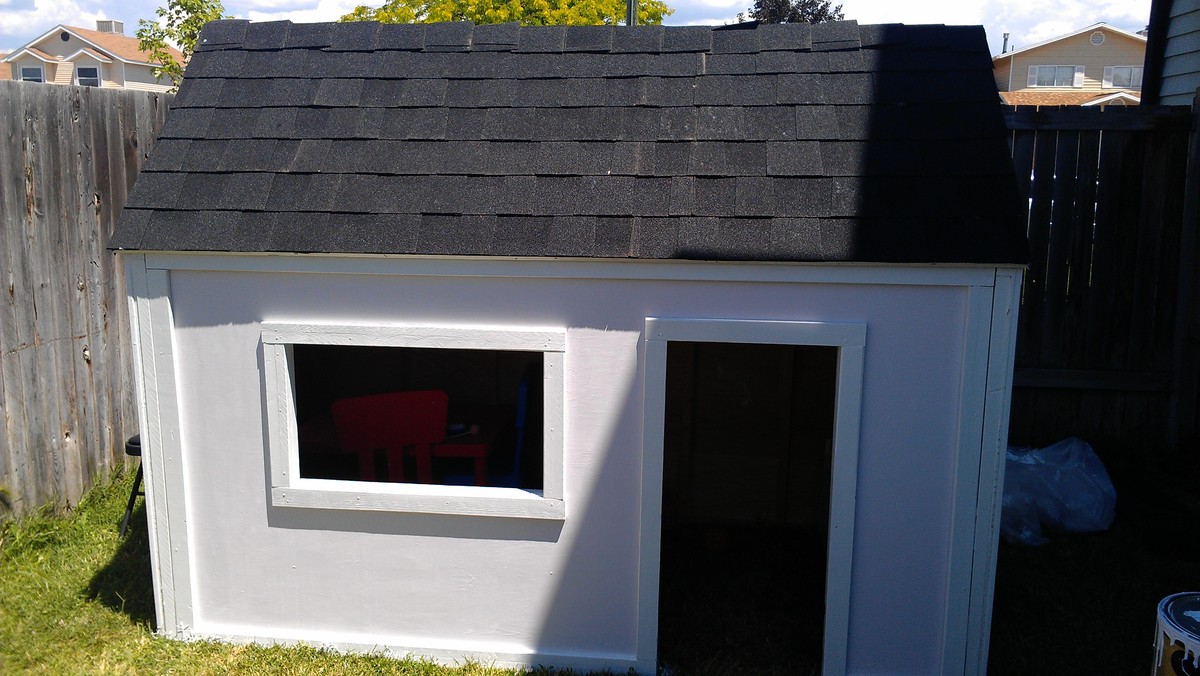
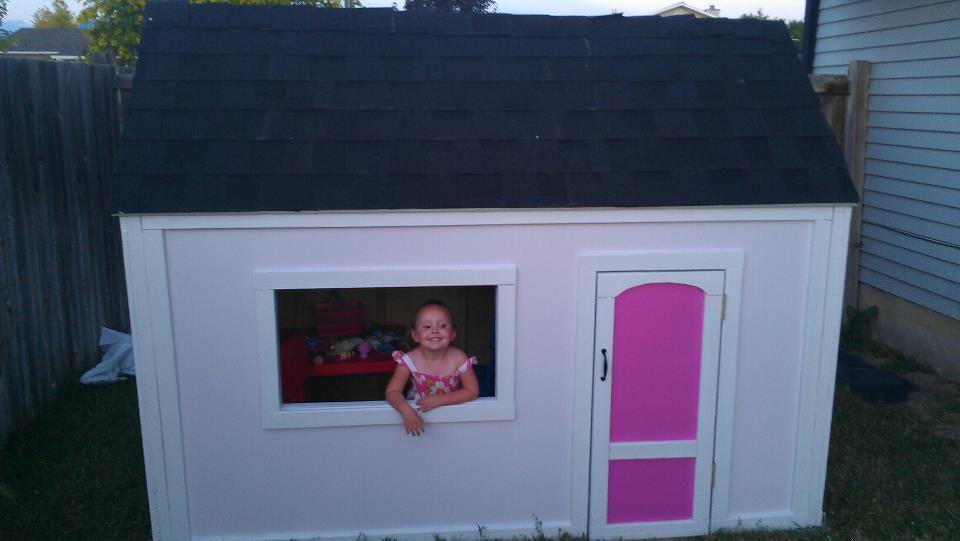
I still have to paint the inside. Since we aren't building a deck yet, we are putting it on some pavers. We bought 40 12x12 pavers and will push that out on in the next couple of days. I also will eventually attach a window box with plants. I'm planning on painting a couple of the inside walls with chalkboard paint.
It was seriously worth every amount of time and energy. If you are thinking of doing this, do it! You can, it's a great plan. Thanks Ana for the plans!