I built this!

I have no idea how much time I spent on this, but it was worth it!
Built from Plan(s)
I have no idea how much time I spent on this, but it was worth it!

I took the original plans from the Farmhouse Table - Updated Pocket Hole Plans - and I modified it so that my table could be countertop height and join up to my counter - like a modified breakfast bar, so this table it countertop high, and is also more narrow and alittle longer. I can easily pull it away from the wall and sit 6 people around it. It is now my favorite place in the house!


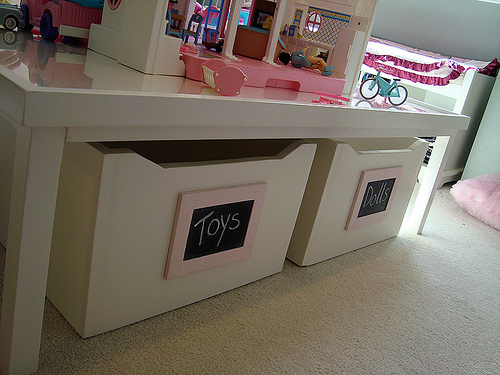
Used scrap material from a new development near me. (Was given permission by developer). Liquid nails and Brad nailer used to assemble the 1x12’s. 1x2 and shoe moldings to clean up edges. Chalk and white paint to finish it up. I already had the coat rack so it literally cost me nothing to assemble.
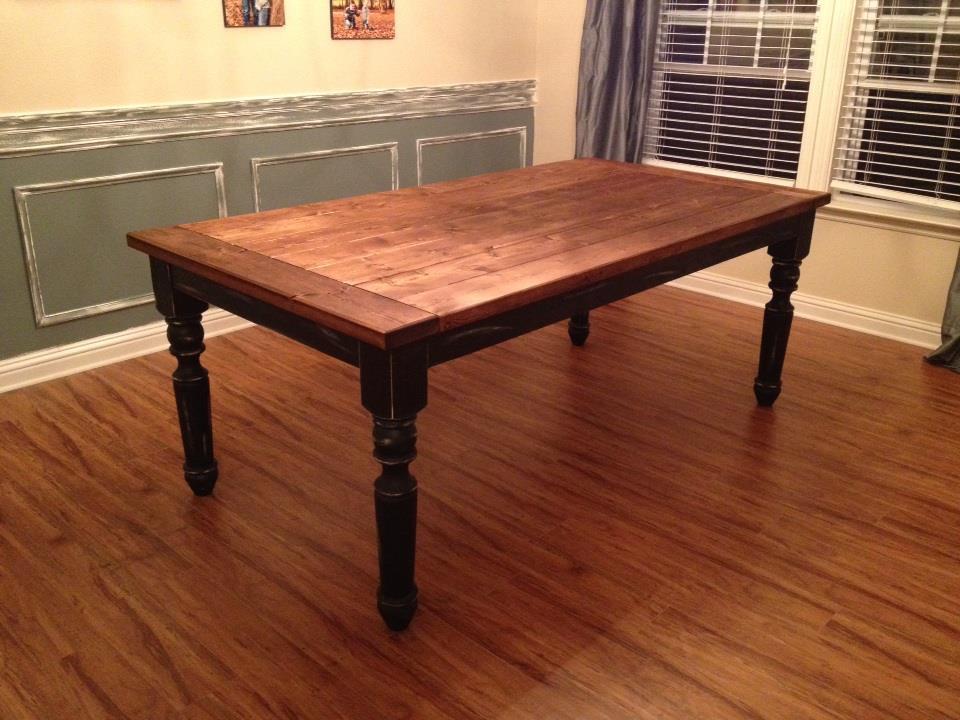
I am completely redecorating my home, Out is the furniture that no one was allowed to sit on or go near. I wanted furniture that we could use. I have 2 boys so I wanted it casual, fun and durable. Loved the farmhouse style and loved this table. It is made from pine, sanded and stained on top. I used Minwax provincial stain. Bottom is painted with black furniture paint then distressed. We purchased the legs from Osborne Wood Products.

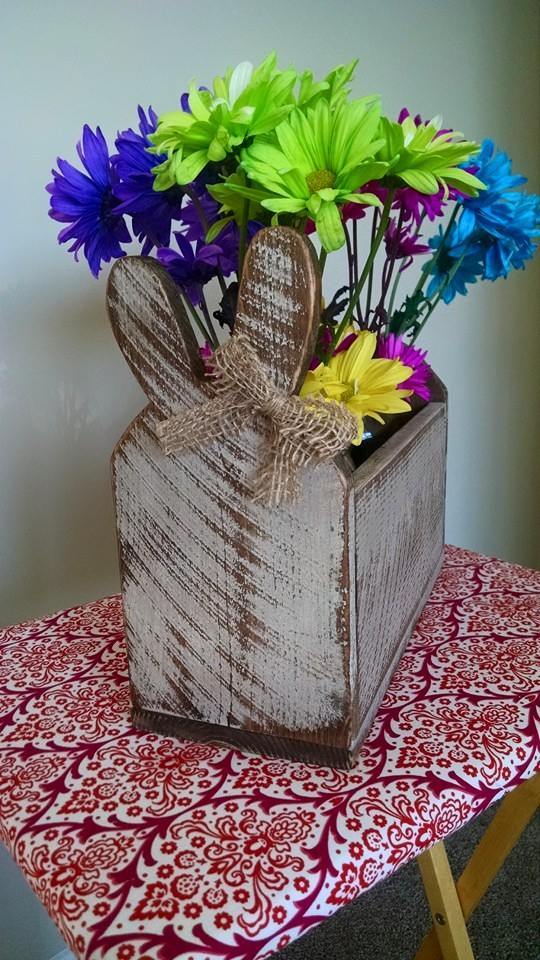
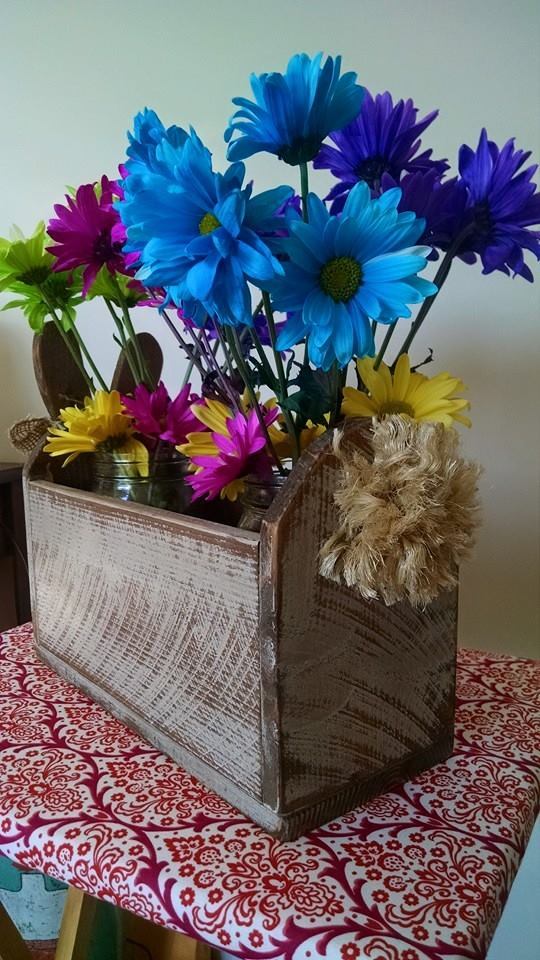
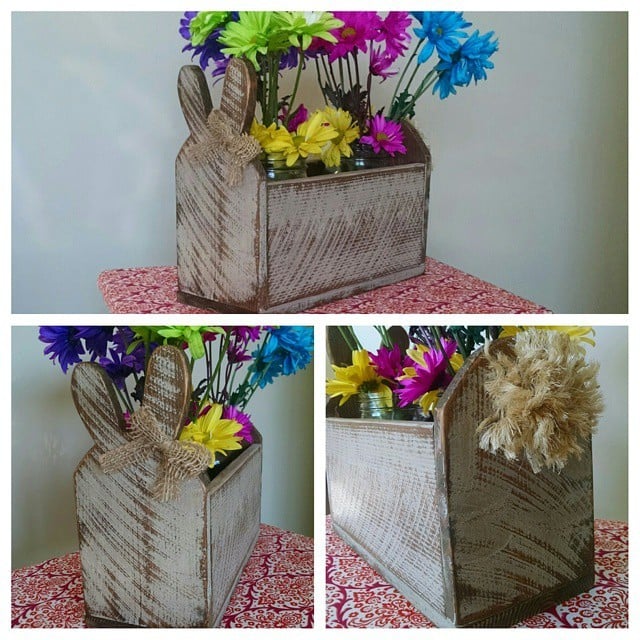
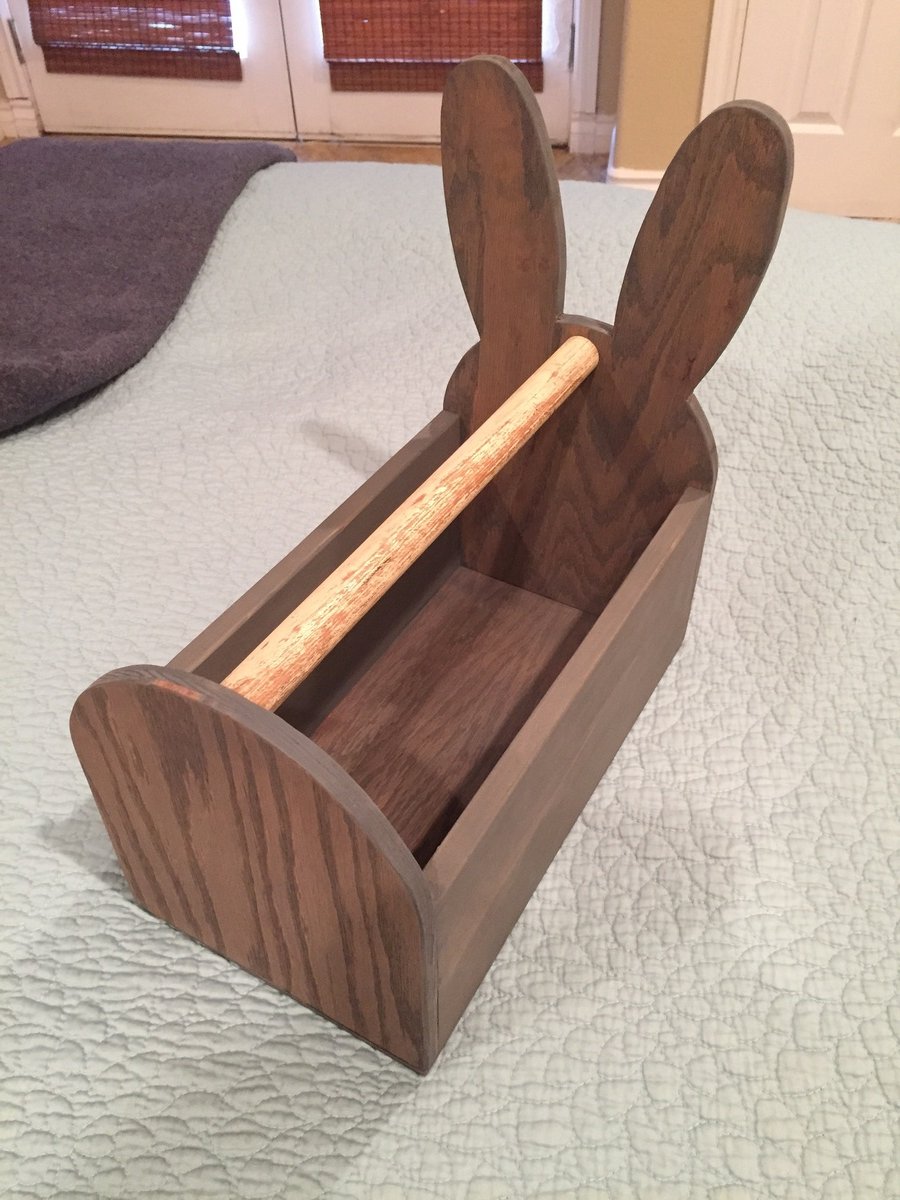
I had a lot of fun with this project! It was quick, and I already had everything I needed on hand. I have been wanting to get more practice with my jigsaw and this project was perfect for that. I used one cedar picket for the whole box and still had some left over. I added a burlap bow and made the tail with some extra pieces of rope and my glue gun. It was a breeze!

Tue, 03/31/2015 - 06:47
Excellent! I doubt that I will make it in 2 hours, but I'll try. I really like this kind of product, especially given the fact that my wife loves in flowering :). By the way, if someone need help in writing of any type of works, you can visit my website http://www.trusteddissertations.com/ and get a decent discount.
Have a nice day!
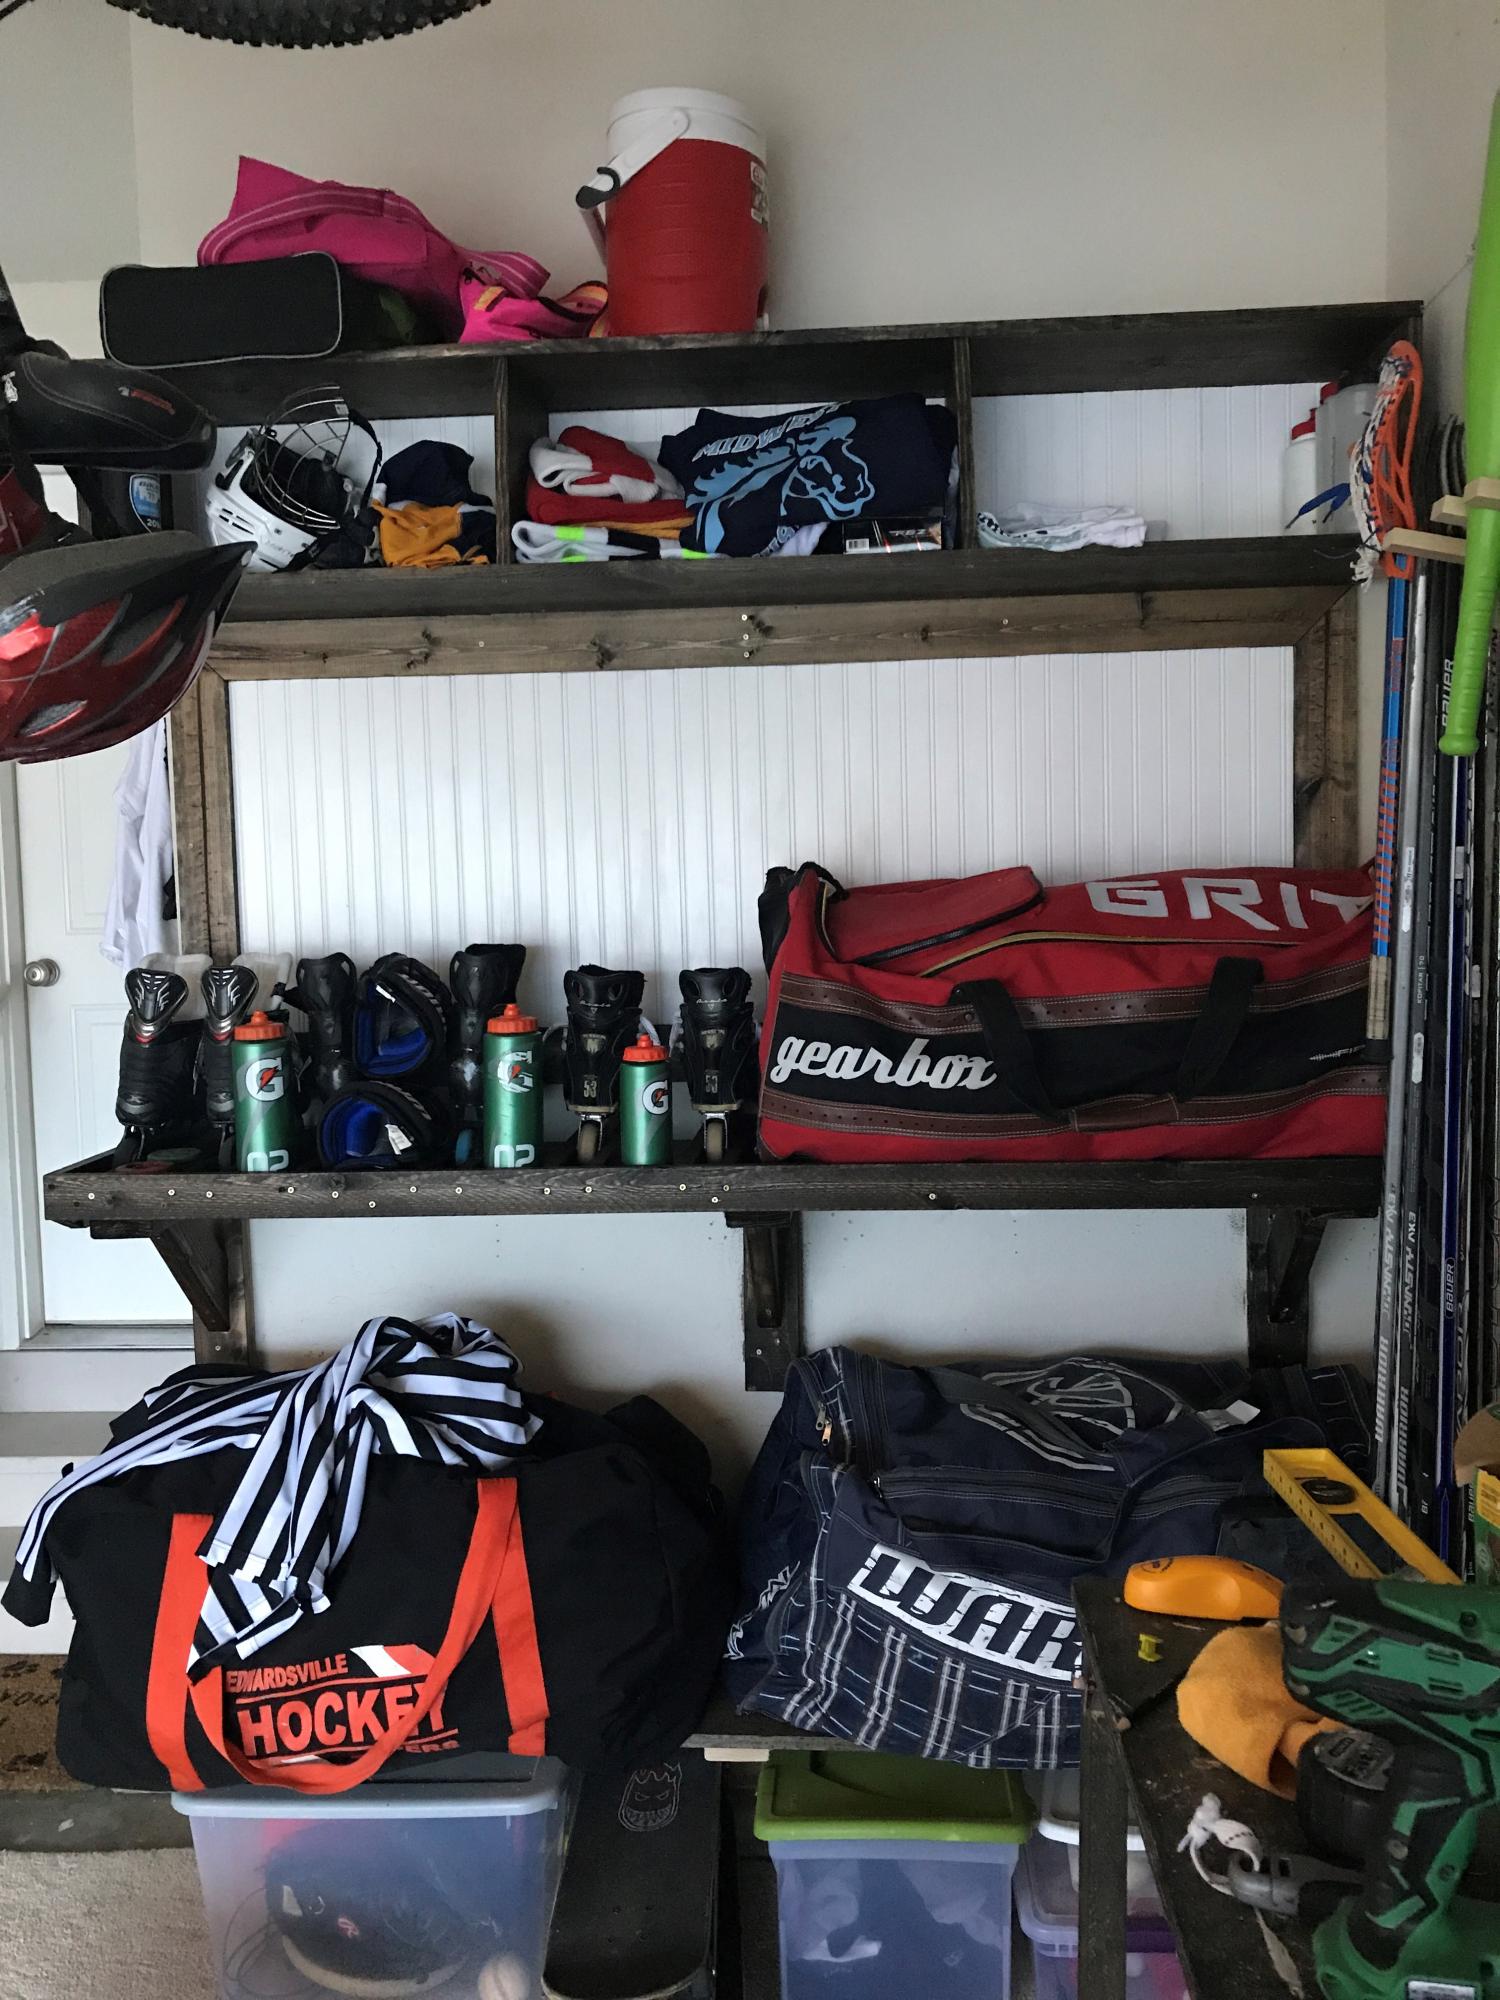
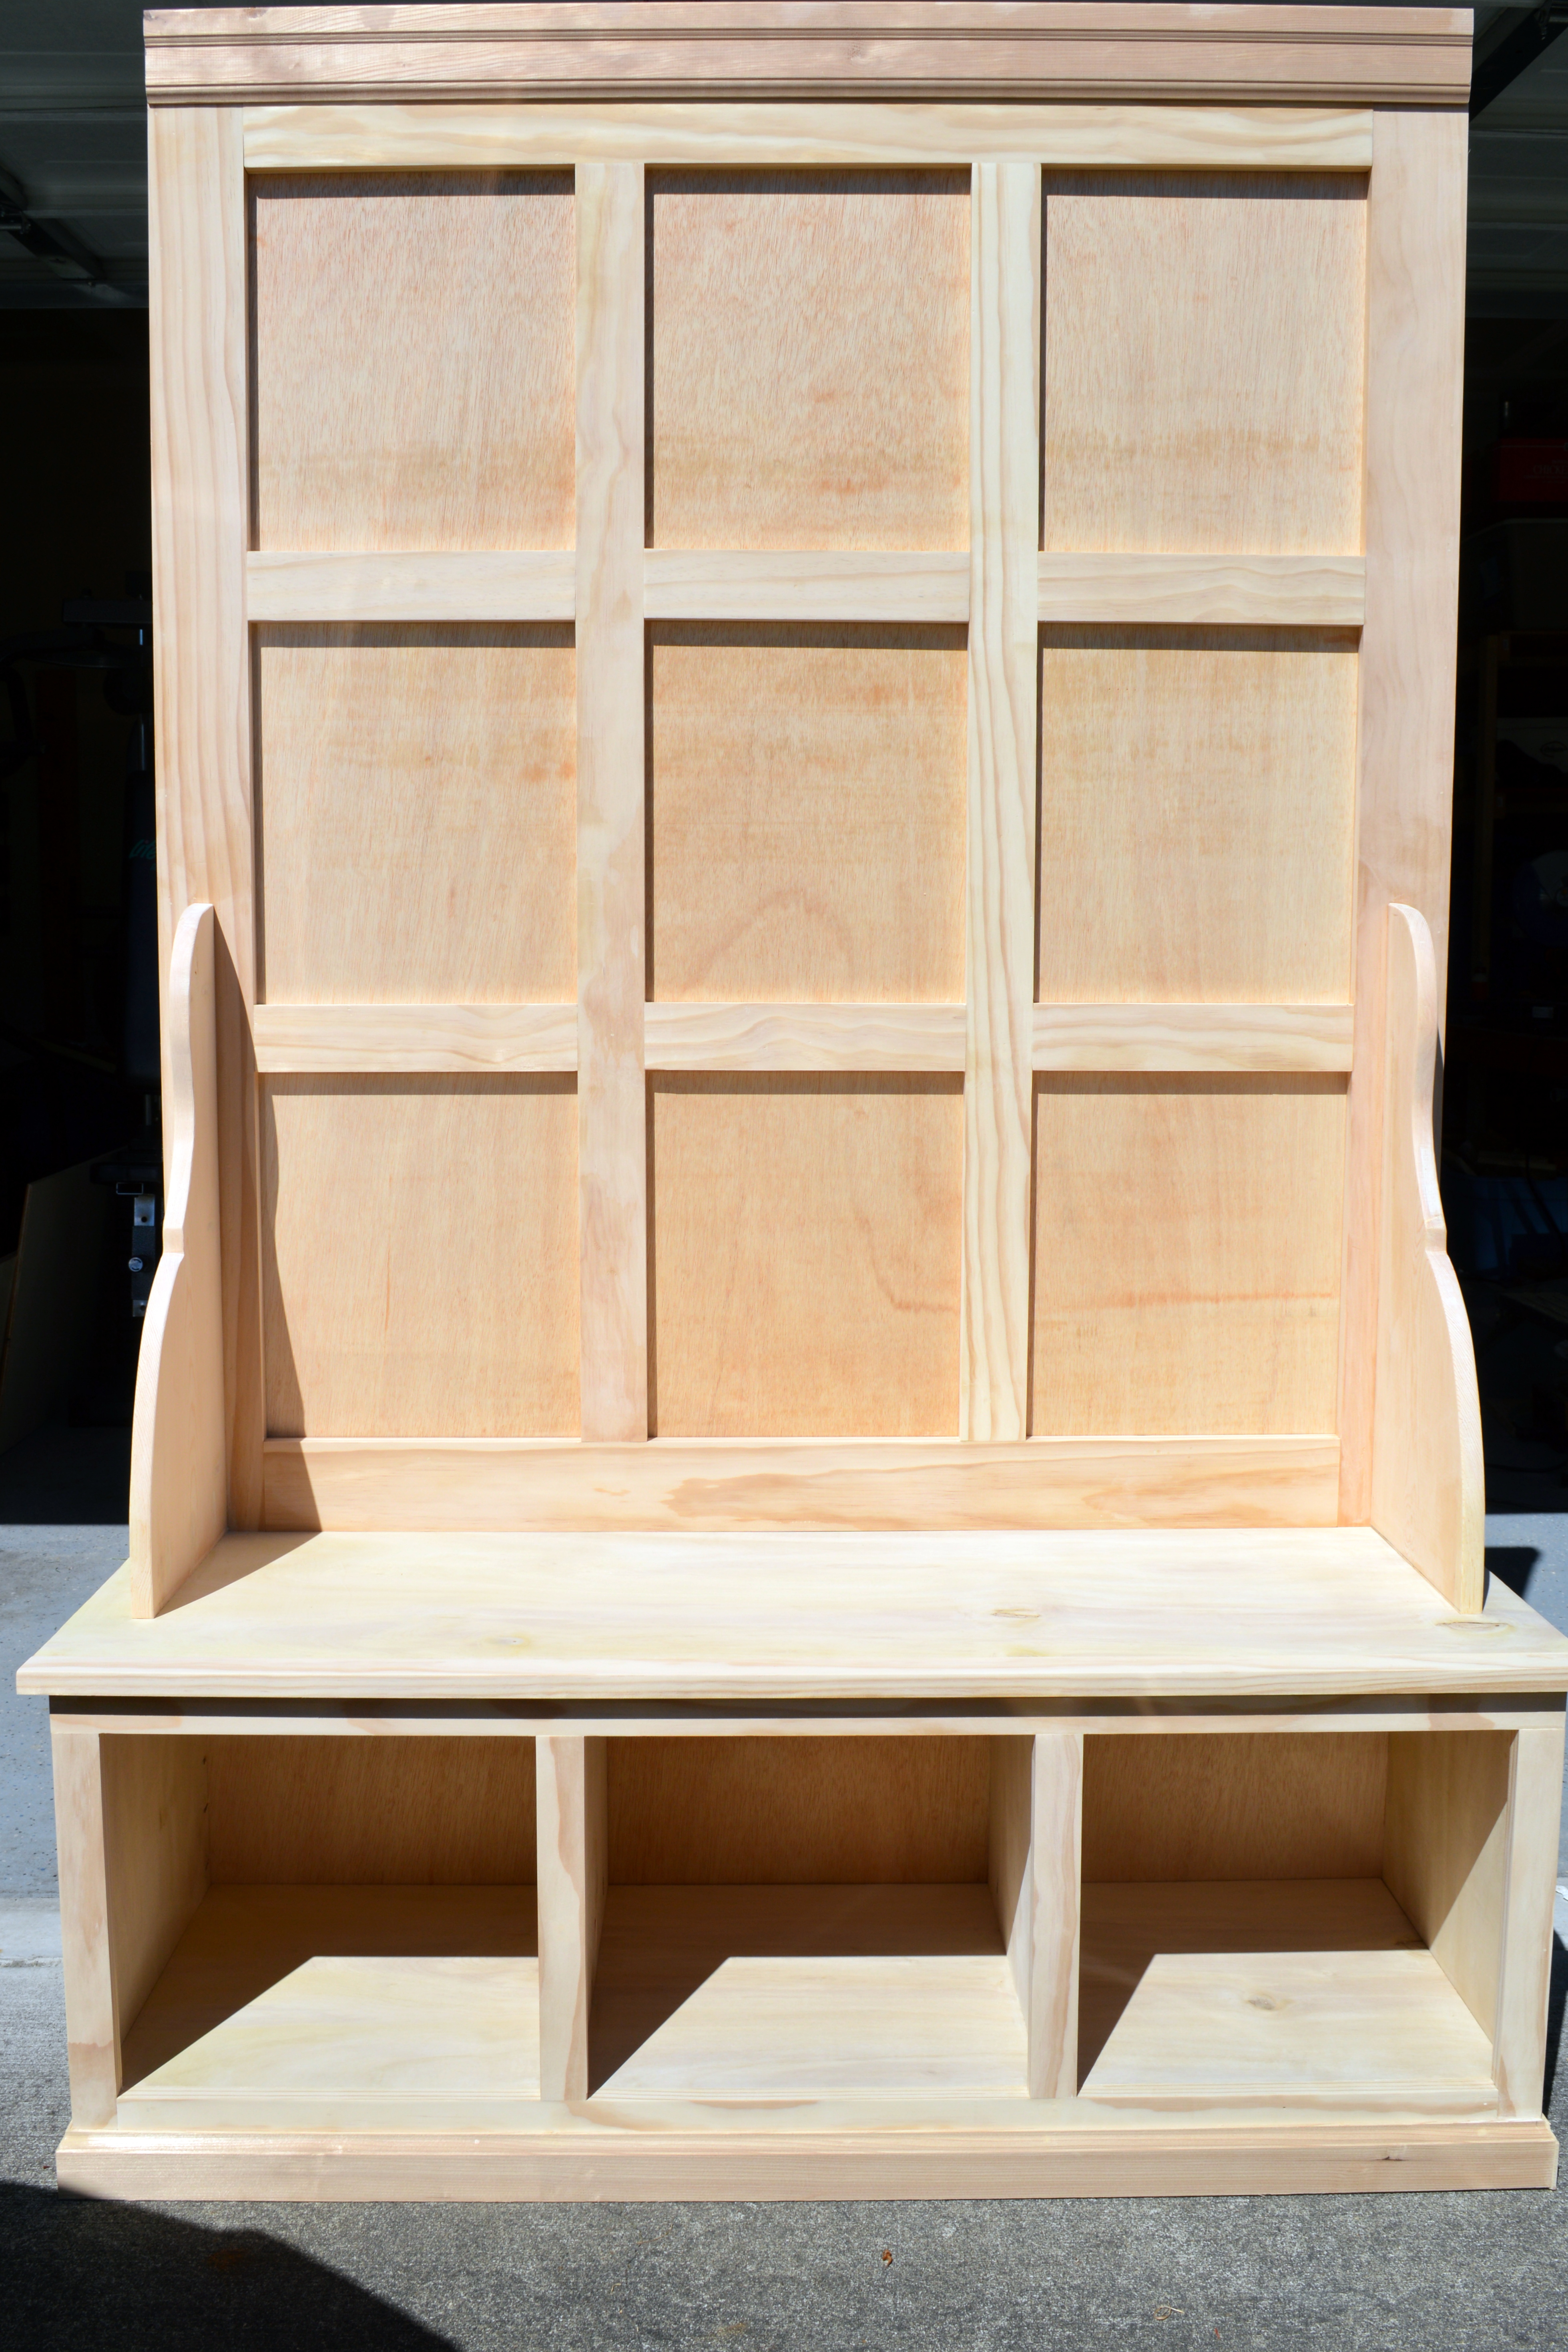
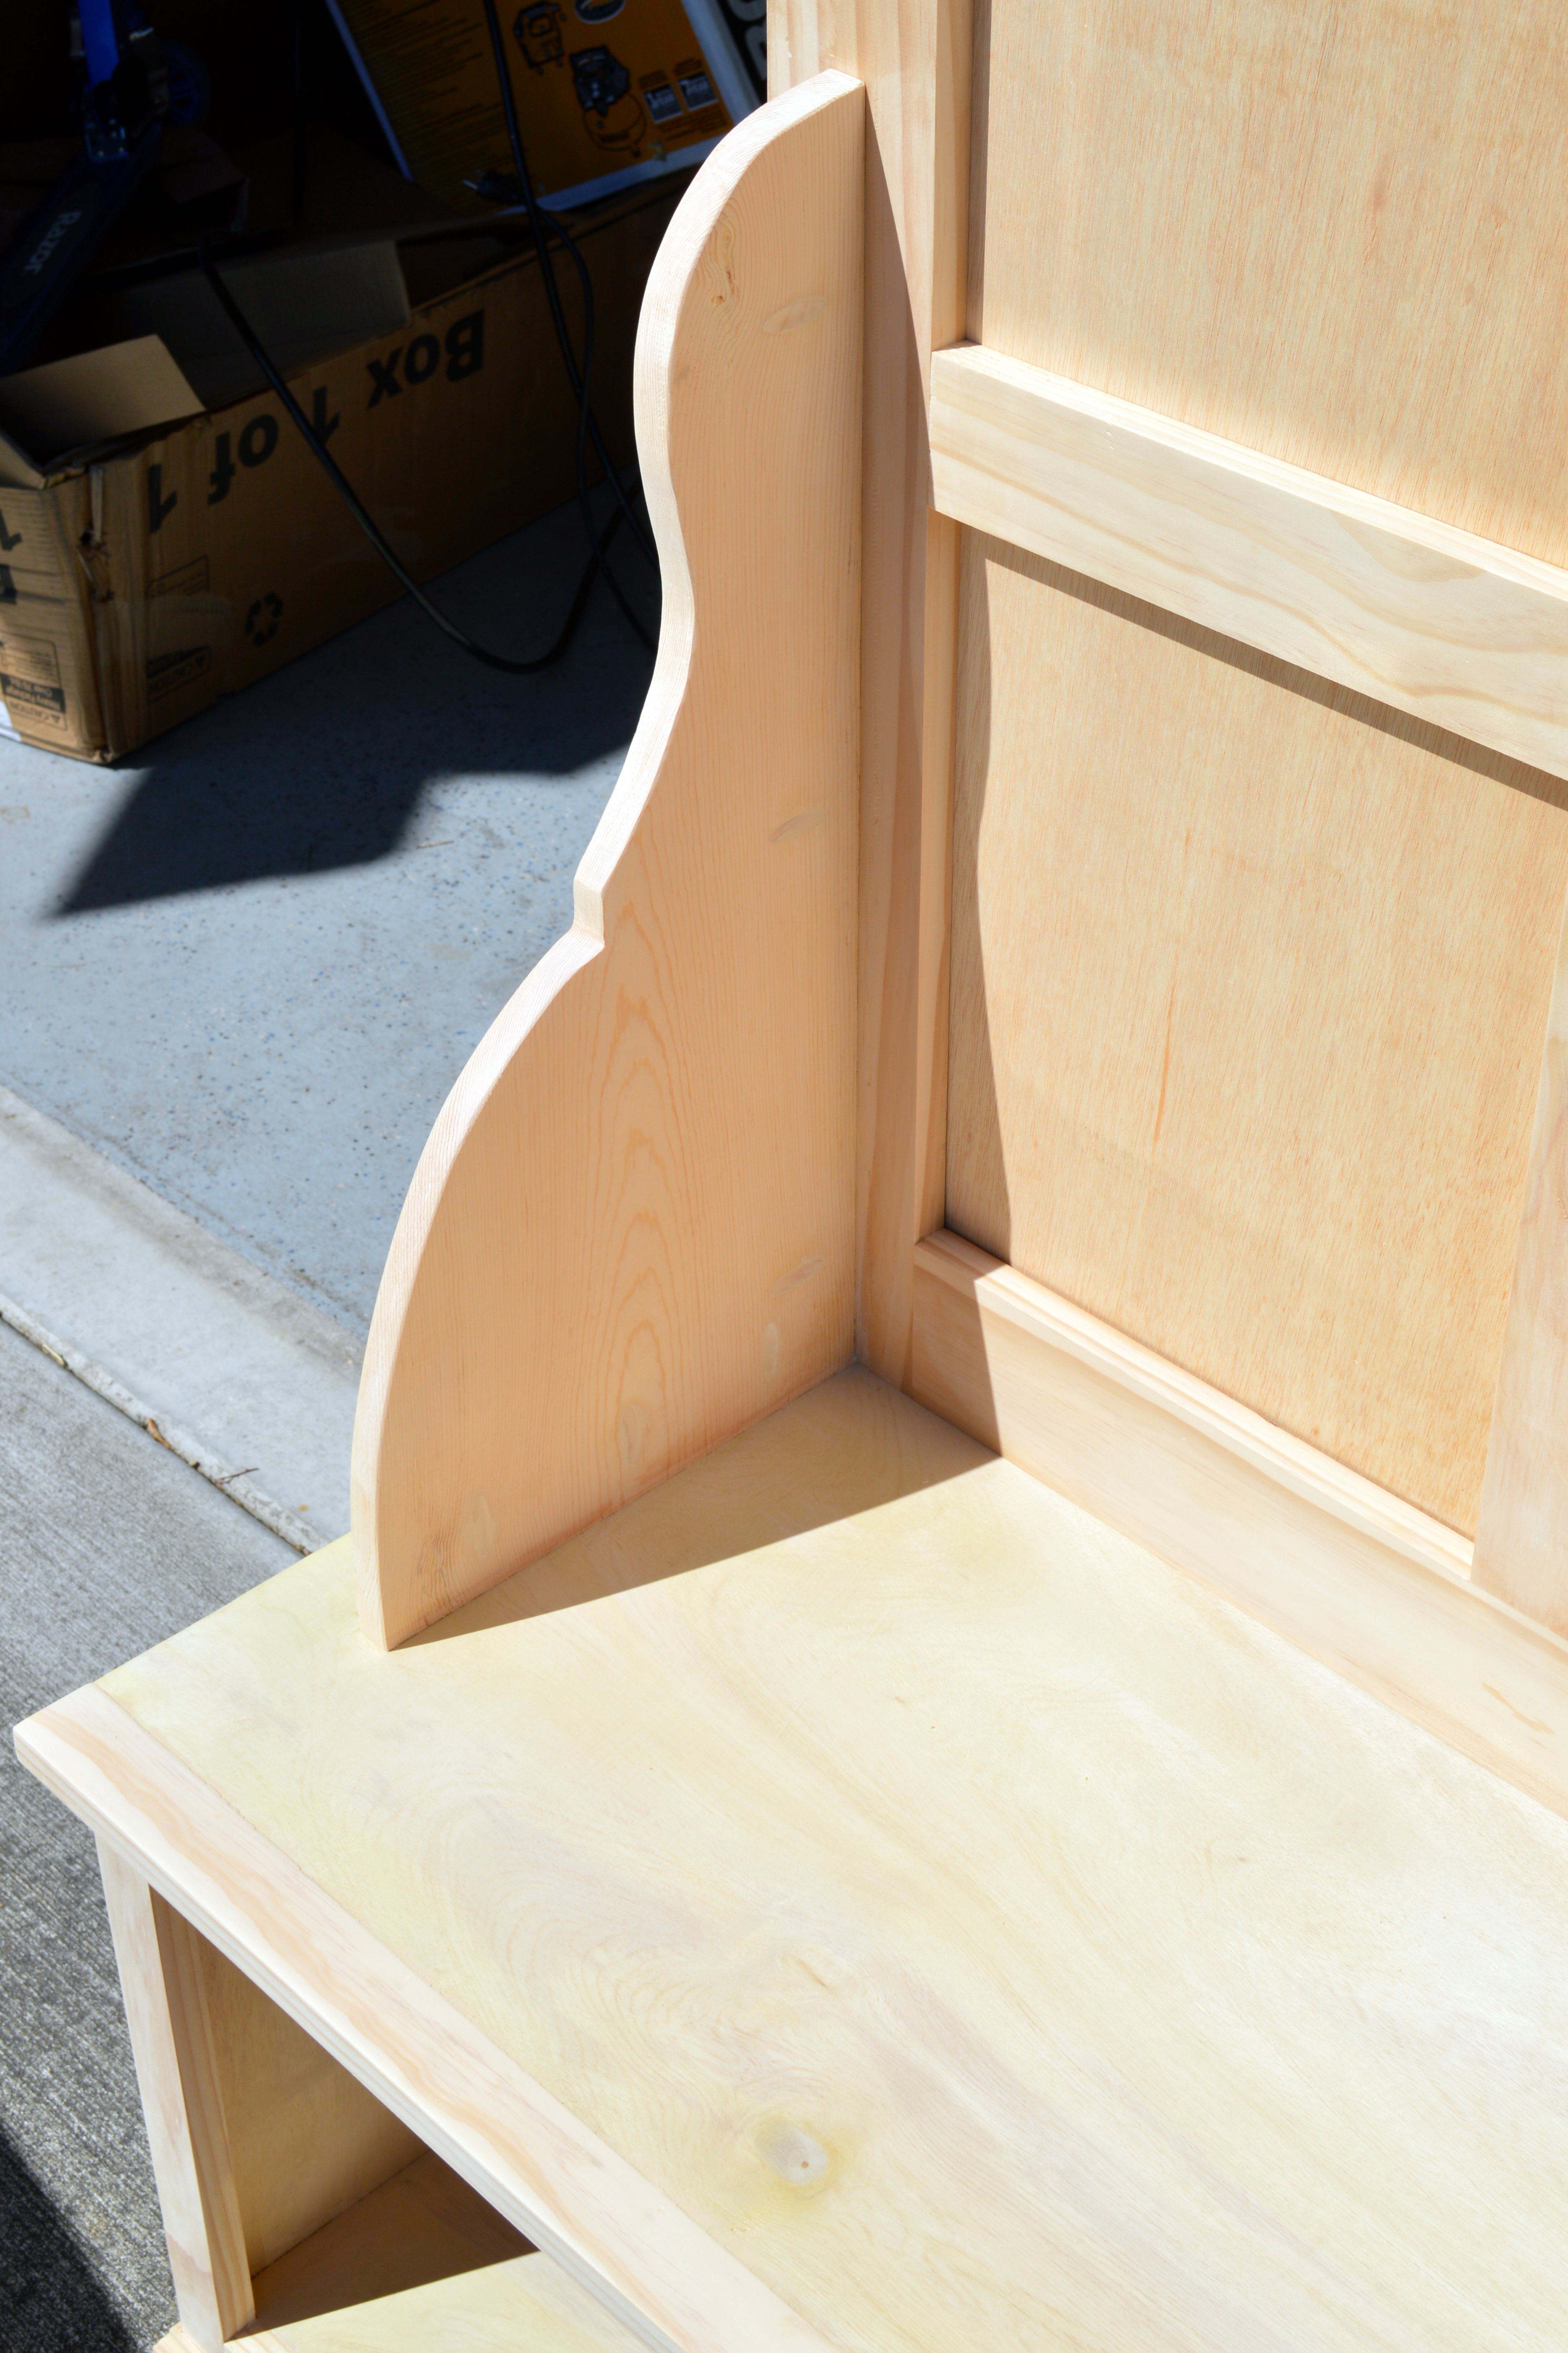
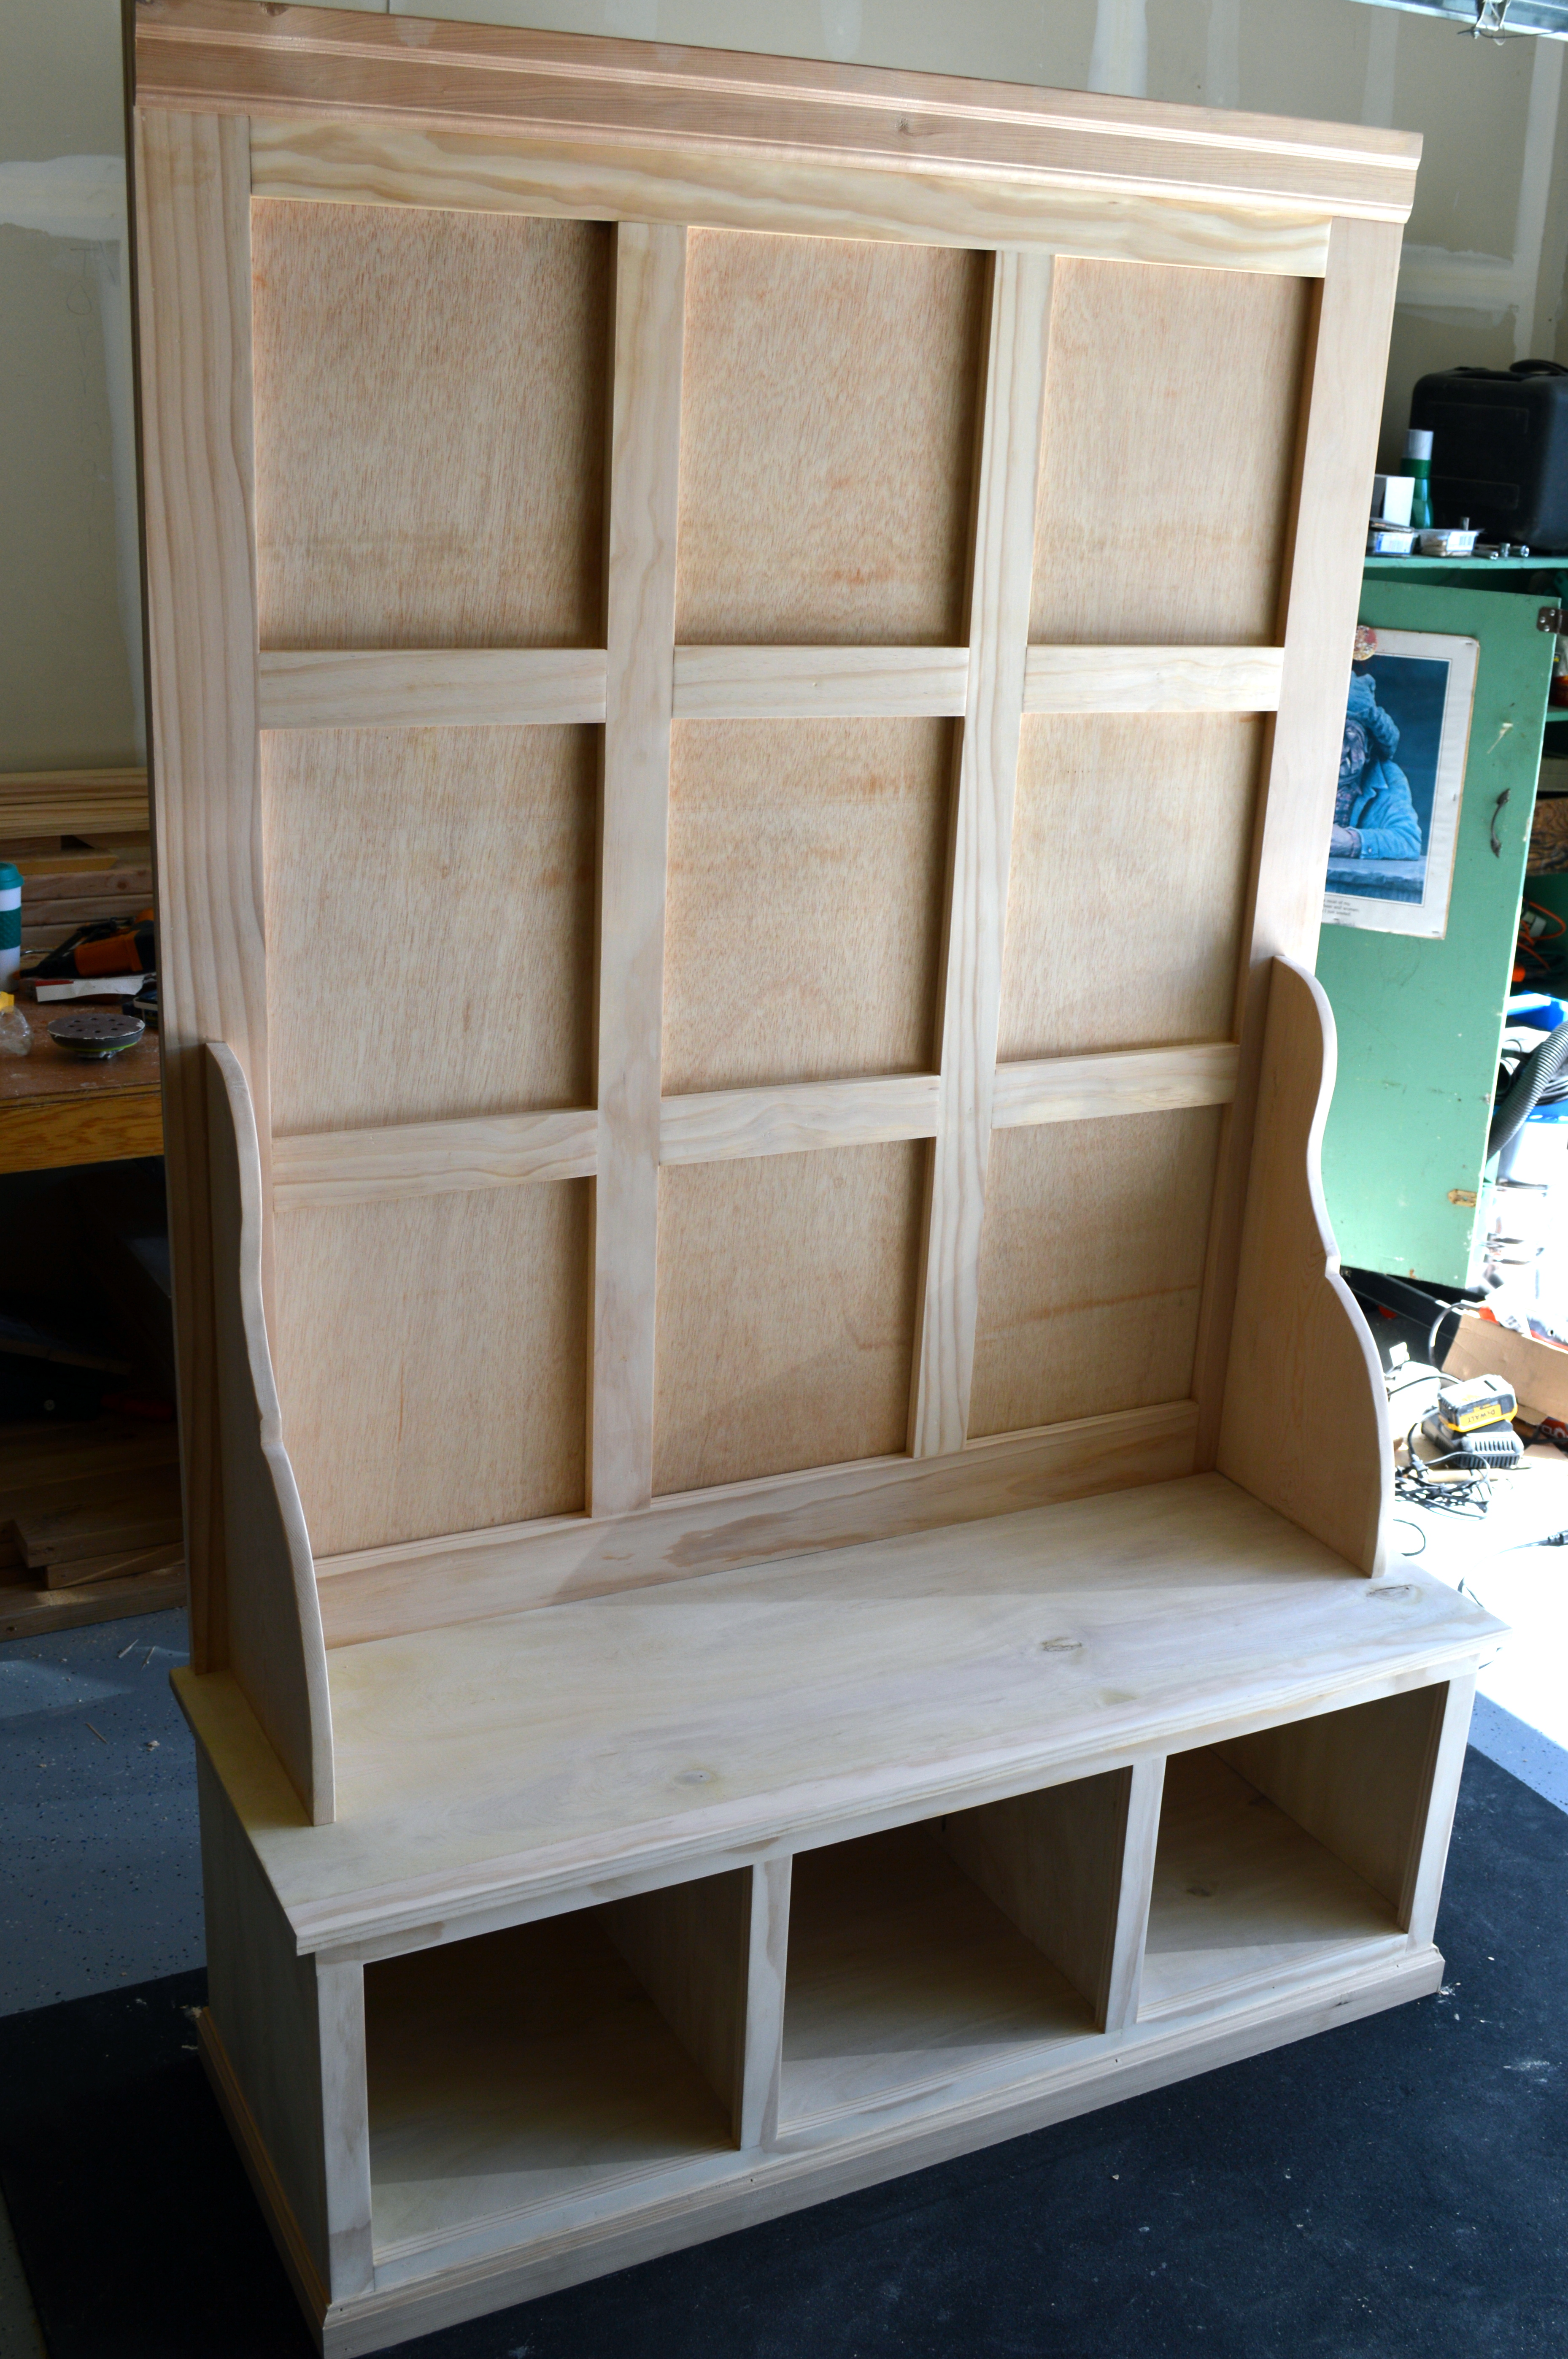
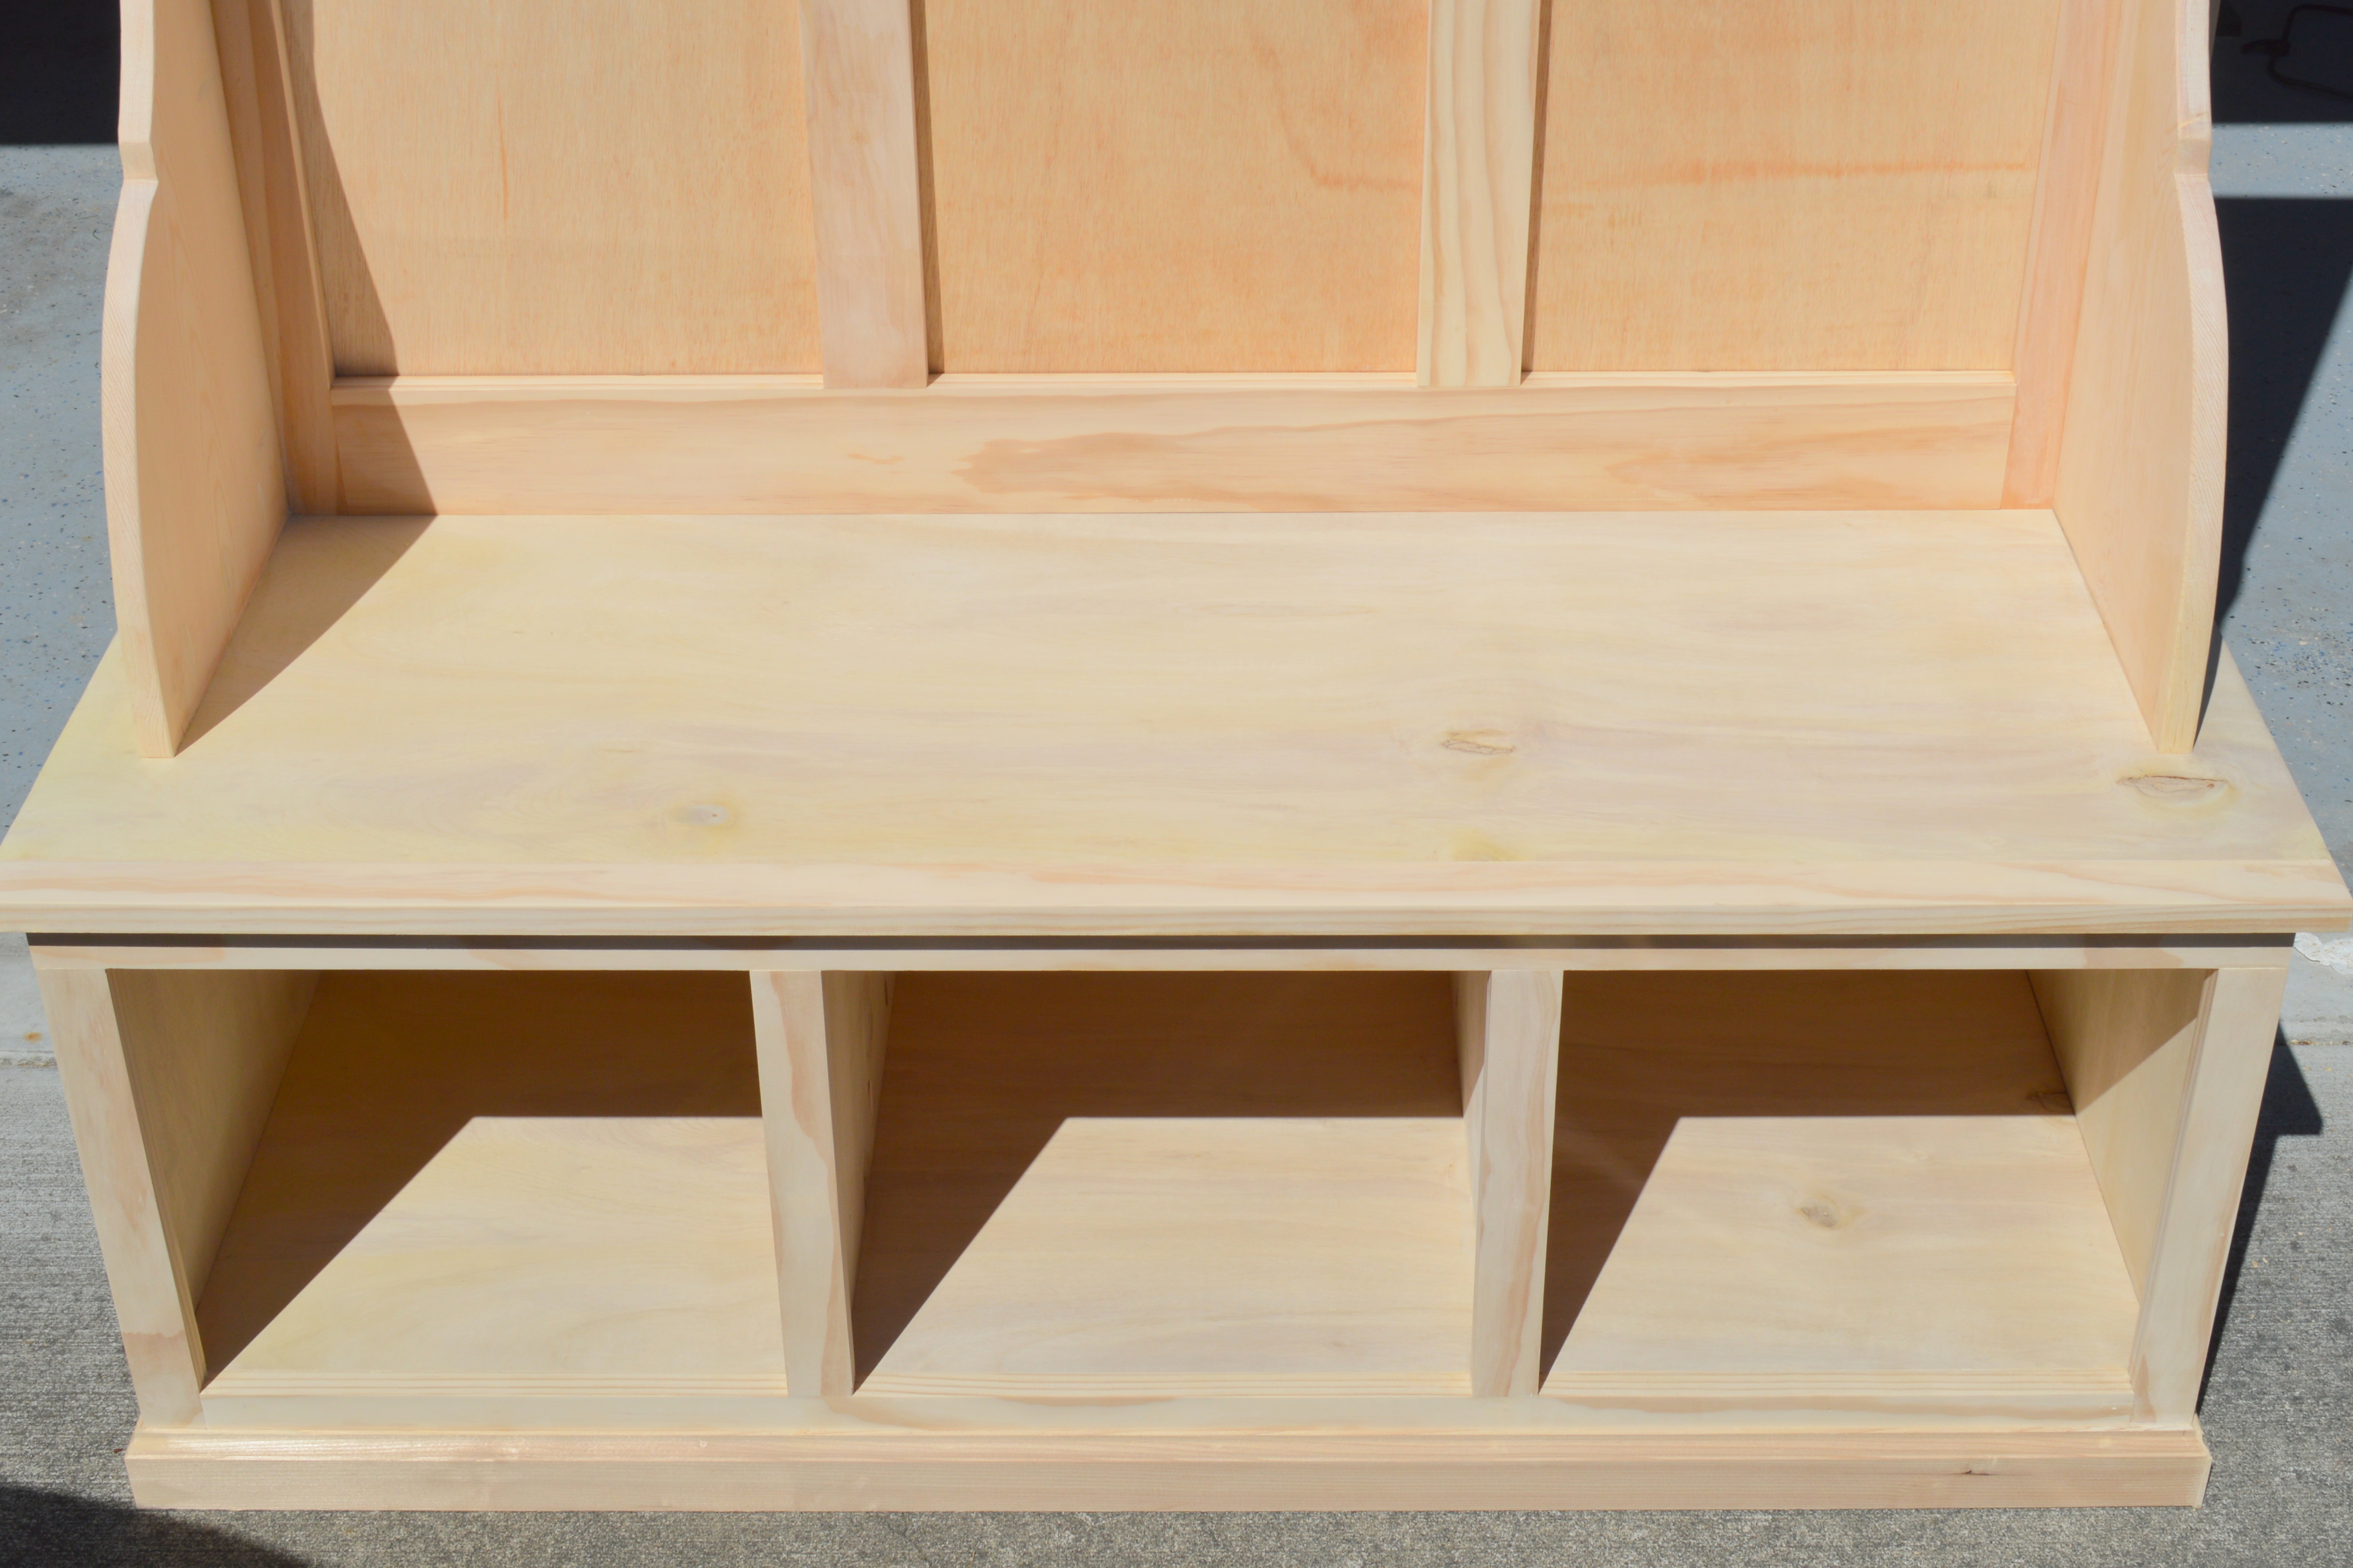
I needed something to organize our hockey gear so I customized this mudroom idea. It turned out great and makes me feel better when I walk in the garage. Everything must have a place!
This table was so easy and so much fun, even for a beginner. In fact, it's so easy I've built it three times. The latest one is my favorite. I think it's the beautiful blue color...
Sat, 05/11/2013 - 15:05
The finish looks really simple but effective, reminds me that I really should finish my other halfs kitchen island I made in February!
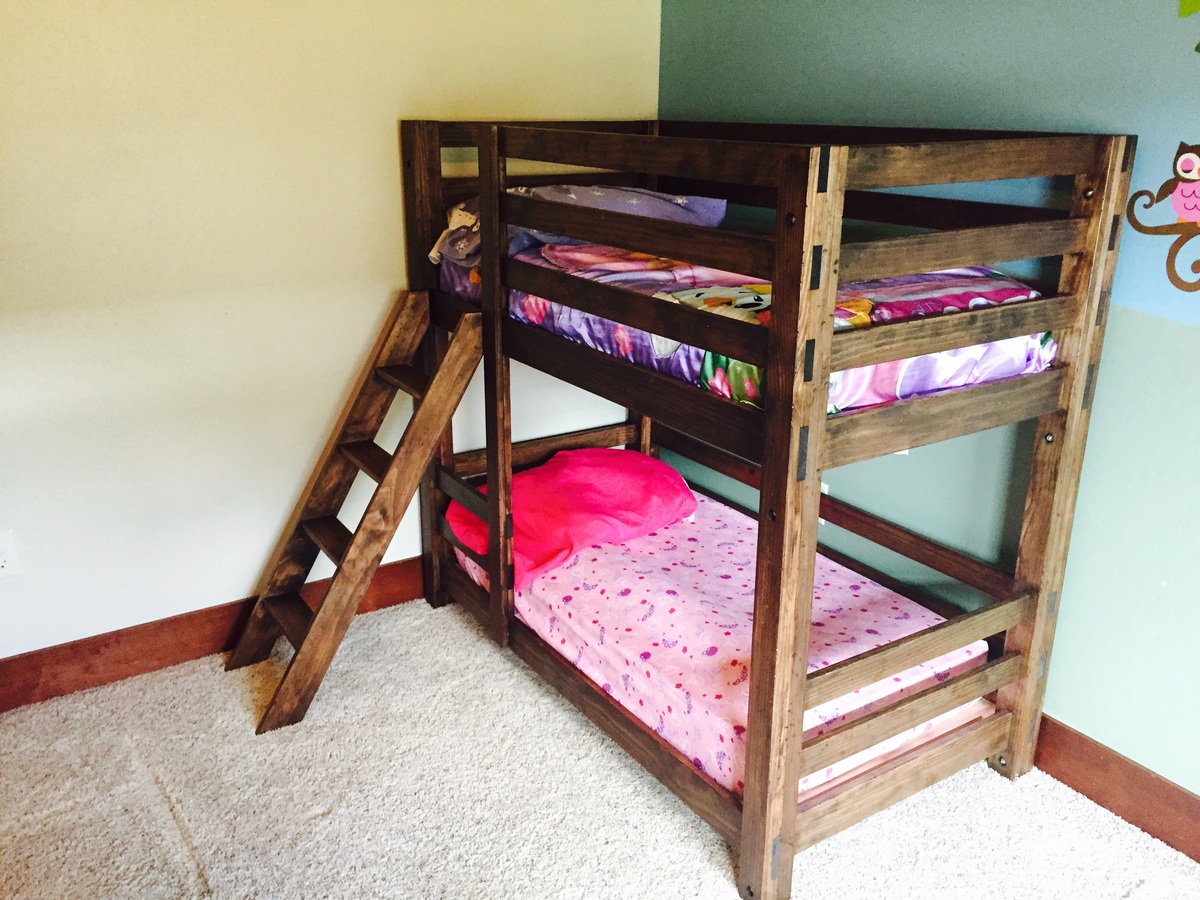
Started with the classic bunk bed plan. Changed most of the 1x4s to 1x3 except the boards at the mattress level. Added an additional rail up top to make safer for my young children. Also added 1x3s on both ends of the head/foot board to make the legs a litter sturdier and to widen the frame as our mattresses turned out to be a little wider than standard. Took out the built in ladder and matched the rest of the rails. Then added detachable stairs to be able to remove during the day and make it easier for my girls to get up and down. Made a few mistakes along the way (when you write 57.5 inches and transfer 52.5 inches to your cut list you eventually have a really bad/sad day), but had a ton of fun!
This great plan!! Thx Ana!
Anna's (the one on the right) new activity table with rolling carts! Rolling drawers are made of 3/4" MDF with 2" casters underneath. The chalkboard frames (found here) were painted with satin finish pink paint, then two coats of glitter Mod Podge. I love how they turned out!!! We added a piece of 1/8" plexiglass to the top to protect it better. The flat top is made of MDF, sides and frame are made of pine and the legs are poplar. Two coats of primer, three coats of semi-gloss paint and three coats of poly. She is sooooo excited!!! Ana's estimate of $50-$100 on her website is fairly accurate depending on where you live, minus the plexiglass. So adding it all up... 3 - 2" x 2" x 8' stud/strips are $1.29 each at HD (total $3.87) 4 - 1" x 2" x 8' Radiata Pine boards are $4.82 at HD (total $19.28) 1 - 49" x 97" sheet 3/4" MDF was about $40 at HD (they rip cut it for me for free) 8 - 2" casters were about $2.50 each at HD (total $20) That's $83.15 plus tax and doesn't include all of the smaller extras like screws, glue, sandpaper, primer, paint and poly. I had most of those already... but it's items like that would easily push the total over $100. The little extras that I did were pricier poplar legs since I didn't like the look of 2x2 stud/strips and the custom sheet of plexiglass $35 at local plastics company. 2x2 studs/strips are fine, but after using them on my sawhorses and painting them, I wanted something more perfectly square (prettier?) for this table.


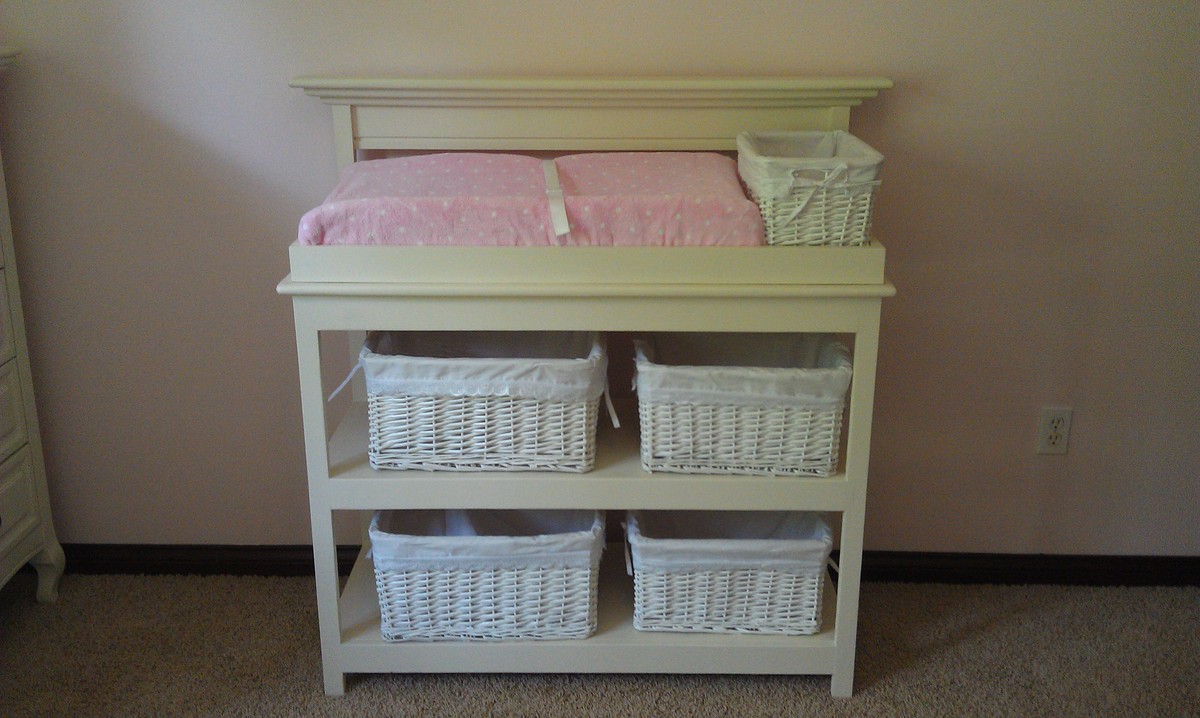
Grandpa modified the simple changing table to match the rest of our nursery furniture.
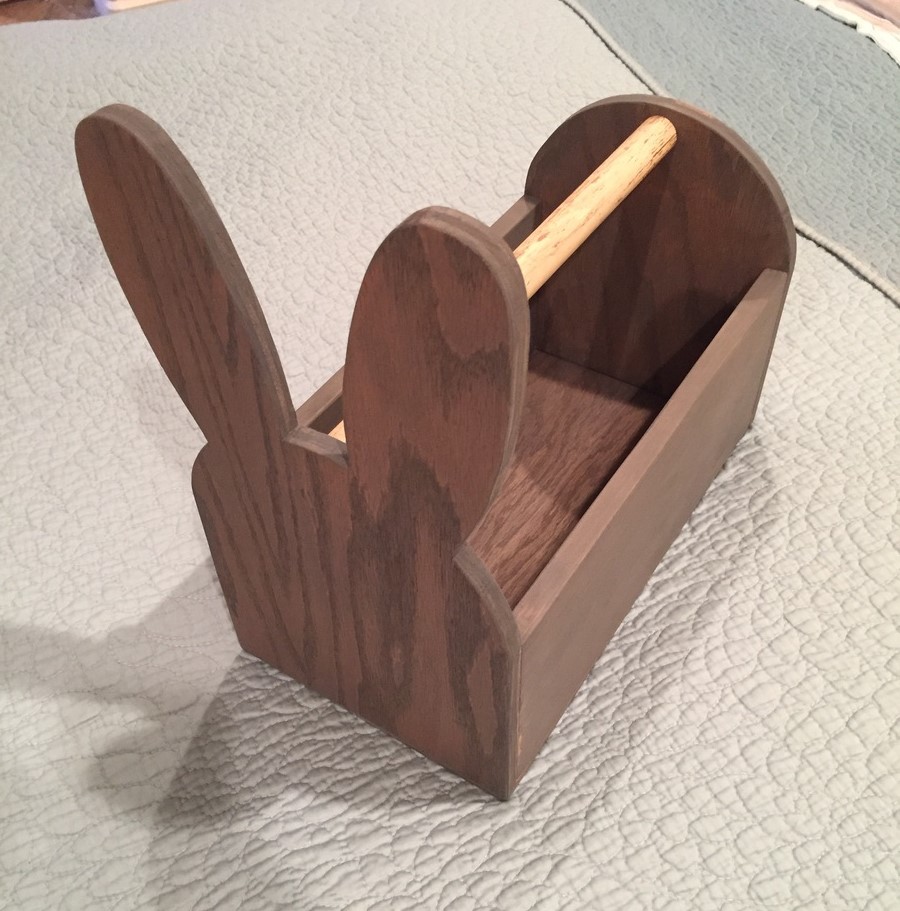
1/2" oak ply, cedar fence post, 1/4 inch oak ply
First brag! I had a little time to play in the garage and decided to join the scrap wood bandwagon. The wife loves the bunny box and now the mother-in-law NEEDS one. Back to the garage I go...

For my son's 4th birthday party, we were doing it at our house and needed outdoor seating, so I took on the task of building 3 Toddler picnic tables and 1 smaller one. Building them was not that big of a deal, but painting all 4 took some time! After the party, we sent 1 to my parents, 1 to in-laws & 1 to my bro/sis-in-law, so only ended up with 1 left over. FYI-the picture on the plan is one of mine, thanks Ana!


Sat, 04/04/2020 - 15:43
I’ve build many picnic tables according to your plans, they all love them.
This is my first DIY project ever. No plans.
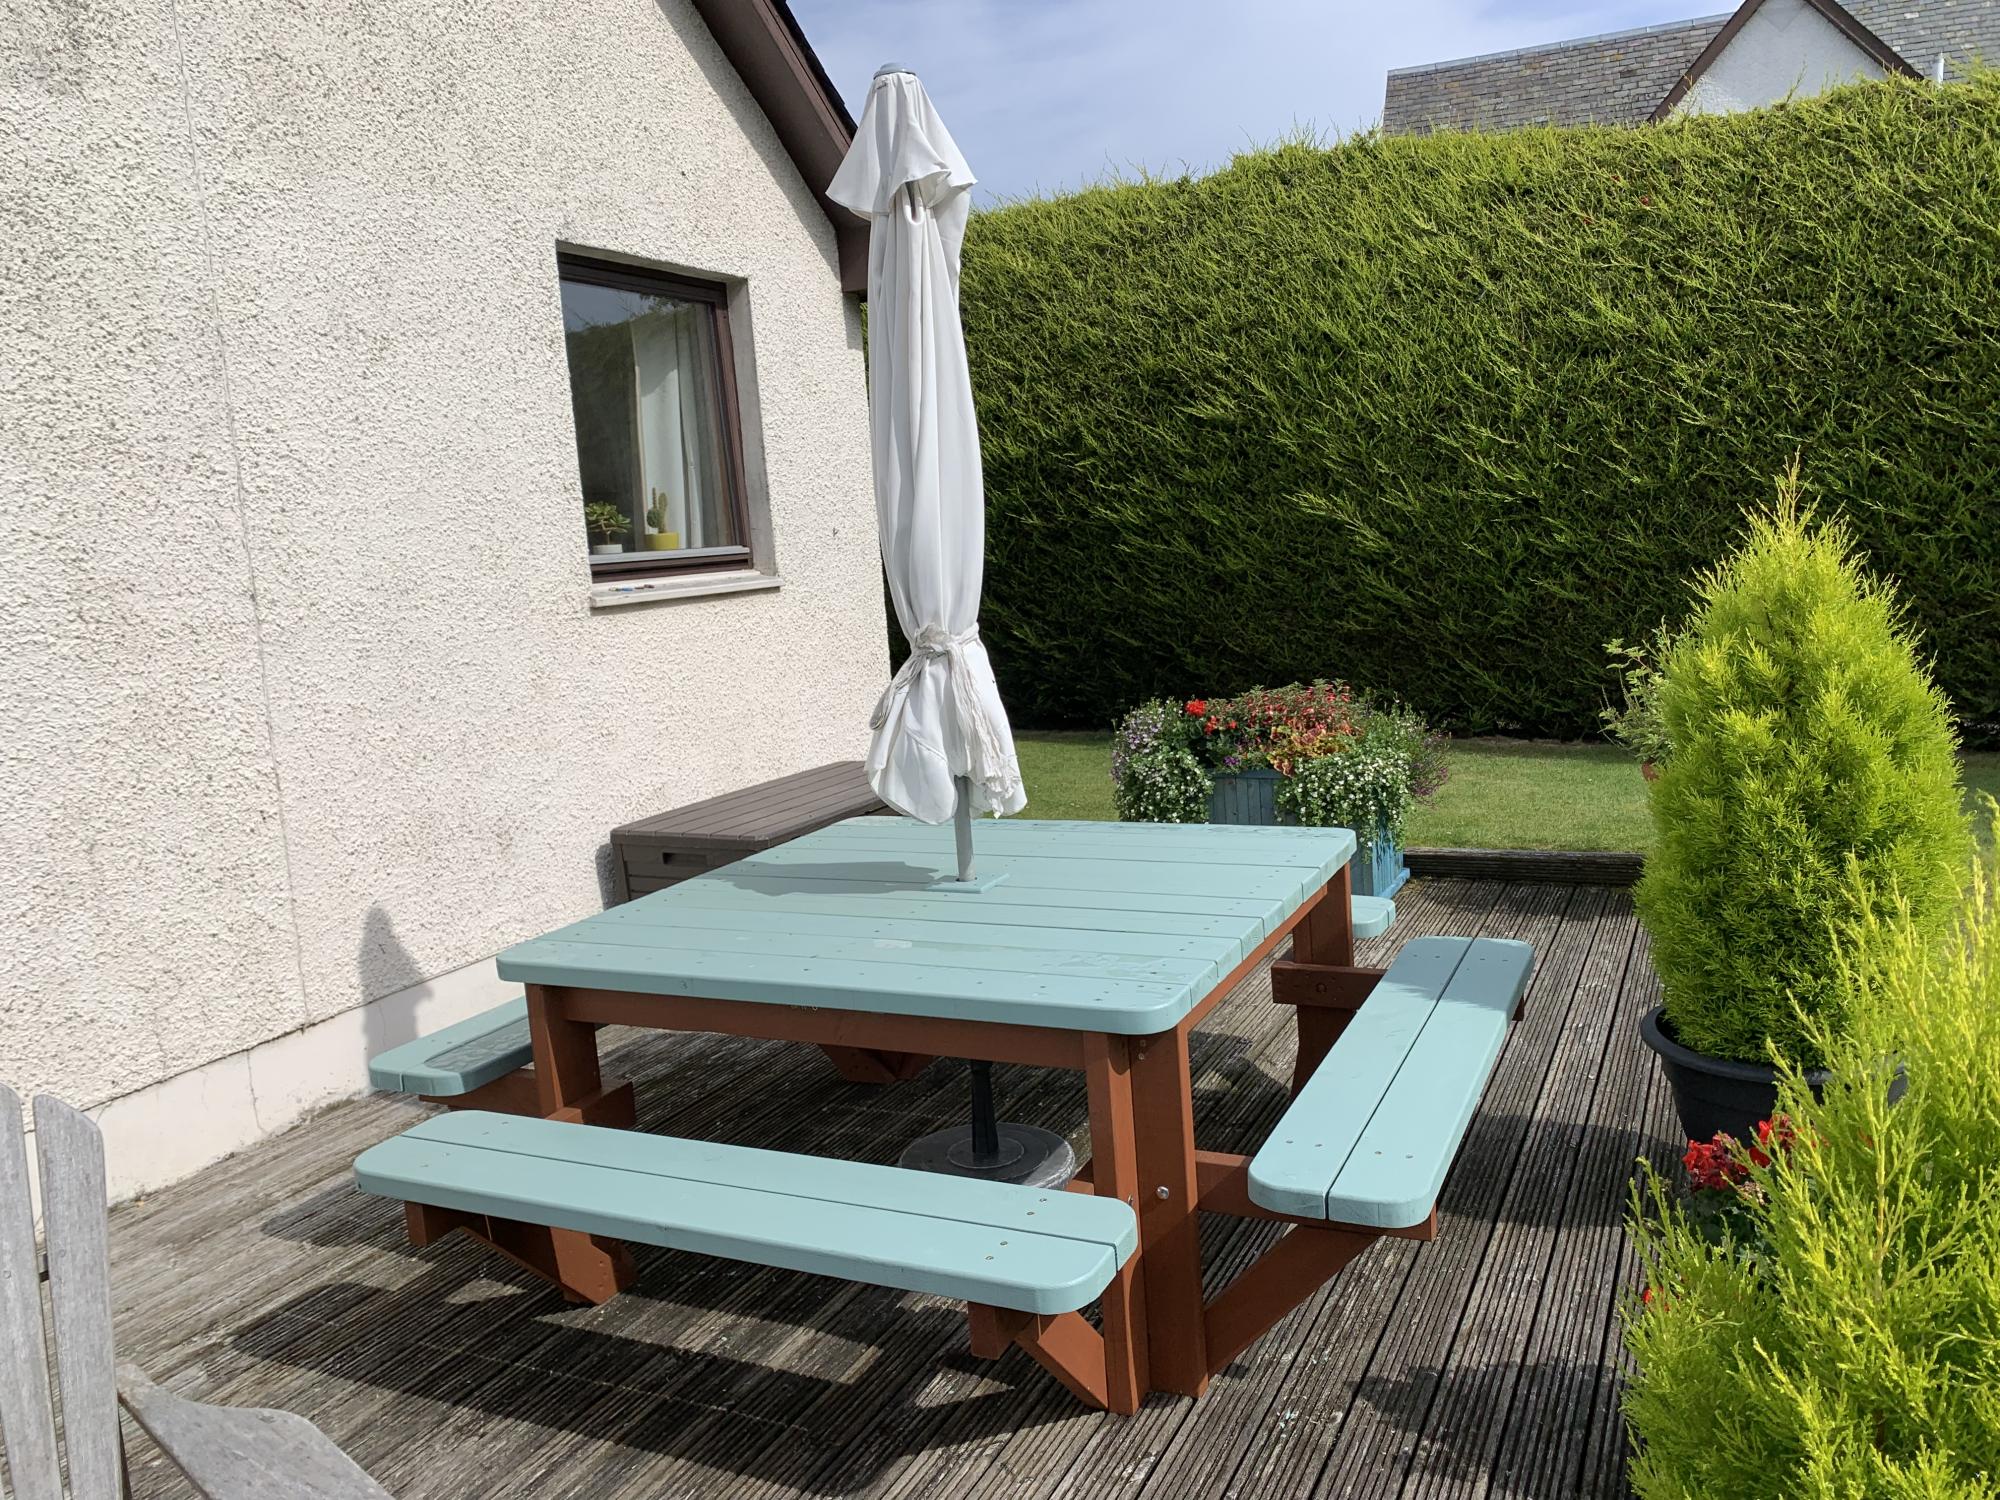
This is a bit larger than Ana’s plan. I added additional support to the table top and added a braced opening for the umbrella. I also went for a more rounded finish by rounding all the corners of the table and benches with my jigsaw and then sanding to create smooth curves.


This was the first good-sized project I built by myself. I finished it more than 4 months ago and it still makes me smile every time I look at it. :-) A simple, functional and BEAUTIFUL shelf that will work anywhere and for anyone! I was so impatient for it to be finished I didn't put poly or any clear coat on it and I'm still in love!
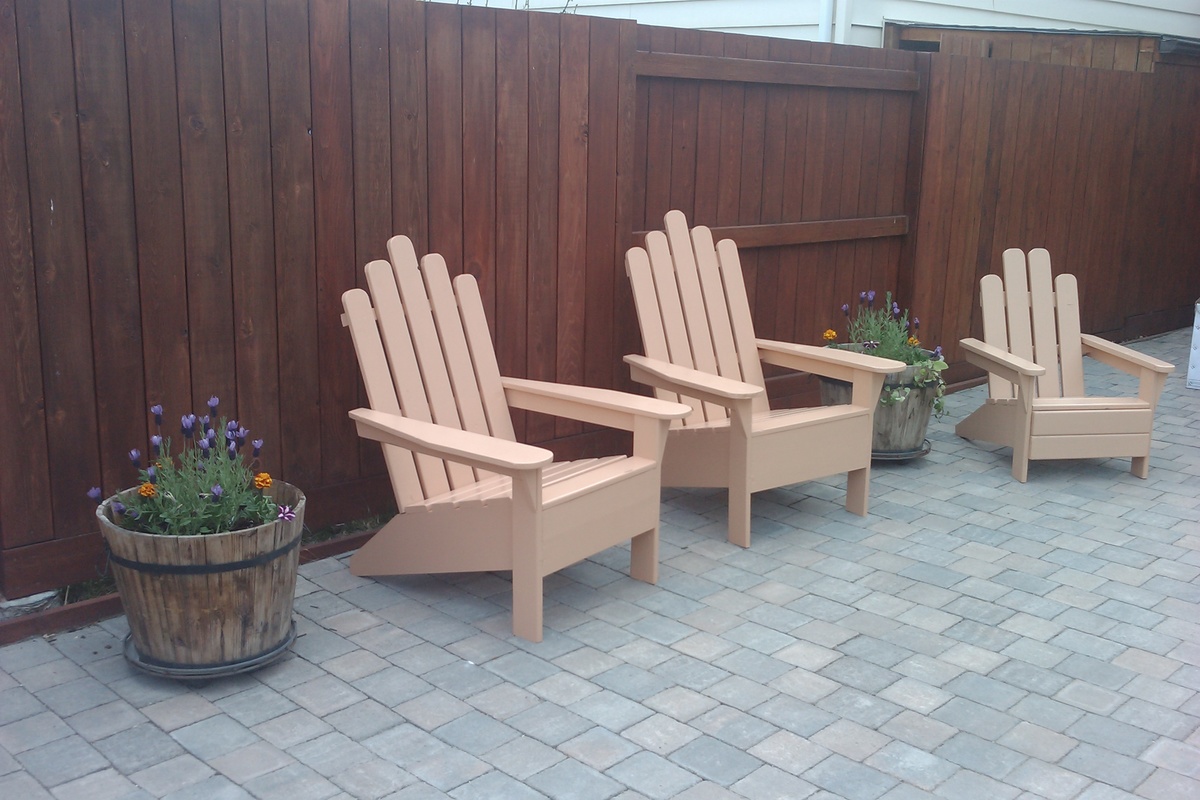
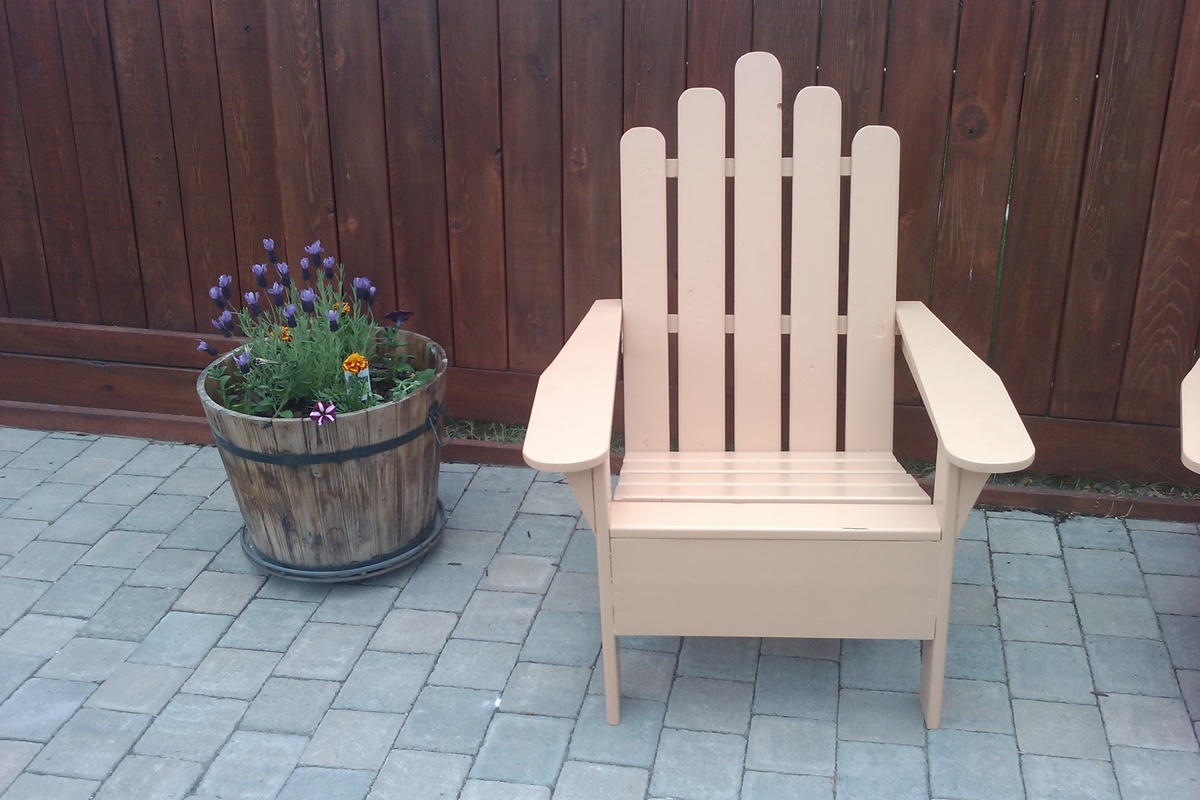
Built three Adirondack Chair, got the dimensions from Ana's Adirondack Chair and modify dimensions for the smaller chair for my daughter. Used ceder and pine. Cost about CDN 40 per chair. Specially I would like to thanks Ana giving information about simple but beautiful furniture designs.
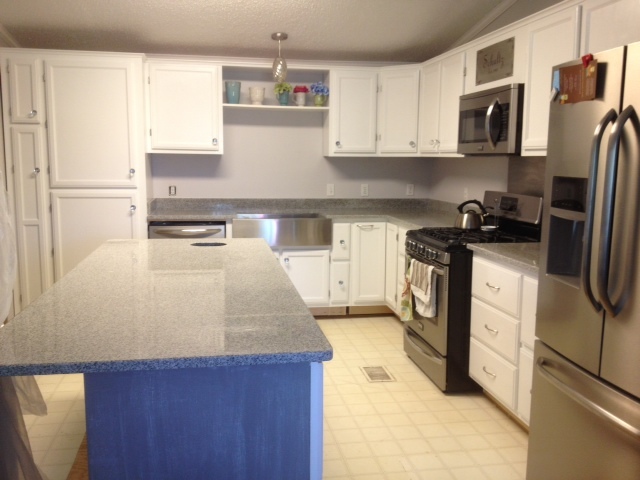
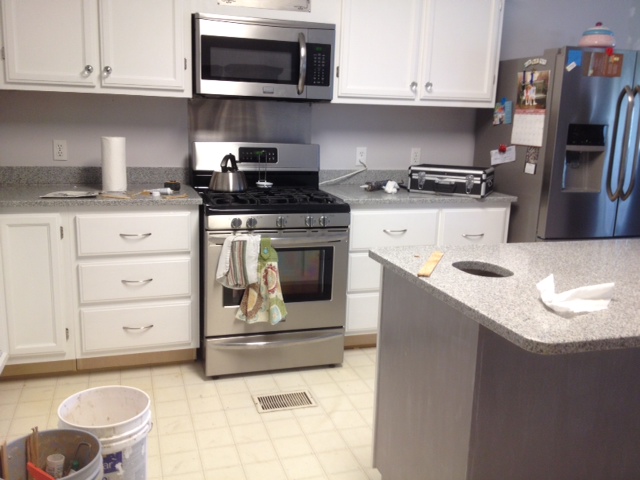
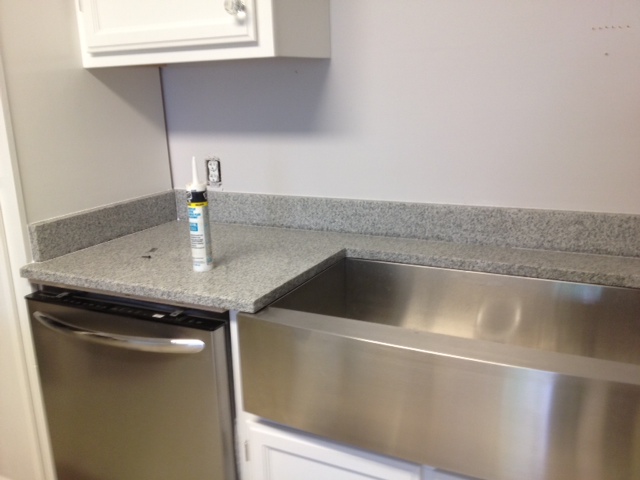
Here is a pic of kitchen cabinets I built using Ana's plans.
Tue, 04/07/2015 - 11:40
If you lived near me, I would hire you. If you can do this, your funk tire buying days are over ! Awesome job!
Mon, 05/04/2015 - 12:00
Thank you, this was my first Kitchen remodel. I am not sure if I want to do this for hire. I may just build the cabinets but not sure if I want to install anymore.
Mon, 05/04/2015 - 12:03
I still have to install the back splash and flooring. Going with a knotty pine flooring. I will distress it and I am going to install vintage Common Rose Head nails at the butt joints of the flooring.
I made this project for a friend. It was very important to get straight boards for the back in order to make everything square. Let me know if you have any questions!
Farmhouse table


Comments
Ana White Admin
Tue, 10/05/2021 - 12:02
WOOHOO!
That is gorgeous, you did it! Thank you for sharing:)