
Happy Monday!!!
Can you believe we are just over a month into building and have gone from this -
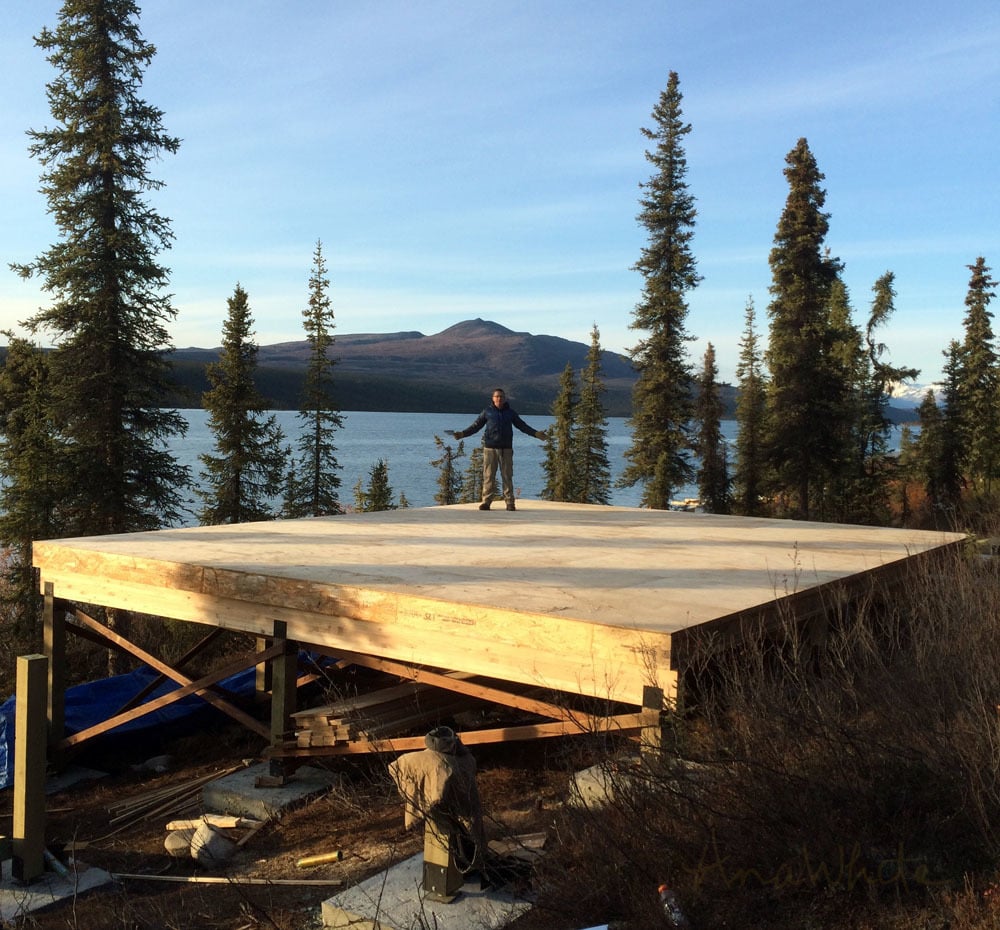
Into this -
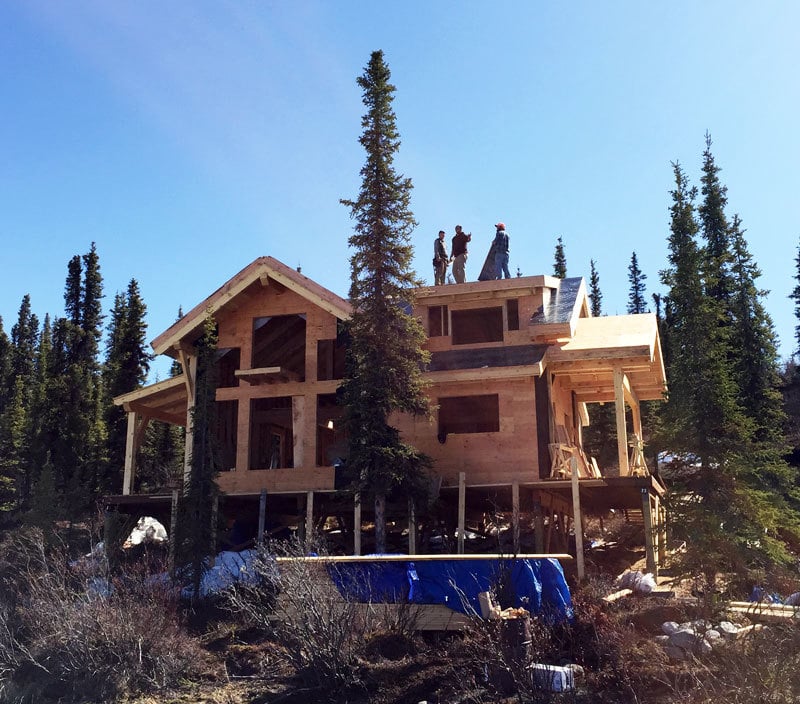
I can hardly believe it myself!
We've been working long hours, and we've got help - two of my husband's friends (pictured on the roof with Jacob) and our Uncle Bill have been vital to progress, and my sister has been babysitting when she can.
But a big part of the reason this cabin has gone up so fast is we spent a couple of months prepping back home in the garage the timberframe structure.
After college, I went to work in the Silicon Valley in the high tech industry. I hated my job. I would sit in my office and stare out the window at the gardeners, envying them as they worked on the flowers below. Having a good job in computers was supposed to be the good life, but I found myself lost and loathing going to work everyday. So one day, I put in my two weeks notice, packed up what little I had, and spent the winter in Breckinridge, Colorado with my sisters. It was here in Breckinridge that I first saw a timberframe home. I was in awe of the soaring ceilings, the heavy beams, the rustic character. And the wood. The wood, the glorious wood beams! I knew right then and there that someday, my dream home would be a timberframe home.
All these years, although never being able to afford a timberframe, it's always been my dream. So when we went to design this cabin, I brought up the idea to Jacob of a timberframe for our cabin. Jacob hadn't had any prior experience with timberframing, as it's not something that is done commonly up here in Alaska. It was a hard sell, convicing him that not only is the timberframe beautiful, but also structurally sound and efficient. He had lots of technical questions, like how do you possibly create a seamless vapor barrier with the beams running from interior to exterior? But after tons and tons of research, he was on board.
Since neither of us have any working experience with timberframes - and my only experience was walking inside one more than a decade earlier- we decided to take my cabin design to a timberframe engineering company and have them create shop drawings that we could work off of and cut the timberframe ourselves from locally grown and milled beams.
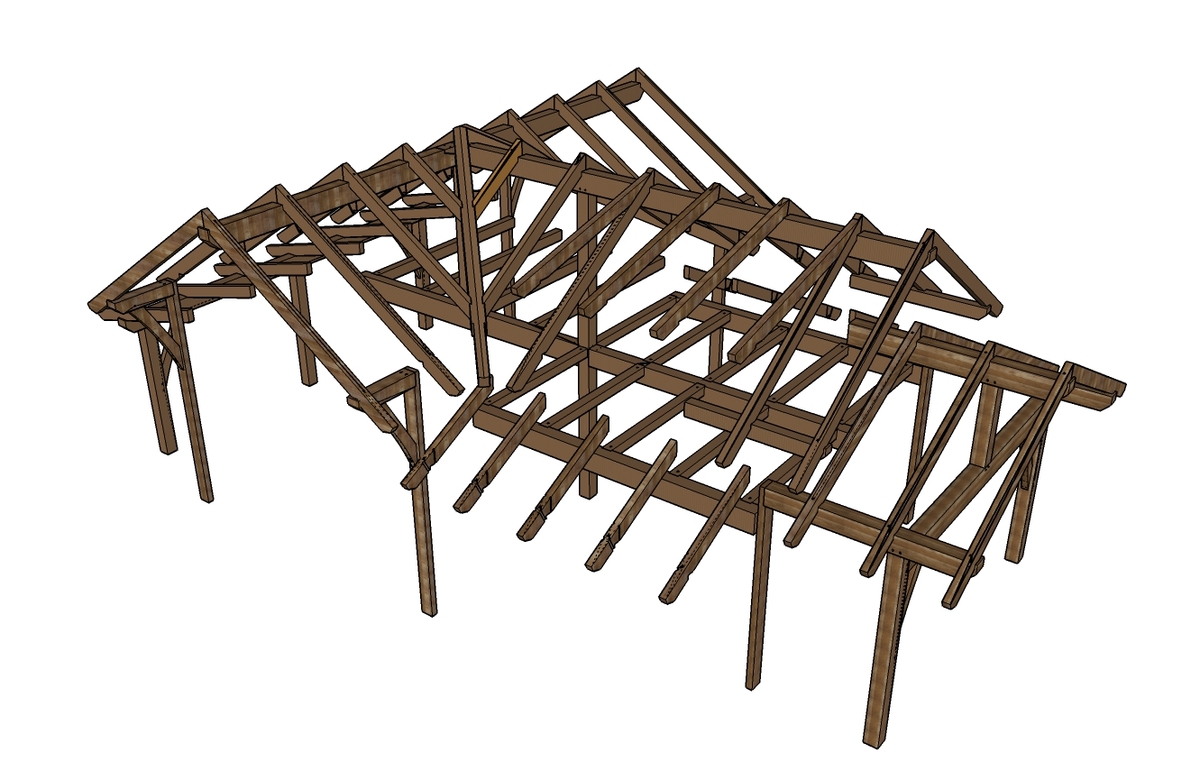
This is what they came up with.
I'll admit to you that despite both of us being carpenters, we were very intimidated. We even had the timberframe company give us a quote for purchasing the precut timberframe. And despite the quote being $25,000 more than going the DIY route, we both though long and hard about either scrapping the whole timberframe idea or figuring out a way to buy it.
But in the end, we decided to just go for it. Since we'd be filming this project for DIY Network, neither of us felt right about passing someone else's work off as our own. And we both wanted locally harvested and milled wood.
We spent about $5000 on Alaska Sitka Spruce, grown and milled in Alaska. We had to make two trips, about 300 miles each way to pick up the beams.
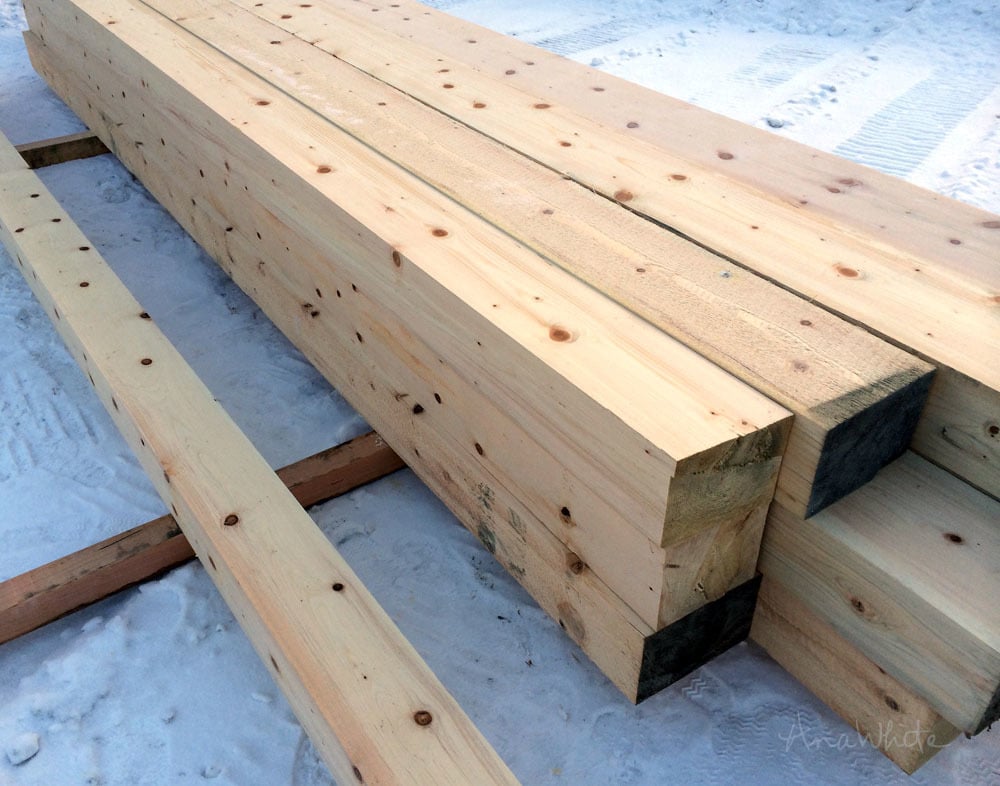
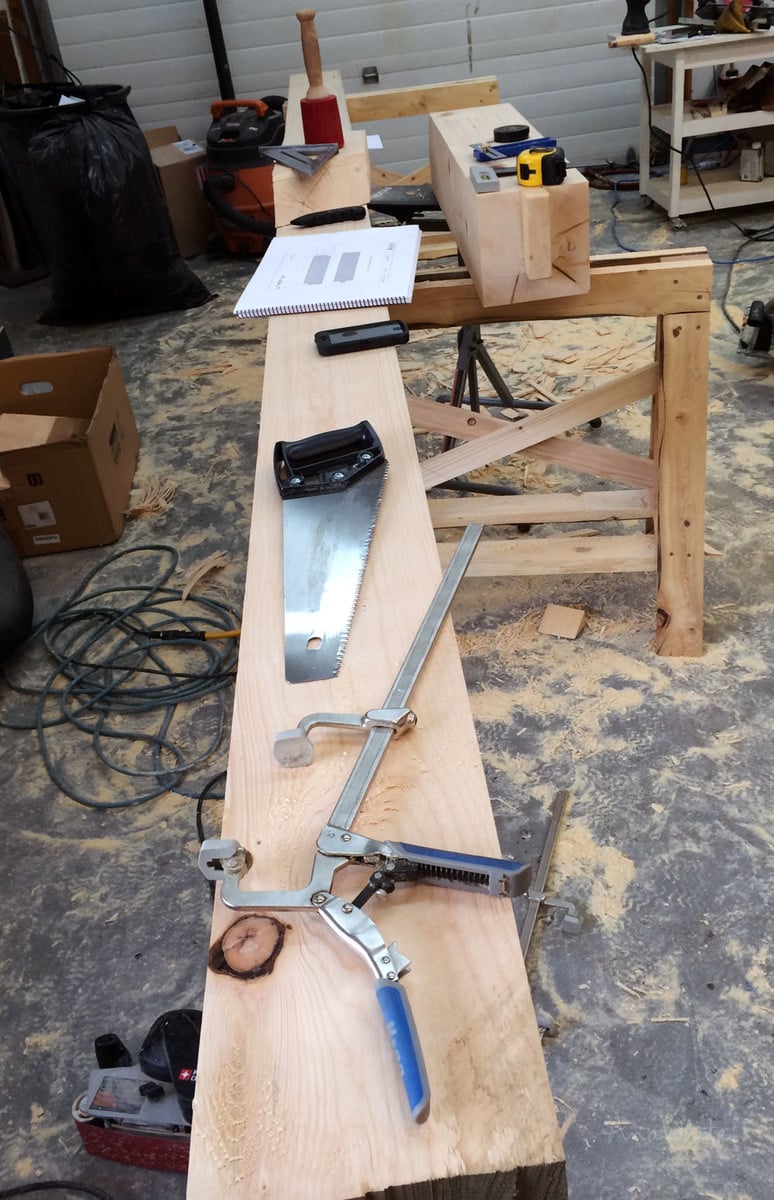
When the beams arrived in the yard, the first thing we did was label each beam for where it would go in the cabin with a number.
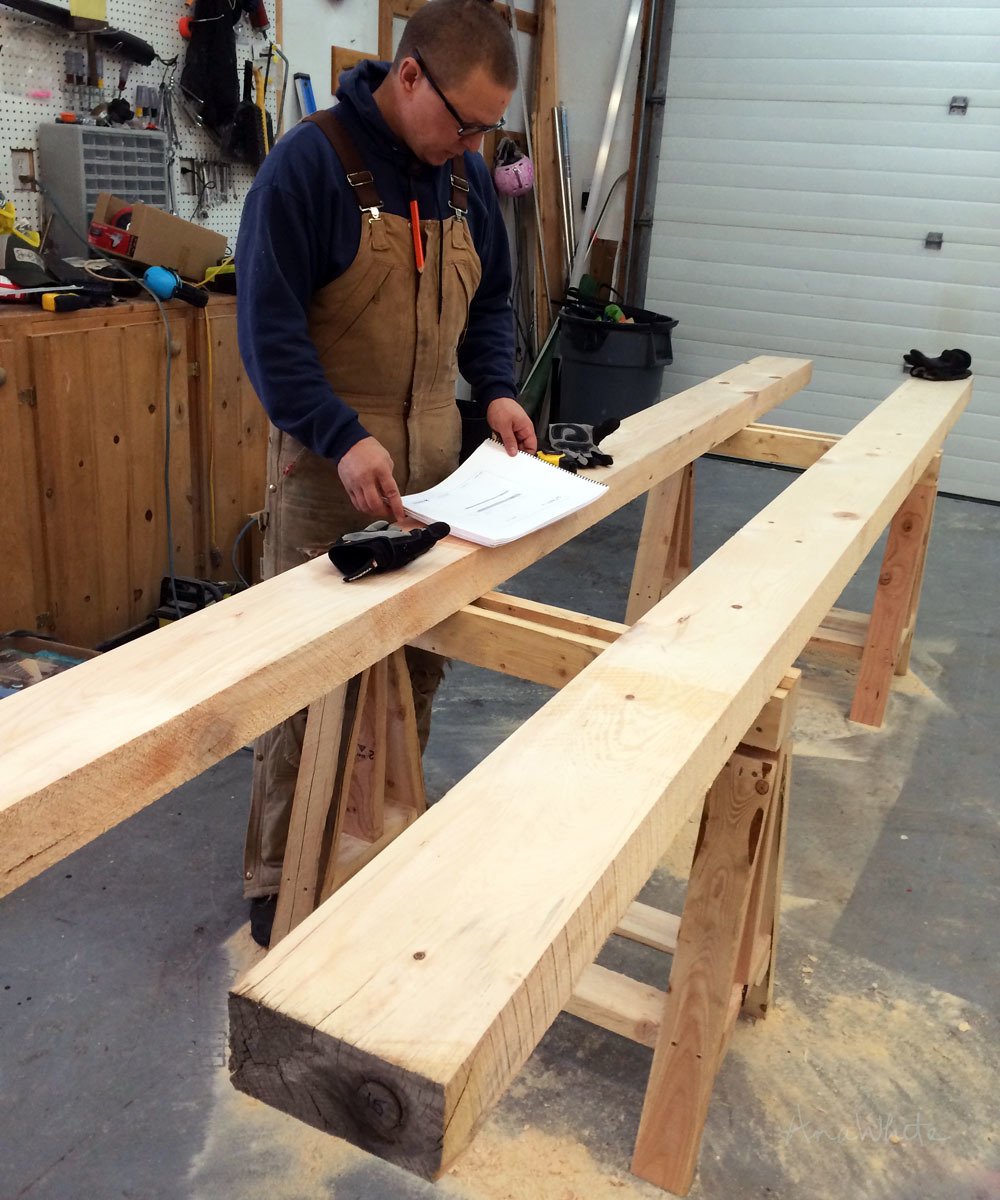
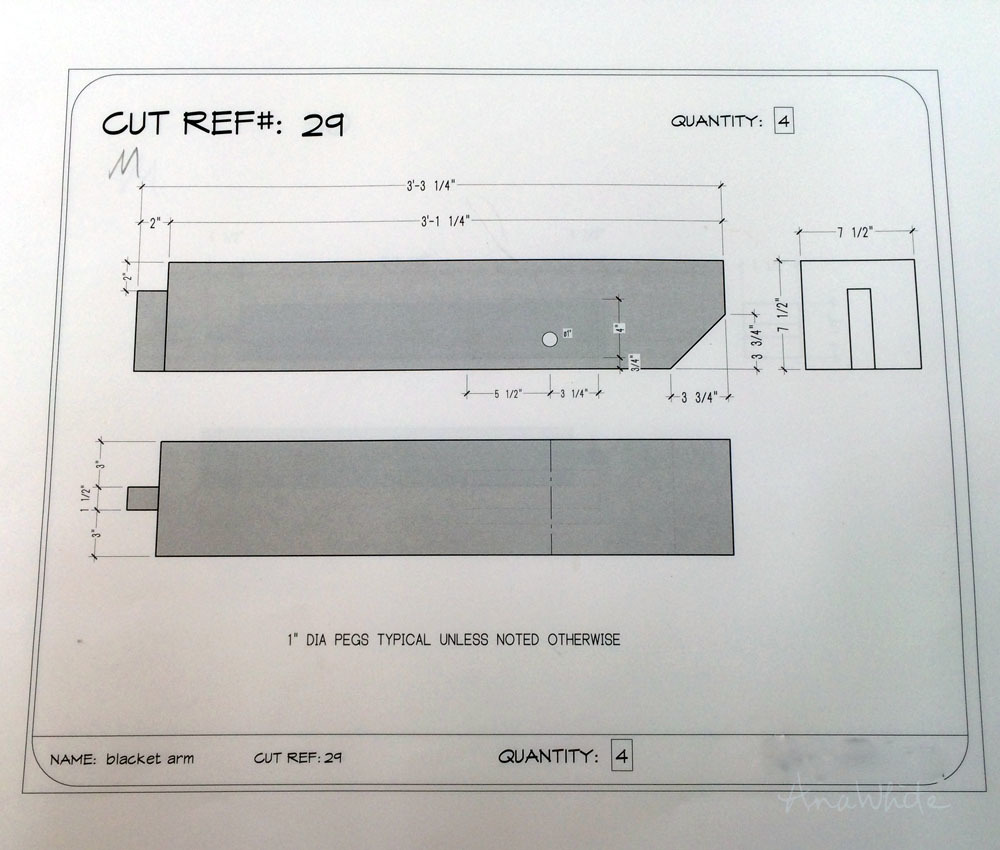
The timberframe company provided us with drawings for each beam, labeling each cut that would need to be made. The drawings are all two dimensional, so it took us a bit to figure out how to read the drawings and transfer them to the beams.
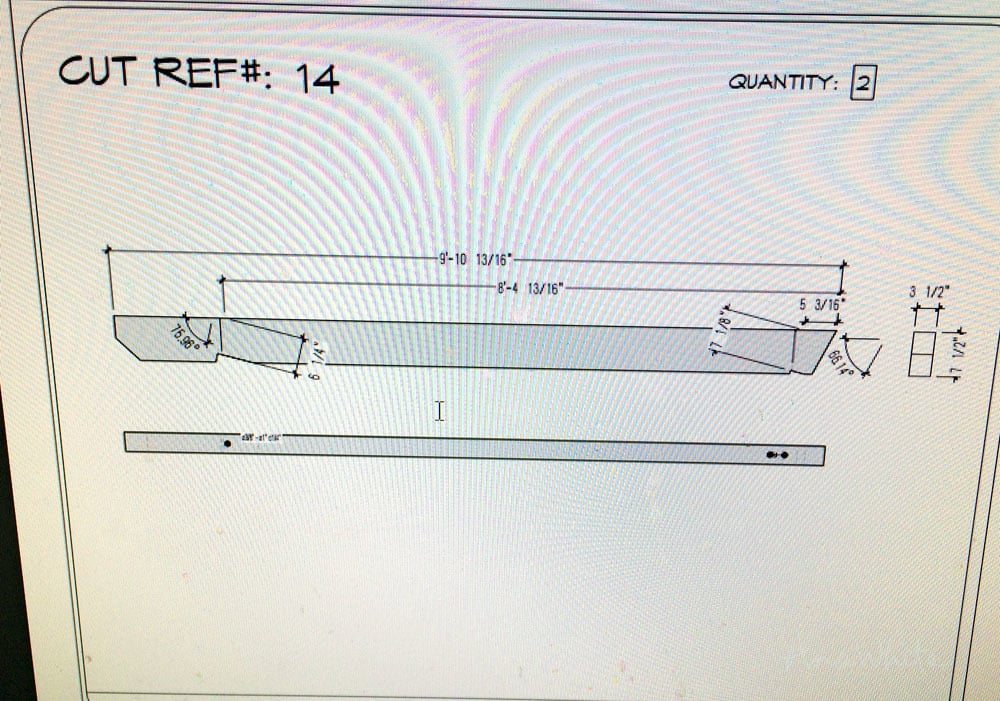
Here's a rafter drawing. The rafters are pretty simple, just the top angle cut, the two birdsmouth cuts where the rafters sit on top of the beam and wall, and the angled cut to dress up the tail a little. Let's not forget that the rafters are all 3-1/2" thick, so all the cuts had to be finished with a had saw.

The rafters went pretty quick, and made up the majority of the beams.
But now comes the hard part.
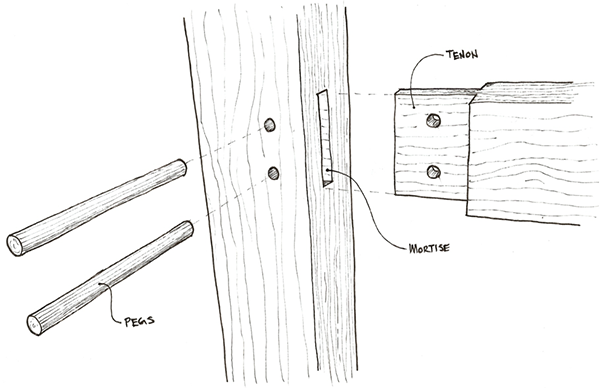
For the two covered decks and the main support beams, we would need to cut mortise and tenons to join the huge beams together. Later on, the joints will be finished with wooden pegs, locking everything together.
Cutting the tenons is not hard. We just set our circular saw to the depth of the material to remove, and made parallel cuts into the material about every 1/4" and used a chisel to remove the material.
It's the mortise that took the time. The mortise is the hole cut in the wood.
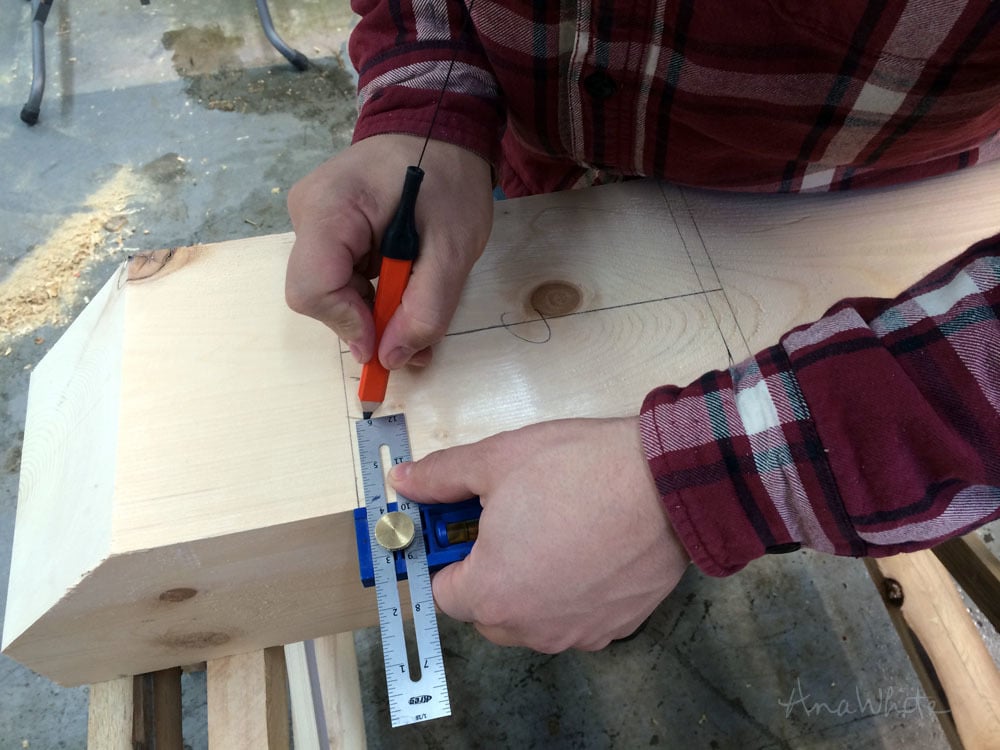
The first thing we did was mark out the center of the beam and work from there. This little Kreg Multi-Mark tool was used over and over and over again.

Since our beams are rough cut from the mill (we hand planed them down), some of the beams could be off in width by a little. So we centered everything.
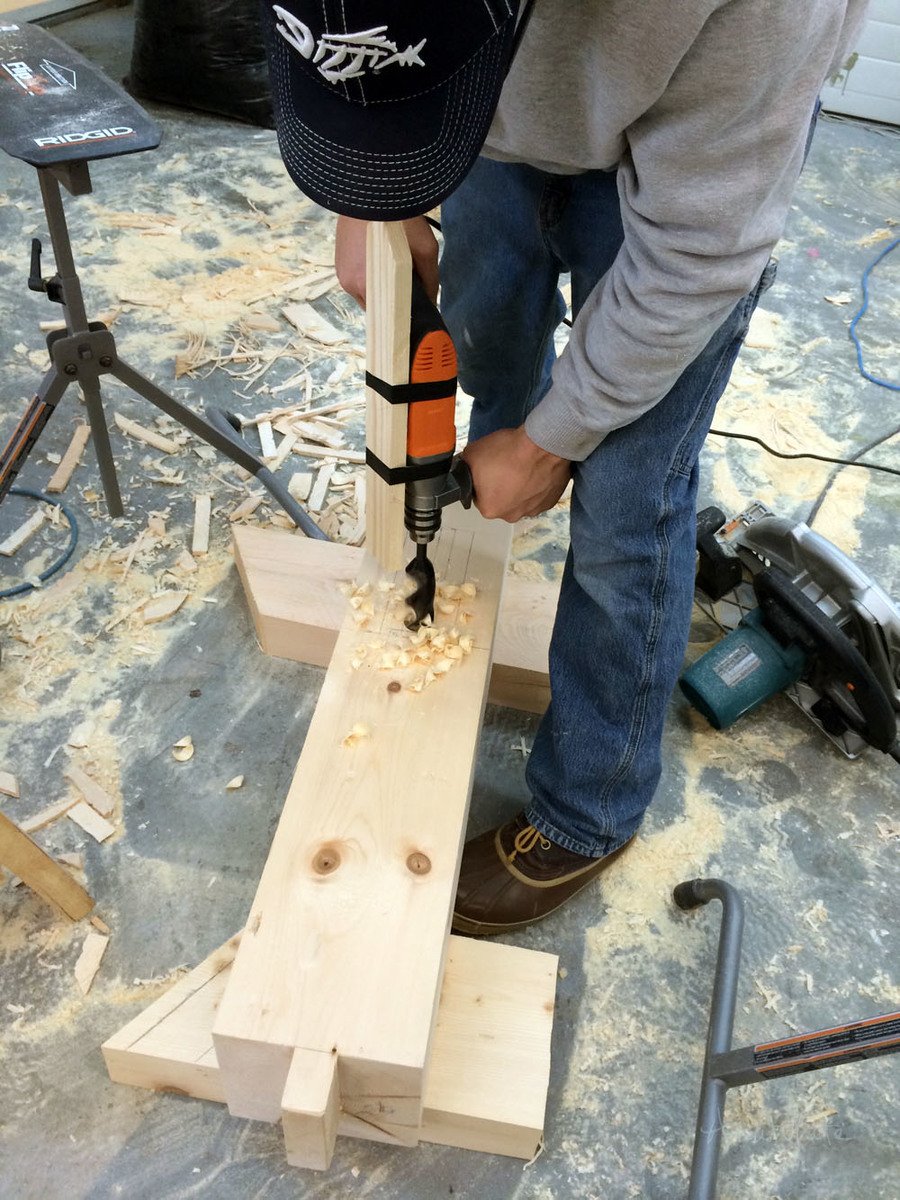
For some of the mortises, we were able to just use a large drill bit, and drill the material out.
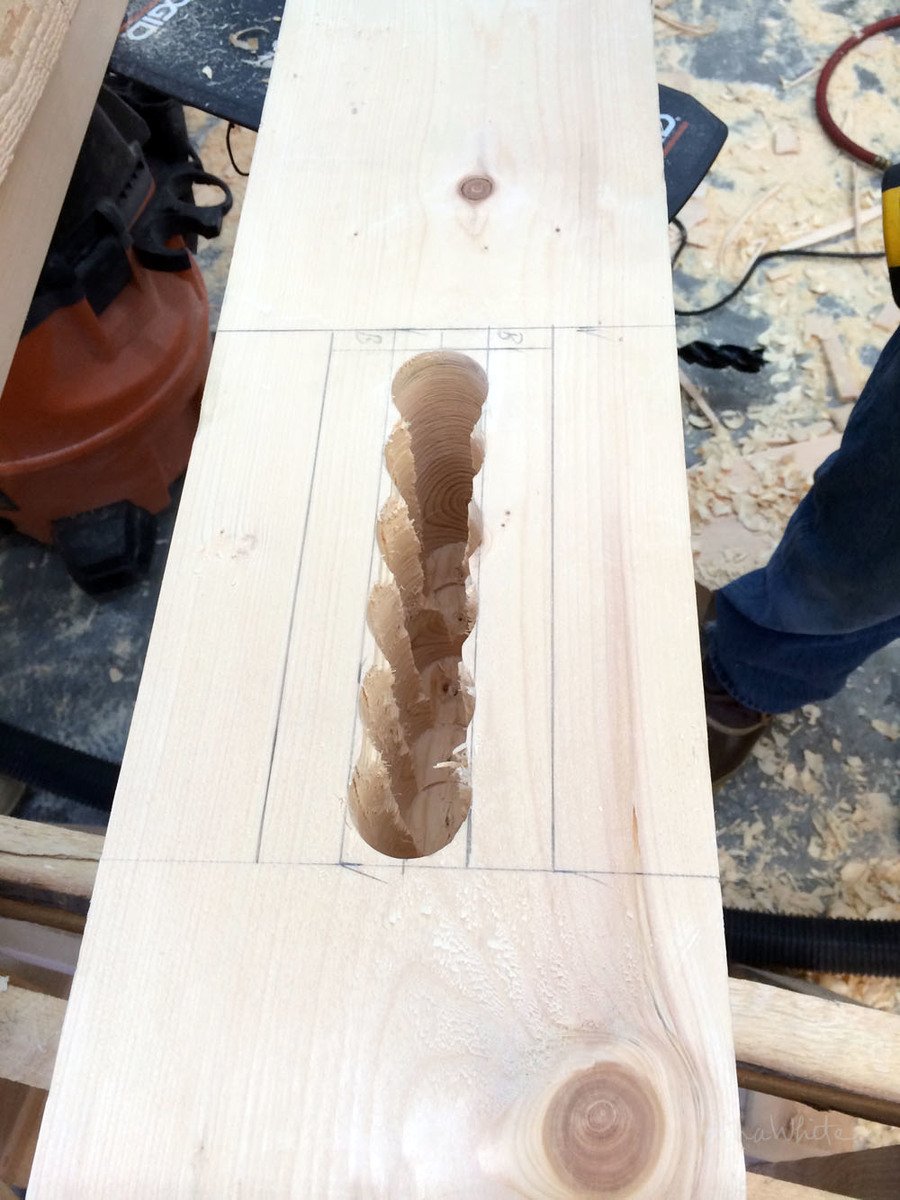
Then we can just finish up the edges with a chisel.
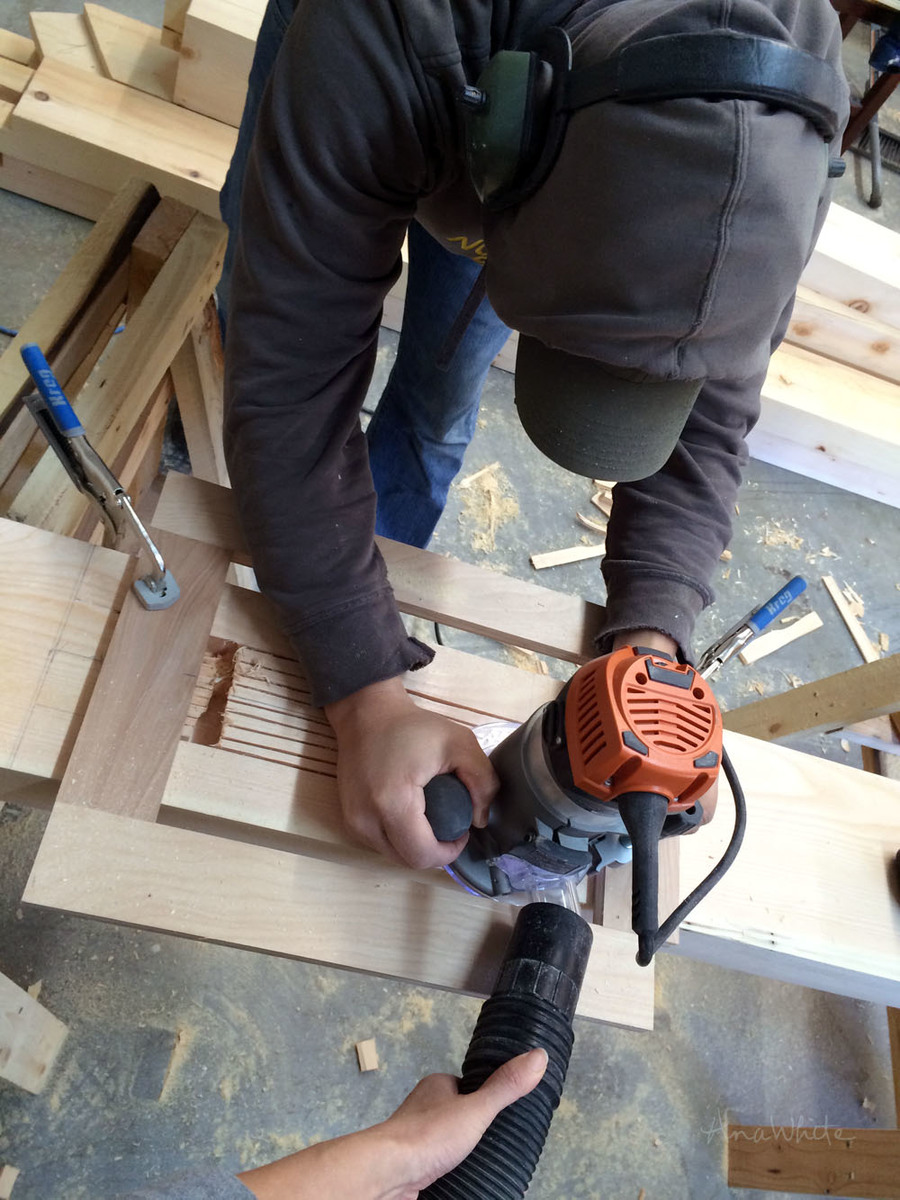
But for mortises that were not as deep, we tried alot of different things like cutting with a circular saw (as we did with the tenons), but since these cuts had to be with the grain, it did not work so well. Finally we invested in a router and routed out the shallower mortises.
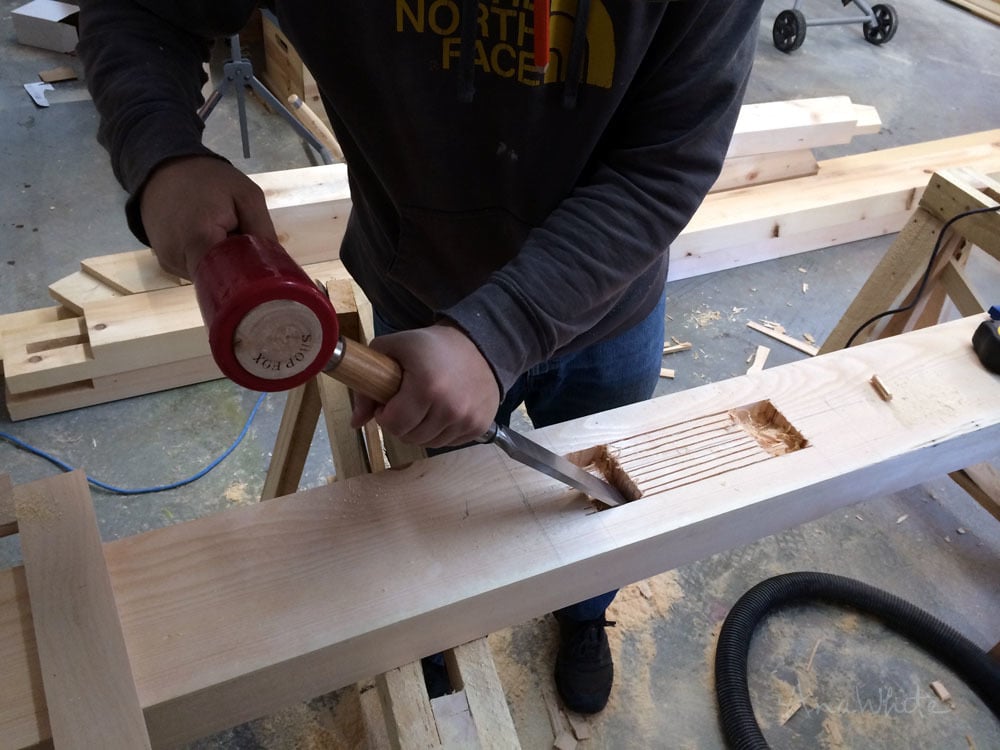
All of the cuts had to be hand finished with a chisel.
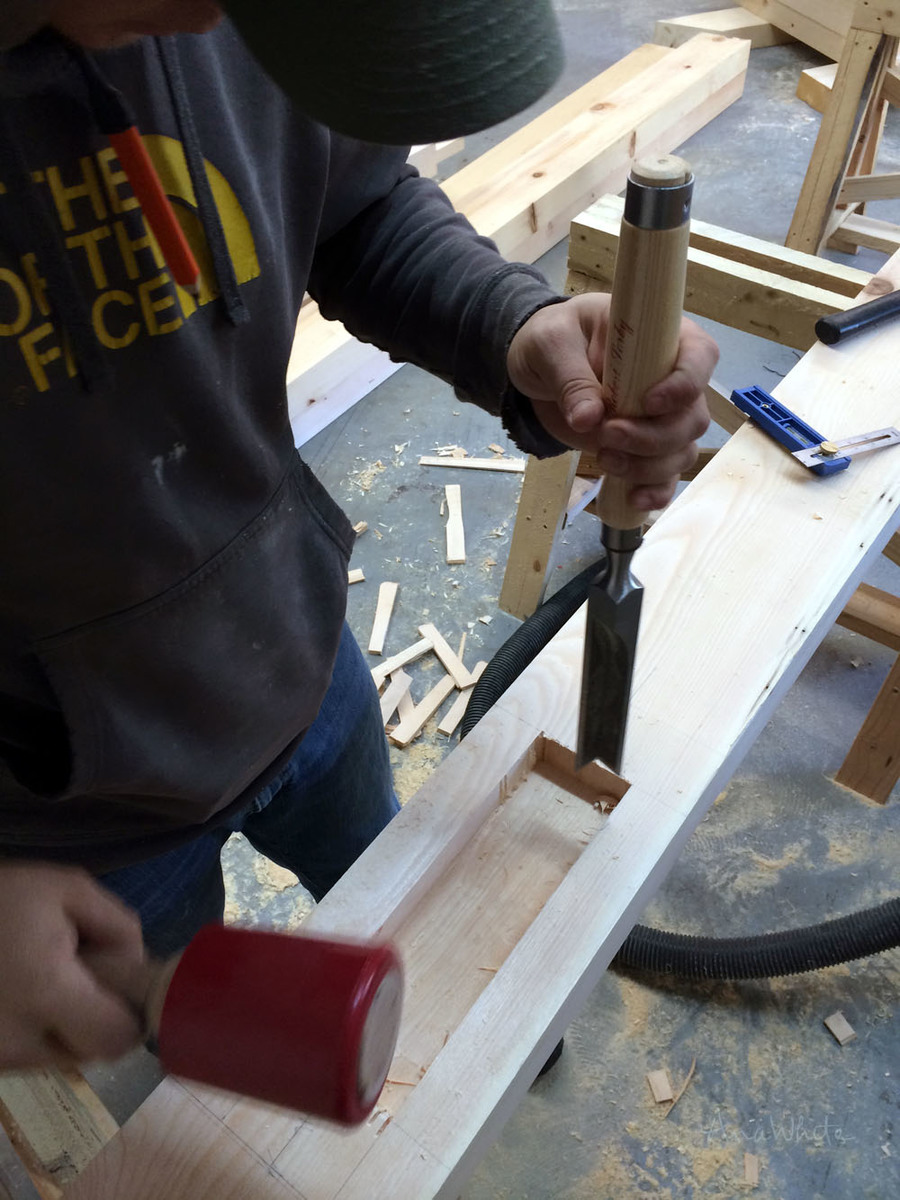
These chisels were expensive - upwards of $100 a chisel - but cheap compared to purchasing a mortiser. Maybe someday we will invest in a mortiser, but for now, we made do with the tools we had, only purchasing a few new tools.

Some of the mortises had to be chiseled at an angle. We cut scrap wood at that angle and used it for a guide when pounding out the mortise.

Jacob did the great majority of the timber work. I helped out on a few of the joints, and I can tell you this - this is not easy work. Although he won't admit this to you, I know Jacob's hands were hurting from the weeks of hand chiseling each and every beam.
Not easy, but worth it.
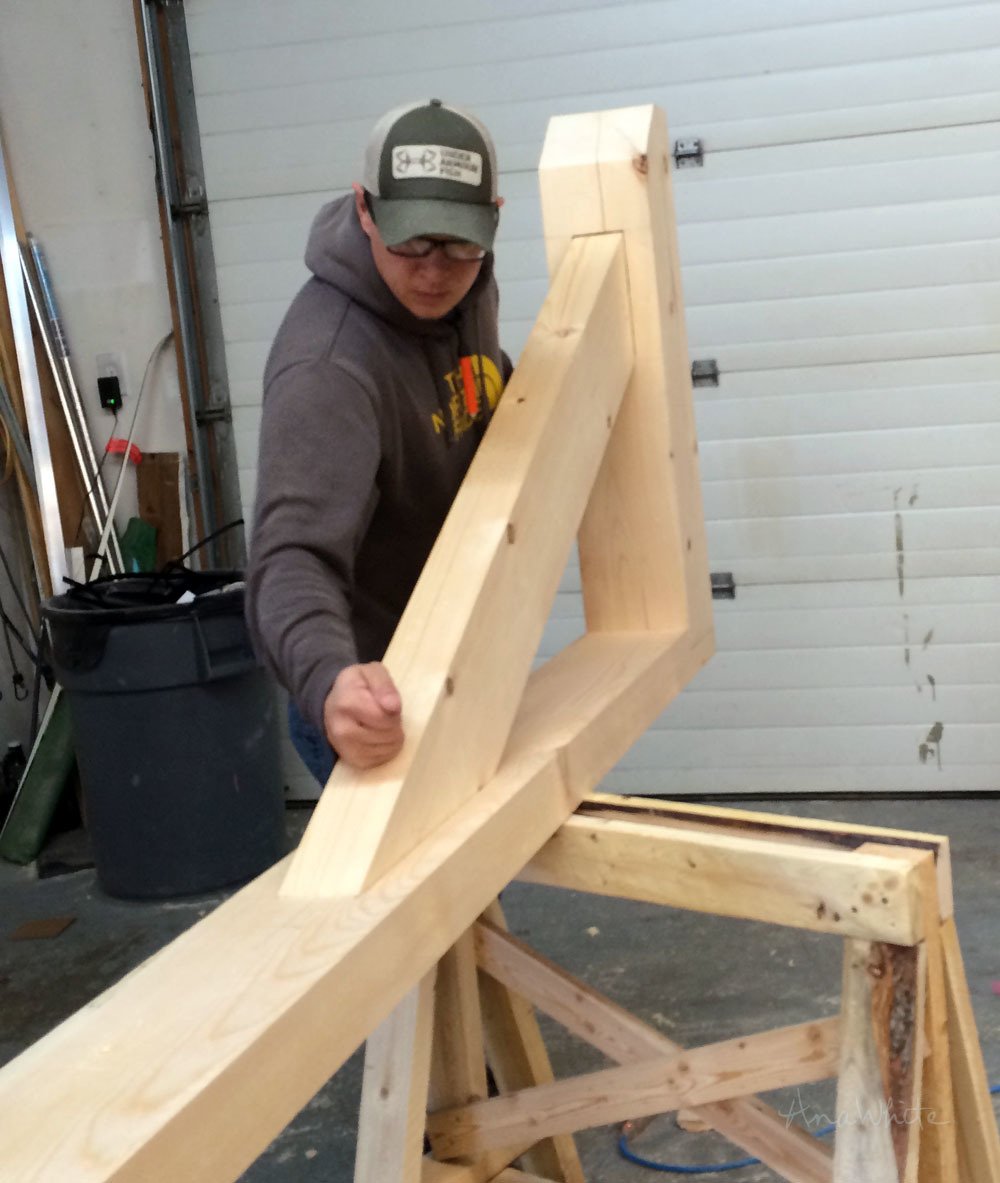
Hardwork does pay off. You can't imagine the sense of accomplishiment we both felt when we dry fit pieces together and got our first taste of what the timberframe would look like. These exterior overhang supports were alot of work - taking us several days to create - but so worth it.
But things would even get harder.

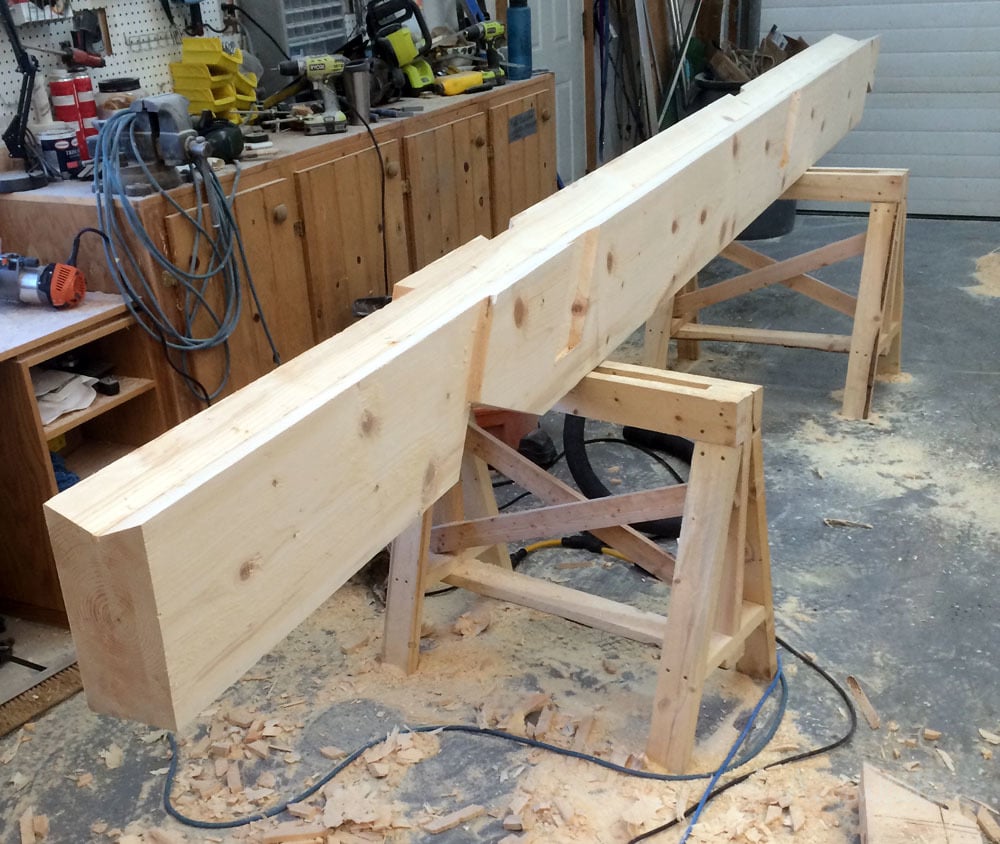
Giant beams make up the upstairs loft floor and the ridges for the cabin. The beams are so heavy, I couldn't even budge them. To move the beams, we had to put my end on a rolling caster plate. Of course when you are workign with that big of a beam, just cutting it is difficult -
But cutting this? This was Jacob's very first scarf joint, on his very first timberframe project.
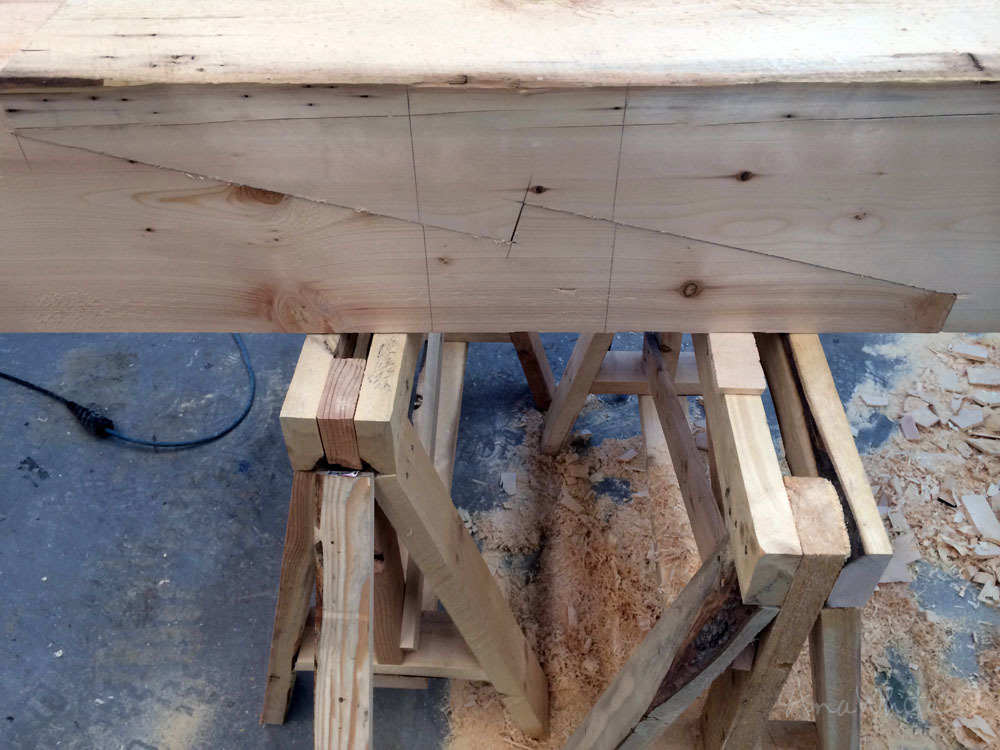
I was beyond amazed.
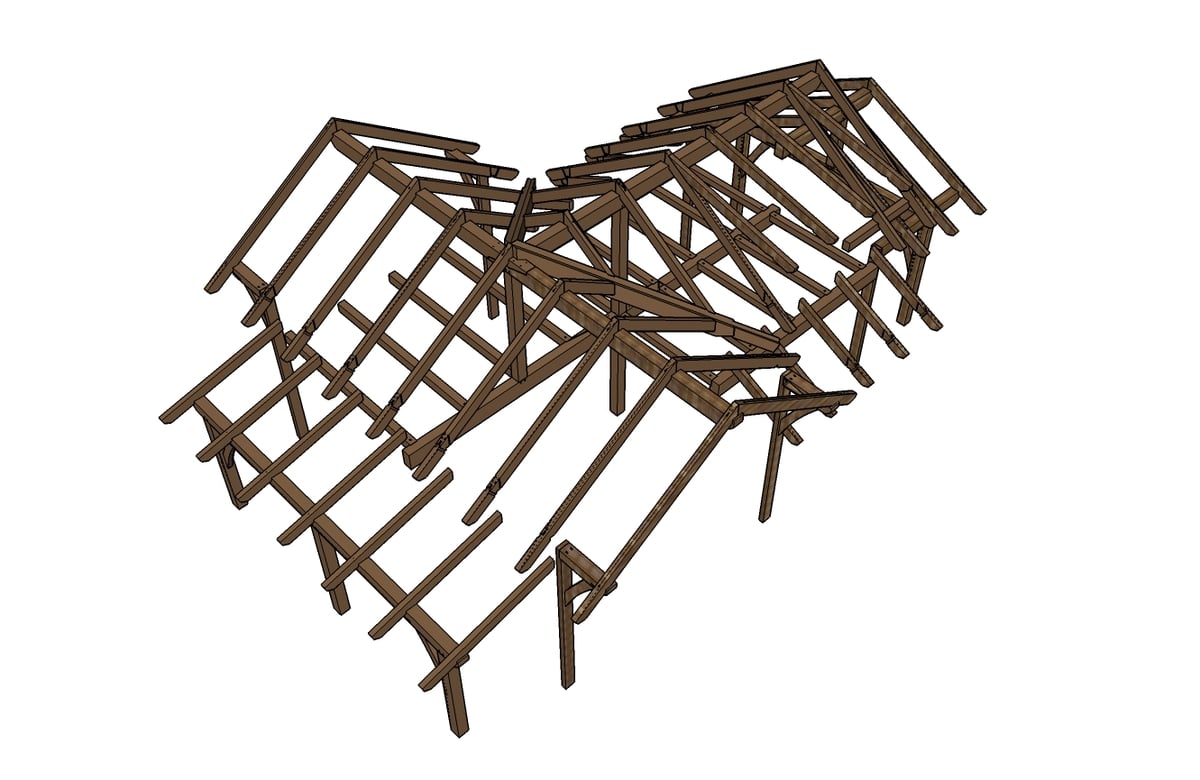
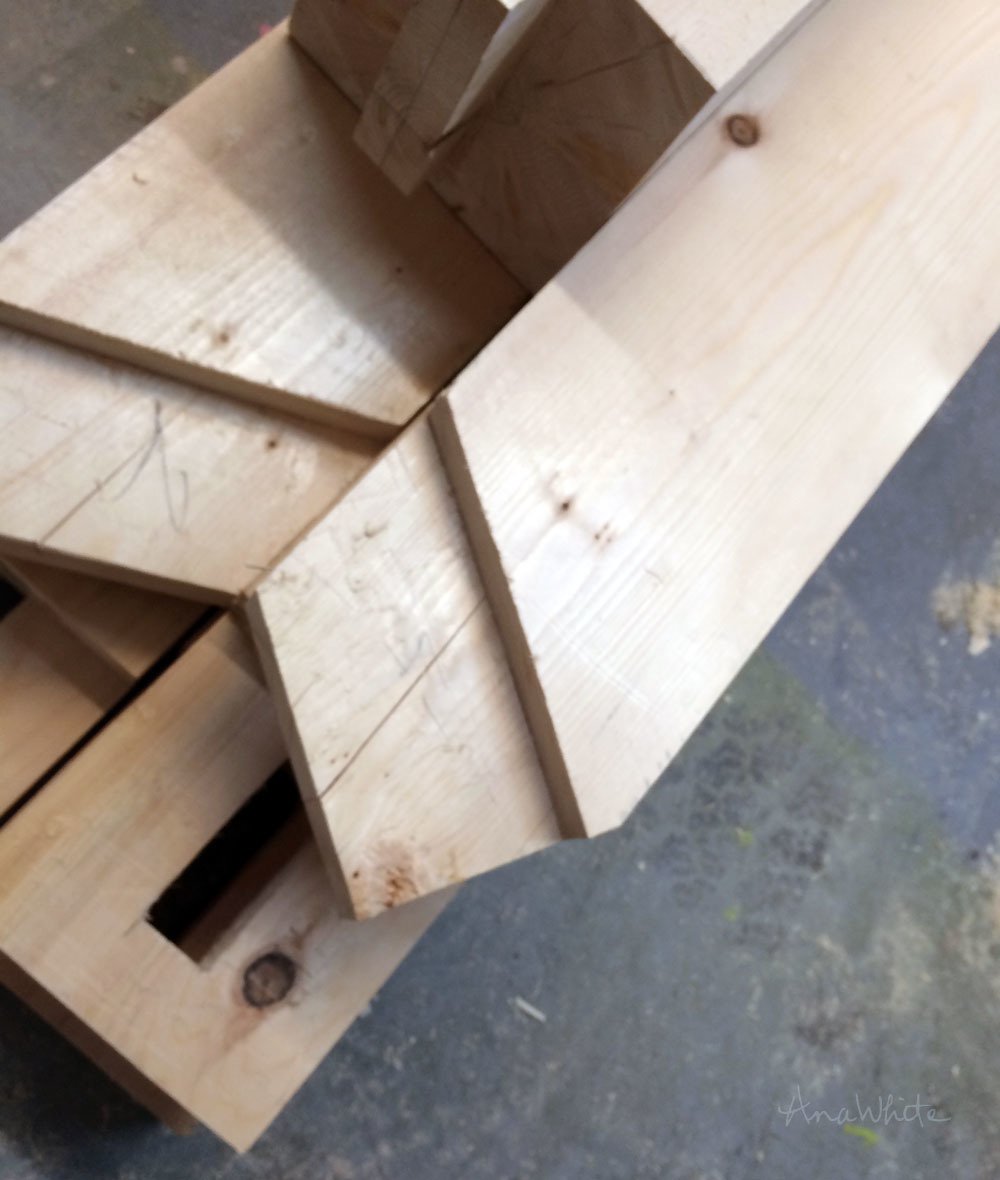
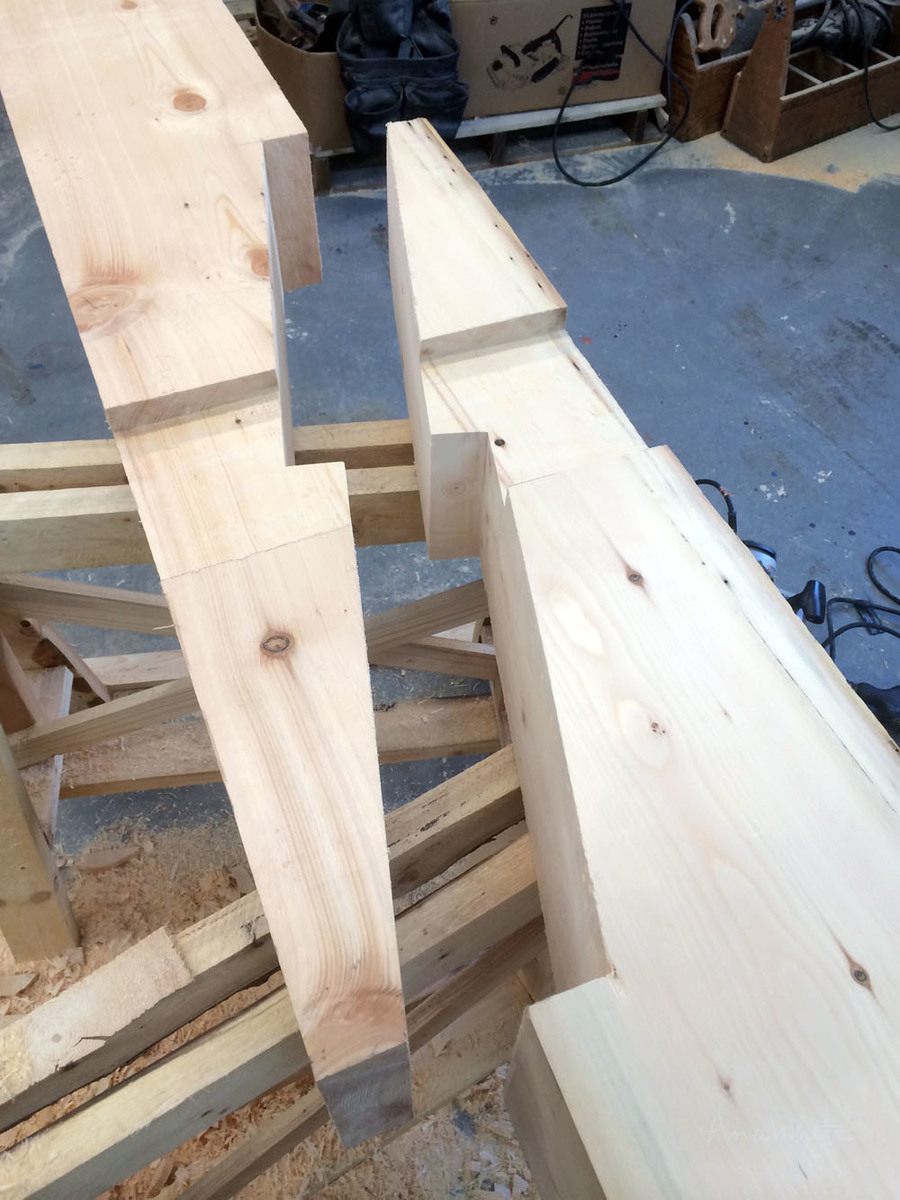
And then came the valley rafters.
Laying it out took us several hours. We couldn't make a mistake, as we didn't have spare beams. And we had to do the cuts in a very specific order to be able to layout the next cut. The top had to be cut out at an angle to allow the tongue and groove to fit later on. And did I mention these valley rafters would tie in over the scarf joint, with five other beams? We wouldn't know until the beams get installed if it works out or not, but you can get a little sneak peek of how things fit together here.
It took us about two months, mostly just Jacob by himself, to take rough beams, plane them down, and cut over 80 timbers for the cabin. We spent about $5000 on beams, and invested in a power hand planer, 12" circular saw, and chisels to do the work. Most of the other tools we used were standard building tools - like hand saws, squares and tape measures.
If you ask Jacob, he'll tell you if you can follow directions, use a circular saw, and don't mind a little elbow grease, taking on a project like this is totally doable. It is hard work, but it can be done.
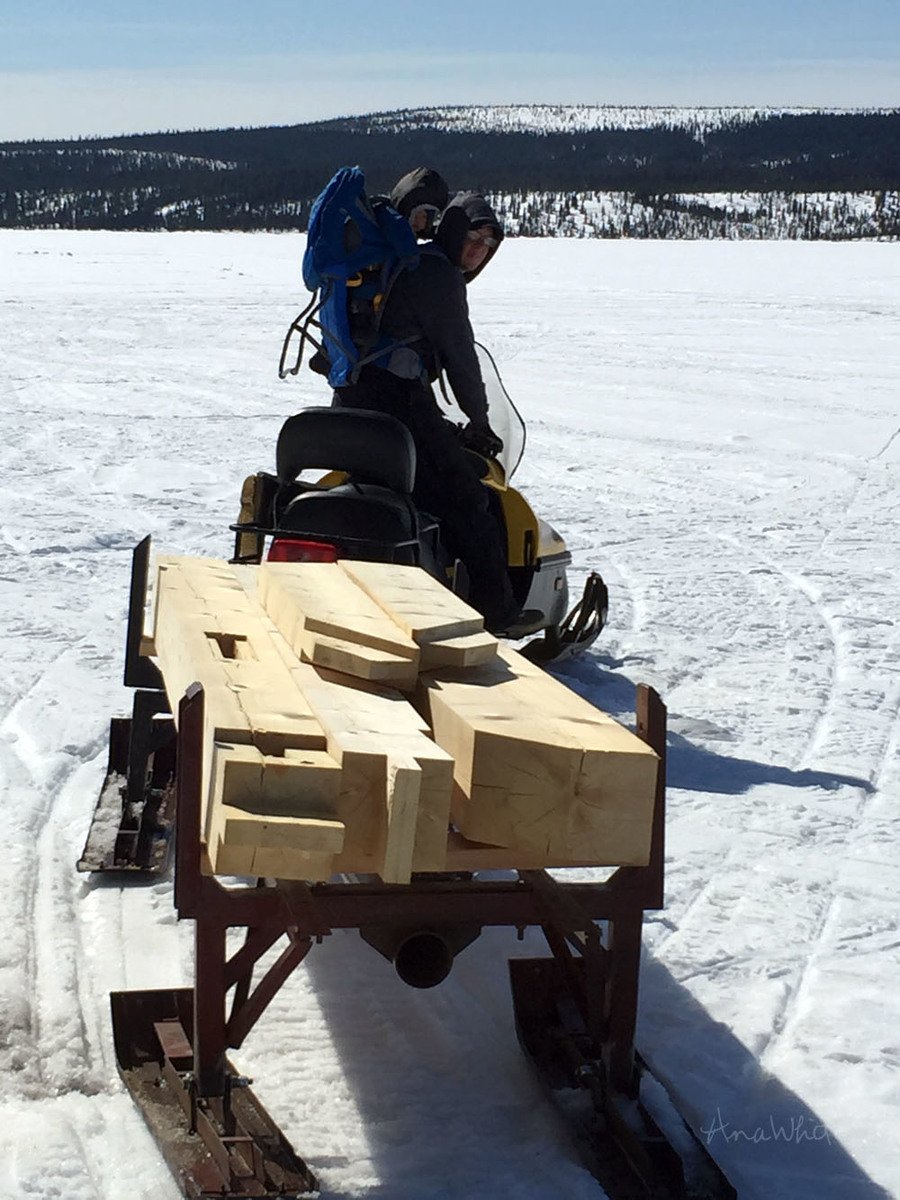
While we've still got snow on the lake, we hauled the beams in with a snow machine.
So what do you think? Will the beams fit? Are we crazy? Is it worth it?
XO Ana
Comments
AndyH
Mon, 05/18/2015 - 19:29
Amazing
It is going to be such an amazing feeling when you have finished and stand back have that first beer on the porch :-)
keely.jane
Tue, 05/19/2015 - 07:20
AHHHH! So beautiful!!!
AHHHH! So beautiful!!!
Heatherdee
Tue, 05/19/2015 - 08:00
At Work
I'm sitting at my desk in my high tech IT job living vicariously through you! I like to watch the window washers and landscapers and think about plants and power washers. Thanks for giving us so much content so we can enjoy a little woodworking each day! I like to know my tools are all in my garage waiting for me to have a few free minutes here or there to work on my projects!
You guys are doing an amazing job. I love the cabin and your hours of meticulous planning are really shining through.
RenoRustic
Wed, 05/20/2015 - 08:37
Wow...
That's amazing and that scarf joint fit together like a glove! It looks like those saw horses you built truly are heavy duty! You guys have done a great job. I can't wait to see the show.
woodtec
Thu, 08/05/2021 - 13:08
Jacob works with a large…
Jacob works with a large crowbar. Can someone tell me where to buy such a large crowbar?