


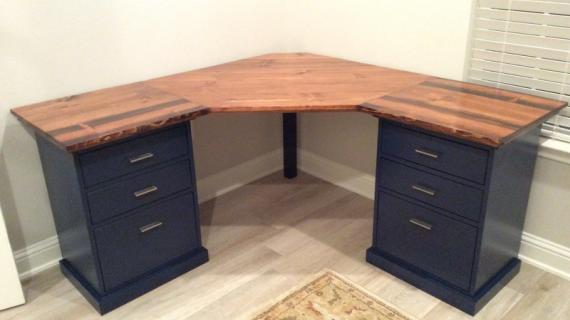
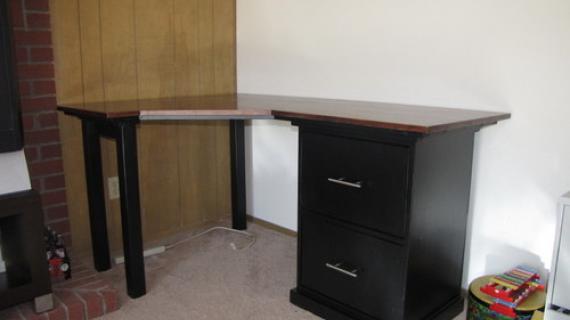
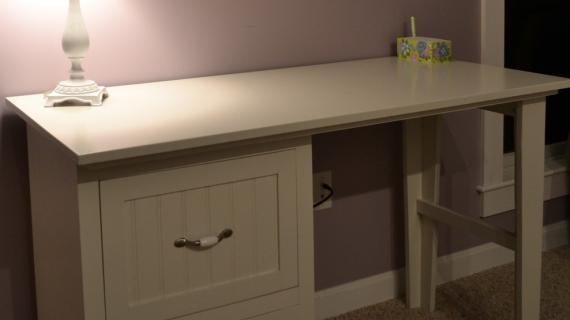
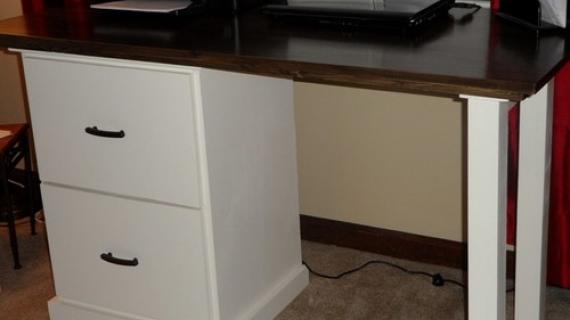
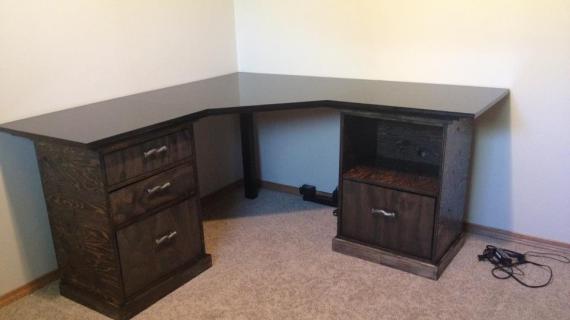
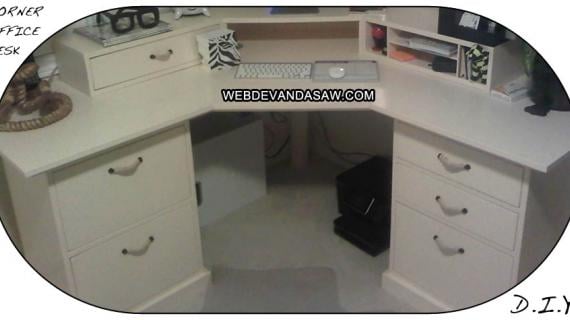
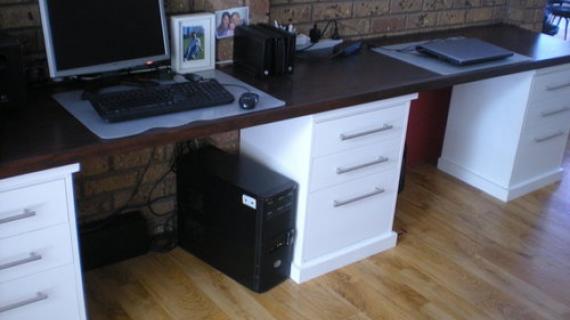
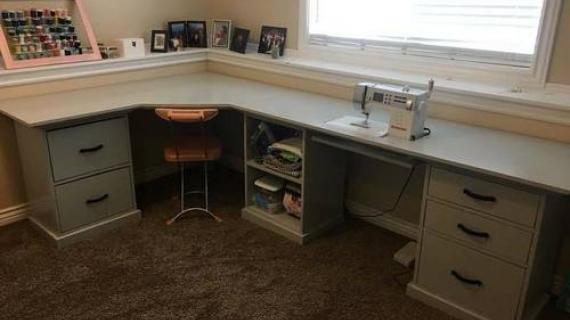
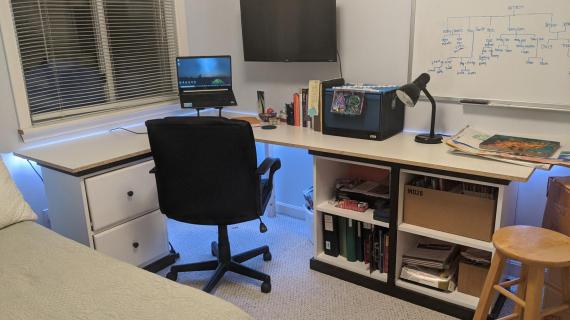
Build your own office with our Modular Office Collection of plans!
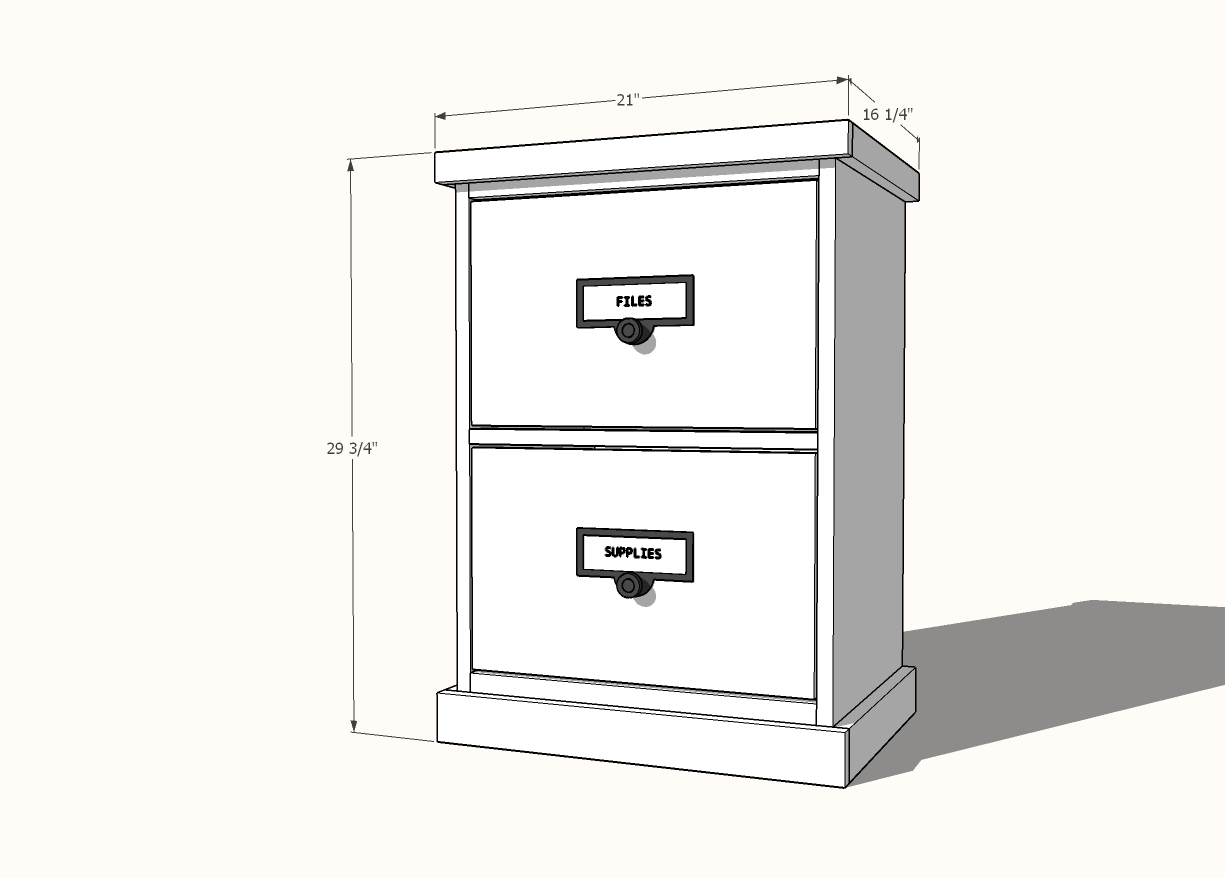
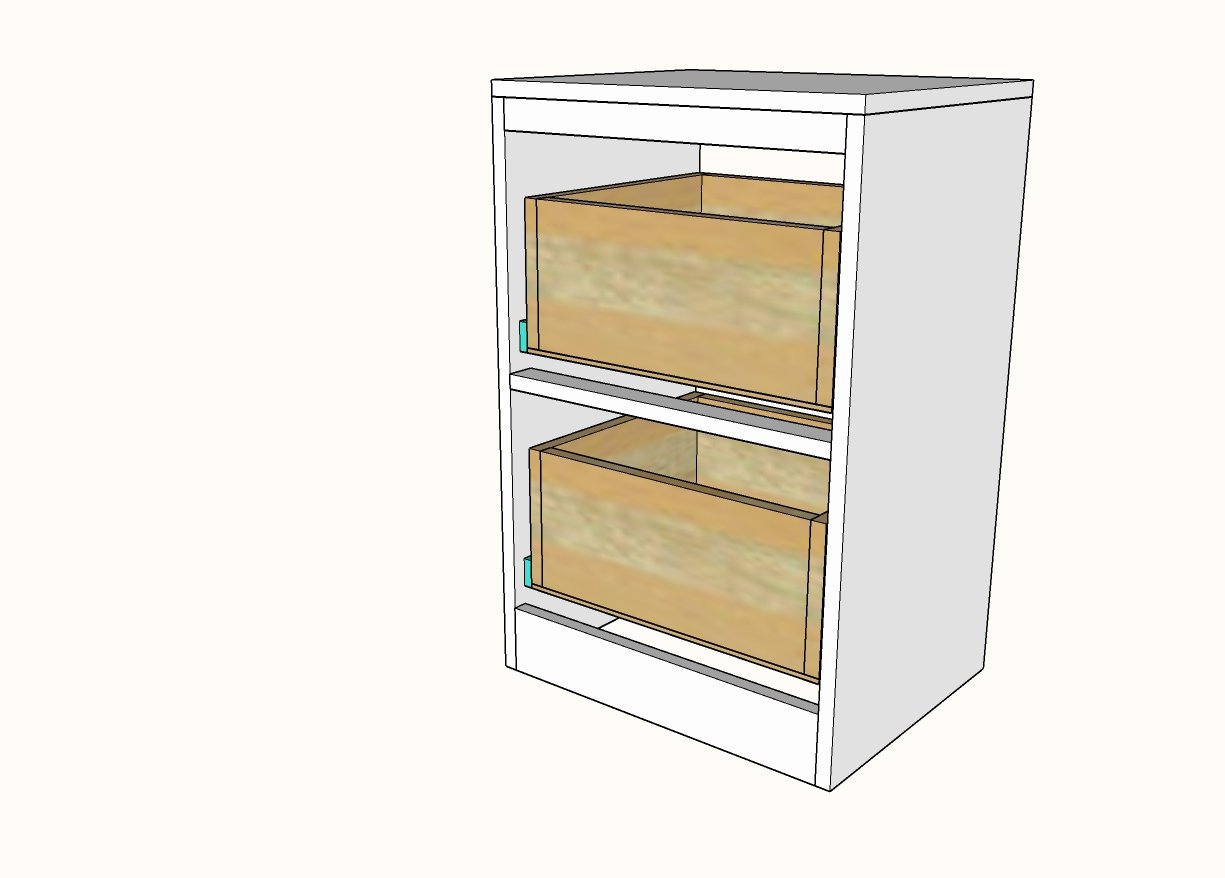
In this woodworking plan, you can build a narrow double drawer base for that can support a desktop. These roomy drawers can be used for storing files, extra supplies, crafts and more. Our free step by step plans include full diagrams, shopping and cut lists.
Preparation
- 1 - 3/4" plywood half sheet (4x4) ripped into strips 15-1/2" wide x 4 feet long OR one strip, 15-1/2" wide x 8 feet long
- 1/4" plywood, 48" x 24" (can use smaller scraps, you'll need two pieces 17" x 14")
- 1 - 1x2 @ 8 feet long
- 1 - 1x4 @ 4 feet long
- 1 - 1x12 @ 3 feet long
- 2 sets of 14" drawer slides (white euro slides recommended)
- We recommend a Kreg Jig for joinery with 1-1/4" pocket hole screws, but you can also build with 2" self tapping wood screws
- Iron on edge banding if you want to finish the front exposed plywood edges to match the wood grain. You'll need a razor knife to trim excess off. If you plan to paint, you can fill the plywood edges with wood filler and sand smooth.
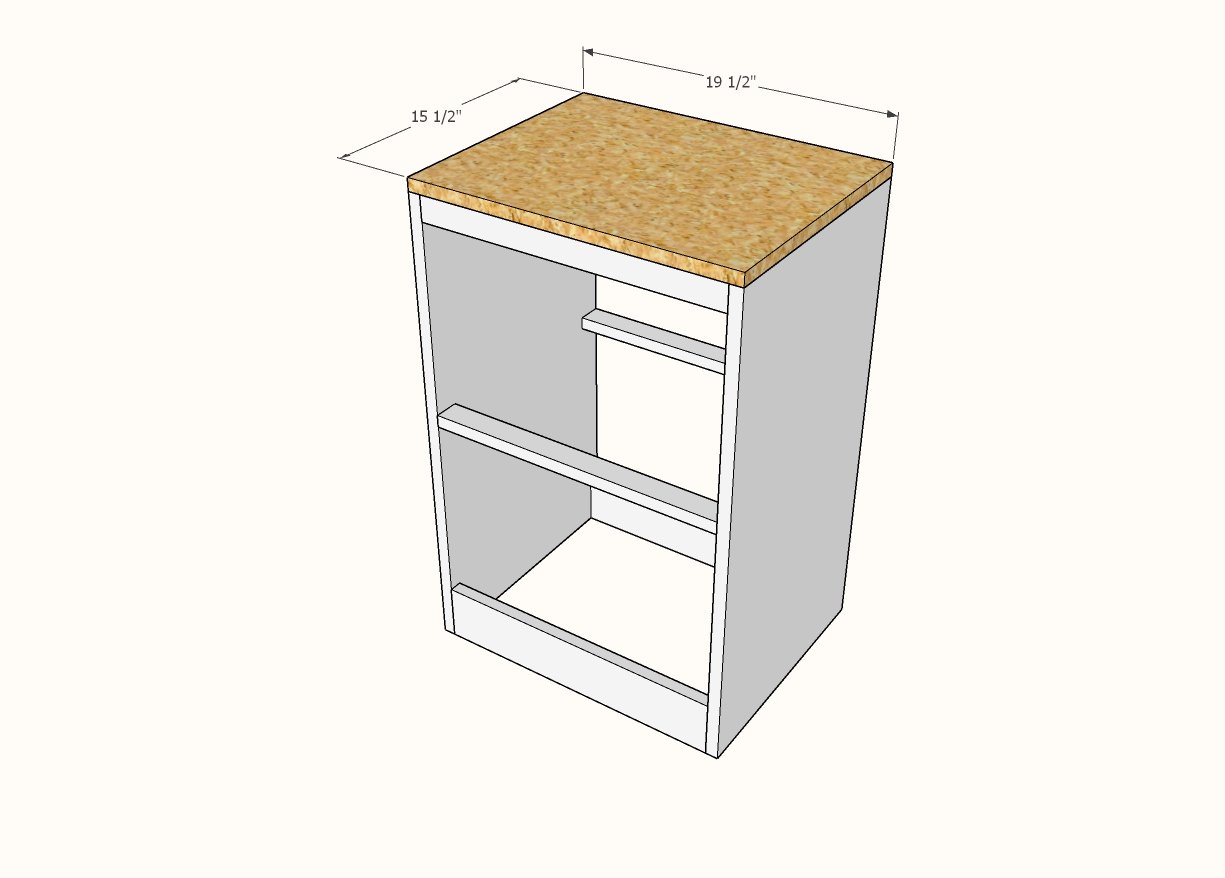
Cabinet
- 2 - 3/4" plywood @ 15-1/2" x 29" - sides
- 2 - 1x4 @ 18" - base trim
- 4 - 1x2 @ 18" - top and middle trim
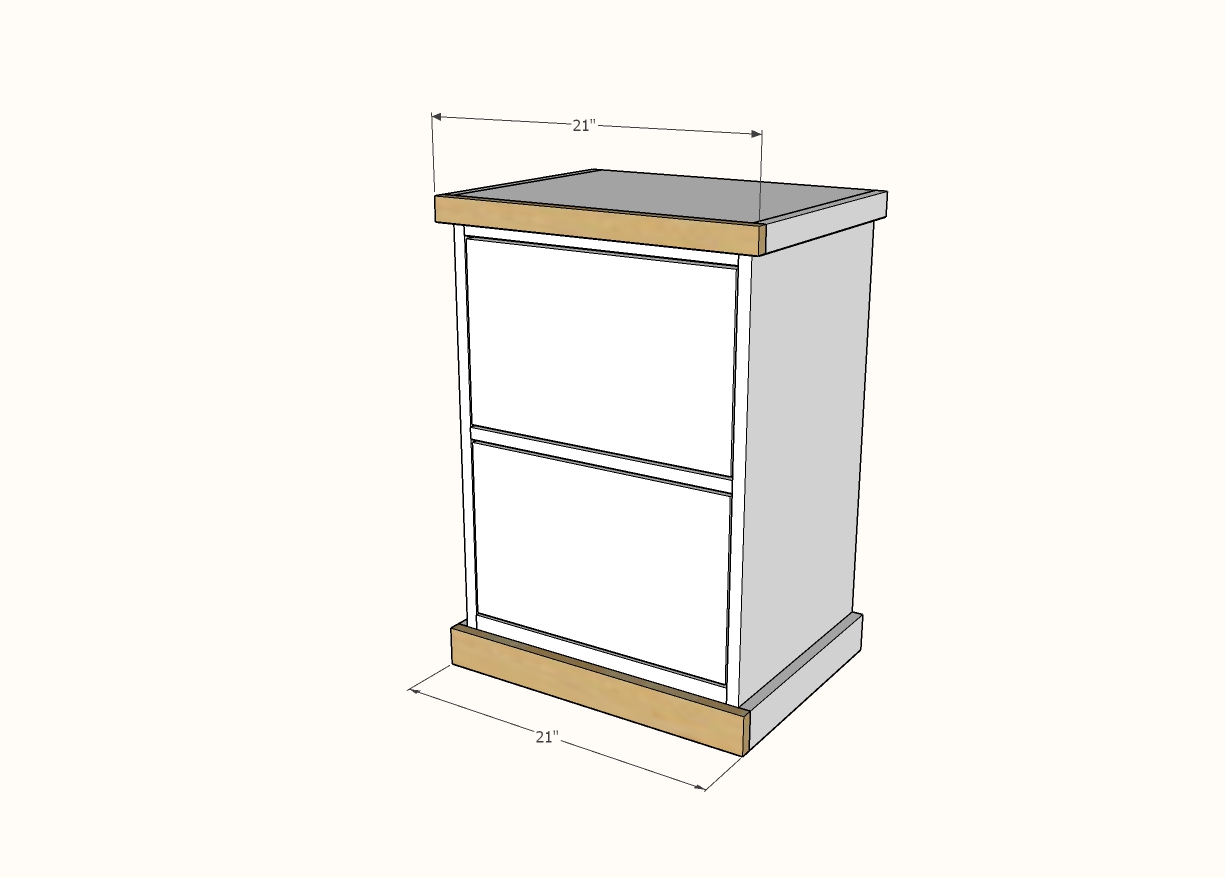
- 1 - 3/4" plywood @ 15-1/2" x 19-1/2" - top
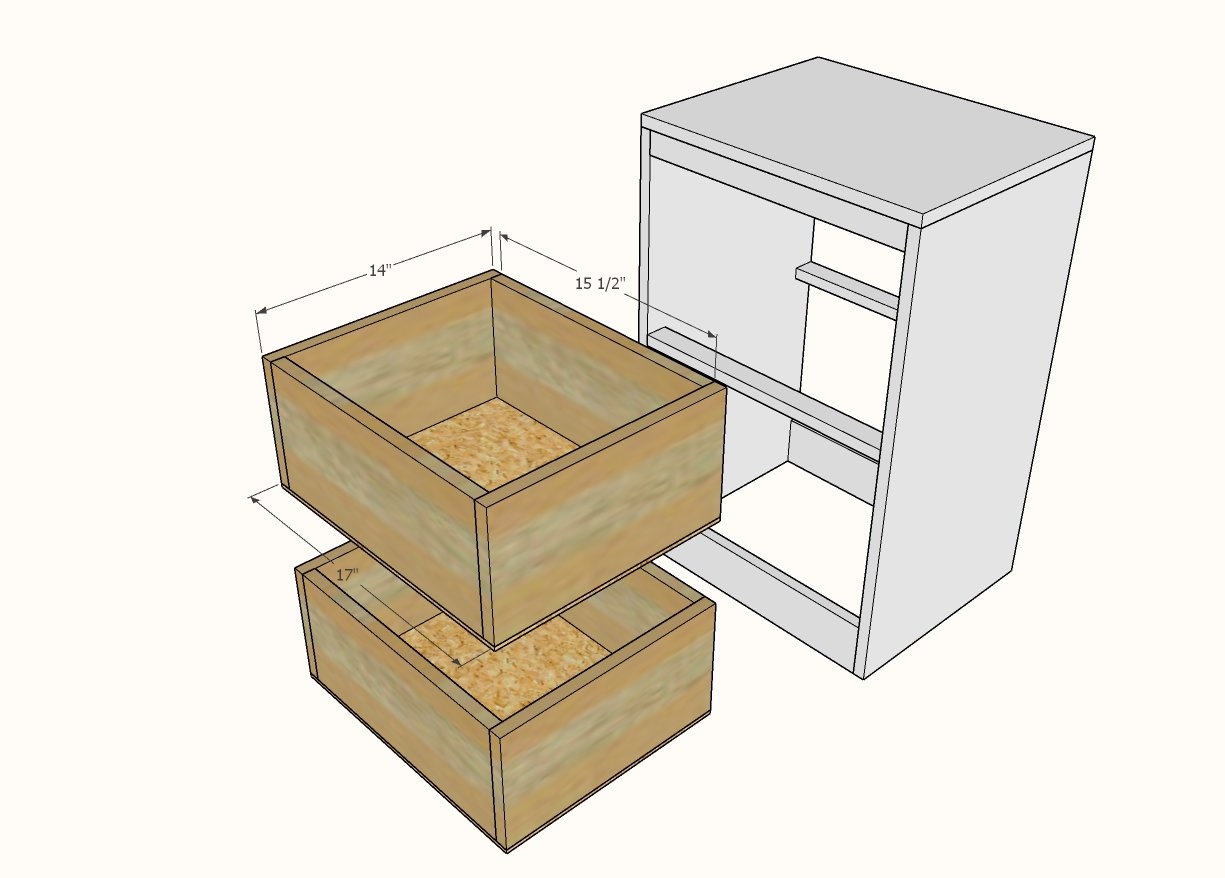
Drawers
- 4 - 1x8 @ 14"
- 4 - 1x8 @ 15-1/2"
- 2 - 1/4" plywood @ 17" x 14"


Instructions
Step 1

TIP: If you want to finish the front edges of plywood with edge banding, do so now instead of later. You only need to apply edge banding to the side front edges.
We recommend attaching the 1x boards to the plywood with 3/4" pocket holes and 1-1/4" pocket hole screws, but you can also use 2" self tapping wood screws and glue.
Clamping down the board while you attach the plywood can help if you don't have an extra person to help hold things in place.
Step 2
Attach top with 1-1/4" brad nails and glue, all outside edges are flush.
Step 3
Build the drawer with either 3/4" pocket holes and 1-1/4" pocket hole screws or 1-1/4" brad nails and glue.
Attach bottoms with 3/4" brad nails and glue.
NOTE: You can build a deeper drawer by using 1x10s instead of 1x8s. You can save some money and use 1x6s but the drawer sides won't be as tall.
Install drawer members of the drawer slides on the bottom of the drawers. The drawer box should be inset 3/4" from the front edge of the cabinet.
Step 4
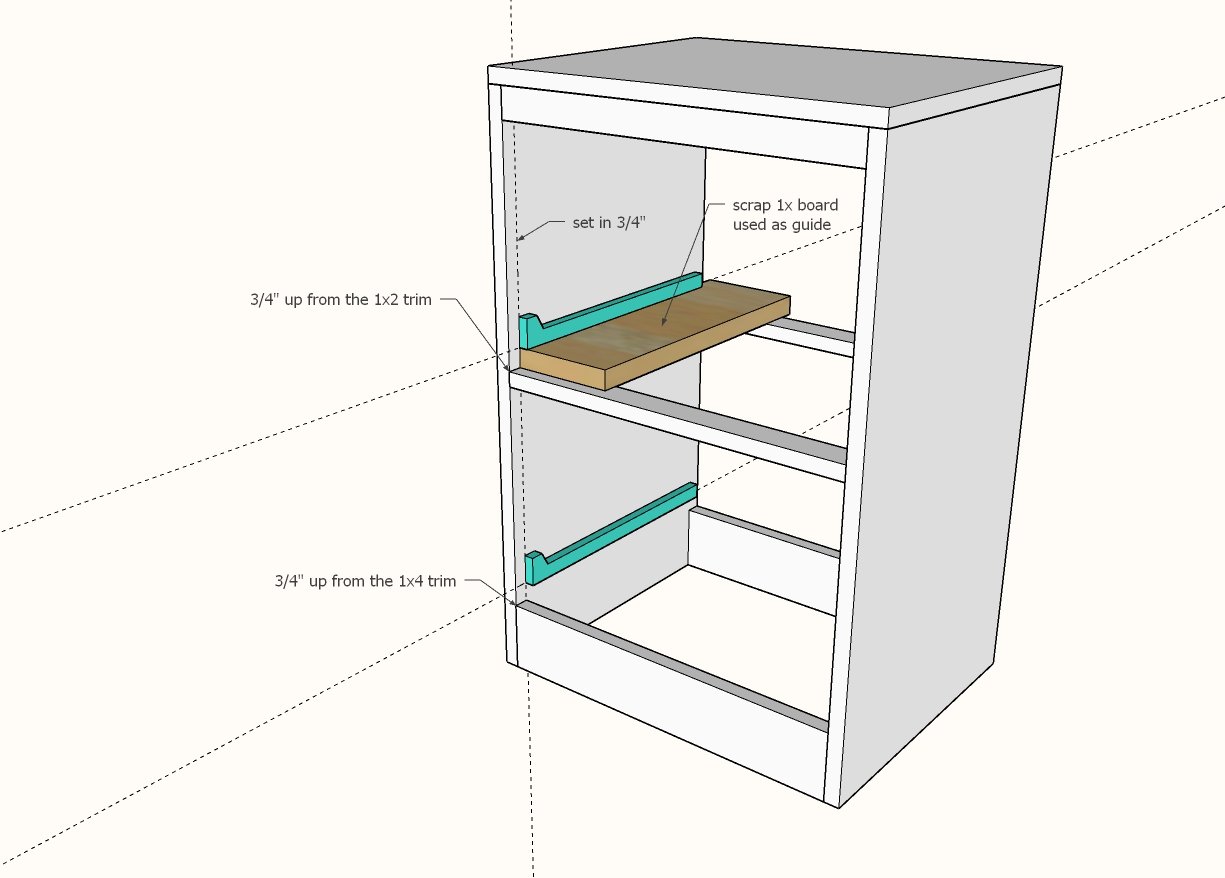
Install cabinet members of the drawer slides inside the cabinet.
Step 5
Test drawer slide fit. If you need to adjust, now is the time. Make sure everything slides smoothly and easily.
Step 6

Position 1x12 on front of the drawer. The cabinet should be setting upright (Do NOT lay on back to attach).
Attach with a few 1-1/4" brad nails from front avoiding areas where you may add drawer hardware.
Remove drawer and add 1-1/4" screws from back to further attach.
Step 7
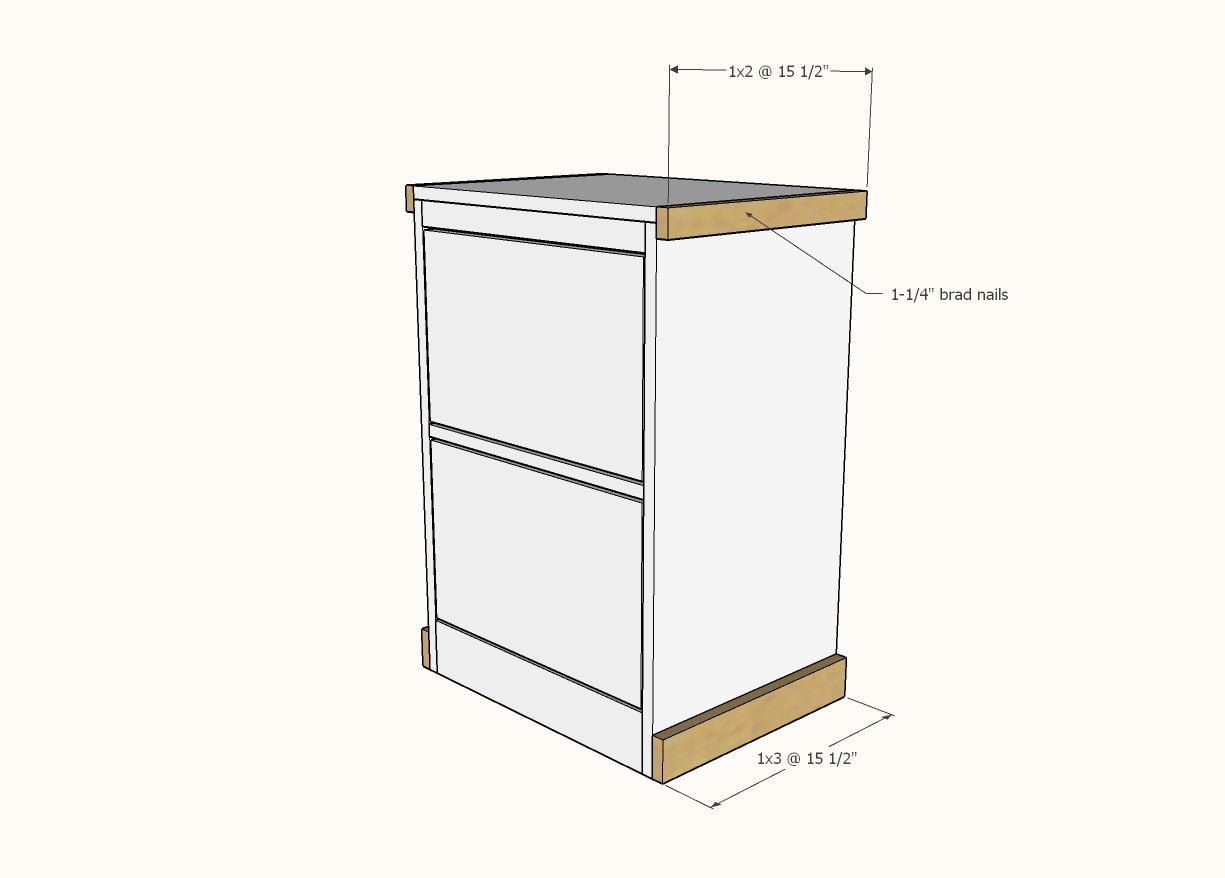
Add side trim with 1-1/4" brad nails and glue.
Step 8
Measure and cut to fit the front trim as it may vary slightly on final step and you want this piece to look nice.
Attach with 1-1/4" brad nails and glue.


Comments
Karla (not verified)
Thu, 02/25/2010 - 09:23
You are most correct, Ana.
You are most correct, Ana. Details, details, details... :) I can't wait for spring so I can start building...no garage, in Alaska...so I must wait. :(
brandi (not verified)
Thu, 02/25/2010 - 09:41
Ana, what would I need to do
Ana, what would I need to do to make those drawers capable of holding files? Is there hardware that can be purchased and installed?
Ana White (not verified)
Thu, 02/25/2010 - 09:47
Look at this post here in the
Look at this post here in the same collection
http://knockoffwood.blogspot.com/2010/02/plans-wide-file-base-for-bedff…
You can also buy file rails at an office supply store.
Another thought is to make the drawer 12" wide and use undermount drawer slides. then the files could just sit on the drawer sides.
tawna (not verified)
Thu, 02/25/2010 - 10:02
I am in total agreement that
I am in total agreement that the hardware can make an item. (i LOVE your site, btw...)
question: has anyone had any luck finding hardware like the beloved PB's? I LOVE the hinged pulls and the label holders...
There are so many of us out there building and itching to build using your fabulous plans- and the hardware is KEY to top it off! Is there anyway of creating a page/section where viewers can post pics of their hardware as well as where they found it?
THANK YOU THANK YOU for all your work!!
Yolanda (not verified)
Thu, 02/25/2010 - 12:19
Re: drawer pullsI love
Re: drawer pulls
I love working my google muscle to find things, but I found it VERY hard to locate a high-polished nickel drop pull like the Pottery Barn ones. But here are a few possibilities for people who are looking. I used the search terms "bail pull” and “drop pull”.
Satin Chrome Cabinet pull—
http://www.rensup.com/Cabinet-Pulls/97189.htm
Classic Hardware Card Holder Pull—
http://www.decorisland.com/product/classic-hardware/100289-03/classic-h…
Mission Style Drop Pull — http://www.nextag.com/Avante-Hardware-62076AB-Antique-524748138/prices-…
Hardware Resources Matte Black Pull—
http://www.decorglamour.com/hardware-resources-r1011mb.html
Rae (not verified)
Thu, 02/25/2010 - 12:21
I'm mistaken, I think a minor
I'm mistaken, I think a minor error in math on the shopping list. The shopping list says 26" of a 1x16 but the cut list says 2 - 1x16 and cut them into 13.5" pieces. that's 27" inches of 1x16 (13.5 x 2).
Love this collection, that will probably be my 2nd project once I make my bunk beds :) Thanks!
Carla (not verified)
Thu, 02/25/2010 - 13:08
Thank you Yolanda!!
Thank you Yolanda!!
Sona Jacob (not verified)
Thu, 02/25/2010 - 19:13
HI!Very neat!!What software
HI!
Very neat!!
What software do you use to create the initial view? Of all the units put together?
Sona
Tracy D (not verified)
Fri, 02/26/2010 - 03:19
I found some nice hardware
I found some nice hardware here too http://www.thehardwarehut.com/cabinet_labels.php
Jennifer (not verified)
Fri, 02/26/2010 - 05:55
Ooooooh TracyD, those are
Ooooooh TracyD, those are awesome cabinet labels!!! Thanks for the link!
TracyD (not verified)
Mon, 03/01/2010 - 09:31
FINALLY found hardware that
FINALLY found hardware that looks like the PB ones!!! I was wandering in Menards and ran across them :-) They are made by National Hardware and are called Chest Handles.
See here: http://www.facebook.com/knockoffwood#!/knockoffwood?v=photos
Debbee (not verified)
Wed, 03/03/2010 - 15:21
Hi All,I can help with all of
Hi All,
I can help with all of these questions regarding an excellent source for hardware in one address: www.leevalleytools.com!
Lee Valley Tools has been around for years, has a HUGE variety of different styles (and types) of hardware: drawer slides, knobs, pulls, hinges..., plus they also have all kinds of Wood Working & Gardening tools and toys. It's my absolute favourite place to shop; virtually or in person.
Enjoy, Deb
Debbee (not verified)
Wed, 03/03/2010 - 16:01
Hello Ana,I found you through
Hello Ana,
I found you through Michaela's link from "The Gardener's Eden" and boy am I excited about it! This is a great idea. Thanks so much for showing everyone just what they can accomplish. DIY never looked so good!
Regarding high end hardware sourcing: I believe I just may have THE answer to all of your questions: www.leevalleytools.com!
Lee Valley Tools has been around for years, has a huge variety of styles and types of cabinetry hardware: handles, pulls, slides, hinges, etc.
They also carry (and design) tons of wood working and gardening tools and toys and give customer satisfaction like nobody's business.
It's my absolute favourite place to shop - virtually or in person...
Hope this helps, Deb
Debbee (not verified)
Wed, 03/03/2010 - 16:05
Sorry for the duplication.Deb
Sorry for the duplication.
Deb
Jezeriah Cook (not verified)
Wed, 11/17/2010 - 05:38
I have a question if someone
I have a question if someone could please help me! It seems that the bottom of the drawer is supposed to be 16" x 13.5". However the back of the drawer is only 15.5" in width. How does this line up with the width (16") of the bottom? It seems like I either need to make the bottom narrower or the back wider. I'm not sure which one I should do to ensure that the drawer still fits in the cabinet.
I appreciate any ideas!
Jezeriah
Ana White (not verified)
Wed, 11/17/2010 - 09:27
Jezeriah, you have to leave
Jezeriah, you have to leave 1/2" on each side for the drawer slides, but you want the drawer face to cover the drawer slides. I would purchase the slides and read the clearance on them before building the drawer. Hope this helps. Ana
Mary (not verified)
Wed, 11/24/2010 - 12:21
Hey everyone! I found
Hey everyone!
I found hardware almost EXACTLY like the PB version. It is galvanized, but you could spray it if you want it shiny. It is the exact same style as PB uses on their desk. Believe it or not, they are cheap! $2.79. Made my National. I found mine at an Ace Hardware, in the section with utilitarian hinges and pulls like you would use on a farm. NOT in the cabinet isle.
I hope this helps. I built the Bedford desk before I knew of Ana's site. This is fantastic! I can't wait to see what else I can make...without having to draw up the plans myself this time! ;o)
If you need specifics on the hardware, feel free to email me. [email protected]
Mary
orangesugar (not verified)
Thu, 12/16/2010 - 04:42
Brandi, check out this
Brandi, check out this product to turn this unit into a file cabinet:
http://www.amazon.com/Blum-Metafile-Complete-Set/dp/B0006HFEIA/ref=sr_1…
commercial chi… (not verified)
Tue, 02/01/2011 - 07:33
thank you thank you for your
thank you thank you
for your site!!!
i am building this today.
eoren1 (not verified)
Sun, 02/20/2011 - 04:26
Ana- Thanks for the plans!
Ana-
Thanks for the plans! I'm planning on starting this next weekend. I did notice that, on the Open File Base Unit plans, the height of the top and bottom drawers seem to differ. The plans for the drawer (using 1x12) would work for the bottom; but not the top (it measures 13 1/4 on the plans).
Also, I was at PB yesterday and saw this desk with the two file cabinet drawers on one side and three drawers on the other. Any chance of adding plans to mod the CPU base so that it has two narrow and one deeper drawer?
Thanks again
E
RWMRyan
Wed, 08/18/2021 - 08:14
Drawer lumber missing from shopping list
The 1x8's (or 10's, or 6's) needed for the drawers is NOT included in the shopping list.
You would need:
2 of 1x8(or 6 or 10)x 6 foot