

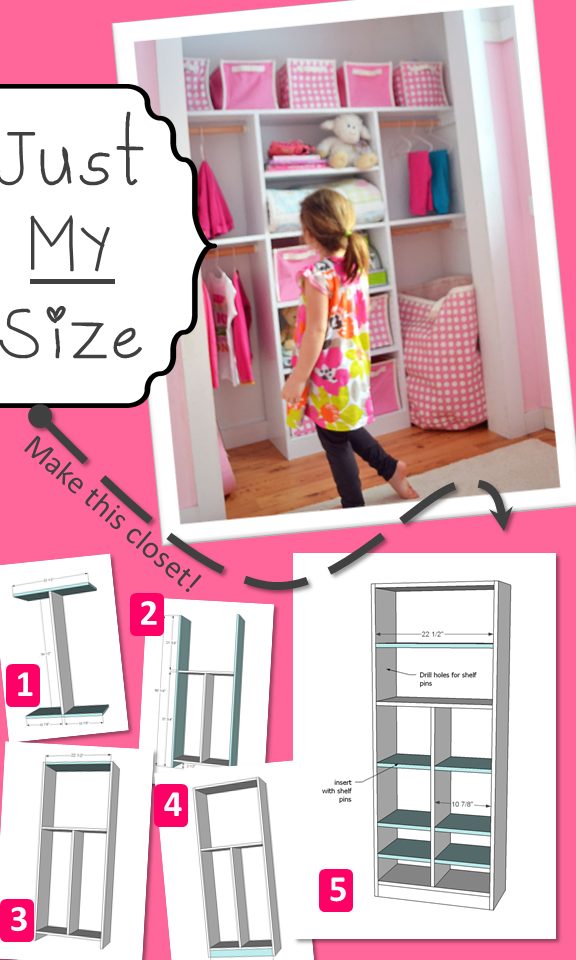
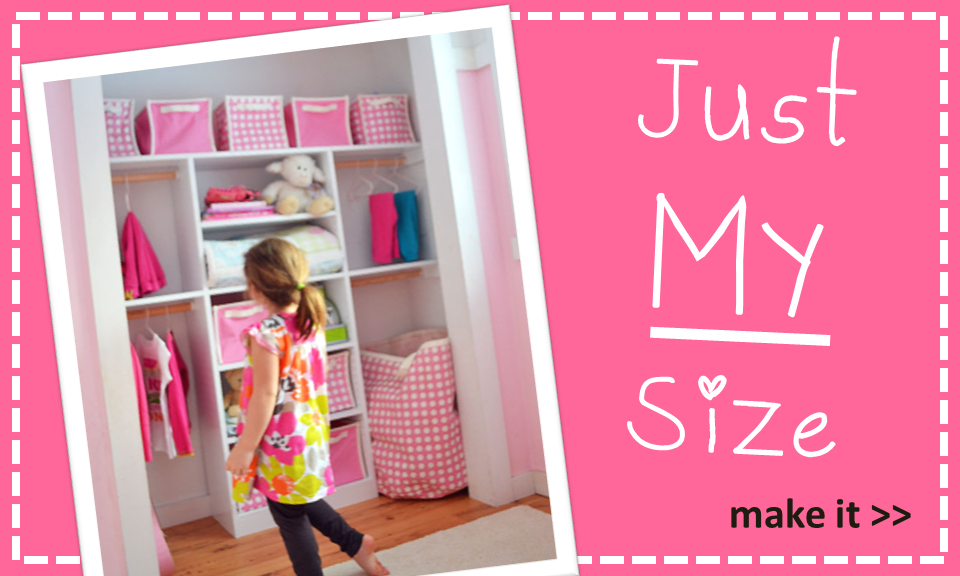
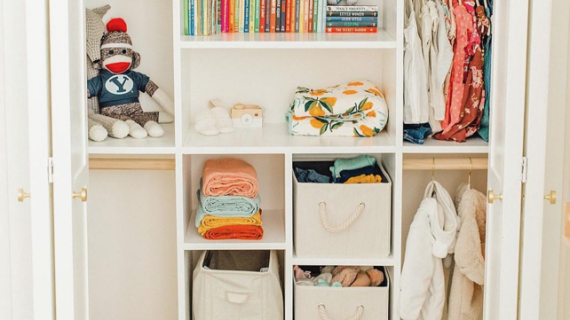
Make this cute closet! Free plans from Ana White!
This is big for us.
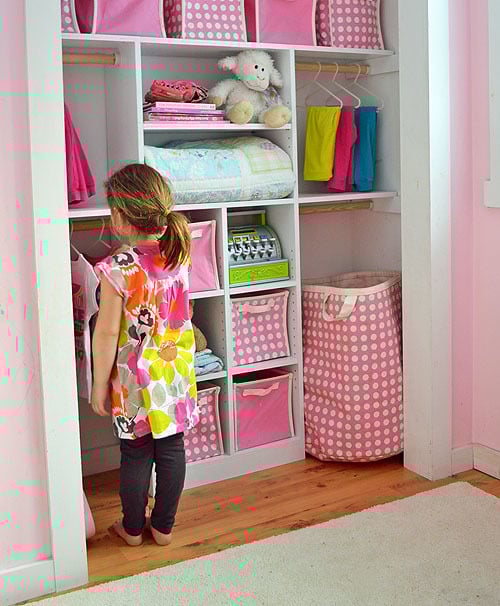
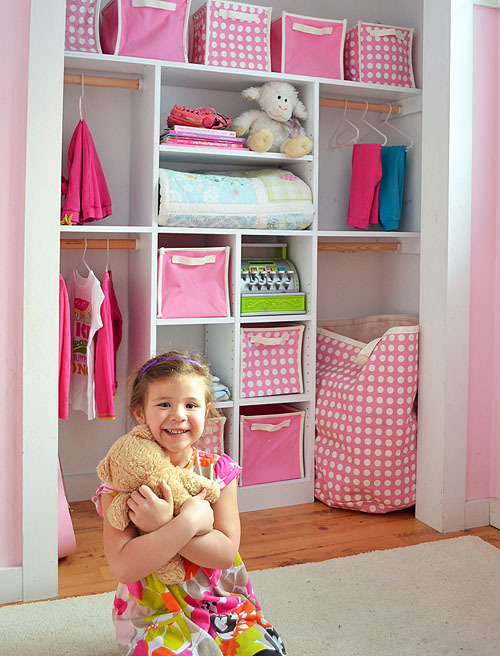
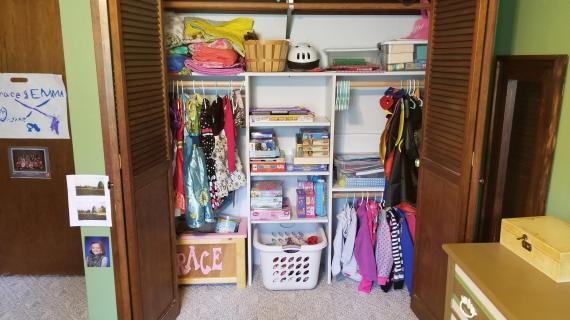
Grace is getting big.
Grace can put her own clothes away.
This makes Mama real happy.
But the closet system we had previously in her room was an adult system and although she was capable of putting her own clothes away, the system we had in place did not allow her to.
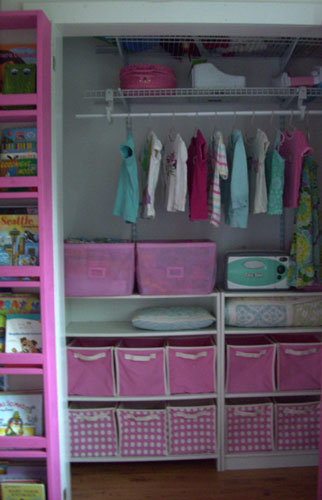
The hangers were at adult height. All she could do was yank stuff down. And we want less yanking down >> more neatly hanging up.
So I told her to reach as high as she could.
And I made a mark on the wall in her closet at the tip of her fingers.
And then I added a few inches.
And that's how tall I made her closet.

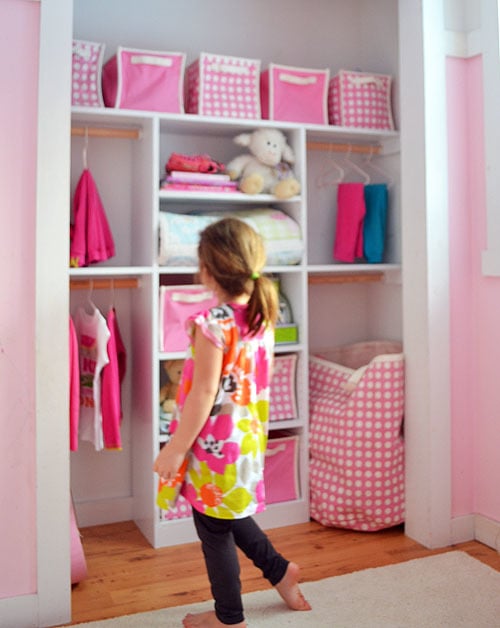
And now she can hang her own clothes up.

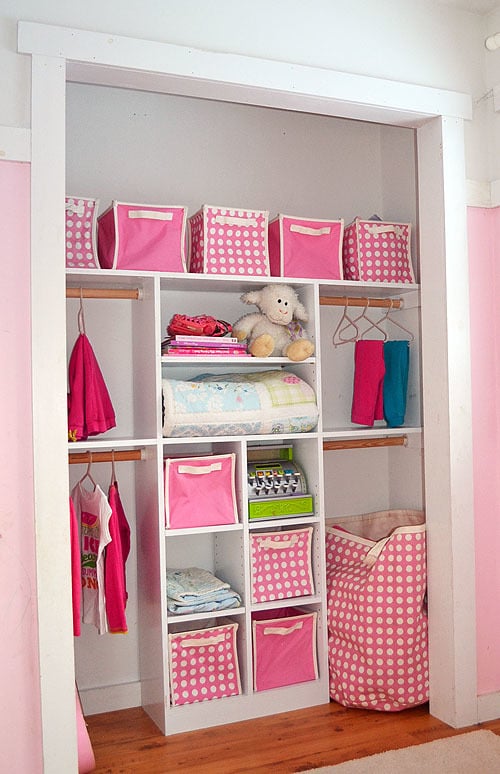
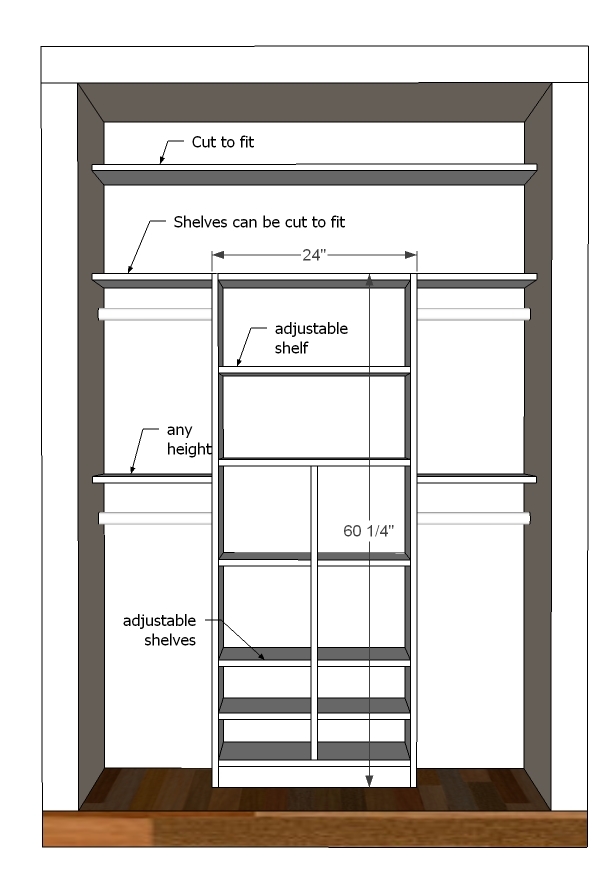
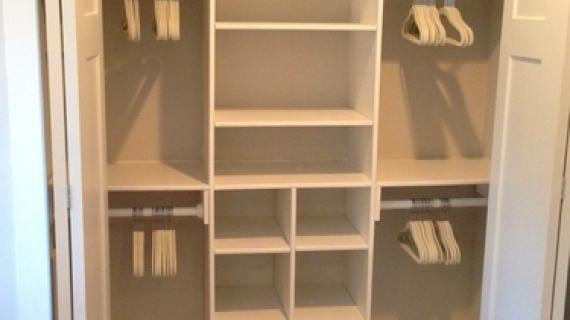
Making a closet like this one is ridiculously easy. And you can customize it to fit all of your needs. We made most of the shelves adjustable, and positioned the rods to fit her dresses and shirts and pants.

We actually threw out the last of the flat pack particle board furniture in our house with this project see the falling apart particle board bookshelf above in the bottom of the closet with missing footers? and replaced it with this closet system made of PureBond Formaldehyde Free plywood. Now if we could just get her to sleep in there!
You can make this closet too! Follow along in this plan and I will show you how!
PS - If you are wondering what happened to Grace's closet doors, I am not ashamed to admit I stole them for my office closet doors.
Preparation
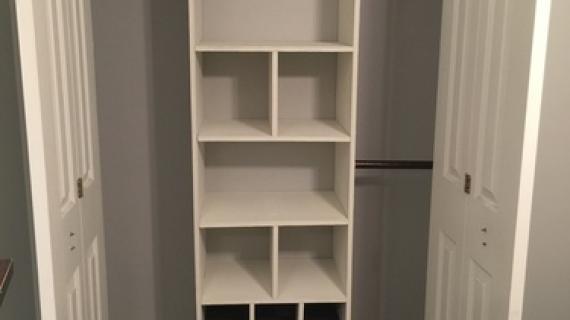
We used 1 sheet of 3/4" PureBond Plywood cut into strips 11 1/2" wide for construction. You can also use 4 - 1x12s 8 feet long You will also need closet rods and 1x3s and 1x4s for supporting shelves, depending on the width of your closet.
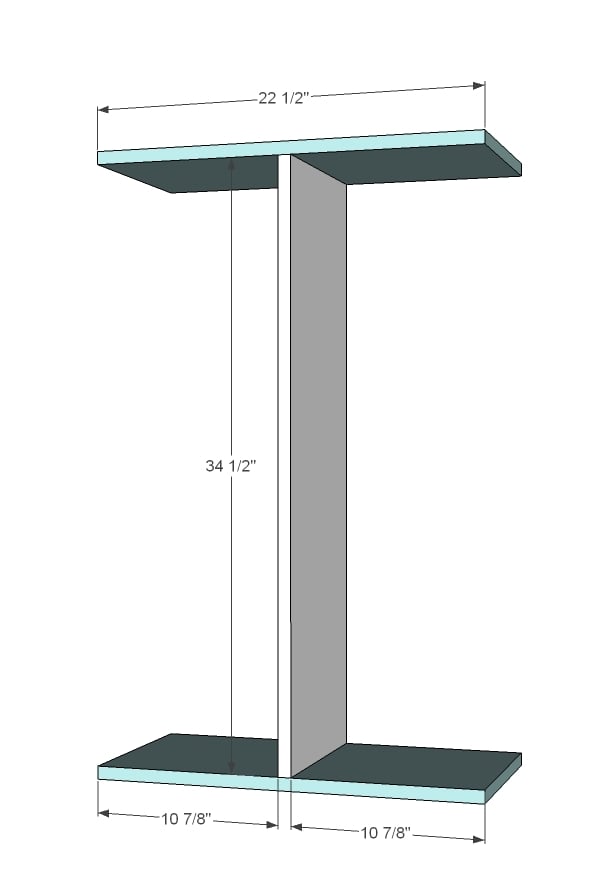
4 - 1x12 @ 22 1/2" 1 - 1x12 @ 34 1/2" 2 - 1x12 @ 60 1/2" 1 - 1x3 @ 22 1/2" 6 - 1x12 @ 10 7/8" (make 10 3/4" for adjustable shelves) NOTE: Using 1x12 width makes this closet only about 12" deep, suitable for children's hangers, but not adult hangers. You can easily make this closet deeper by simply using a wider width board (for example, 1x16). NOTE: This closet does not provide cut list for additional shelving on sides. After your closet is installed, measure and cut and install shelving to fit.


Please read through the entire plan and all comments before beginning this project. It is also advisable to review the Getting Started Section. Take all necessary precautions to build safely and smartly. Work on a clean level surface, free of imperfections or debris. Always use straight boards. Check for square after each step. Always predrill holes before attaching with screws. Use glue with finish nails for a stronger hold. Wipe excess glue off bare wood for stained projects, as dried glue will not take stain. Be safe, have fun, and ask for help if you need it. Good luck!
Instructions
Step 1
NOTE: Before you begin, decide how you are going to work around your baseboard trim in closet. We just installed the closet in front and there is no issues, but you may wish to do something different.
Start by making the center divider part. I used 3/4" PHs and 1 1/4" PH screws, but you could also use 2" screws and glue. I don't recommend nails because there's no back or face frame on this piece.
Step 2

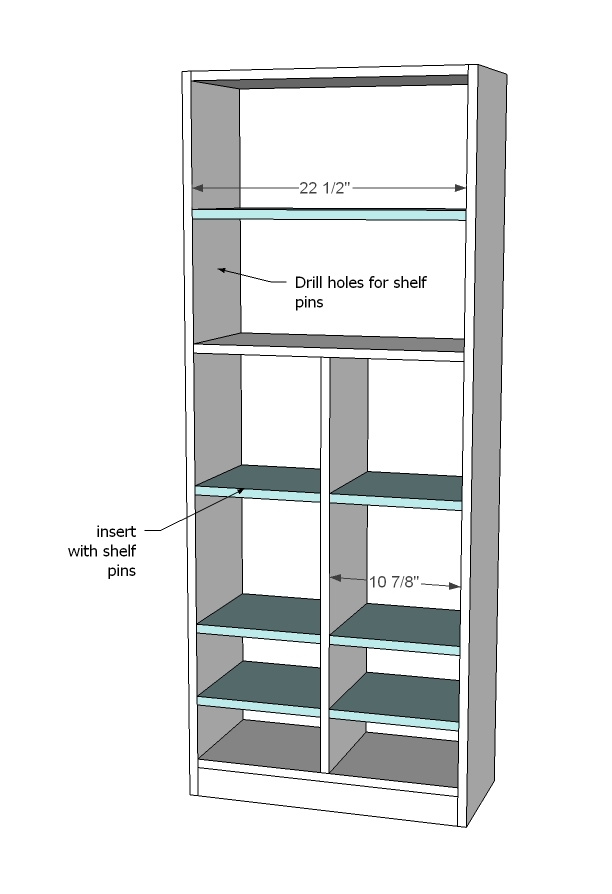
Now add the sides ... TIP: If you are using shelf pins, would be easier to drill the shelf pins first, but no biggie if you do it afterwards.
Step 3
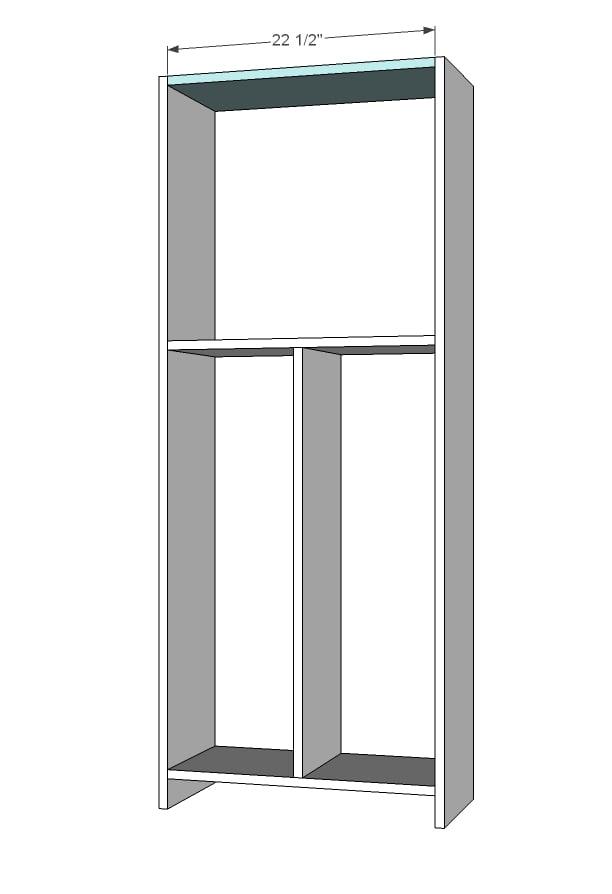
Add the top.
Step 4
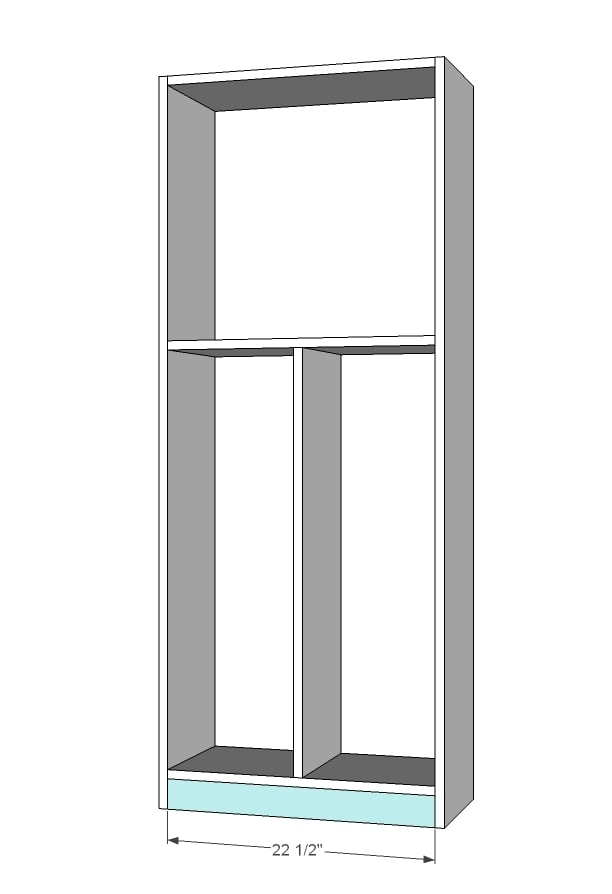
And then the footer.
Step 5
Step 6

Install closet in your closet. For rods, use 1x4 cleats screwed to studs in your wall on the wall side, and attach the rod pocket holder to these 1x4s and the side of the closet system. You can add more shelves or not above the rods.
It is always recommended to apply a test coat on a hidden area or scrap piece to ensure color evenness and adhesion. Use primer or wood conditioner as needed.


Comments
Aisha_ (not verified)
Wed, 03/28/2012 - 09:51
It's official, you're a rock
It's official, you're a rock star Ana! Love these plans!! I'm renting but I'm still debating putting a closet system in my kid's closet because it's quite large in there and their dressers are falling apart and I would much rather do this than even build new dressers and have to deal with drawers! Love the fact that it's kid friendly.
Stephanie (not verified)
Wed, 03/28/2012 - 11:08
Oh my word! She looks so big
Oh my word! She looks so big compared to when you first started this whole blog things!!
Ana White
Wed, 03/28/2012 - 18:52
Hey Whitney! I love your
Hey Whitney! I love your closet! Thanks for adding all the brag posts! Thanks Aisha! Kids are funny - suddenly when it's their size, it's fun to do things we detest like folding laundry?
Hi Stephanie, thanks for being there since Grace was a toddler! I have been blogging since she was almost three! She's definitely growing up!
BJ D
Thu, 03/29/2012 - 05:58
Awesome job, as usual with her closet
I love that it's her size and she's excited to help. My little one is a ttoal helper and would love to have something her size. I def need to put this on our list.
Guest (not verified)
Thu, 03/29/2012 - 06:58
plans for closet door items
I am new to your website, but I am strongly addicted now. I need my daily fix of just looking through your plans. I will be off for the summer and already have a long to do list of your projects. Would like to know which plans are the ones for the organizers on the closet doors to Just My Size.
Those would be my first projects this summer. I am sure I can find them just my looking through your plans, but I NEED them now!
Thanks for your website --
Tammy @ she we… (not verified)
Thu, 03/29/2012 - 07:16
Question
Did you do something to the edges to make them smooth? Even good plywood seems to have pretty rough edges when cut and then there are more steps involved in making it look pretty when it shows. This project looks so quick and simple if the edges don't need anything. Thanks!
kristen
Mon, 04/02/2012 - 12:01
Plywood edges
I would bet quite a bit of money that Ana didn't finish the edges--especially with it going in the closet. I just built a closet organizer (http://pinktoesandpowertools.com/2012/02/05/how-to-build-a-closet-organ…)--I face-framed the middle with the drawers, but all other visible edges just got a bit of sanding and paint. I'm very happy with it, but I'd only use this option in a closet or other similar less-visible situation.
JeneF
Mon, 08/06/2012 - 13:47
shelf pin holes?
I'm finishing my basement and this beautify closet is just what I was looking for to put into my daughter's bedroom. You reference a video on doing shelf pin holes, but I don't see it. Can you point me in the right direction!
badg0003
Fri, 06/17/2016 - 16:25
Shelf supports
Just wanted to confirm if you used 1x4 cleats for all the top and side shelves?