

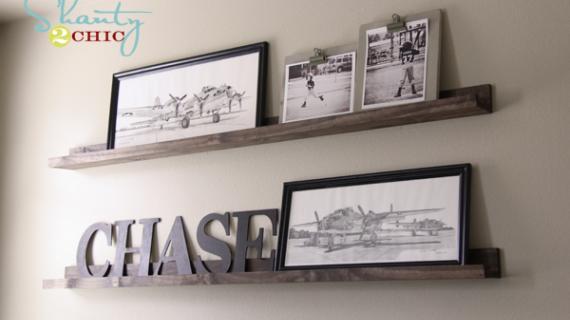
You can build your own picture ledge or gallery ledge for about a DOLLAR a foot. This easy to build picture ledge tutorial requires NO cutting and basic tools. Paint or stain any color you choose. Thousands of people have built this shelf and you can too - free step by step plans from Ana-White.com

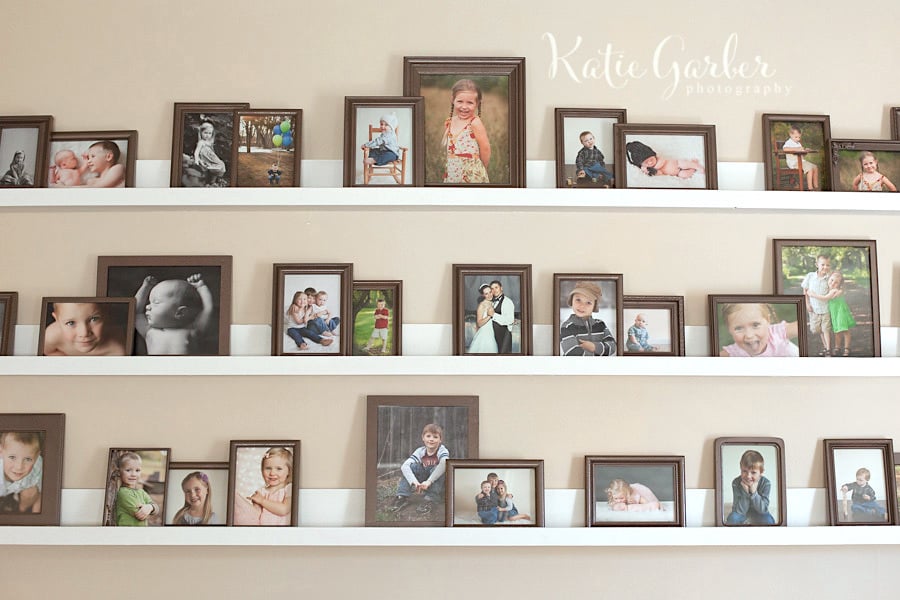
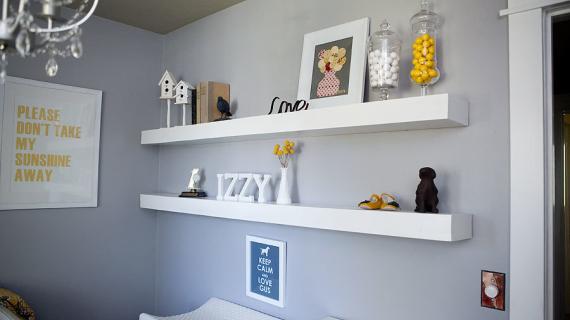
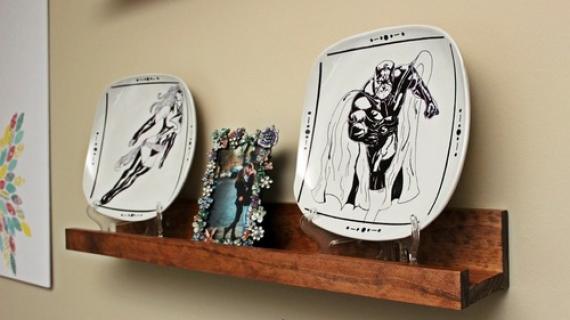
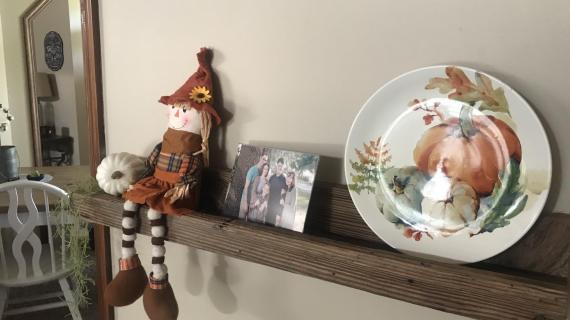
Reader submitted photo by Katie Garber
Need an inexpensive and beautiful way to display books, photos, decor or more on your walls? Our famous $10 picture ledge shelves are easy to build (you can even build these without cutting a single board!), can be built in any length, and are easy to hang!
What You'll Need
- Off the shelf pine boards available at any home improvement store
- Drill (used to build and hang the shelves)
- Screws (used to build and to hang the shelves)
- Paint or stain
- Level is recommended for hanging the shelves
- A stud finder is recommended for locating the studs in the wall to hang the shelves on
If you want to customize the overall length of the shelves, you'll also need a tape measure and any saw that can cut wood (this includes a handsaw).
But I'm Not Handy
These picture ledge shelves have been built thousands of times, by beginners everywhere. In fact, we recommend this project as your first project because it is SO easy and SO affordable! Our step by step tutorial makes it easy.
YOU can do this!
Reader Submitted Photos from Our Picture Ledge Tutorial
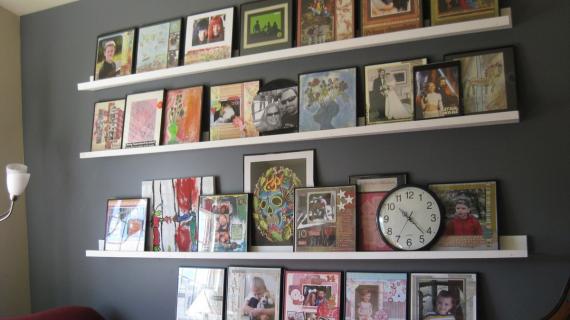
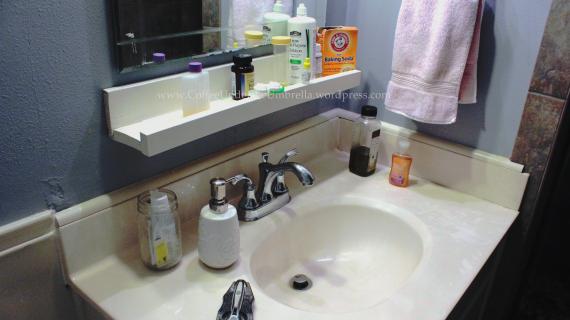
Here's a few different versions of our picture ledge, submitted by readers, and used in different ways.
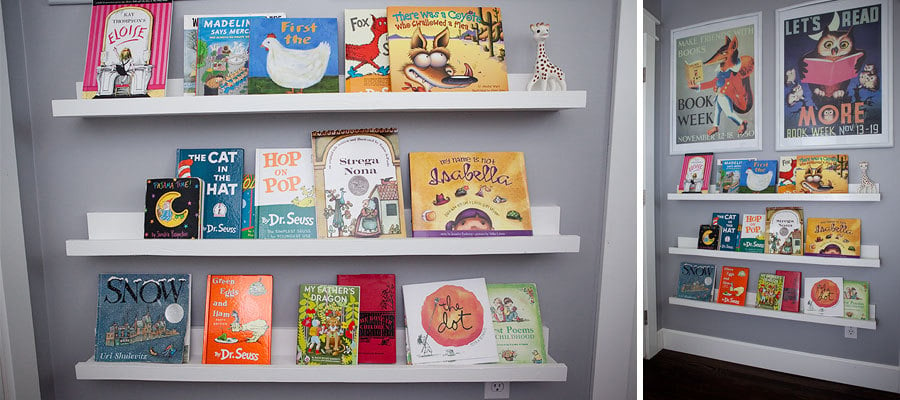
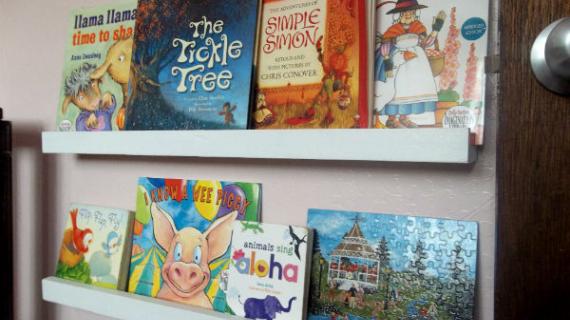
Book ledges by Crisaphi

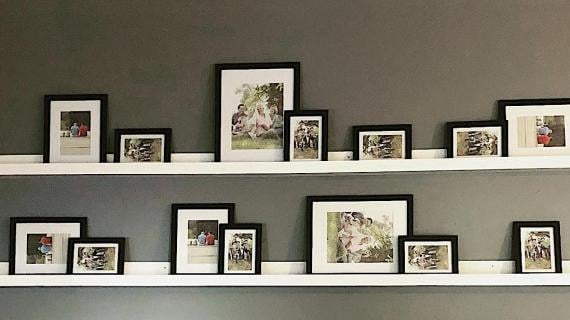
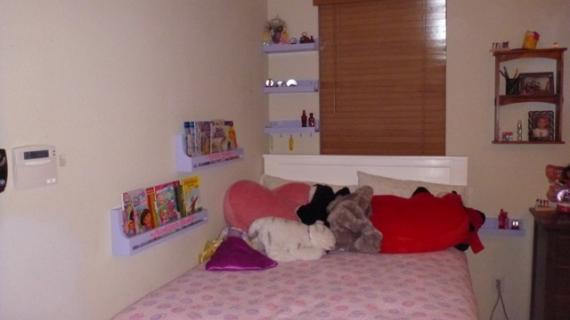
Reading nook by karahart
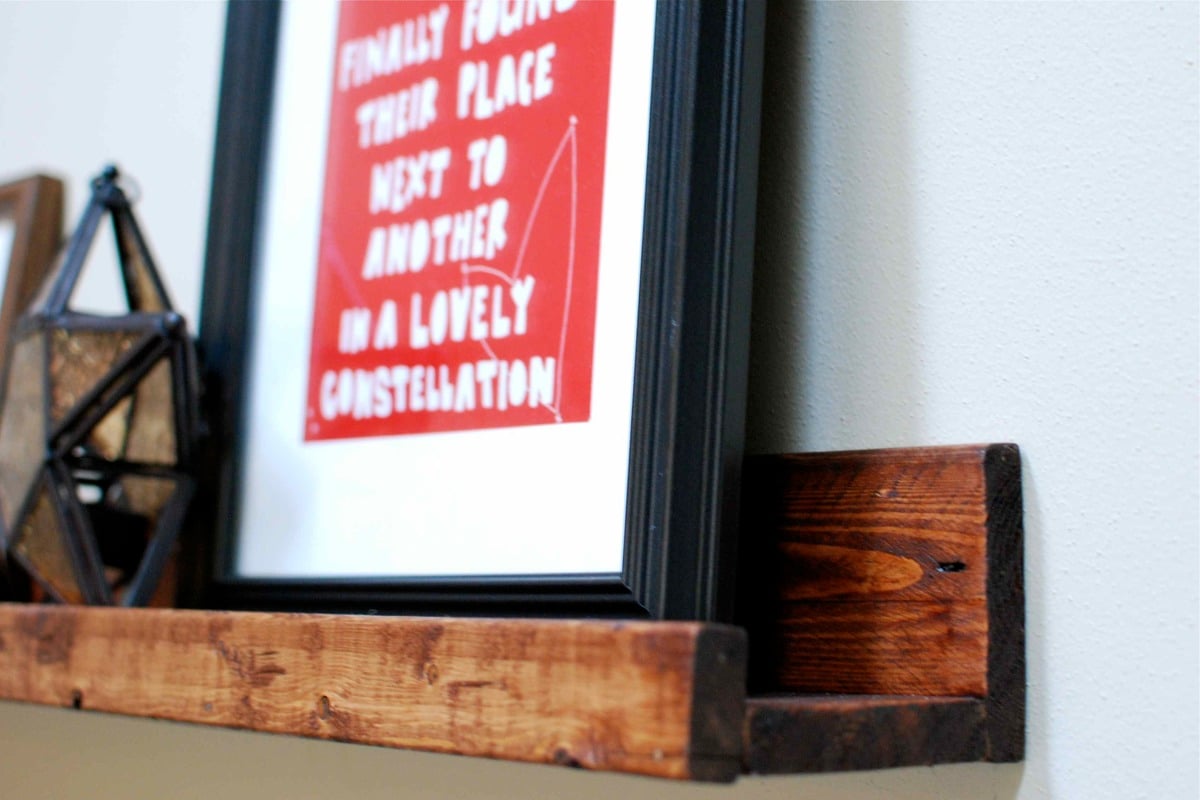
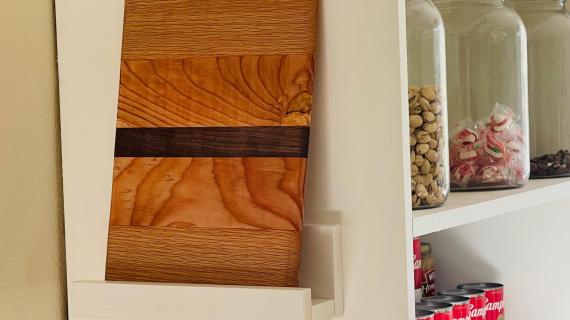
Rustic Stain by a.stauff

Easy Picture Ledge Tutorial
Pin For Later!
Avoid going to short (less than 24") because it may be hard to find a stud in the wall)
You can also make the shelf deeper by simply replacing the bottom 1x3 board with a 1x4, 1x6 or 1x8 board
Preparation
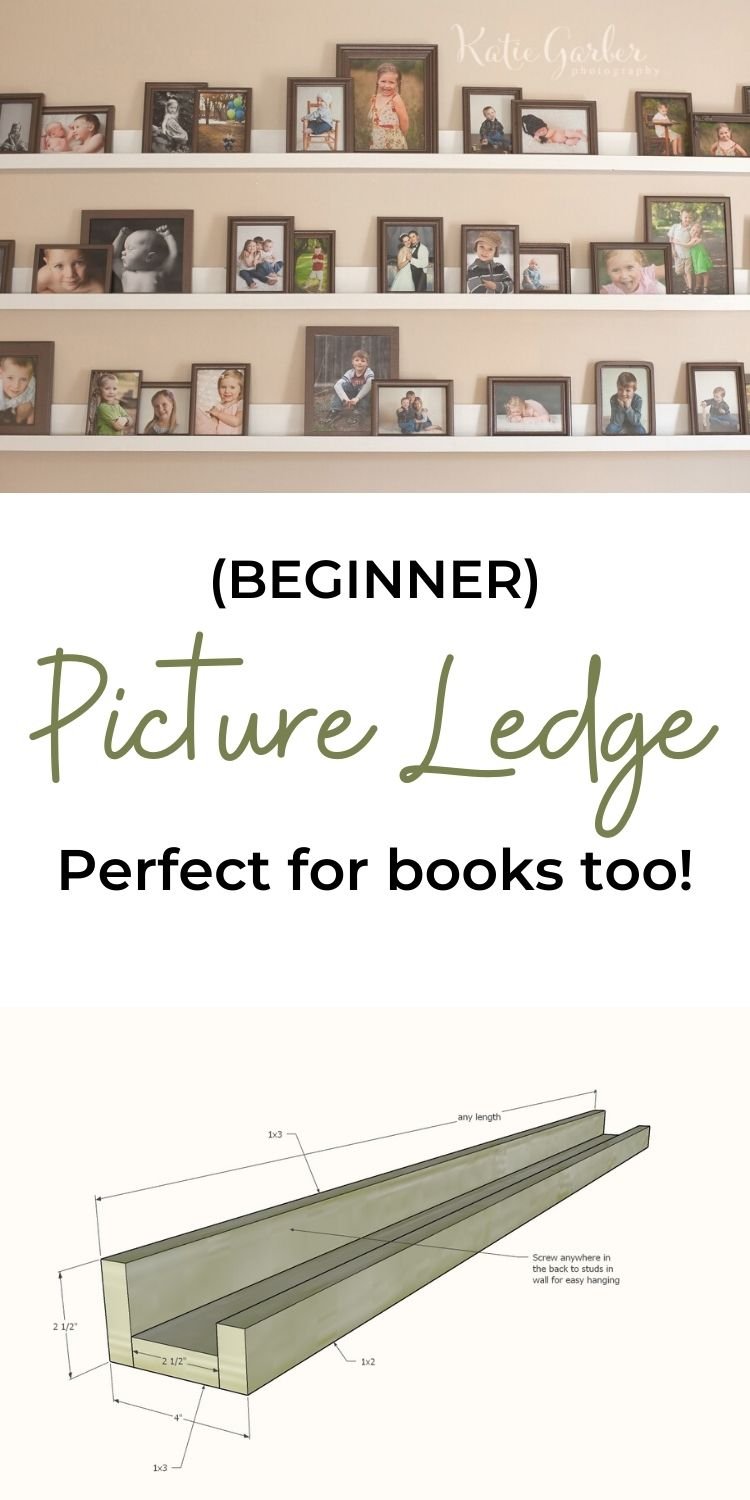
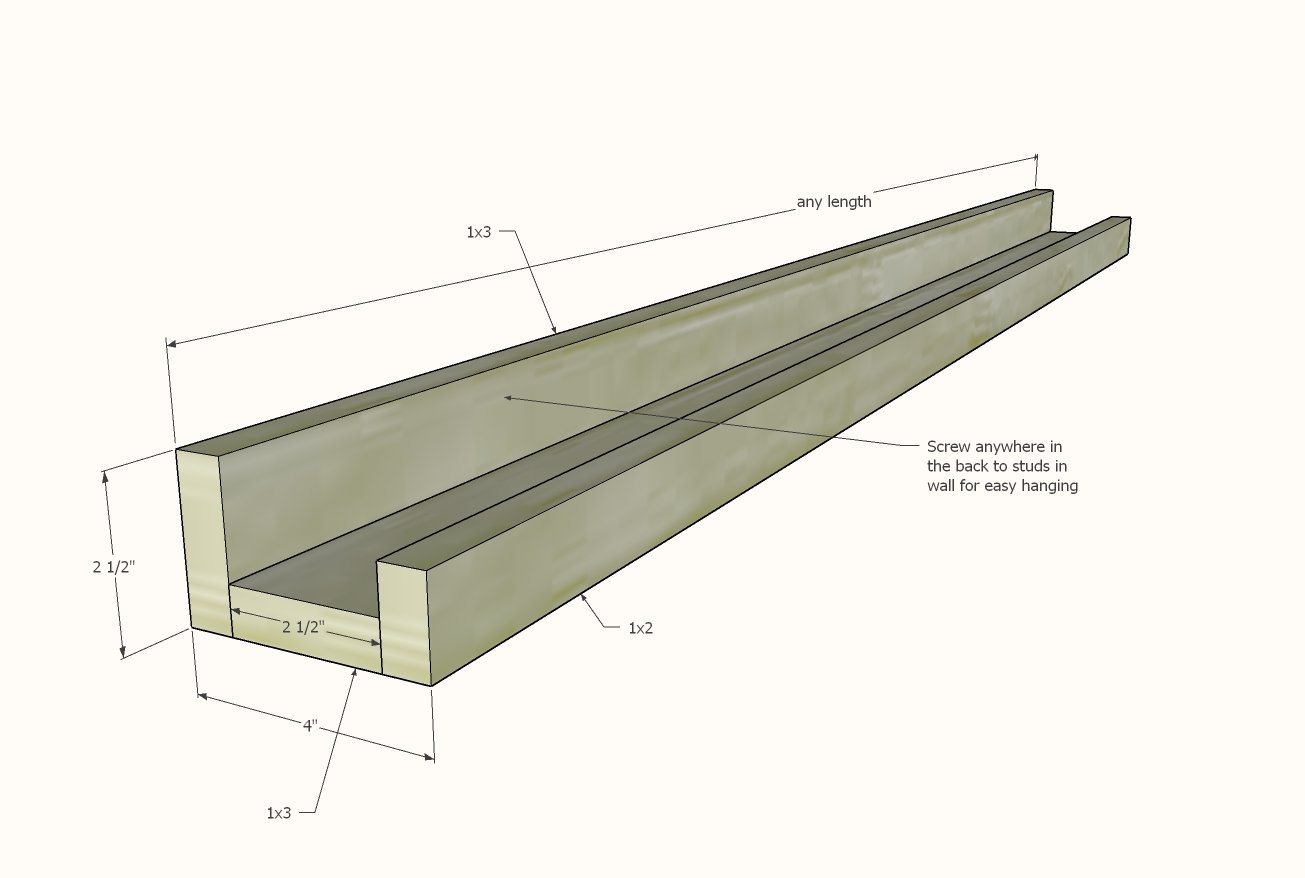
For (1) 8 foot long gallery ledge
- 2 - 1x3 @ 8 feet long
- 1 - 1x2 @ 8 feet long
- For every foot of shelving, you'll need about (3) 2" wood trim screws (like these that also include the drill bit)
What Type of Wood?
- The least expensive is pine furring strips (about $2 for a 1x3 and $1 for a 1x2) and will paint just fine and stain to that rustic look everyone is after these days
- You can use a select pine or hardwood board as well if you are trying to match other woodwork in your home or are looking for a more refined look
- I don't recommend MDF as it doesn't have much structural integrity
For 8 foot long shelving, NO cuts are necessary.
For shorter shelves, simply cut
- 2 - 1x3 @ desired length of shelving
- 1 - 1x2 @ desired length of shelving
EXAMPLE: For 36" long shelves, you would cut two 1x3 @ 36" and 1 - 1x2 @ 36"


Instructions
Step 1
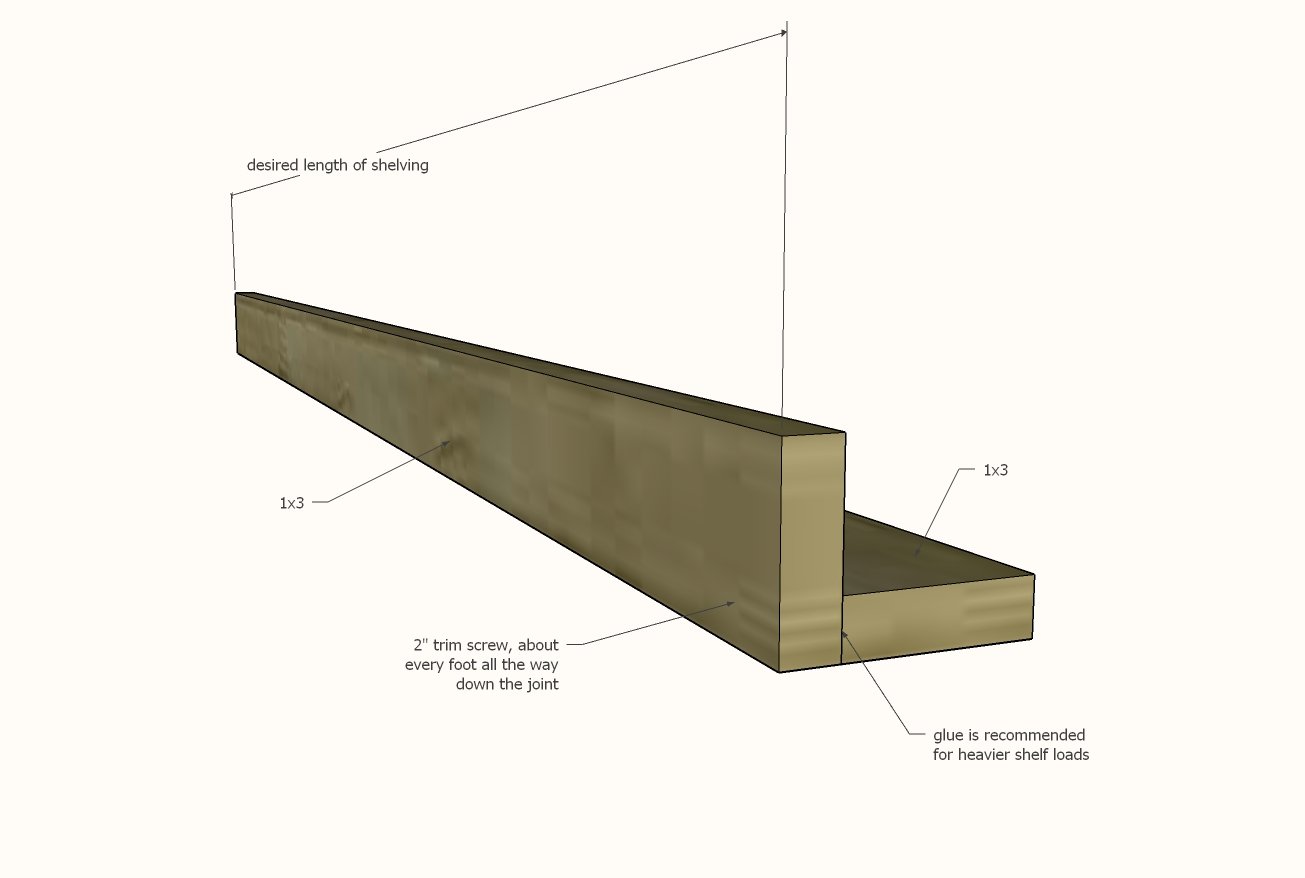
Attach the two 1x3 boards together with 2" trim screws, about every 12".
Step 2
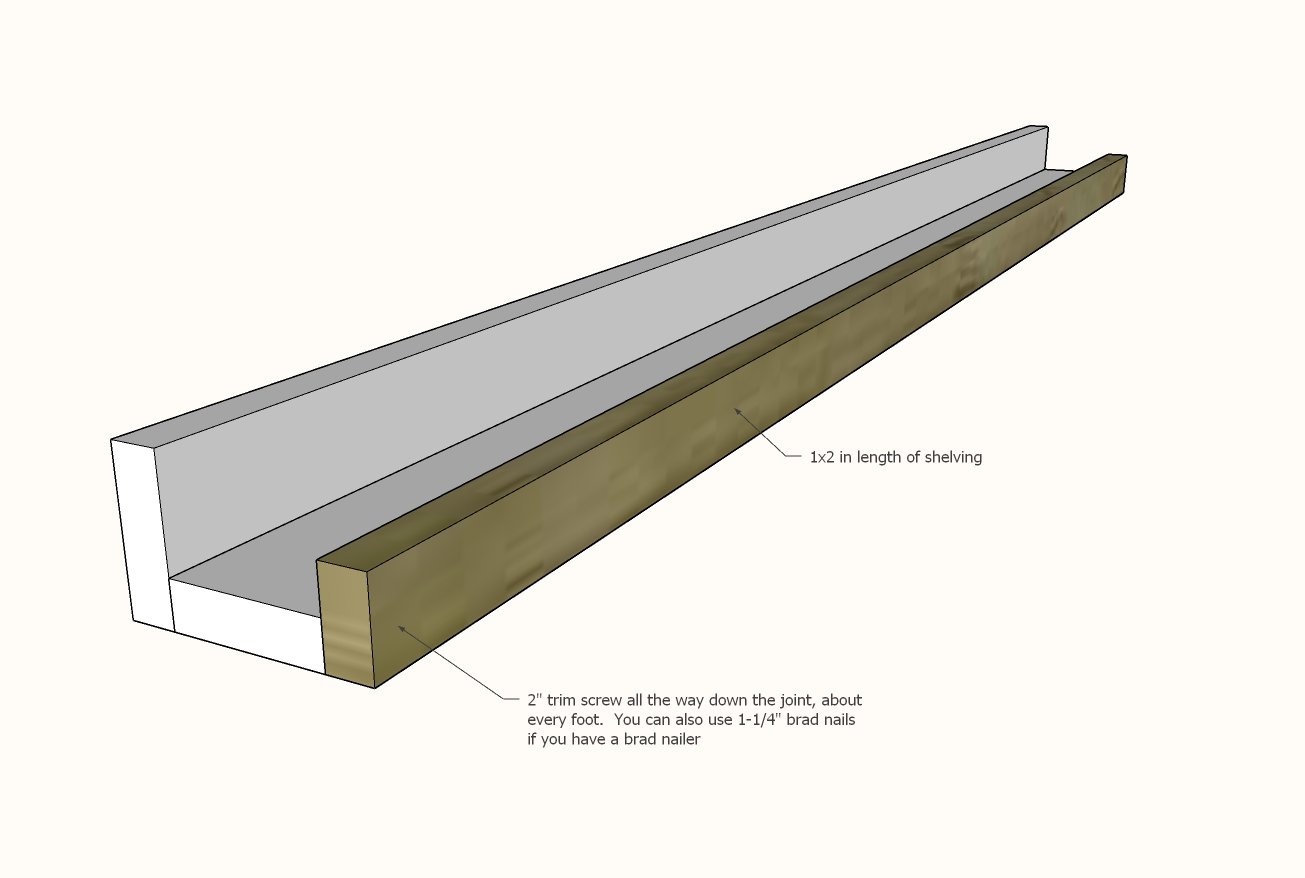
Attach the 1x2 to the front, with the 2" trim screws.
If you have a brad nailer, 1-1/4" brad nails and glue can also be used and will be easier to finish than screws.
- For a painted finish, fill the screw or nail holes in the front 1x2 only with wood filler. Let the wood filler dry and then lightly sand any excess off. Then paint as desired.
- For a stained finish, lightly sand the project. Then apply wood stain of your choice. Then use a stain matched wood filler to fill any holes.
Step 3
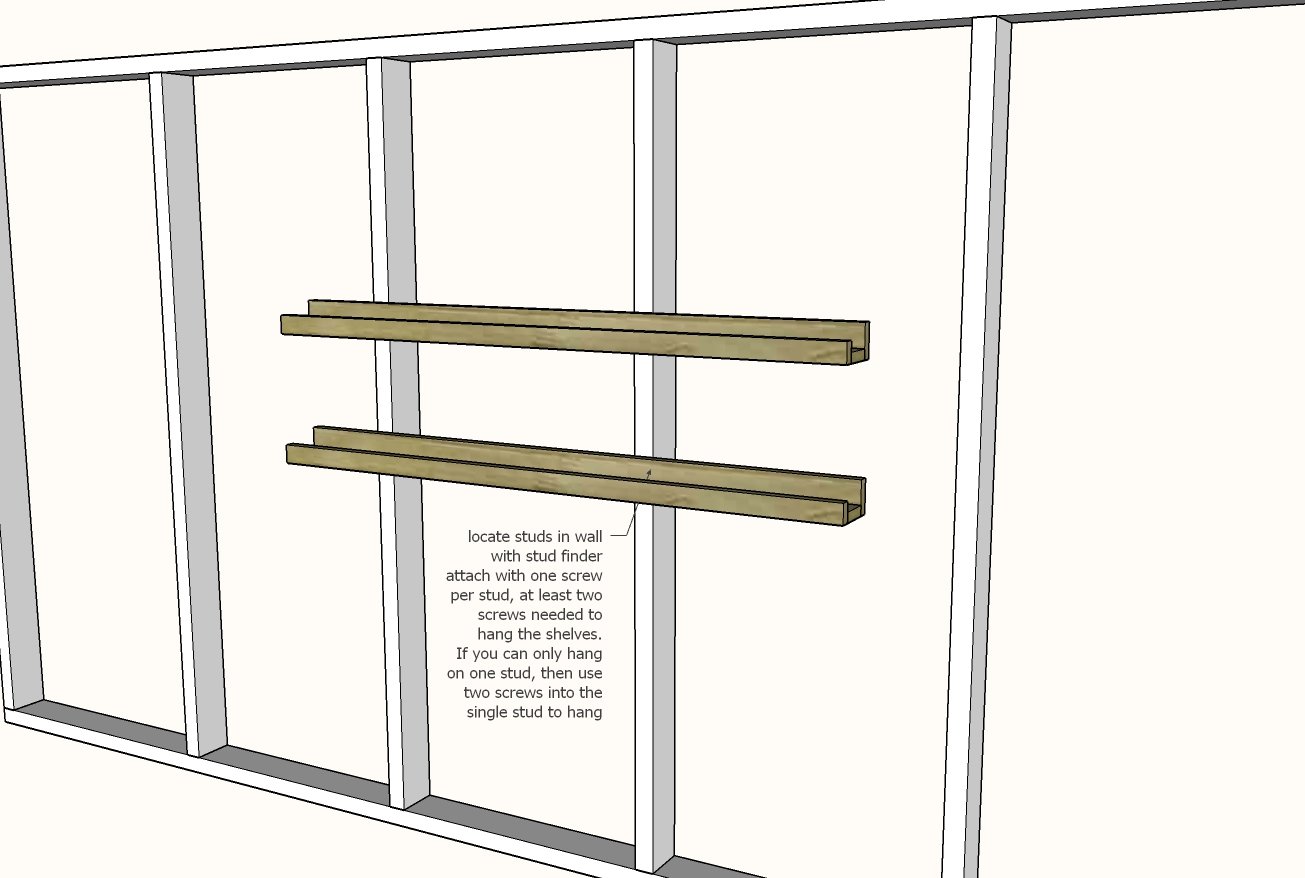
Locate studs in the wall with a stud finder.
Mark with a pencil.
Place the picture ledge up on the wall at the desired location and screw through the back 1x3 into the studs in the wall.
- At least two screws are needed to hang the picture ledge.
- One screw per stud in the wall
- If only one stud behind the picture ledge, than use two screws to attach to the one stud


Comments
Kelly (not verified)
Wed, 10/06/2010 - 17:51
Ahhh! This is exactly what we
Ahhh! This is exactly what we need! I was literally at Lowes today trying to find a solution for my homeschool room- this will be perfect, thanks :)
Jayme (not verified)
Wed, 10/06/2010 - 17:52
I wish you could come to my
I wish you could come to my Mops group! I love these, going to try them hopefully this weekend!
Anna (not verified)
Wed, 10/06/2010 - 17:54
I love these! So accesible
I love these! So accesible because of their ease and price!! Another winner Ana!
Onica (not verified)
Wed, 10/06/2010 - 18:02
I need, need, need these! Off
I need, need, need these! Off to the lumber yard soon! THANKS ANA!
Our Nifty Notebook (not verified)
Wed, 10/06/2010 - 18:03
I love this! I'm thinking
I love this! I'm thinking this would also be a cool book display too!
Kathy (not verified)
Wed, 10/06/2010 - 18:07
Love, love, LOVE this! Can't
Love, love, LOVE this! Can't wait to build them! Thank you!
sarahj77 (not verified)
Wed, 10/06/2010 - 18:11
Wow. Wish I'd seen that a
Wow. Wish I'd seen that a few weeks ago. I bought knockoff PB shelves for my son's room and when his brother slams the door, everything falls off. That lip on the shelf would solve my problem!
Lisa Forrette (not verified)
Wed, 10/06/2010 - 18:14
Ana, you are my hero! This
Ana, you are my hero! This is just beautiful and oh so simple.
Until I found your site, I was afraid I'd never be able to afford decorating/furnishing my home it the way I dreamed it could be. No I have hope! Keep up the great work and thanks, thanks, thanks!
Leslie (not verified)
Wed, 10/06/2010 - 18:57
Wow! Wow! Did I say WOW?
Wow! Wow! Did I say WOW? THAT has to be the easiest build on record. Even with three cut fingers (had a run in with a table saw - the saw won!), I think I could still manage this. Yup! Looks like I need to head to my favorite lumber yard tomorrow. Thanks!
Lisa (not verified)
Wed, 10/06/2010 - 18:59
Dear Ana, I have been
Dear Ana, I have been following your blog for months now and never left a comment. However....EVERY plan you post is amazing...inspiring and creative! And I could leave a "wow" comment for each one. I can't express how much I look fwd. to opening your blog every day....and how grateful I am for your generosity in sharing....and encouraging!! I Thank you thank you...!
p.s. Do you have a P.O. box to send donations??
sarahhiggs (not verified)
Wed, 10/06/2010 - 19:02
what did you do to finish the
what did you do to finish the shelves?? they look awesome!
love this entire look.. I have been wanting to do something like this in my office.
thanks so much!
Faith (not verified)
Wed, 10/06/2010 - 19:02
Love.Love.Love these! I know
Love.Love.Love these! I know what I'm going to do with my big, empty, boring family room wall! I can mix framed pics with my toddlers art they love to have on display! LOVE THESE! Thanks so much!
Stephanie (not verified)
Wed, 10/06/2010 - 19:15
Hey! I totally built these a
Hey! I totally built these a few months ago! They're great :) I should upload a picture... but I'm lazy...
Kelli (not verified)
Wed, 10/06/2010 - 19:56
Would these work using a 1x2
Would these work using a 1x2 instead of a 1x4 for the "bottom" of the shelf? I need something for my hallway and I'm not sure if by using 1x4's it would stick out too far. I love them though! So easy and look great!
Tracy (not verified)
Wed, 10/06/2010 - 21:08
This is a really great idea!!
This is a really great idea!! I have tile on my kitchen walls but would love to have this for my spices and cookbooks! Love it!
Tracy
anaturalprocess.blogspot.com
Ana White (not verified)
Wed, 10/06/2010 - 21:18
Hi Kelli, it would "work" but
Hi Kelli, it would "work" but the problem with going narrow is your books might fall forward (or picture frames). I did a demo with a 1x3 as the bottom, and it was too narrow for taller items. It would definitely work for shorter items. The 1x4 was much better though for layering photos frames and holding other collectibles.
kasimpkins
Tue, 07/30/2013 - 21:29
What about using ticky tacky
What about using ticky tacky at the top of each frame? It might be enough to hold them up on a smaller shelf. Just a thought.
Silky (not verified)
Wed, 10/06/2010 - 21:24
Just last week I mounted
Just last week I mounted similar ledges that I bought at IKEA. They aren't as pricey as the PB ledges but you could still save a bit when building your own.
I combined them with a clip art rail and it's the perfect combination.
I still need to take pics.
Ana White (not verified)
Wed, 10/06/2010 - 21:43
Sarah, it's simply high gloss
Sarah, it's simply high gloss white cabinet paint, three coats. Grace helped. The frames are horrible - need another coat but it started snowing on me outside! These are so easy and so difficult to mess up!
Ana White (not verified)
Wed, 10/06/2010 - 21:43
Can't wait to see! That
Can't wait to see! That sounds really functional and attractive!
jojabis (not verified)
Wed, 10/06/2010 - 21:55
okay so at our place of
okay so at our place of business we have about 30 brag photos of our work but the only place I could put them was in the back and when we want to show them off we have to get them down. stupid $1 frames only have stands so I can't hang them on the wall. Just today I was trying to figure out a shallow shelf to put along the narrow hall that is our lobby. This is perfect thank you so very much.
Jan (not verified)
Thu, 10/07/2010 - 02:09
Hi Lisa, There's a "donate"
Hi Lisa,
There's a "donate" button on the right side on the website. ;-)
I agree with everything you said.
Jan
kate (not verified)
Thu, 10/07/2010 - 02:33
Thanks again, Ana! Such a
Thanks again, Ana! Such a simple and inexpensive project...bravo!
amy cornwell (not verified)
Thu, 10/07/2010 - 02:37
That is fabulous! I love them
That is fabulous! I love them and have already sent the plan to my hubby to make for me. Thank you SO much!
maryanne (not verified)
Thu, 10/07/2010 - 02:57
You can donate through Paypal
You can donate through Paypal on her site. Look on the righthand side of the page (scroll up from here) and you'll see a link where you can make a donation. I've done it - it's easy!
maryanne (not verified)
Thu, 10/07/2010 - 03:01
I think this may be your best
I think this may be your best plan yet. It is sooo simple, no cutting required, and can be used in so many different ways: frames, narrow figurines, children's artwork or A+ schoolwork, books, magazines. This can be used as an alternative to the bunk bed shelf. You can hang it in the dining room and display plates. Since it's screwed into studs, it's super strong... how about adding cup hooks to the bottom and hang coffee cups or something from the bottom? Bravo!
darbynwoods (not verified)
Thu, 10/07/2010 - 03:44
ana nice work. simple and
ana nice work. simple and easy.
this is a great project for the popular and pine that you can find at hd. I would also prime and paint the wood before assemblying the shelves. this is much easier to get into the corners and just do some touchup.
if you plan to make a few you may want to look into a taper drill bit for the holes on the front. then you could put in a plug and sand it off and not see the screws.
i would only add to predrill holes on the shelve for the screws to go into the wall . This is after finding and laying out the studs.
david
darbynwoods.etsy.com
www.facebook.com/darbynwoods
Tanjia (not verified)
Thu, 10/07/2010 - 03:50
Ana - I think I might be able
Ana - I think I might be able to get this project done before the snow starts flying here! Thanks for empowering me yet again!
Melissa (not verified)
Thu, 10/07/2010 - 03:59
These look great, Ana! What a
These look great, Ana! What a good idea to creatively "match" all the frames in your house, too.
sarahhiggs (not verified)
Thu, 10/07/2010 - 04:55
haha.. sorry, i'm new to all
haha.. sorry, i'm new to all of this! I think this will be my first project! ;)
I recently helped my husband build a shed, gate and shingled the roof! It's the first time I've really ever picked up a tool, and although scary at first, not so bad once you get the hang of it! I have been following your site for a few weeks now and have about 20 projects bookmarked.. thank you so much for all the inspiration. simply amazing.
Marygail (not verified)
Thu, 10/07/2010 - 05:12
I LOVE this Ana. This is
I LOVE this Ana. This is going to be my first project.
Tsu Dho Nimh (not verified)
Thu, 10/07/2010 - 05:21
Sarah - Can you nail and glue
Sarah - Can you nail and glue on a lip and paint the shelves?
Tsu Dho Nimh (not verified)
Thu, 10/07/2010 - 05:22
Lisa - She has a paypal
Lisa - She has a paypal donate button at the bottom of the right-hand column of stuff.
Tsu Dho Nimh (not verified)
Thu, 10/07/2010 - 05:28
Oh my ... I have a wall these
Oh my ... I have a wall these would be perfect on for some cookbooks, and a pile of scrap lumber to play with :)
QUESTION: What is that paint color? I'm looking for a creamy pale yellow and that looks like a nice shade.
ShaRee Hirschi (not verified)
Thu, 10/07/2010 - 05:56
Ana, (Please respond if you
Ana, (Please respond if you read this)
Can you give measurements of the height you hung the shelves on the wall. What was the distance between shelves, etc?
Thanks so much!
ShaRee
[email protected]
Ana White (not verified)
Thu, 10/07/2010 - 06:44
Hi ShaRee, I'm in flight
Hi ShaRee, I'm in flight right now, so I can't give you the exact measurements - but I can give you an approximation. We hung the bottom shelf at about table height - so about 30" high. Then we left enough room for the frames, about 15" between the shelves. When I get home I can give you better specs. Thanks so much for asking - I'm sure others have the same question.
Annalea (not verified)
Thu, 10/07/2010 - 06:51
Ana, I just wanted to say
Ana, I just wanted to say (again!), how much I appreciate this blog, and all of the awesome plans on it. We're currently building a house, and I can hardly wait to pretty much fill it with things I build from your site. These ledges, especially, are going to be perfect for the apartment over the garage where we'll be living while we build the house itself. (The garage is coming along nicely, but it's going to be a squeeze with the kids. Think Japanese-style living.) These ledges will allow great use of little bits of wall, while not projecting into the room, or overwhelming the space. Thanks so much!!!
Annalea (not verified)
Thu, 10/07/2010 - 06:53
The best way to pick a color
The best way to pick a color is to go grab some paint chips that appeal to you, and then tape them to the wall you're wanting to paint. Since color is an abstraction, literally a function of the ambient light in a given area since color is just reflected light, it's really difficult to directly transfer a color from a photograph to your own home. Printing out the photo above and taking it to the paint display is probably your best bet. :o)
Hope this helps!
Annalea (not verified)
Thu, 10/07/2010 - 06:59
P.S.) Is there a way to
P.S.) Is there a way to download a pdf that I missed? If not, here's a PDF I made in case someone wants an easily-printable version. Ana, if you'd rather not have this here, please feel free to delete this comment, or let me know, and I'll remove access to the document.
Thanks!
Maureen (not verified)
Thu, 10/07/2010 - 07:35
Love you Ana! Went to Orange
Love you Ana! Went to Orange and bought wood today (I decided to go with 6 foot long for over my couch). I also picked up some spray paint to make my matching frames. Can't wait to knock this out! Thank you once again!!
suzannah (not verified)
Thu, 10/07/2010 - 07:54
Have been looking at our bare
Have been looking at our bare walls since we moved in this summer - afraid to hang anything permanent since we don't have permanent furniture.... these shelves are perfect for any furniture placement!! no centering needed! Love it! Another thing on my project list!
Laurie (not verified)
Thu, 10/07/2010 - 08:01
These are GREAT! I've been
These are GREAT! I've been meaning to ask you, do you use a spray gun? Spray paint gets pretty expensive and there aren't as many options. I found one that attaches to the pancake compressor and uses mason jars. Makes cleanup, paint color changes, and paint storage so much easier! $40 on amazon.com. I think it's called "Critter".
ChrisE (not verified)
Thu, 10/07/2010 - 08:54
Off topic comment - but I
Off topic comment - but I just wanted to tell you I heard you on NPR today. Great job!!!! I don't know why they didn't mention your website by name though!!!
Laurie (not verified)
Thu, 10/07/2010 - 09:11
I just re-read my post and it
I just re-read my post and it sounds like I'm trying to sell something! Sorry, just excited about my find!
Laurie (not verified)
Thu, 10/07/2010 - 14:54
Ana! I have been following
Ana! I have been following you for a while and have even built a few things! I am addicted! Anyway, I want to build some of these for my daughters room for books and things, but I don't really want to screw them to the wall. I do want them to be able to hold ALOT!! Any suggestions?
Sheela (not verified)
Thu, 10/07/2010 - 16:42
Ana (or anyone else who is a
Ana (or anyone else who is a finishing expert) - what are your tips for getting paint to lay down smoothly on wood surfaces? Do you use a brush, foam brush, roller, etc.? Any tips are very appreciated!
Lyndsay (not verified)
Thu, 10/07/2010 - 16:56
This is my 2nd project that I
This is my 2nd project that I have made of yours. And this one was so easy and simple. I love it. I just need to wait for the paint to dry to hang it up. I am putting it in my craft room. It is going to hold all my paints. Thank you so much.
Nichole (not verified)
Fri, 10/08/2010 - 03:34
Hi Ana. I have been loving
Hi Ana. I have been loving your blog for quite a while now. I originally found you through a reference on Woot! and have been checking it daily ever since. I am in the process of buying my first house. In fact, I just had the inspection yesterday. I am so excited about getting in there and fixing it up and making it mine. I have dreams of filling it with furniture I made myself from your plans. My dad has always done woodworking in his spare time and I always admired that and wanted to try it myself, but was too intimidated until I found your site. Maybe these shelves will be my first project for the new house.
Thanks so much for all you're doing to help us make our homes beautiful while keeping some money in our pockets. More importantly, though, for giving us the confidence to try.
Also, I wanted to let you know I happened to catch your interview on NPR last night during a late-night burger run. You did great. Please consider this positive comment #10,001.
Leah (not verified)
Fri, 10/08/2010 - 04:00
Most people prefer spray
Most people prefer spray paint for that super-smooth finish~
malissa (not verified)
Fri, 10/08/2010 - 04:35
I love these!
I love these! question...could I make the ledge piece bigger than the 1x4 for say wine bottles? Will it hold up? I love these from PB but they are too long
http://www.potterybarn.com/products/holman-entertaining-shelves/?pkey=e…
thanks!