
Summer is winding down for us here in Alaska. We spent the weekend fishing for silver Salmon off the coast of Alaska, and broke up our trip home by staying the night in our cabin that we built earlier this year with DIY Network (will be airing later this year, will let you know when we know!).
Each time we come to our cabin, we fall in love all over again with it. It was a ton of work. There were long hours, long days, long weeks of hard manual labor, building remote and off the grid. But it was so worth it!
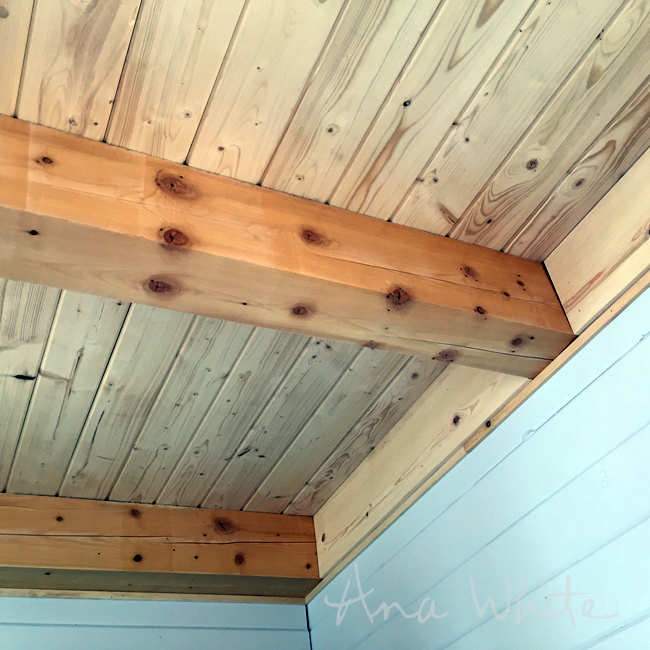
One of my favorite elements of the cabin is the upstairs loft.

The woodwork is what makes this cabin. All of the wood used throughout this cabin was locally grown, harvested and milled right here in Alaska. This floor, it is also the ceiling below -
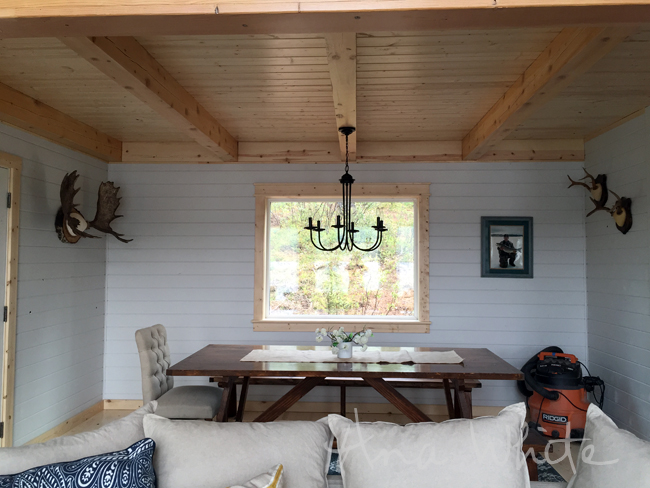
Table plans here and matching bench plans here
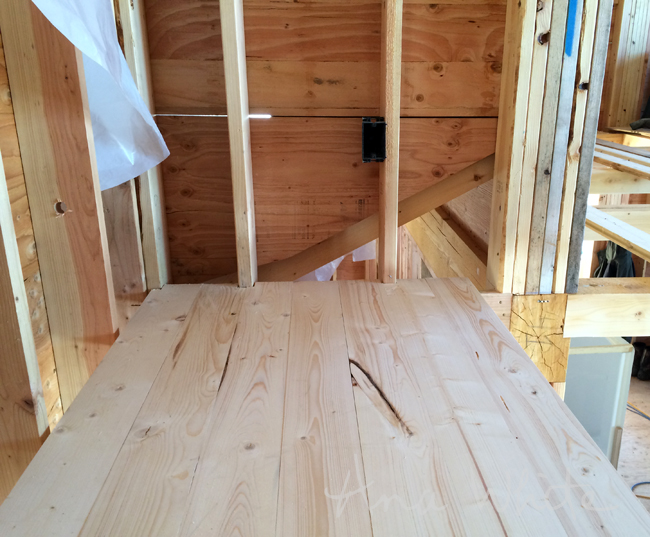
We just used 2x6 tongue and groove, placing the flat side up for the upstairs floor, and the grooved side down for the downstairs ceiling. I don't know if there exists a faster way to install a finished floor and finished ceiling, and they look this beautiful.
Here's how we did it -
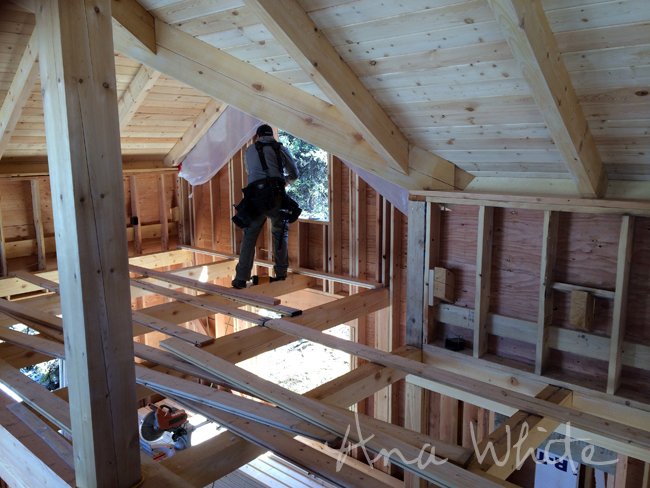
We have beams already spanning where the loft goes, as part of the timberframe that we cut and put together.
We figured our where we wanted to start, and then did some figuring to make sure we are starting square, all the stuff you normally do when installing a finished floor.

When we were finally happy, we glued and nailed down the first piece of tonge and groove, careful to place fasteners where the baseboard will cover them up.
I opted for this install to hide all fasteners. I love the look of rustic floors with exposed nailheads, but since we were under a huge time crunch with the filming schedule, I had to compromise on the added steps of staining and distressing the floors. Fasteners on brand new floors just would have looked terrible, and really stood out. We'll get to how we hid the fasteners on the rest of the floor in a moment.
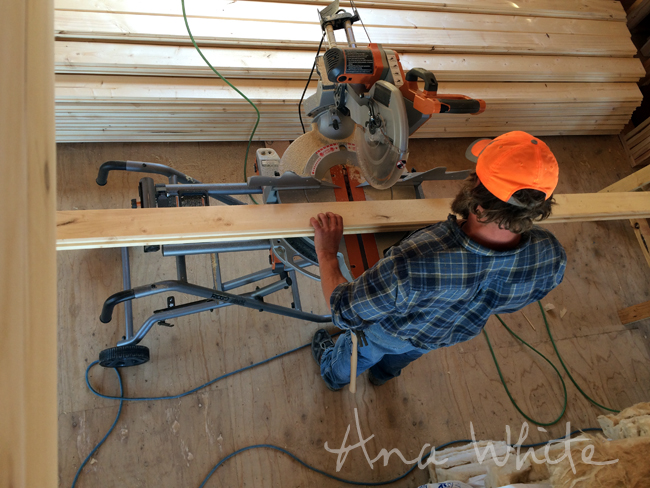
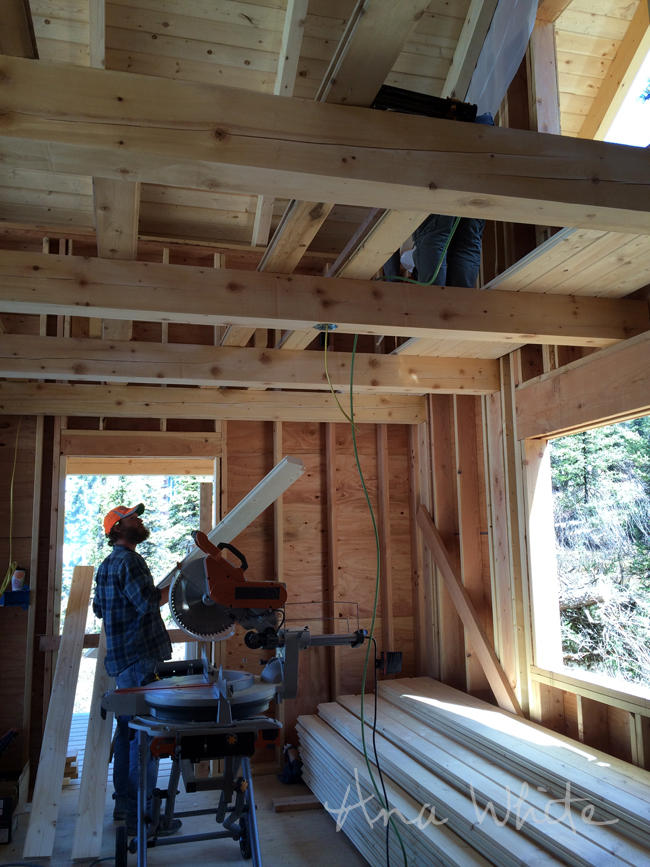
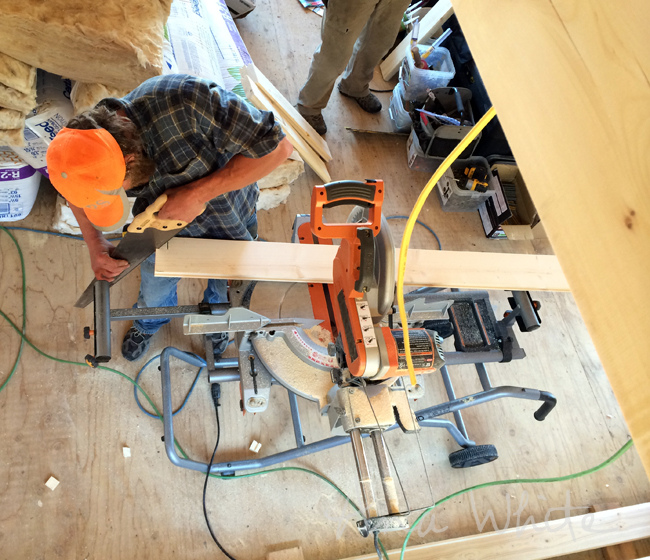
We set up a compound miter saw directly below the floor, and had one person (Matt) cut -
And then pass the cut boards up to Jacob, who was installing and nailing.
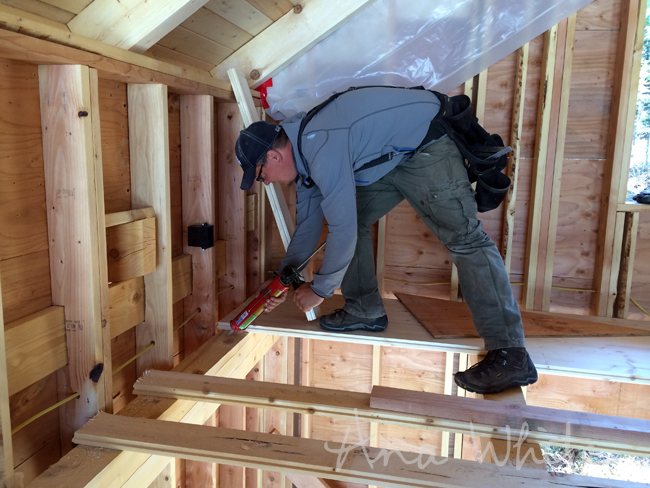
Since we decided to nail all the boards down, we used construction adhesive at all joints. This will keep the floors from sqeaking later on.
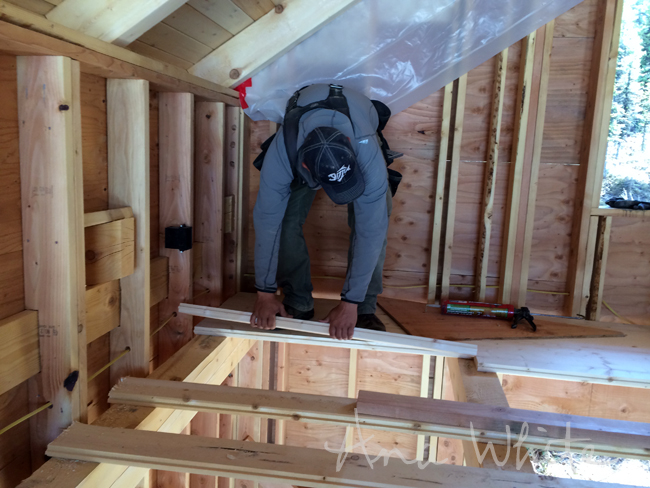
Whenever we could, we used full length boards. But in some spots, we had to add joints because we just didn't have boards long enough to span the full 30 feet of the cabin. So we made sure to place butt joints directly over wood beams below.
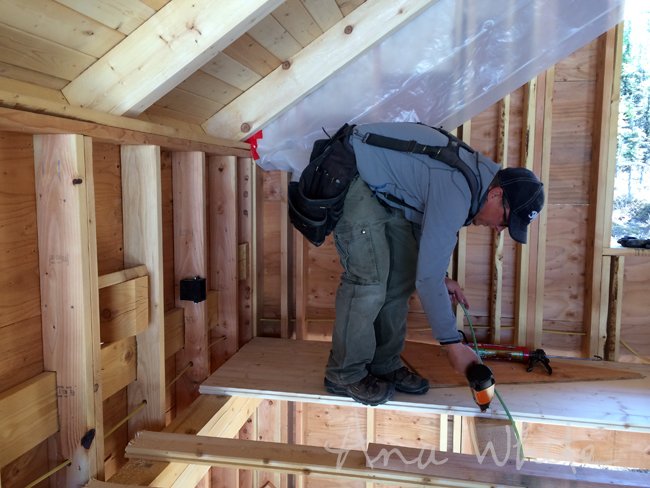
We used a 15 gauge nailer to nail the boards to the beams, nailing on the tongue side, at an angle into the beam. Not only does this hide the nail hole, but it pushes the board into the other boards as it's attached.
This is one of those projects that goes fast, and alot gets done quickly. Just ask anyone who has ever finished a drywall ceiling or went back after the fact and put tongue and groove up on a ceiling. Working with your materials down below you is much easier than working overhead on ladders.
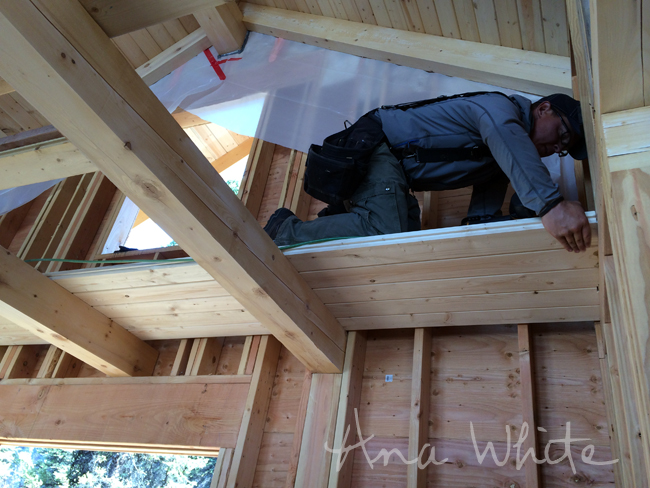
There were a few spots where we had to do some hand notching. Since everything is visibile, from top and bottom, we had to be very careful, and used a handsaw.
That, and .... someone forgot to grab the jigsaw. No Home Depot out here.
In one spot, there was no beam to land the end of the tongue and groove on. What we ended up doing was notching a board into the wall, and then landing the tongue and groove on top of that board (eventually to be embeded inside the finished wall). This was not a big deal, but placement of those beams was crucial, so your tongue and groove is fully supported.
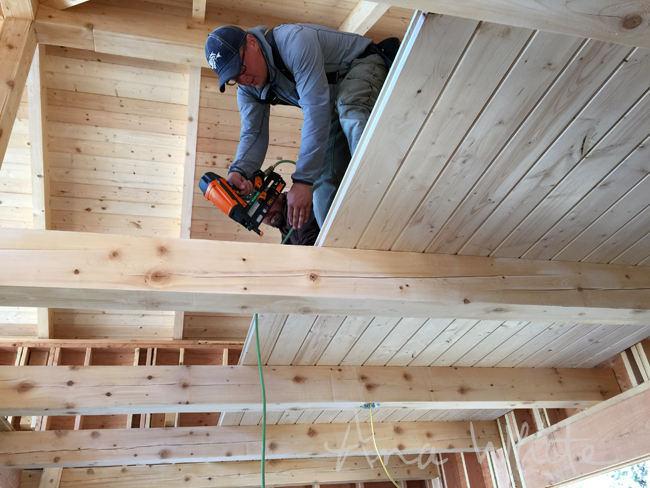
We had already routed out the light fixture wiring, so after the little hiccup around the wall, things went super fast.
In just a couple of hours, we went from open beams -
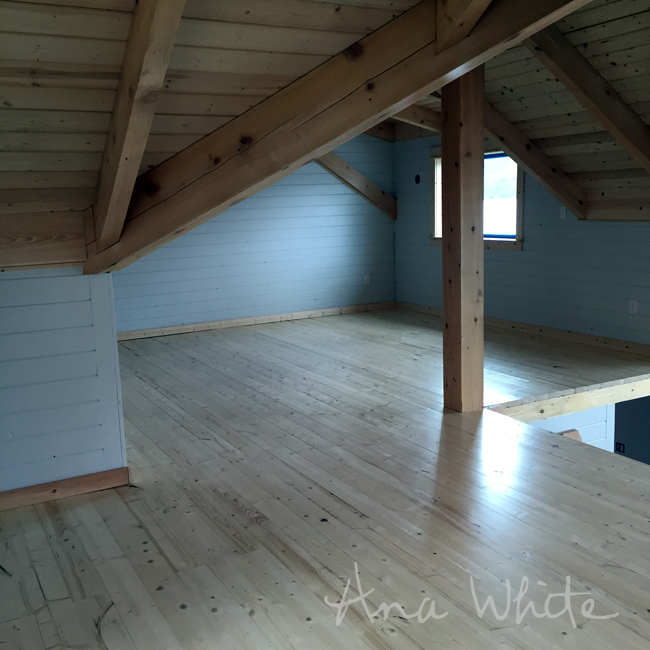
to a finished floor,
And a finished ceiling full of character!
This is the way to go for a cabin loft. A few drawbacks are - there is no insulation from noise, so kids jumping around upstairs will be heard; you can't hide any utilities besides the routed wiring (wouldn't work for plumbing or HVAC systems); and we don't have local building codes in Alaska, so you may wish to check with your local building codes about a ceiling like this for fire prevention reasons.
Thanks so much for reading and following along on our cabin build! We can't wait for it to air on DIY Network, and hope you'll tune in with us too!
XO Ana + Crew
Comments
coseydog
Mon, 08/17/2015 - 19:09
Gorgeous!
Ana, your cabin is so amazing! A work of art. :) I was wondering, is it dry? I noticed in your original post with sketched out plans you have a bathroom... If it's not dry, how do you deal with pipes leading outside the house with an open foundation in the winter? I'm hoping to build my own (much simpler!) cabin next summer, and this is a question I have been wondering about...
Thanks! Can't wait to see the project on tv!
In reply to Gorgeous! by coseydog
Ana White
Tue, 08/18/2015 - 12:05
Hello and thank you! What we
Hello and thank you! What we ended up doing is an outhouse, with a indoor sink and shower for summer use only. So dry in the winter and then limited water in the summer. Hope this helps! Ana
coseydog
Thu, 08/20/2015 - 08:19
Thanks so much for responding
Thanks so much for responding! :)
Josh Burnell
Thu, 08/20/2015 - 06:59
Full plans
So what would it take to get the plans for something like the whole cabin? I am in love with the way that t you guys put it together.
natacha_imperf…
Sun, 08/23/2015 - 07:07
Love!
Hey Ana,
Recently started following you! My boyfriend jokes with me all the time we should just move to Alaska and build a cabin...these posts actually have me considering it-everything looks SO beautiful! I'm in love!!
natacha_imperf…
Sun, 08/23/2015 - 07:07
Love!
Hey Ana,
Recently started following you! My boyfriend jokes with me all the time we should just move to Alaska and build a cabin...these posts actually have me considering it-everything looks SO beautiful! I'm in love!!