


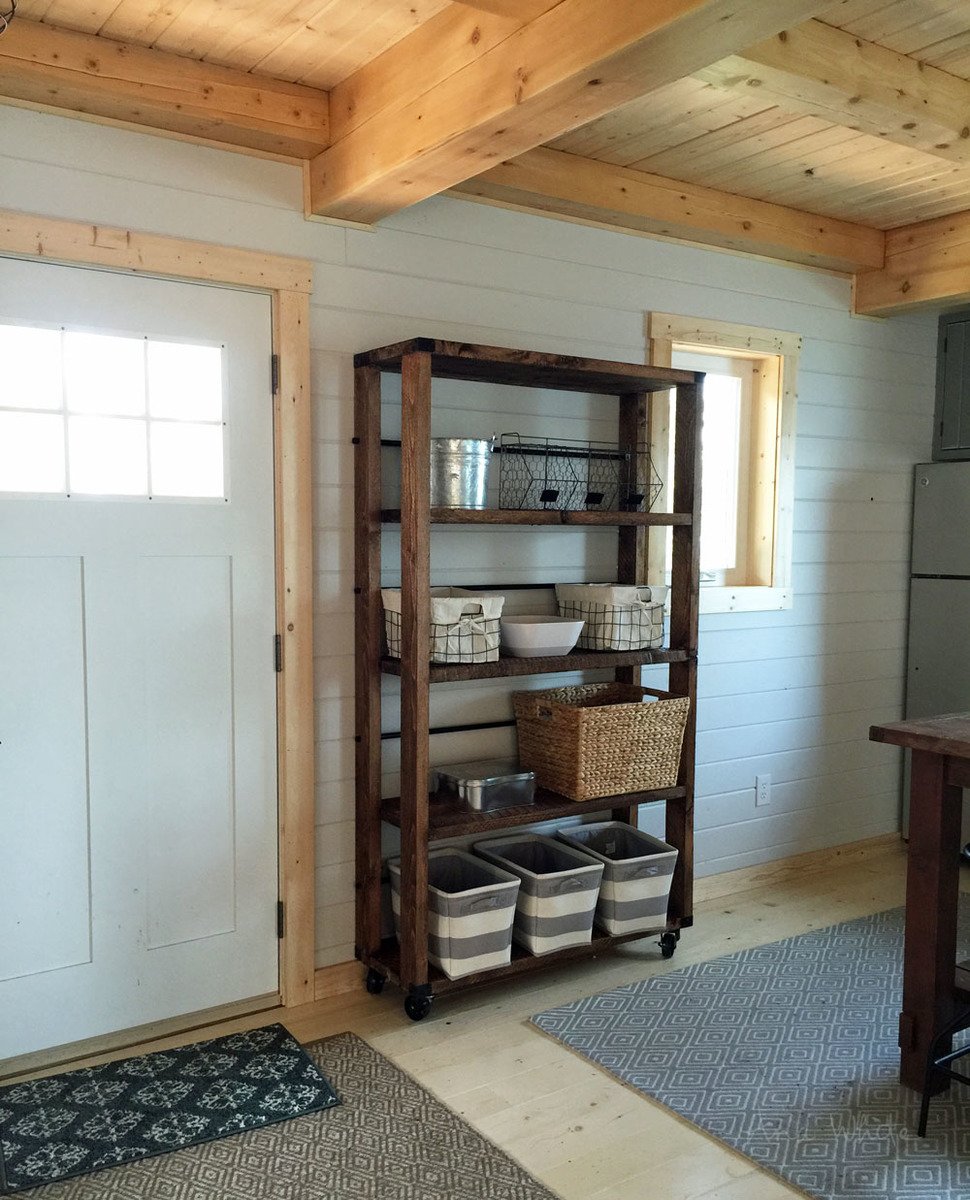
Easy how to build reclaimed wood salvaged look rolling shelf - modern industrial style.
Hi there! I'm so excited today to get to share with you the very first of the furniture plans for our Alaska lake cabin!!!
You'll have to watch the show when it airs on DIY Network to see the whole room, and how all the pieces fit in, but I'm so thrilled to be able to share the individual plans with you before it airs. Yipee!
After building the cabin, we ended up with quite a bit of scrap wood leftover. We had to over-order on materials since the cabin is so remote. Being out a 2x4 means an entire day of driving to go get another one.
So we decided to build all of the furniture from the leftover wood. For each piece of furniture, we would go down to the scrap wood pile, figure out what we had left in material, and make something out of it. By the time we got to building a pantry in the kitchen, there wasn't much left, espeically wider width boards, but we did have some rough cut 2x4s leftover from the exterior siding.
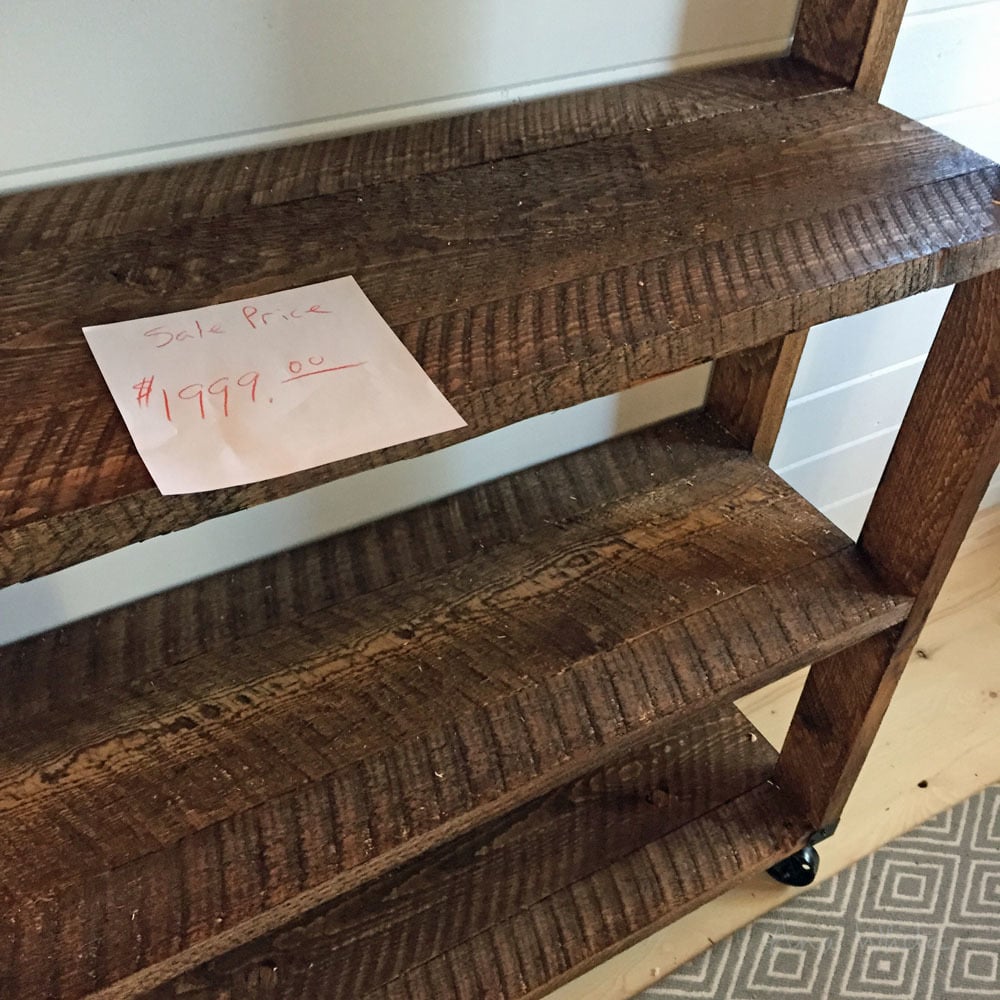
I've always loved this piece from Restoration Hardware (and there's lots more similar styles made by different companies)
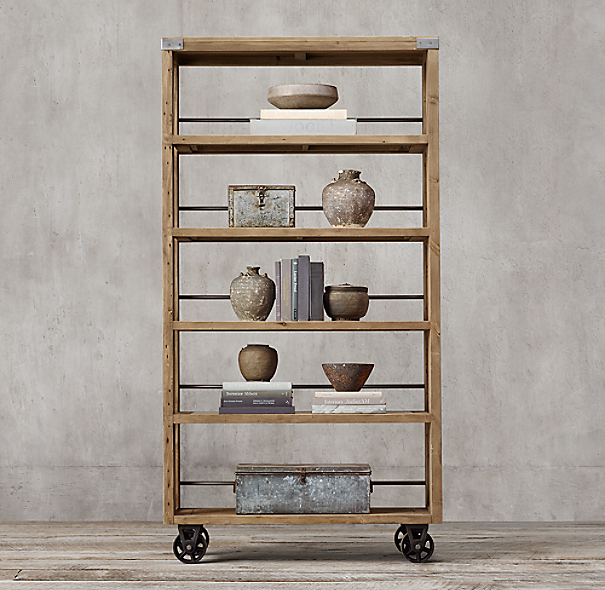
Not that they would ship to remote Alaska, and even if they would, $2500 is way out of my budget. So here's my opportunity to build and use and love it!

Built for less than $50!!! Pretty much all of the budget was spent on hardware and casters and screws. This project was built by Ross, a good friend of ours that helped out on the cabin.
Very funny Ross.
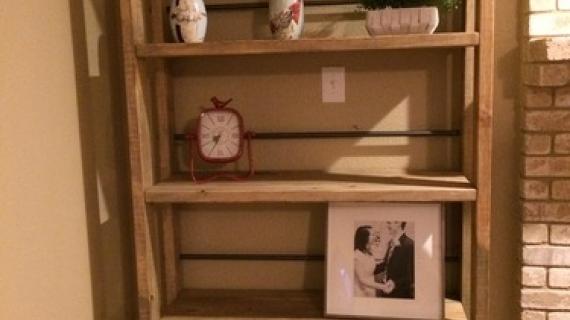
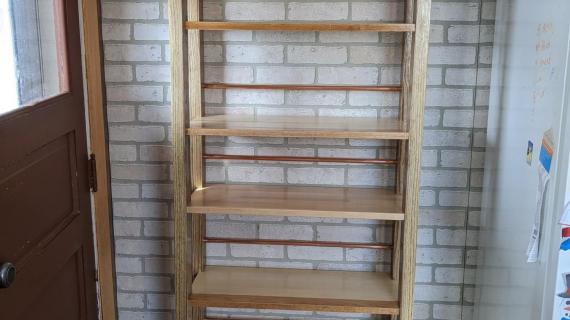
I built mine out of rough cut Alaska Sitka Spruce to get this texture on the wood. To get rid of the splinters, I used a sander with 120 grit sandpaper over top of the rough cut. This left the saw marks, but made the final finish smooth to the touch.

Rough cut lumber is availabe at local saw mills, and is often considerably cheaper than kiln dried lumber. Of course, if you can find salvaged wood or reclaimed wood, that would even be better. And using good old 2x4 boards would work too, but you may not get this same texture in your wood.

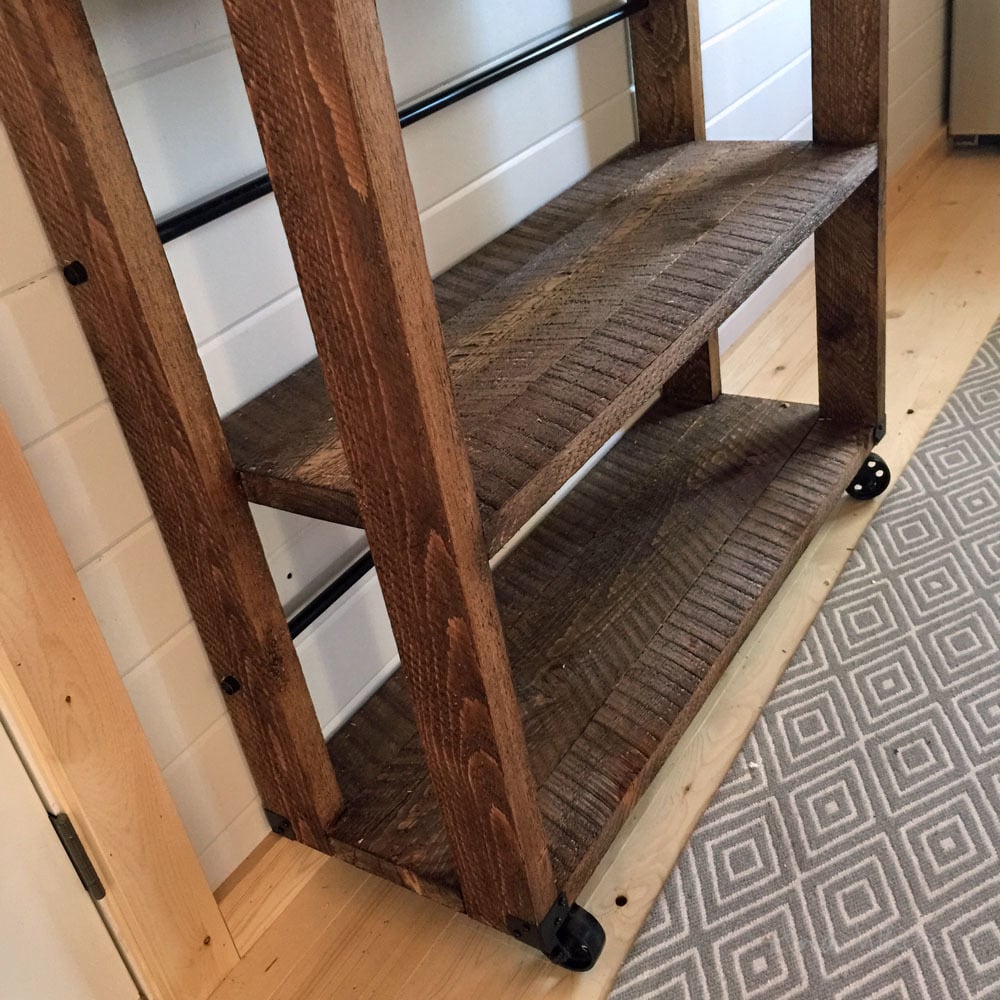
For the hardware, I used metal caster wheels, corner brackets and EMT pipe, all spray painted black with Rustoleum Spray paint in black. The wood was stained using Varathane Early American.

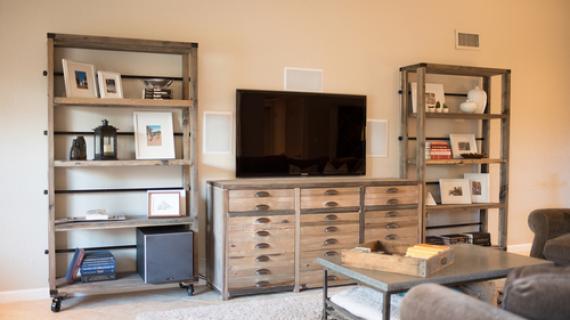
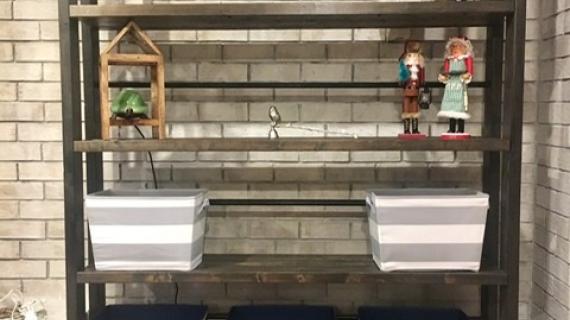
I'll be using this shelf as a pantry in the kitchen. A few random baskets (striped totes are from Target) and it's one of my favorite pieces in the cabin!
So your turn now!!! Plans follow, enjoy!
XO Ana
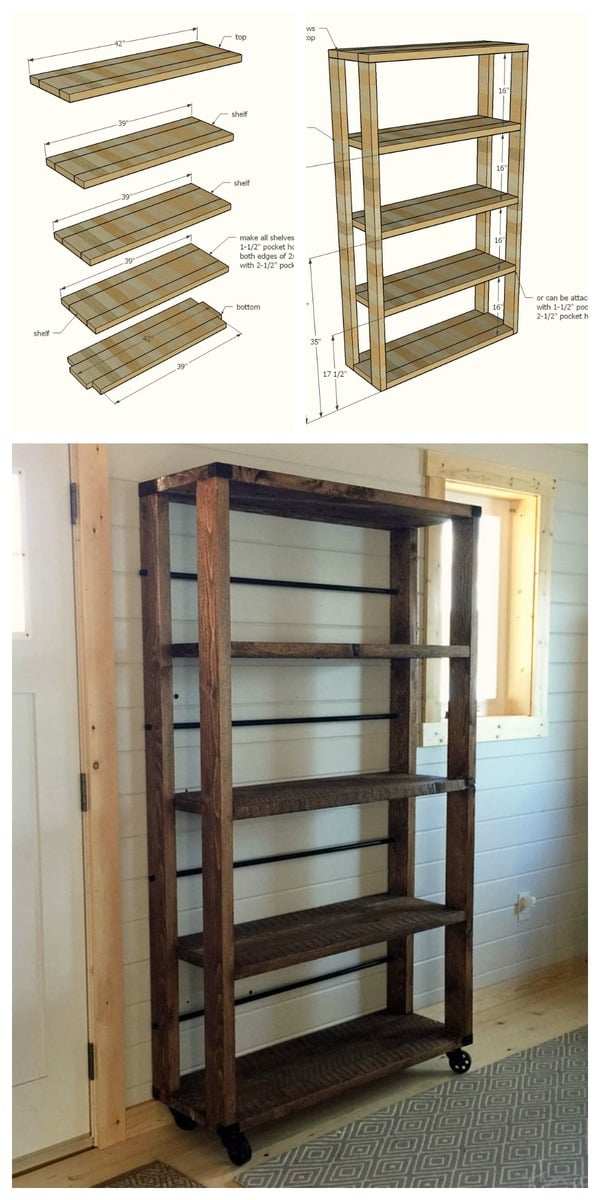
Preparation
2 - 2x4 @ 12 feet long (cut legs out of these)
5 - 2x4 @ 8 feet or stud length (cut shelf boards out of these)
1 - 2x8 @ 12 feet long
1 - 2x8 @ 8 feet long
16 feet of 1/2" pipe (I used EMT spray painted black)
8 - corner brackets
4 - caster wheels
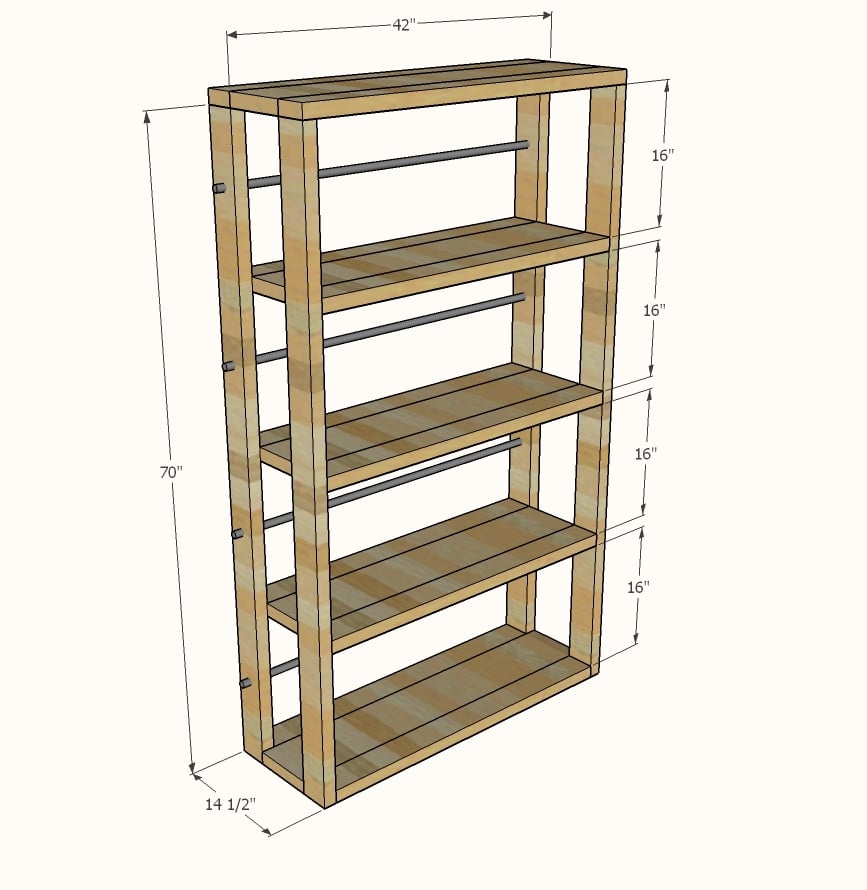
2 - 2x4 @ 42"
8 - 2x4 @ 39"
3 - 2x8 @ 39"
2 - 2x8 @ 42"
4 - 2x4 @ 70"


Please read through the entire plan and all comments before beginning this project. It is also advisable to review the Getting Started Section. Take all necessary precautions to build safely and smartly. Work on a clean level surface, free of imperfections or debris. Always use straight boards. Check for square after each step. Always predrill holes before attaching with screws. Use glue with finish nails for a stronger hold. Wipe excess glue off bare wood for stained projects, as dried glue will not take stain. Be safe, have fun, and ask for help if you need it. Good luck!
Instructions
Step 1

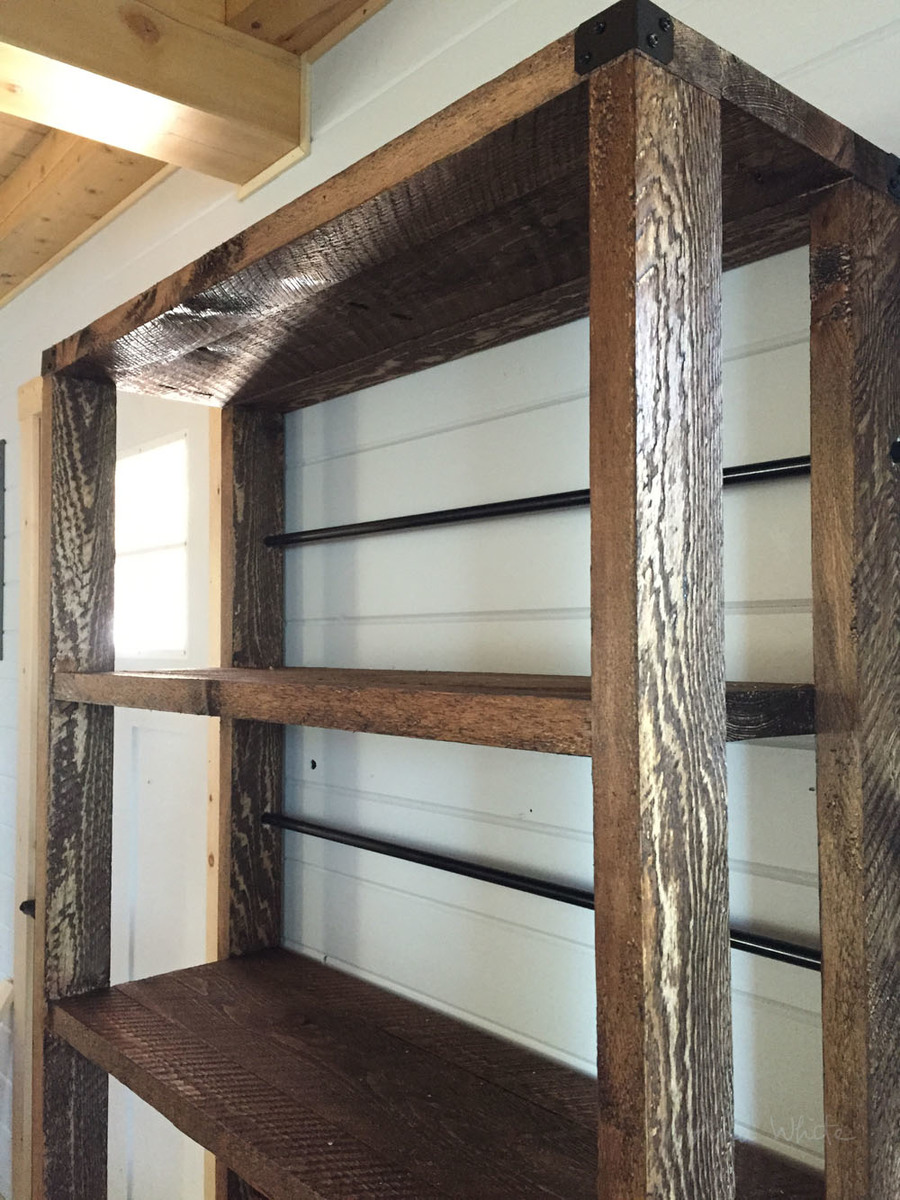
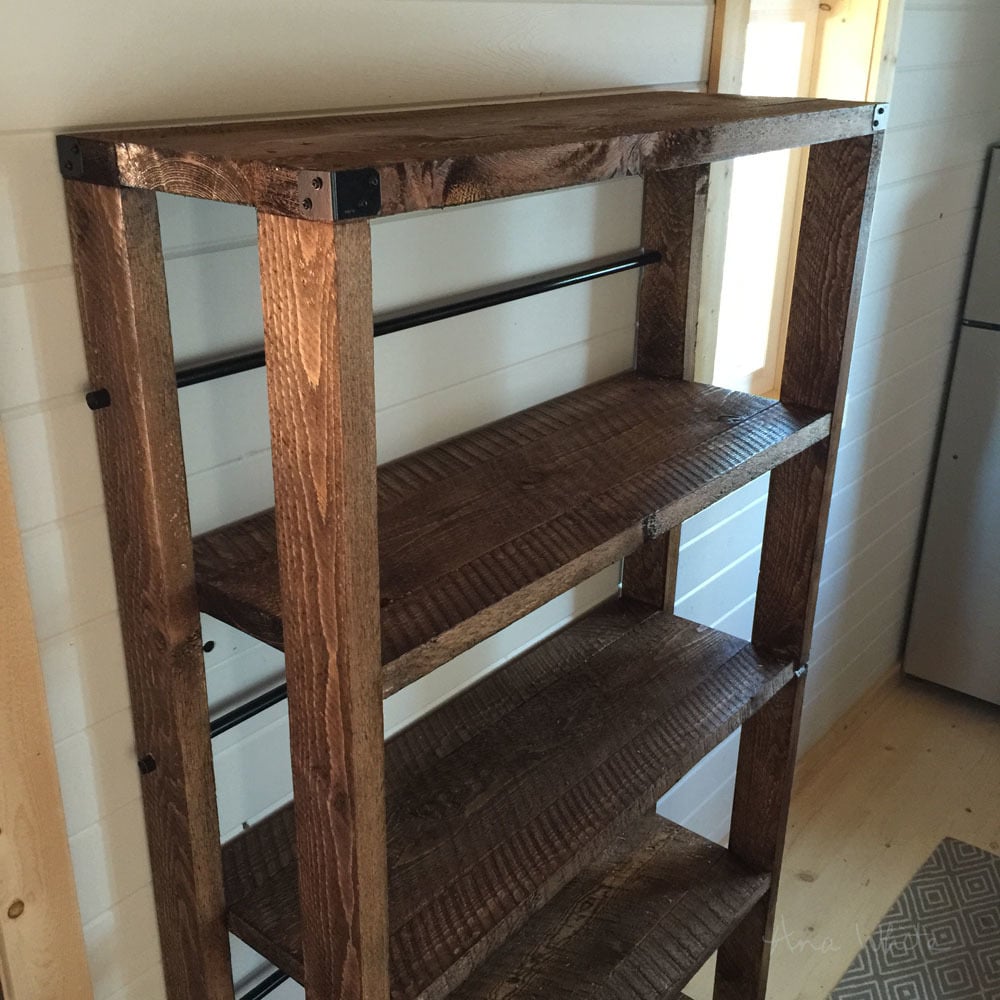
First, build all of the shelves as pictured, using 1-1/2" pocket holes and 2-1/2" pocket hole screws. You can also drill pocket holes for attaching legs in next step.
Step 2
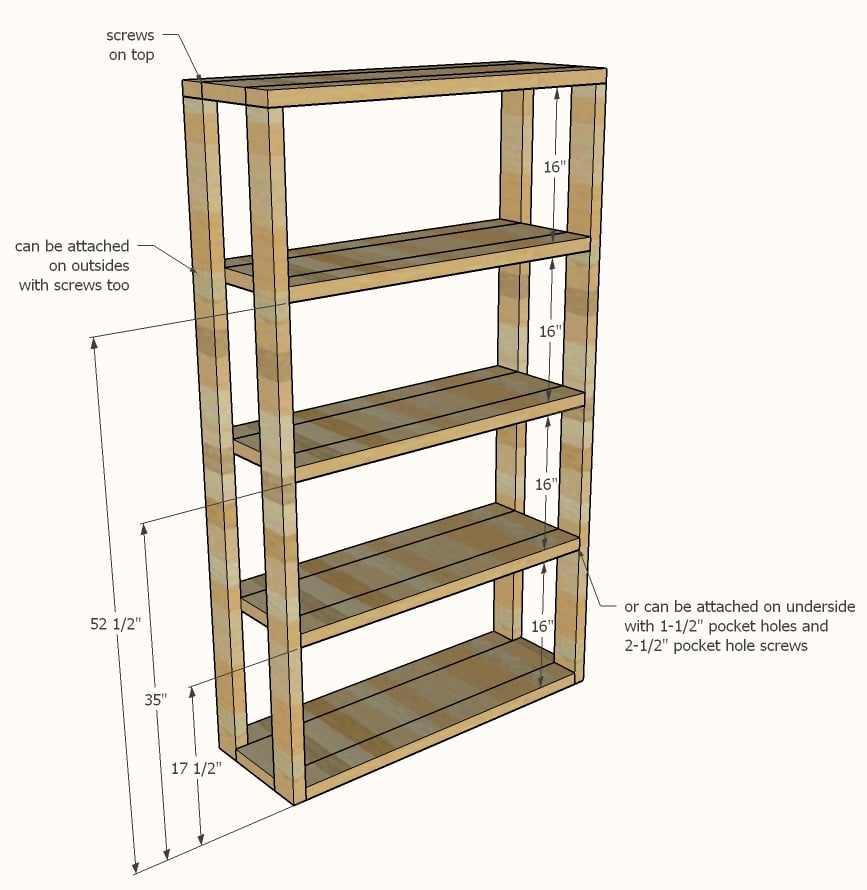
Attach legs to shelves, either with pocket holes or 3" wood screws. Attach top to shelves with 3" wood screws.
Step 3
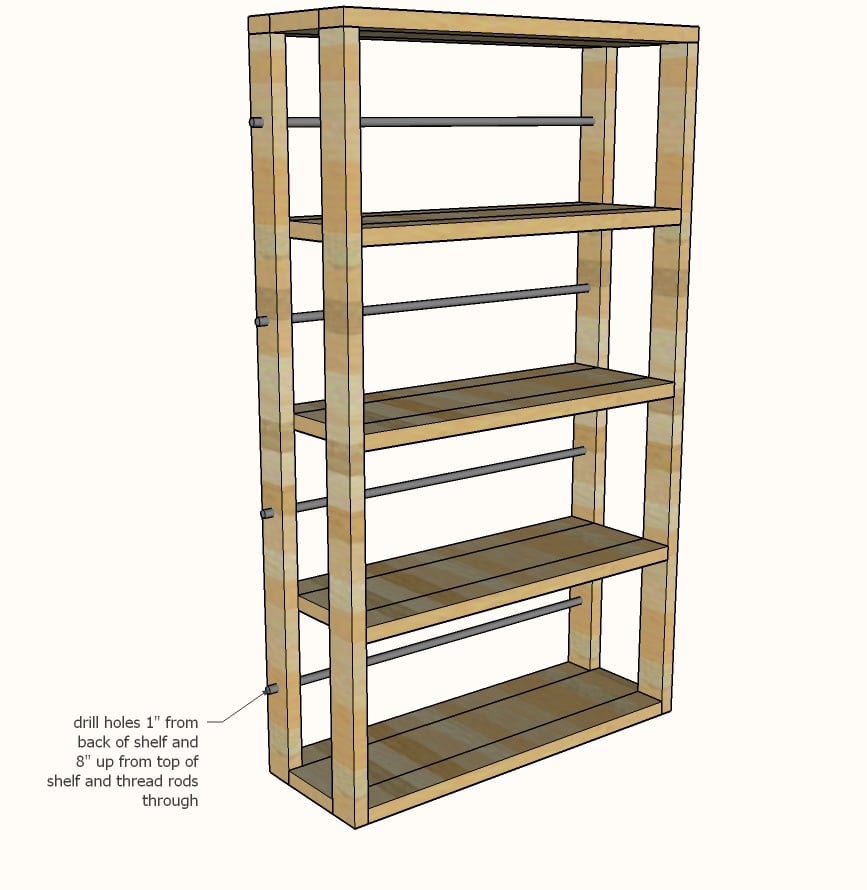
Cut pipe 1" longer than outside dimensions of shelf (should be 43"). Drill holes to match pipe size 1" from back, 8" from top of lower shelf. Thread pipe through holes. If the holes are drilled snug, the pipe will stay in place without added hardware.
Step 4

Attach caster wheels to base of project. I also added metal brackets to the corners for an added industrial style touch.
Step 5

It is always recommended to apply a test coat on a hidden area or scrap piece to ensure color evenness and adhesion. Use primer or wood conditioner as needed.

Comments
spiceylg
Thu, 06/25/2015 - 09:35
Love it!
How beautiful! I love it more than the one from RH because of that wood with the saw markings. Besides, their products are ridiculously overpriced! Are you officially moved in now and if so, what will become of that 1/2 of the Momplex that you vacated?
kced01
Wed, 07/01/2015 - 12:20
Love this piece!
Where did you find the hardware and brackets?
Swilliams658
Thu, 02/11/2016 - 08:49
Hardware
Hi Ana! Gorgeous piece. Do you know the size of the casters? Do you have a go-to brand for hardware? Thanks!
Edemardil
Sun, 11/27/2016 - 11:04
Ive bought and read everything.
How the heck do you put the 2x4 and 2x8 together for the shelves?
anita1977
Tue, 11/29/2016 - 07:01
Pocket Holes
First, build all of the shelves as pictured, using 1-1/2" pocket holes and 2-1/2" pocket hole screws. You can also drill pocket holes for attaching legs in next step.
Edemardil
Fri, 12/09/2016 - 08:47
Pocket Holes
So just like that? Not "Drill 2 holes on each ends" or "2 on each end and 2 in the middle" or "Drill from the 2x8 to the 2x4s" or "Drill from the 2x4's to the 2x8's" ? It's not a very informative direction.
cafm1953
Thu, 03/02/2017 - 17:59
Pocket holes
I don't think it matters if you drill from the 2x8 to the 2x4 or 2x4 to the 2x8. Kreg tool recommends drilling a hole approximately 2" from each end, then about every 6" or so for longer boards. Hope this helps.
Edemardil
Thu, 03/02/2017 - 13:08
Nightmare.
Making these has been a nightmare.
jsamans
Wed, 04/22/2020 - 15:45
Pipe needed?
Is the pipe needed for structural support or was it added for the look? Would wood cross-pieces anchored with pocket screws provide the same effect?