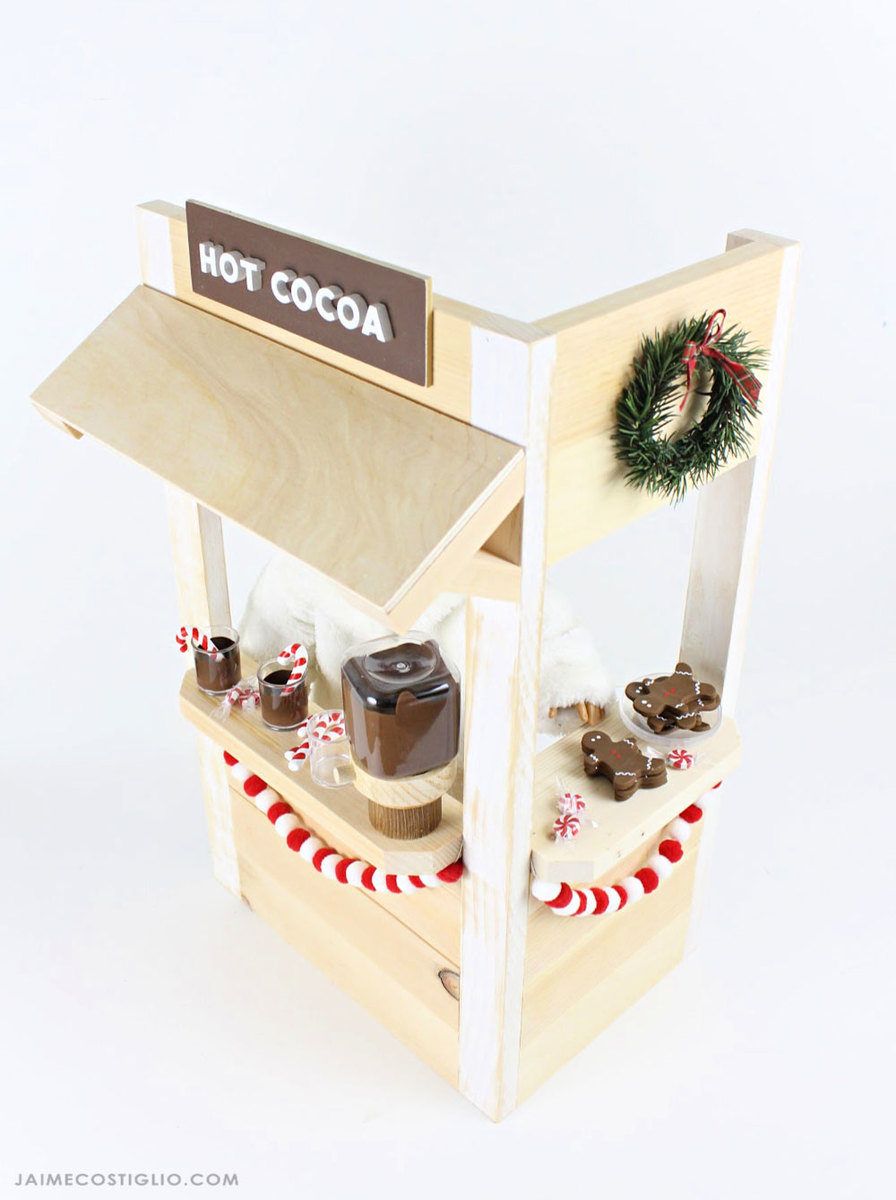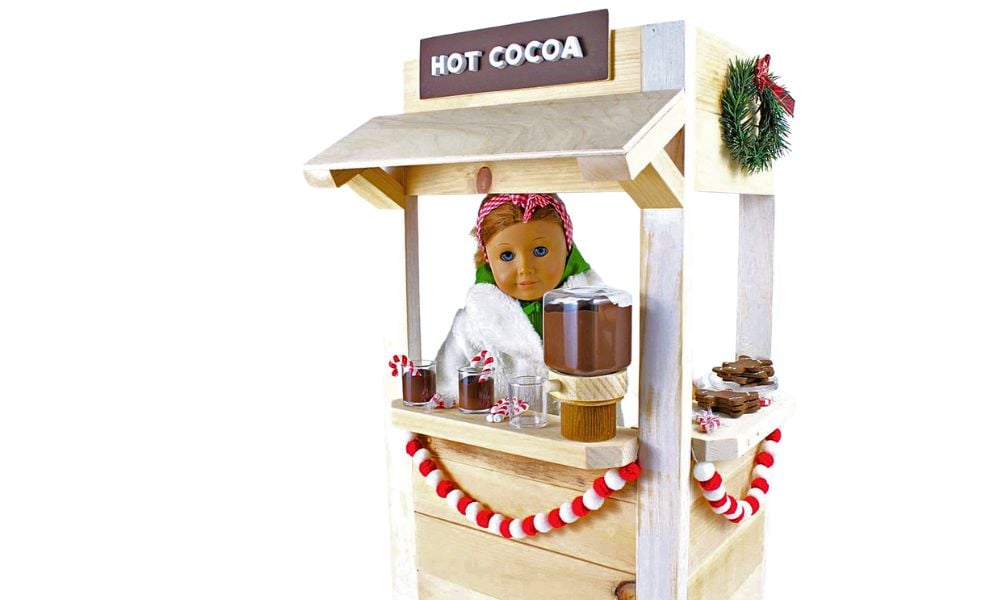

For less than $10 you can build this American Girl or My Life Doll Beverage Stand! Free plans by ANA-WHITE.com
Do you have an Amercian Girl fan on your Christmas list this year?
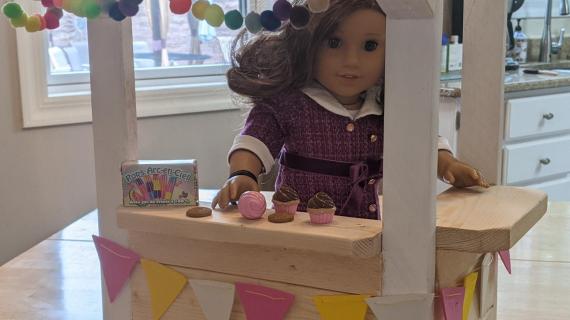
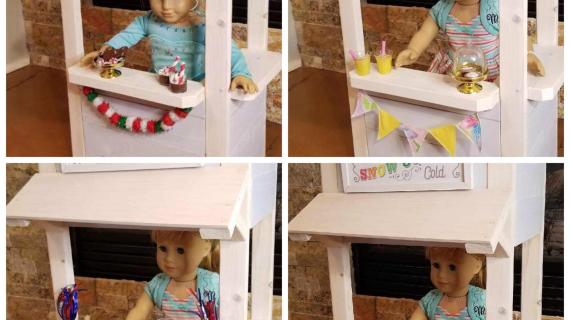
American Girl or My Life Doll Accessories can be so expensive! But not if you DIY!
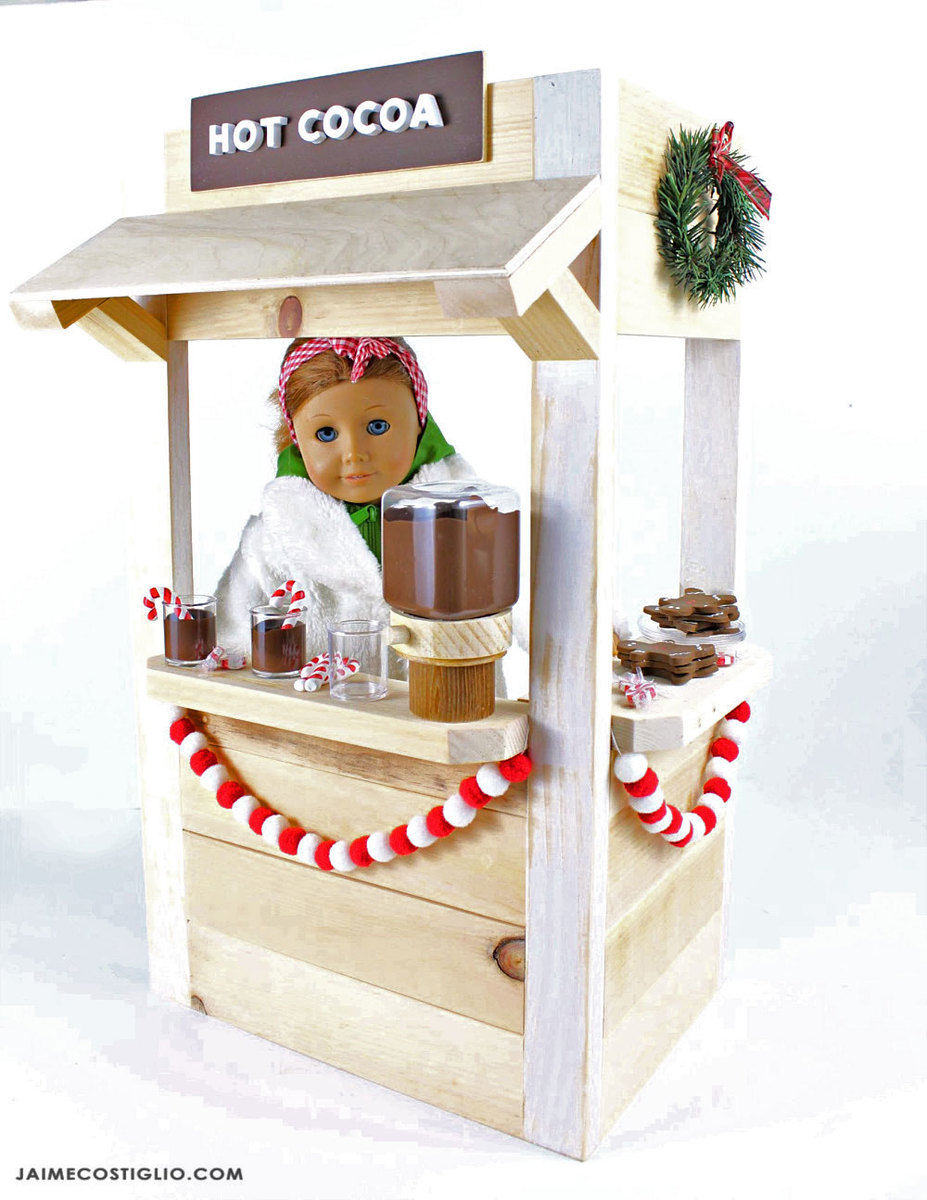
This adorable beverage stand is easy to make with a few standard woodworking tools - and you can make it from small scrap wood pieces! No scraps? This beverage stand will cost about $10 in new materials!
Build Post with Construction Photos
This project is part of Jamie Costglio and I's Handbuilt Holiday Series -
Where we give you a new, free gift plan every Friday in the weeks leading up to Christmas. We've got hundreds of plans built up in our Handbuilt Holiday catalog, so do make sure to look through for more project plan ideas!
Ready to build this American Girl sized beverage stand? Here's what to do -

Head on over to Jaime Costiglio.com for the build post - with all the details on how Jaime Costiglio DIYed all the accessories! Because the accessories are the fun part!
And then come back here for the free plans below.
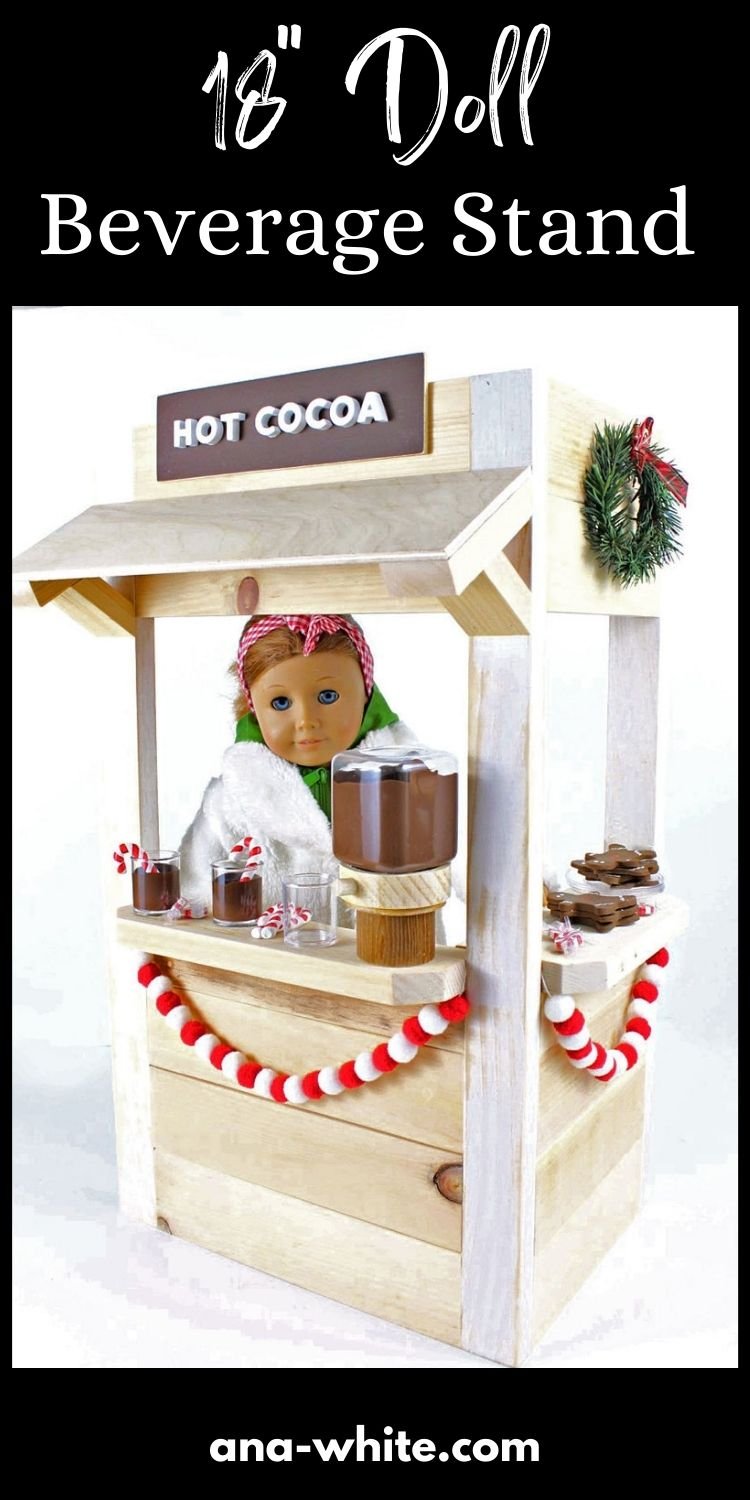
Pin For Later!
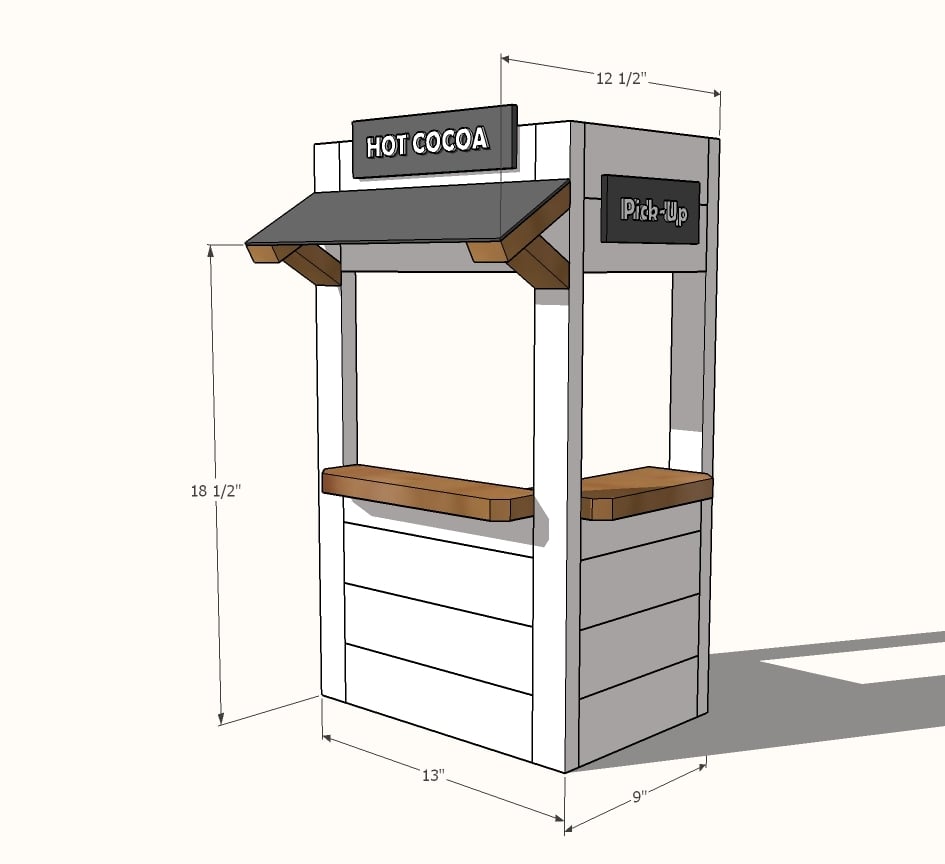
Preparation
- 1x2 - about 8 feet of scraps
- 1x3 - about 8 feet of scraps
- 1x4 - about 8" of scraps
- 1/4" plywood scraps (for signs and awnings)
WHEN CUTTING LITTLE PIECES, CUT FROM A LARGER PIECE WITH HANDS A SAFE DISTANCE FROM SAW BLADE, ESPECIALLY THE BEVEL CUTS
- 3 - 1x2 @ 22-1/2"
- 6 - 1x3 @ 10"
- 1 - 1x2 @ 10"
- 5 - 1x3 @ 7-1/2"
- 1 - 1x2 @ 7-1/2"
- 1 - 1x4 @ 7-1/2"
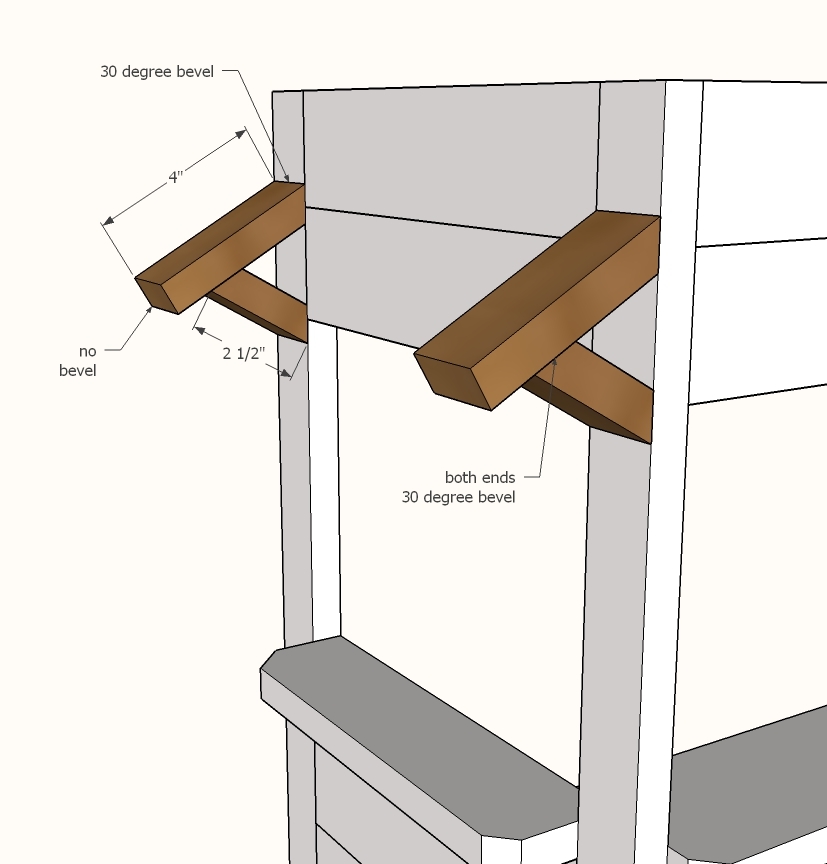
- 2 - 1x2 @ 4" - one end cut at 30 degree bevel, long point measurement
- 2 - 1x2 @ 2-1/2" - both ends cut at 30 degree bevel, ends NOT parallel, long point to long point measurement


Instructions
Step 1

Drill a 3/4" pocket hole on each end of the 10" boards shown. Attach to legs with glue and a 1-1/4" pocket hole screw - also add glue on long edges between the boards.
Step 2
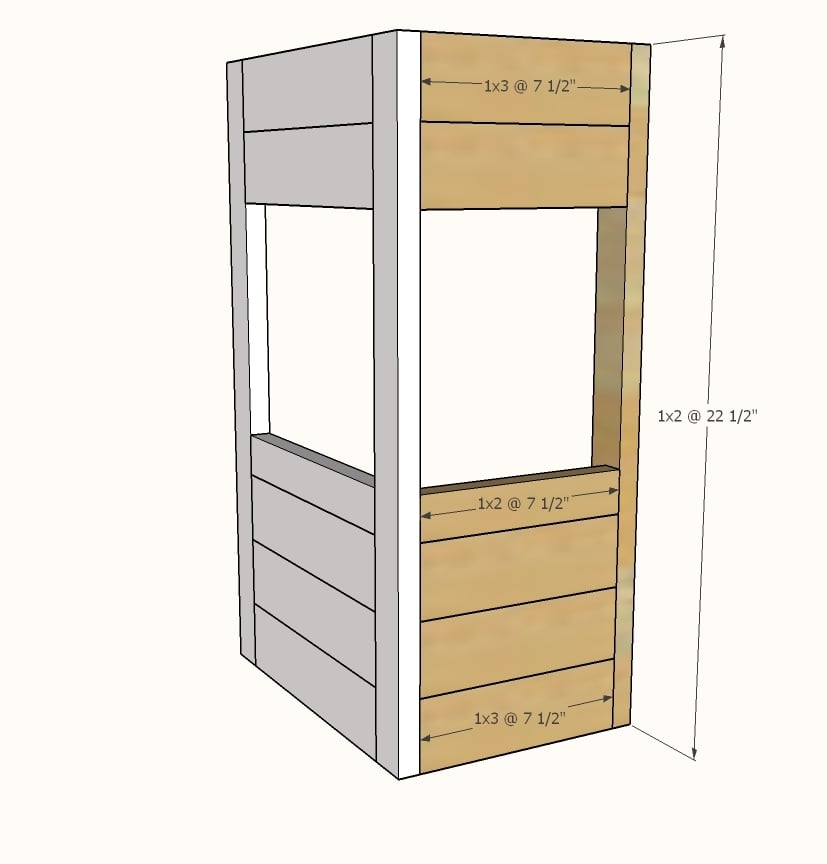
First build this wall piece, then attach to the wall piece built in step 1, using 3/4" pocket holes and 1-1/4" pocket hole screws and glue.
Step 3

Cut corners to soften with jigsaw. Nail (1-1/4" nails) and glue to the top of the larger window sill.
Step 4
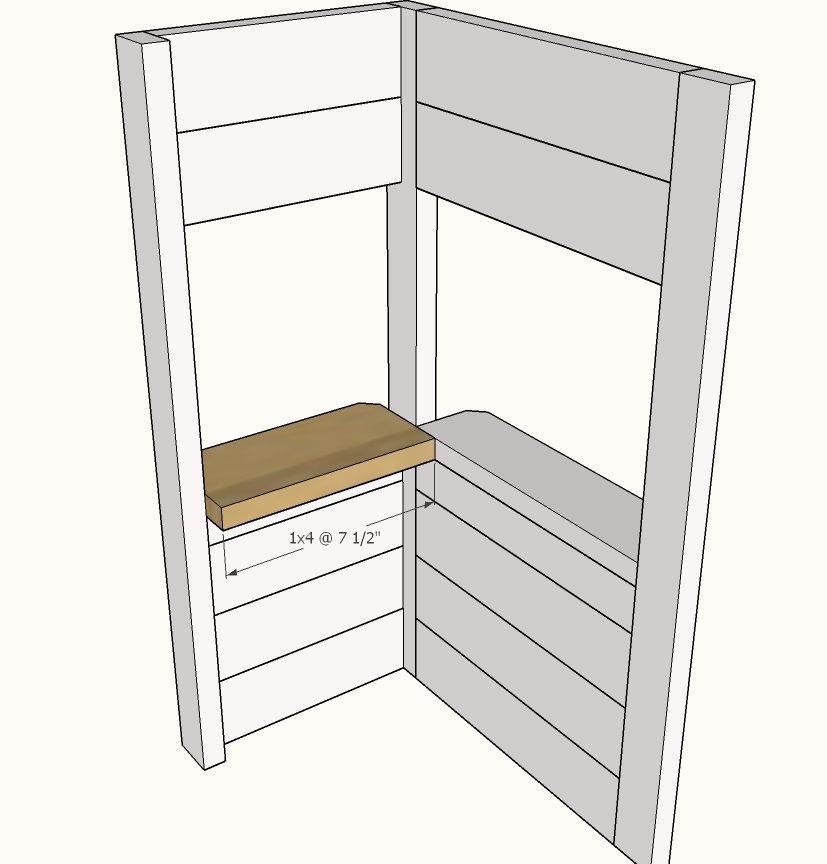
Cut corners of second counter. Nail and glue to the smaller window opening.
NOTE: You can also hot glue counters in place.
Step 5
Step 6
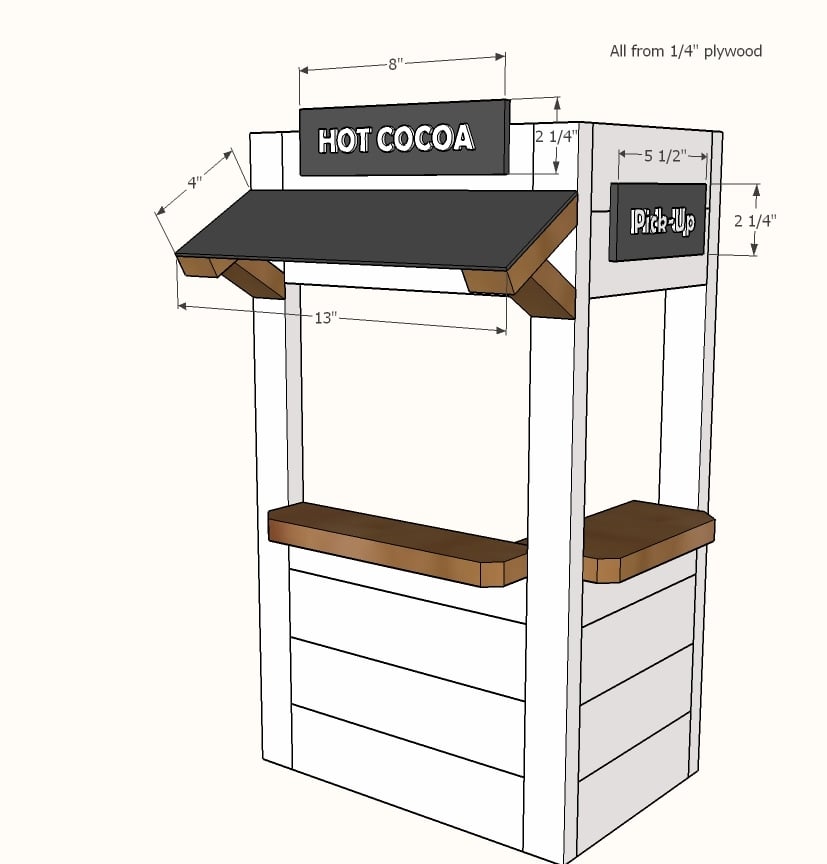
Awning and signs are cut from 1/4" plywood scraps as shown. Hot glue or nail on with 5/8" brad nails.