
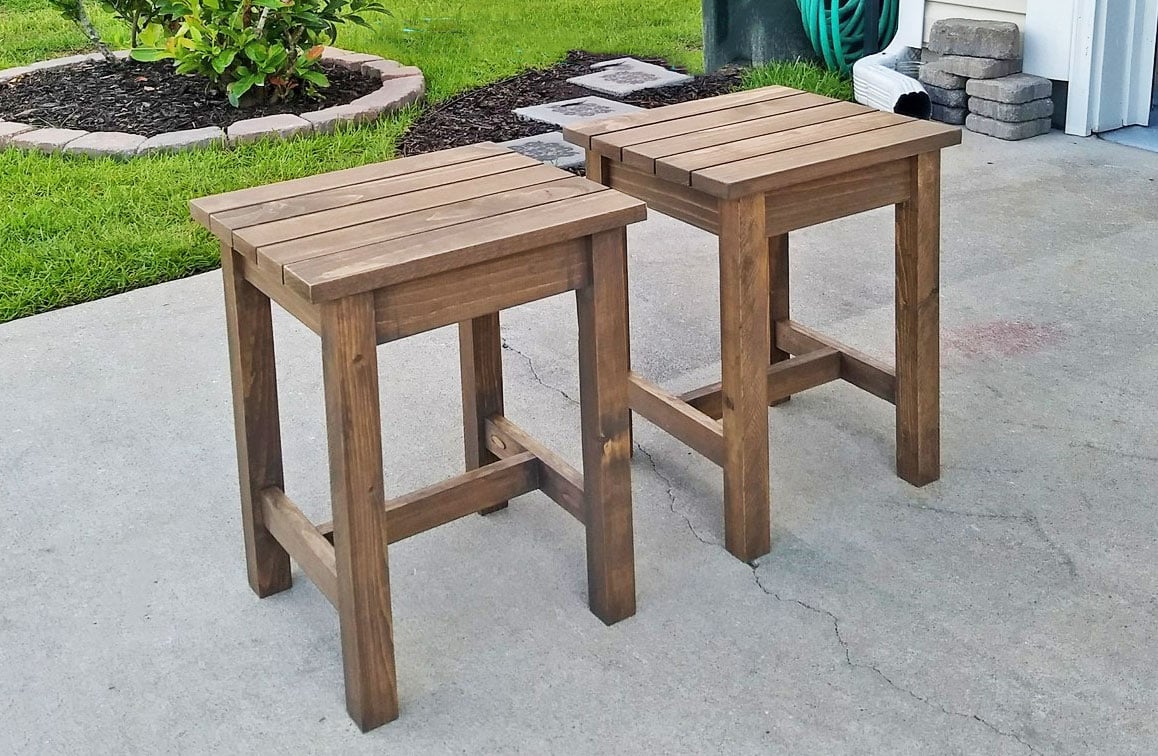

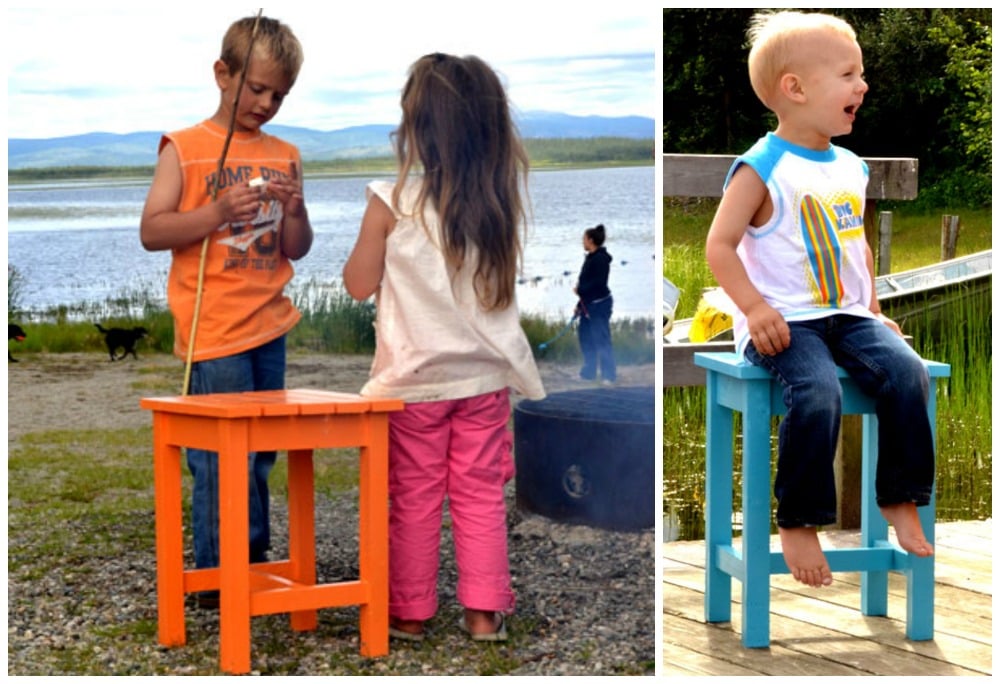
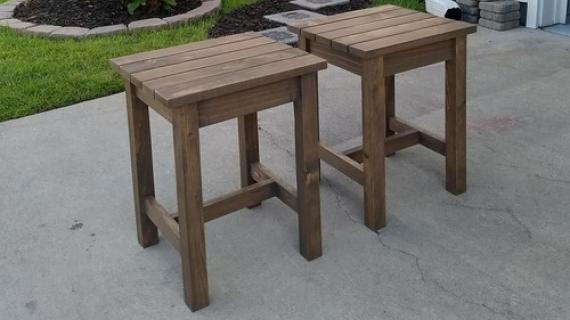
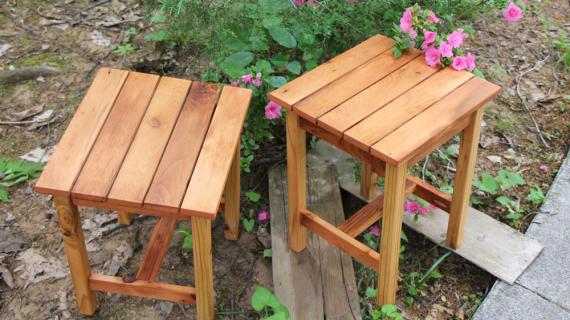
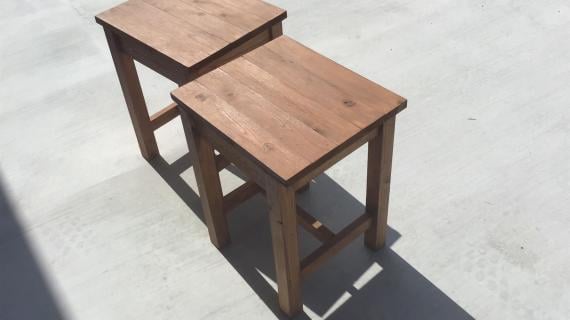
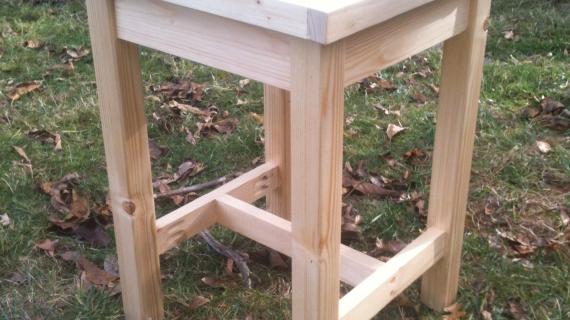
This simple Adirondack side table can also be used as a stool. It's perfect for any outdoor space. Our free plans include step by step diagrams and shopping lists and cut list.
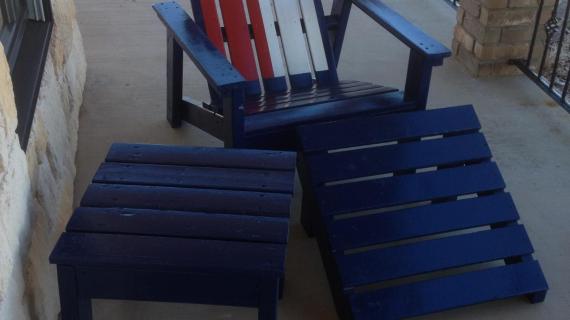
We also have Adirondack Chair plans and lots more outdoor furniture plans. Make sure you read our outdoor furniture finishing secrets here.
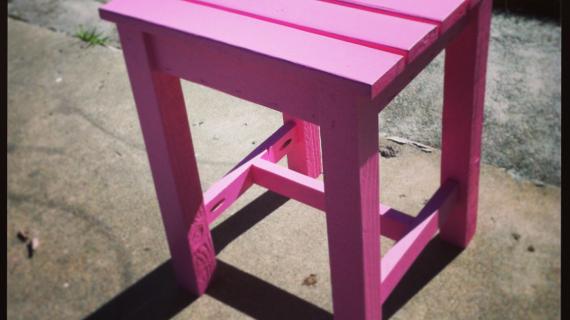
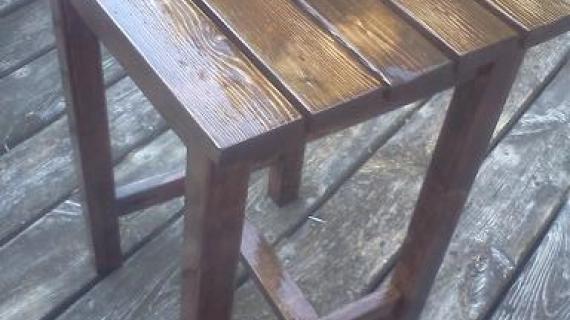
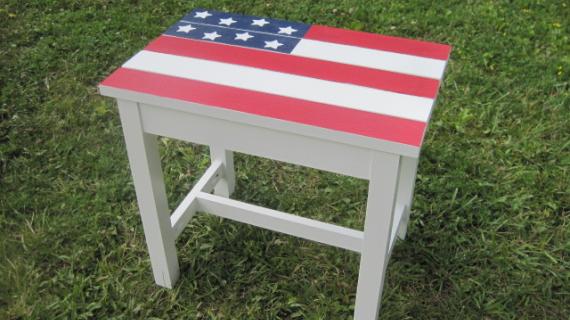
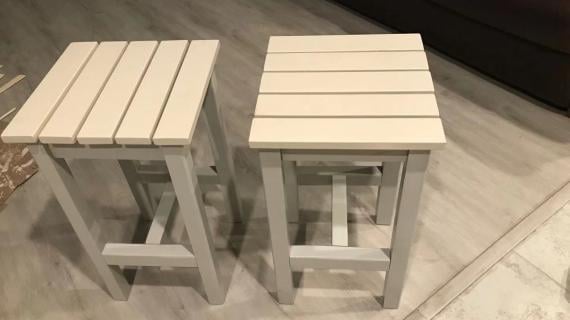
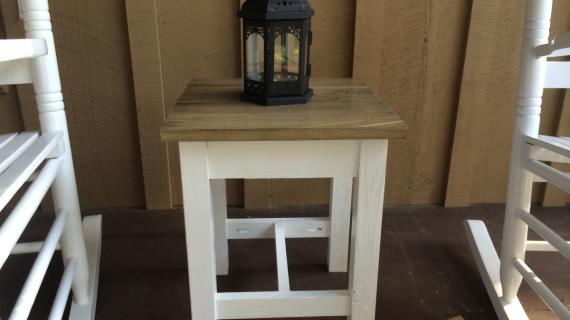
This little outdoor stool doubles as an end table or side table.
Pin for Later!

Preparation
2 - 1x3 @ 8 feet long
1- 2x2 @ 8 feet long
1 - 1x2 @ 4 feet long
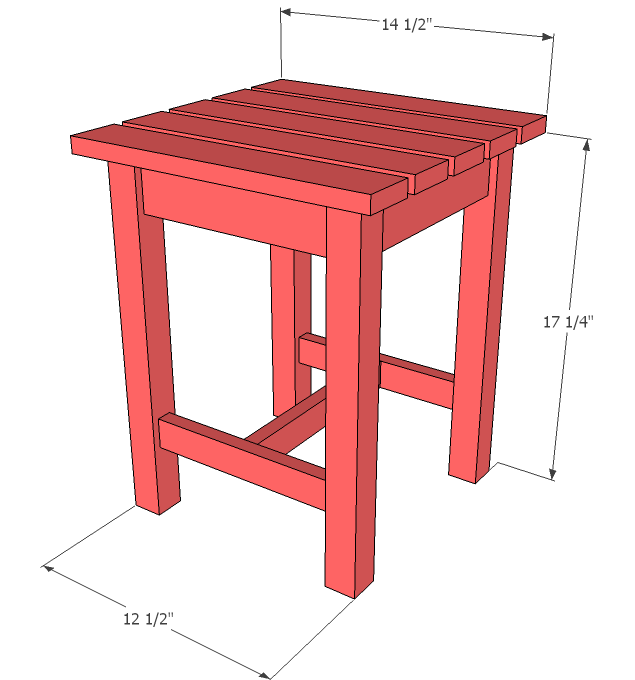
4 - 2x2 @ 17 1/4" (Legs)
4 - 1x3 @ 9 1/2" (Aprons)
2 - 1x2 @ 9 1/2" (Side Supports)
1 - 1x2 @ 10 1/4" (Stretcher)
5 - 1x3 @ 14 1/2" (Top)


Instructions
Step 1
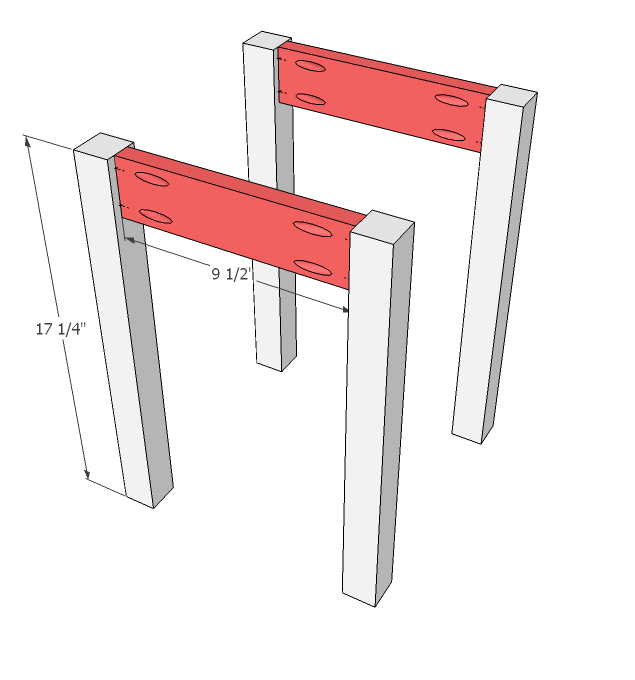
Build two legs sets as shown above drilling Kreg Jig pocket holes for 3/4" stock, and using 1 1/4" pocket hole screws and glue.
Step 2
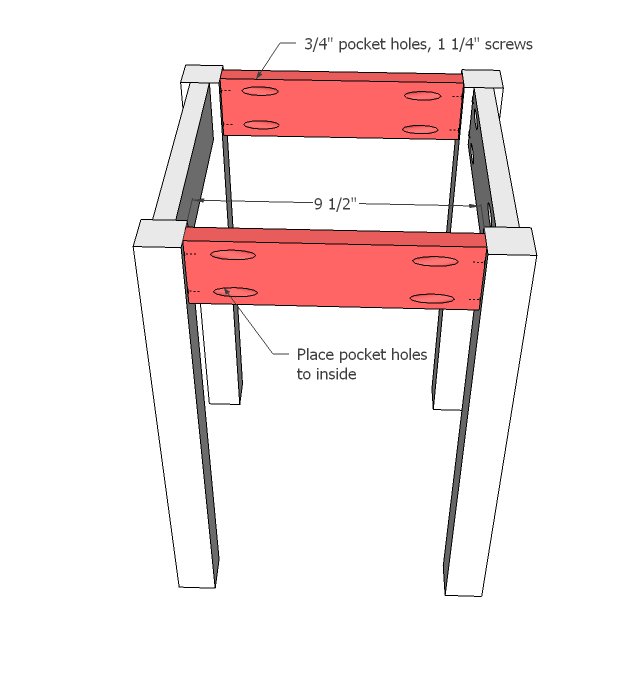
With the remaining 2 aprons, drill Kreg Jig pocket holes on ends and attach to leg sets as shown above. Place pocket holes to insides.
Step 3
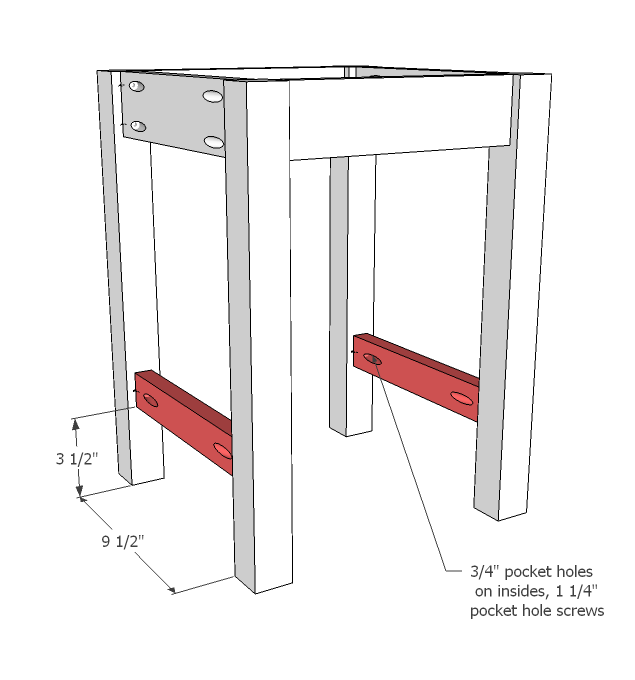
Measure up 3 1/2" on all legs and mark. Attach side supports with glue and 1 1/4" pocket hole screws centered on legs.
Step 4
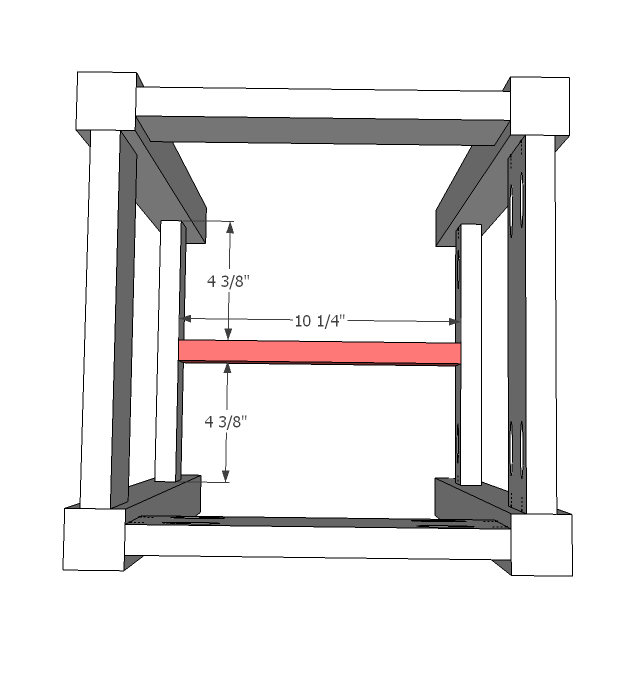
Follow with stretcher, attached with 3/4" Kreg Jig pocket holes and 1 1/4" pocket hole screws and glue.
Step 5

It is always recommended to apply a test coat on a hidden area or scrap piece to ensure color evenness and adhesion. Use primer or wood conditioner as needed.

Comments
Erin in Fairbanks (not verified)
Thu, 08/04/2011 - 12:32
Love the little table
I didn't win the Kreg jig...can I do this project without it?
In reply to Love the little table by Erin in Fairbanks (not verified)
Ana White
Fri, 08/05/2011 - 09:44
Hi Erin, darn, I wish I could
Hi Erin, darn, I wish I could give everyone a Kreg Jig!
What I would do is swap the aprons and bottom supports for 2x thick boards, that way when you go to screw (use 2 1/2" screws and countersink from outsides) you'll have more "meat" to screw into. Certainly, you can!
Erin in Fairbanks (not verified)
Fri, 08/05/2011 - 09:59
Kreg Jig
Thanks Ana,
I'll either try it that way, or maybe I need to buy myself a Kreg Jig for my anniversary. :)
Erin
Sarah Wade (not verified)
Thu, 08/04/2011 - 13:54
Love it!! makes me want to
Love it!! makes me want to buy wood!! Thanks for ALL that you do!
Daisies and Crazies
Fri, 08/05/2011 - 10:17
Love this
This is such a cute table. I was just telling my husband this week that Ana White is the all-around perfect woman. Not perfect as in "doesn't make mistakes" but more because you are kind, gorgeous, multi-talented, generous, hardworking, etc.
I really admire and appreciate you. xo
Daisies and Crazies
Fri, 08/05/2011 - 10:18
P.S.
You'd better get your hiney to Kansas City on your book tour. www.RainyDayBooks.com brings lots of very famous authors here. I'll be first in line to get my book and ticket! xo
bhoppy
Fri, 08/05/2011 - 11:50
wood filler in all pocket holes?
For an outdoor table such is this one, is it necessary to fill in all the pocket holes on the aprons with wood filler? I just wondered because you say to place the pocket holes to the inside... but if you have to fill them all in with wood filler and sand them even with the board it seems like it would be easier if the holes were on the outside. I'm probably overthinking it but when I made the outdoor harriet table I spent twice as much time sanding the 50+ pocket holes that I filled in with wood filler than I did putting it together.... Was that overkill? LOL Thanks
Pam the Goatherd
Fri, 08/05/2011 - 12:48
This is perfect! My son needs
This is perfect! My son needs a little table to go next to his computer desk to hold "stuff". I think I'll make this a little taller and put a shelf at the bottom instead of the stretcher and make the top out of a solid piece of plywood. Should be just what he needs.
Suzanne64
Sun, 09/18/2011 - 16:10
*****test*****
*****test*****
Suzanne64
Sun, 09/18/2011 - 16:06
Kreg Jig System versus mini Kreg Jig
Hi Ana, I'm a little confused about the Kreg Jig. Is it necessary to purchase the whole system and the mini is just a part of that or can you just purchase the mini and use that by itself?
I am very new to woodworking and absolutely love it! Working on my first Adirondack chair as we speak.
jenni (not verified)
Sat, 01/12/2013 - 11:38
Adirondack chair plan?
Is there plans for the Adirondack chair to go with this table? I tried to search for it but had no luck finding anything. Please help. Thanks
suthernfancy
Tue, 04/09/2013 - 20:44
ADIRONDACK STOOL
Hi Ana, I really like the Adirondack stool. I was wondering if you will have the matching chair plans in your book? I like this style of Adirondack better because it looks lighter than your original style. I would love to see a set of plans for the new style of chair. Wonderful web site and keep up the great work.
ctmkgw03
Wed, 04/17/2013 - 19:41
Love it
So need to build some of these for the deck'
Debbie742
Sat, 07/06/2013 - 06:39
print out questin
Is it possible to print out the plans for just the table and not the entire article? When I hit the PDF, it wants to do all 22 pages
In reply to print out questin by Debbie742
JoanneS
Sat, 07/06/2013 - 07:25
Printout question reply
Hi Debbie 742,
To print out a selected range of pages on a .pdf file:
click 'print' icon (or select file>print)
a "print" dialog pox appears. About 1/3 of the way down under "print range" at the left side of the box, you can key in the page numbers you want to print. (When I tested this it was pages 14-22.)
The 'Preview: composite' section at the right of that box will show you what your printout will look like.
Then you can click "ok" and it will print out just the pages you want.
e3moore1212
Sun, 07/21/2013 - 06:30
Adirondack chair
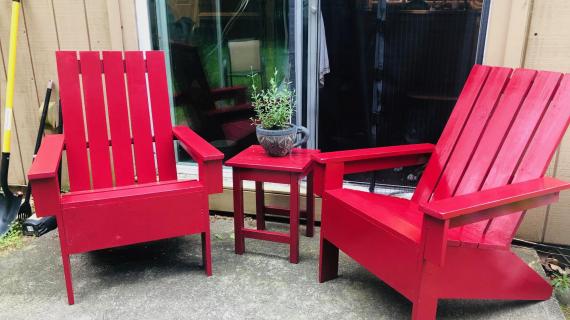
Is there plans for the Adirondack chair in the picture with this table?
In reply to Adirondack chair by e3moore1212
JoanneS
Sun, 07/21/2013 - 07:30
Adirondack chair plan
Hi e3moore1212,
The plan for the chair in the photo is in Ana's book "The Handbuilt Home" on page 174. It's a great book with some wonderful plans and super useful info for building.
She also has several other great adirondack chair plans on this site:
Home depot chair plan:
http://ana-white.com/2013/06/plans/home-depot-dih-workshop-adirondack-c…
Ana's Adirondack chair:
http://ana-white.com/2010/05/furniture-plans-adirondack-chair-ana.html
Modish Adirondack chair:
http://ana-white.com/2010/05/modish-adirondack-chair
e3moore1212
Sun, 07/21/2013 - 15:21
thanks
Awesome thank you!
jriker
Tue, 05/31/2016 - 08:26
Chair plans too?
I'd love to make the chairs pictured with this table too but I'm having trouble finding the plan for these exact chairs. Help please?
jriker
Tue, 05/31/2016 - 08:30
Just saw previous comment and
Just saw previous comment and ordered the book. Thanks!
kat_icu
Thu, 05/09/2019 - 15:56
Did I miss the instructions…
Did I miss the instructions to put the top on?
thatryan
Mon, 07/22/2019 - 16:17
I do not see them either…
I do not see them either...hey @Ana any help? :)
MattyCakes
Wed, 05/20/2020 - 15:43
I didn't see it either…
I didn't see it either... and I'm working on this project right now! Lol.
My guess is to use the 2 inch finishing nails for the top pieces, since those are on the equipment list but haven't been used in steps 1-4... I'm going to give it a try and we'll see how it goes! Fingers crossed.
lahfrench
Mon, 09/14/2020 - 16:18
How did you all attach the…
How did you all attach the top? I noticed that a brad nailer is listed in the Equipment needed section. Is that what you used???
thatryan
Tue, 07/16/2019 - 13:24
Bottom shelf for table?
Hi there! I am new to woodworking and love this little table. Would it be hard to add a shelf at the bottom somehow, over the support? Any tips?
Thank you!
John_W
Sun, 07/19/2020 - 10:11
Not sure how to attach the top to the base.
I'm not sure how the top is attached unless I'm missing the directions somewhere. I'll figure something out but for me I'm not sure how they get attached to the base.
Love this starter project to get me back into woodworking. Thanks, Ana!
Cadet1978
Sun, 03/07/2021 - 21:14
Question
In step 5, what did you use to attach the top boards of the tabletop? Screws? Nails? No description is given.
Calla7235
Sun, 04/18/2021 - 14:44
I made this table with some…
I made this table with some modifications so it sits right below the windowsill it’s wider and not quite as deep. Perfect quick and simple table for a beginner