
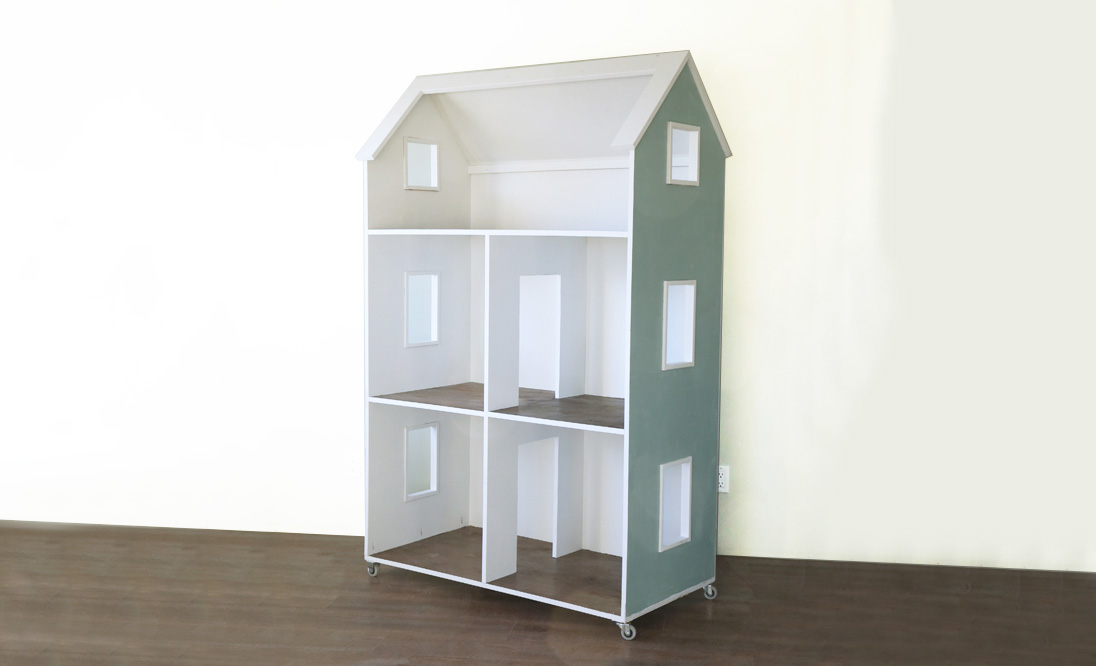

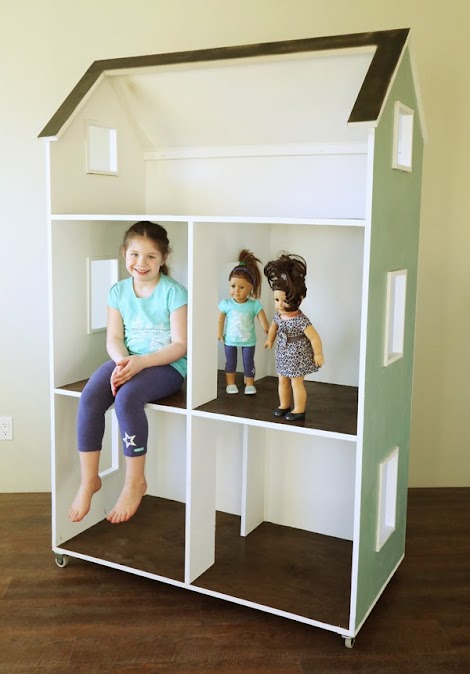
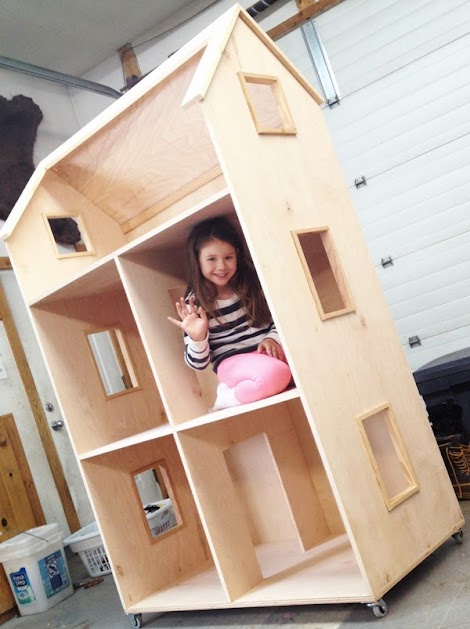
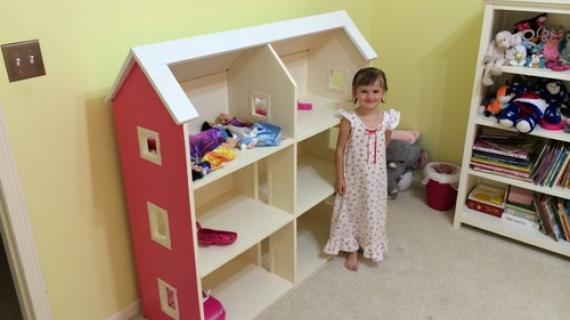
Free American Girl Dollhouse / 18 Inch Dollhouse Plans. This three story dollhouse features five large rooms. It's easy to build with our step by step diagrams, shopping and cut list, and lots of reader submitted photos.
We also have lots of American Girl furniture and accessory plans.
Smaller Version of this Dollhouse
Want to build an American Girl Dollhouse, but in a smaller version? We have created a new plan that is very similar, but only two stories. I found my daughter couldn't reach that third story, so the shorter version worked better for us.
Does your child love American Girl or 18" dolls?
American Girl dollhouses are outrageously expensive. Have you considered a DIY dollhouse?
American Girl Dollhouse Features
- Easy to build with about $150 in materials
- All plywood construction - so will last much longer than an MDF or particle board dollhouse
- Fun to customize and decorate
- Can add casters so easy to move
- Plans are easy to modify - so you can make it a two story dollhouse or change up the size
- Lots of reader submitted photos and success stories
How to Build the Dollhouse
Here's how we built our DIY dollhouse -
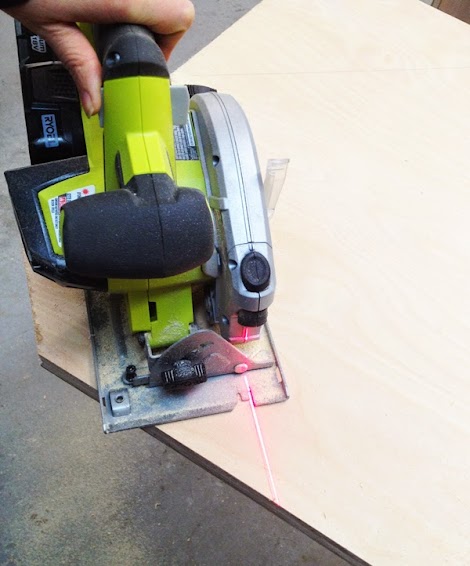
Rip Plywood for Sides and Shelves
We cut the plywood into strips 23-3/4" wide by 8 feet long. You'll get four strips from the two sheets of plywood. Have your home improvement store do this for you if you don't have a table saw or a truck, just make sure the strips are exactly the same width.
Then cut the tops into the house shape for the two sides.
Cut Doors and Windows Out
Then to cut the doors and windows out,
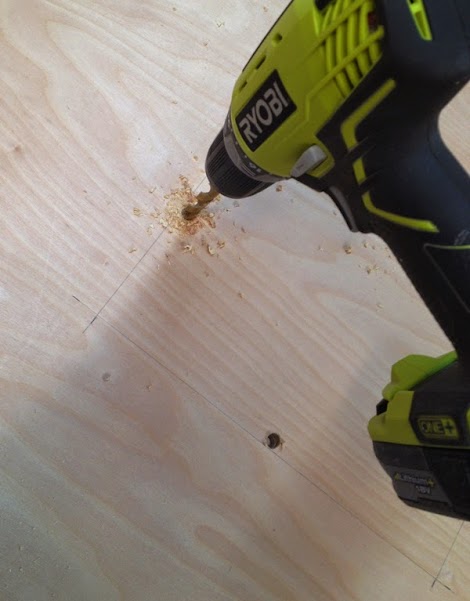
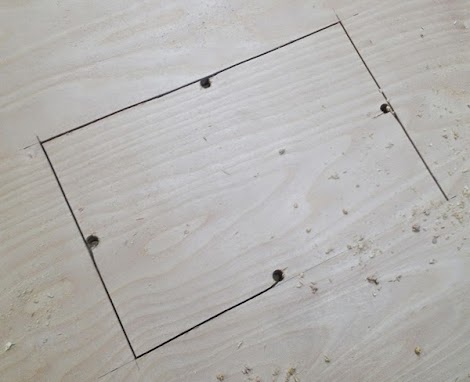
I drew the windows and doors out on each of the panels, and then drilled holes on each side, inside the lines,
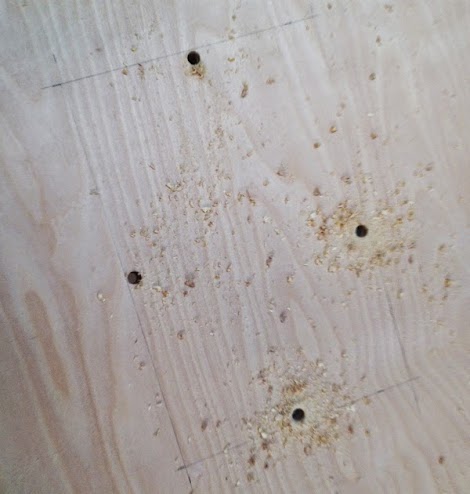
Then it's just a matter of connecting the dots,
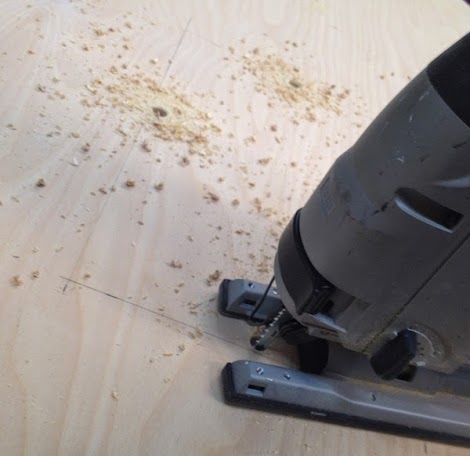
With a jigsaw.
Cutting out the windows and doors was probably the most time consuming part of this whole project.
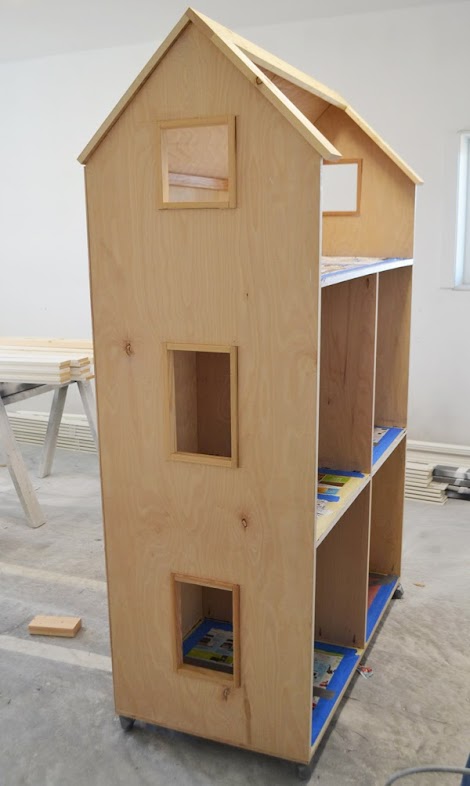
Assemble the Dollhouse
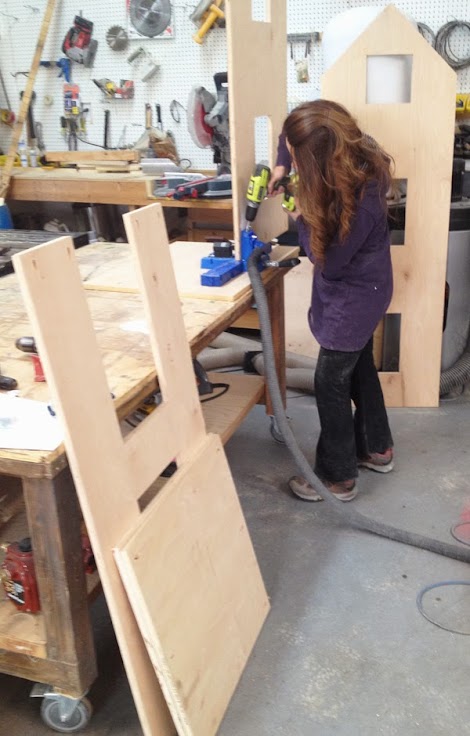
I used a Kreg Jig to assemble the pieces. There's not alot of joints, but because the pieces are so huge, it was a little cumbersome - but nothing I couldn't manage on my own. You don't have to use a Kreg Jig - you can also use 2" self tapping wood screws.
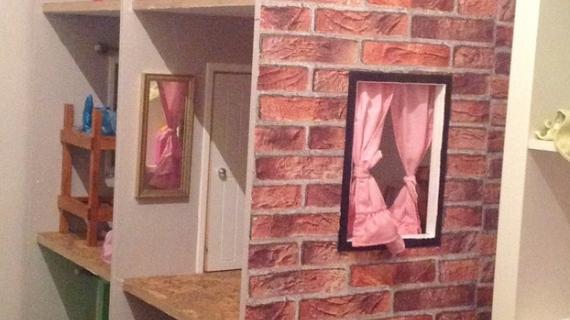
Window and Door Trim
The window and door trim makes a huge difference on the dollhouse. Here's how I built it -
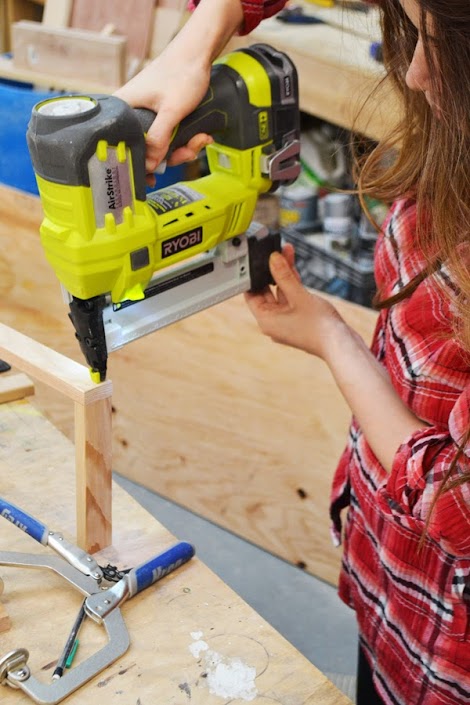
I nailed together 1x2 "boxes" first with 1-1/4" brad nails and glue.

Then I just placed the trim in the openings and nailed to the plywood edges.
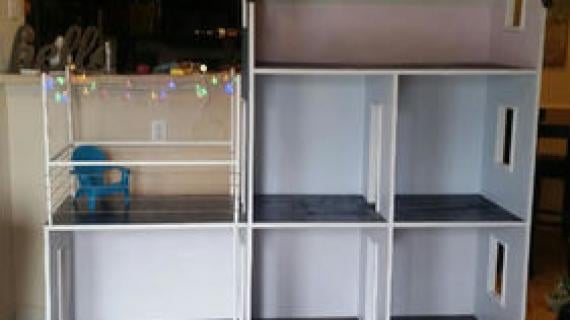
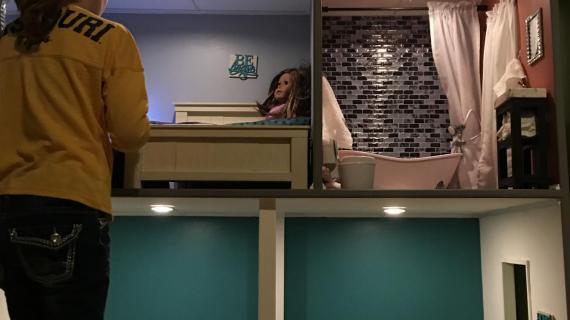
Our happy client made a few requests that aren't in this plan - we did not add the bottom trim and used caster wheels instead. And instead of the two rooms upstairs, we made one full room upstairs (but had to add a 1x2 at the top to support the 1/4" plywood on the back.
How We Finished the Dollhouse
I also added veneer edge banding to all exposed plywood edges to finish them off.
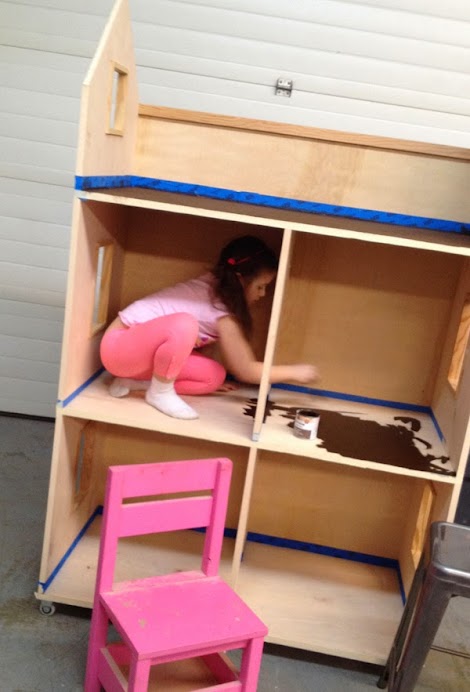
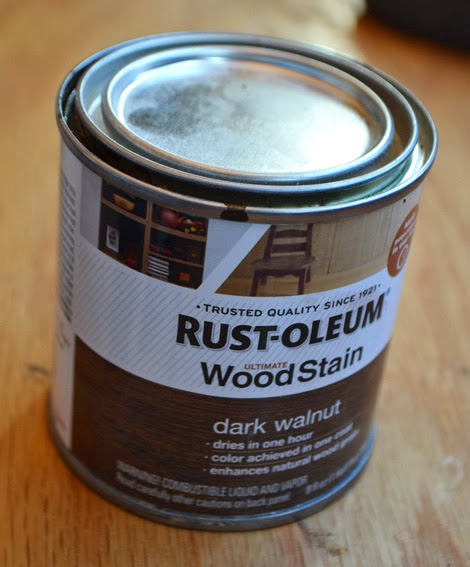
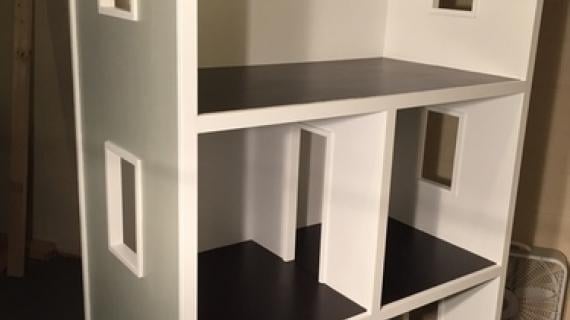
For the floors inside the dollhouse, we wanted to keep the wood, so we used Rustoleum Wood Stain in Dark Walnut.
It's a one step - just apply and wipe off. Easy enough for my seven year old to help out!
We also applied RustOleum polyurethane over the stain to protect the floors (just like a real wood floor!!!).
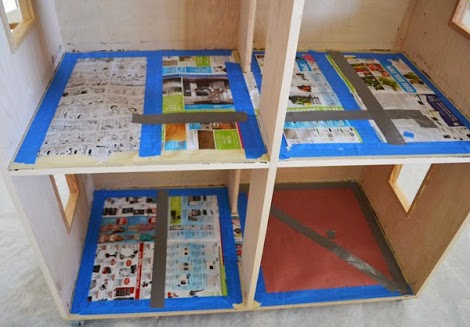
Then we taped over the floors with painter's tape (until we ran out and had to use duct tape) and newspaper,
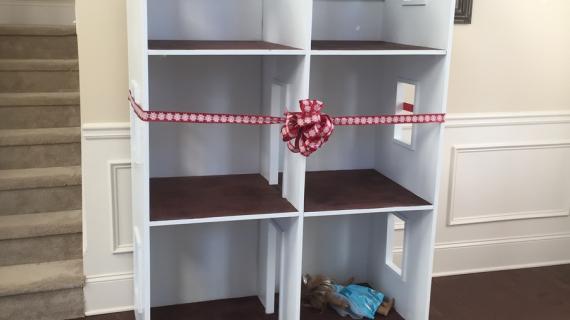
A quick sanding, and she's ready for primer!
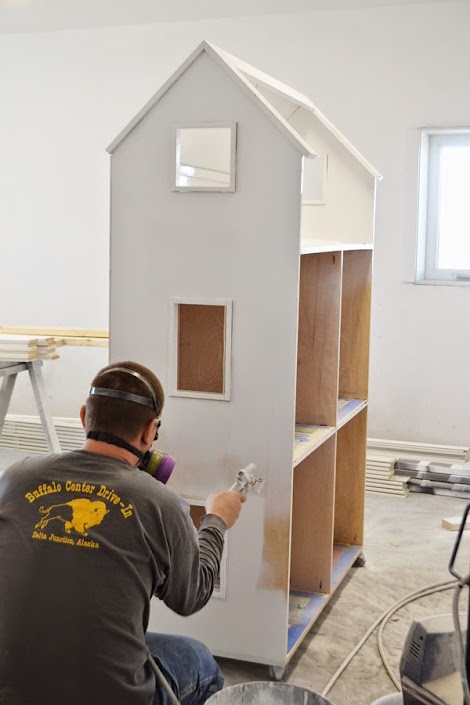
Jacob sprayed the dollhouse with primer,
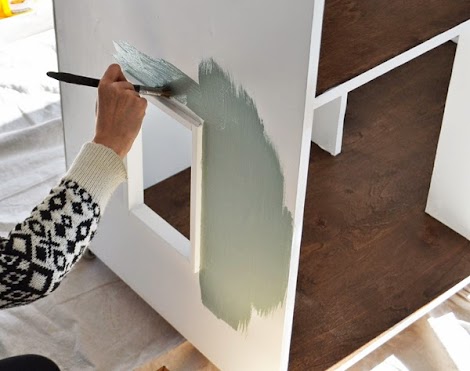
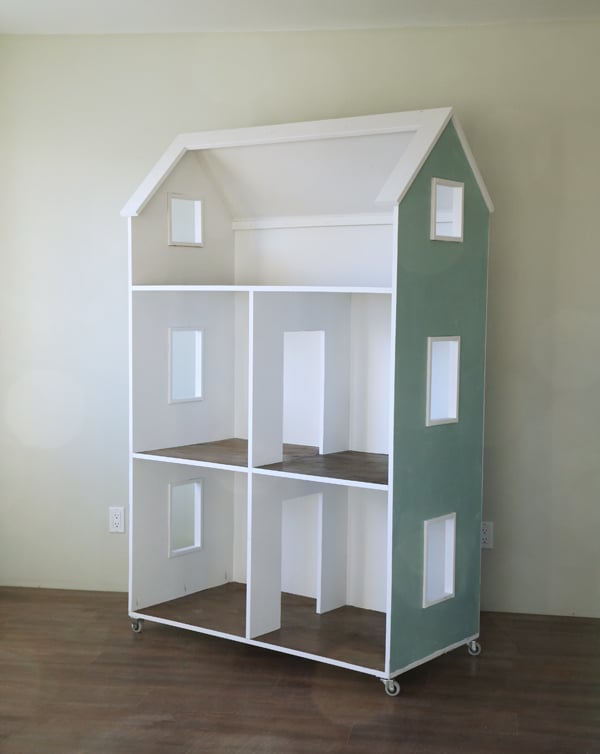
And then I painted carefully the blue exterior paint on the outsides.
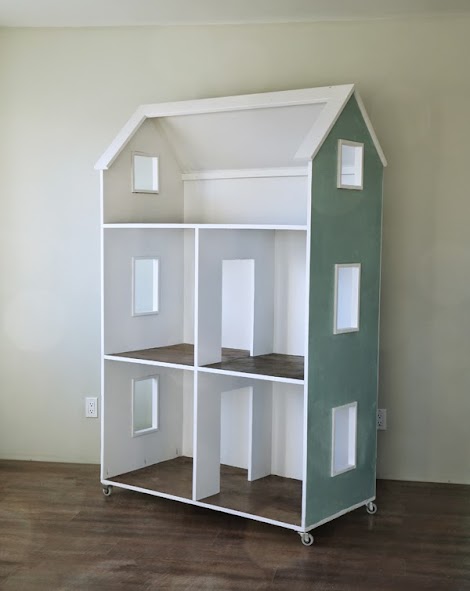
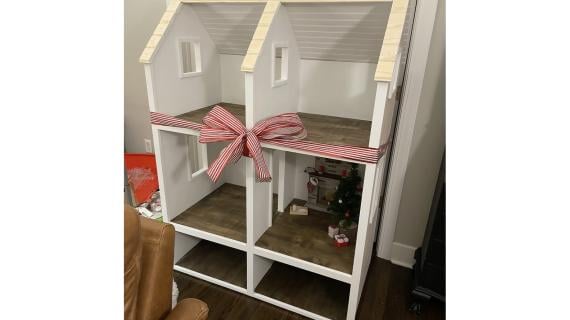
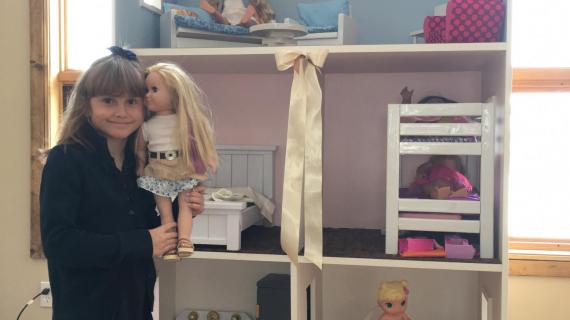
We LOVED how it turned out!!!!
But we wanted the roof to stand out a little more,
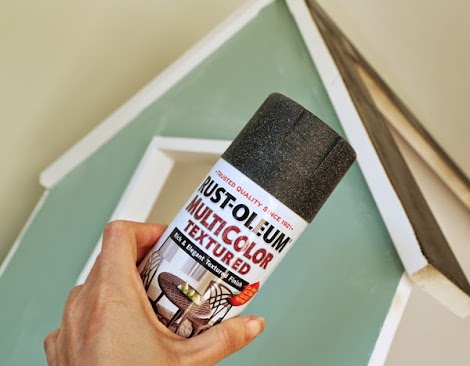
So I picked up some RustOleum textured spray paint and sprayed the roof. It loos like roofing!!!
Related: American Girl Dollhouse for Small Spaces
This dollhouse plan is VERY big. If you need a smaller dollhouse, we have one other plan that would fit in almost any space.
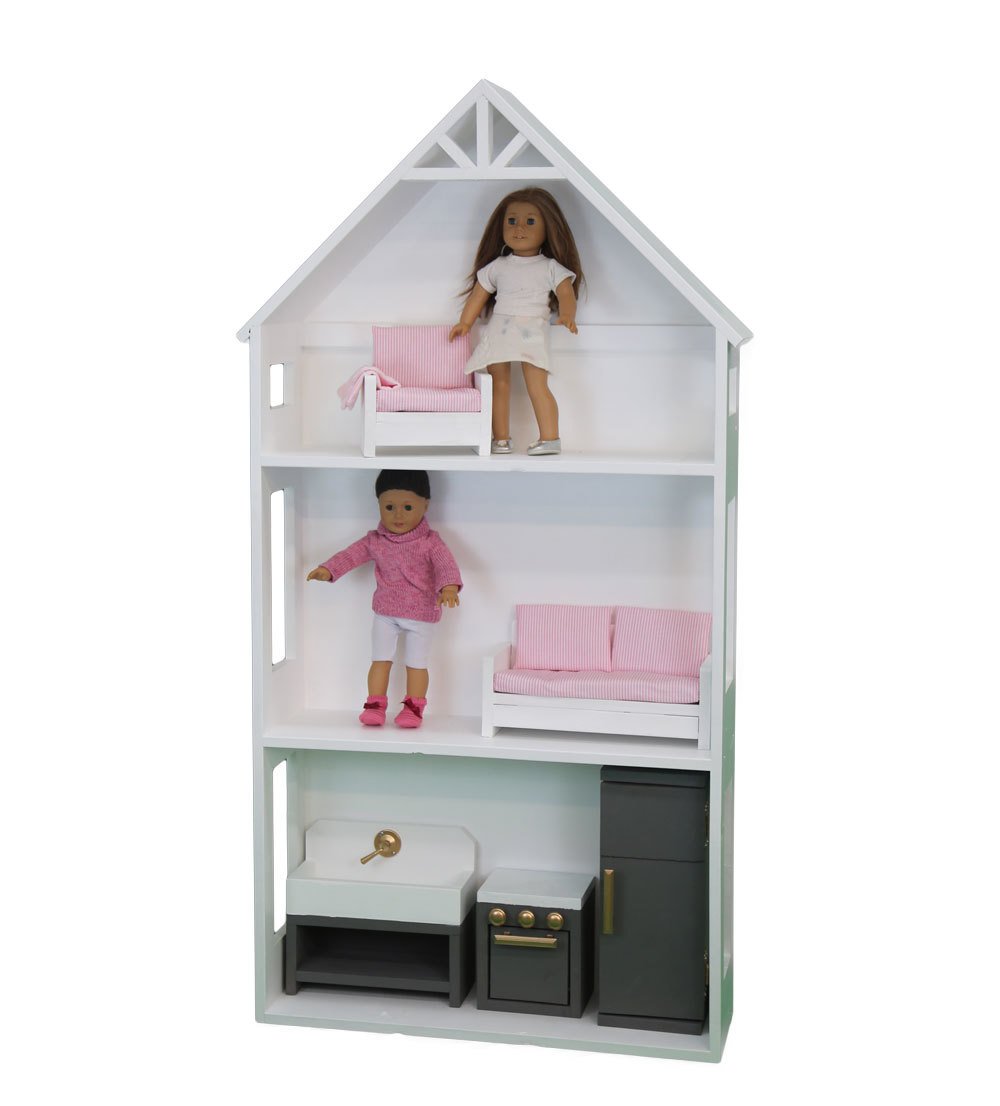
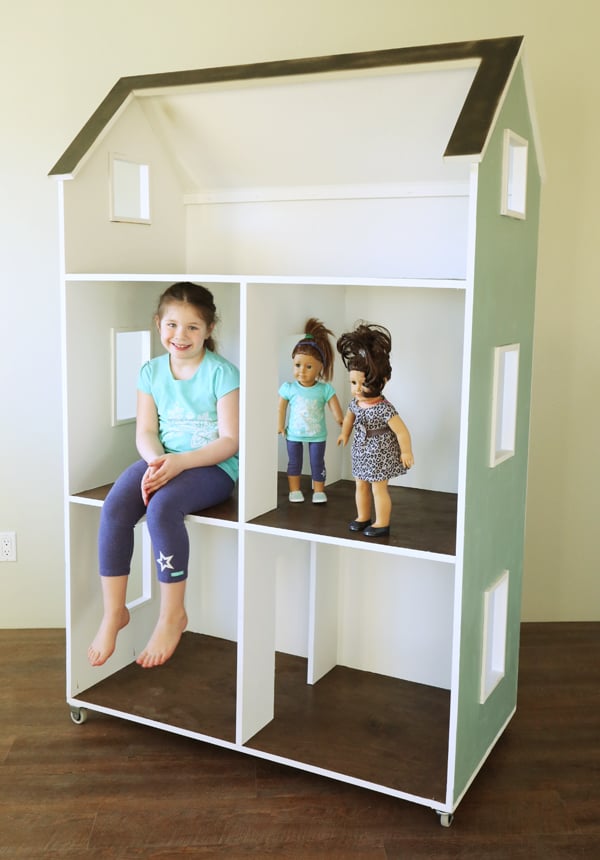
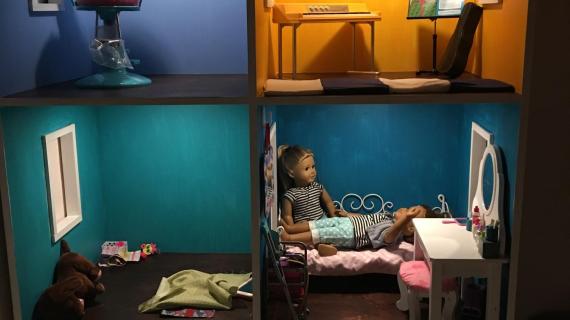
The rooms are not full depth, but I found my daughter preferred to play on the floor with her dolls, and just used the dollhouse to store and display her American Girls and their accessories.
You can find the free plans for the smaller American Girl Dollhouse here.
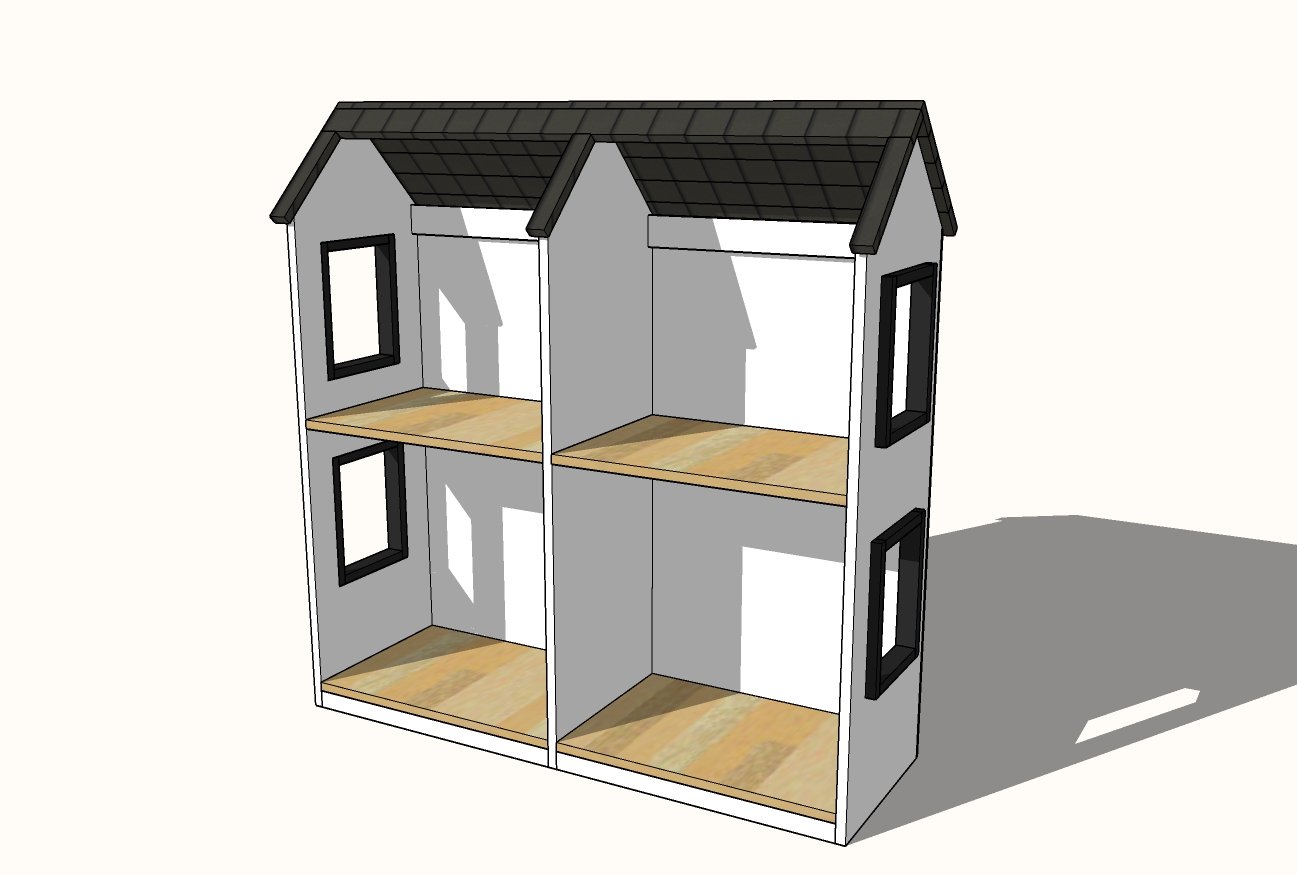
American Girl Dollhouse Plans
The plans for this dollhouse follow. You can easily customize to different size and of course, paint or stain any way you imagine.
Pin For Later!

Preparation
- 2 - sheets 3/4" plywood or MDF
- 1 - sheet 1/4" plywood or MDF (for back)
- 6 - 1x4 @ 12 feet long (add another one for the base if desired)
- 4 - 1x2 @ 8 feet long
- 1-1/4" pocket hole screws
- 1-1/4" finish nails or staples
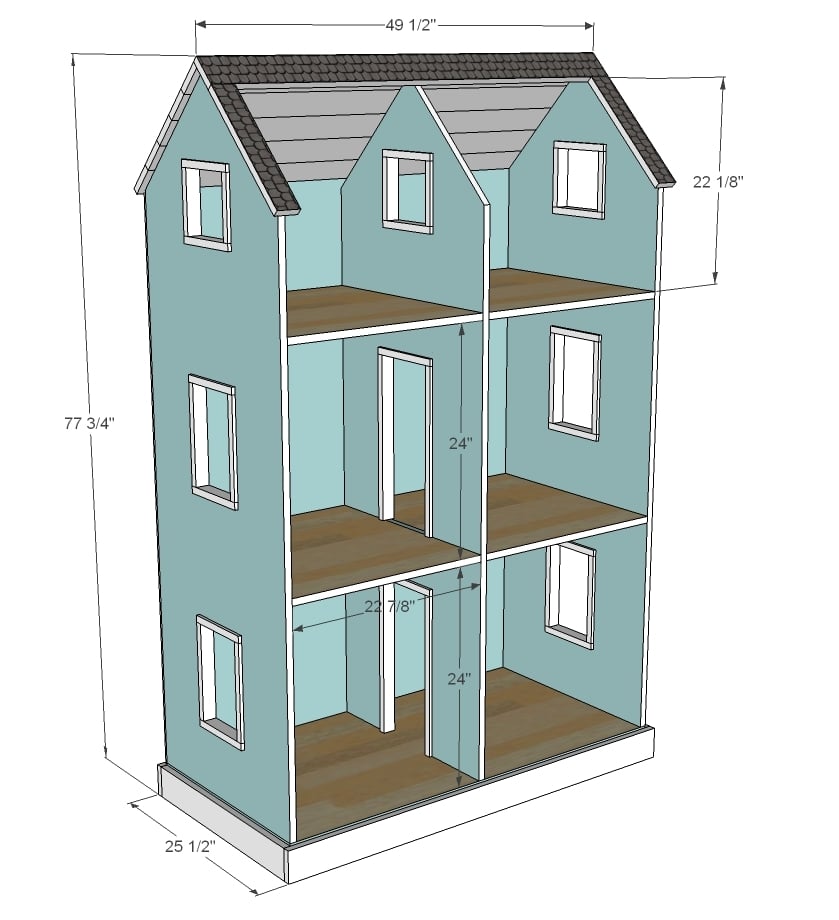
WALLS AND FLOORS
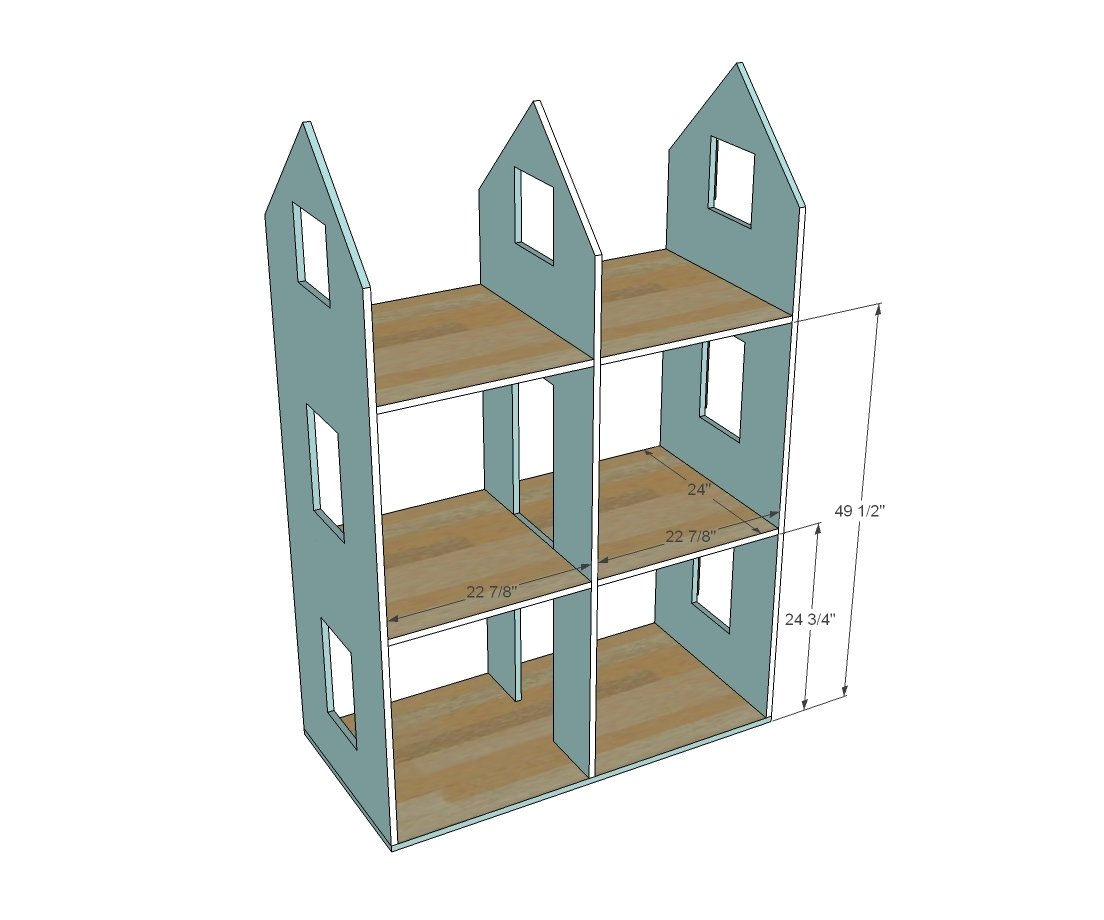
- 3 - 3/4" plywood or MDF @ 23-3/4" x 73" (sides and center divider)
- 1 - 3/4" plywood or MDF @ 23-3/4" x 48" (bottom)
- 4 - 3/4" plywood or MDF @ 23-3/4" x 22-7/8" (upper floors)
ROOF
- 5 - 1x4 @ 49-1/2" (OR 1- 3/4" plywood @ 49-1/2" x 17-1/2" (measure and cut to fit))
- 1 - 1x4 @ 49-1/2"
- 2 - 1x4 @ 14-3/4"
BACK
- 1 - 1/4" plywood @ 48" x 61-1/2"
WINDOWS - CUT TO FIT


Please read through the entire plan and all comments before beginning this project. It is also advisable to review the Getting Started Section. Take all necessary precautions to build safely and smartly. Work on a clean level surface, free of imperfections or debris. Always use straight boards. Check for square after each step. Always predrill holes before attaching with screws. Use glue with finish nails for a stronger hold. Wipe excess glue off bare wood for stained projects, as dried glue will not take stain. Be safe, have fun, and ask for help if you need it. Good luck!
Instructions
Step 1

First, cut out all the pieces. If you don't have a truck or tablesaw, it might be easier to have your home improvement store rip your plywood into 22-3/4" widths, 8 feet long. Then cut the longest pieces first. The top roof angle is 45 degrees. You can easily find this by finding the center of your side and middle panels (at the top). This distance should be 11-7/8" from the sides. Then measure down 11-7/8", and draw a diagonal between the two points. Then mark out all windows and doors and cut out with a jigsaw.
Step 2
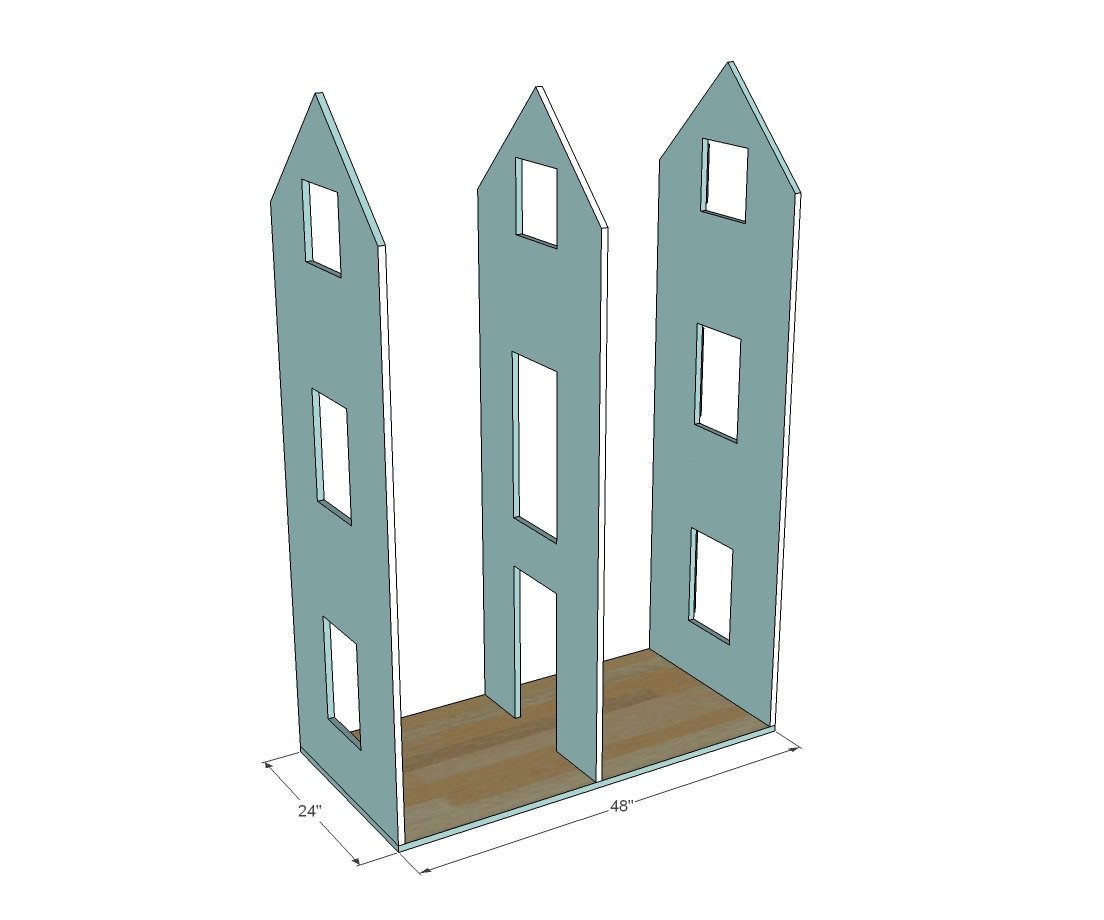
Once the pieces are cut, attach the floor to the walls. I used a Kreg Jig set at 3/4" and 1-1/4" pocket hole screws.
Step 3
Next, add the floors. I used 3/4" pocket holes on the underside and 1-1/4" pocket hole screws.
Step 4

Because we opted for one large room on the top floor, I opted to use plywood for my roof (no center support without the divided upper room). Keep top edge flush as you attach room with glue and finish nails or staples.
Step 5
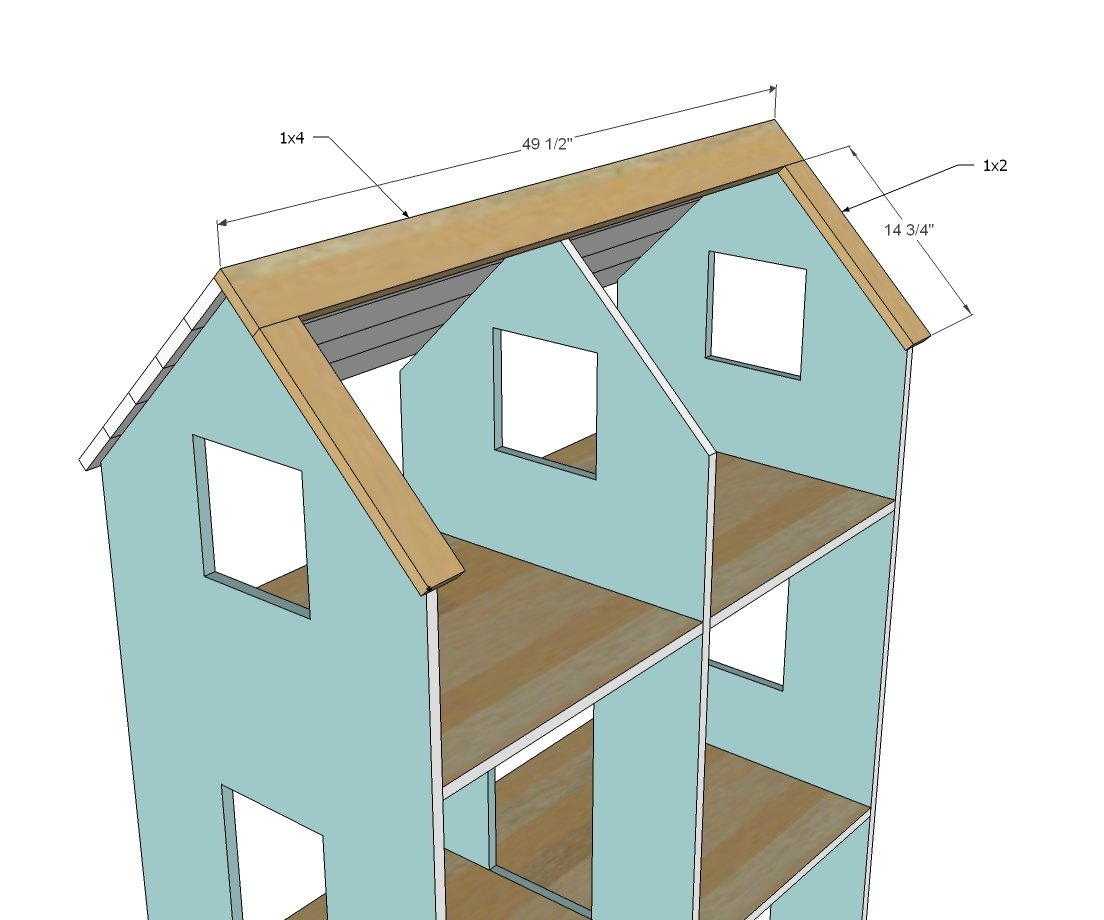
For the roof front, we just used 1x boards. If first attached together with pocket holes, and then attached the entire roof panel on top.
Step 6
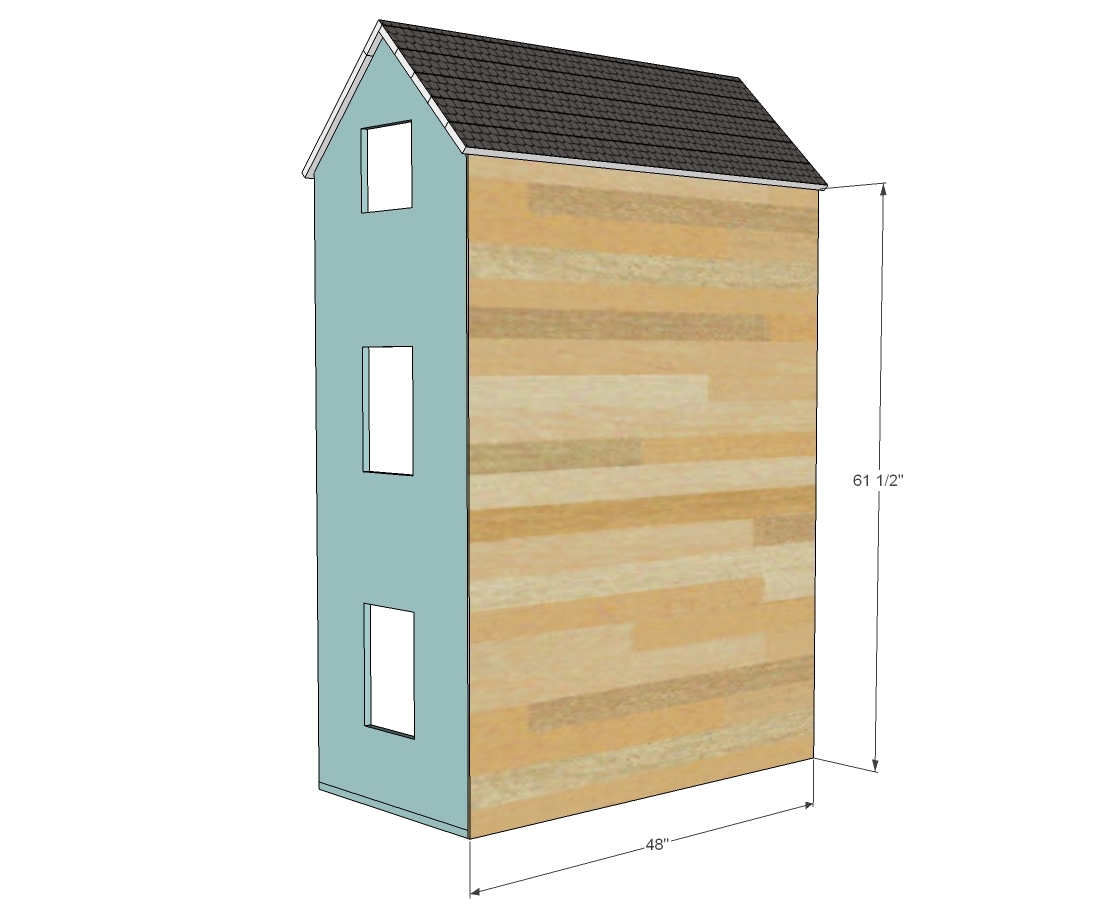
For the back, I used 1/4" plywood and nailed it to all of the walls and floors with glue.
Step 7

We opted for caster wheels instead, but you could also finish out the base with 1x boards. Shown in the diagram is 1x4s.
Step 8
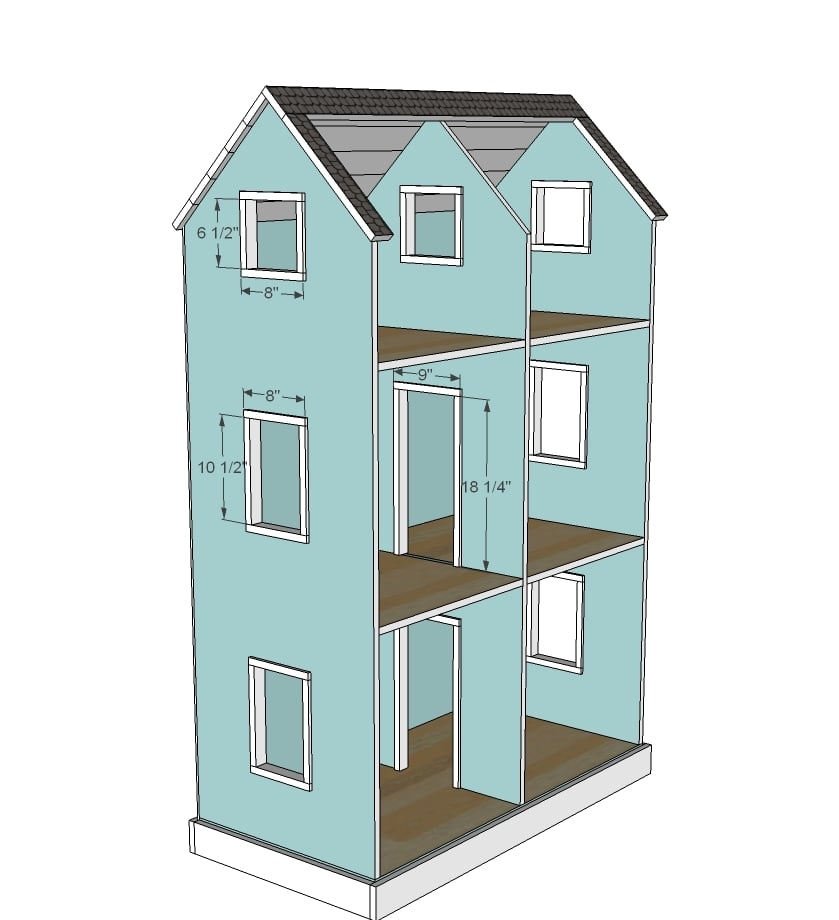
I measured each window and built the window trim to fit snugly, gluing in place when I was done.
Step 9
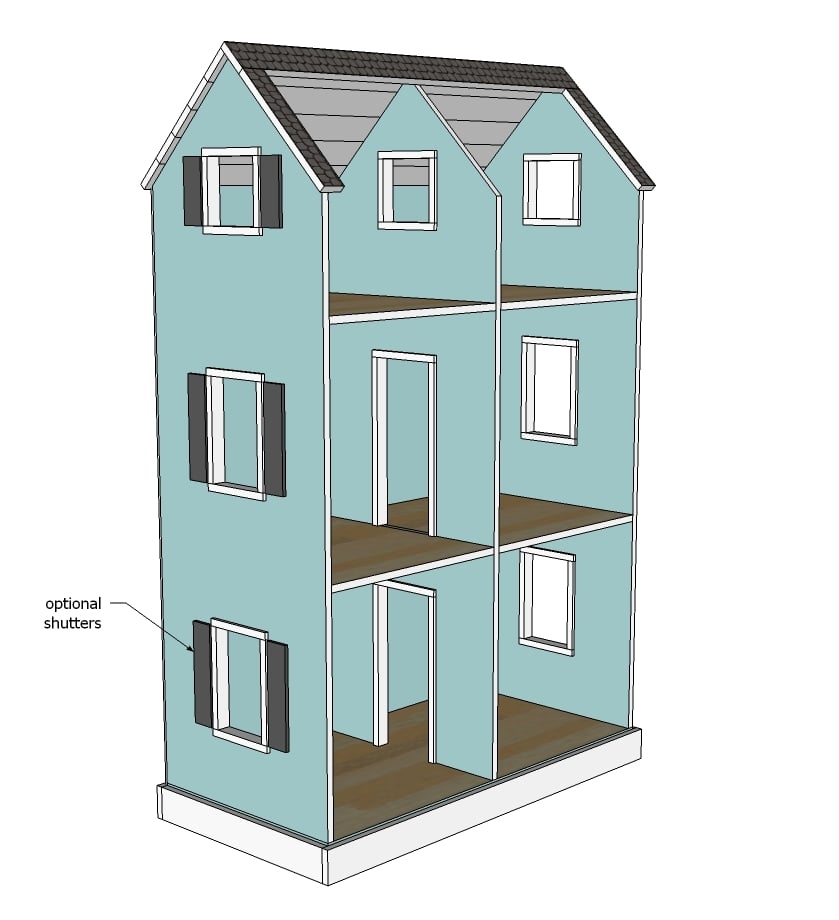
I haven't added shutters yet, but this is what 1x2 shutters would look like.
It is always recommended to apply a test coat on a hidden area or scrap piece to ensure color evenness and adhesion. Use primer or wood conditioner as needed.


Comments
jimmypaul
Sat, 04/05/2014 - 11:02
all projects
PDF . is anyone having problems downloading plans on PDF , I checked several projects an it appears that the PDF is not working ,, or is it just onmy end ????
Thank You
Mom24girls
Thu, 02/05/2015 - 17:31
Price
Is the price $100-$150 if you have wood on hand? I just left Lowes and one piece of nice plywood would be $50! Any help would be amazing!!!
Ana White Admin
Fri, 02/06/2015 - 11:25
Varies
Hi, the price can vary from town to town. Having scraps on hand can help cut down on cost. It would probably be closer to $200, if that is the price where you live. I would call around and try the price match and beat by 10% if possible. Hope this helps!
pwrcarpenter
Thu, 10/22/2015 - 03:42
stronger floors
If you make the floors run all the way across and cut the center divider into 3 pieces this will
make the floors much stronger with less sag and less chance of screws pulling out.
since the picture shows a little girl sitting on the floor I would highly suggest this. :)
dustintphelps
Tue, 11/24/2015 - 14:26
A Little Help Please!
I am looking at the cut list and wondering how this was made with only 2 sheets of 3/4 plywood. Seems as though you would need 3. Am I missing something here?
In reply to A Little Help Please! by dustintphelps
Stephen Peters
Wed, 11/25/2015 - 17:10
How many sheets of 3/4" plywood
Hi dustintphelps,
I just looked over the cut list and you can get this doll house out of two sheets of 3/4" Plywood......as long as the roof is made from 1x4's. It could be missed that the three upright peices will have about 24" left over to make the floor peices. I hope that helps. Have fun with your build! ~Stephen
Piesq
Tue, 12/01/2015 - 12:11
Unless I am missing something
Unless I am missing something, there is no way this can be built with only two 4' x 8' sheets of plywood. The two outside pieces take up basically one full sheet. the middle piece takes up half of a second sheet, leaving you with about a 2' x 8' piece. This remaining 2' x 8' piece gets split in half, leaving two 2' x 4' pieces, used for the bottom floor and middle floor. You now are left with nothing but random scraps from the two plywood sheets and no floor for the third floor.
smitjd
Sat, 12/05/2015 - 16:33
Your correct, I just
Your correct, I just completed this build, and the material list shows everything for the house in the photos with the little girl sitting inside. If you notice the diagrams are different. Once you make your cuts for the outside walls, you will have 2 pieces that would be used for the inside walls on the first and second floors, as you can see the third floor in the pictures does not have a middle wall, unlike the diagram.
amyg74
Mon, 12/07/2015 - 05:35
window and door frames
Are the window and door frames made out of the 1x2s? I have completed the steps for cutting the outside, walls, windows and doors, and now I am on framing them. I want to be sure I am using the rigt size pieces to frame. Please confirm that the 1x2s are for the window frames. thank you.
In reply to window and door frames by amyg74
Ana White
Wed, 12/09/2015 - 17:57
Yes 1 x 2's measure and cut
Yes 1 x 2's measure and cut to fit your window openings as you go.
JLynn
Fri, 12/25/2015 - 13:54
Question
I LOVE this house! My plan is to go to Lowes/Homd Depot and play helpless asking them to do my cuts for me. I don't own a saw out a fear my spouse would get "brave" and try some project and chop off his fingers LOL, but we can follow plans. SOOOOOO I think we'll be ok with this?
My question is if you make the floors go all the way across and cut the middle into small sections, does it make the floor stronger? My plan is to add 2 inches in width to each room?
nbarnhouse
Wed, 01/29/2020 - 07:34
Built with little experience - hard but not impossible
Had the hardest time cutting out the squares for the windows. They were not straight, but once I trimmed them, they weren't as noticeable. Someone mentioned in the comments above to not cut the horizontal shelves, so that is what we did. Left those boards long and then cut the vertical wall boards and used them to help support the "floors". I hit a lot of snags, but was able to complete it and my daughter loves it. I'd say I spent $250. I did save a lot of trouble by checking the purchase list against the cut list and double checking all measurements. It turns out only some plywood is exactly 48" wide, most is not.
mr500
Mon, 11/16/2020 - 08:37
If you go over to CutList…
If you go over to CutList Otimizer (google it) and put in the cut list it will show you how to cut the pieces . You can get it all out of 2 sheets. CO is free and its web based so nothing to DL
And NO this is not spam or click bate lol