American Girl Dollhouse for Small Spaces

american girl dollhouse
Difficulty
Intermediate
| Print this plan

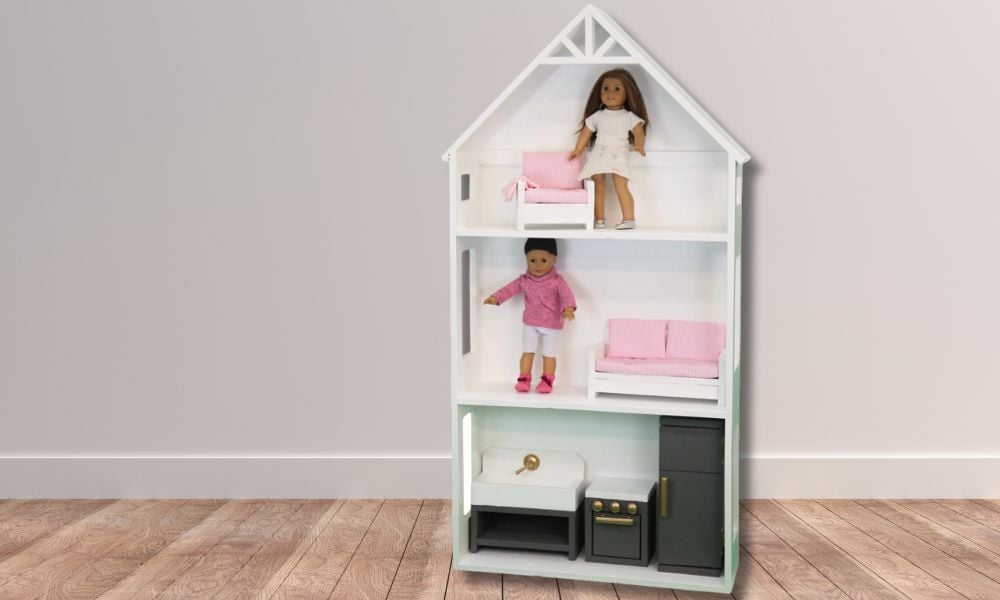
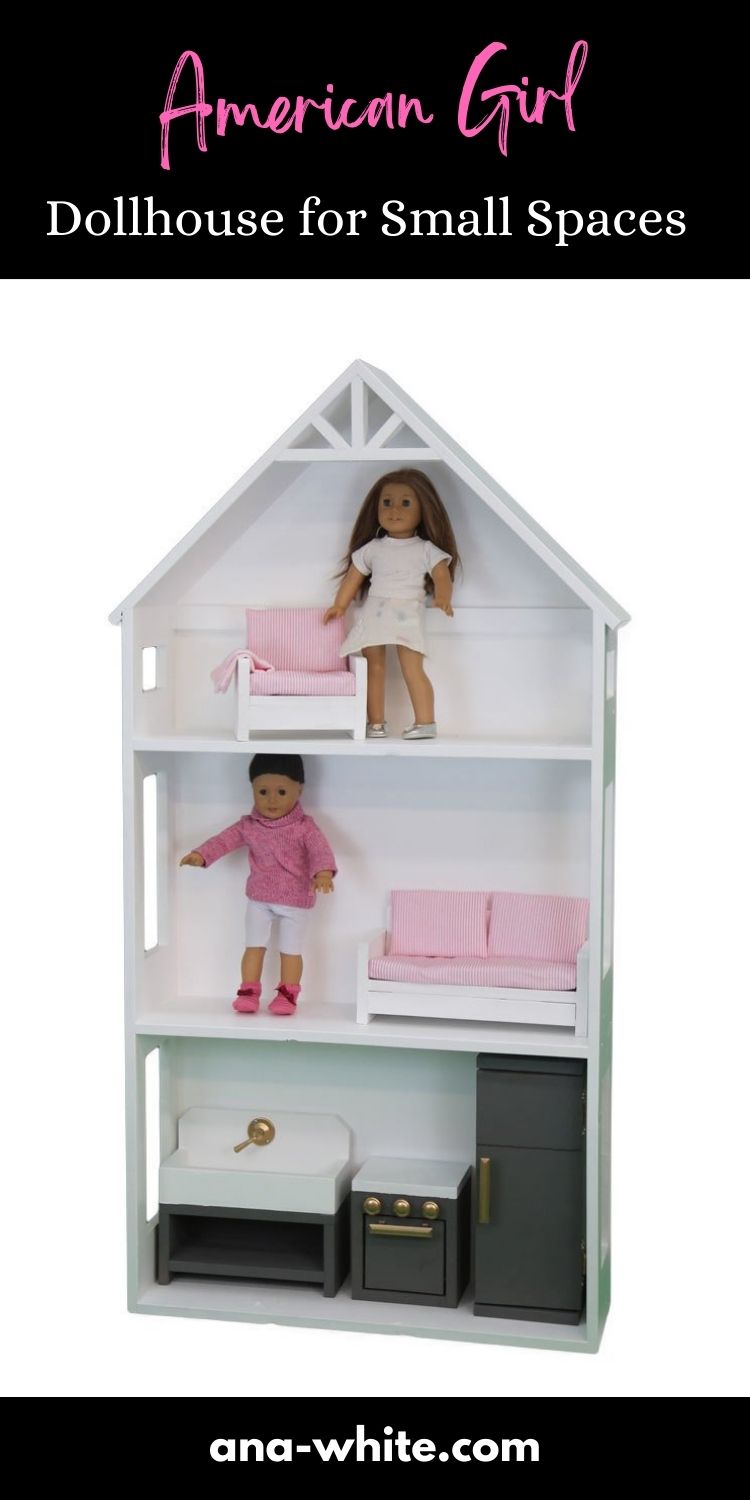
We love American Girl dollhouses but they can be SO big.  If you have a small space, here's an alternative - our compact American Girl dollhouse is about the size of a bookshelf (and you can use it as a bookshelf later!) but still fits all the furniture.  Works with any 18 doll including My Life and Our Generation dolls.

This is an easy to build beginner friendly woodworking plan, using off the shelf 1x12 boards, with full diagrams, shopping and cut list.

American Girl Dollhouse

American Girl or 18 Dolls are big dolls, and the dollhouses can be HUGE - which is great if you have the space.

But in a small space or a tight bedroom, here's an option for an American Girl Dollhouse that takes up much less space.


My daughter was more into playing with the dolls, and taking the matching playsets out, than playing in the dollhouse.  The dollhouse was almost more for storage and display than play.  

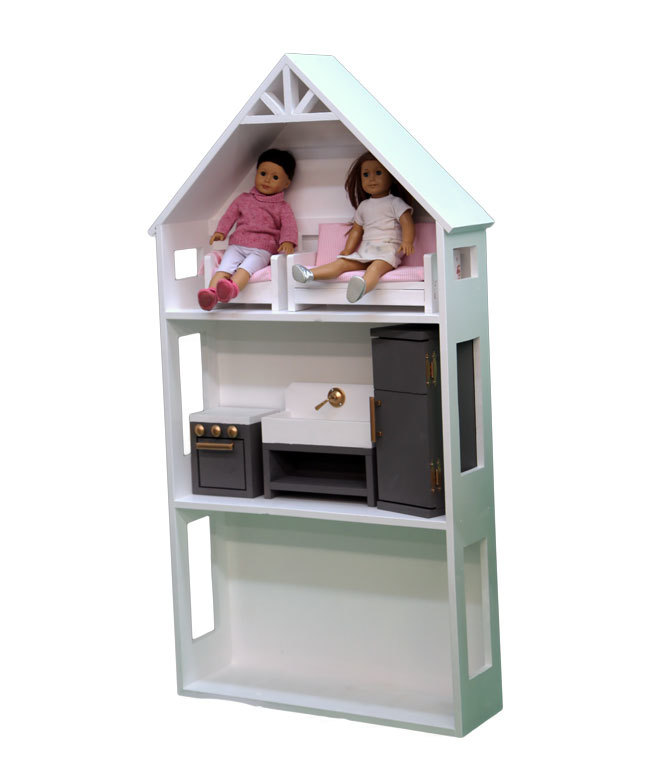
So creating a shallow dollhouse not only takes up much less space, but it works better for the way our child uses it.

You can still fit some projects in the dollhouse -

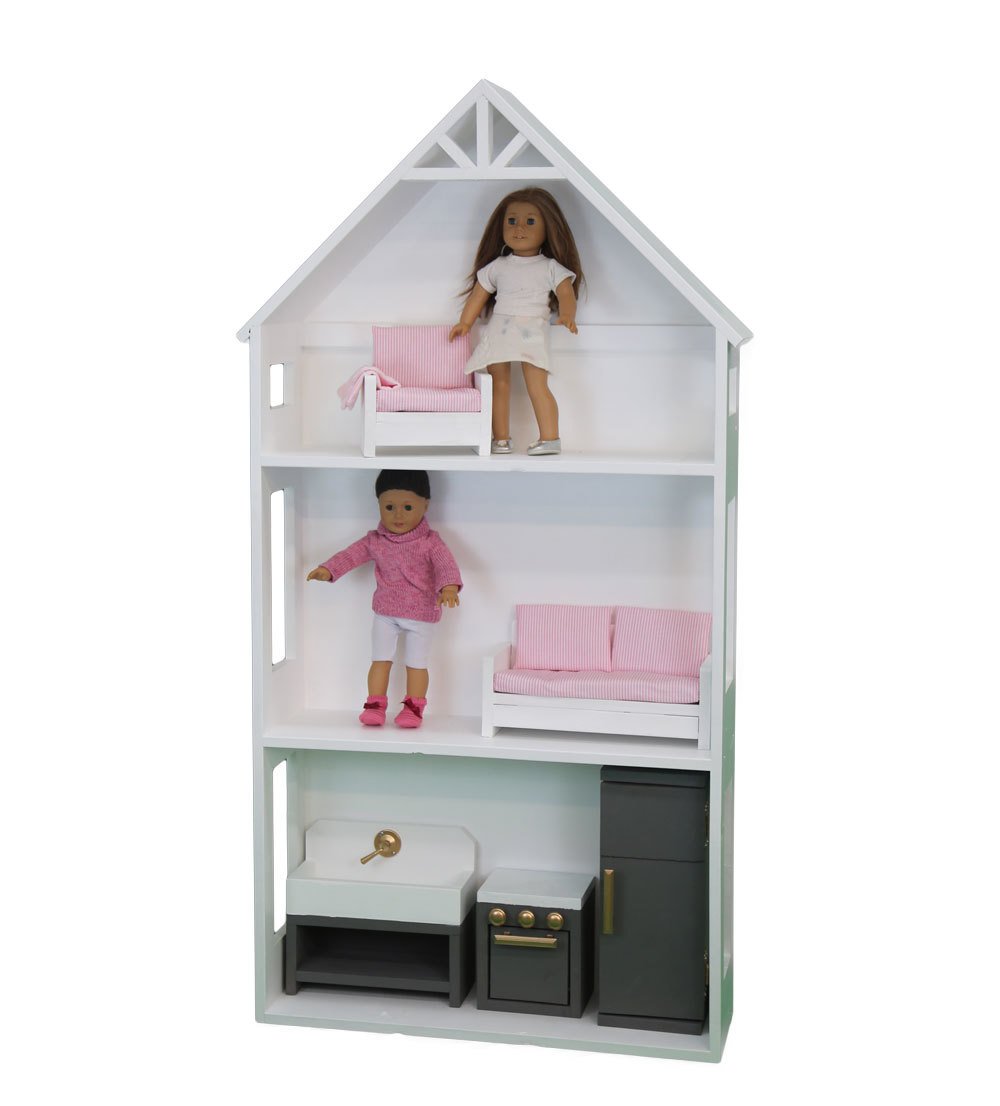
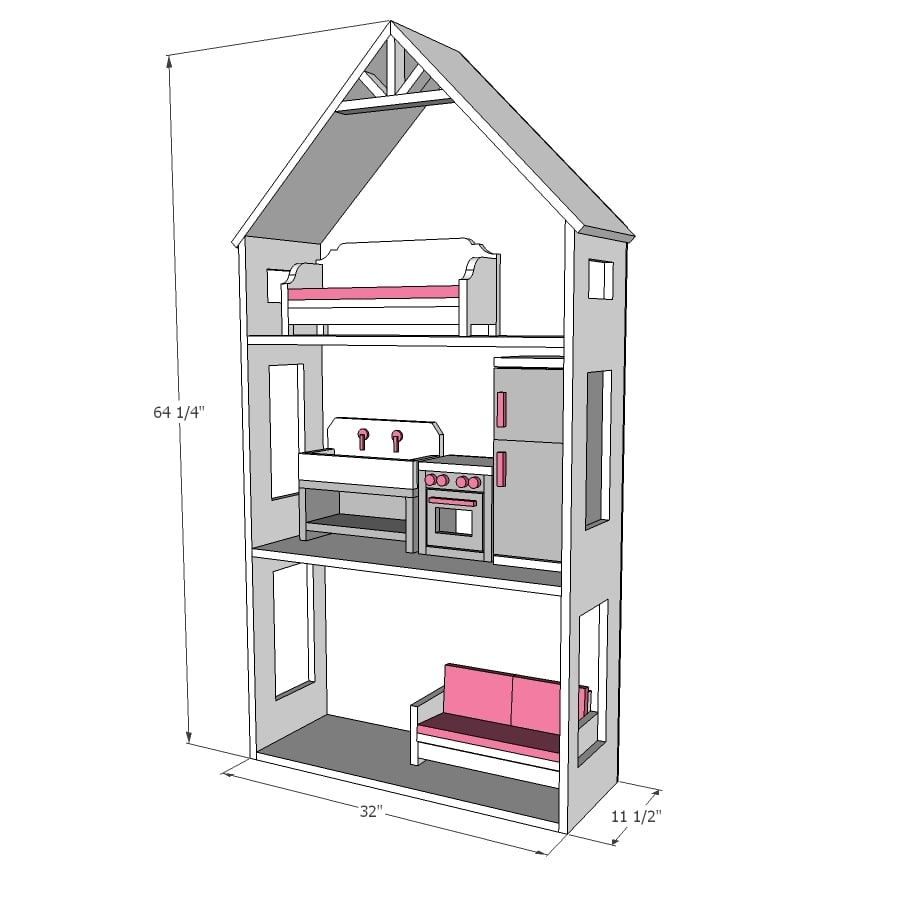
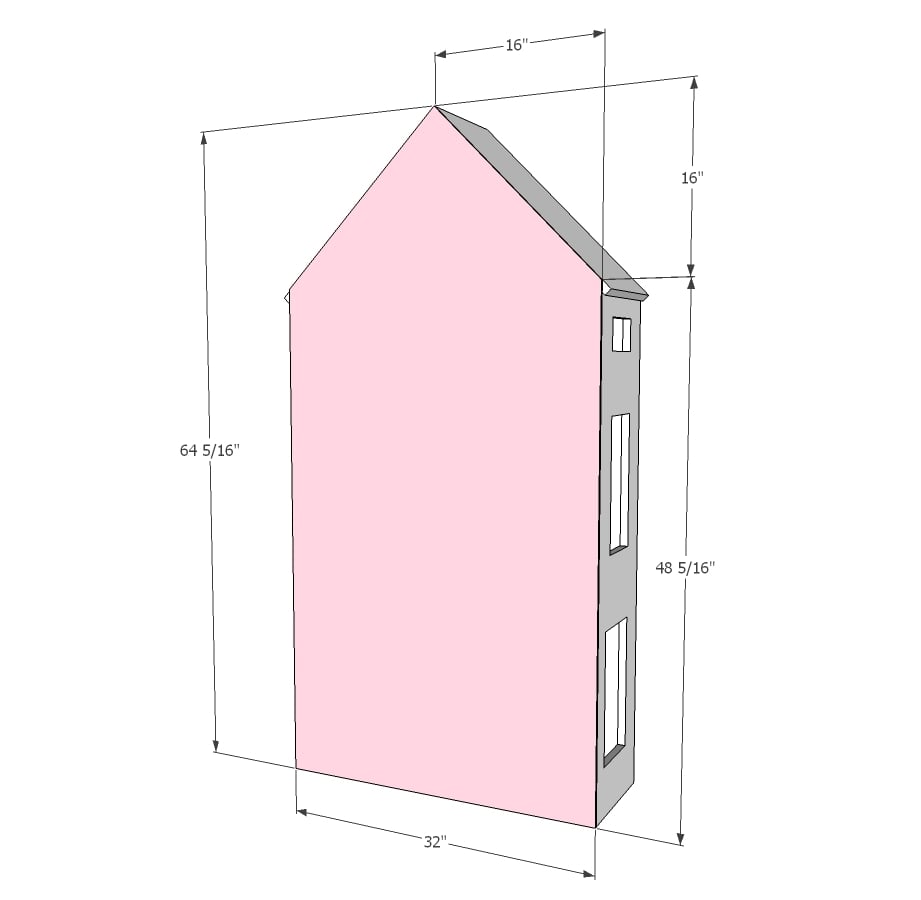
This dollhouse is only about five feet four inches tall, and 32" wide.  

We LOVE that this dollhouse is built with 1x12 boards - so easy to build!!

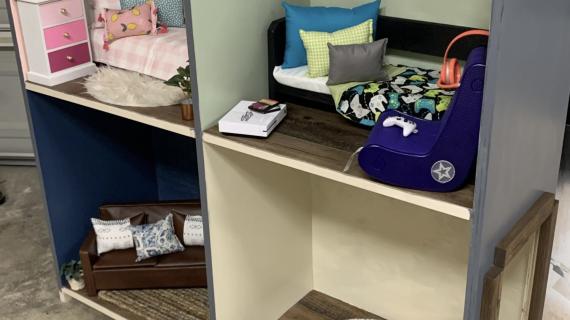
Unlike a traditional style dollhouse where you set up rooms, this one isn't big enough to do that, as the rooms are only 11-1/4" deep.  

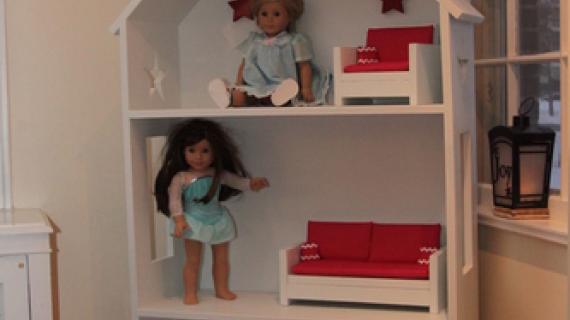
But I love how the furniture and dolls are on display.  I can just imagine the girls taking the furniture out, playing with it on the floor.  It makes a beautiful display, and the shelves are all at height that the girls could easily reach and play with.

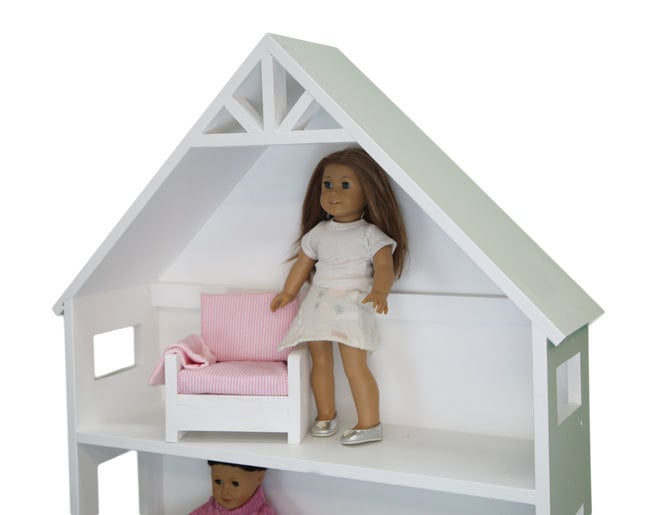
This project is so simple to make - just a 1x12 bookshelf really - but the truss detail at the top really makes it cute.

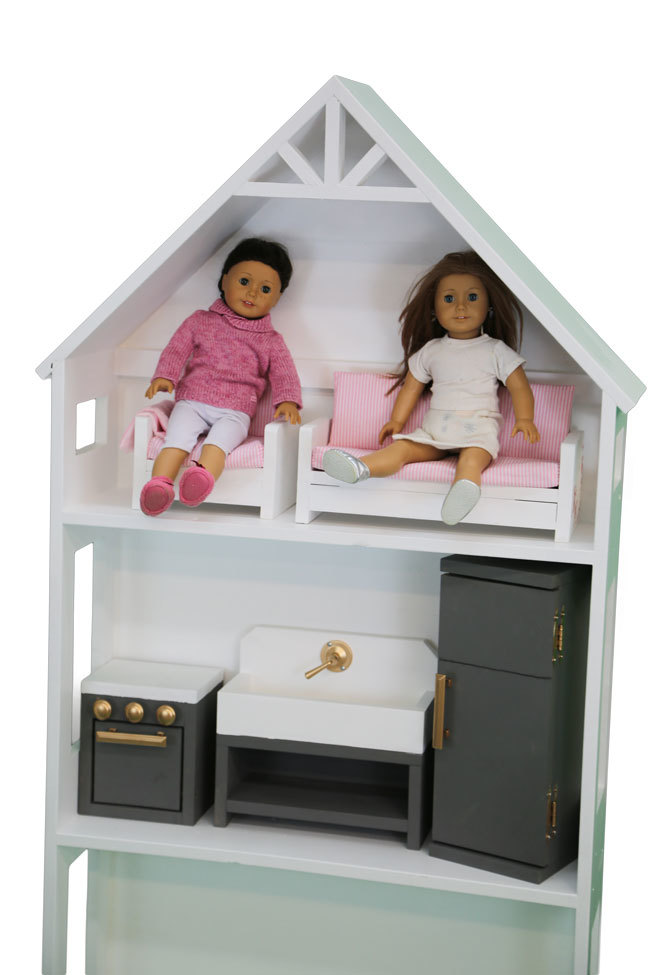
Build the Furniture Too!

The furniture in this dollhouse is all DIY!

I added the plans here so you can make everything in the photos.


Pin For Later! 

American Girl Dollhouse for Small Spaces

Dimensions
american girl dollhouse dimensions
Dimensions shown above

Preparation

Shopping List
  • 2 - 1x12 @ 6 feet long (for sides and roof)
  • 1 - 1x12 @ 8 feet long (for floors or shelves)
  • About 30" of 1x2 boards for the truss detail
  • 1 4x8 sheet of 1/4" thick plywood, mdf, beadboard or other backing material
Common Materials
3/4 inch finish nails
1 1/4 inch finish nails
Cut List
  • 2 - 1x12 @ 48" long, one end cut at 45 degrees off square, longest point measurement (cut from 6' long 1x12)
  • 2 - 1x12 @ 23-3/4" long, one end cut at 45 degrees, longest point measurement (use scrap from 48" long cut, you don't even need to cut it, it can be longer as this is the roof and will just increase overhang)
  • 3 - 1x12 @ 30-1/2" - cut all of these from the 8 foot 1x12 board
  • 1/4" plywood @ 32" x 64-5/16"

TRUSS DETAIL

  • 1 - 1x2 @ 11" - both ends cut at 45 degree BEVEL, long point to long point mesurement
  • 1 - 1x2 @ 4-3/4" - dogeared to a 45 degree point
  • 2 - 1x2 @ 3-1/8" - one end cut at 45 degrees, longest point measurement
Tools
Tape Measure
Speed Square
Pencil
Safety Glasses
Hearing Protection
Kreg Jig
Drill
Circular Saw
Jigsaw
Miter Saw
Brad Nailer
Power Sander
General Instructions

Please read through the entire plan and all comments before beginning this project. It is also advisable to review the Getting Started Section. Take all necessary precautions to build safely and smartly. Work on a clean level surface, free of imperfections or debris. Always use straight boards. Check for square after each step. Always predrill holes before attaching with screws. Use glue with finish nails for a stronger hold. Wipe excess glue off bare wood for stained projects, as dried glue will not take stain. Be safe, have fun, and ask for help if you need it. Good luck!

Instructions

Step 1

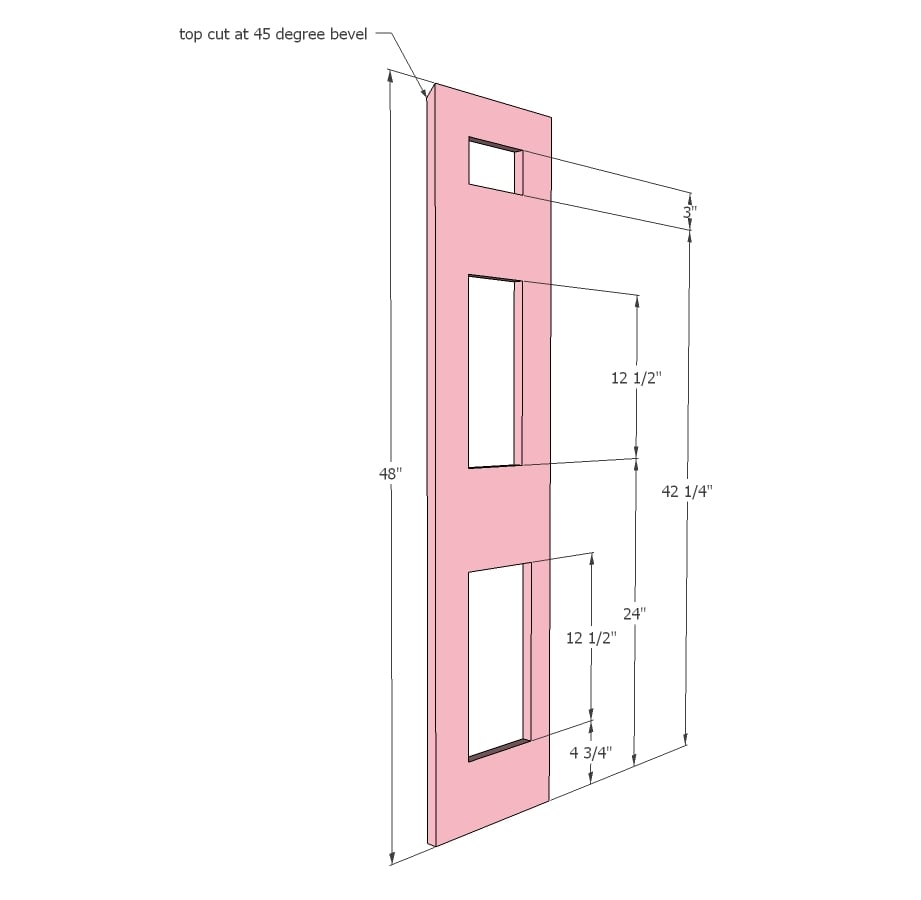
Cut out windows from the side panels. Use a drill to start cuts and then cut from the drilled holes with a jigsaw. Sand the rough edges. I recommend drilling two pocket holes facing upward for attaching the roof in later steps, on either side of the small window, on the inside.

Step 2

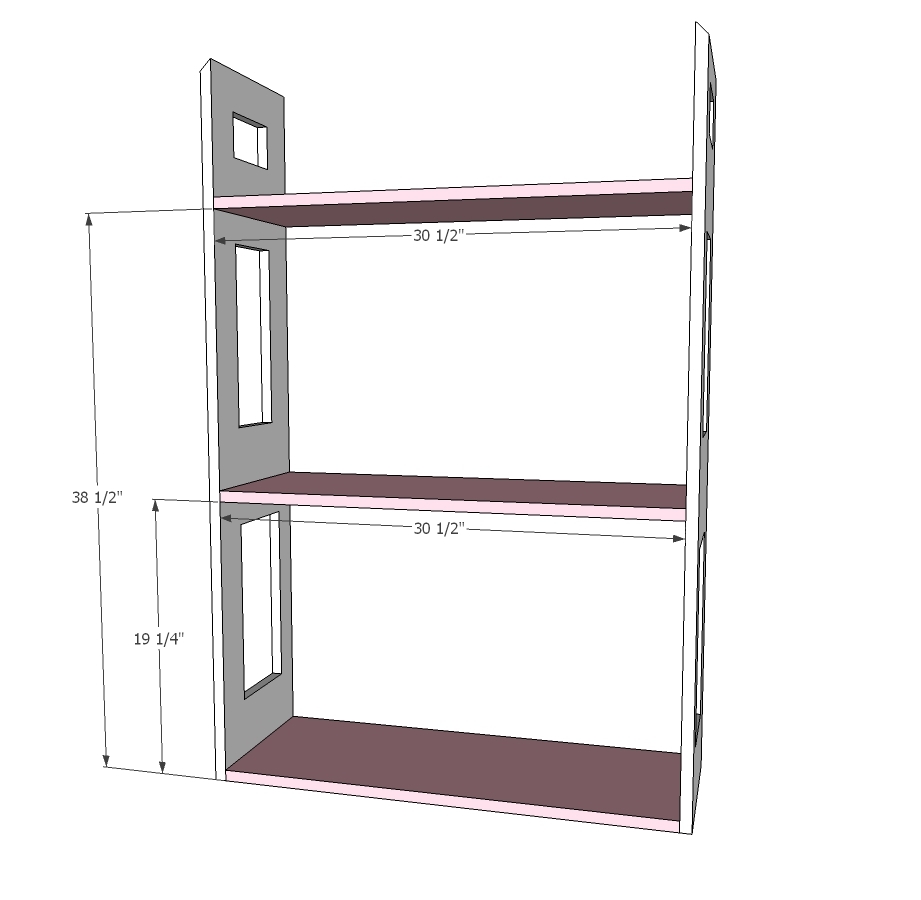
Drill three 3/4" pocket holes on each of the shelves. Attach shelves to the sides with 1-1/4" pocket holes and wood glue. NOTE: If using pocket holes to attach roof (and you drilled pocket holes on sides as suggested in step 1) do not attach the third floor until after you complete step 3 or your drill will not be able to fit.

Step 3

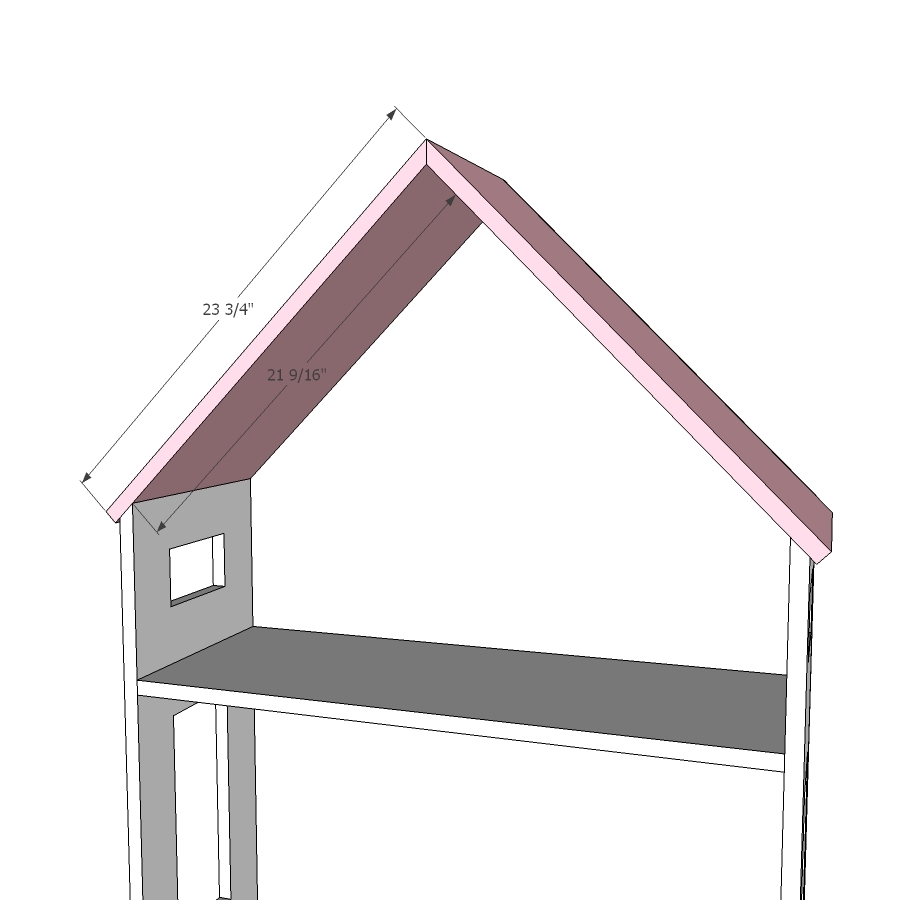
Attach the roof to the sides. Use glue and 1-1/4" nails to attach roof at peak. The truss detail and back will further support this joint.

Step 4

Attach back with 3/4" brad nails or staples and glue to all fixed shelves, sides and roof.

Step 5

Finishing Instructions
Preparation Instructions
Fill all holes with wood filler and let dry. Apply additional coats of wood filler as needed. When wood filler is completely dry, sand the project in the direction of the wood grain with 120 grit sandpaper. Vacuum sanded project to remove sanding residue. Remove all sanding residue on work surfaces as well. Wipe project clean with damp cloth.

It is always recommended to apply a test coat on a hidden area or scrap piece to ensure color evenness and adhesion. Use primer or wood conditioner as needed.

Comments

jstagliareni

Fri, 01/08/2016 - 05:25

Ana, the kitchen appliances you have in the doll house look fantastic, have you added those plans to the website yet? I searched and couldn't find them. My daughter got Grace for Christmas and is already asking for a kitchen for her birthday so she and Grace can cook. Thank you

LindseyT

Wed, 01/20/2016 - 11:05

Thank you for these plans, Ana! I contemplated the larger house at Christmas but was a bit intimidated by the size. This smaller version is perfect! Planning on adding this to my weekend to do & gifting on valentines :) 


Frequently Asked Questions

Wood Questions

What kind of wood should I use?
Most of our plans use standard construction lumber like pine or fir. It's affordable, easy to work with, and easy to find. It's also rapidly renewing and biodegradable, so a great eco friendly choice!

Can I use hardwoods instead?
Yes—just keep in mind they're heavier, cost more, and can be tougher on tools and harder to join together and finish. I recommend not tackling a hardwood project until after you have built several softwood projects.

What if my boards are warped?
Choose the straightest boards at the store. You can often work around slight warps by cutting them into shorter pieces.

What wood should I use for outdoor furniture?
Use red-toned or pressure-treated 2x lumber for framing, and cedar or cedar fence pickets for the decking. Outdoor furniture should be built like a deck—your local home center can help recommend the right wood for your climate.

Will my wood move or warp after I build?
Potentially, especially in humid climates. Let your wood acclimate indoors before building. Once acclimated and kept in a stable environment, movement should be minimal. Remember, most houses are built using framing lumber - it's all about keeping moisture down indoors.

Cutting Questions

Do I need a miter saw?
A miter saw is great, creating fast, safe, and precise cuts, even for beginners. But most plans can be built with a circular saw and a straight edge. If using a circular saw to cut, take time to practice, and get good at making cuts, before cutting your project boards.

How do I get clean cuts with a circular saw?
Clamp your board, measure twice, cut slow, and use a sharp blade. This takes practice, so spend some time making cuts. I go through becoming proficient at freehand cutting in my course, it is worth taking if you want to master this skill.

Will the store cut my wood?
Yes—most stores will do rough cuts to help you transport your materials home. But from store to store, the quality of cuts could greatly vary.

Joinery Questions

What screws should I use?
We recommend star-head self tapping screws for framing, most common sizes are 2-1/2", 1-3/4". Pre-drill if close to the edge or you find your wood is splitting.

Do I have to use pocket holes?
Pocket holes are the cheapest, easiest and fastest way to do some joints - like edge to edge or a hidden fastener joint. There are other methods, but these can be time consuming and expensive. We recommend using pocket holes as indicated in plans for best results.

How do I keep things square?
Use a speed square and measure diagonals after each step. Always clamp joints before screwing to keep them tight and flush.

Finishing Questions

Stain or paint before or after building?
A quick sand before and a full finish after gives the best results. Pre-finish if you're doing two-tone or detailed finishes.

What type of finish?
Use oil-based or water-based stain. For paint, cabinet-grade latex or enamel works great. High use surfaces on indoor projects should get a coat of polyurethane, I recommend a Helsman or Spar or other flexible poly that won't crack or peel with wood movement. For exterior projects, use a finish suitable for exterior fences.

How to get a smooth finish?
Start with a well sanded project. Sand between coats (220 grit), wipe clean, and apply light coats with a foam brush or roller.

Plan Questions

Can I change the size?
Many people do, and that's the great thing about building your own furniture! But do keep in mind going bigger might mean more supports are required, and often plans are optimized for minimal material waste.

Are these beginner-friendly?
Yes—plans are written with simple tools and clear steps in mind, with every effort to make plans as simple as possible.

Can I sell what I build?
Absolutely! Just don’t resell or repost the plans themselves.

General Questions

What tools do I really need?
A drill, circular saw, tape measure, square, and a few clamps will get you through most projects.

Do I need a workshop?
Nope! A driveway or small patio is plenty to get started, just make sure you have a level place to work. If you find you are building several projects a year, creating a small workbench is a great way to store tools and have a dedicated workspace.

What if I mess up?
Wood filler, sanding, or flipping boards goes a long way. Mistakes are part of the process!

What can I do to make my projects look more professional?
Start with straight boards, make accurate cuts, clamp all joints, and line up everything neatly. Sand thoroughly, use a neutral finish, and apply it in light coats for a clean look.

I've never built anything before. Where should I start?
Start with a few smaller softwood projects to get hands-on experience. Or if you're tackling a big project, buy a little extra lumber and practice your cuts and joints first. If possible, work with someone who has a bit of experience.

Care & Maintenance

How long will my furniture last?
With good joinery and regular care, your DIY furniture can last for decades. I have pieces in my own home that are over 20 years old and still going strong! One of the best parts about DIY furniture is that it’s easy to repaint, refinish, or repair—so your projects can grow and adapt with you.

How should I care for outdoor furniture?
Lightly pressure wash or hose it down once or twice a year. Tighten screws and reapply finish as needed to protect it—just like a deck or fence. A little upkeep goes a long way in extending the life of your furniture.

How about indoor furniture?
Regularly dust or wipe with a damp cloth. If it starts to look worn, a light sanding and touch-up paint or stain can refresh it in no time. DIY pieces are meant to be durable and fixable—so don’t be afraid to give them some love now and then.

Want to Build with Confidence?

Check out my ebook: 12 Skills to Build Your Own Furniture
It walks you through the core skills every builder needs—measuring, cutting, joinery, and finishing—so you can build beautiful furniture that lasts.

Still Have Questions?

Email us anytime at [email protected] and we’ll be happy to help!