
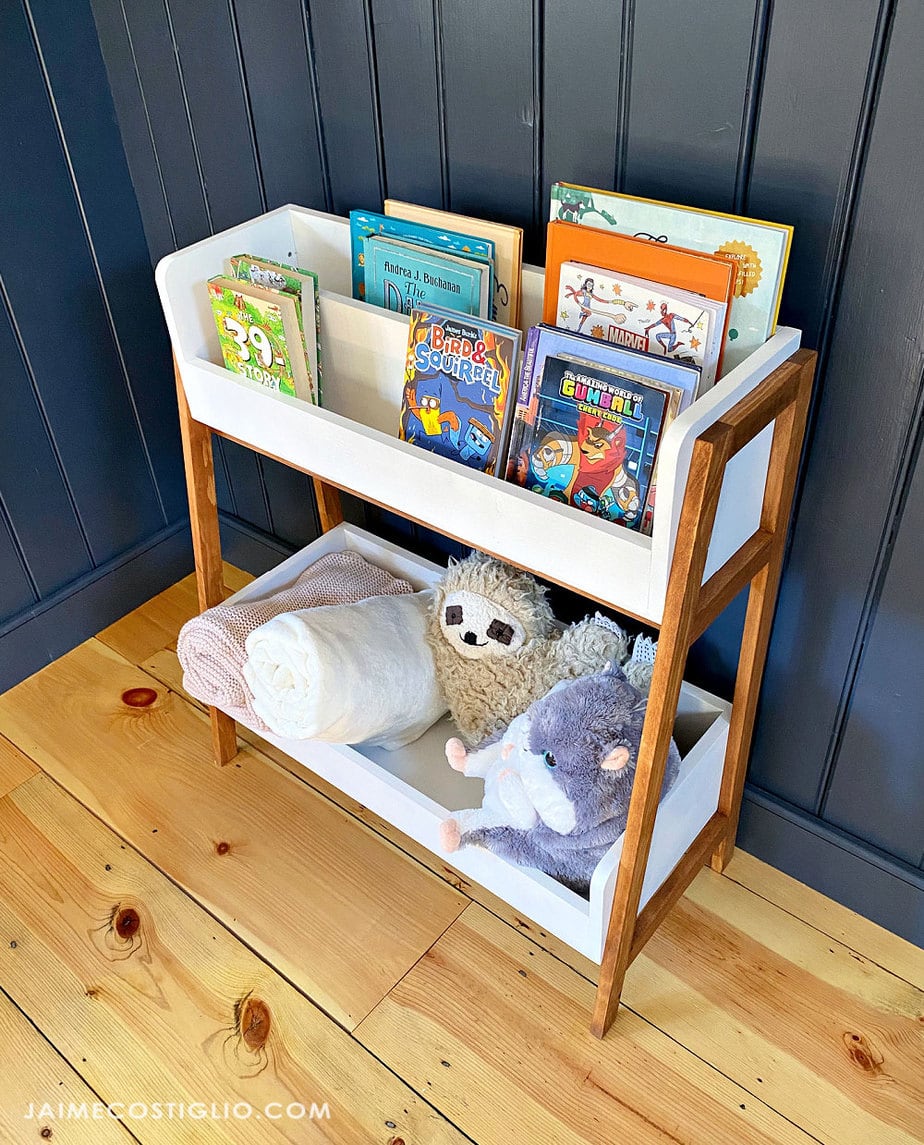

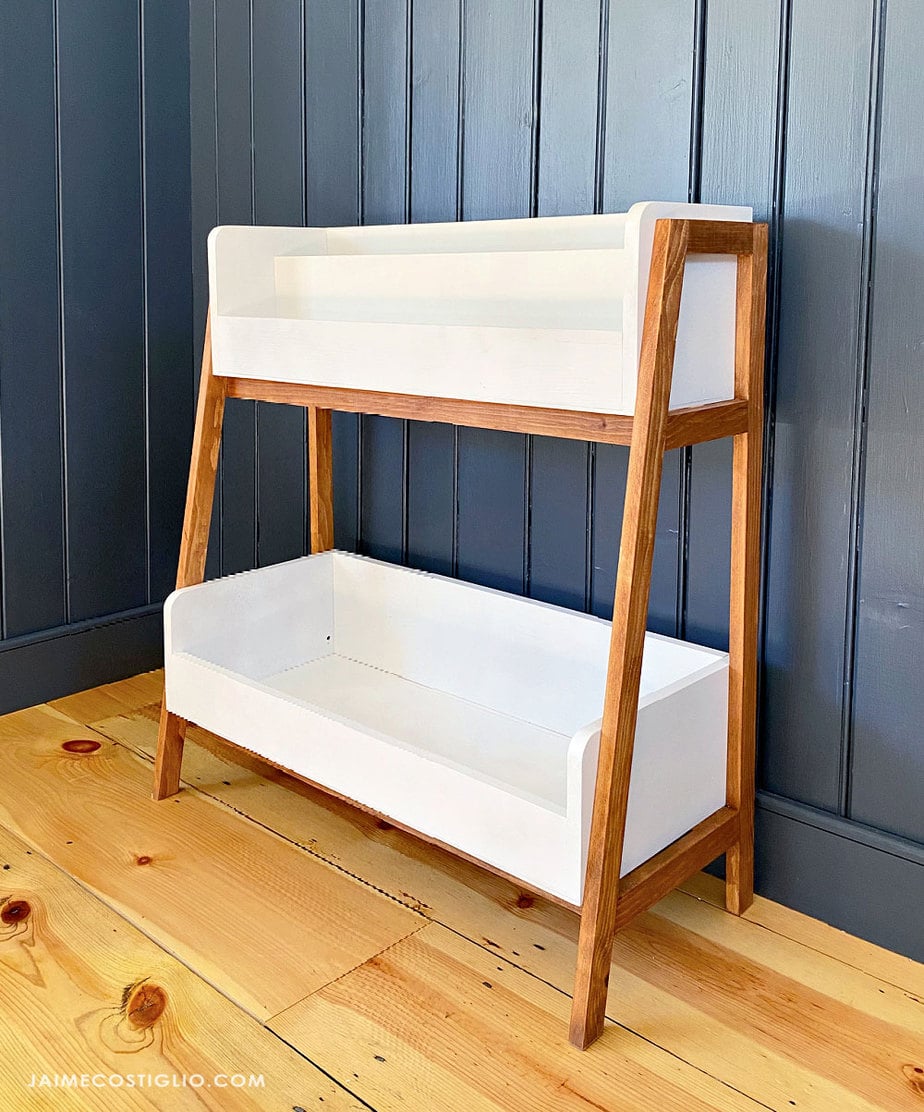
Build your own bookrack with toy bin with our free plans! Features a upper shelf for sorting books of different sizes, and a generous bottom bin for holding stuffies and larger items. Built by JaimeCostiglio.com for Handbuilt Holiday 2021. Free plans from Ana-White.com
Specific storage makes tidy up a no brainer - especially for toys. Because kids know exactly where to put things away, making toy room clean up easy and decision free.
This week, Jaime Costiglio and I, are sharing a brand new plan to help you with just that!

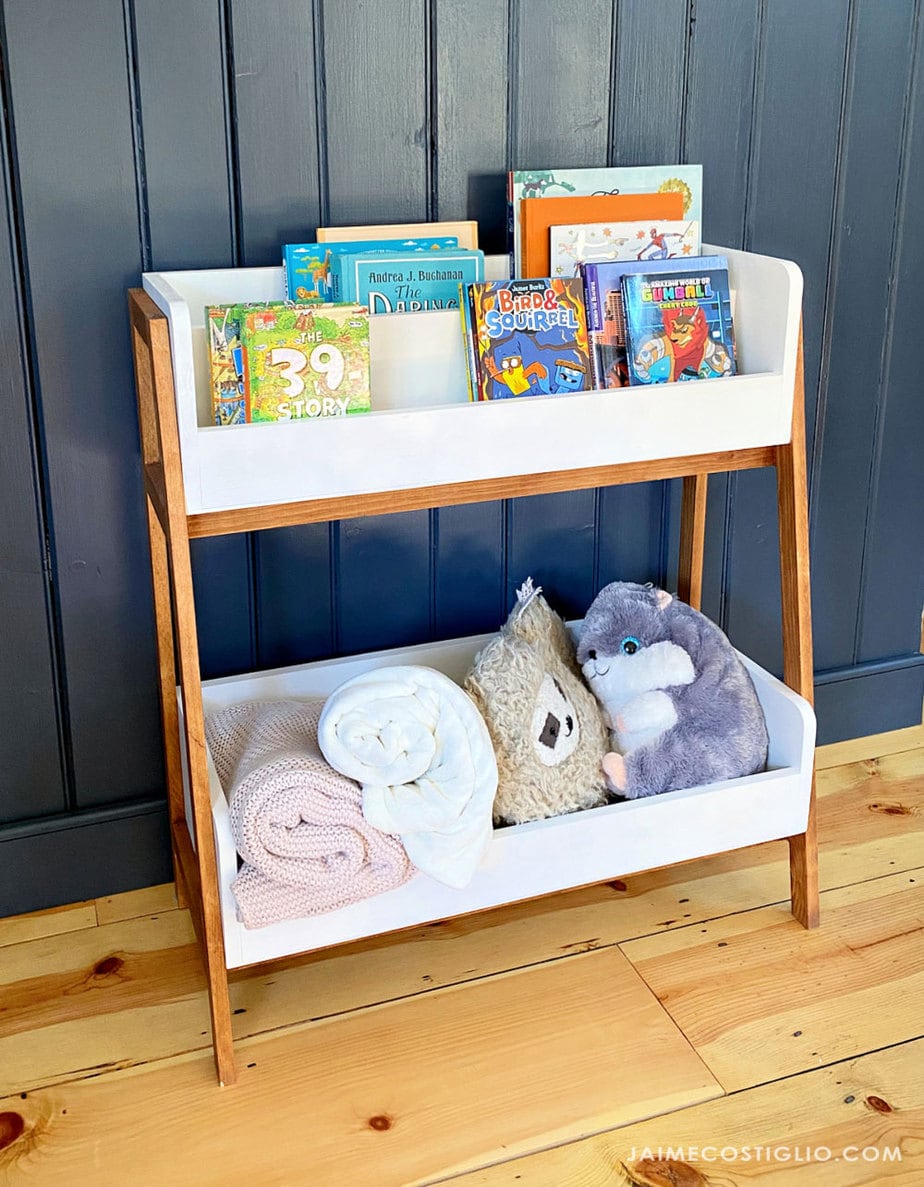
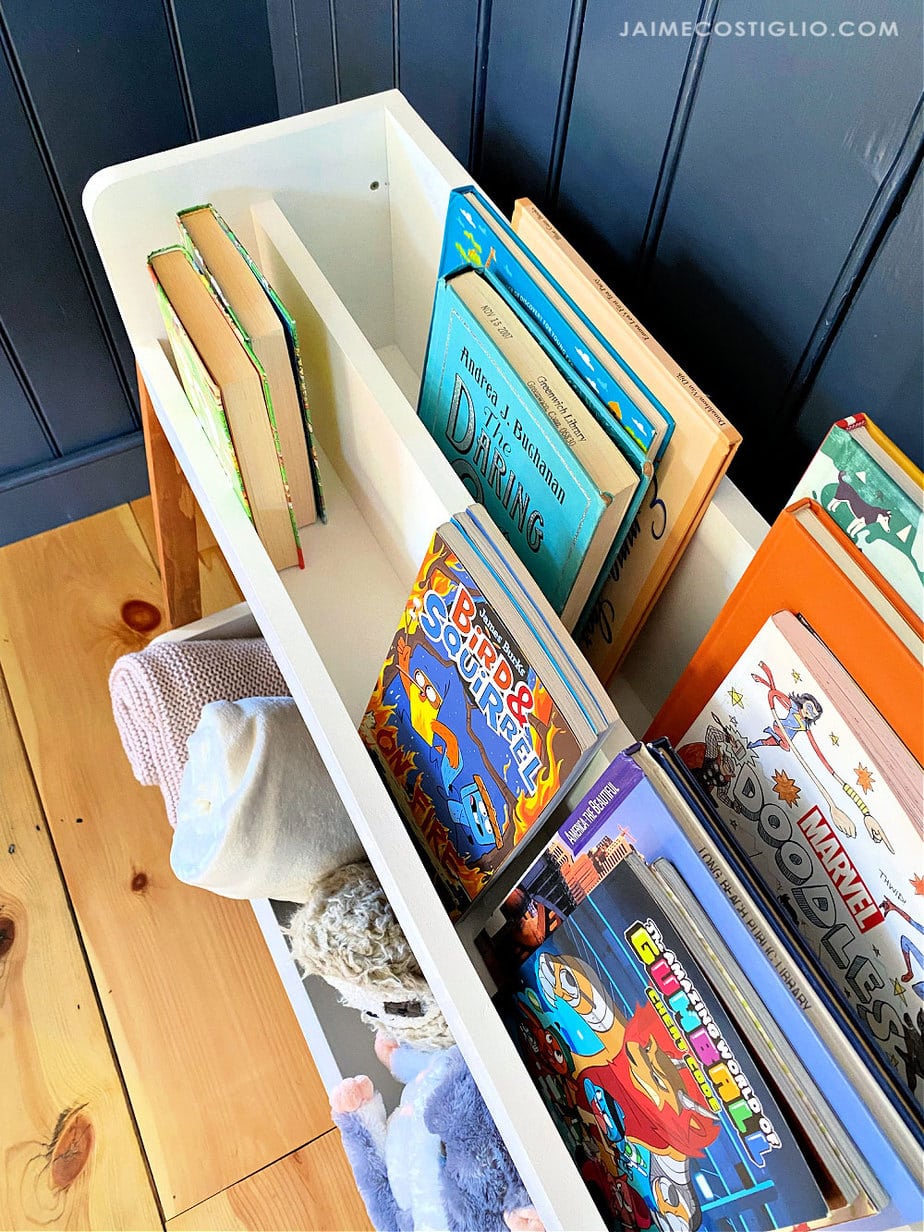
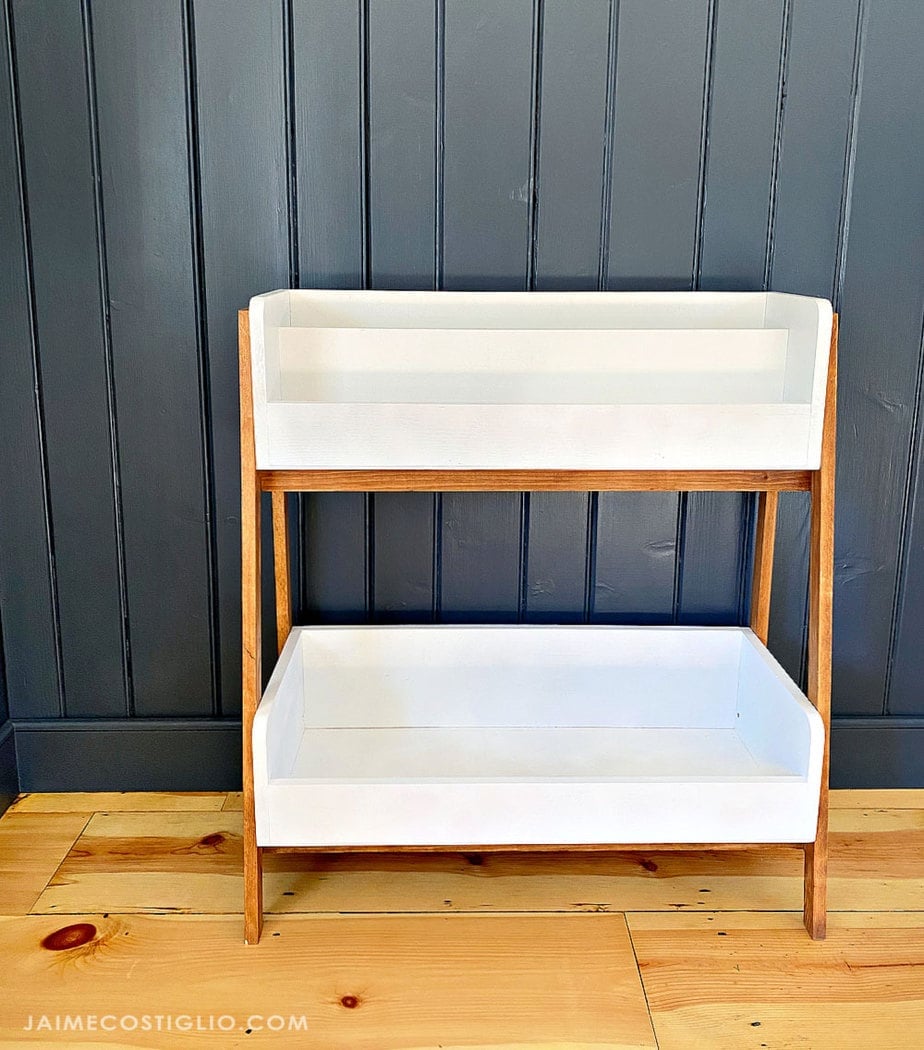
This bookrack features a bin at top for organizing books forward facing, suitable for different sized books. This also displays beautiful book covers facing outward. The bottom is great for larger items like stuffed animals, blankets, or favorite action figures. I love that there is no tabletop surface to accumulate clutter on top of.
Handbuilt Holiday 2021
It's the season of giving! I partnered up with Jaime Costiglio to bring you a brand new free gift plan, every Friday in the 12 weeks leading up to Christmas! Over the years, we've gifted hundreds of plans, many that you can make with scrap wood. Check out the entire Handbuilt Holiday Collection here.
Build Post and More Photos from Jaime Costiglio
Want to see this project come together with build photos? Tips and tricks? Lots more finished photos? Jaime puts together a build post on her blog with much more details - please click over and check it out.
CLICK HERE FOR JAIME COSTIGLIO BUILD POST
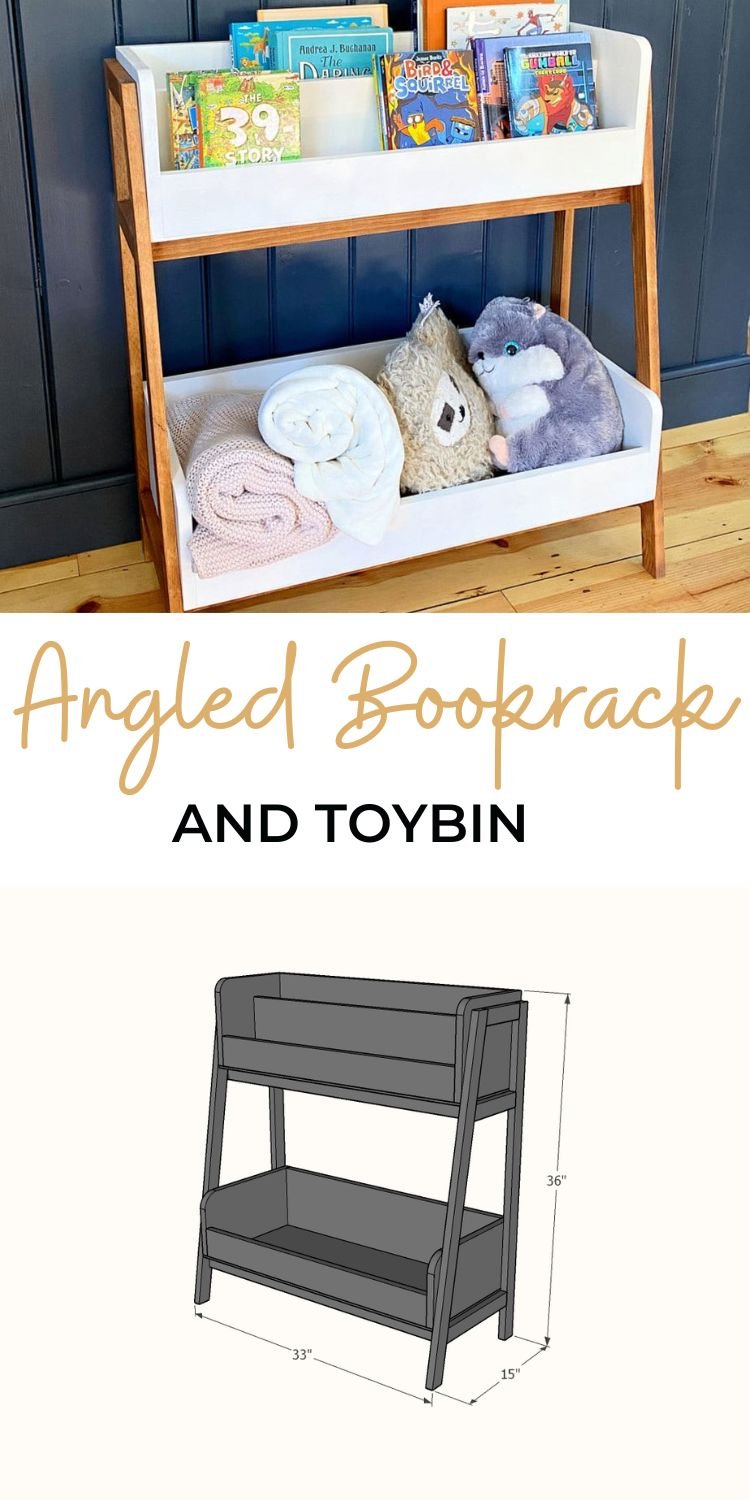
Pin For Later!
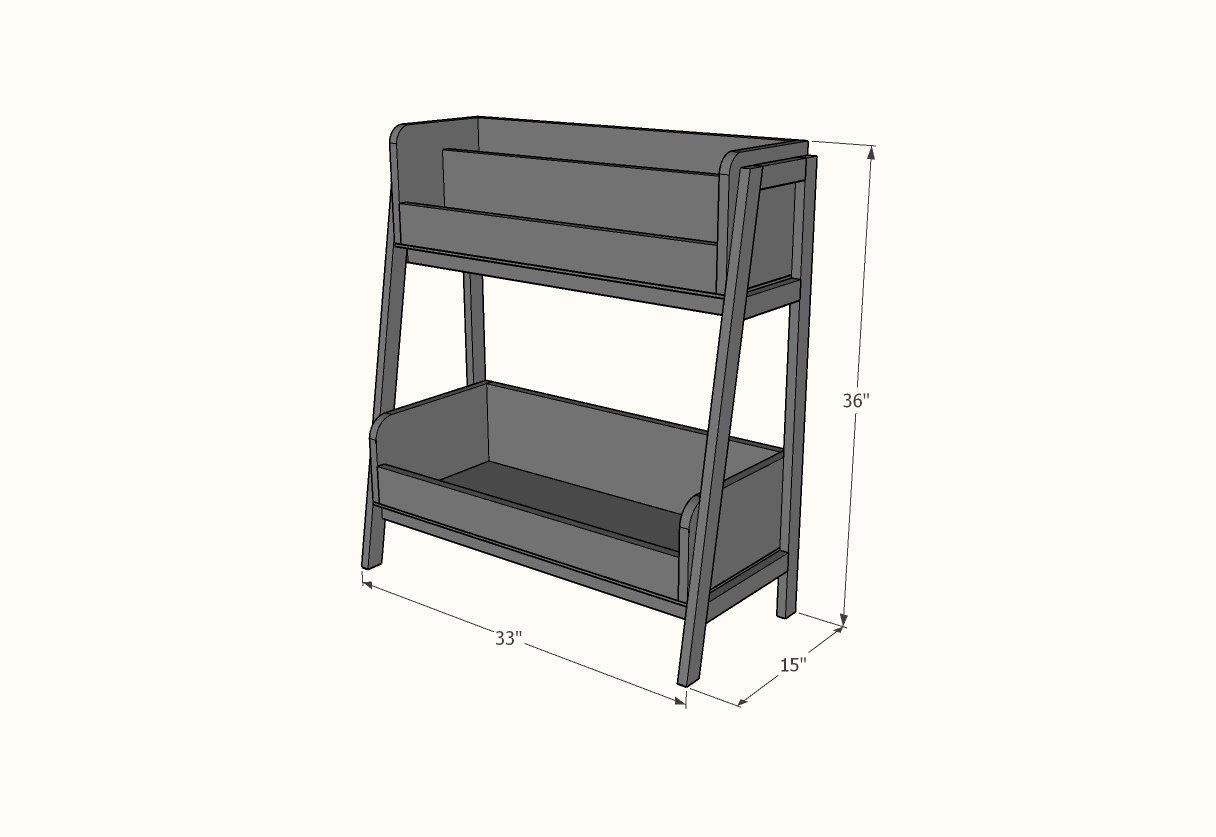
Preparation
- 4 - 1x2 @ 8 feet long
- 2 - 1x10 @ 5 feet long
- 1 - 1x8 @ 8 feet long
- 1 - 1x4 @ 6 feet long
- 1 - 1/4" plywood panel or underlayment panel @ 24" x 48"
- 1-1/4" and 3/4" brad nails
Frame
- 2 - 1x2 @35" - back legs
- 2 - 1x2 @ 35-1/2" - front legs - both ends cut at 10 degrees off square, ends are parallel, long point to short point
- 2 - 1x2 @ 6" - long point measurement, one end cut at 10 degrees off square
- 2 - 1x2 @ 7-1/2" - long point measurement, one end cut at 10 degrees off square
- 2 - 1x2 @ 11-1/8" - long point measurement, one end cut at 10 degrees off square
- 4 - 1x2 @ 31-1/2"
Top Shelf
- 2 - 1x10 @ 10"
- 1 - 1x10 @ 30"
- 1 - 1x8 @ 30"
- 1 - 1x4 @ 30"
- 1 - 1/4" plywood @ 10" x 31-1/2"
Bottom Shelf
- 2 - 1x8 @ 14"
- 1 - 1x8 @ 30"
- 1 - 1x4 @ 30"
- 1 - 1/4" plywood @ 10" x 31-1/2"


Instructions
Step 1
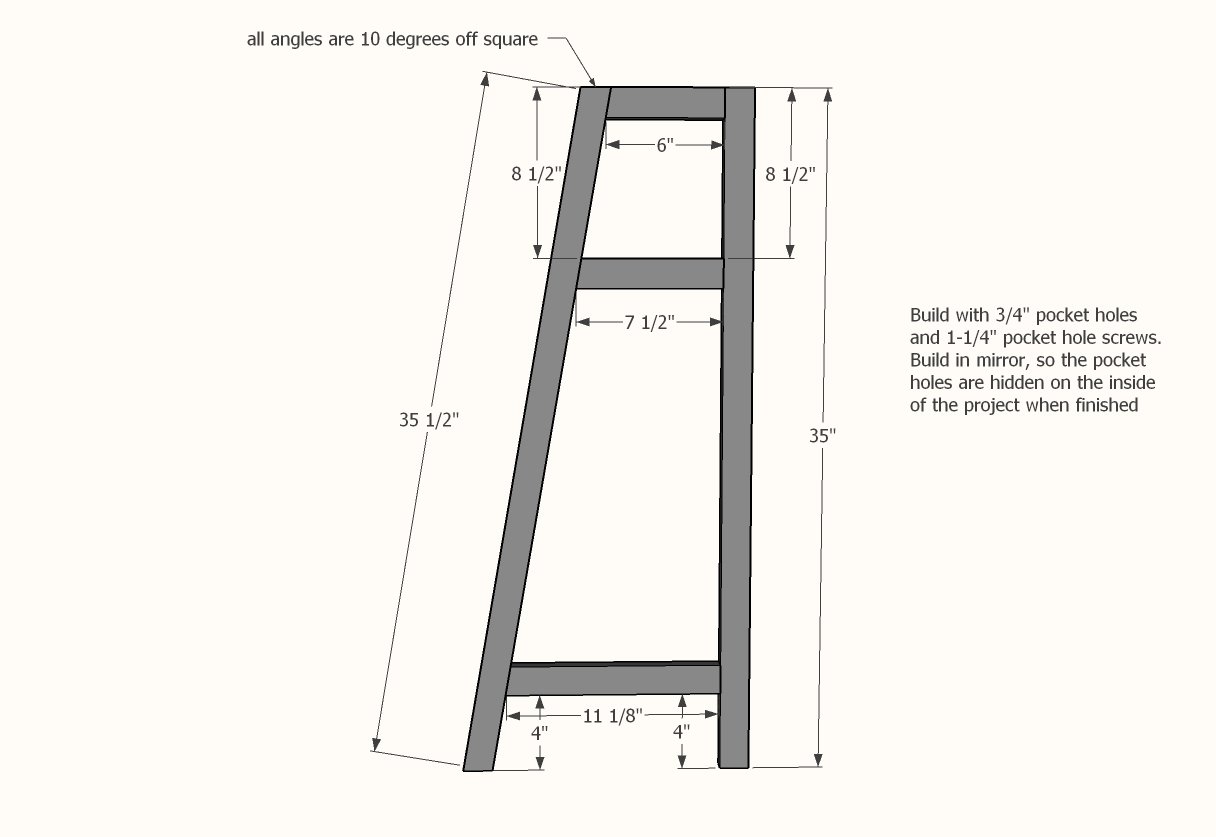
Lay out the leg sets and mark. Drill pocket holes and attach. Two pocket holes are recommended, but you could get away with one if you use glue.
Make sure you build in mirror, so the pocket holes are hidden on the inside.
Step 2
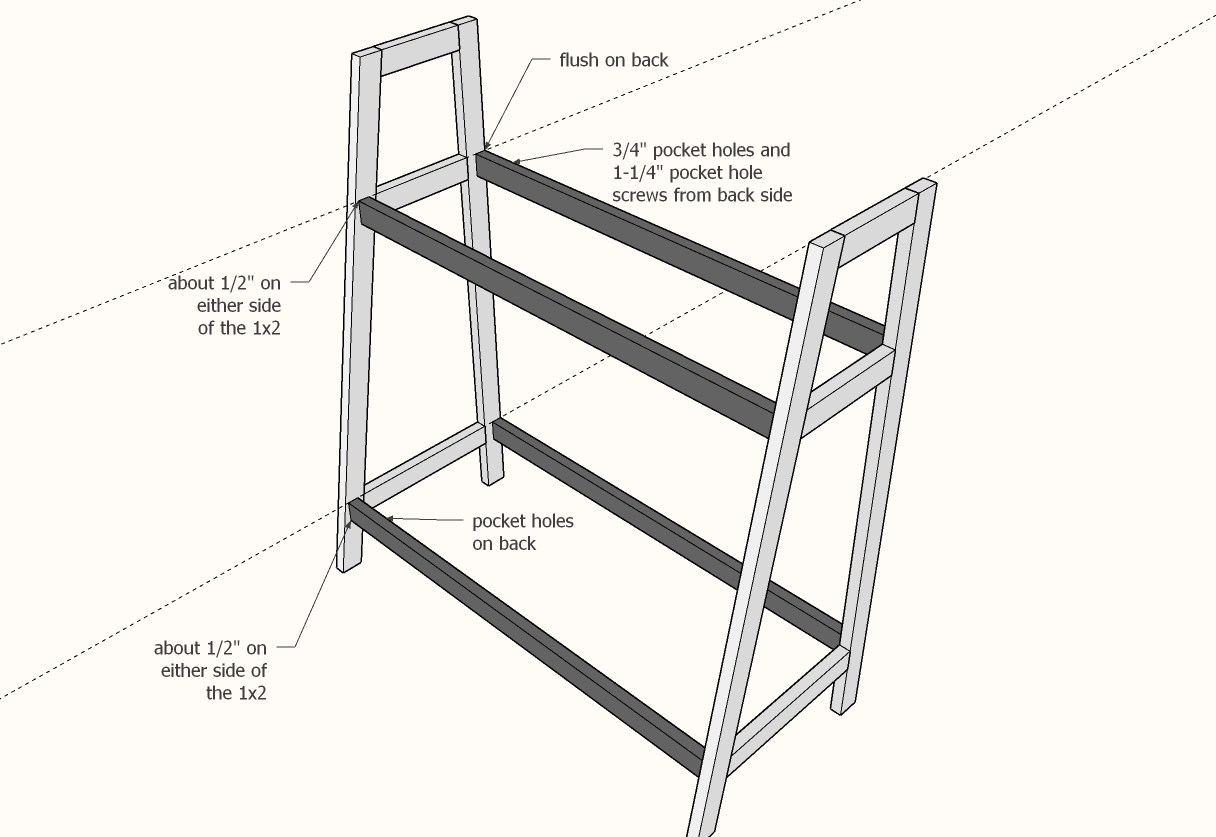
Attach the horizontal supports to the legs with pocket holes on the back side - two pocket holes per joint is recommended.
Step 3
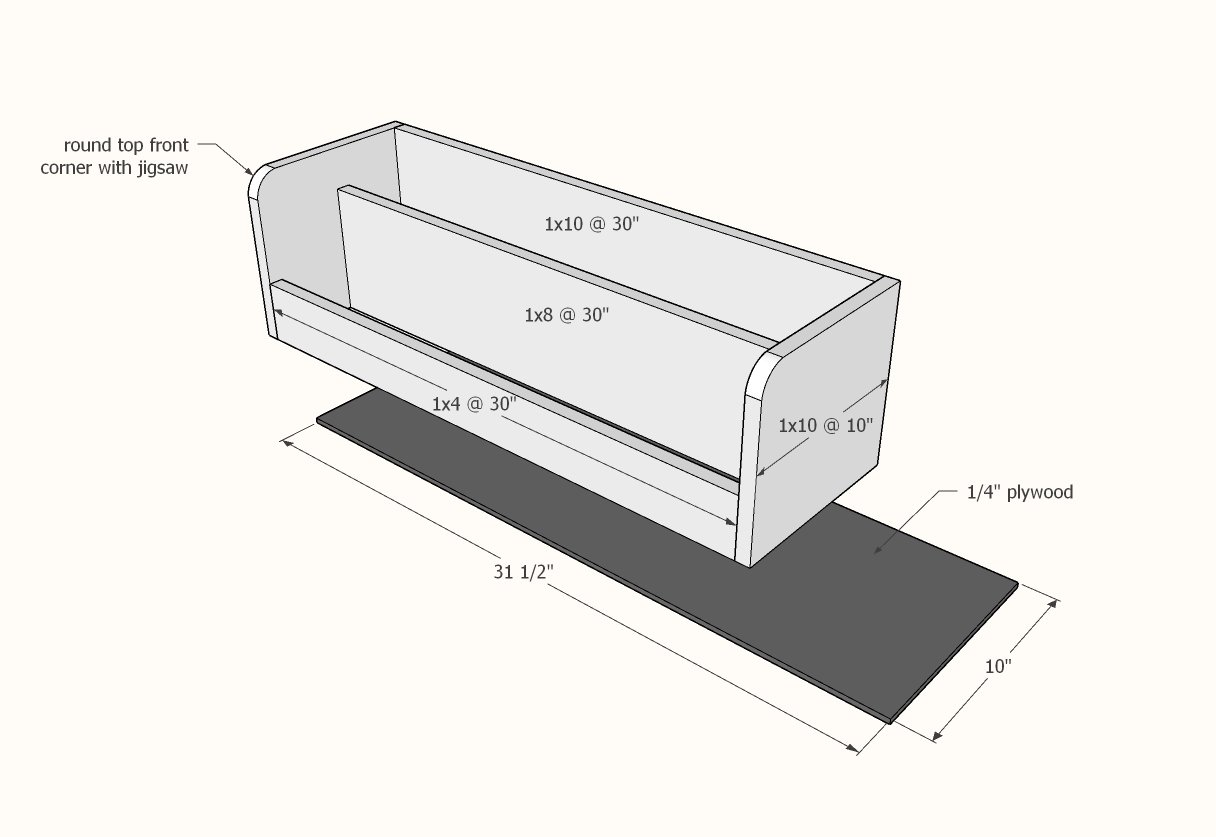
Build the book rack portion with 1-1/4" brad nails and glue.
Use 5/8" brad nails and glue to attach the bottom.
Step 4
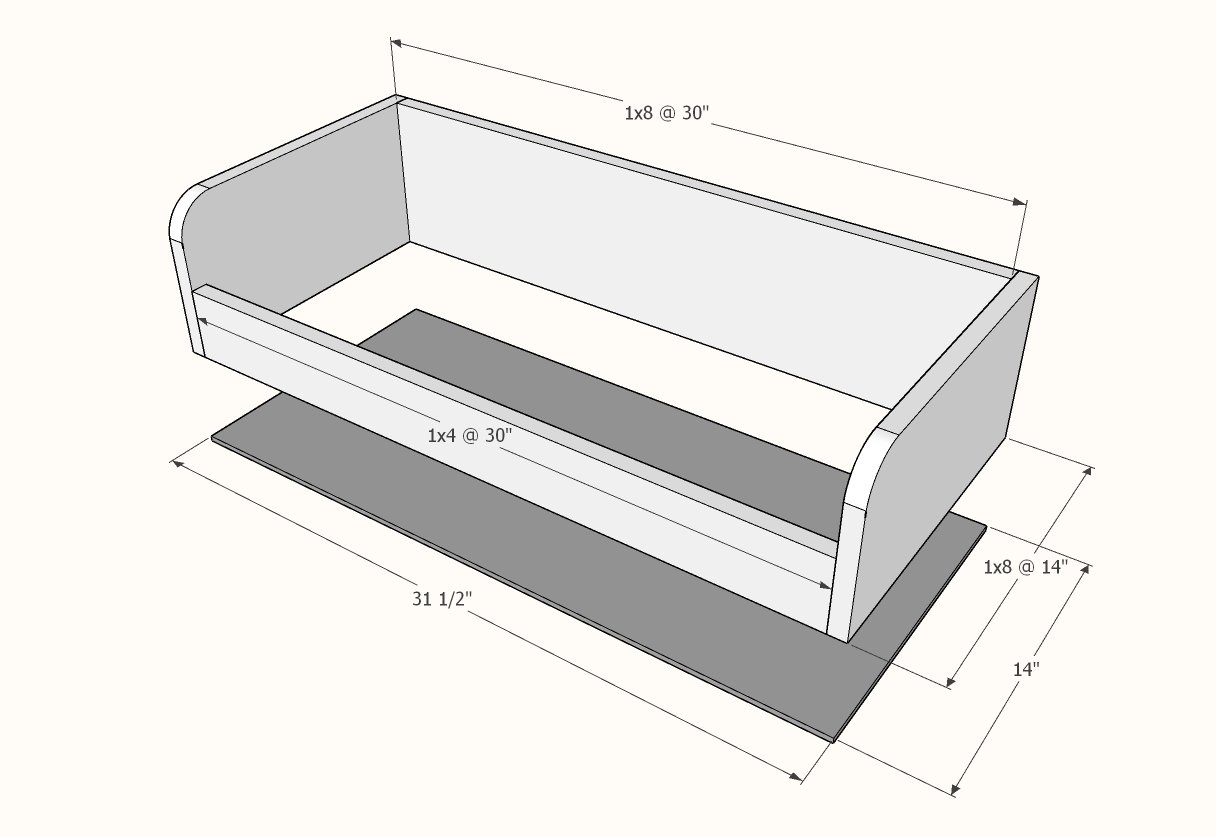
Build the lower bin using 1-1/4" brad nails and wood glue.
Attach bottom with 5/8" brad nails and wood glue.
Step 5
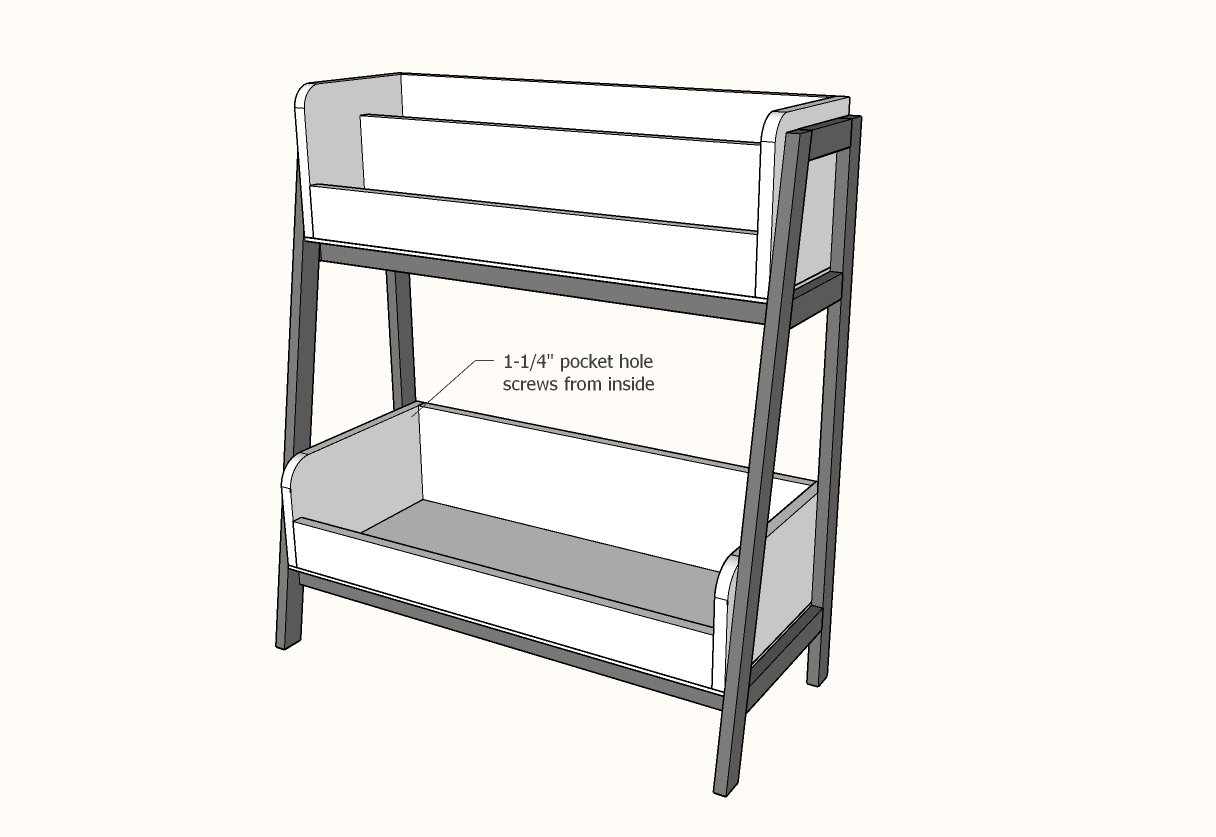
Place the bins inside the frame and attach from inside into the frame with 1-1/4" screws (yes, you can use pocket hole screws).
