
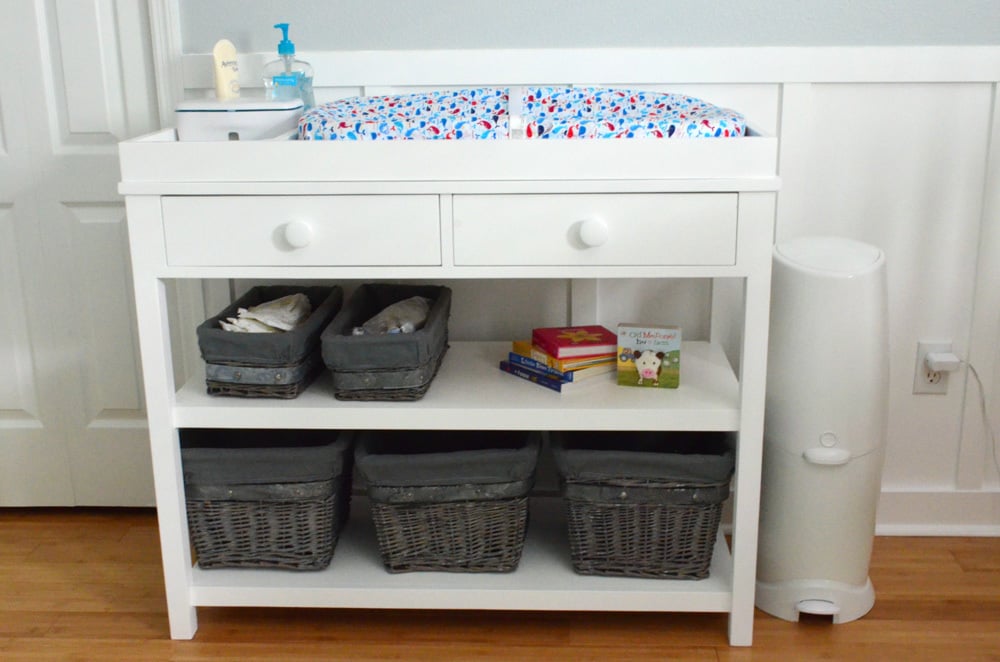

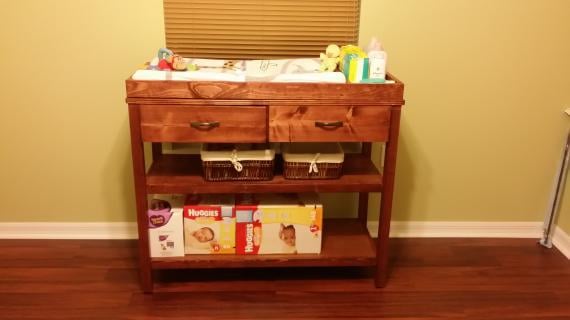
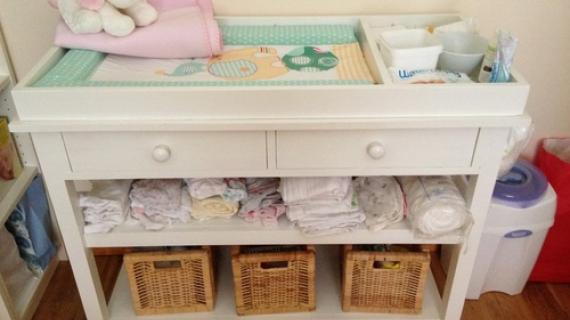
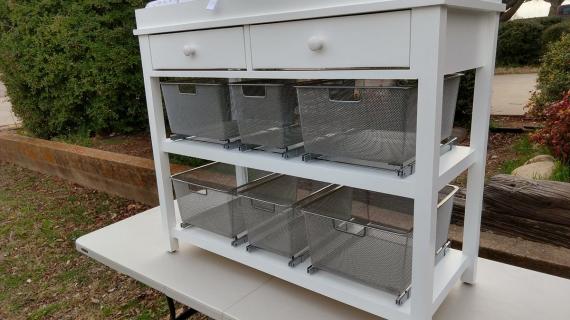
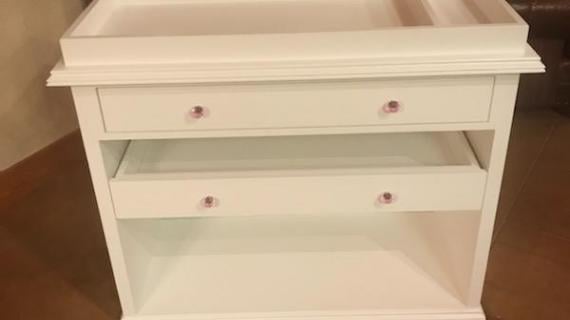
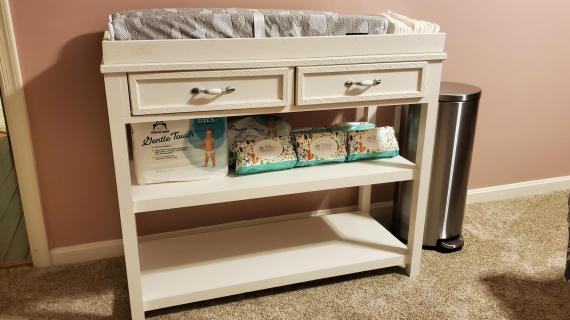
Here's a great baby changing table plan! Featuring two small drawers, two big shelves, and a large top perfect for changing, get all of baby's things ready and organized. Free step by step plans from Ana-White.com

Why We Built this Changing Table
Baby Sew Woodsy has arrived and is all cuteness!

I've had changing tables on my mind with our own little one.

John and Katie AKA Baby Sew Woodsy's parents, were kind enough to work with me again on Changing Table Plans for little Ryder's nursery!

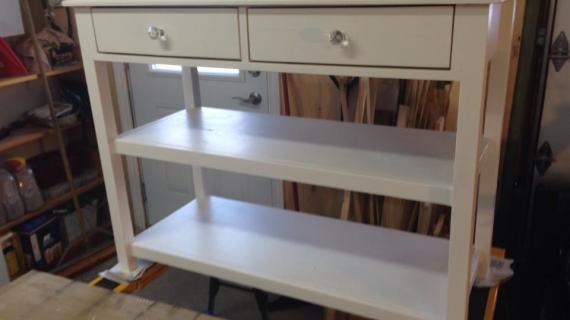
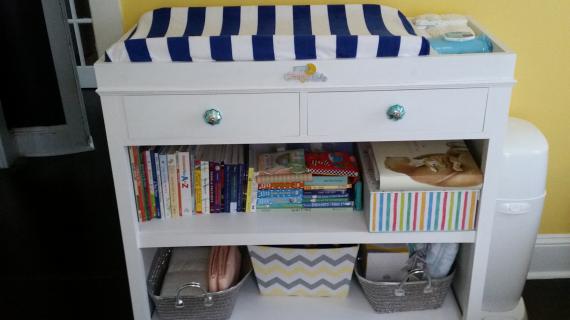
More Photos and Build Post from Sew Woodsy
The plans follow, and for more photos, finishing details, and Sew Woodsy's building post for tips and tricks - please go here now.

Preparation
- 1/2 Sheet of 3/4” plywood or MDF
- 2 - 2x2 @ 8 feet long
- 3 - 1x2 @ 8 feet long
- 1 - 1x6 @ 10 feet long
- 1 - 1x4 @ 12 feet long
- 1/4” plywood piece at least 16” x 35”
- 2 - 1x3 @ 8 feet long (for topper)
- 1-1/4” pocket hole screws
- 2 - sets of 14" drawer slides
- 1-1/4" and 3/4" brad nails
- wood glue
- 4 - 2x2 @ 32” - legs
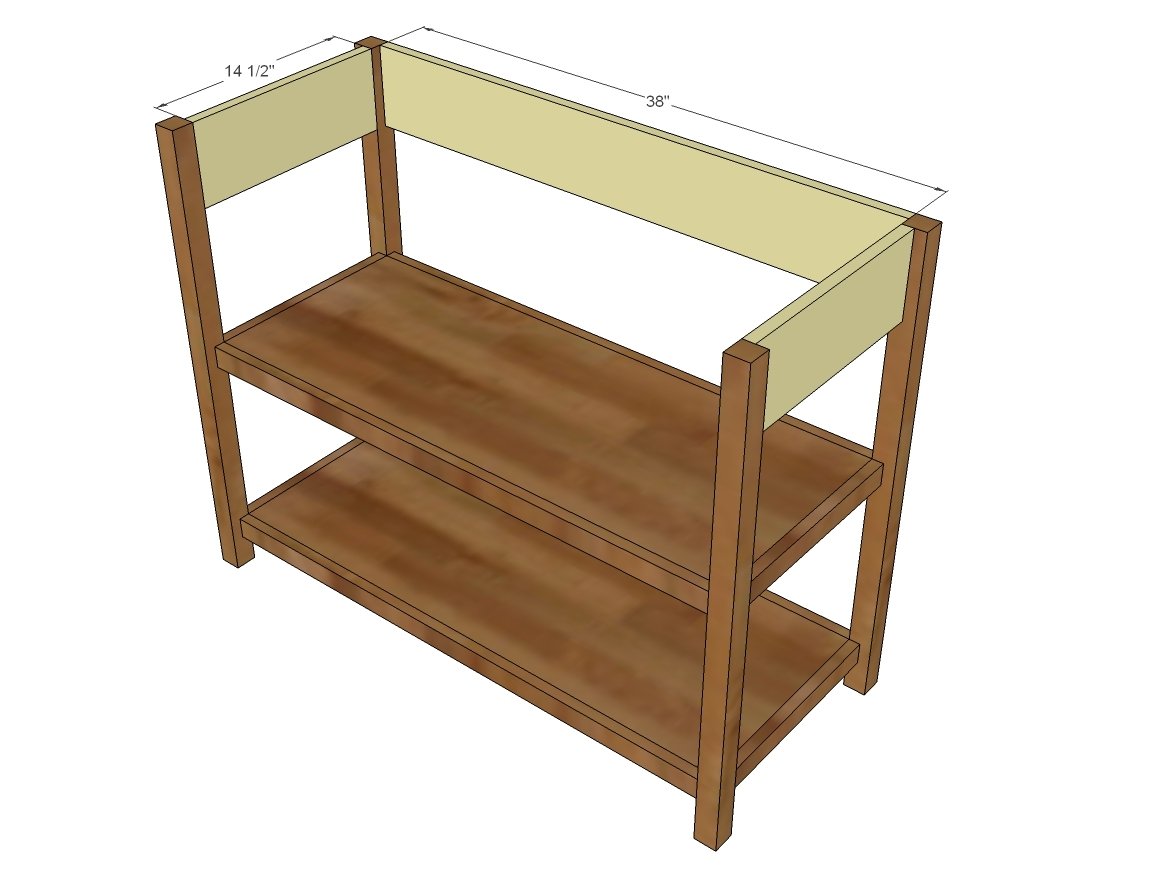
- 4 - 1x2 @ 14-1/2” - side trim
- 4 - 1x2 @ 38” - front and back trim
- 2 - 3/4” plywood @ 14-1/2” x 38” - shelves
- 2 - 1x6 @ 14-1/2” - sides
- 1 - 1x6 @ 38” - back
- 1 - 3/4” plywood @ 17-1/2” x 41”
- 2 - 1x2 @ 38” - drawer trim
- 6 - 1x2 @ 4-3/4” - drawer trim
DRAWERS
- 4 - 1x4 @ 15-1/2” (sides)
- 4 - 1x4 @ 15-3/8” (front/back)
- 2 - 1/4” plywood @ 15-1/2” x 16-7/8” (bottom)
- 2 - 3/4” plywood or 1x6 @ 4-1/2” x 17-5/8” (front)
TOPPER
- 2 - 1x3 @ 41”
- 3 - 1x3 @ 16"


Please read through the entire plan and all comments before beginning this project. It is also advisable to review the Getting Started Section. Take all necessary precautions to build safely and smartly. Work on a clean level surface, free of imperfections or debris. Always use straight boards. Check for square after each step. Always predrill holes before attaching with screws. Use glue with finish nails for a stronger hold. Wipe excess glue off bare wood for stained projects, as dried glue will not take stain. Be safe, have fun, and ask for help if you need it. Good luck!
Instructions
Step 1
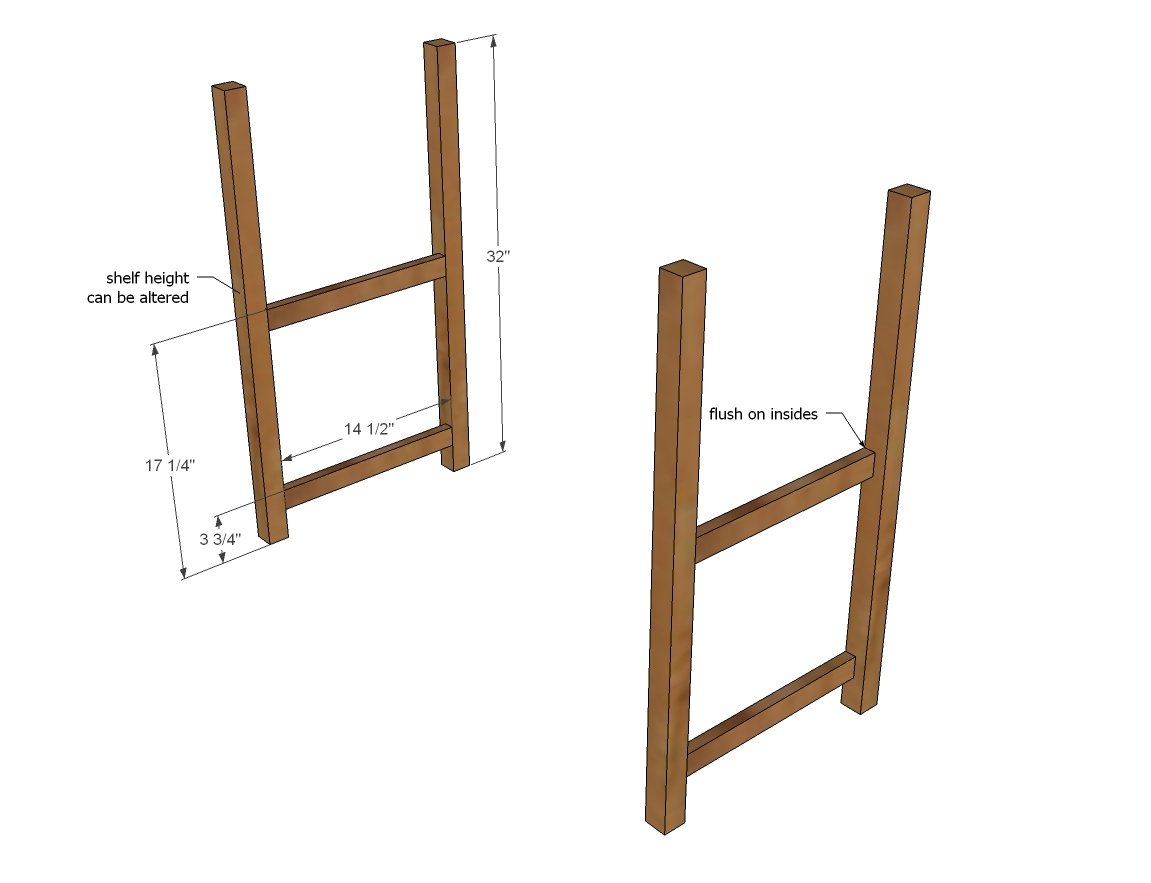
Drill (2) 3/4” pocket holes on each end of the 1x2 @ 14-1/2” long. Attach to the 2x2 legs with 1-1/4” pocket hole screws, flush to inside, keeping pocket holes hidden on insides. NOTE: Upper shelf can be placed at any height. In this plan, the upper shelf is placed to allow 12” height on lower shelf.
Step 2
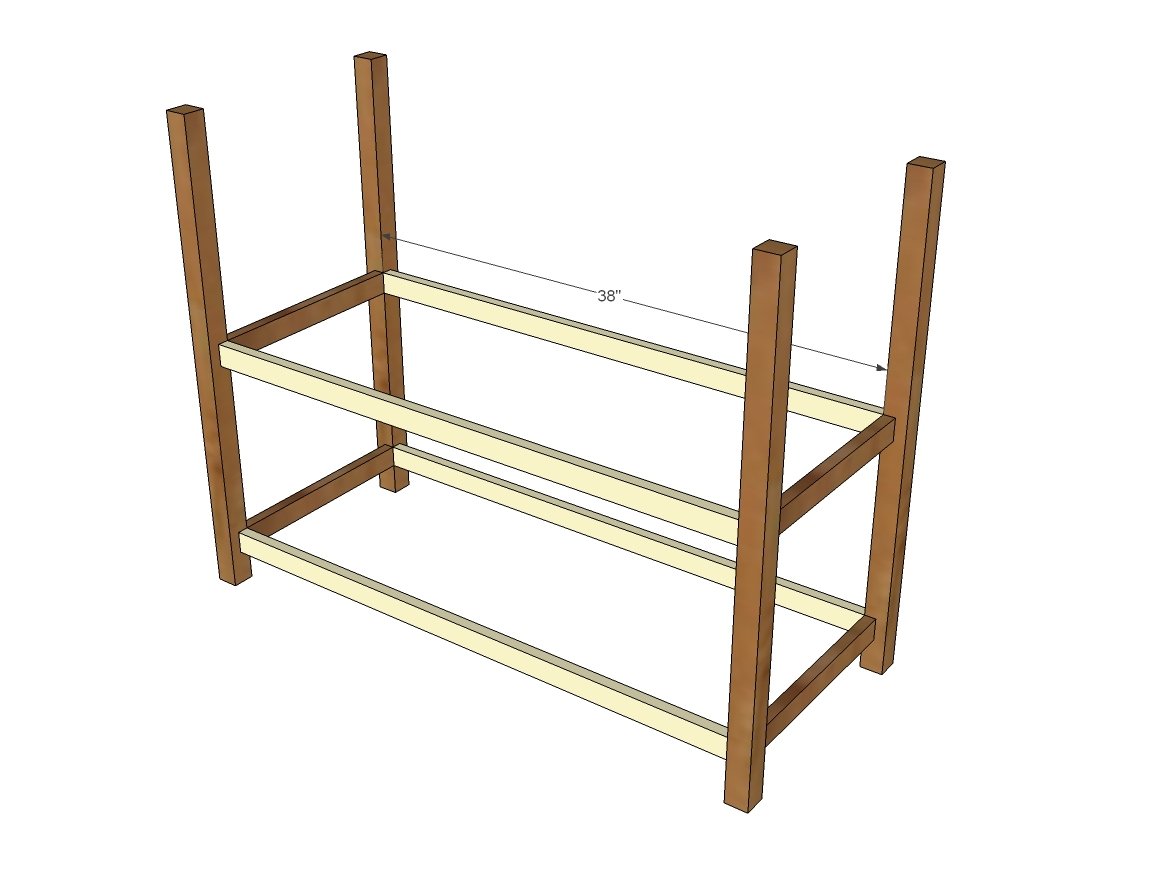
Drill 2 - 3/4” pocket holes on each end of the 1x2 @ 38” long and attach with 1-1/4” pocket hole screws to the 2x2 legs, at the same height as the side 1x2s. Keep 1x2s flush to inside of the legs.
Step 3
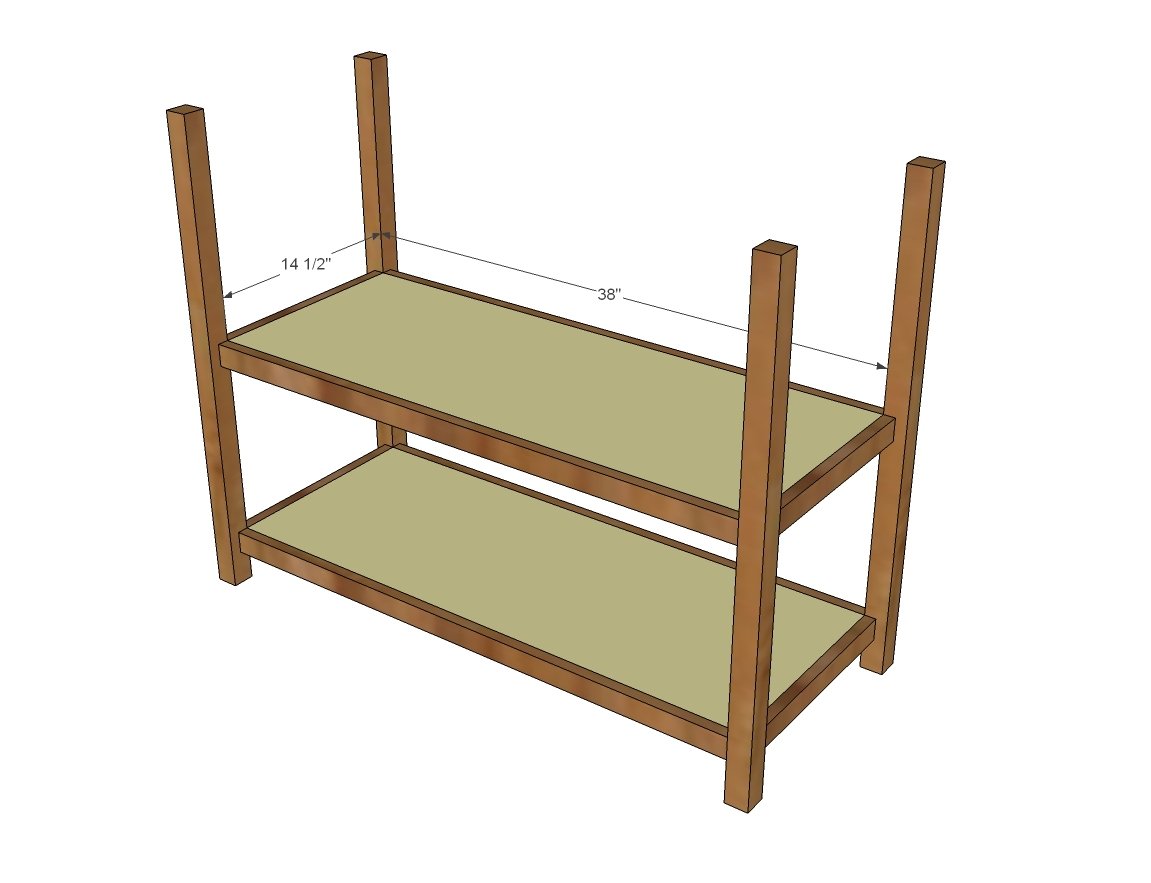
Drill 3/4” pocket holes around all four edges of the two shelves (14-1/2” x 38”), spacing pocket holes every 6-8 inches. Attach inset to the 1x2 frames with 1-1/4” pocket hole screws.
Step 4
On the 1x6 boards, drill 3/4" pocket holes facing upward for attaching the top in later steps. Then drill 3/4" pocket holes on the ends for attaching to the legs.
Attach the 1x6 side and back aprons with 3/4” pocket holes and 1-1/4” pocket hole screws. Also drill 3/ 4” pocket holes on the insides of the aprons facing upward to attach the top in later steps. *Note: the backboard should be flush to the outside of the legs.
Step 5
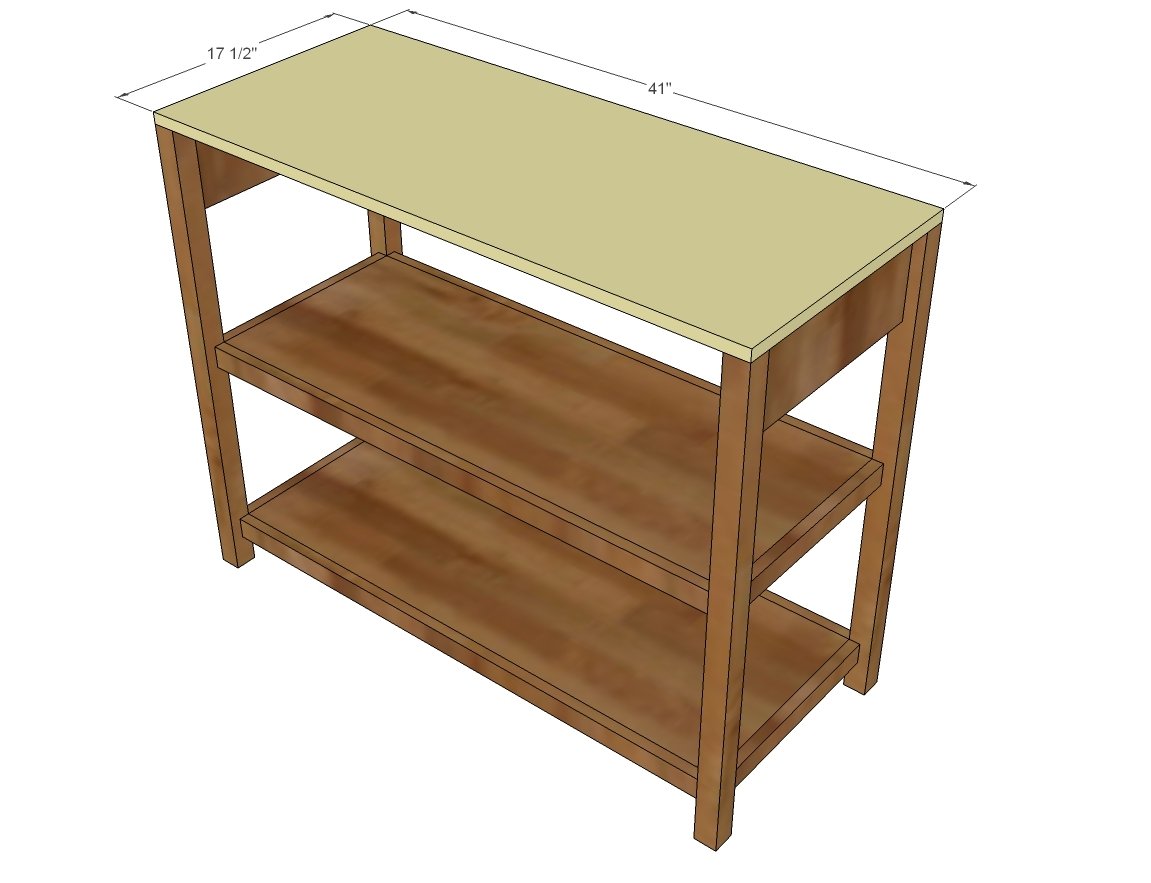
Top - attach the top through the predrilled holes in the 1x6 boards with 1-1/4" pocket hole screws.
Step 6
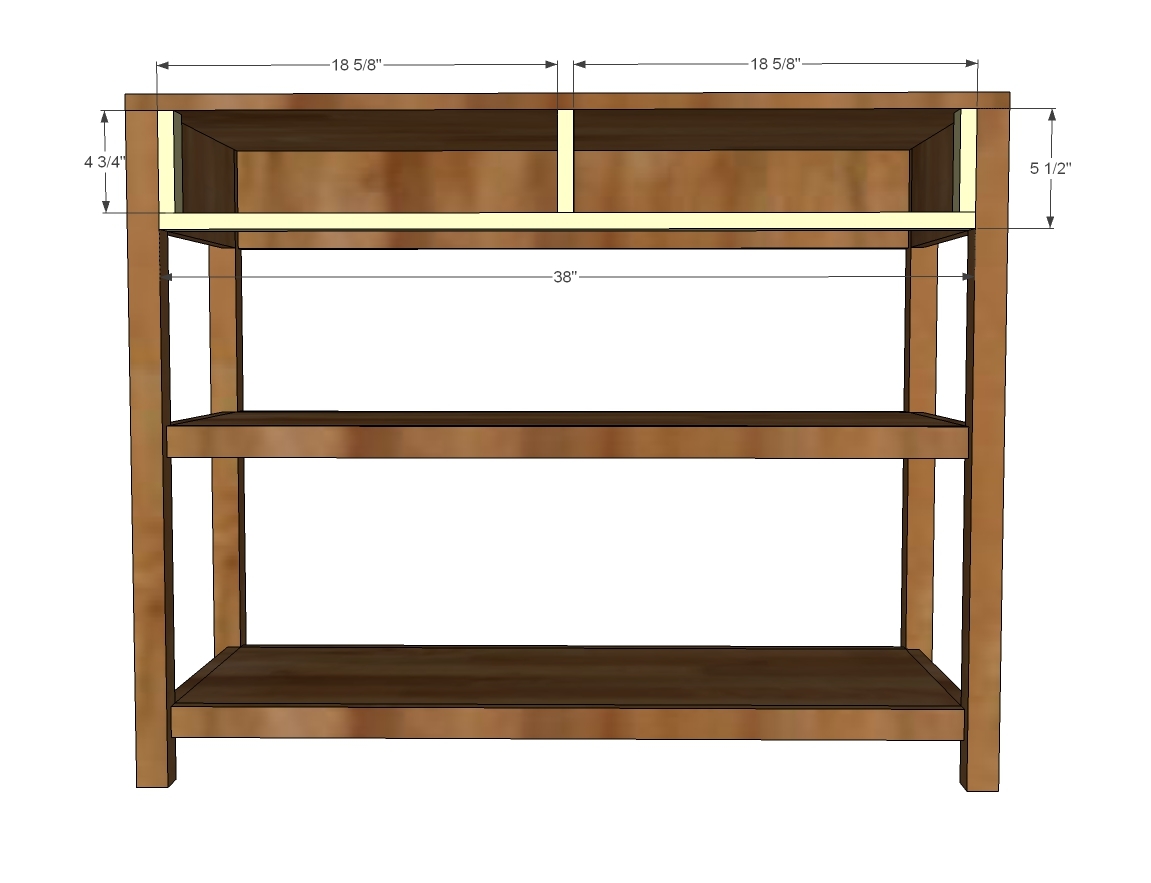
Attach the shorter 1x2 boards to inside of drawer area. Then attach bottom 1x2 with glue and finish nails - also use pocket holes to attach to legs.
Repeat this step for the second frame, positioned so the 14" drawer slides can be attached at the back to the shorter 1x2s.
Step 7
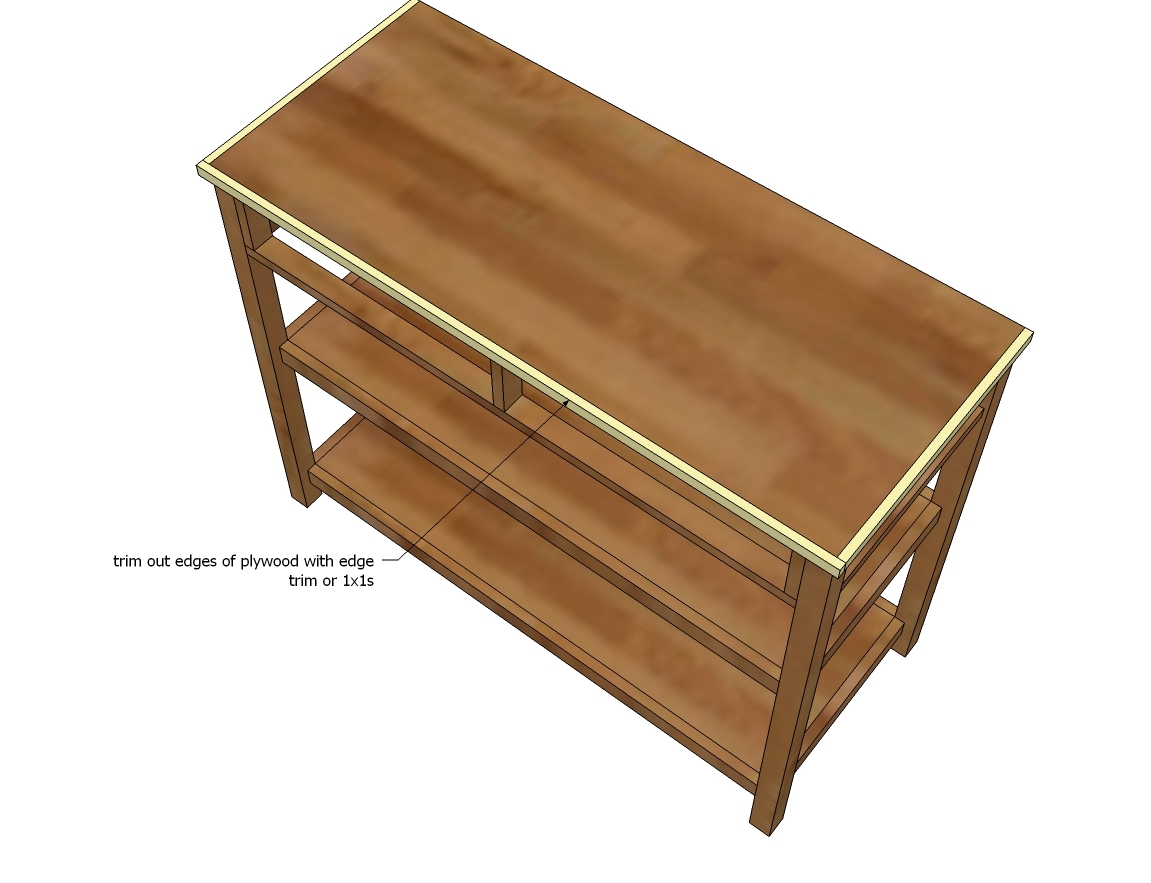
Trim out around top with molding or 1x1s to finish plywood edges. For a more finished look, miter corners.
Step 8

Build drawers to fit openings and drawer slides. Install drawers in table with drawer slides, insetting 3/ 4” to allow for the drawer face.
The drawer can be built with 1-1/4" brad nails and glue. The bottom of the drawer can be attached with 3/4" brad nails and glue.
Here is a good video on installing drawers:
Step 9
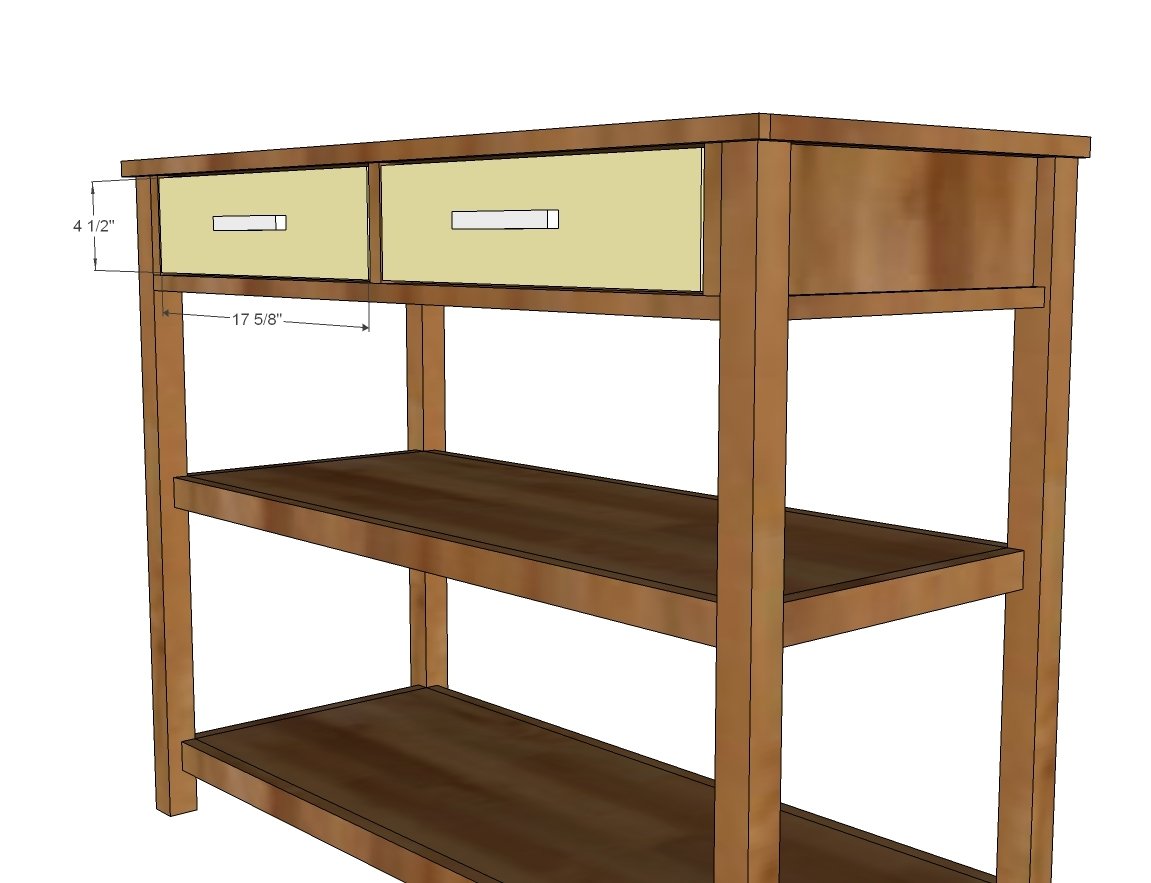
Attach drawer face to drawers with 1-1/4” finish nails and glue, then attach from inside with 1-1/4” screws. NOTE: It may be easier to attach handles or knobs before attaching the drawer faces.
Step 10
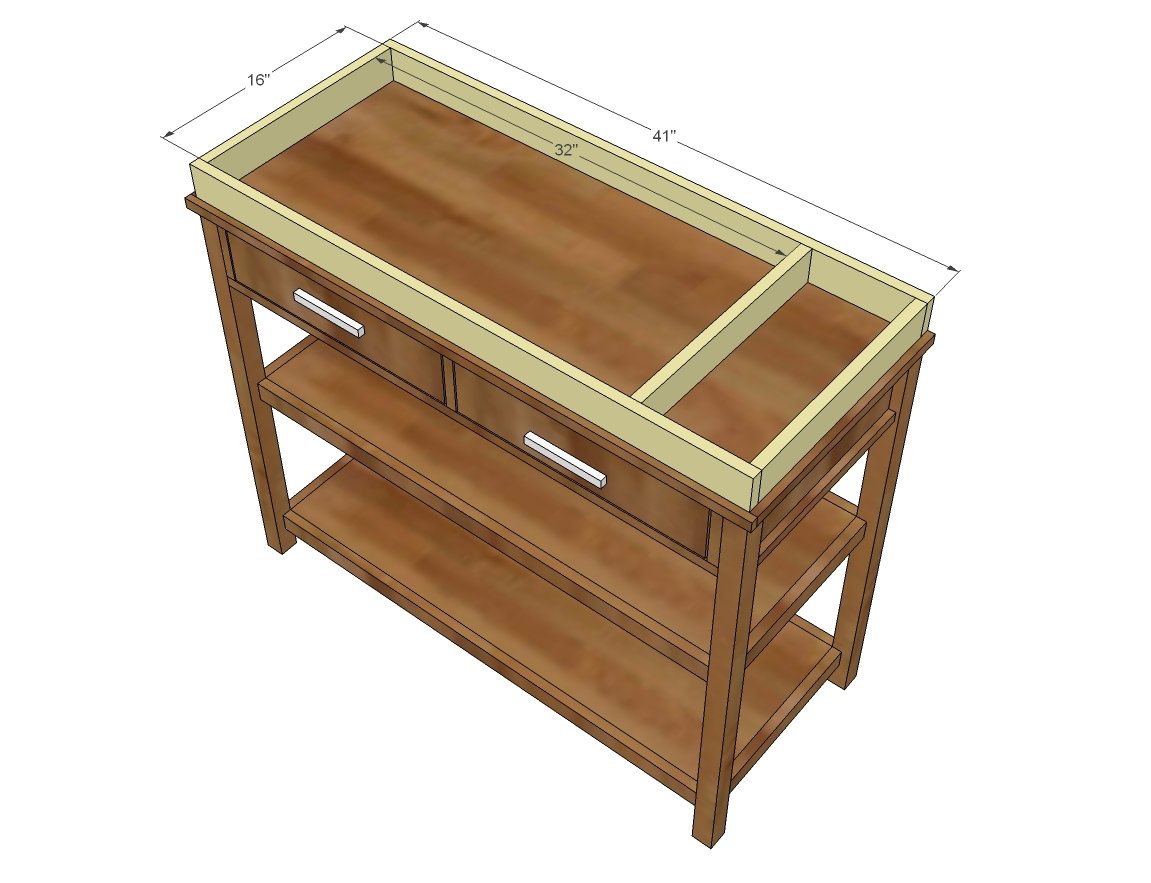
Build topper with either finish nails and glue or pocket holes. Bottom is not necessary. Can be attached with a bracket on back side to keep in place. *Note: We adjusted the 32” measurement to 30” to fit our changing pad and wipe container better.
It is always recommended to apply a test coat on a hidden area or scrap piece to ensure color evenness and adhesion. Use primer or wood conditioner as needed.

Comments
kaylathorpe
Sat, 11/01/2014 - 23:13
flush?
What does flush on inside mean? Thank you
abaron03
Sat, 01/31/2015 - 20:32
drawer slides
Can you please help me with step 9? It says to install drawers with drawer slides, but I don't see anything in the shopping list about drawer slides, and I don't see anything about how to install them in the instructions. If you simply insert the drawers into the structure as shown above, it seems like they would be balancing on a small cross section of a 1x2 board. I assume that can't be right. Is there a missing step?
hoodaehoo
Sun, 03/08/2015 - 13:35
I'm wondering the same thing.
I'm wondering the same thing... Where do the slides get mounted to?
rjminn59
Thu, 06/11/2015 - 06:41
Still looking
Has anyone figure out the draws yet
ReclaimedBuilder
Fri, 09/25/2015 - 12:18
An Idea
I am thinking bottom mount center drawer guides?
Something like these perhaps.
http://www.lowes.com/pd_380986-93052-T35072G16_0__?productId=50041754
Search Center mount Drawer slides to get some different images. Should work well.
kpower5
Sat, 12/05/2015 - 03:47
Drawer issue solved !!
Hi All,
I was having the same issue so I added an extra 2x1 in step 6 behind the small bit in the center. I attached it with pocket hole screws and glue and attached the drawer slides on both sides. I've adde a picture of it to my bragpost. Hope it helps.
dsmolkin
Sat, 03/12/2016 - 09:34
How to get flush 90 degree joints
Can't for the life of me get flush 90 joints with a kreg jig and a 90deg clamp. Is this a common problem or is it unusual? New to using the system, so it's probably a user issue.
dsmolkin
Sun, 03/13/2016 - 19:06
Figured it out.
I was moving too fast. Nice and slow is the winner.