Birdhouse Frames

Difficulty
Beginner Projects
| Print this plan

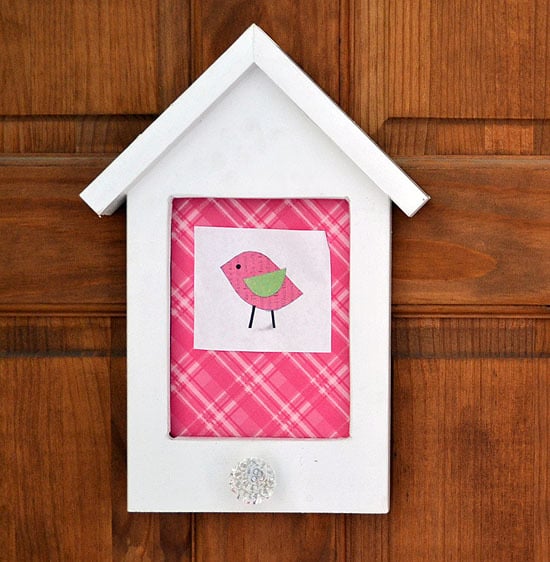
Make cute birdhouse frames for free from scrap wood!
Did you have a special Easter weekend?

Ours was very Alaska style, if you know what I mean. 

Of course I mean more fresh snow.

Minor details when there are eggs to find.

Always up for a fun project to work on with the girls, we cut out some shapes from pine boards and PureBond Plywood leftover from various projects

And then routered out a little spot in the back for photos and art.

This is just a little palm router and it worked great for this application.

And then we had the girls put their frames together

The littlest needed a little help

Her "pluggers" kept falling out, so we used tape and glue instead of a nailgun for attaching the roof.

The frames were finished in no time at all and now the hard part. Waiting for the glue to dry.

Not a moment too soon!

I found these pretty glass knobs at Micheals for a buck each.

A perch or a hook?

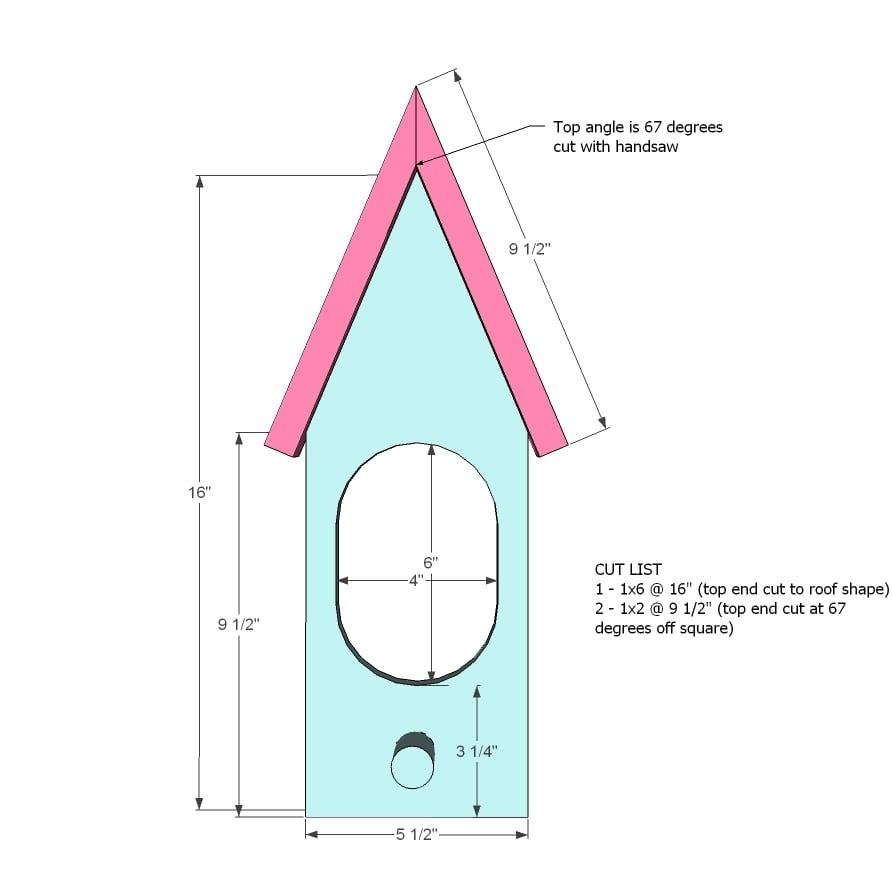
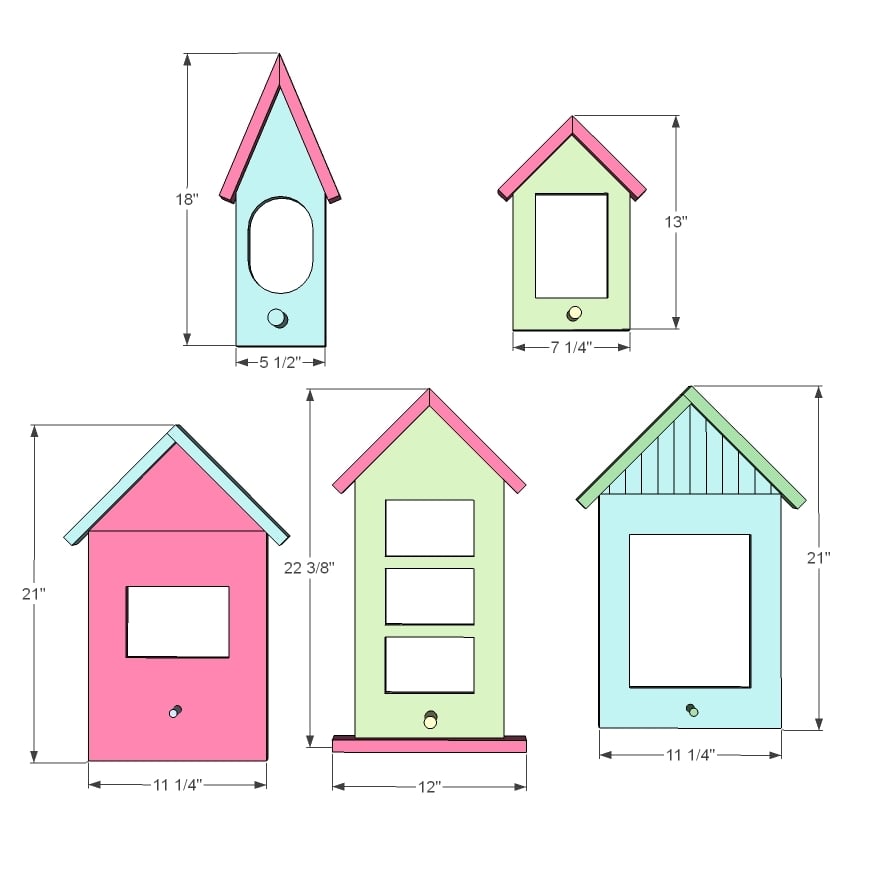
Dimensions

Preparation

Shopping List

Scrap wood
router
command strips for haning
optional 1 1/4" nails for attaching roof
glue
knobs or dowels
paint
router (optional for routerng out picture groove)

Cut List

See each frame per cut list below

Tools
Tape Measure
Speed Square
Pencil
Safety Glasses
Hearing Protection
General Instructions

Please read through the entire plan and all comments before beginning this project. It is also advisable to review the Getting Started Section. Take all necessary precautions to build safely and smartly. Work on a clean level surface, free of imperfections or debris. Always use straight boards. Check for square after each step. Always predrill holes before attaching with screws. Use glue with finish nails for a stronger hold. Wipe excess glue off bare wood for stained projects, as dried glue will not take stain. Be safe, have fun, and ask for help if you need it. Good luck!

Instructions

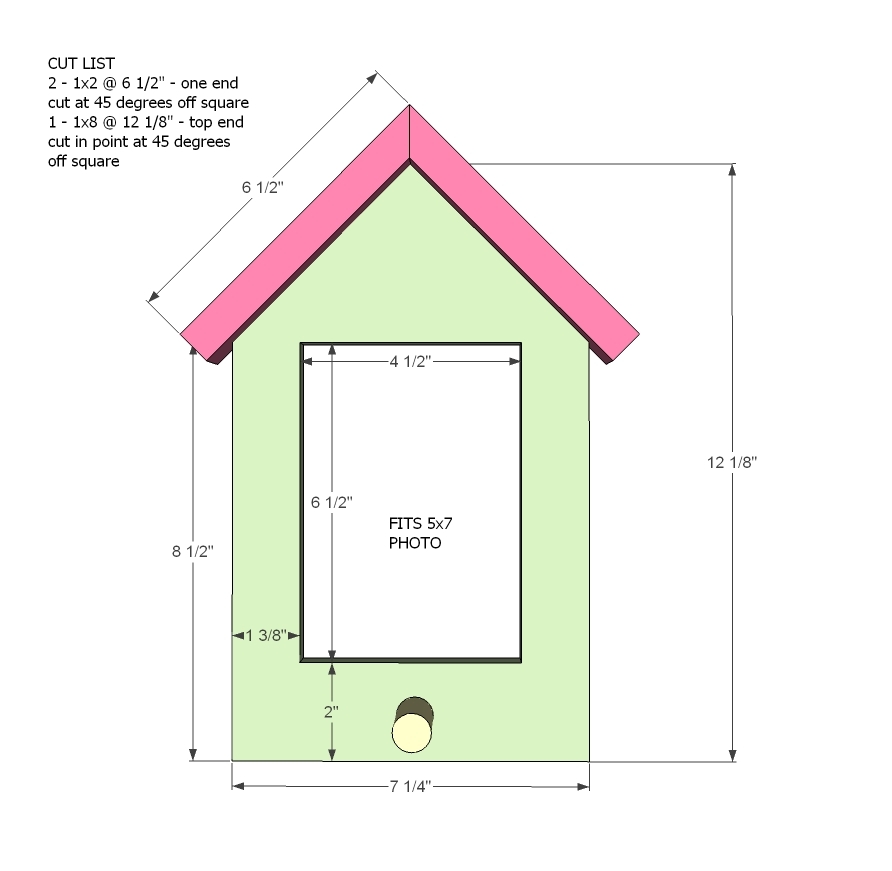
Step 1

This is the one shown in the picture. It's sized just right for a 5x7 photo.

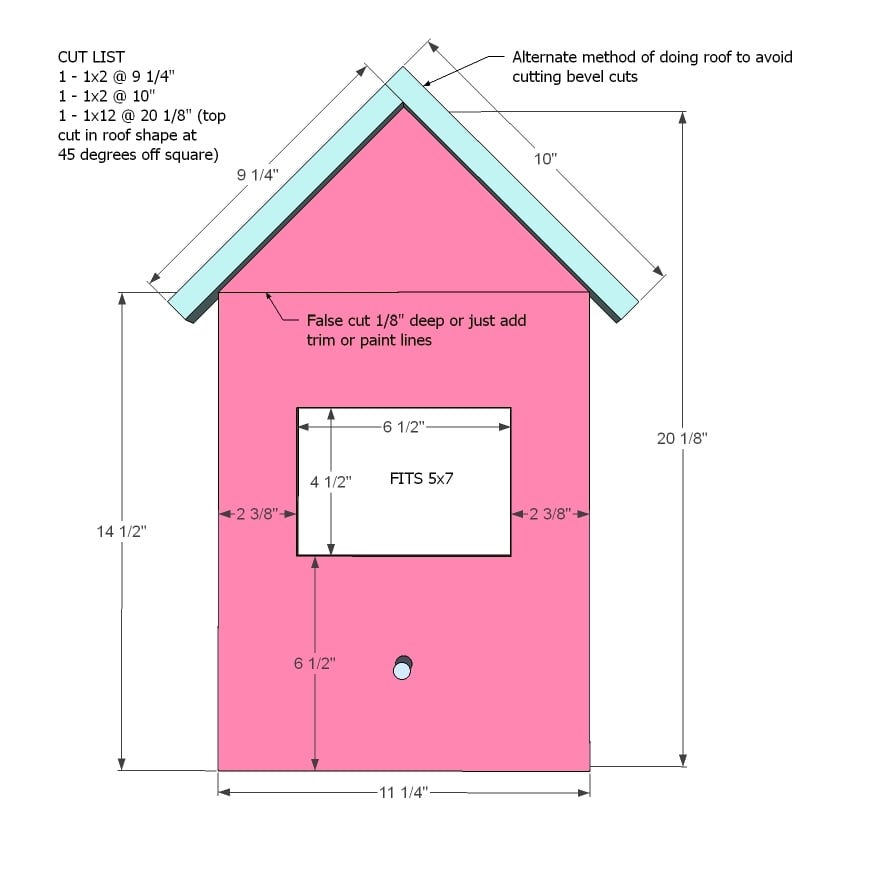
Step 2

I did the roof a little different in this one in case you don't have a miter saw. You can use this roof style on all roofs made with 45 degree angles off square.

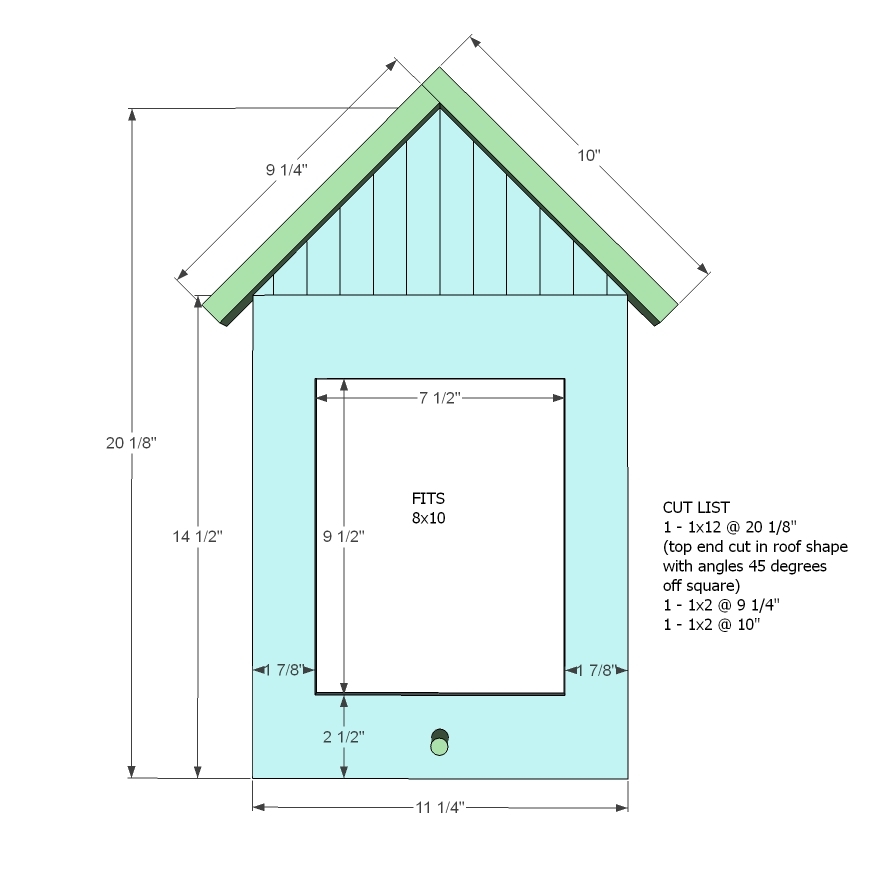
Step 3

This one is the same as the last, excpet fits a 8x10.

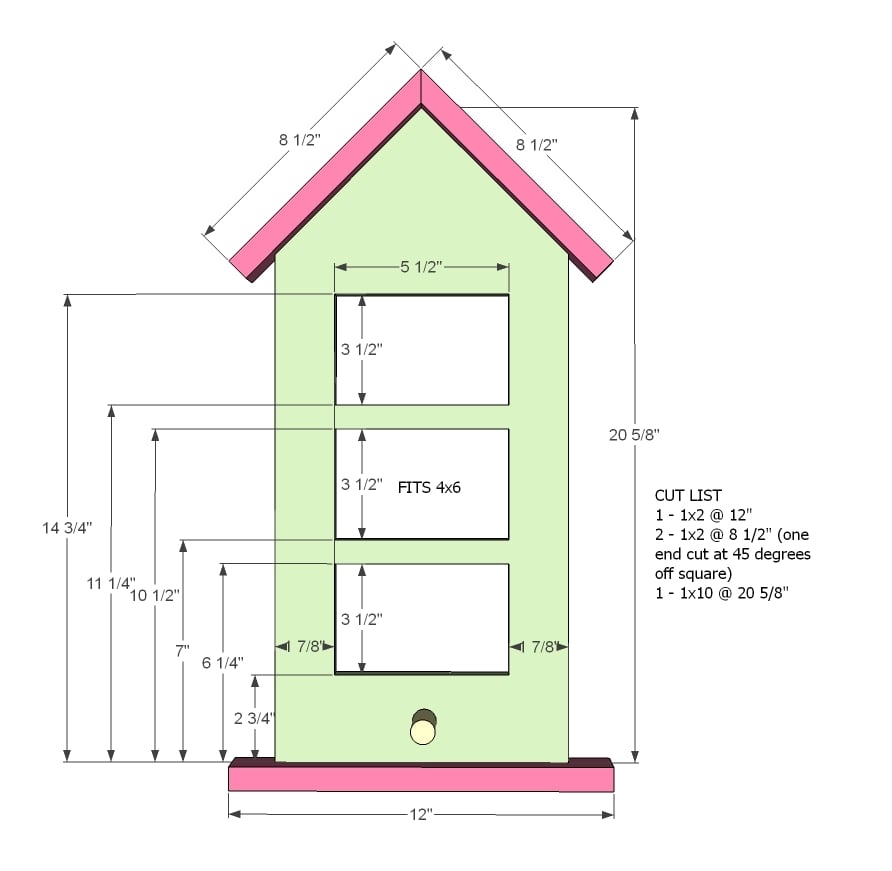
Step 4

My fav. You can add the base to any of the frames as well.

Step 5

Finishing Instructions
Preparation Instructions
Fill all holes with wood filler and let dry. Apply additional coats of wood filler as needed. When wood filler is completely dry, sand the project in the direction of the wood grain with 120 grit sandpaper. Vacuum sanded project to remove sanding residue. Remove all sanding residue on work surfaces as well. Wipe project clean with damp cloth.

It is always recommended to apply a test coat on a hidden area or scrap piece to ensure color evenness and adhesion. Use primer or wood conditioner as needed.

Comments