Easy Build Wood Headboard (All Mattress Sizes)

ana white headboard
Difficulty
Beginner Projects
| Print this plan

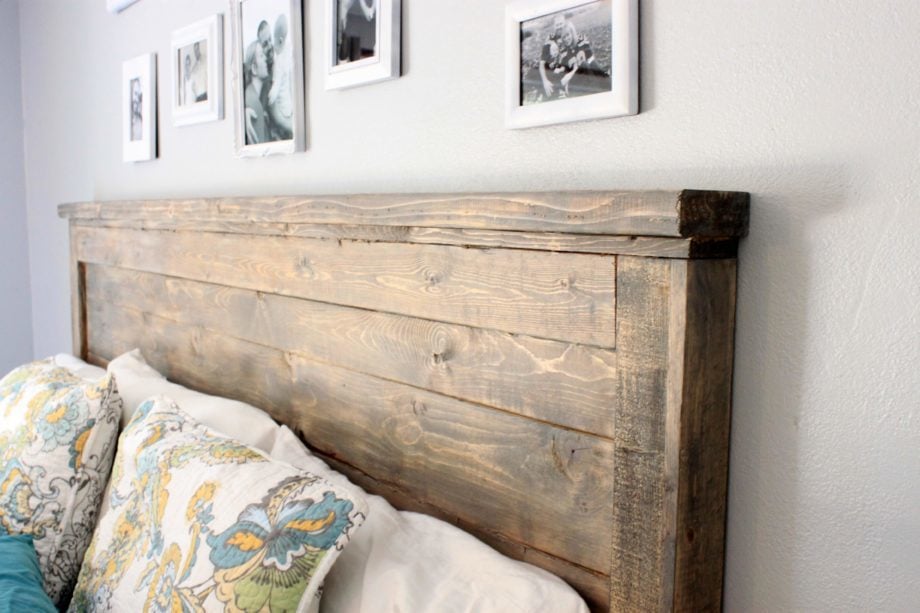
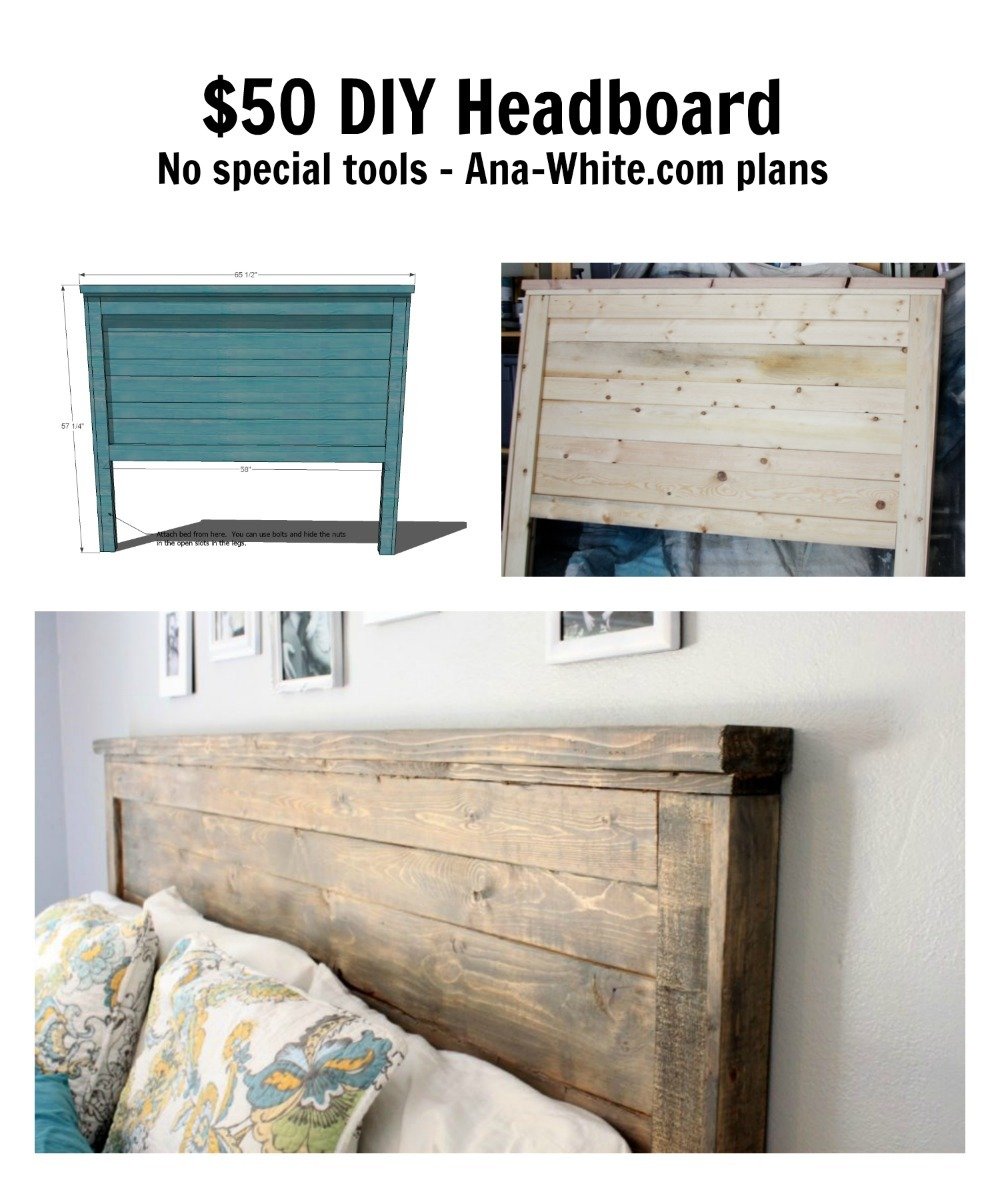
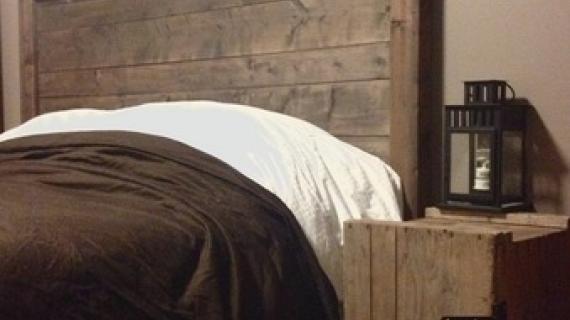
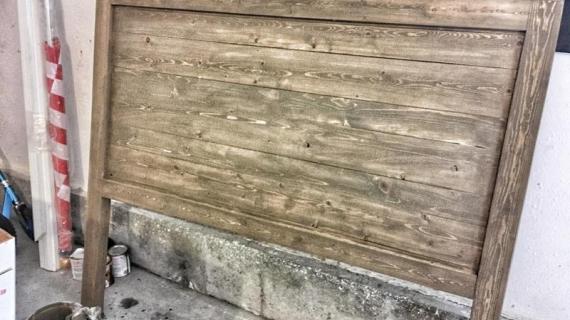
Easy DIY planked wood headboard build - no special tools required!  This beautiful headboard gives that wood texture to your bedroom - without costing a fortune or being a huge project.  You can use inexpensive pine boards or furring strips.  Free step by step plans by ANA-WHITE.com


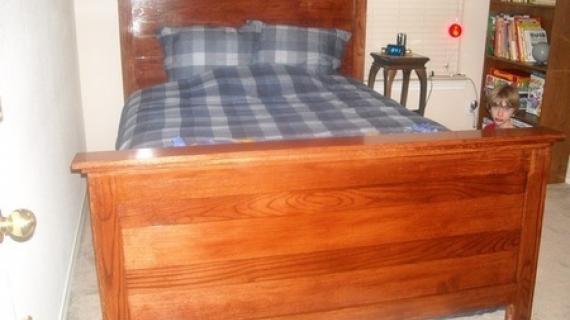
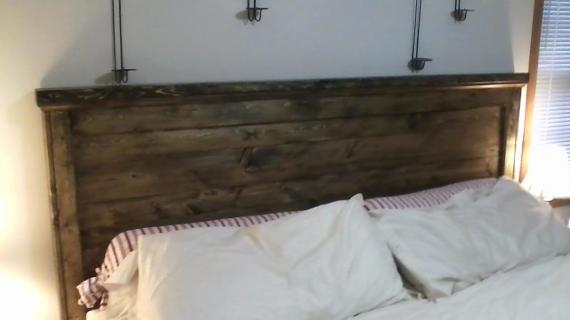
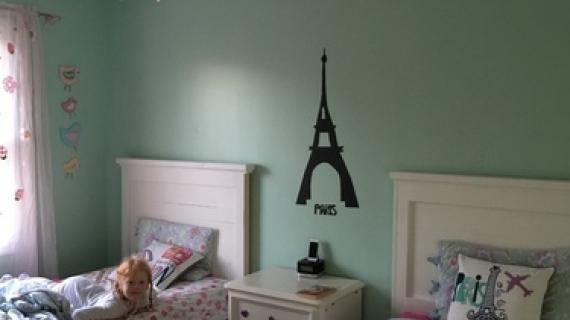
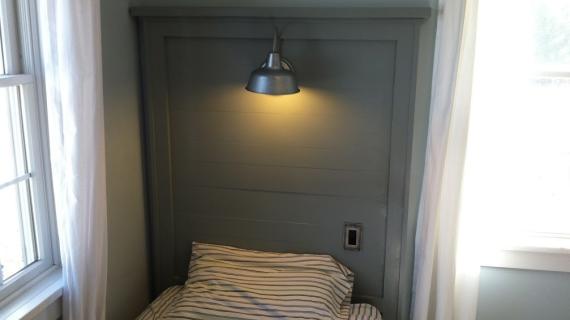
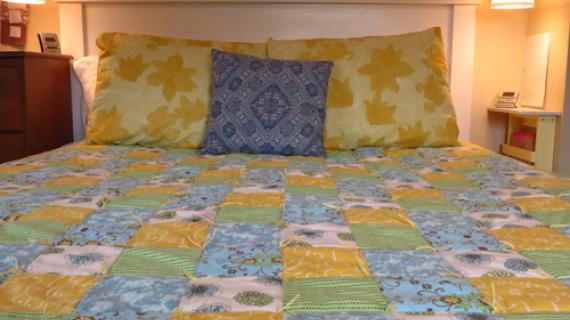
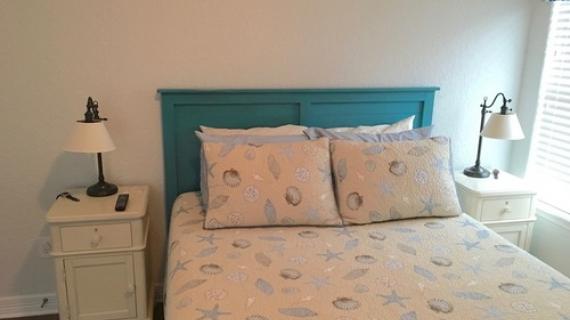
Photos submitted by Cynthia and Nicole.

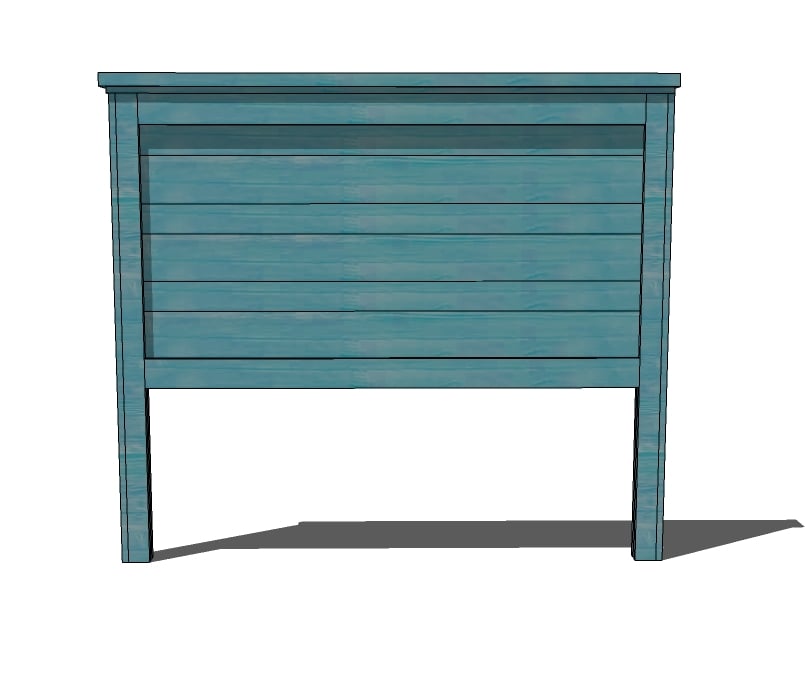
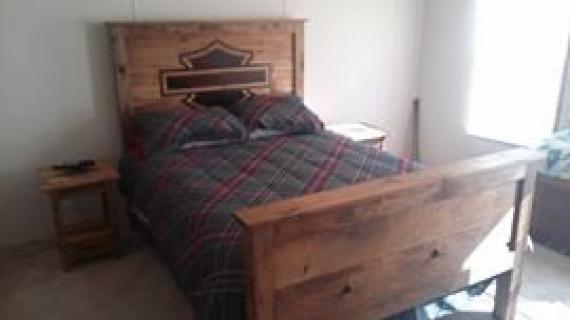
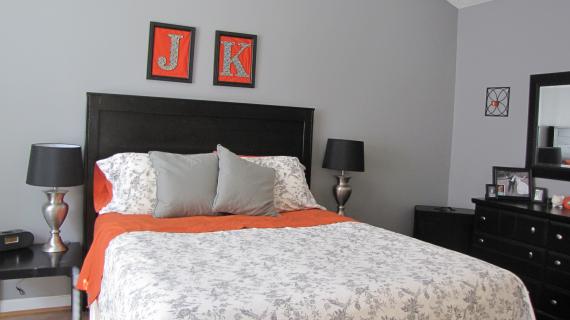
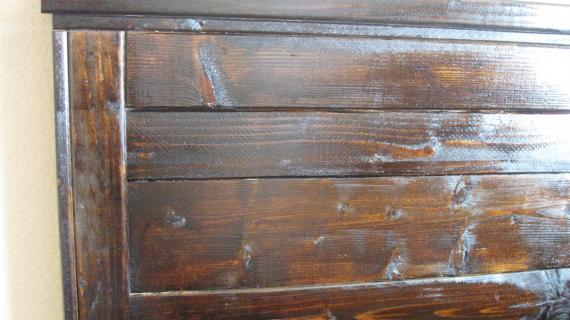
Simplicity and the beauty of soild wood come together in this headboard to transform a room. This project can be completed in just a few hours. Available in all standard bed sizes.

Easy to build, all you need is a saw and nails - you can even use a hammer and nails!  

easy to build wood headboard

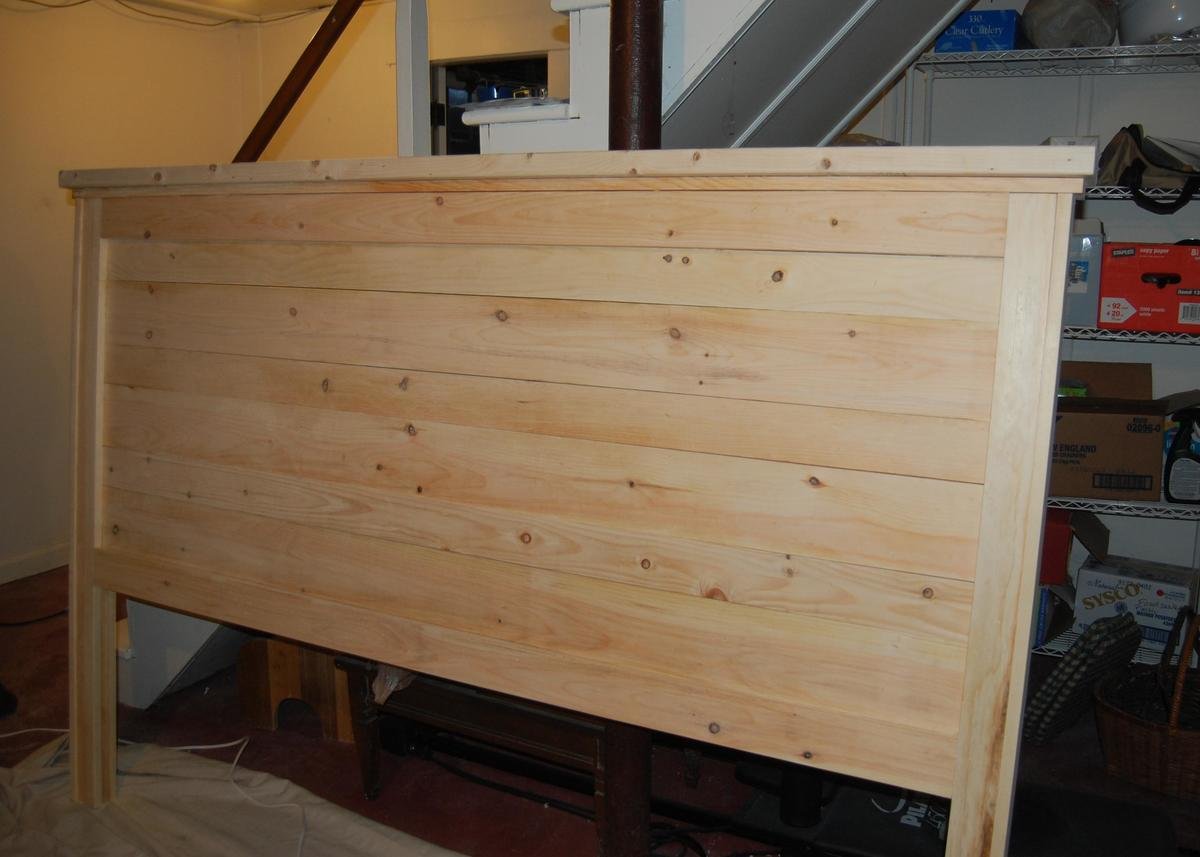
Most builders are spending about $50 making this beauty.  Be sure to check out brag posts.  

Free plans follow!

Pin For Later! 

Easy Build Wood Headboard (All Mattress Sizes)

Dimensions
queen wood headboard
57 1/4" x 65 1/2" dimensions for queen size as shown

Preparation

Shopping List

Twin Lumber Shopping List

  • 2 – 1×2 – 8′ Length
  • 7 – 1×3 – 8′ Length
  • 3 – 1×4 – 10′ Length
  • 1 – 1×6 – 10′ Length
  • 1 – 2×4 – 8′ or Stud Length

Full Shopping List

  • 2 – 1×2 – 8′ Length
  • 7 – 1×3 – 8′ Length
  • 4 - 1×4 – 10′ Length
  • 1 – 1×4 – 6′ Length
  • 3 – 1×6 – 5′ Length
  • 1 – 2×4 – 8′ or Stud Length

Queen Lumber Shopping List

  • 2 – 1×2 – 8′ Length
  • 7 – 1×3 – 8′ Length
  • 4 - 1×4 – 10′ Length
  • 1 – 1×4 – 6′ Length
  • 3 – 1×6 – 5′ Length
  • 1 – 2×4 – 8′ or Stud Length

Standard King Shopping List

  • 2 – 1×2 – 8′ Length 
  • 7 – 1×3 – 8′ Length 
  • 9 - 1×4 – 8′ Length 
  • 3 - 1×6 – 8′ Length 
  • 1 – 2×4 – 8′ or Stud Length 

 California King Lumber for California King 

  • 2 – 1×2 – 8′ Length 
  • 7 – 1×3 – 8′ Length 
  • 5 - 1×4 – 12′ Length 
  • 4 - 1×6 – 6′ Length 
  • 1 – 2×4 – 8′ or Stud Length
Common Materials
1 1/4 inch finish nails
2 inch finish nails
120 grit sandpaper
Cut List

Cut List for Twin

  • 6 - 1×3 @ 55″ (Fronts and backs of Legs)
  • 2 – 1×2 @ 55″ (Inside of Legs)
  • 5 – 1×4 @ 39″ (Panel Pieces)
  • 3 – 1×6 @ 39″ (Panel Pieces)
  • 4 – 1×4 @ 37″ (Panel Trim, Front and Back)
  • 1 – 1×3 @ 43 1/2″ (Top Trim)
  • 1 – 2×4 @ 44 1/2″ (Top of Headboard)
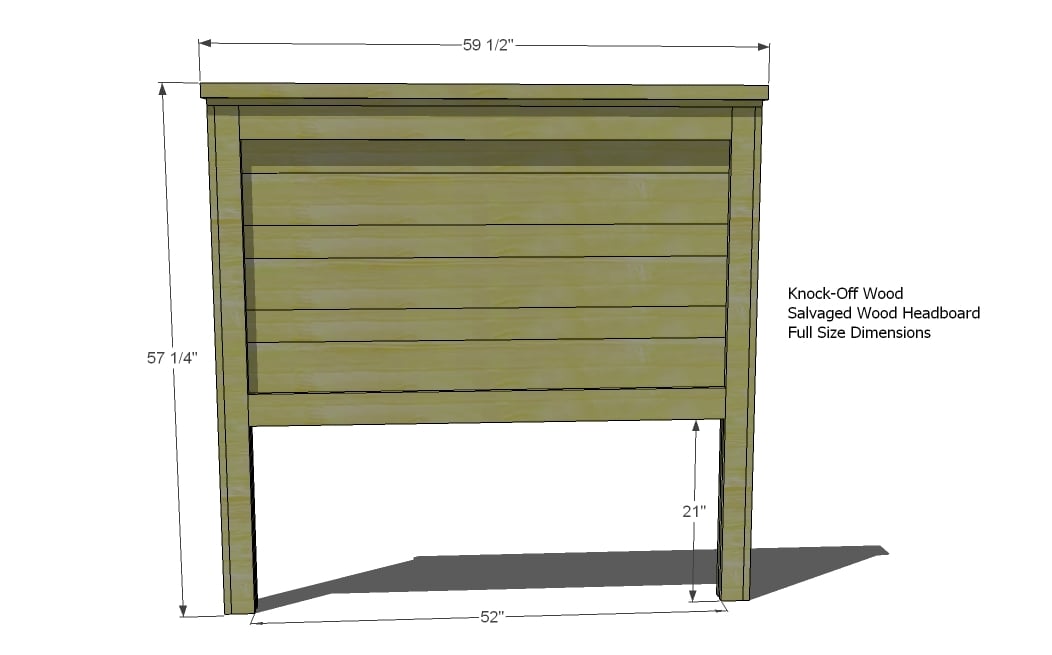
 

Cut List for Full

  • 6 - 1×3 @ 55″ (Fronts and backs of Legs)
  • 2 – 1×2 @ 55″ (Inside of Legs)
  • 5 – 1×4 @ 54″ (Panel Pieces)
  • 3 – 1×6 @ 54″ (Panel Pieces)
  • 4 – 1×4 @ 52″ (Panel Trim, Front and Back)
  • 1 – 1×3 @ 58 1/2″ (Top Trim)
  • 1 – 2×4 @ 59 1/2″ (Top of Headboard)


Cut List for Queen

  • 6 - 1×3 @ 55″ (Fronts and backs of Legs)
  • 2 – 1×2 @ 55″ (Inside of Legs)
  • 5 – 1×4 @ 60″ (Panel Pieces)
  • 3 – 1×6 @ 60″ (Panel Pieces)
  • 4 – 1×4 @ 58″ (Panel Trim, Front and Back)
  • 1 – 1×3 @ 64 1/2″ (Top Trim)
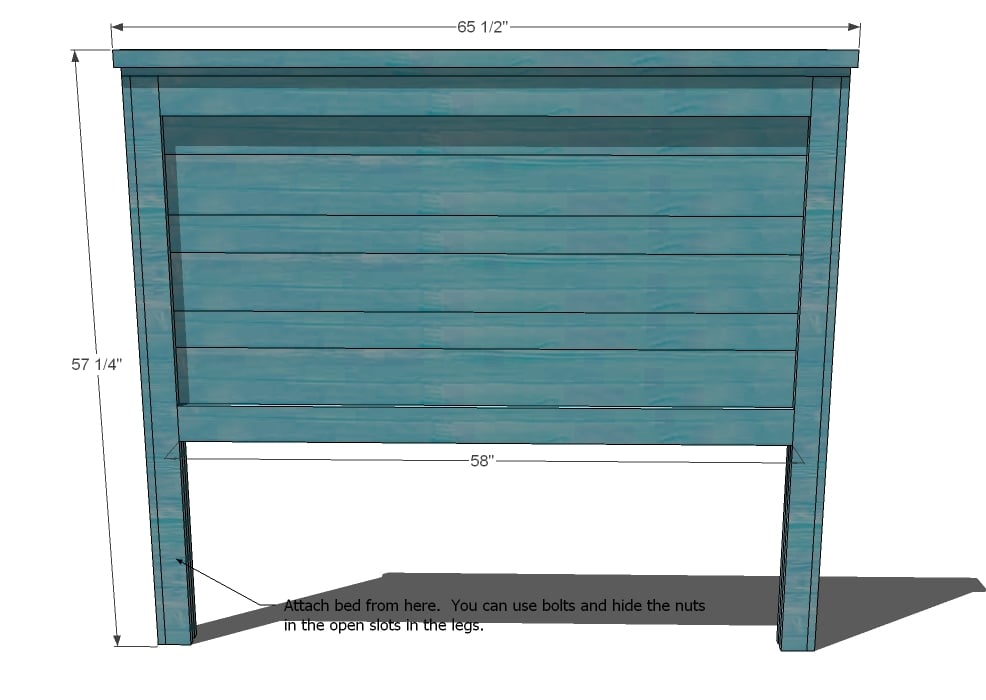
  • 1 – 2×4 @ 65 1/2″ (Top of Headboard)

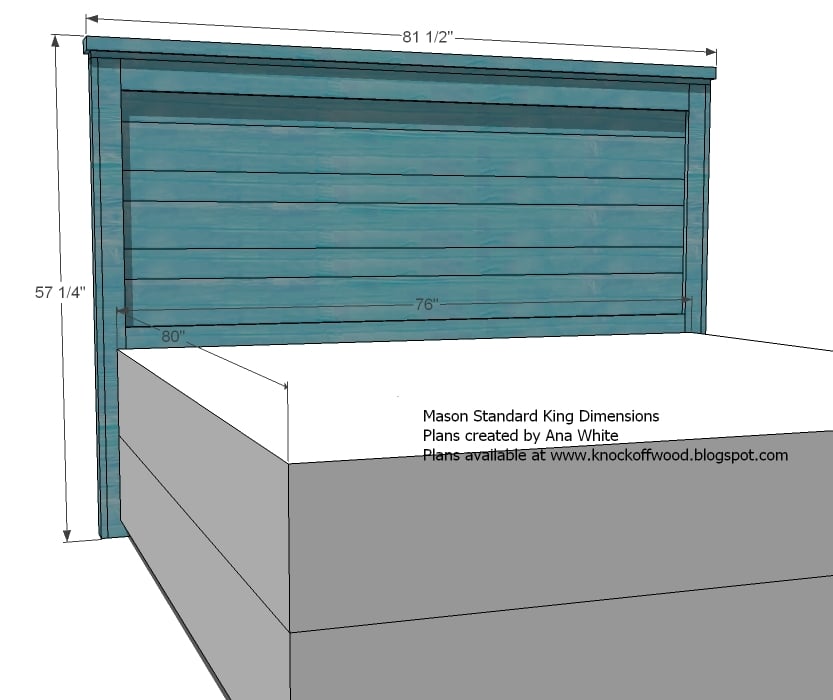
Cut List for Standard King 

  • 6 – 1×3 @ 55″ (Fronts and backs of Legs) 
  • 2 – 1×2 @ 55″ (Inside of Legs) 
  • 5 – 1×4 @ 76″ (Panel Pieces) 
  • 3 – 1×6 @ 76″ (Panel Pieces) 
  • 4 – 1×4 @ 74″ (Panel Trim, Front and Back) 
  • 1 – 1×3 @ 80 1/2″ (Top Trim) (measure before cutting) 
  • 1 – 2×4 @ 81 1/2″ (Top of Headboard) (measure before cutting) 

Cut List for California King 

  • 6 – 1×3 @ 55″ (Fronts and backs of Legs) 
  • 2 – 1×2 @ 55″ (Inside of Legs) 
  • 5 – 1×4 @ 72″ (Panel Pieces) 
  • 3 – 1×6 @ 72″ (Panel Pieces)
  • 4 – 1×4 @ 70″ (Panel Trim, Front and Back) 
  • 1 – 1×3 @ 76 1/2″ (Top Trim) (measure to fit) 
  • 1 – 2×4 @ 77 1/2″ (Top of Headboard) (measure to fit)
Tools
Tape Measure
Speed Square
Pencil
Safety Glasses
Hearing Protection
Circular Saw
Brad Nailer
Power Sander
General Instructions

Work on a clean level surface. Use necessary safety precautions. Measure and cut your boards to fit your piece – measurements given are for a perfect build, and you may find your headboard off a tiny bit. So on the trim and top pieces, measure to fit, using the given cut list as a approximate measurement. Use glue and check for square after each step.

Standard King Dimensions

king dimensions


Dimensions for Full

full size dimensions

Instructions

Step 1

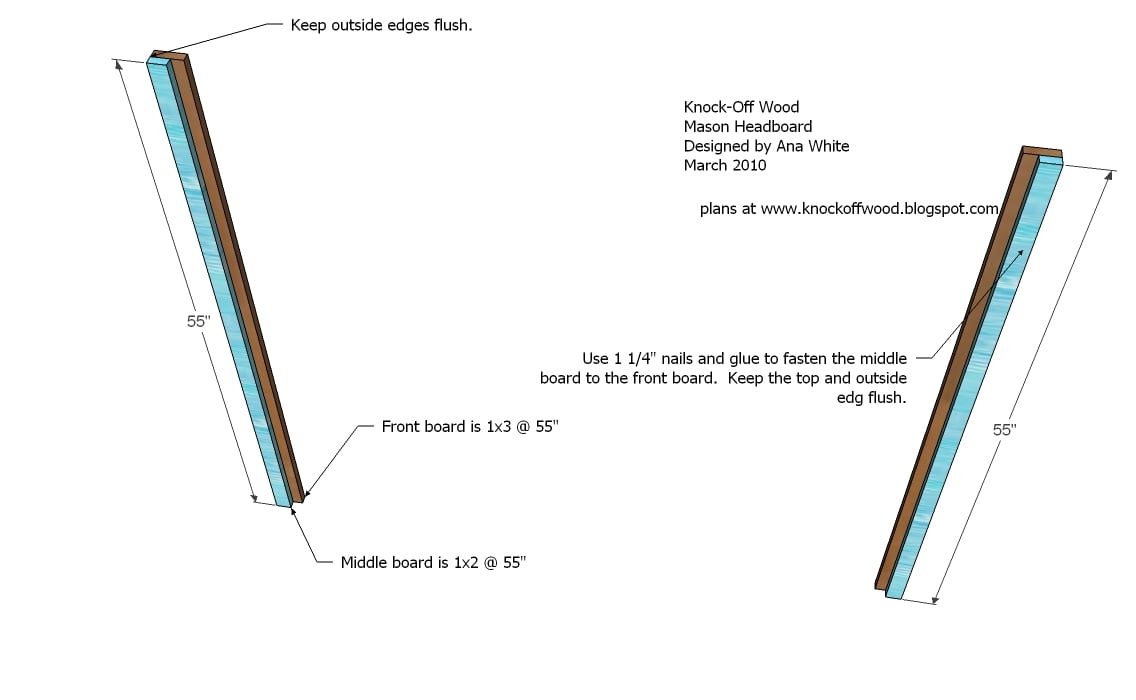
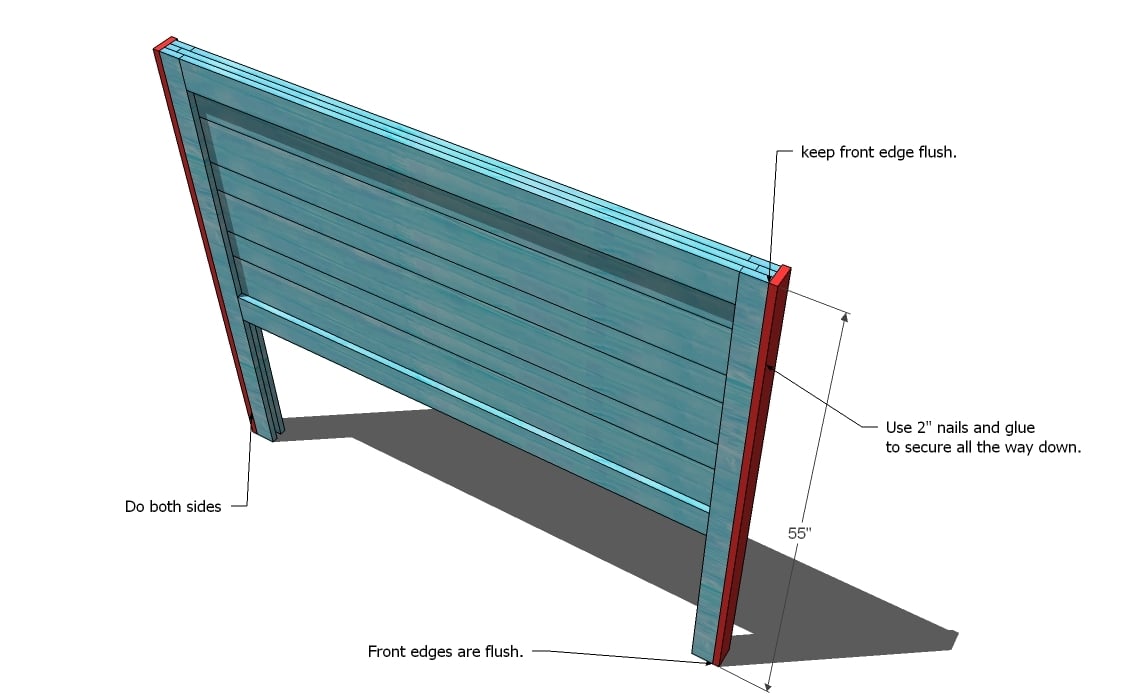
Legs. Begin building the legs by fastening the 1×2 middle piece to the 1×3 front leg piece, as shown above. To hide your nail holes, fasten for the 1×2 board into the back side of the 1×3 board. Keep outside edges flush.

Step 2

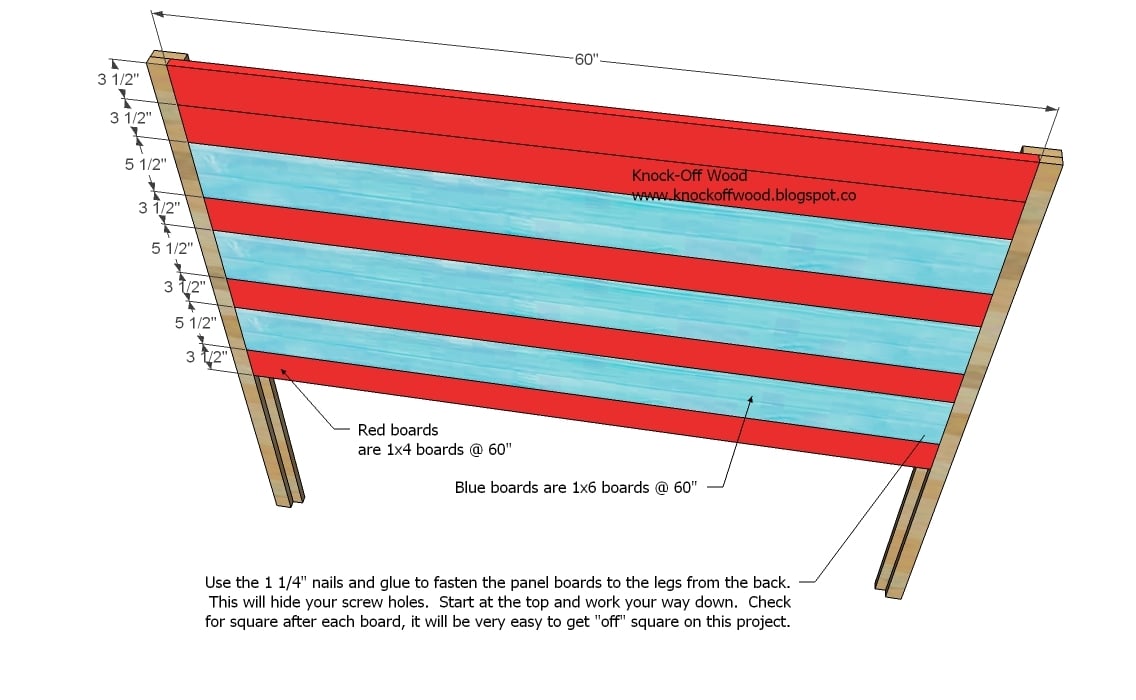
Panel Pieces. Starting on the top, fasten the panel pieces as shown above. The red pieces are 1×4 boards, the blue are 1×6 boards. Use 1 1/4″ nails and glue. Check for square. Hide your nail holes as you did in step 1.

Step 3

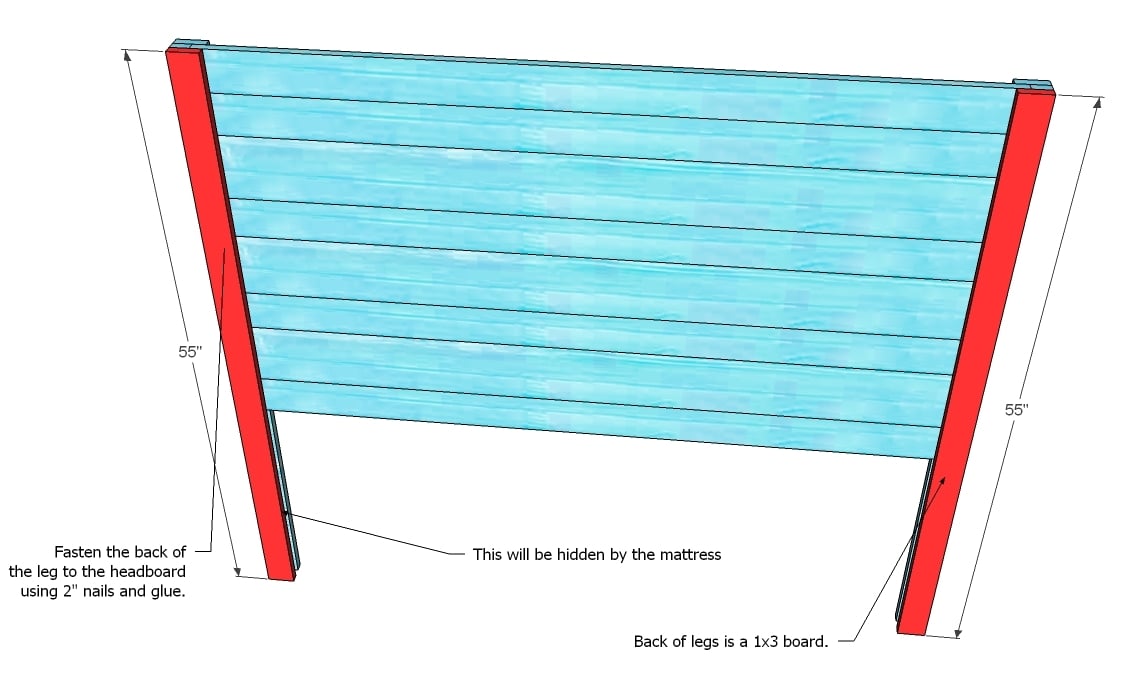
Back of Legs. Use 2″ nails and glue to fasten the back of the legs in place. Fasten to the panel pieces and the middle leg piece. Keep outside edges flush.

Step 4

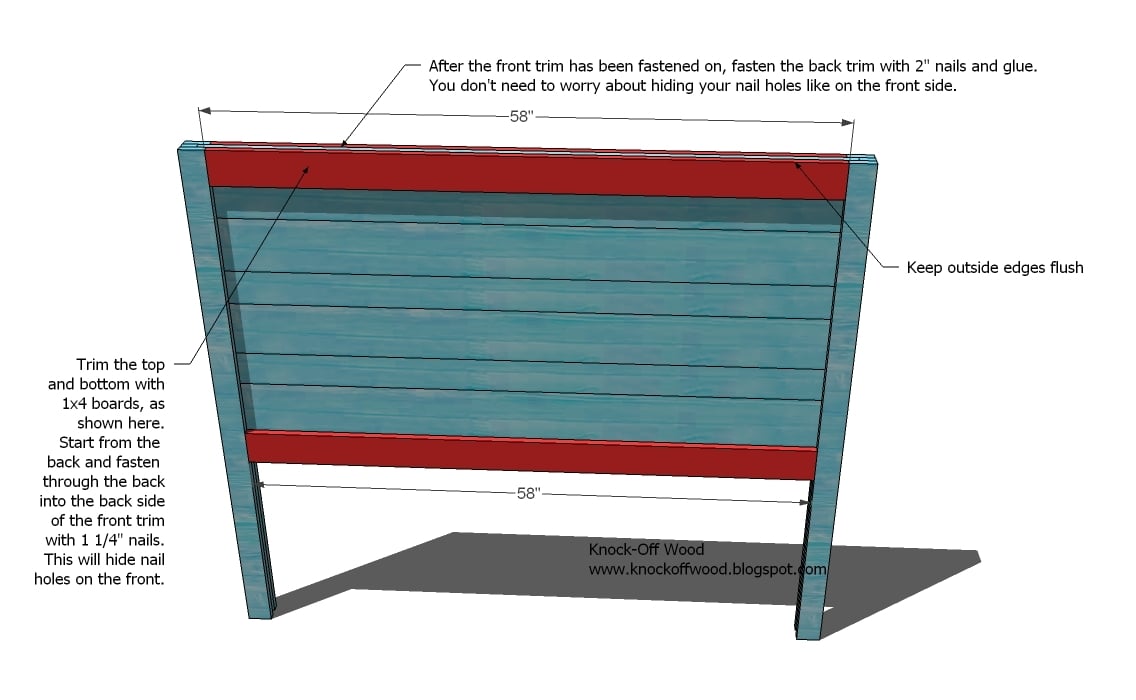
Trim Pieces. Start by fastening the front trim pieces by using 1 1/4″ nails and nailing through the back into the back edge of the front trim. This will hide your nail holes. Then fasten the back trim in place using 2″ nails and glue.

Step 5

Step 6

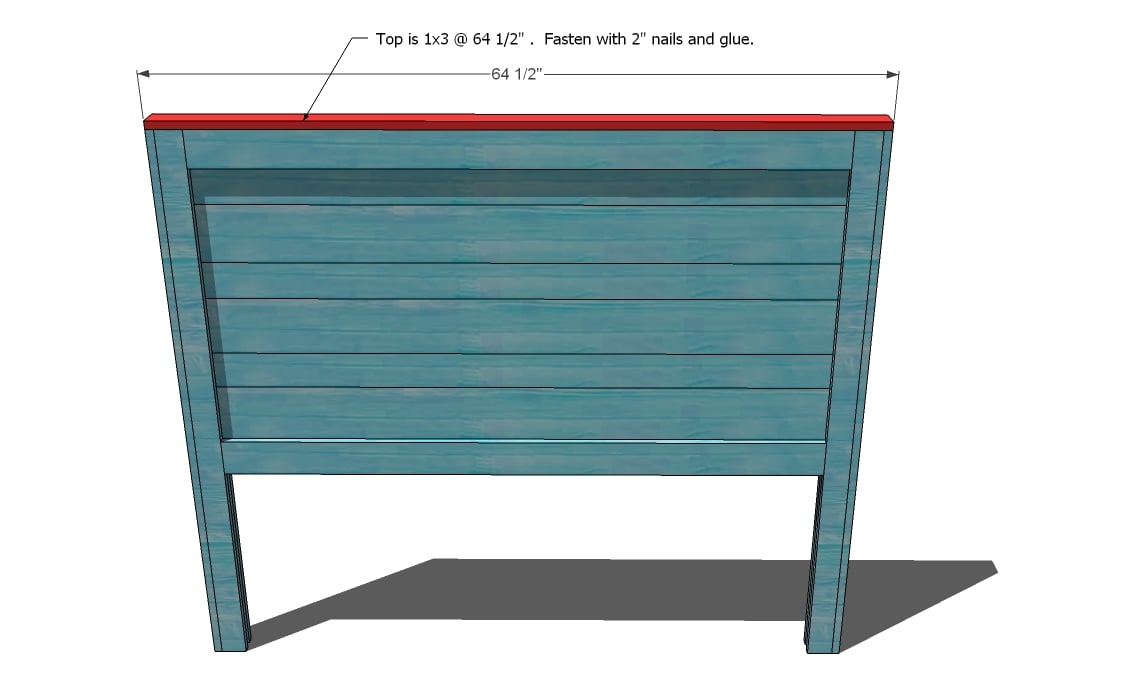
Top Trim. As shown above, measure and cut your top trim piece. The distance will be the overall width of the headboard at this step. Keeping the top trim flush with the outer leg and the front of the headboard, use 2″ nails and glue to fasten in place.

Step 7

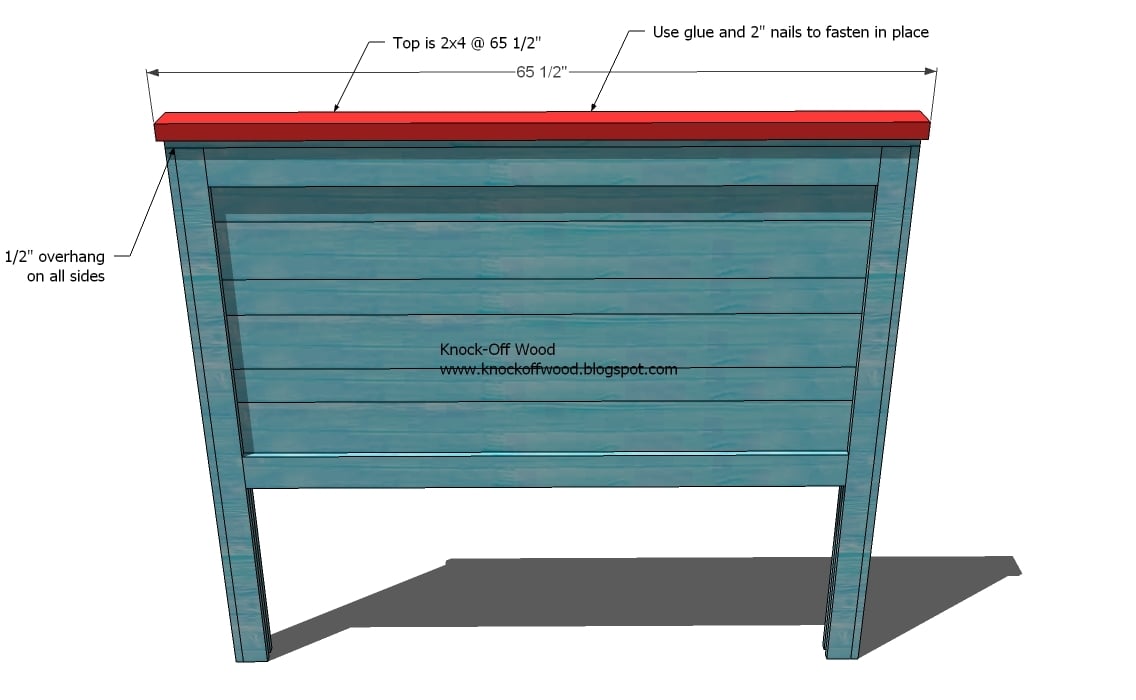
Top of Headboard. Cut the top of the headboard piece 1″ longer than the trim piece from step 6. Mark 1/2″ in from all sides. Center on top of the headboard and fasten in place with glue and 2″ nails.

Step 8

Finishing. Fill any visible nail holes with wood filler and sand and finish as desired. A bed frame can be attached by drilling holes in the fronts of the legs, and using bolts and nuts inserted in the slots open in the insides of the legs.

Comments

cdewan

Wed, 11/04/2020 - 14:22

"Measure and cut your boards to fit your piece – measurements given are for a perfect build, and you may find your headboard off a tiny bit. So on the trim and top pieces, measure to fit."

HAHA, I wish I had read that BEFORE I cut all the wood from the cut list! My top pieces all wound up being 1/4" too short, ugh! A $25 mistake. But now with new boards the thing looks great. Thanks!

andimat

Sat, 09/18/2021 - 12:58

I’m a rookie and looking to make this plan in a full. I have no idea how to convert the measurements. Can anyone help? I made this and a queen and love it and now I’m making version of it for one of my children in a fall but I don’t know how many inches to subtract off the width. Any help would be appreciated!

Frequently Asked Questions

Wood Questions

What kind of wood should I use?
Most of our plans use standard construction lumber like pine or fir. It's affordable, easy to work with, and easy to find. It's also rapidly renewing and biodegradable, so a great eco friendly choice!

Can I use hardwoods instead?
Yes—just keep in mind they're heavier, cost more, and can be tougher on tools and harder to join together and finish. I recommend not tackling a hardwood project until after you have built several softwood projects.

What if my boards are warped?
Choose the straightest boards at the store. You can often work around slight warps by cutting them into shorter pieces.

What wood should I use for outdoor furniture?
Use red-toned or pressure-treated 2x lumber for framing, and cedar or cedar fence pickets for the decking. Outdoor furniture should be built like a deck—your local home center can help recommend the right wood for your climate.

Will my wood move or warp after I build?
Potentially, especially in humid climates. Let your wood acclimate indoors before building. Once acclimated and kept in a stable environment, movement should be minimal. Remember, most houses are built using framing lumber - it's all about keeping moisture down indoors.

Cutting Questions

Do I need a miter saw?
A miter saw is great, creating fast, safe, and precise cuts, even for beginners. But most plans can be built with a circular saw and a straight edge. If using a circular saw to cut, take time to practice, and get good at making cuts, before cutting your project boards.

How do I get clean cuts with a circular saw?
Clamp your board, measure twice, cut slow, and use a sharp blade. This takes practice, so spend some time making cuts. I go through becoming proficient at freehand cutting in my course, it is worth taking if you want to master this skill.

Will the store cut my wood?
Yes—most stores will do rough cuts to help you transport your materials home. But from store to store, the quality of cuts could greatly vary.

Joinery Questions

What screws should I use?
We recommend star-head self tapping screws for framing, most common sizes are 2-1/2", 1-3/4". Pre-drill if close to the edge or you find your wood is splitting.

Do I have to use pocket holes?
Pocket holes are the cheapest, easiest and fastest way to do some joints - like edge to edge or a hidden fastener joint. There are other methods, but these can be time consuming and expensive. We recommend using pocket holes as indicated in plans for best results.

How do I keep things square?
Use a speed square and measure diagonals after each step. Always clamp joints before screwing to keep them tight and flush.

Finishing Questions

Stain or paint before or after building?
A quick sand before and a full finish after gives the best results. Pre-finish if you're doing two-tone or detailed finishes.

What type of finish?
Use oil-based or water-based stain. For paint, cabinet-grade latex or enamel works great. High use surfaces on indoor projects should get a coat of polyurethane, I recommend a Helsman or Spar or other flexible poly that won't crack or peel with wood movement. For exterior projects, use a finish suitable for exterior fences.

How to get a smooth finish?
Start with a well sanded project. Sand between coats (220 grit), wipe clean, and apply light coats with a foam brush or roller.

Plan Questions

Can I change the size?
Many people do, and that's the great thing about building your own furniture! But do keep in mind going bigger might mean more supports are required, and often plans are optimized for minimal material waste.

Are these beginner-friendly?
Yes—plans are written with simple tools and clear steps in mind, with every effort to make plans as simple as possible.

Can I sell what I build?
Absolutely! Just don’t resell or repost the plans themselves.

General Questions

What tools do I really need?
A drill, circular saw, tape measure, square, and a few clamps will get you through most projects.

Do I need a workshop?
Nope! A driveway or small patio is plenty to get started, just make sure you have a level place to work. If you find you are building several projects a year, creating a small workbench is a great way to store tools and have a dedicated workspace.

What if I mess up?
Wood filler, sanding, or flipping boards goes a long way. Mistakes are part of the process!

What can I do to make my projects look more professional?
Start with straight boards, make accurate cuts, clamp all joints, and line up everything neatly. Sand thoroughly, use a neutral finish, and apply it in light coats for a clean look.

I've never built anything before. Where should I start?
Start with a few smaller softwood projects to get hands-on experience. Or if you're tackling a big project, buy a little extra lumber and practice your cuts and joints first. If possible, work with someone who has a bit of experience.

Care & Maintenance

How long will my furniture last?
With good joinery and regular care, your DIY furniture can last for decades. I have pieces in my own home that are over 20 years old and still going strong! One of the best parts about DIY furniture is that it’s easy to repaint, refinish, or repair—so your projects can grow and adapt with you.

How should I care for outdoor furniture?
Lightly pressure wash or hose it down once or twice a year. Tighten screws and reapply finish as needed to protect it—just like a deck or fence. A little upkeep goes a long way in extending the life of your furniture.

How about indoor furniture?
Regularly dust or wipe with a damp cloth. If it starts to look worn, a light sanding and touch-up paint or stain can refresh it in no time. DIY pieces are meant to be durable and fixable—so don’t be afraid to give them some love now and then.

Want to Build with Confidence?

Check out my ebook: 12 Skills to Build Your Own Furniture
It walks you through the core skills every builder needs—measuring, cutting, joinery, and finishing—so you can build beautiful furniture that lasts.

Still Have Questions?

Email us anytime at [email protected] and we’ll be happy to help!