
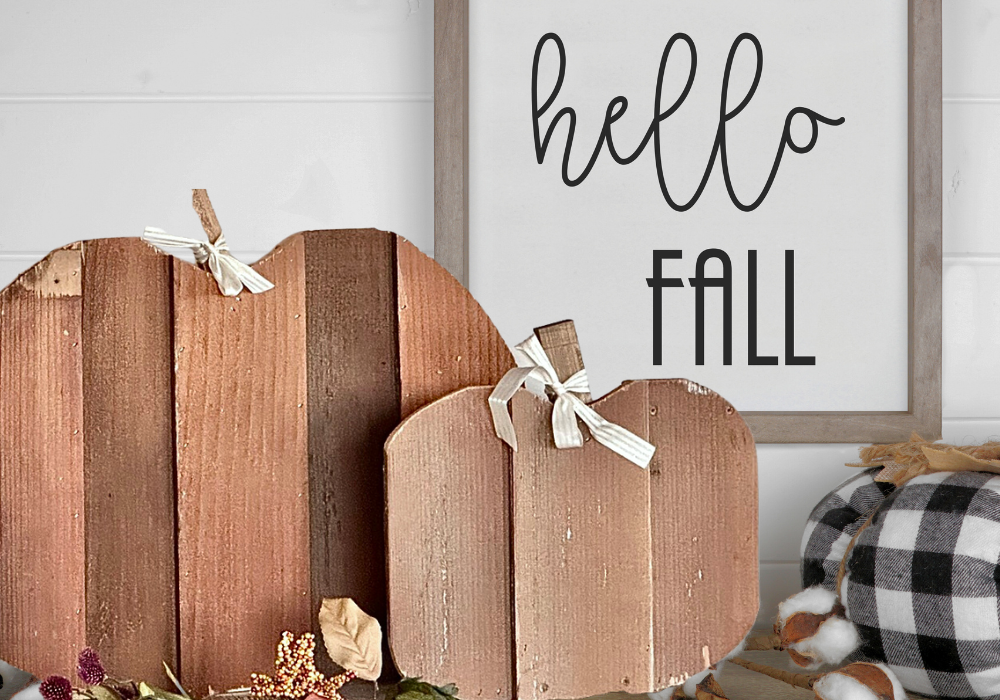

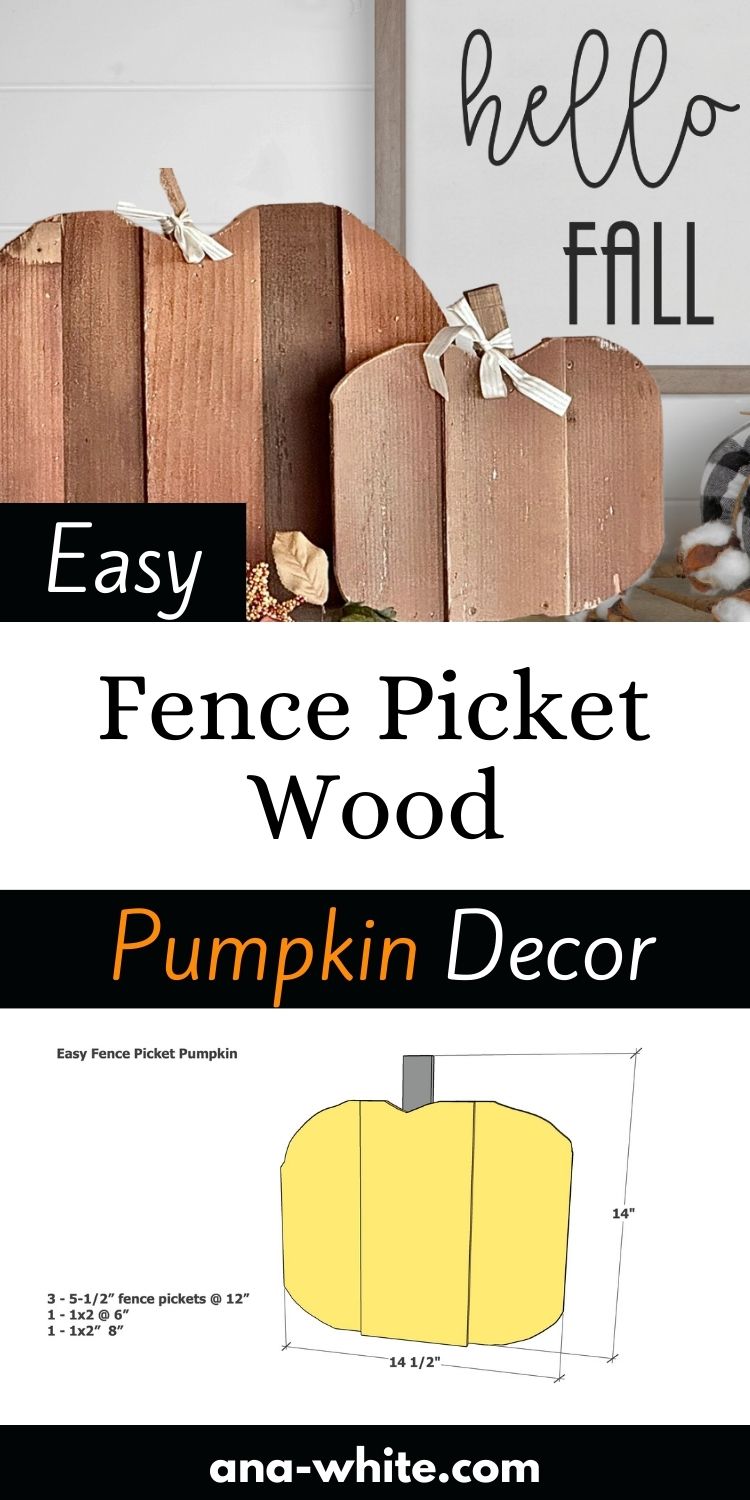
Make your own wood pumpkins out of fence pickets! This simple to build design can be used indoors or out. This is a great way to add fall beauty to your home, the wood pumpkin shape adds texture and a subtle fall touch. Free tutorial from Ana-White.com
How I Built this Layered Wood Pumpkin Using Fence Pickets
This project was super easy to make. You'll just need a jigsaw and a brad nailer or stapler and 1" fasteners.
I cut the fence pickets to the lengths needed in the cut list.
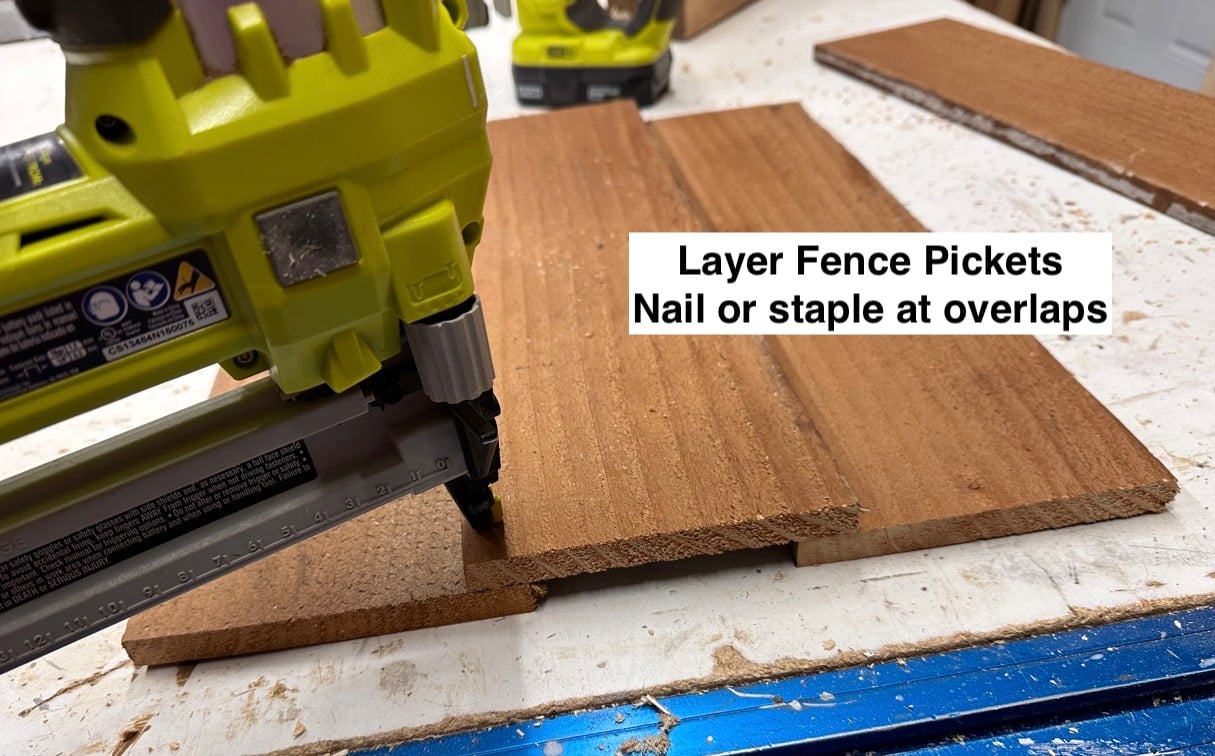
Then I layered the wood pieces, overlapping about 1" (no need to be super accurate here) and attached with 1" fasteners and glue.
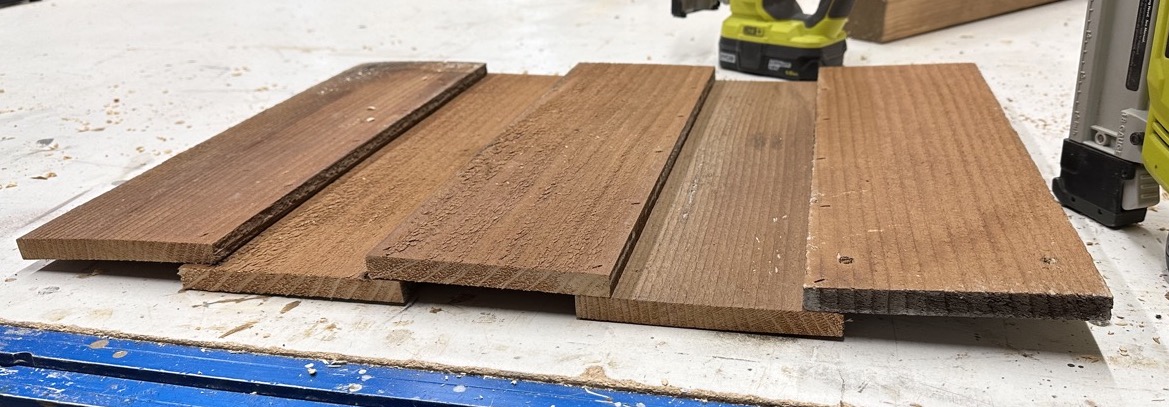
For the larger pumpkin, I layered five pieces.
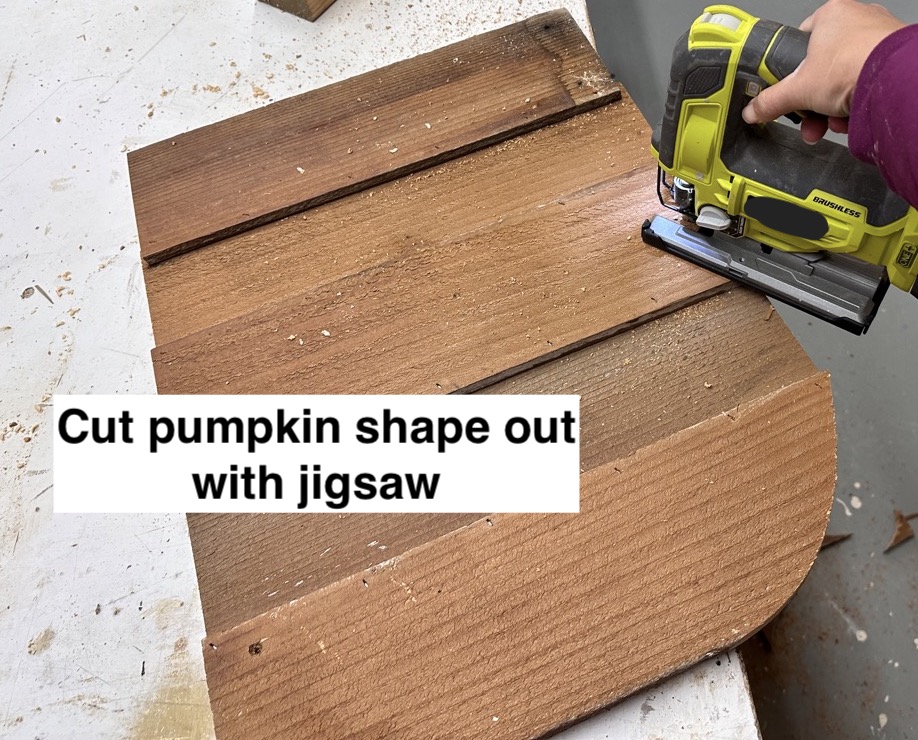
Then I just cut a pumpkin shape out. No need to stress here - all pumpkins are different shapes and sizes, and you can always cut off more if you don't like the shape. Just avoid cutting any nails or staples and make sure the jigsaw blade can operate freely and you aren't cutting into your work table.

I didn't like this shape, so ended up further rounding the corners and also taking some out at the bottom.
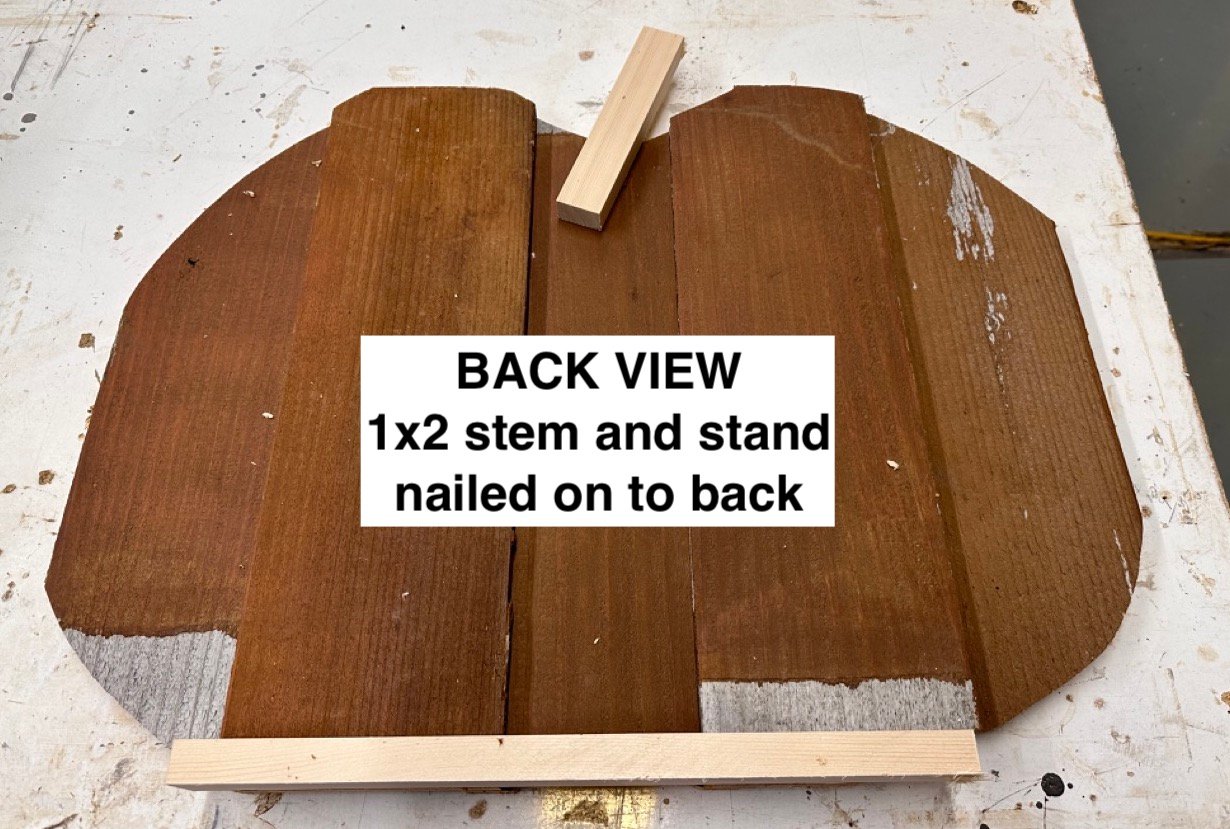
When I was happy with the pumpkin shape, I attached the 1x2s at the bottom to act as a stand and the 1x2 stem. You'll attach these pieces from the front, through the fence pickets.

What Type of Wood Did You Use?
I used reclaimed cedar fence pickets in the 5-1/2" width.
Can I Make My Pumpkins out of Pallet Wood?
Yes! However, pallet wood may be 3-1/2" wide instead of 5-1/2" - so you will need more boards to get the width for a plump pumpkin.
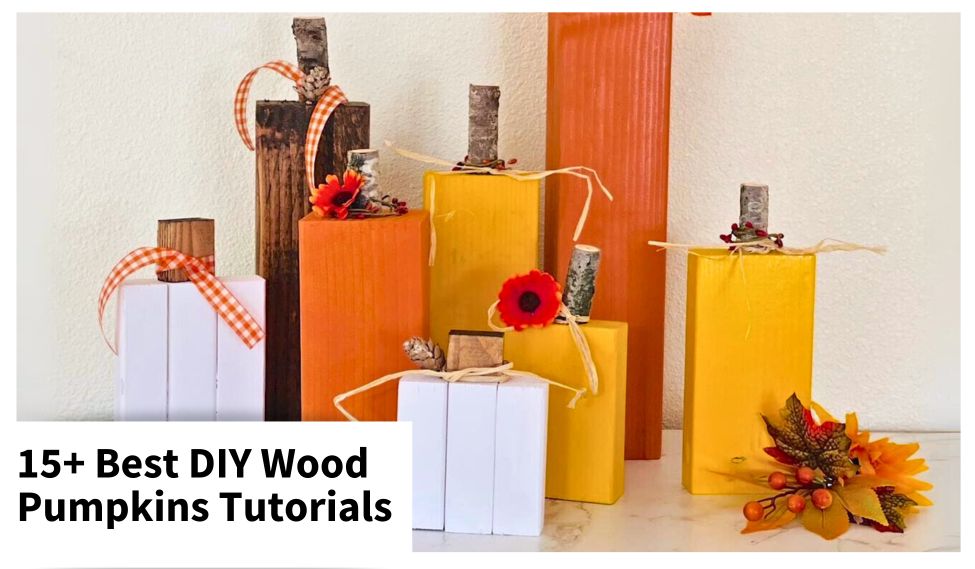
More Wood Pumpkin Tutorials!
Love making wood pumpkins? We put together all our favorite wood pumpkins in one post!
Pin For Later!
Preparation
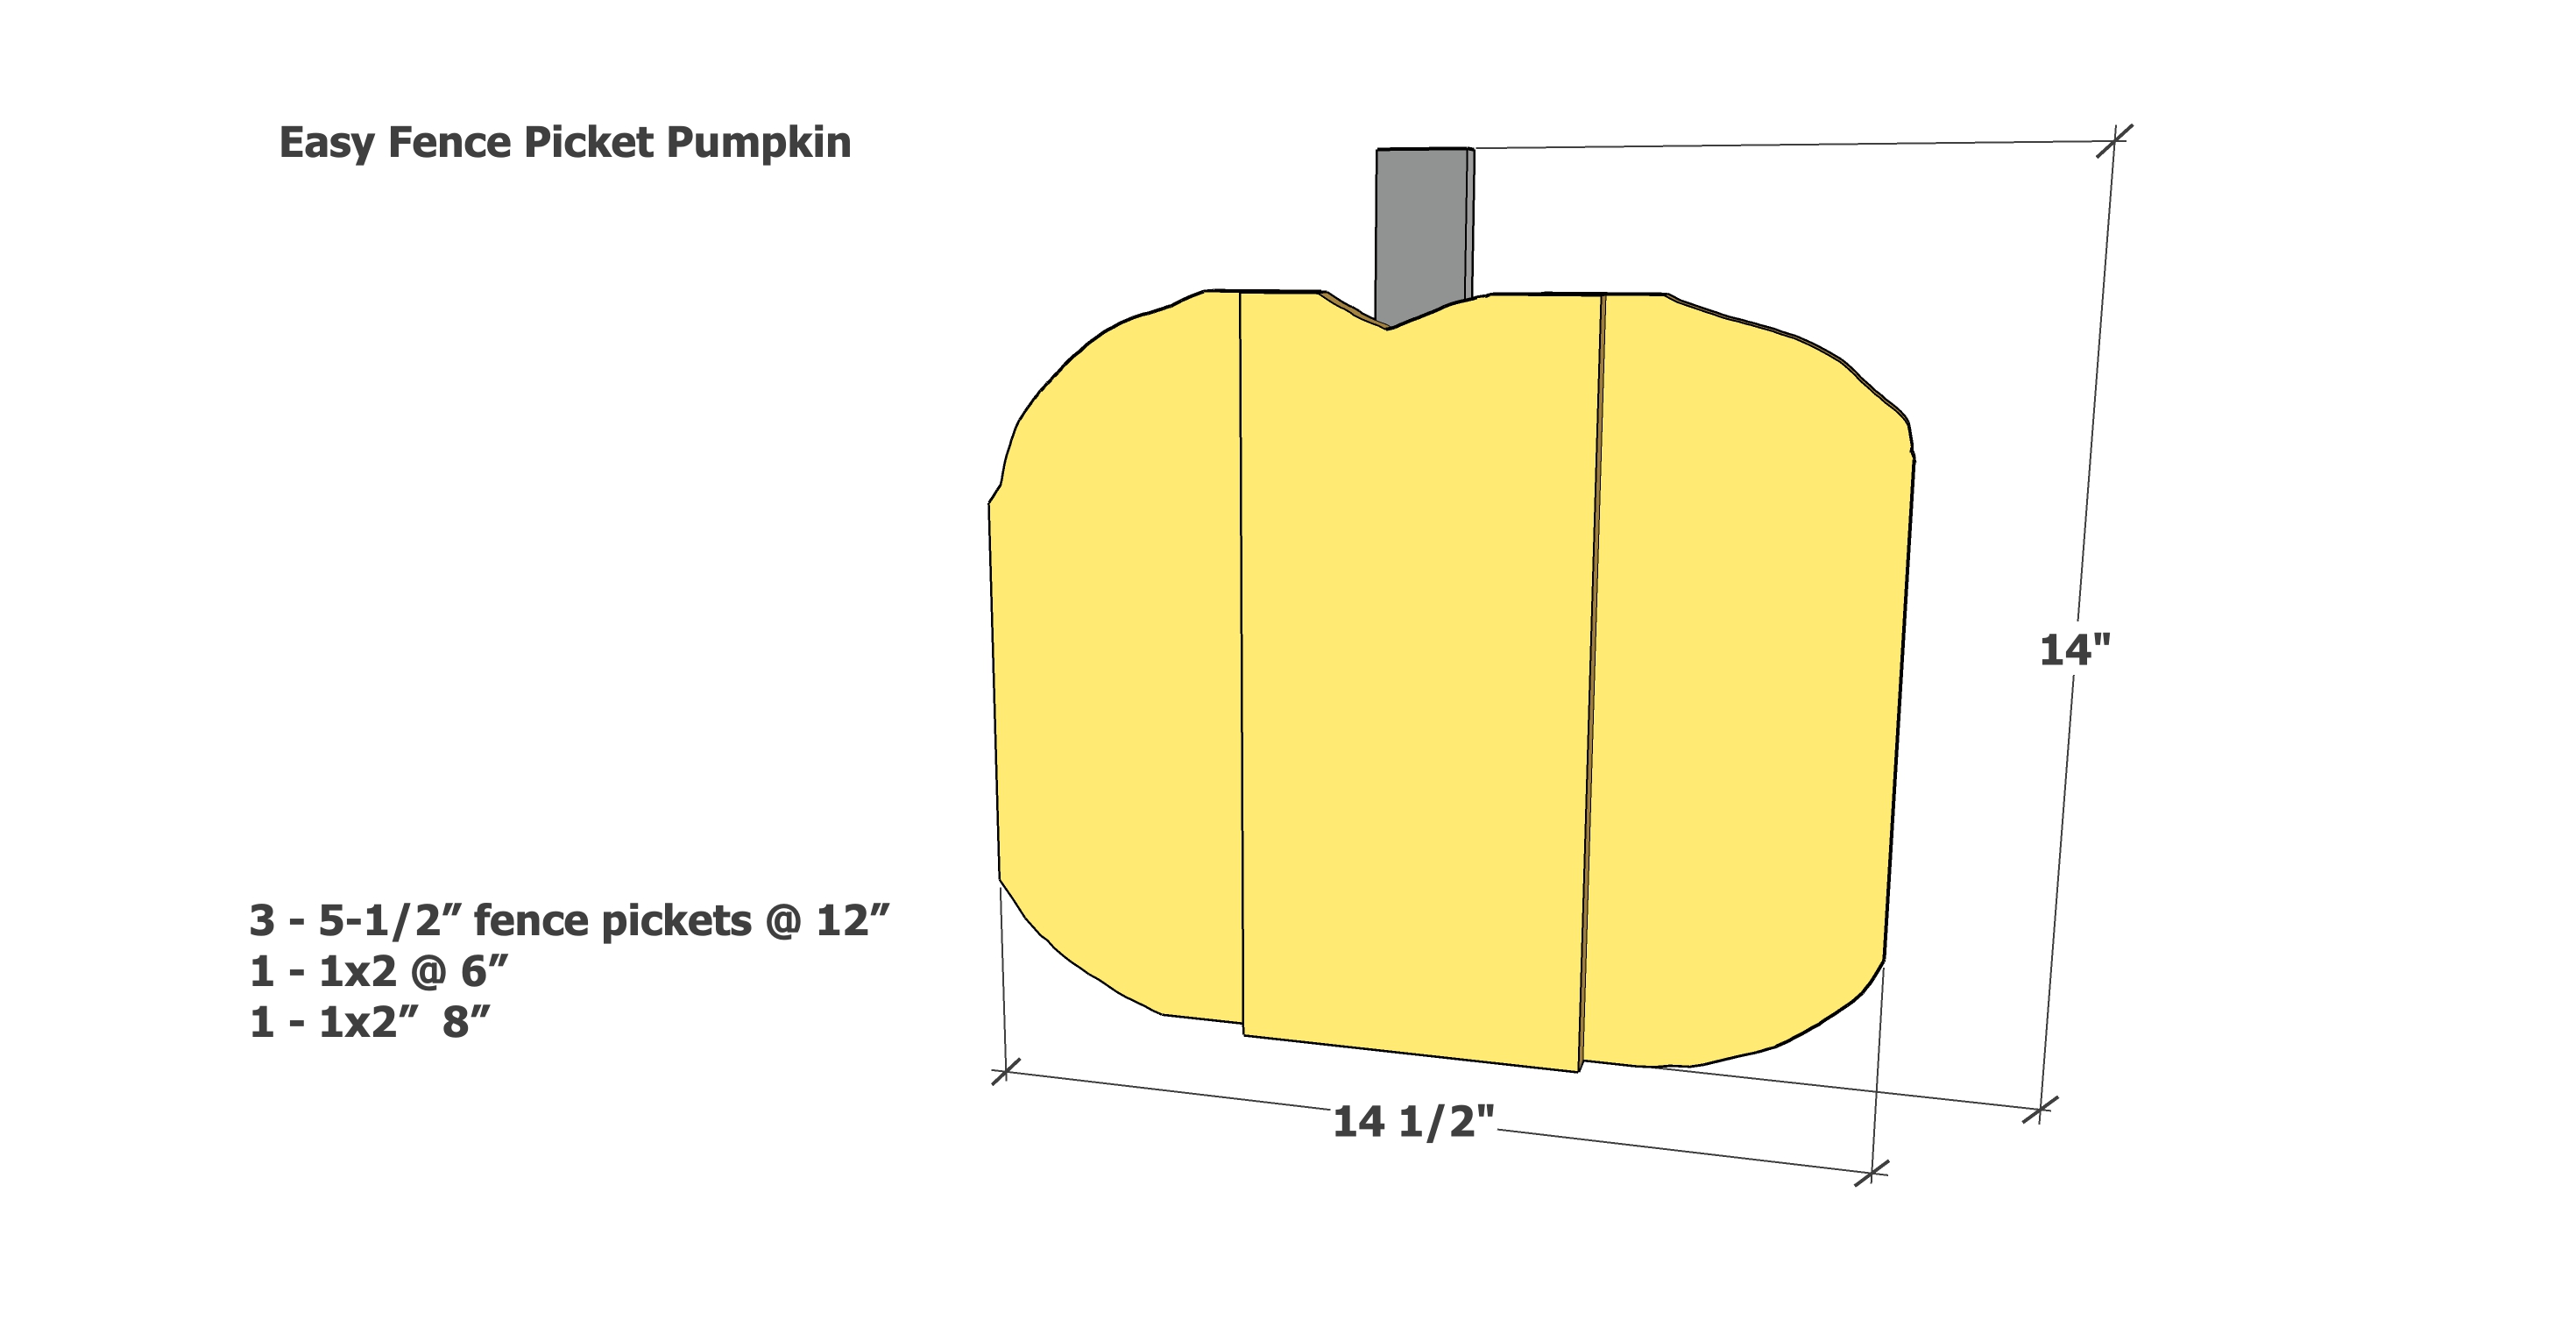
To make both the small and large pumpkin, you'll just need two 5-1/2" wide x 72" long cedar fence pickets.
For Small Pumpkin
- 3 board feet of 5-1/2" wide cedar fence picket (half of a 72" fence picket)
- 12" of 1x2
- 1" staples or brad nails
- wood glue
- Jigsaw
- Brad nailer or stapler
For Large Pumpkin
- 9 board feet of 5-1/2" wide cedar fence picket (one and a half 72" fence pickets)
- 18" of 1x2
- 1" staples or brad nails
- wood glue
- Jigsaw
- Brad nailer or stapler
Small Pumpkin Cut List
- 3 - cedar fence pickets @ 12" long
- 1 - 1x2 @ 4" long
- 1 - 1x2 @ 8" long
Large Pumpkin Cut List
- 5 - cedar fence pickets @ 18" long
- 1 - 1x2 @ 4" long
- 1 - 1x2 @ 12" long
Cut the wood pieces first with a jigsaw, miter saw or circular saw. Do not cut small pieces, instead, cut a small piece off of a larger piece.


Instructions
Step 1
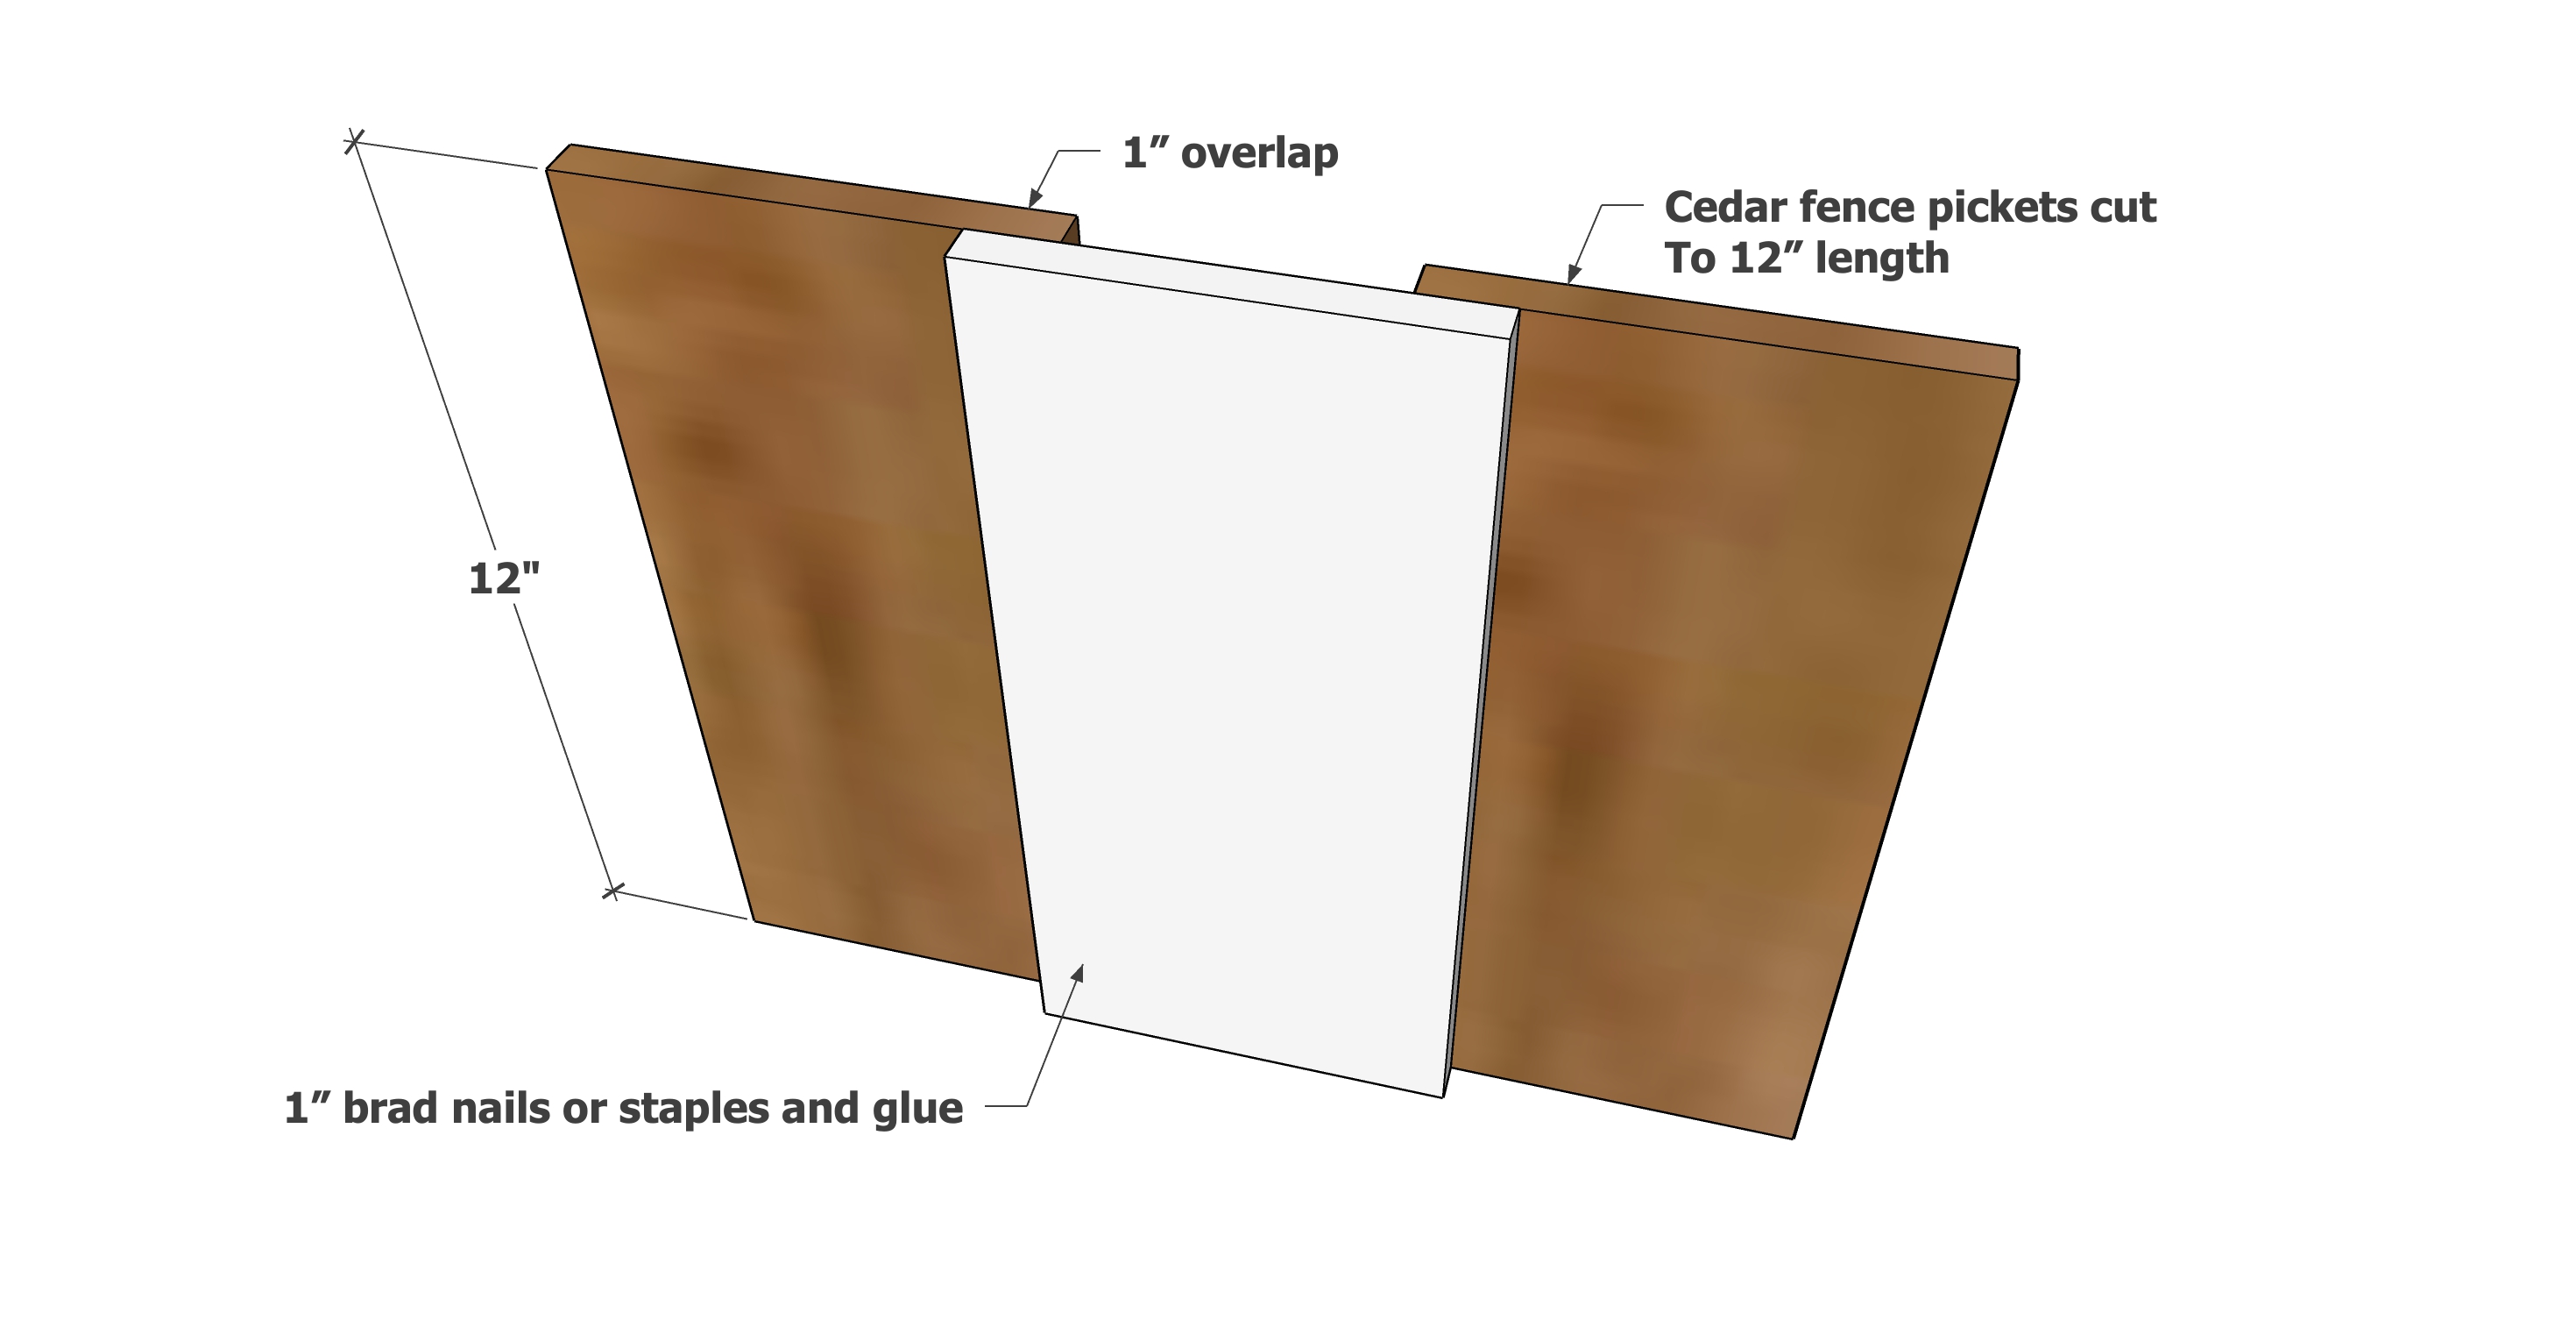
Glue and nail the fence picket pieces together, with about a 1" overlap, using 1" fasteners (staples or brad nails and glue). For the larger pumpkin add two additional layered fence pickets.
Step 2

Use a pencil to free hand a pumpkin shape. All pumpkins are different, so any shape is up to you.
Cut out with a jigsaw and lightly sand any rough edges.
For a two tone look, paint or stain the pumpkin in this stage. Paint or stain the stem in a different color if desired.
Step 3
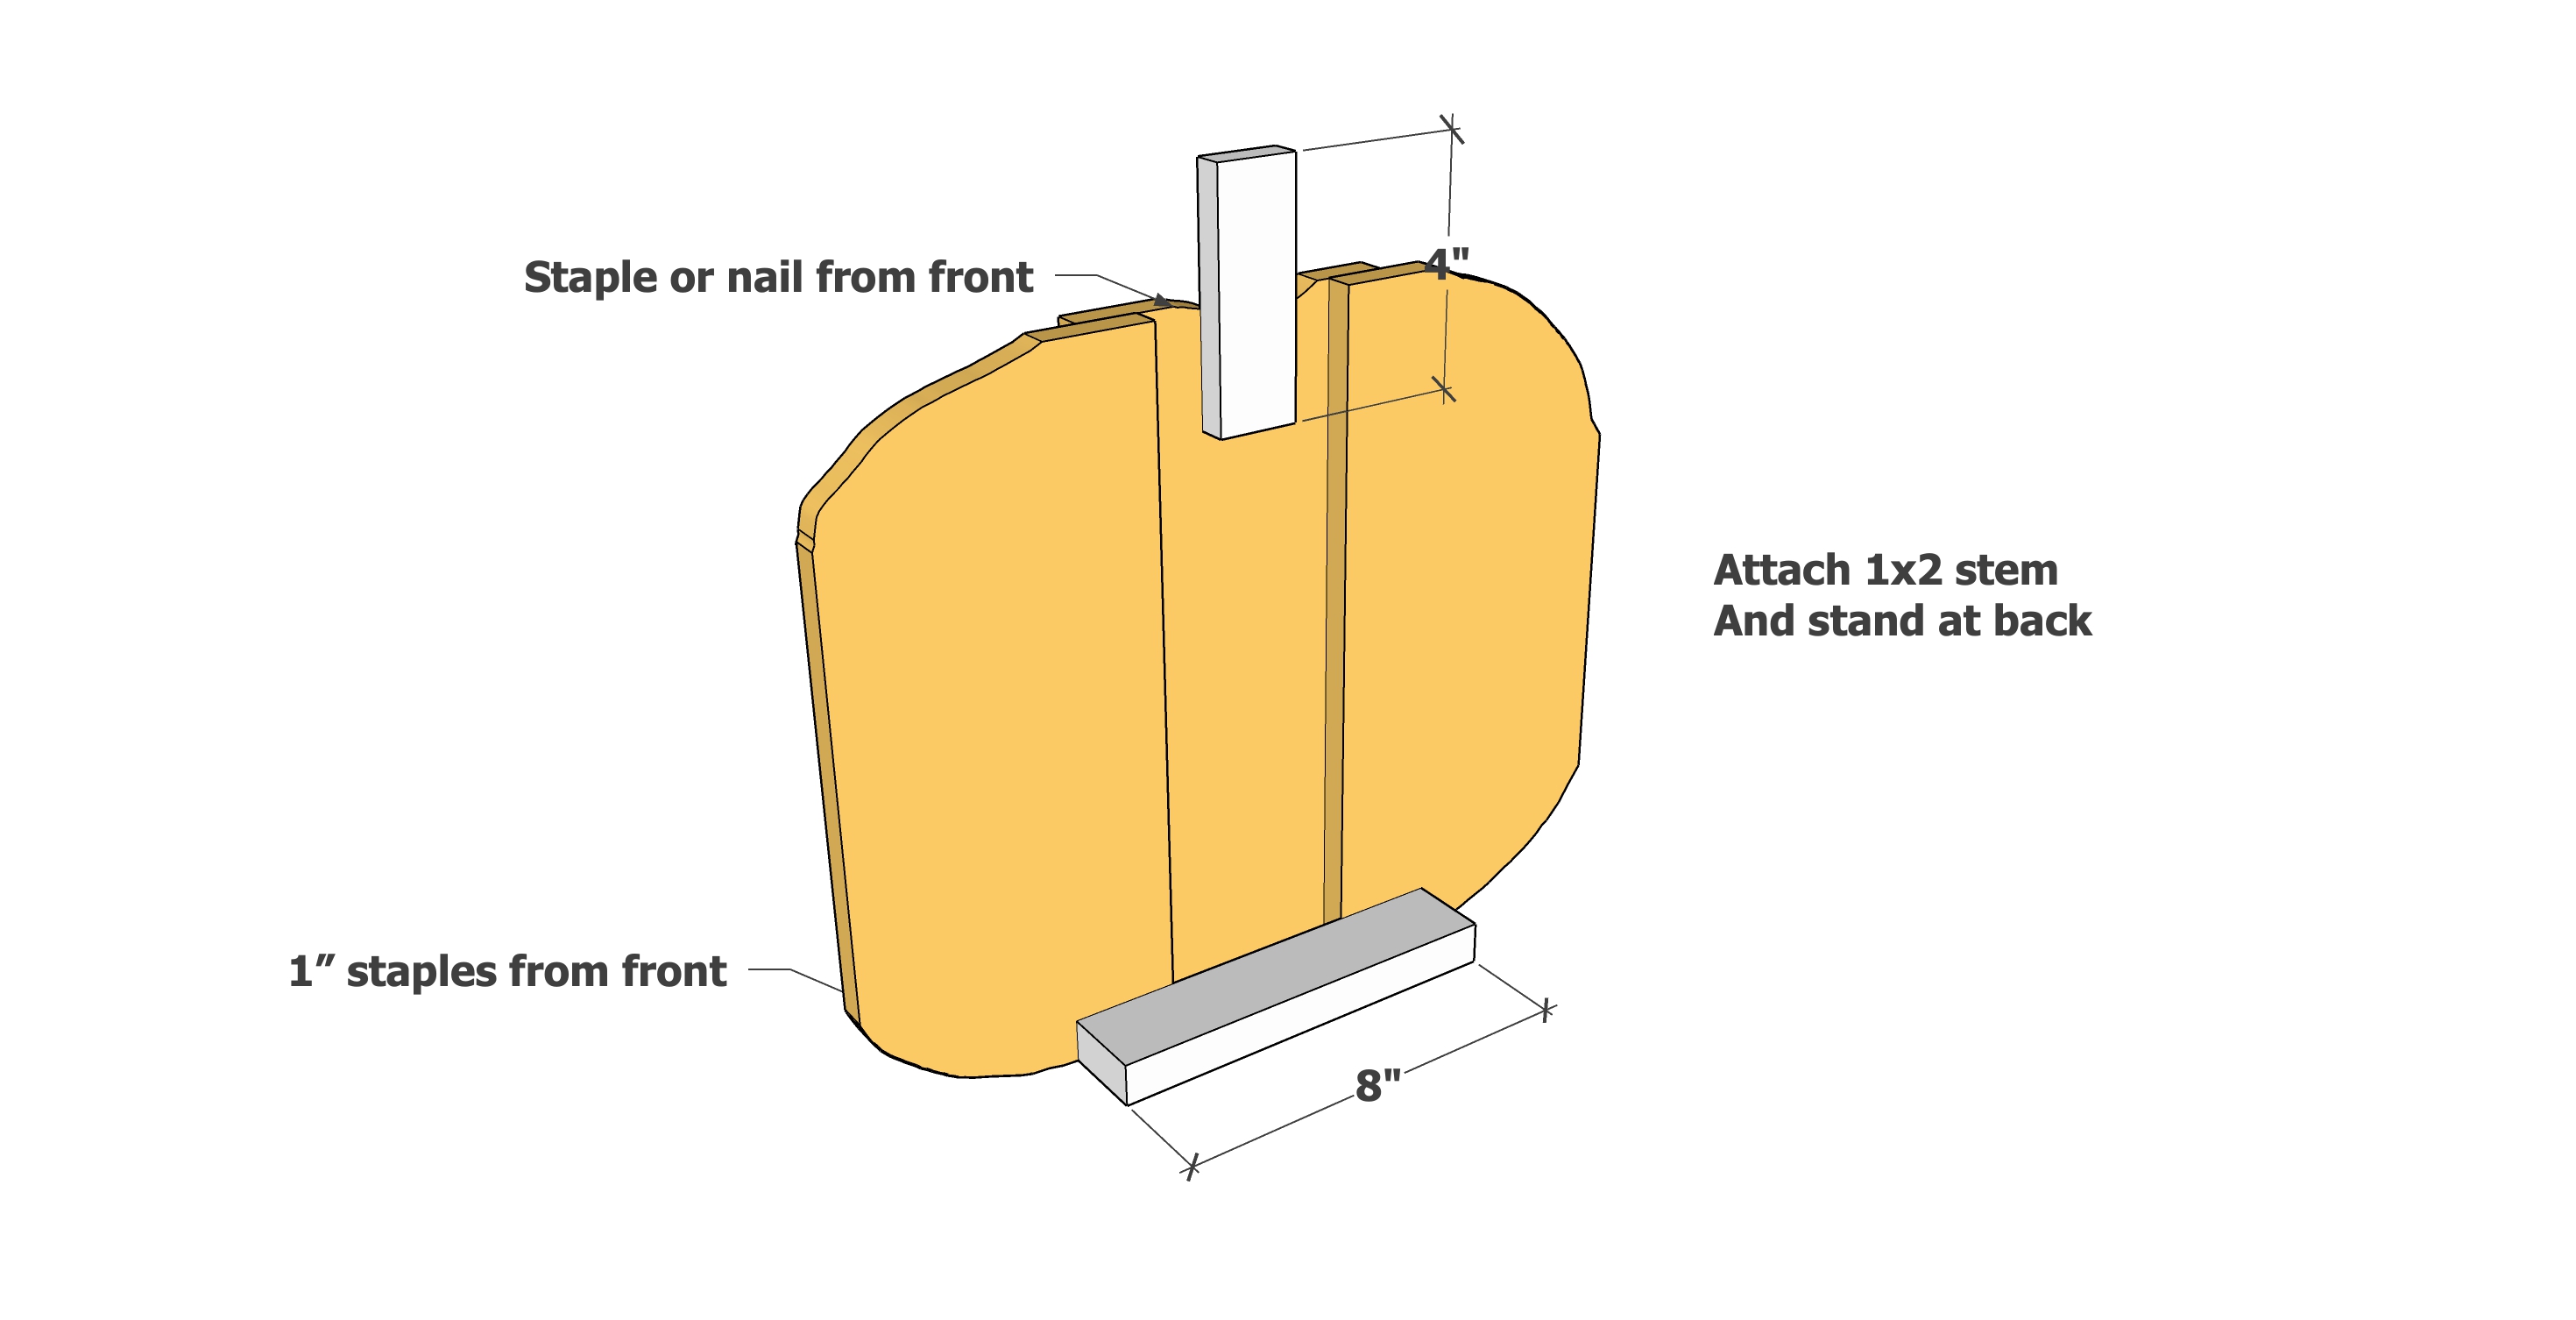
Glue and attach the 1x2 pieces to the back of the pumpkin.
To do this, you'll need to nail or staple from the fence picket side into the back of the 1x2 pieces.
Make sure the pumpkin stays upright with the 1x2 piece.
