Over the years of building kitchen cabinets, we've refined our process and come up with our best method for building your own kitchen cabinets. This free tutorial has everything you need, including a custom kitchen cabinet plan app - so you can get started on building your own kitchen cabinets.
This free plan includes diagrams, video tutorial, design app and user photos from Ana-White.com
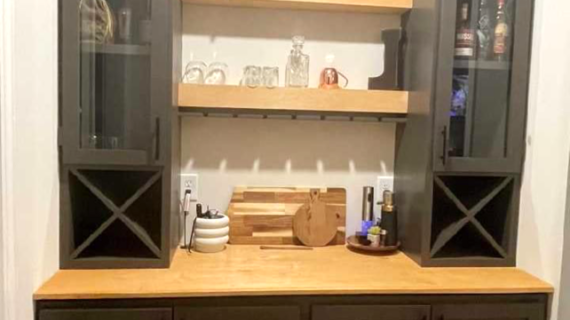
Building your own kitchen cabinets can give you a greater level of customization and quality, all at an affordable price. We've built many kitchens over the years, and have refined our process down to this for Face Frame Kitchen Cabinets.
Video Tutorial of Building Face Frame Kitchen Cabinet
WHY FACE FRAME?
Face frames are NOT required and will add more expense and add additional steps to your kitchen build. But in my opinion, it is worth it.
Face frames increase the strength of kitchen cabinets
A face frame can finish front edges of cabinetry if not edge banding
Face frames can be used to hang drawer slides and cabinet doors in wider openings
In homes where walls are not square, a face frame can be used to help align cabinets
In the video we choose to add face frames since the island is not attached to any walls, and we wanted to increase the strength to hold the solid stone countertop.
DIMENSIONS
Face frame cabinets can be made in any width, but consider after about 36" shelves may start to sag and drawers may not slide as smooth. In this template, the example cabinet is 36" wide. Height (34-1/2" and depth (24-3/4" overall) are the same no matter your cabinet width.
CONFIGURATION
To get the math worked out for your cabinets, my free configurator by inputing desired width, and the standard height (34-1/2") and standard depth (23-1/4").
If shelves are desired, add to the configuration.
If you want to use your face frame to line up cabinets in a room with out of square walls, make your carcass 1/2" smaller than the desired cabinet size. The face frame will be the full width. This leaves 1/2" gaps in between cabinets behind the face frame, for squaring up cabinets.
CARCASS BUILDING
Order your carcass pieces through our configurator, or cut out on a tablesaw. It is very important that the cuts are precise and square for your cabinets to turn out professional looking.
Cut toekick out of all side panels. Toekick can be any height and depth, 4" x 4" is my standard but you can adjust depending on what type of finished toekick you are using.
Drill four 3/4" pocket holes on the underside of the bottom shelf on both ends. Attach with 1-1/4" pocket hole screws and glue so bottom edge is flush with toekick.
BAY SUPPORTS
You'll need additional framing to finish out the cabinet. I recommend 1x3 or 1x4 furring strips, attach with 3/4" pocket holes and 1-1/4" pocket hole screws. Bay supports are also recommended on the bottom of the cabinet.
FACE FRAME
Face frames are made of 1x2 boards. Use poplar for a painted finish, and wood in desired species to match doors for a stained finish.
Measure and cut the face frame to fit your cabinet. Attach the face frame pieces together first with 3/4" pocket holes and 1-1/4" pocket hole screws. Then attach the completed face frame to the front of the cabinet with 1-1/4" brad nails and glue.
For double drawers or doors, additional face framing can be added as shown.
DRAWERS ON FACE FRAME CABINETS
Drawers on face frame cabinets are hung on the face frame. You'll need to block out with wood to match the face frame overlay to support drawer slides. For a full row of drawers, simply run the blocking all the way down the cabinet vertically.
Drawer slides as shown are 22" full extension ball bearing, requiring 1/2" clearance on each side. If using other drawer slides, consult the instructions before building your drawer box.
The drawer box should be 1x4 for top drawers. Drawer sides are 22" and drawer front and back are the opening of the face frame, minus 2-1/2". Build the drawer box with 3/4" pocket holes and 1-1/4" pocket hole screws, pocket holes placed on outsides. For the bottom, cut 1/4" plywood to drawer box dimensions, and attach with 3/4" nails or staples and glue.
DOORS AND DRAWER FACES
Full overlay doors and drawer faces are recommended.
Figure drawer faces and doors with a total of 1/2" reveal of face frame, considering when two cabinets are placed side by side, the reveal should still equal 1/2". The below diagram shows this.
FINISH
Only the face frame and drawer faces and doors need to be painted or stained. The interior carcass and drawer boxes should be protected with a clear coat or polyurethane or similar.
INSTALLATION
On install, the face frames should be lined up and attached together with 2-1/2" cabinet screws. Also attach the bay supports to the wall behind the cabinets.
What kind of wood should I use?
Most of our plans use standard construction lumber like pine or fir. It's affordable, easy to work with, and easy to find. It's also rapidly renewing and biodegradable, so a great eco friendly choice!
Can I use hardwoods instead?
Yes—just keep in mind they're heavier, cost more, and can be tougher on tools and harder to join together and finish. I recommend not tackling a hardwood project until after you have built several softwood projects.
What if my boards are warped?
Choose the straightest boards at the store. You can often work around slight warps by cutting them into shorter pieces.
What wood should I use for outdoor furniture?
Use red-toned or pressure-treated 2x lumber for framing, and cedar or cedar fence pickets for the decking. Outdoor furniture should be built like a deck—your local home center can help recommend the right wood for your climate.
Will my wood move or warp after I build?
Potentially, especially in humid climates. Let your wood acclimate indoors before building. Once acclimated and kept in a stable environment, movement should be minimal. Remember, most houses are built using framing lumber - it's all about keeping moisture down indoors.
Cutting Questions
Do I need a miter saw?
A miter saw is great, creating fast, safe, and precise cuts, even for beginners. But most plans can be built with a circular saw and a straight edge. If using a circular saw to cut, take time to practice, and get good at making cuts, before cutting your project boards.
How do I get clean cuts with a circular saw?
Clamp your board, measure twice, cut slow, and use a sharp blade. This takes practice, so spend some time making cuts. I go through becoming proficient at freehand cutting in my course, it is worth taking if you want to master this skill.
Will the store cut my wood?
Yes—most stores will do rough cuts to help you transport your materials home. But from store to store, the quality of cuts could greatly vary.
Joinery Questions
What screws should I use?
We recommend star-head self tapping screws for framing, most common sizes are 2-1/2", 1-3/4". Pre-drill if close to the edge or you find your wood is splitting.
Do I have to use pocket holes?
Pocket holes are the cheapest, easiest and fastest way to do some joints - like edge to edge or a hidden fastener joint. There are other methods, but these can be time consuming and expensive. We recommend using pocket holes as indicated in plans for best results.
How do I keep things square?
Use a speed square and measure diagonals after each step. Always clamp joints before screwing to keep them tight and flush.
Finishing Questions
Stain or paint before or after building?
A quick sand before and a full finish after gives the best results. Pre-finish if you're doing two-tone or detailed finishes.
What type of finish?
Use oil-based or water-based stain. For paint, cabinet-grade latex or enamel works great. High use surfaces on indoor projects should get a coat of polyurethane, I recommend a Helsman or Spar or other flexible poly that won't crack or peel with wood movement. For exterior projects, use a finish suitable for exterior fences.
How to get a smooth finish?
Start with a well sanded project. Sand between coats (220 grit), wipe clean, and apply light coats with a foam brush or roller.
Plan Questions
Can I change the size?
Many people do, and that's the great thing about building your own furniture! But do keep in mind going bigger might mean more supports are required, and often plans are optimized for minimal material waste.
Are these beginner-friendly?
Yes—plans are written with simple tools and clear steps in mind, with every effort to make plans as simple as possible.
Can I sell what I build?
Absolutely! Just don’t resell or repost the plans themselves.
General Questions
What tools do I really need?
A drill, circular saw, tape measure, square, and a few clamps will get you through most projects.
Do I need a workshop?
Nope! A driveway or small patio is plenty to get started, just make sure you have a level place to work. If you find you are building several projects a year, creating a small workbench is a great way to store tools and have a dedicated workspace.
What if I mess up?
Wood filler, sanding, or flipping boards goes a long way. Mistakes are part of the process!
What can I do to make my projects look more professional?
Start with straight boards, make accurate cuts, clamp all joints, and line up everything neatly. Sand thoroughly, use a neutral finish, and apply it in light coats for a clean look.
I've never built anything before. Where should I start?
Start with a few smaller softwood projects to get hands-on experience. Or if you're tackling a big project, buy a little extra lumber and practice your cuts and joints first. If possible, work with someone who has a bit of experience.
Care & Maintenance
How long will my furniture last?
With good joinery and regular care, your DIY furniture can last for decades. I have pieces in my own home that are over 20 years old and still going strong! One of the best parts about DIY furniture is that it’s easy to repaint, refinish, or repair—so your projects can grow and adapt with you.
How should I care for outdoor furniture?
Lightly pressure wash or hose it down once or twice a year. Tighten screws and reapply finish as needed to protect it—just like a deck or fence. A little upkeep goes a long way in extending the life of your furniture.
How about indoor furniture?
Regularly dust or wipe with a damp cloth. If it starts to look worn, a light sanding and touch-up paint or stain can refresh it in no time. DIY pieces are meant to be durable and fixable—so don’t be afraid to give them some love now and then.
Want to Build with Confidence?
Check out my ebook: 12 Skills to Build Your Own Furniture
It walks you through the core skills every builder needs—measuring, cutting, joinery, and finishing—so you can build beautiful furniture that lasts.