
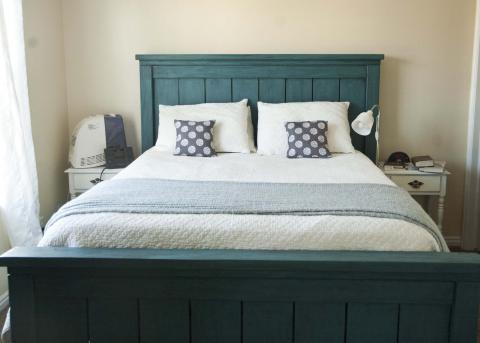

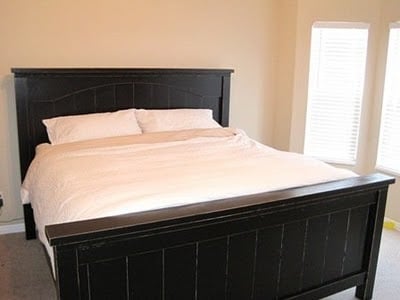
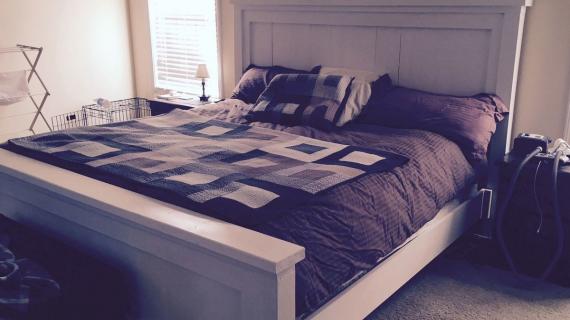
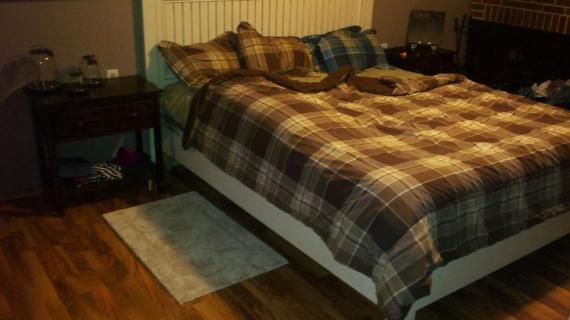
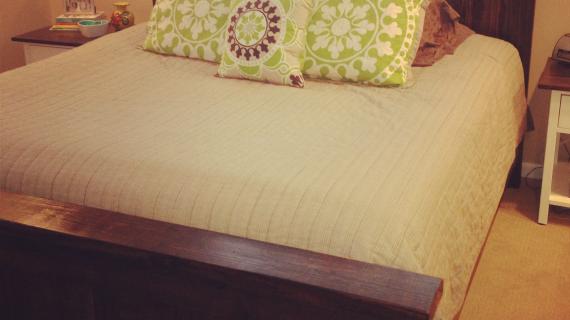
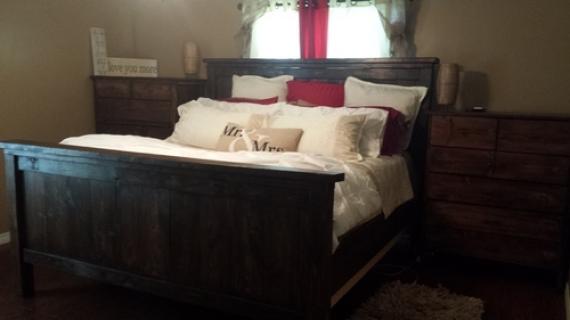
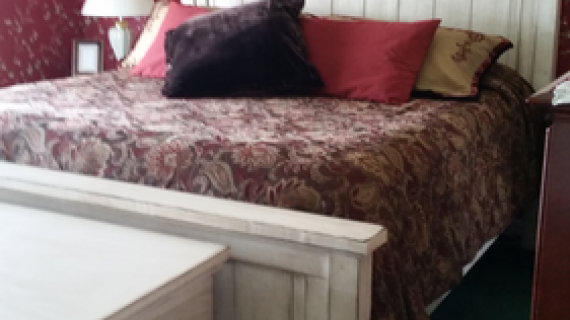
The blog favorite Farmhouse Bed, now in California King! This bed plan is a must read, as the construction is a tad different to accommodate no 4x4 posts and an easier method of joining the siderails with the headboard. Special thanks to JME Blog for their marvelous photos!


Preparation
9 – 1×8 boards, 8′ Long
1 – 1×3 board, 8′ Long
2 – 2×6 board, 8′ Long or Stud Length (doesn’t matter)
13 – 2×4 boards, 8′ Long or Stud Length (doesn’t matter, you may need more or less depending on if you have a box spring or not)
3″ self tapping wood screws
2 1/2″ self tapping wood screws
2″ self tapping wood screws
1 1/4″ nails for a brad nailer
Headboard
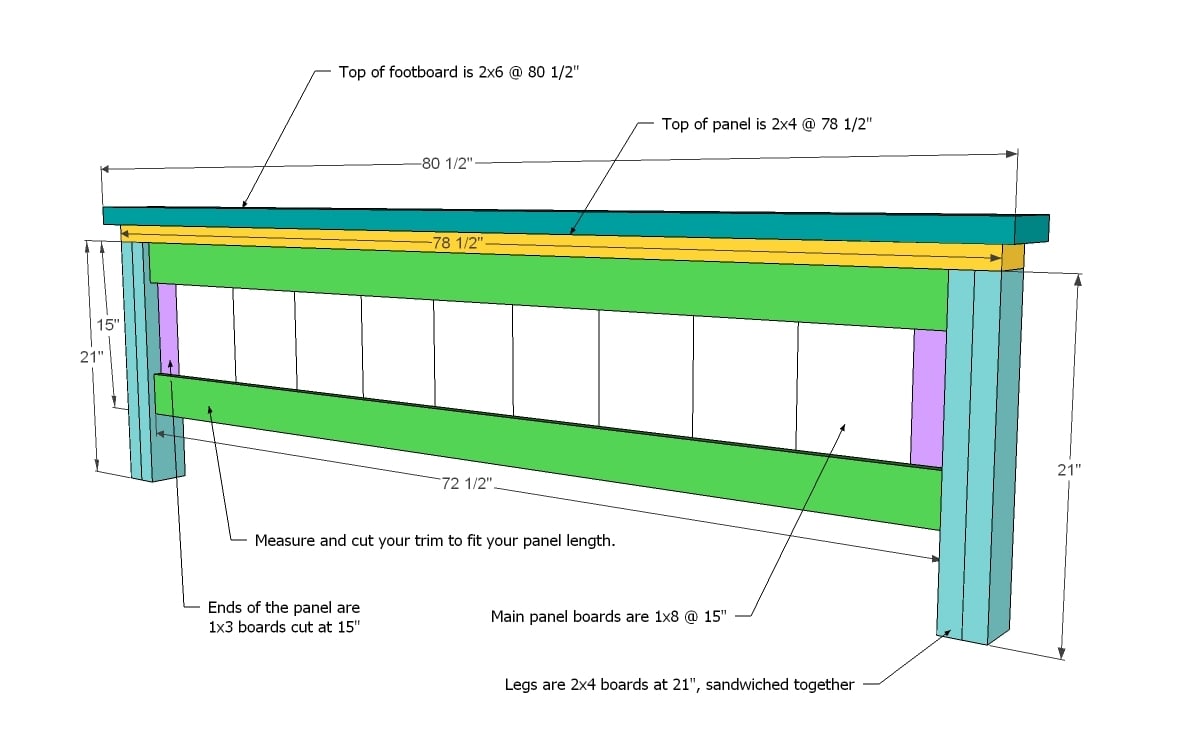
- 4 – 1×4 @ 72 1/2″ (Panel Trim)
- 2 – 1×3 @ 30″ (Ends of the Panel)
- 9 – 1×8 @ 30″ (Main boards in the Panel)
- 2 – 2×4 @ 34 1/2″ (Inner Leg for Headboard)
- 2 – 2×4 @ 54″ (Outer Leg for Headboard)
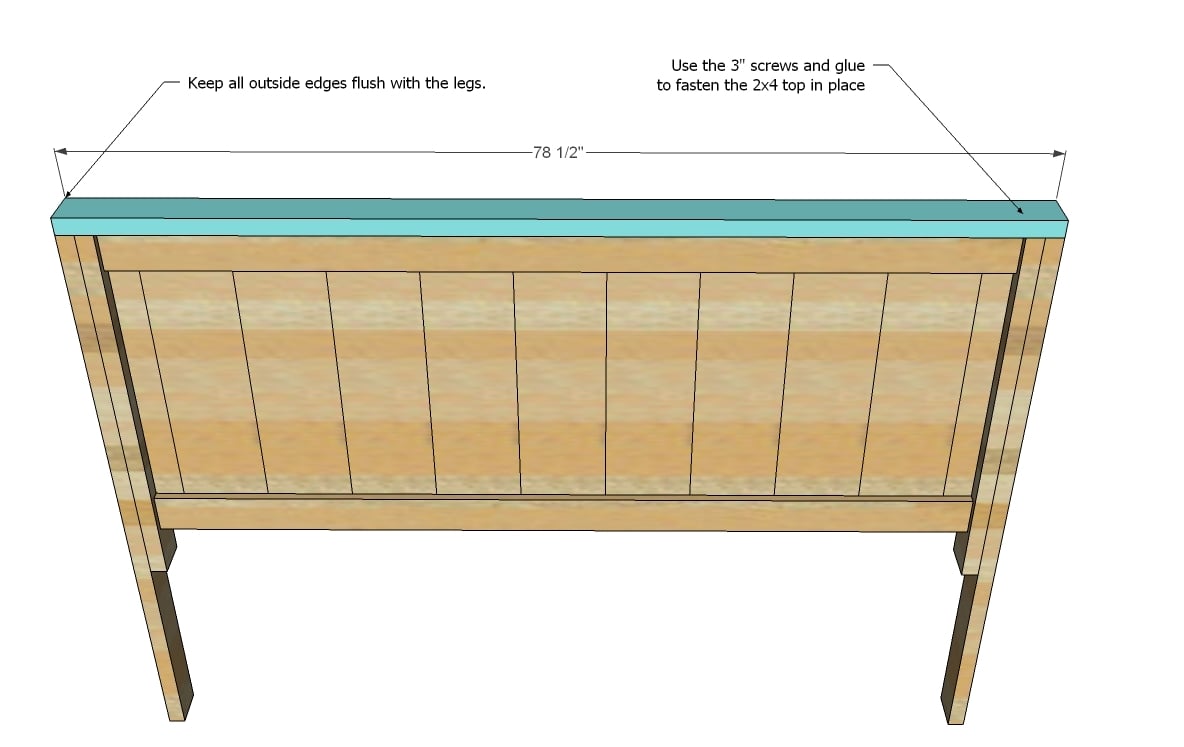
- 1 – 2×4 @ 78 1/2″ (Top of Legs and Panel for Headboard)
- 1 – 2×6 @ 80 1/2″ (Top of Headboard)
- 2 – 2×4 @ 10″ (Bottom Leg Piece for Headboard)
Footboard
- 4 – 1×4 @ 72 1/2″ (Panel Trim)
- 2 – 1×3 @ 15″ (Ends of Panel)
- 9 – 1×8 @ 15″ (Main Boards in the Panel)
- 4 – 2×4 @ 21″ (Legs)
- 1 – 2×4 @ 78 1/2″ (Top of Legs and Panel for Headboard)
- 1 – 1×6 @ 80 1/2″ (Top of Headboard)
Siderails and Frame
- 2 – 2×10 @ 87 1/2″ (Siderails)
- 2 – 2×4 @ 88 1/2″ (Side Cleats)
- 8 – 2×4 @ 69 1/2″ (Joists, you can use less if you have a box spring, may need more if your mattress is flimsy or you choose not to add plywood to top)
- Optional plywood on top of joists


Instructions
Step 1
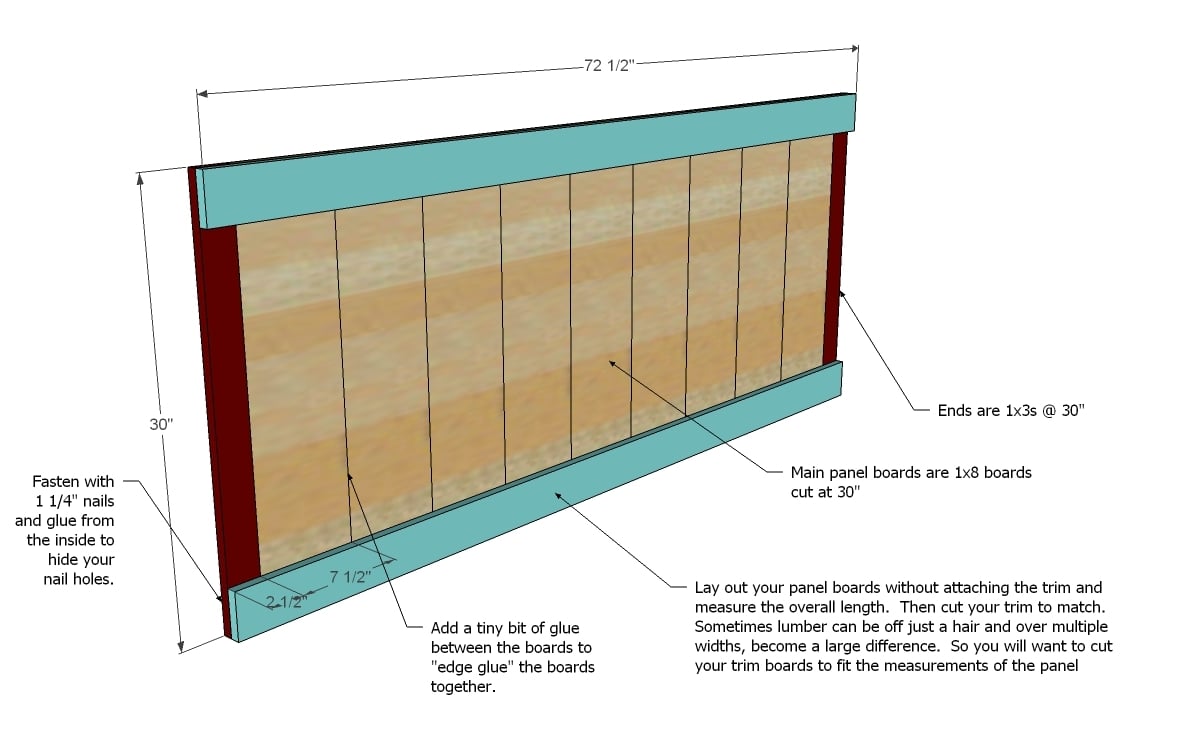
Front of Headboard Panel. Lay out the panel pieces on a clean level surface. Take a measurement of the total length and cut your trim boards to this measurement (approximately 78 1/2″). Then fasten the trim pieces to the panel as shown above. Use the 1 1/4″ nails and glue. Attach from the back to hide your nail holes.
Step 2
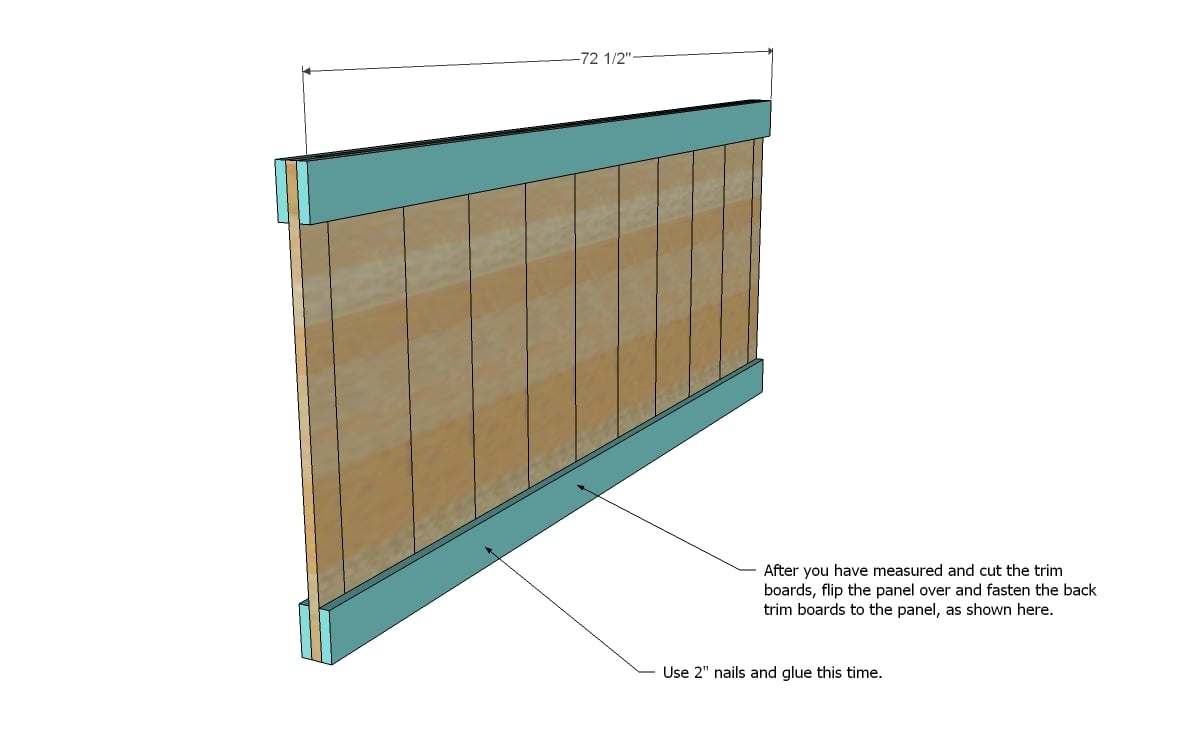
Back of Headboard Panel. In the same manner as step 1, fasten the back trim pieces to the headboard. This is shown above. Use glue and 2″ nails. This will be the back of the headboard, as your nail holes are showing.
Step 3

Inner Leg. Predrill and countersink your screws, attaching the inner leg to the headboard panel as shown above. Use glue and the 3″ screws.
Step 4
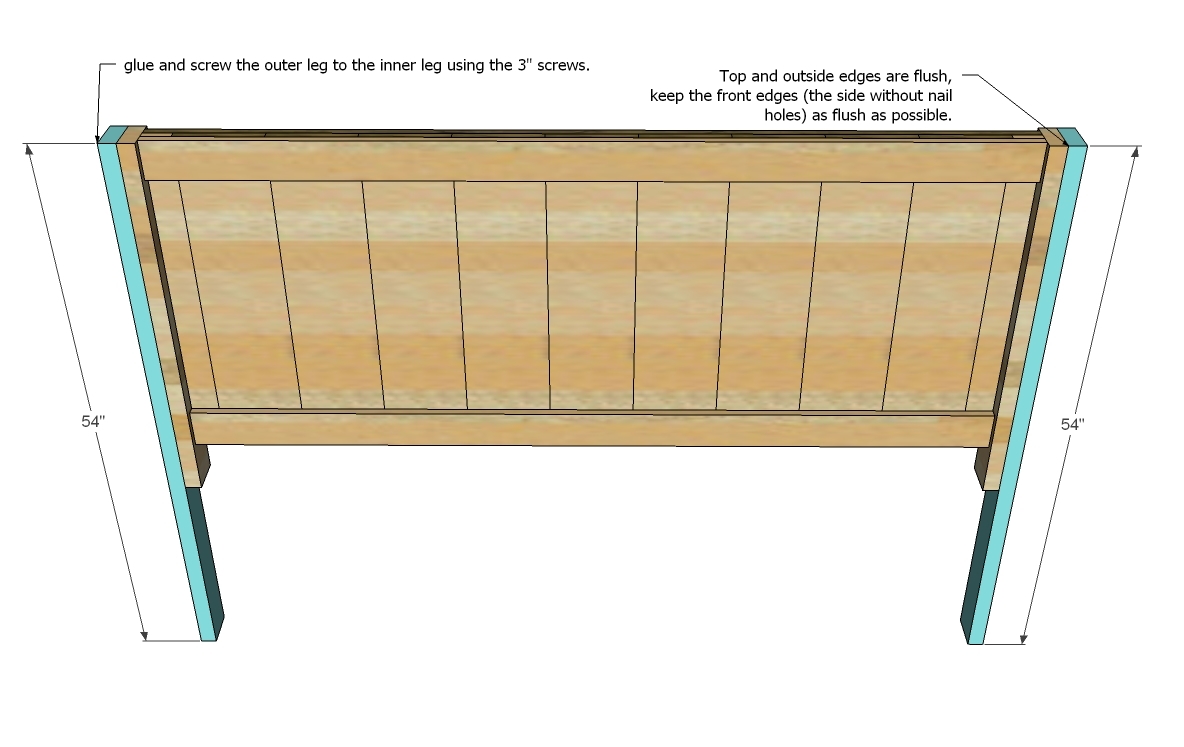
Outer Leg. Fasten the outer leg to the inner leg, using the 3″ screws and glue. Again, use the countersink bit. Keep top and outside edges flush.
Step 5
Step 6
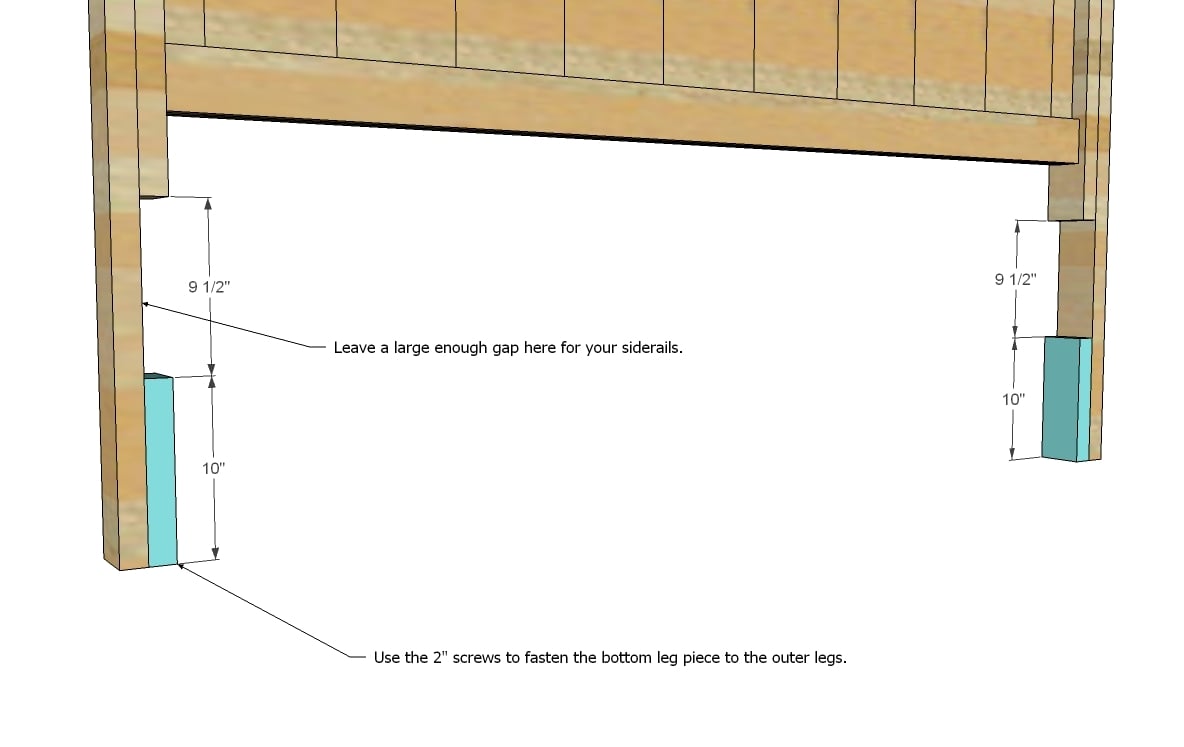
Bottom Leg Piece for Headboard. Use the 2″ screws and glue to attach the bottom leg piece. Countersink your screws. You may need to shorten or lengthen the bottom leg piece, depending on the thickness of your side rails. Take a measurement of your side rails before cutting this piece.
Step 7
Footboard. Except for the changes in the legs as shown above, the footboard will be assembled just like the headboard. The footboard leg pieces are identical in size and there is not bottom leg piece.
Step 8

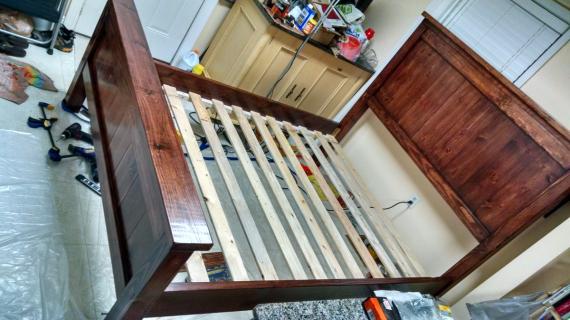
Siderails and Frame. Begin by building the frame using 3″ screws and glue. The above joists are shown spaced every 12″. You may need to add more if you are not using a box spring (standard maximum slat spacings is 6″), and you could possibly get away with less if you have a good box spring. Remember, king beds often have 2 box springs.
After you have built the frame, attach the side rails to the frame. Keep the front edges flush. The bottom edge of the frame will overhang the siderails by 5/8″. Please note that you can adjust the height of the frame to suit your needs, higher for no boxspring, lower to accomodate a box spring.
Step 9

Attaching the siderails to the Headboard. You will only need a few screws on each side rail to attach the siderails to the frame because the bottom leg piece holds the weight. Predrill and countersink your screws, using 2 1/2″ screws. Do not use glue here.
Step 10
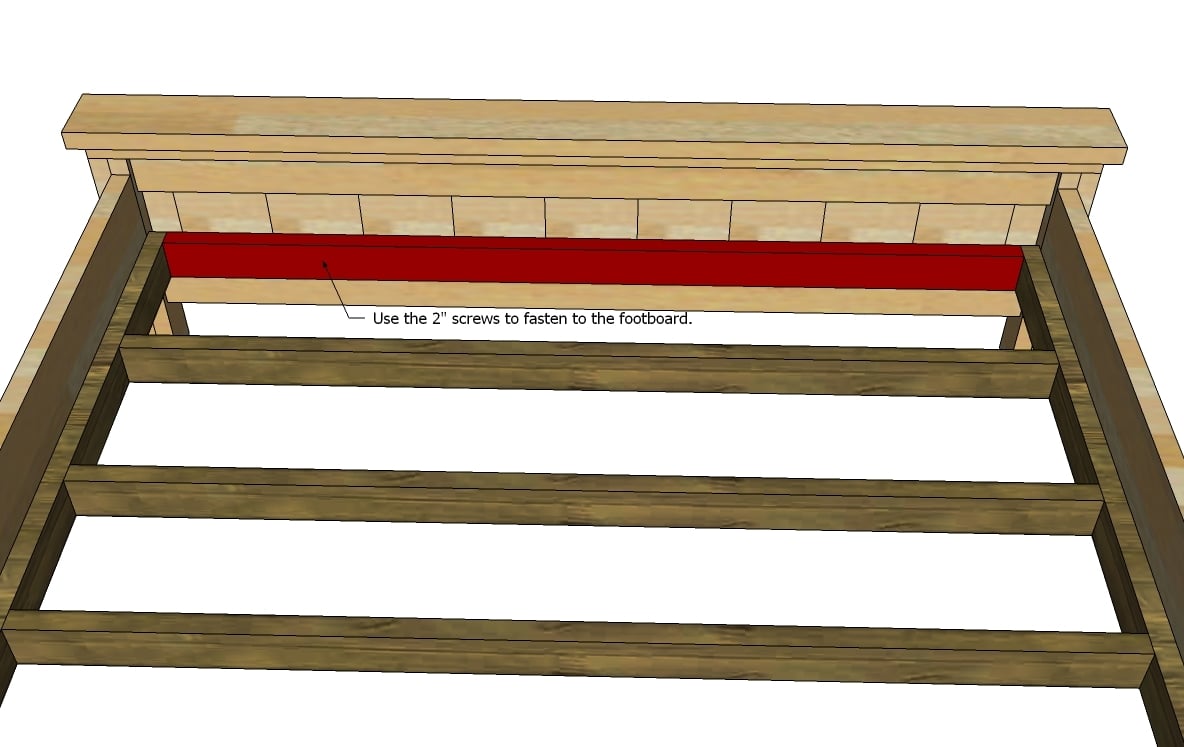
Attaching to the Footboard. Fasten the bottom frame joists directly to the footboard panel as shown here. Use the 2″ screws, but no glue.

Comments
rnmblazers
Sat, 02/07/2015 - 18:45
not the proper size
This is mentioned as a california king. however, i followed the plans for this bed to a T. and i am still having to modify the bed to fit a regular king size. my 2 twin box springs would not fit. it was plenty long enough but was about 6 inches 2 narrow.
tachpro92
Thu, 12/21/2017 - 12:26
Proper size for a 'California' King
I know this is an older comment and hopefully rnmblazers recognized the error afterwards, but I thought I would point out the error for anyone new reading this. If the plans were folowed "to a T" as mentioned then a California king size frame, 72 x 84, was constructed. The dimensions for a regular king are 76 x 80. So yes, the two twin mattresses definately would not fit if this plan was followed. Actually, two twins would be around 78 inches wide (each 39") so that would equal the 6" shortcoming noted in the above comment. Hope this helps someone.
tachpro92
Fri, 12/22/2017 - 06:47
Proper size for a 'California' King
Sorry for accidentally labeling my own original comment as spam haha. My original reply was regarding rnmblazers comment that this was not the proper size. I wanted to add the correction in case others may read it and get confused. As i said, I guess he did't realize that following this plan 'to a T' he built the 'California' king which measures 72" x 84". A regular king bed is 76" x 80". So yes, two twins, which would normally fit a 'regular' king would have definately been too wide. In fact two twins, each 39" wide, would be about 78". That would explain the 6" shortcoming experienced by rnmblazers. Hope this helps.
deworkman
Sun, 06/07/2015 - 11:34
what is the comlete shopping
what is the comlete shopping list and how would cut this down to a queen size bed? Thank you
In reply to what is the comlete shopping by deworkman
Ana White
Sun, 06/07/2015 - 20:00
Take a look at this posthttp:
Take a look at this post
http://ana-white.com/2009/10/farmhouse-bed-save-158100_7467.html
JoanneS
Sun, 06/07/2015 - 15:10
Farmhouse Queen Plan link
Hi deworkman, the complete queen plan is at this link:
http://ana-white.com/2009/10/farmhouse-bed-save-158100_7467.html
avlamb
Thu, 06/25/2015 - 15:28
Wood types
What type of wood do you recommend for the side rails and larger cuts? We can't get 2x6 or 2x10 pine anywhere around here in Northern California. It's also difficult to find any dry Doug Fir or Poplar without having to special order it, and I definitely don't want to go with the stuff at Home Depot or Lowes and get sap on my bedroom floor or sheets.
Any suggestions?
jpurp
Thu, 11/26/2015 - 19:26
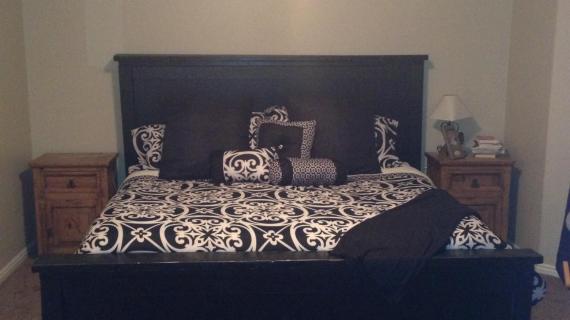
Paint Colour
Does anyone know what colour that is in the pic of the Farmhouse bed in the California King plans? I'm building it right now and would love to paint it the same colour.
Thanks
Fxjor
Sun, 05/01/2016 - 19:26
Bed
Project
Delainelw
Thu, 07/28/2016 - 08:13
Missing shopping list items. Please help!
I purchased all the supplies from the shopping list today to build the cal King frame. Now I'm looking at the cut list and am noticing I'm missing more lumber. Can u please let me know what's missing from shopping list?
Thanks
delaine
Col
Sun, 07/31/2016 - 14:07
Stain/paint color
Hello, I was wondering if you recall what stain/paint color you used on this bed. I'm loving the color and pull love to utilize it on the bed we're making now! Thanks!
HelloSunshine
Tue, 02/07/2017 - 18:07
Paint
I have seen several people ask about paint color but no response. I would love to know the color also. Another thing, several questions about actual shopping list. I want to make sure I get the right amount of the right stuff. Thanks!
Spcschaffer
Tue, 06/19/2018 - 06:05
Carriage Bolts
When building this bed would carriage bolts through the post and into the side rails on the headboard be possible versus using screws thst can strip over time?
spectralcicada
Sat, 10/05/2019 - 14:30
MISSING MATERIALS!!!!! 😡
I am VERY crabby that several items from the materials list are missing. I got back from buying lumber and I am missing a bunch because you didn’t include them. PLEASE fix this!