

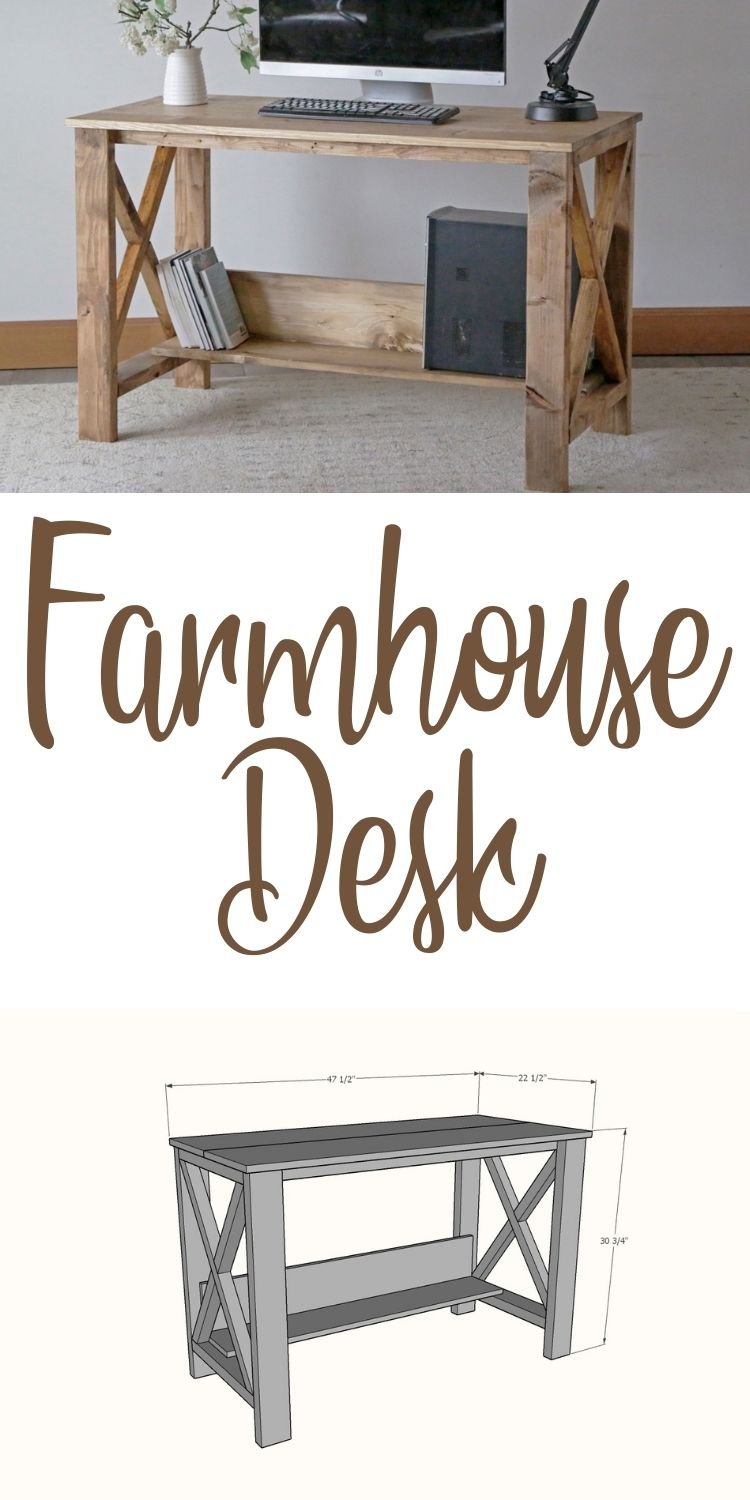
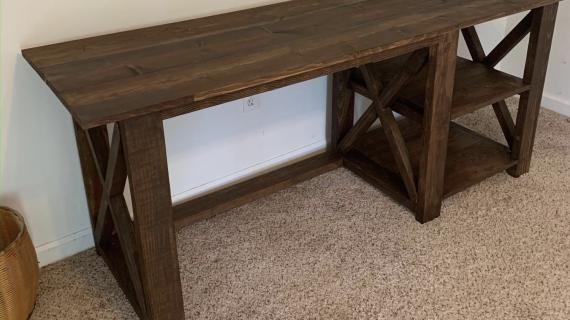
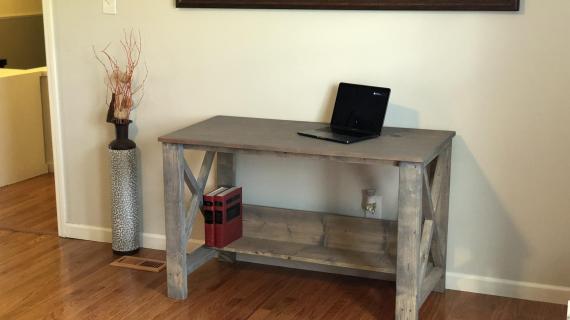
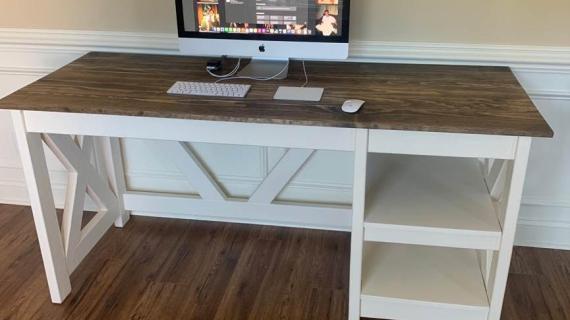
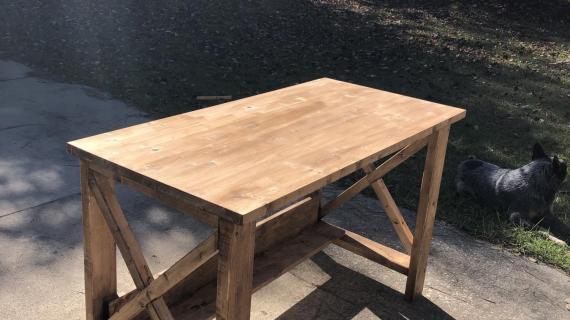
Build your own farmhouse desk for about $50! This free step by step woodworking plan is designed for beginners. Created by Ana-White.com
Do you need a desk?
Have you considered building your own?
For about $50 and with just a couple tools, you can build this desk!
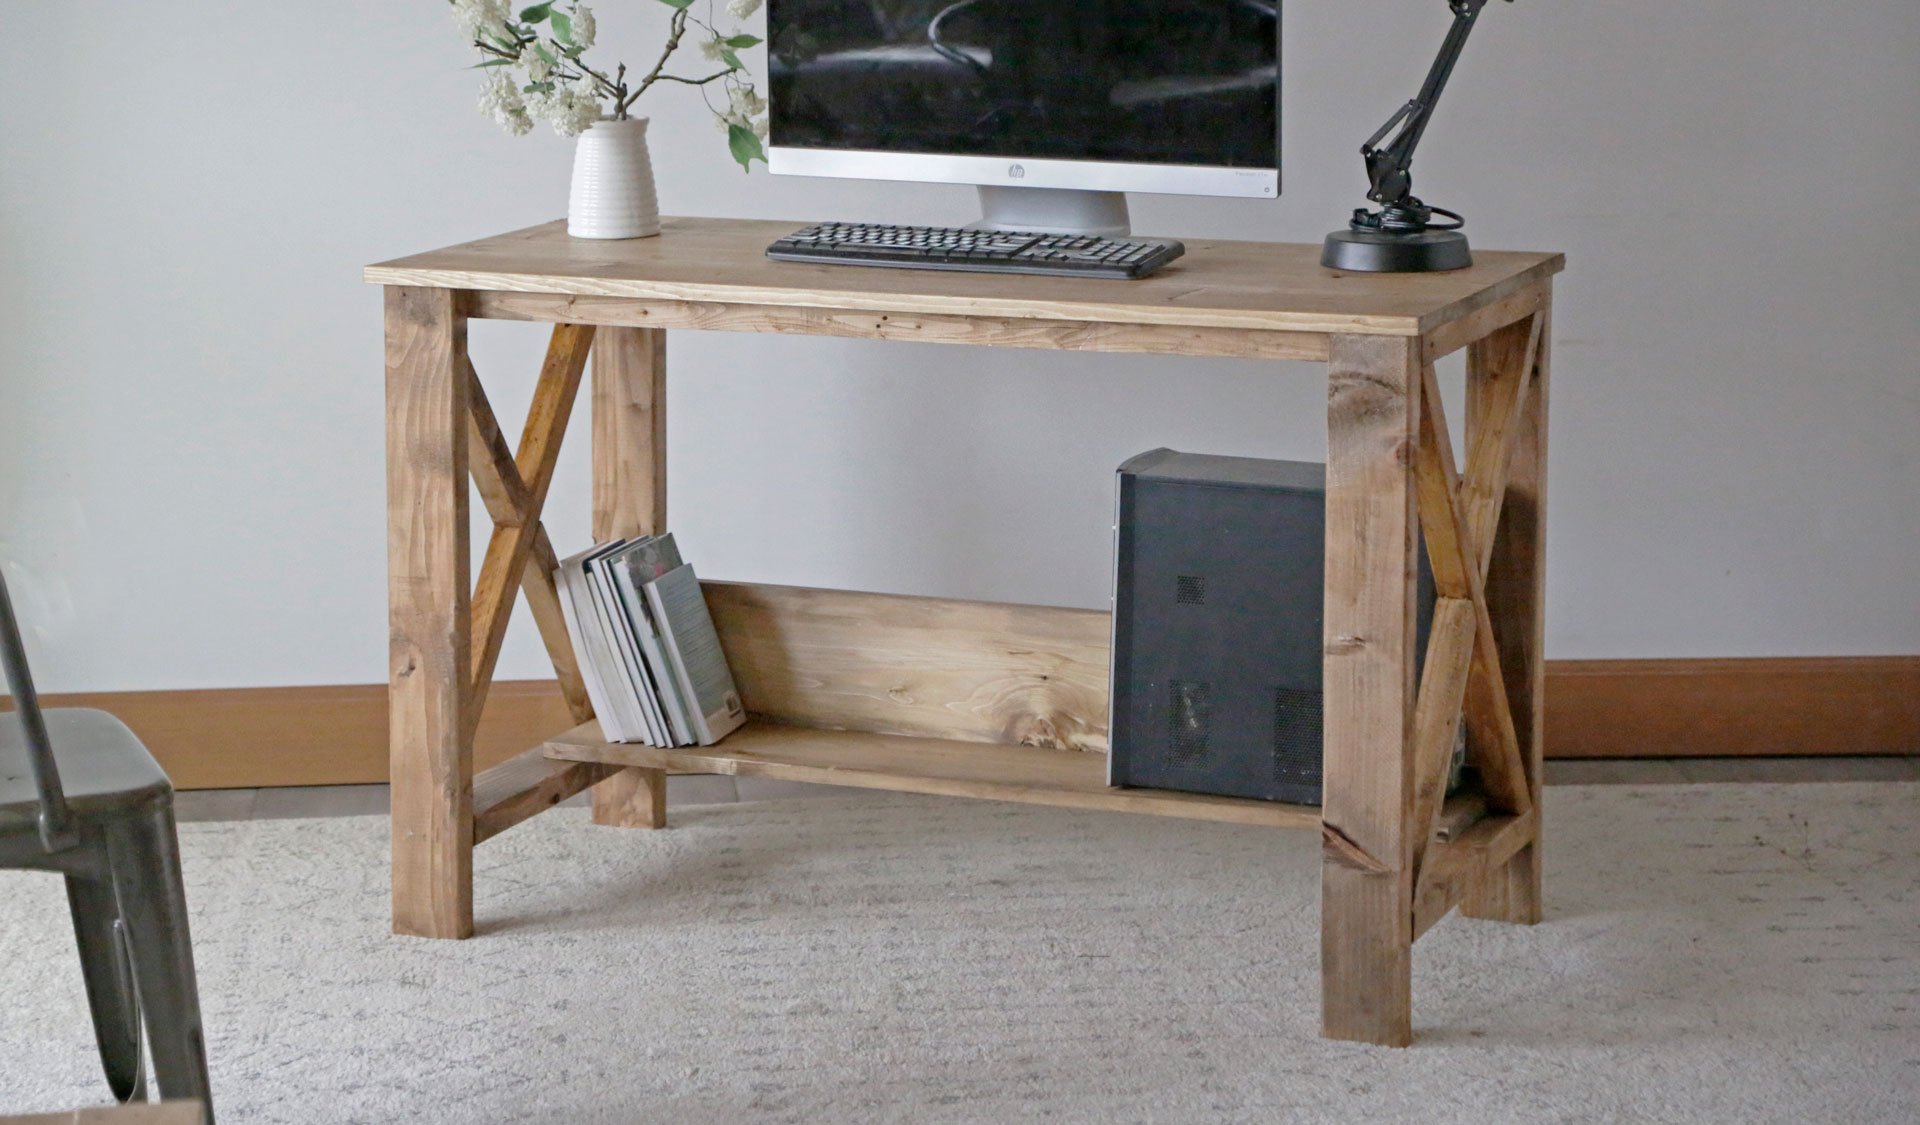
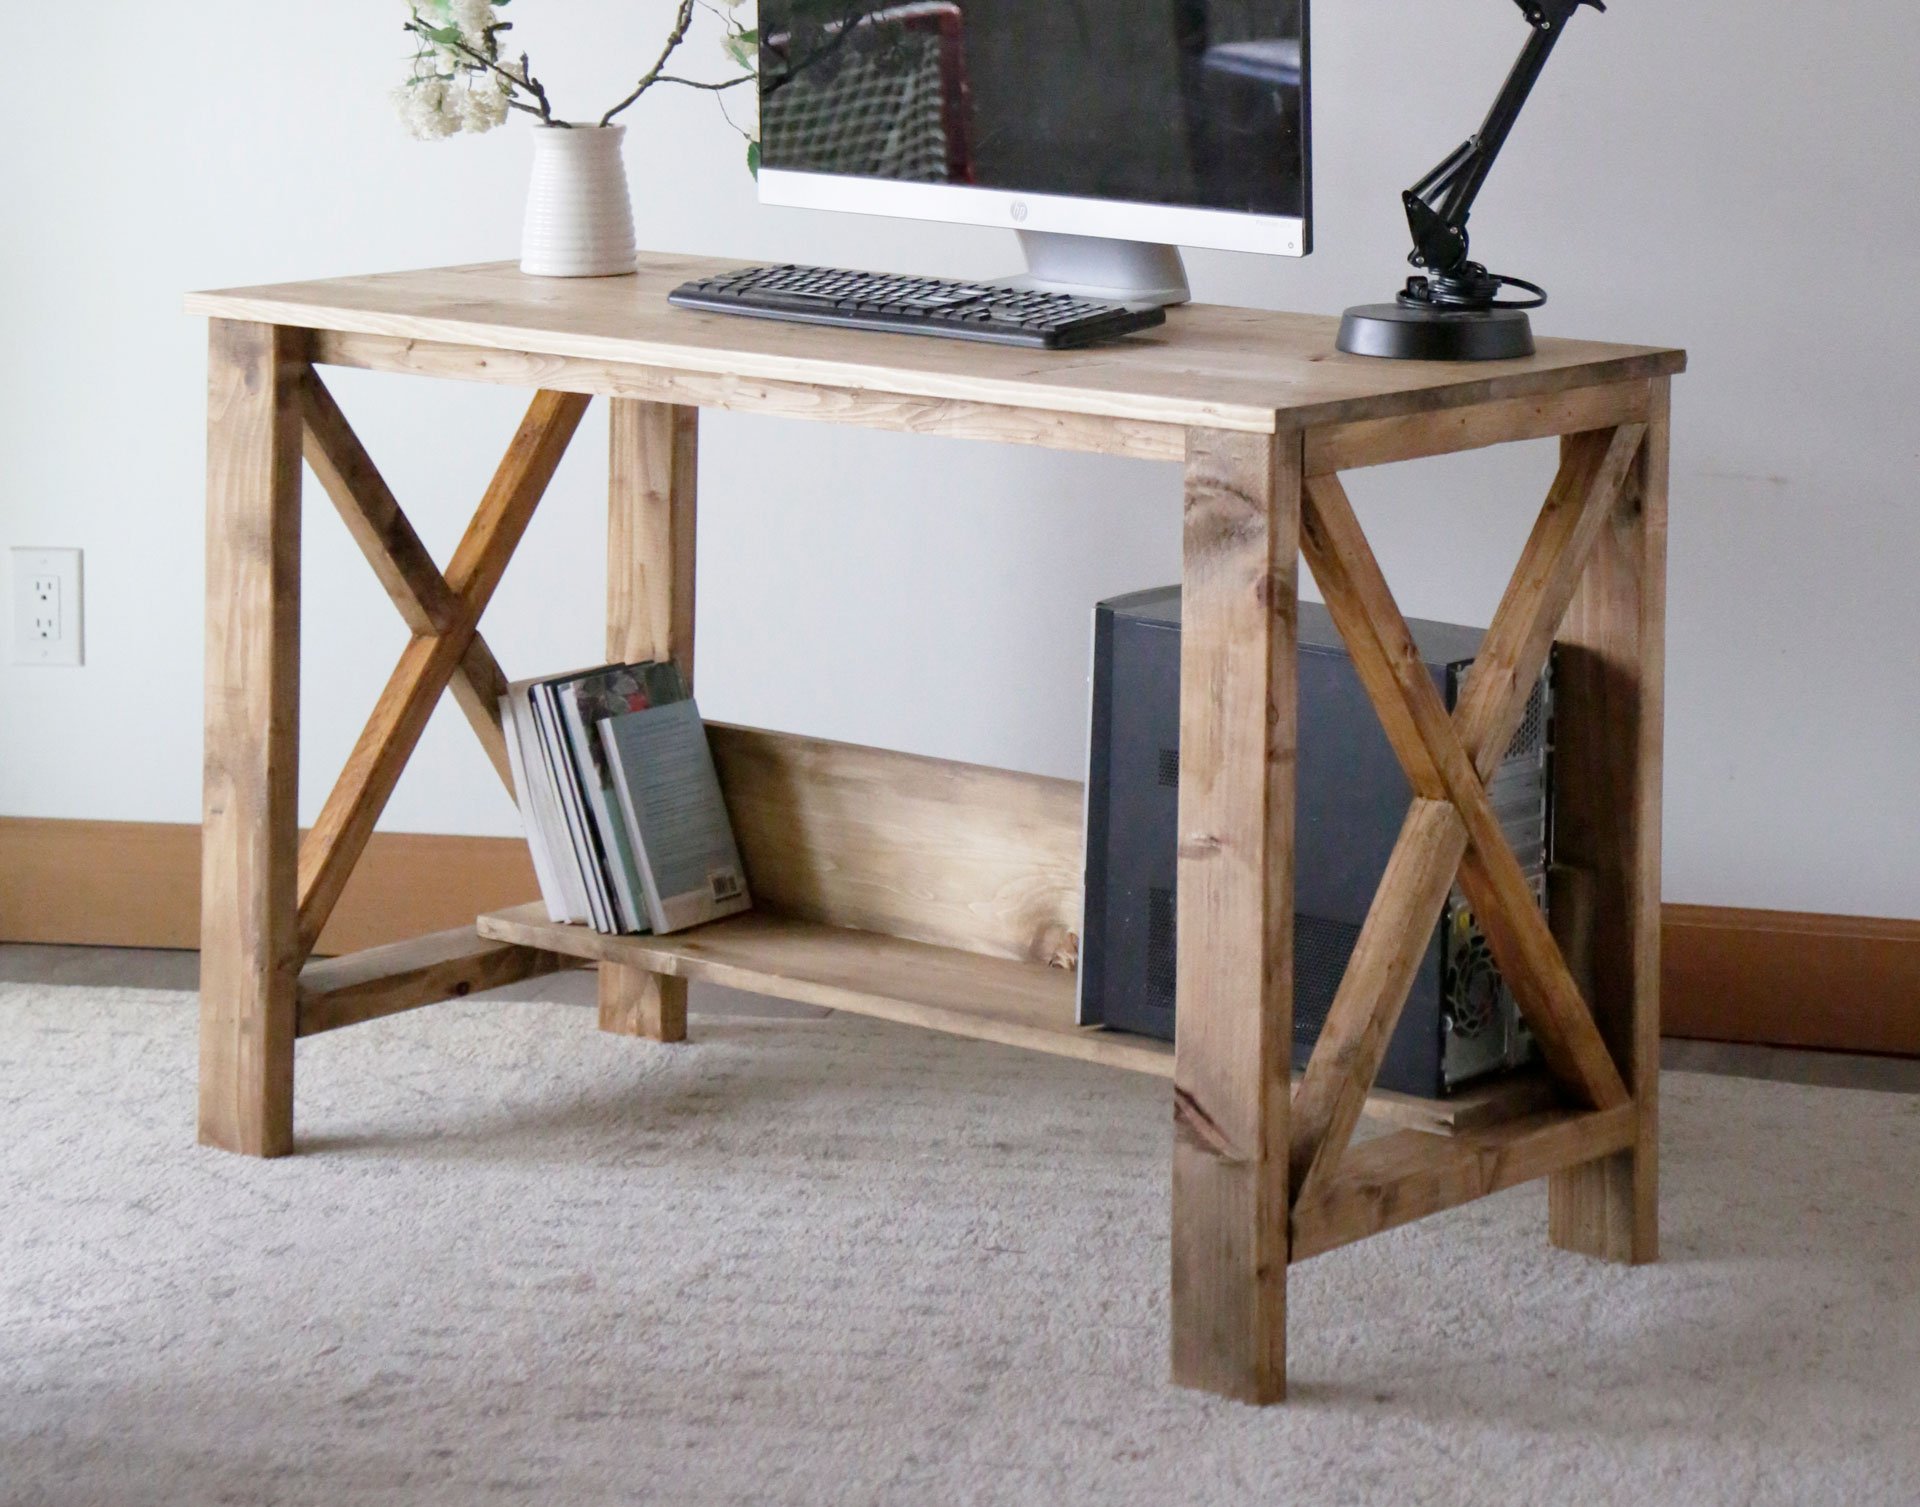
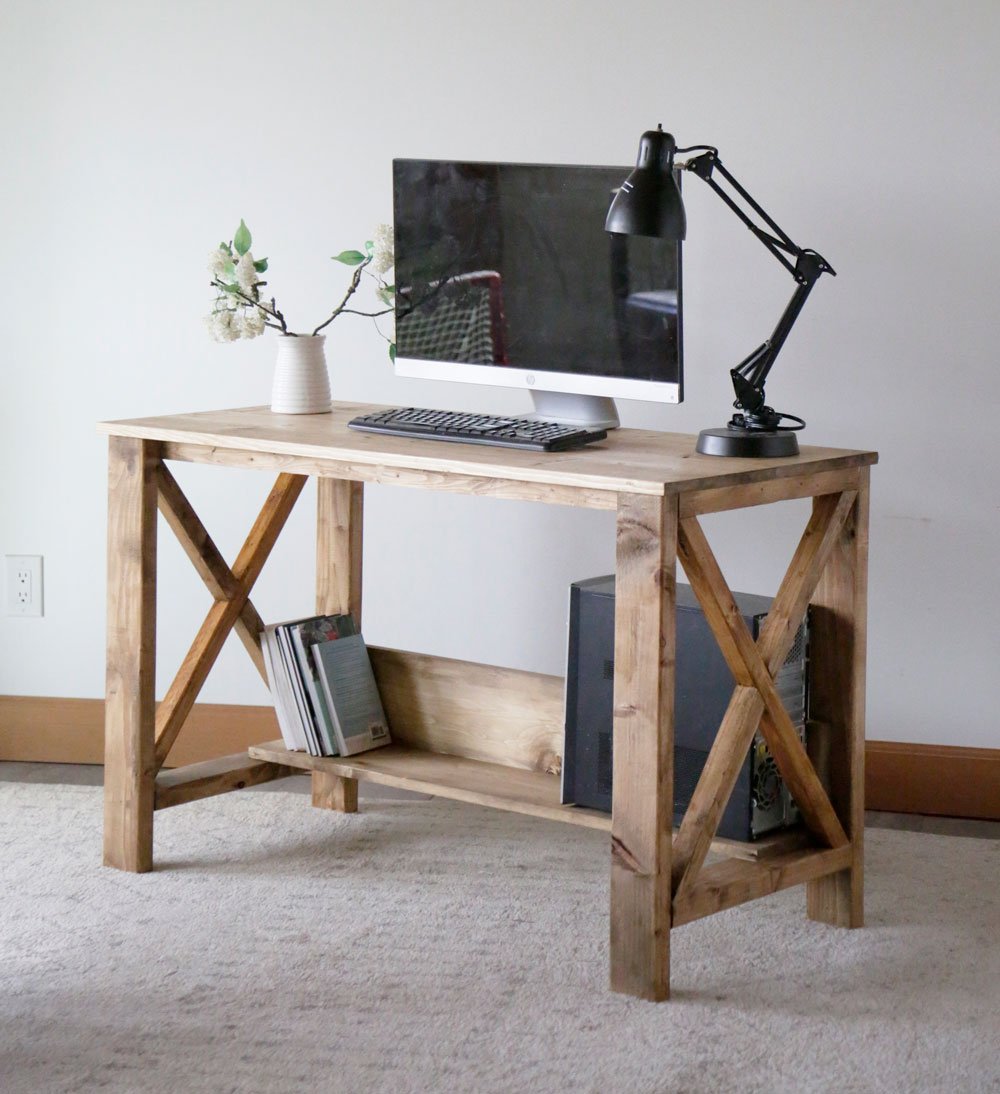
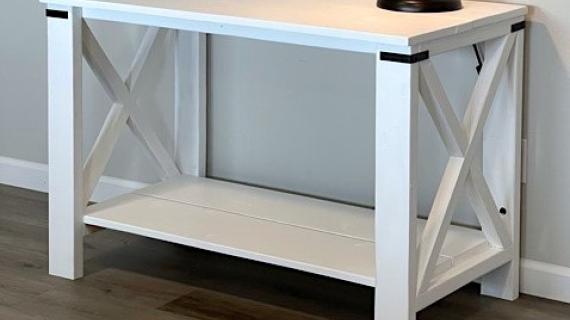
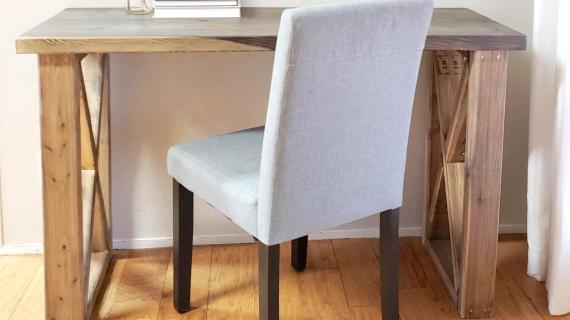
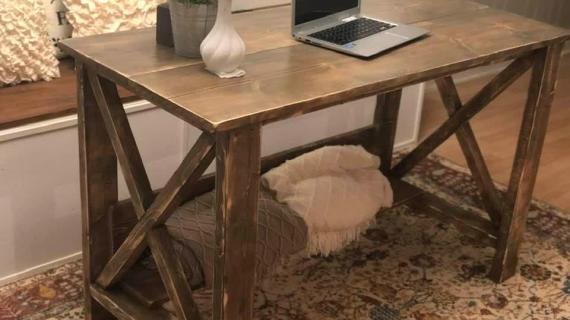
Farmhouse Desk Features
- Easy to build design uses off the shelf lumber and basic tools
- Solid wood so can be painted or stained any color and can be refinished
- Sturdy - won't fall apart on you!
- Good sized desktop with just one wood joint in center
- Bottom shelf sized for standard computer towers or books can also be used as a footrest
- The elevated bottom shelf helps hide cords
- X styling is on trend and goes with almost any style decor
Video Tutorial
It's easy to build this desk! To help you out, we also put together a video tutorial so you can visualize how the desk is put together.
Farmhouse Desk Plans
The plans for this desk follow. Thanks so much for using my plans!
Pin it!
Thank you for pinning this project - it helps us get the word out.

Preparation
- 3 - 2x2 @ 8 feet long
- 2 - 2x4 @ 8 feet long
- 1 - 1x8 @ 8 feet long
- 1 - 1x12 @ 8 feet long
- 40 - 2-1/2" long self tapping screws (recommend star bit #8 or #9)
- 1-1/4" long brad nails
- wood glue
NOTE: The wood I used for this project is "whitewood" boards available at most home improvement stores and construction 2x4s and 2x2 furring strips. The wood species are different, but everything stained up fine despite the differences.
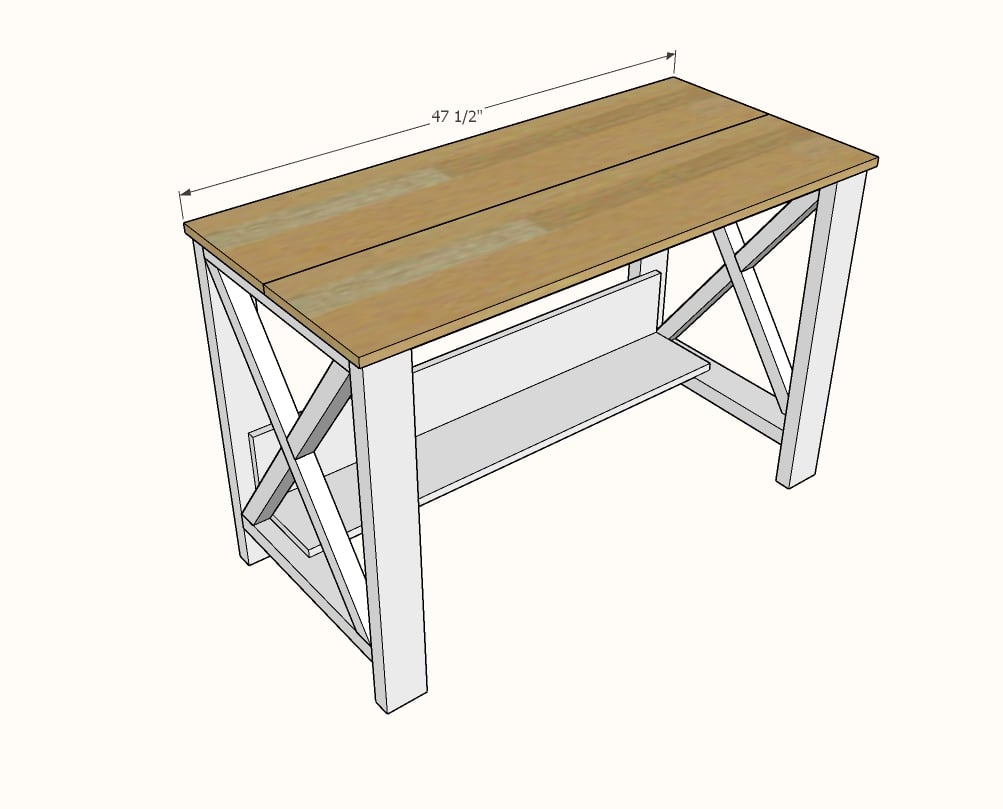
- 4 - 2x4 @ 29-1/4" - legs
- 2 - 2x4 @ 19" - leg bottom support
- 2 - 2x2 @ 19" - leg top support
- 2 - 2x2 @ 43-1/2" - front/back aprons
- 1- 2x2 @ 16" -center support
- 2 - 1x8 @ 43-1/2" - bottom shelf
- 2 - 1x12 @ 47-1/2"


Instructions
Step 1
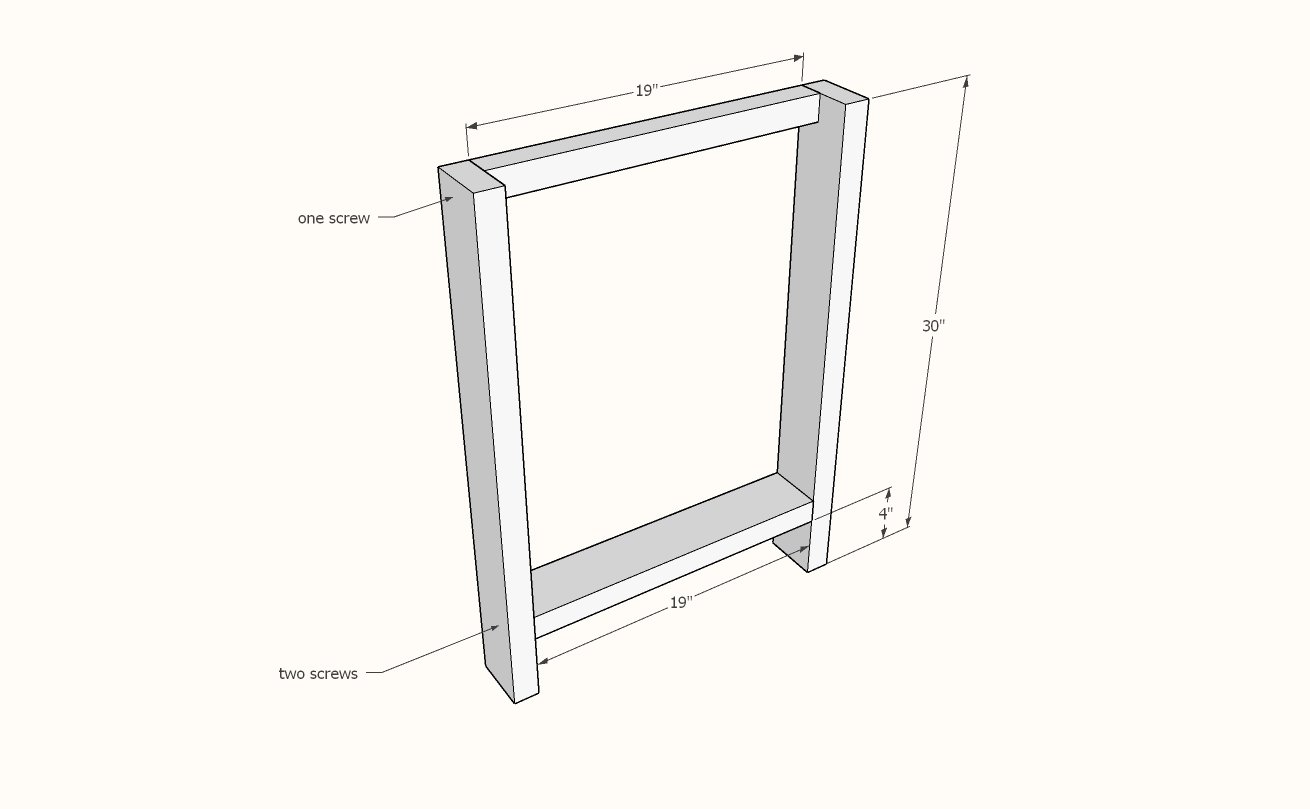
Build two leg sets with the 2-1/2" long screws.
Step 2
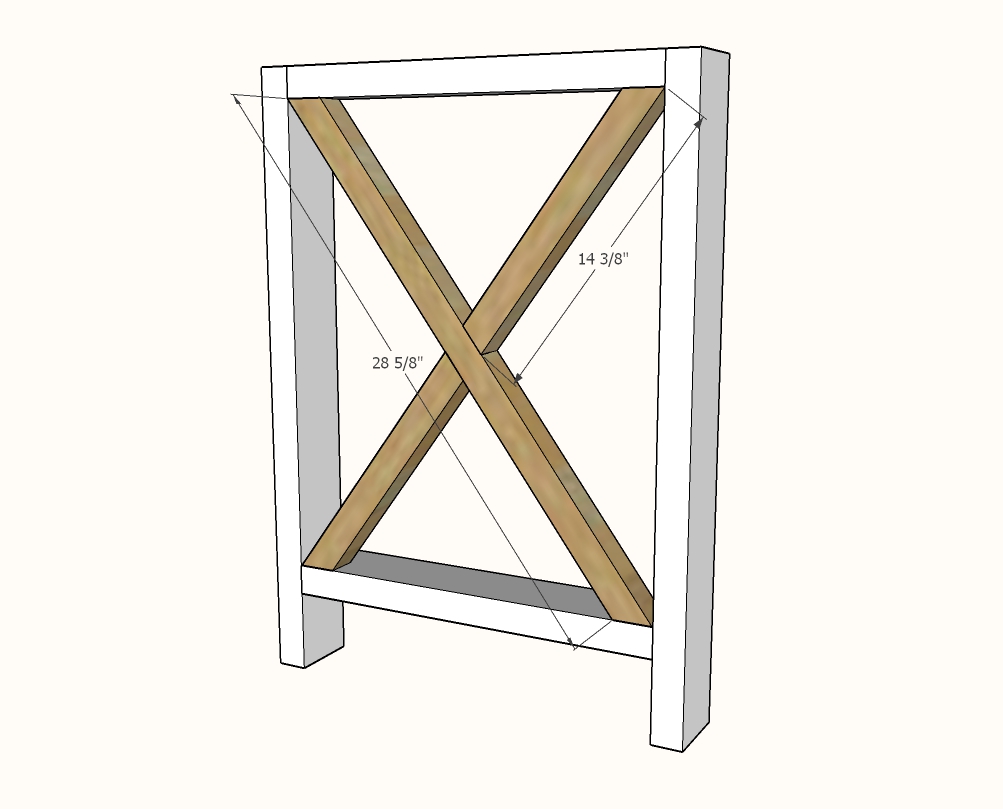
Scribe the X bracing detail on the ends and cut with a miter saw or circular saw. My angles were 36 degrees and 16 degrees, but this may vary depending on your wood thickness and building accuracy.
Attach with the 2-1/2" long screws.
Step 3
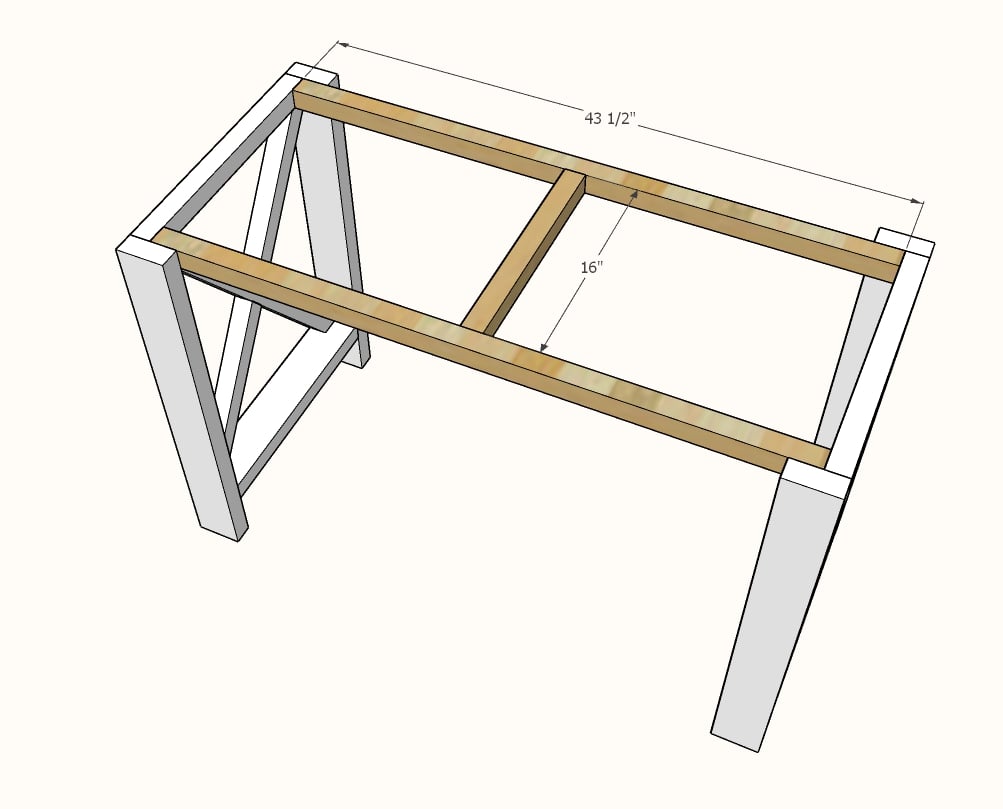
Attach the two leg sets together with the 2x2 aprons and the 2-1/2" long screws.
Step 4
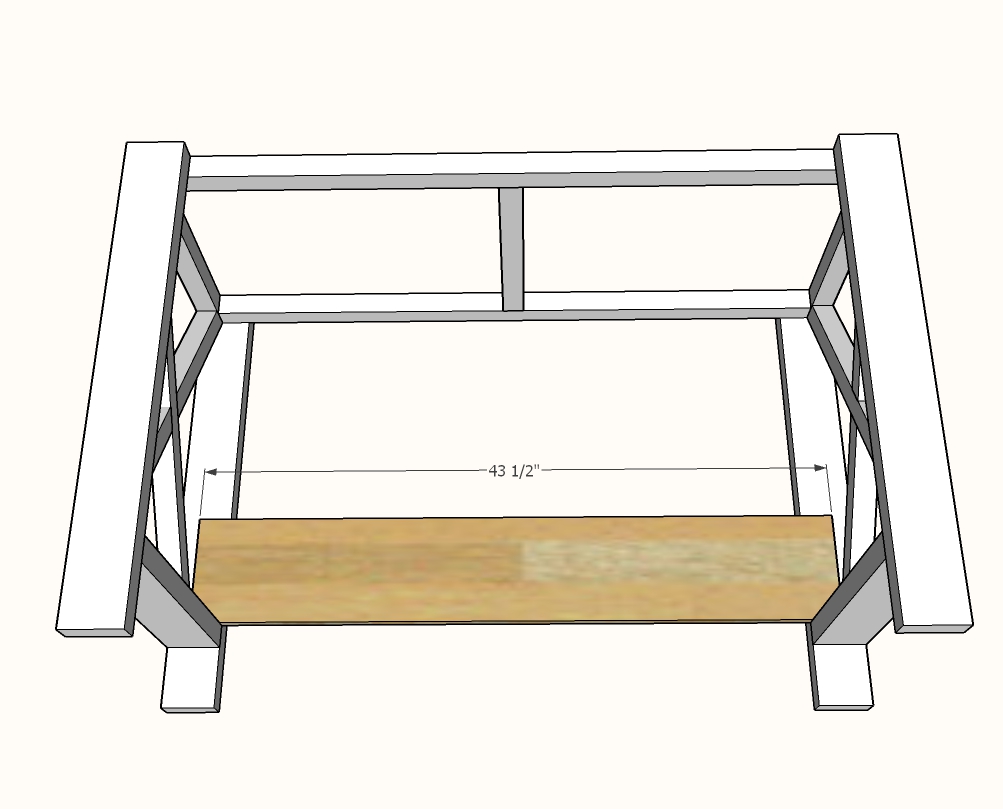
Attach bottom shelf back board to back legs with glue and brad nails.
Step 5

Attach bottom shelf board to the legs base and to the 1x8 back board with brad nails and wood glue.
Step 6
Attach 1x12s on top with even overhangs on ends, flush to the back, with the brad nails and glue.


Comments
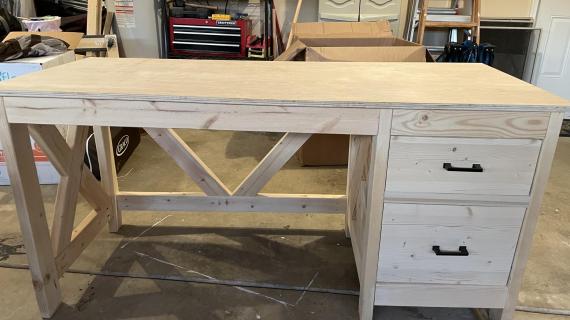
mccal006
Mon, 11/30/2020 - 07:12
Sturdy desk, instructions on X legs not clear
Hi Ana,
I love this desk. It took me about 3 hrs start to finish, but I probably could have cut an hour off that if there had been clearer instructions about how to scribe the cross braces. The pieces weren't on the cut list, and I made a total mess of trying to figure it out on my own.