Frameless Kitchen Cabinet Building Guide

DIY kitchen cabinets
Difficulty
Advanced
| Print this plan

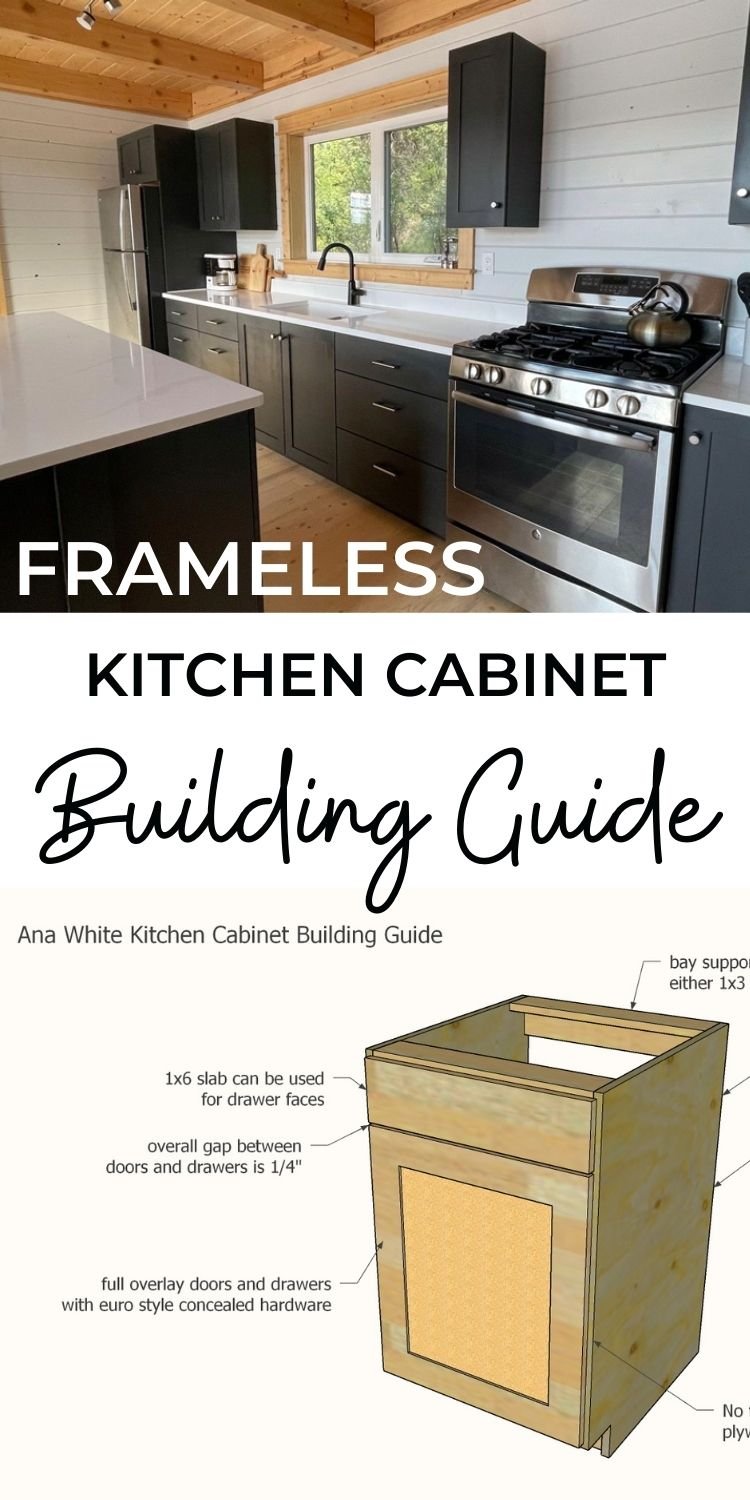
Want to build your own kitchen cabinets?  Here's our process from start to finish, and links to all the tutorials and templates we use.

Over the last decade of building kitchen cabinets, we've learned alot, everything from what materials to use to what techniques, and finally, are ready to share our process from start to finish with you. 

But first, let's discuss what exactly we are building - as there are many different ways to build kitchen cabinets, and many different types of materials to use.

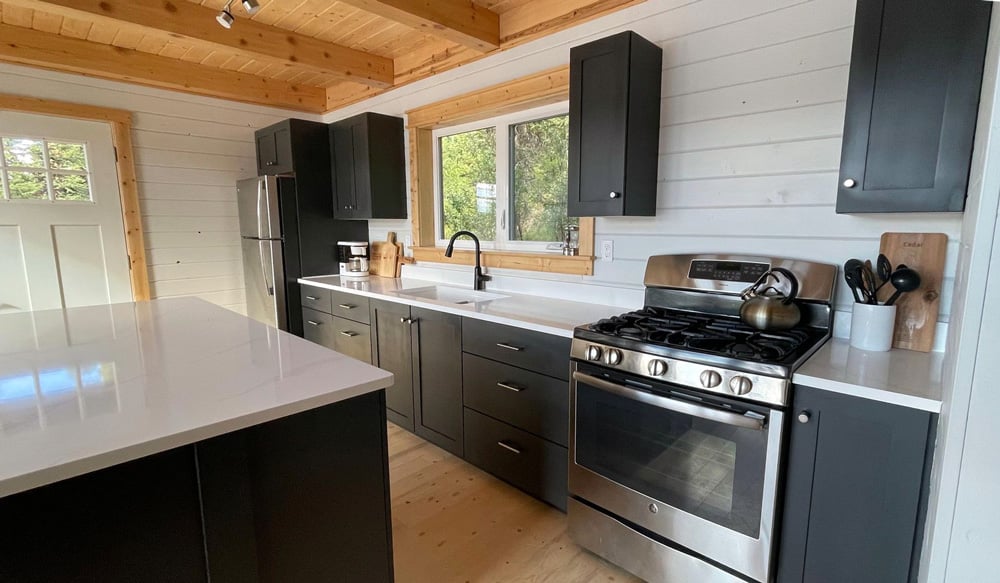
The Ana White Kitchen Cabinet

ana white kitchen cabinet building guide

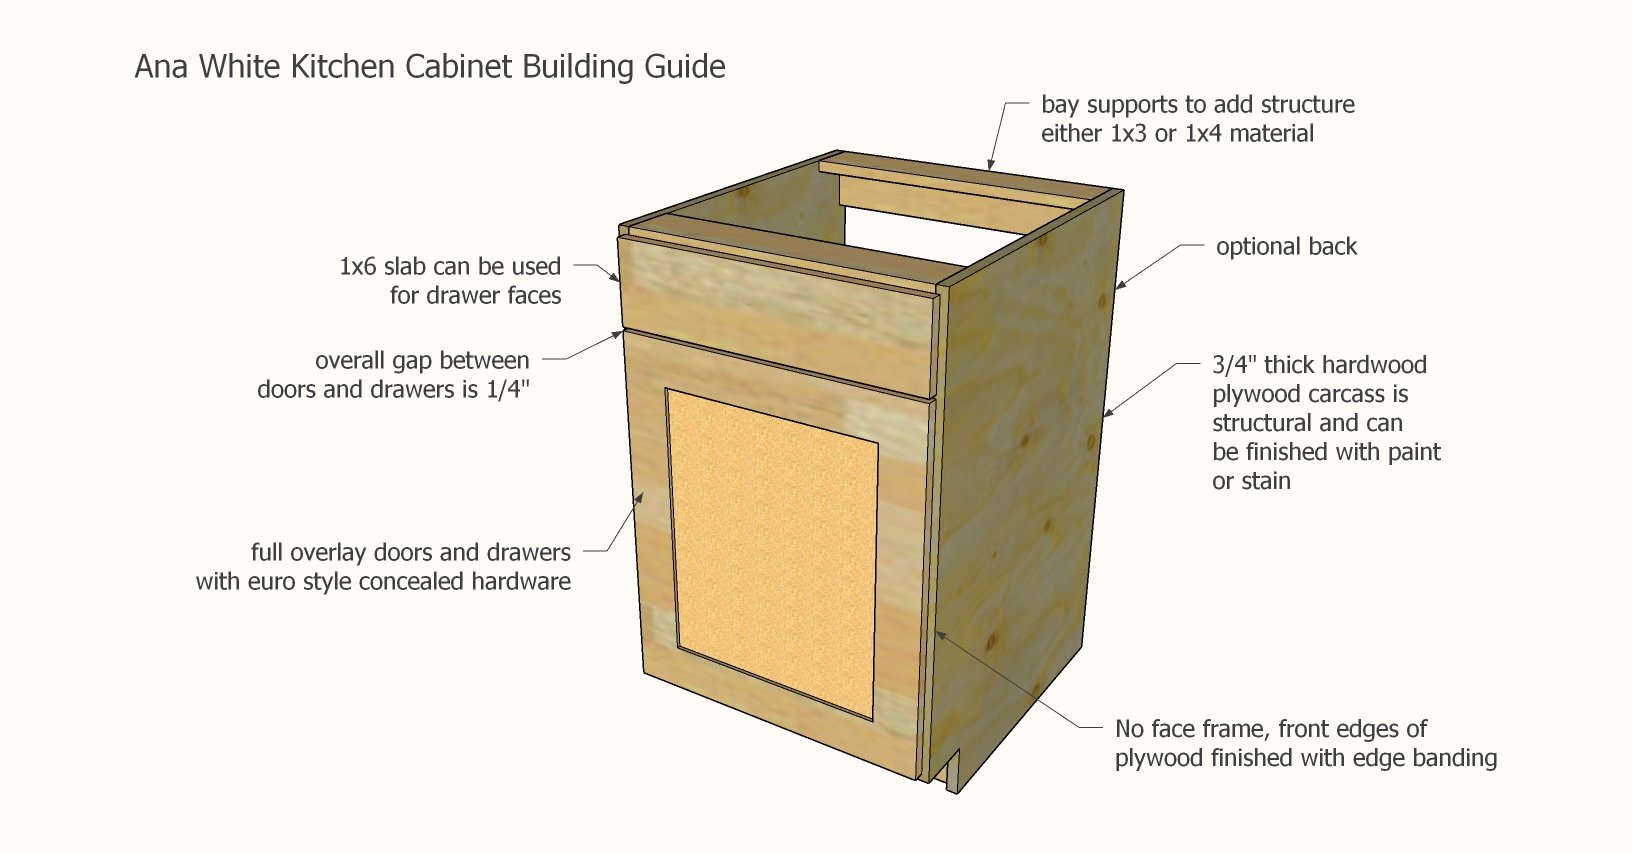
  • 3/4" plywood carcass with front edges edgebanded
  • Frameless - with the plywood carcass, no face frame is needed for structure
  • Pocket hole joinery
  • Full overlay doors and drawers with concealed hinges
  • 1/4" gap overall in between doors and drawers
  • For open shelving or cabinets with no doors/drawers, I like to add a face frame for a finished look
  • I like to use a 1x6 for the top drawer faces with a 1x4 or 1x3 drawer box.
  • I don't recommend 1x12s for larger drawer faces, as they always seem to warp or cup

How much Does it Cost to Build Your Own Kitchen?

This really depends on how much work you do yourself.  For this kitchen, I did a little math:

  • 1/2" plywood RTA cabinets that you assemble yourself and install and trim out yourself: $6000
  • DIY cabinets using Shelf Help and ordering hardwood doors, you build, install and paint or finish: $2500
  • Full DIY - cutting your own plywood, building your own doors, doing everything: $1200-$1800 (depending on wood prices)

If you are doing the hybrid DIY method, I find the doors are going to cost about the same amount as your carcass from Shelf Help.  The overall cost is generally about three times your carcass quote from Shelf Help.


What to Expect When You DIY a Kitchen

Building a kitchen is a big process, and there are many steps.  The good news is you can outsource the hard parts (cutting carcasses and building doors), and tackle the easier parts - assembling, painting, and trimming - and still get a custom kitchen on a DIY budget.  

Here's a video of my entire process of building a kitchen:


Tutorial Links for Building Kitchen Cabinets

As promised in the video, here's links to the steps.

Thank you for using our tutorials, we hope this helps you in your builds, and love seeing your final projects.


Pin for Later!

Frameless Kitchen Cabinet Building Guide

Preparation

Tools
Speed Square
Pencil
Safety Glasses
Kreg Jig
Drill
Miter Saw
Table Saw
Brad Nailer
Power Sander
Drill Bit Set
Iron for Edge Banding
General Instructions


For long term durability and more professional results, I recommend using a pocket hole joinery system for wood joints.  Here is a video with tips for using a pocket hole jig:

Comments

bikerchick1963

Thu, 07/08/2021 - 14:35

You mention that it's possible to have the doors made. Do you recommend a specific place to have them made or have any suggestions about it? I'm seriously considering doing this after getting a rough price for RTA cabinets online as a starting point.

Thanks!

Frequently Asked Questions

Wood Questions

What kind of wood should I use?
Most of our plans use standard construction lumber like pine or fir. It's affordable, easy to work with, and easy to find. It's also rapidly renewing and biodegradable, so a great eco friendly choice!

Can I use hardwoods instead?
Yes—just keep in mind they're heavier, cost more, and can be tougher on tools and harder to join together and finish. I recommend not tackling a hardwood project until after you have built several softwood projects.

What if my boards are warped?
Choose the straightest boards at the store. You can often work around slight warps by cutting them into shorter pieces.

What wood should I use for outdoor furniture?
Use red-toned or pressure-treated 2x lumber for framing, and cedar or cedar fence pickets for the decking. Outdoor furniture should be built like a deck—your local home center can help recommend the right wood for your climate.

Will my wood move or warp after I build?
Potentially, especially in humid climates. Let your wood acclimate indoors before building. Once acclimated and kept in a stable environment, movement should be minimal. Remember, most houses are built using framing lumber - it's all about keeping moisture down indoors.

Cutting Questions

Do I need a miter saw?
A miter saw is great, creating fast, safe, and precise cuts, even for beginners. But most plans can be built with a circular saw and a straight edge. If using a circular saw to cut, take time to practice, and get good at making cuts, before cutting your project boards.

How do I get clean cuts with a circular saw?
Clamp your board, measure twice, cut slow, and use a sharp blade. This takes practice, so spend some time making cuts. I go through becoming proficient at freehand cutting in my course, it is worth taking if you want to master this skill.

Will the store cut my wood?
Yes—most stores will do rough cuts to help you transport your materials home. But from store to store, the quality of cuts could greatly vary.

Joinery Questions

What screws should I use?
We recommend star-head self tapping screws for framing, most common sizes are 2-1/2", 1-3/4". Pre-drill if close to the edge or you find your wood is splitting.

Do I have to use pocket holes?
Pocket holes are the cheapest, easiest and fastest way to do some joints - like edge to edge or a hidden fastener joint. There are other methods, but these can be time consuming and expensive. We recommend using pocket holes as indicated in plans for best results.

How do I keep things square?
Use a speed square and measure diagonals after each step. Always clamp joints before screwing to keep them tight and flush.

Finishing Questions

Stain or paint before or after building?
A quick sand before and a full finish after gives the best results. Pre-finish if you're doing two-tone or detailed finishes.

What type of finish?
Use oil-based or water-based stain. For paint, cabinet-grade latex or enamel works great. High use surfaces on indoor projects should get a coat of polyurethane, I recommend a Helsman or Spar or other flexible poly that won't crack or peel with wood movement. For exterior projects, use a finish suitable for exterior fences.

How to get a smooth finish?
Start with a well sanded project. Sand between coats (220 grit), wipe clean, and apply light coats with a foam brush or roller.

Plan Questions

Can I change the size?
Many people do, and that's the great thing about building your own furniture! But do keep in mind going bigger might mean more supports are required, and often plans are optimized for minimal material waste.

Are these beginner-friendly?
Yes—plans are written with simple tools and clear steps in mind, with every effort to make plans as simple as possible.

Can I sell what I build?
Absolutely! Just don’t resell or repost the plans themselves.

General Questions

What tools do I really need?
A drill, circular saw, tape measure, square, and a few clamps will get you through most projects.

Do I need a workshop?
Nope! A driveway or small patio is plenty to get started, just make sure you have a level place to work. If you find you are building several projects a year, creating a small workbench is a great way to store tools and have a dedicated workspace.

What if I mess up?
Wood filler, sanding, or flipping boards goes a long way. Mistakes are part of the process!

What can I do to make my projects look more professional?
Start with straight boards, make accurate cuts, clamp all joints, and line up everything neatly. Sand thoroughly, use a neutral finish, and apply it in light coats for a clean look.

I've never built anything before. Where should I start?
Start with a few smaller softwood projects to get hands-on experience. Or if you're tackling a big project, buy a little extra lumber and practice your cuts and joints first. If possible, work with someone who has a bit of experience.

Care & Maintenance

How long will my furniture last?
With good joinery and regular care, your DIY furniture can last for decades. I have pieces in my own home that are over 20 years old and still going strong! One of the best parts about DIY furniture is that it’s easy to repaint, refinish, or repair—so your projects can grow and adapt with you.

How should I care for outdoor furniture?
Lightly pressure wash or hose it down once or twice a year. Tighten screws and reapply finish as needed to protect it—just like a deck or fence. A little upkeep goes a long way in extending the life of your furniture.

How about indoor furniture?
Regularly dust or wipe with a damp cloth. If it starts to look worn, a light sanding and touch-up paint or stain can refresh it in no time. DIY pieces are meant to be durable and fixable—so don’t be afraid to give them some love now and then.

Want to Build with Confidence?

Check out my ebook: 12 Skills to Build Your Own Furniture
It walks you through the core skills every builder needs—measuring, cutting, joinery, and finishing—so you can build beautiful furniture that lasts.

Still Have Questions?

Email us anytime at [email protected] and we’ll be happy to help!