Difficulty
Starter Projects
| 
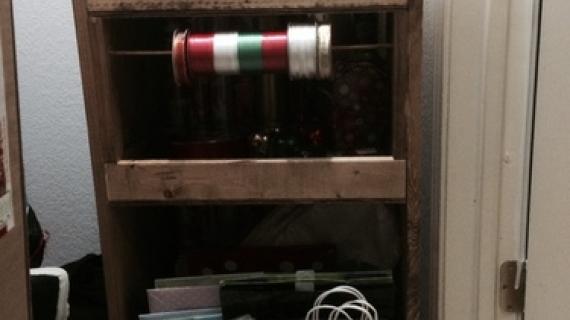
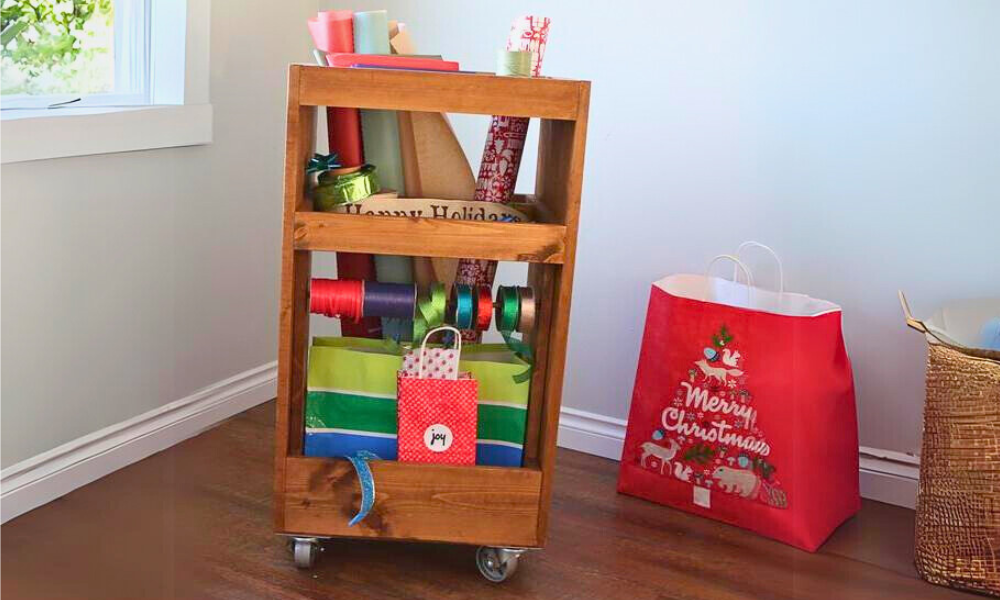
Organize your gift wrapping supplies in this beautiful cart! Featuring storage for rolls, and shelves for ribbons and bags, customize with dowels for more ribbon storage.
This is a free step by step project plan from Ana-White.com, including diagrams, shopping and cut list.
Pin For Later!
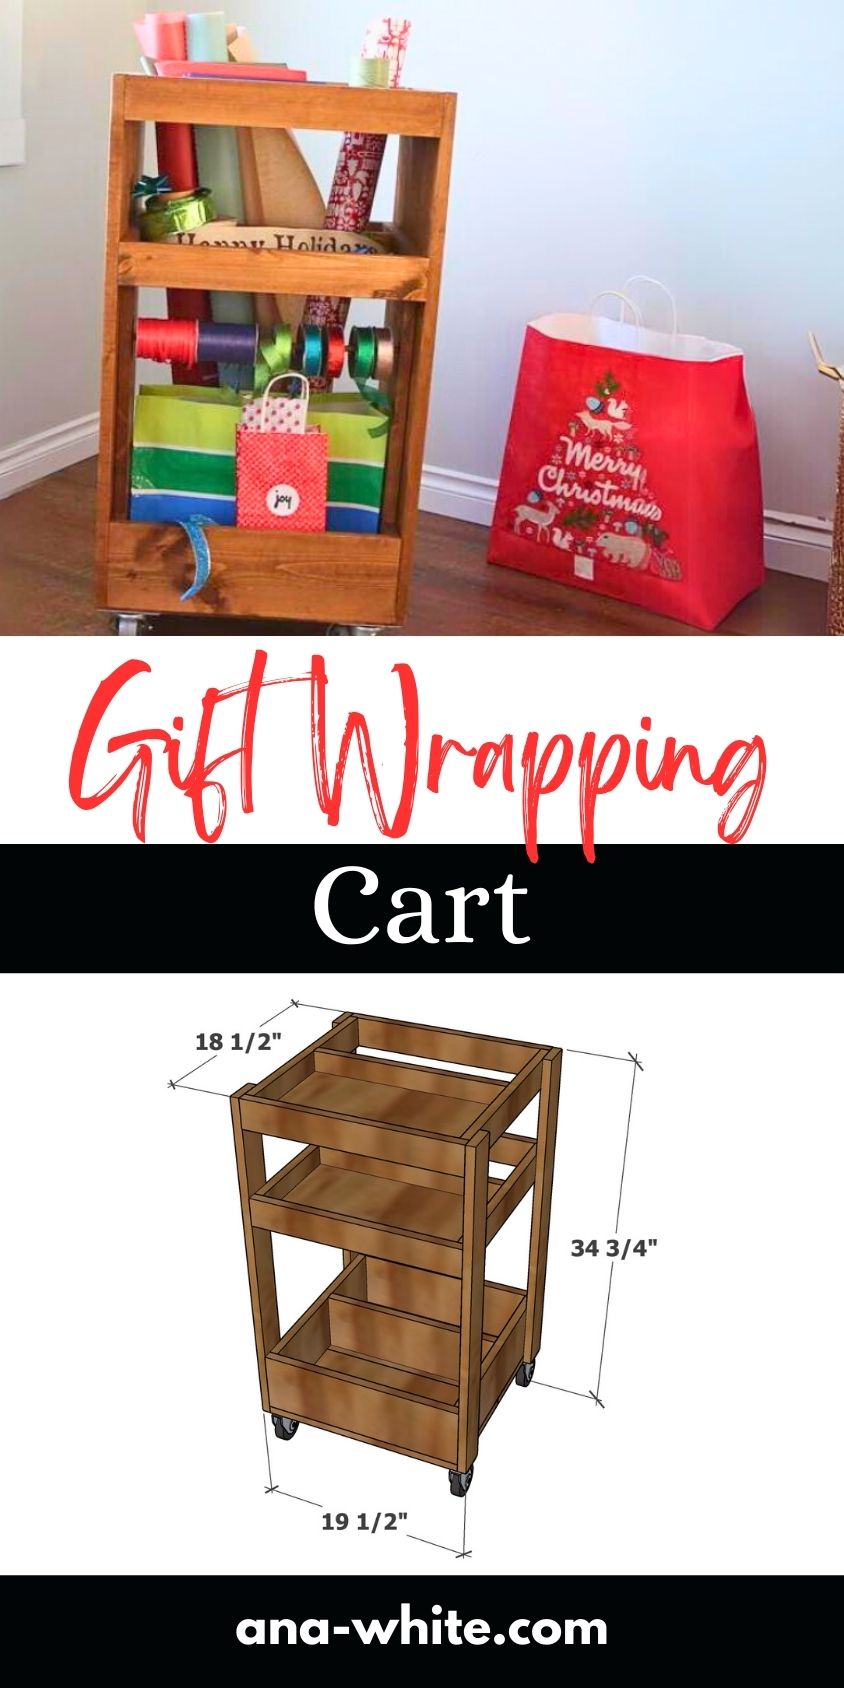
Dimensions
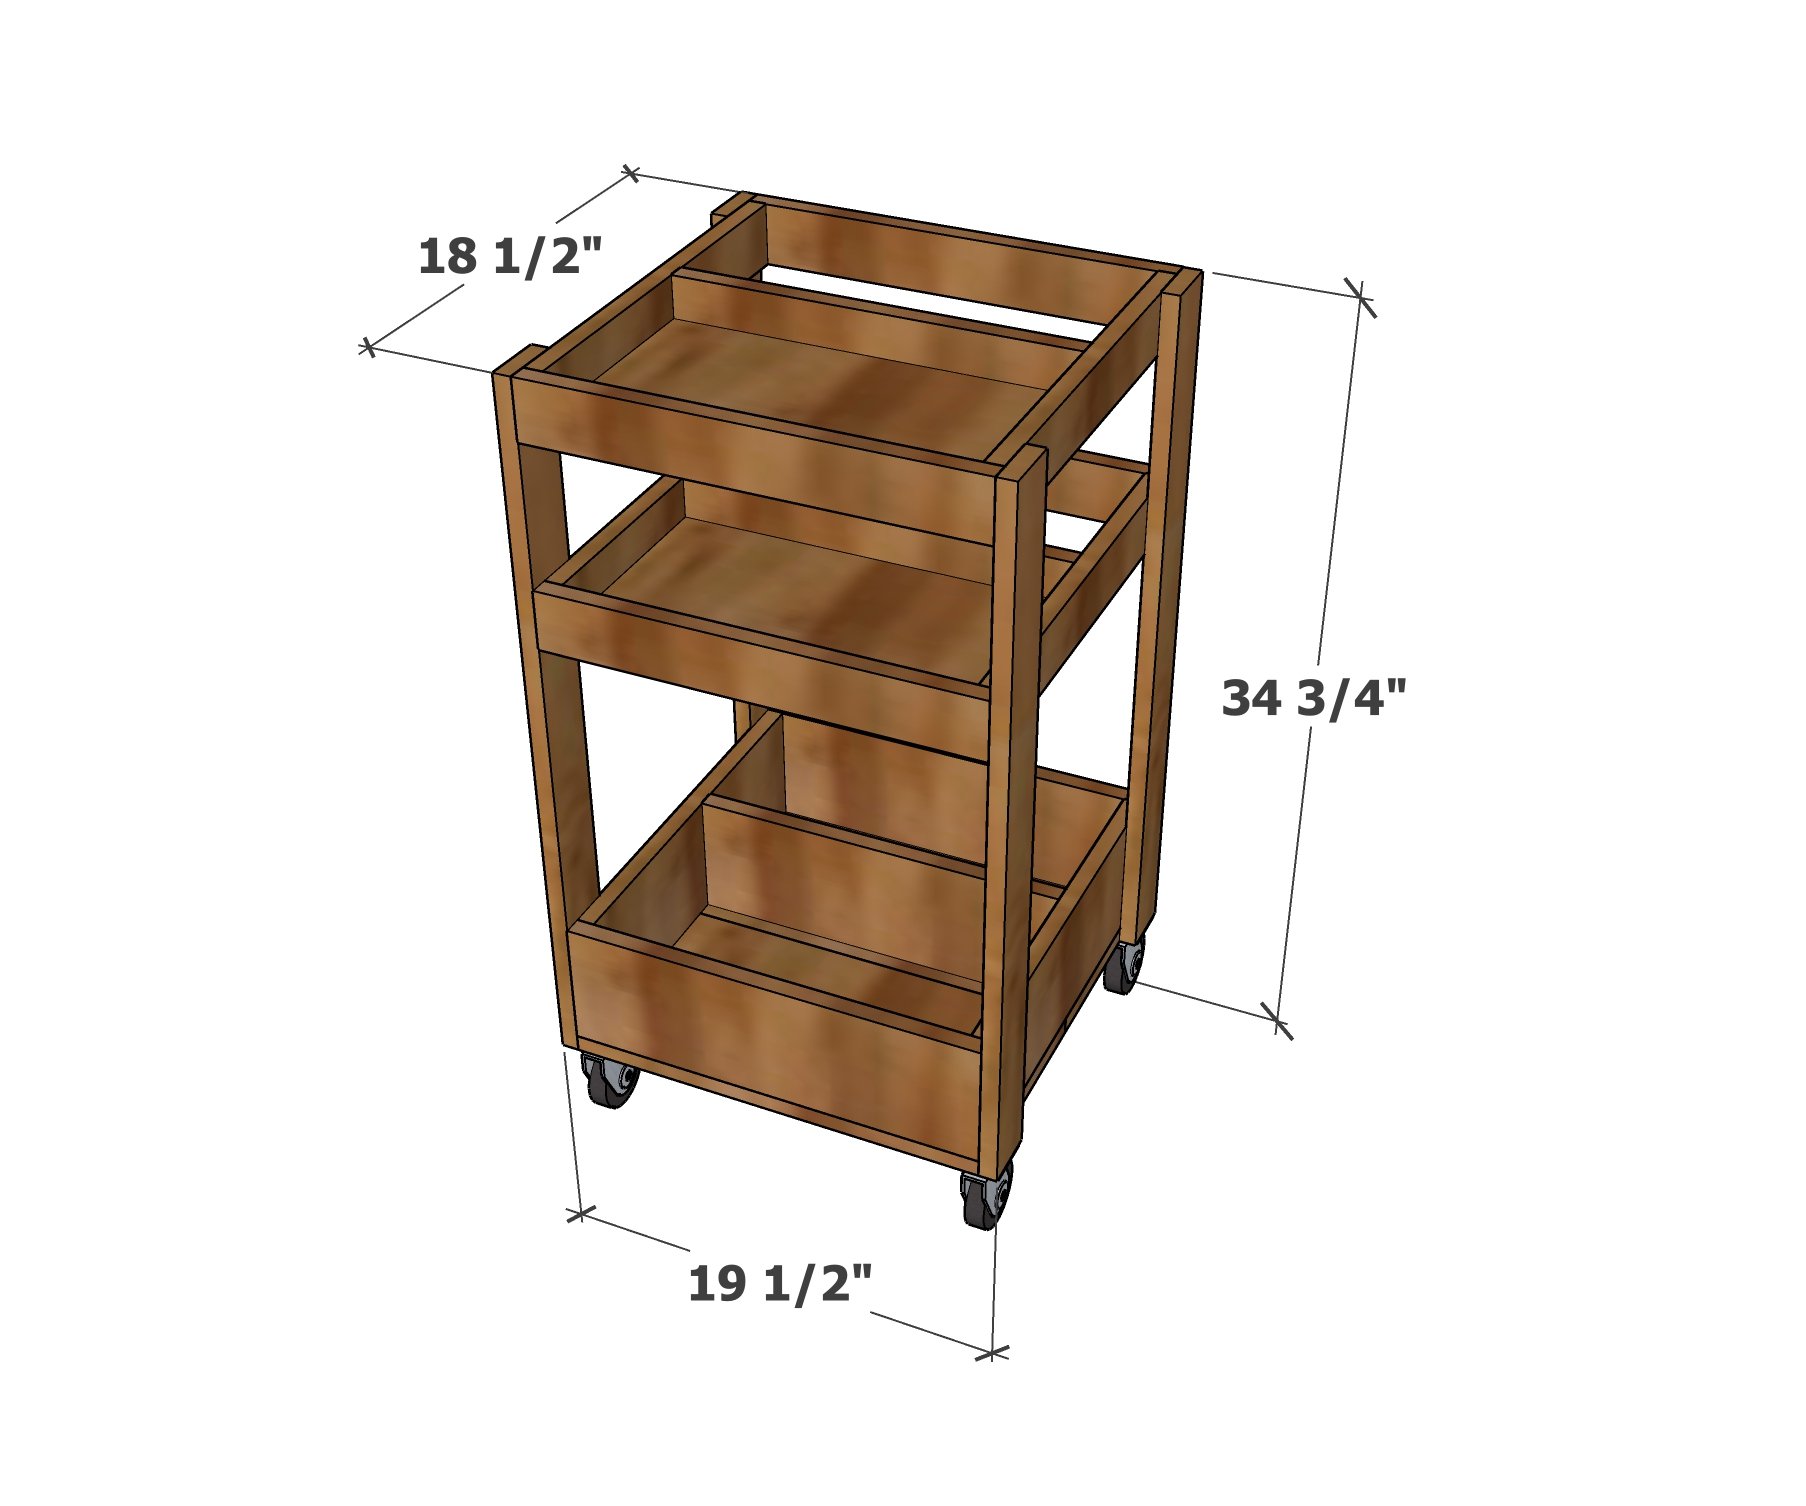
gift wrapping station dimensions
Preparation
Shopping List
- 4 - 1x3 @ 8 feet long
- 1 - 1x6 @ 8 feet long
- 1 - 1x10 @ 6 feet long
- 4 - caster wheels with screws for attaching
- 1-1/4" brad nails
- wood glue
- wood stain or paint for finishing
Cut List
- 4 - 1x3 @ 18" - outer frame, longer piece
- 4 - 1x3 @ 17" - outer frame, shorter piece
- 2 - 1x3 @ 16-1/2" - inner divider
- 2 - 1x6 @ 18" - outer frame, longer piece
- 2 - 1x6 @ 17" - outer frame, shorter piece
- 1 - 1x6 @ 16-1/2" - inner divider
- 2 - 1x10 @ 16-1/2" - 1x3 frame bottoms
- 2 - 1x10 @ 18" - 1x6 frame bottoms
- 4 - 1x3 @ 30-1/2" - legs
Tools


Instructions
Step 1

Build two frames using 1x3s and one frame using 1x6s, all layed out as shown in the diagram.
Step 2
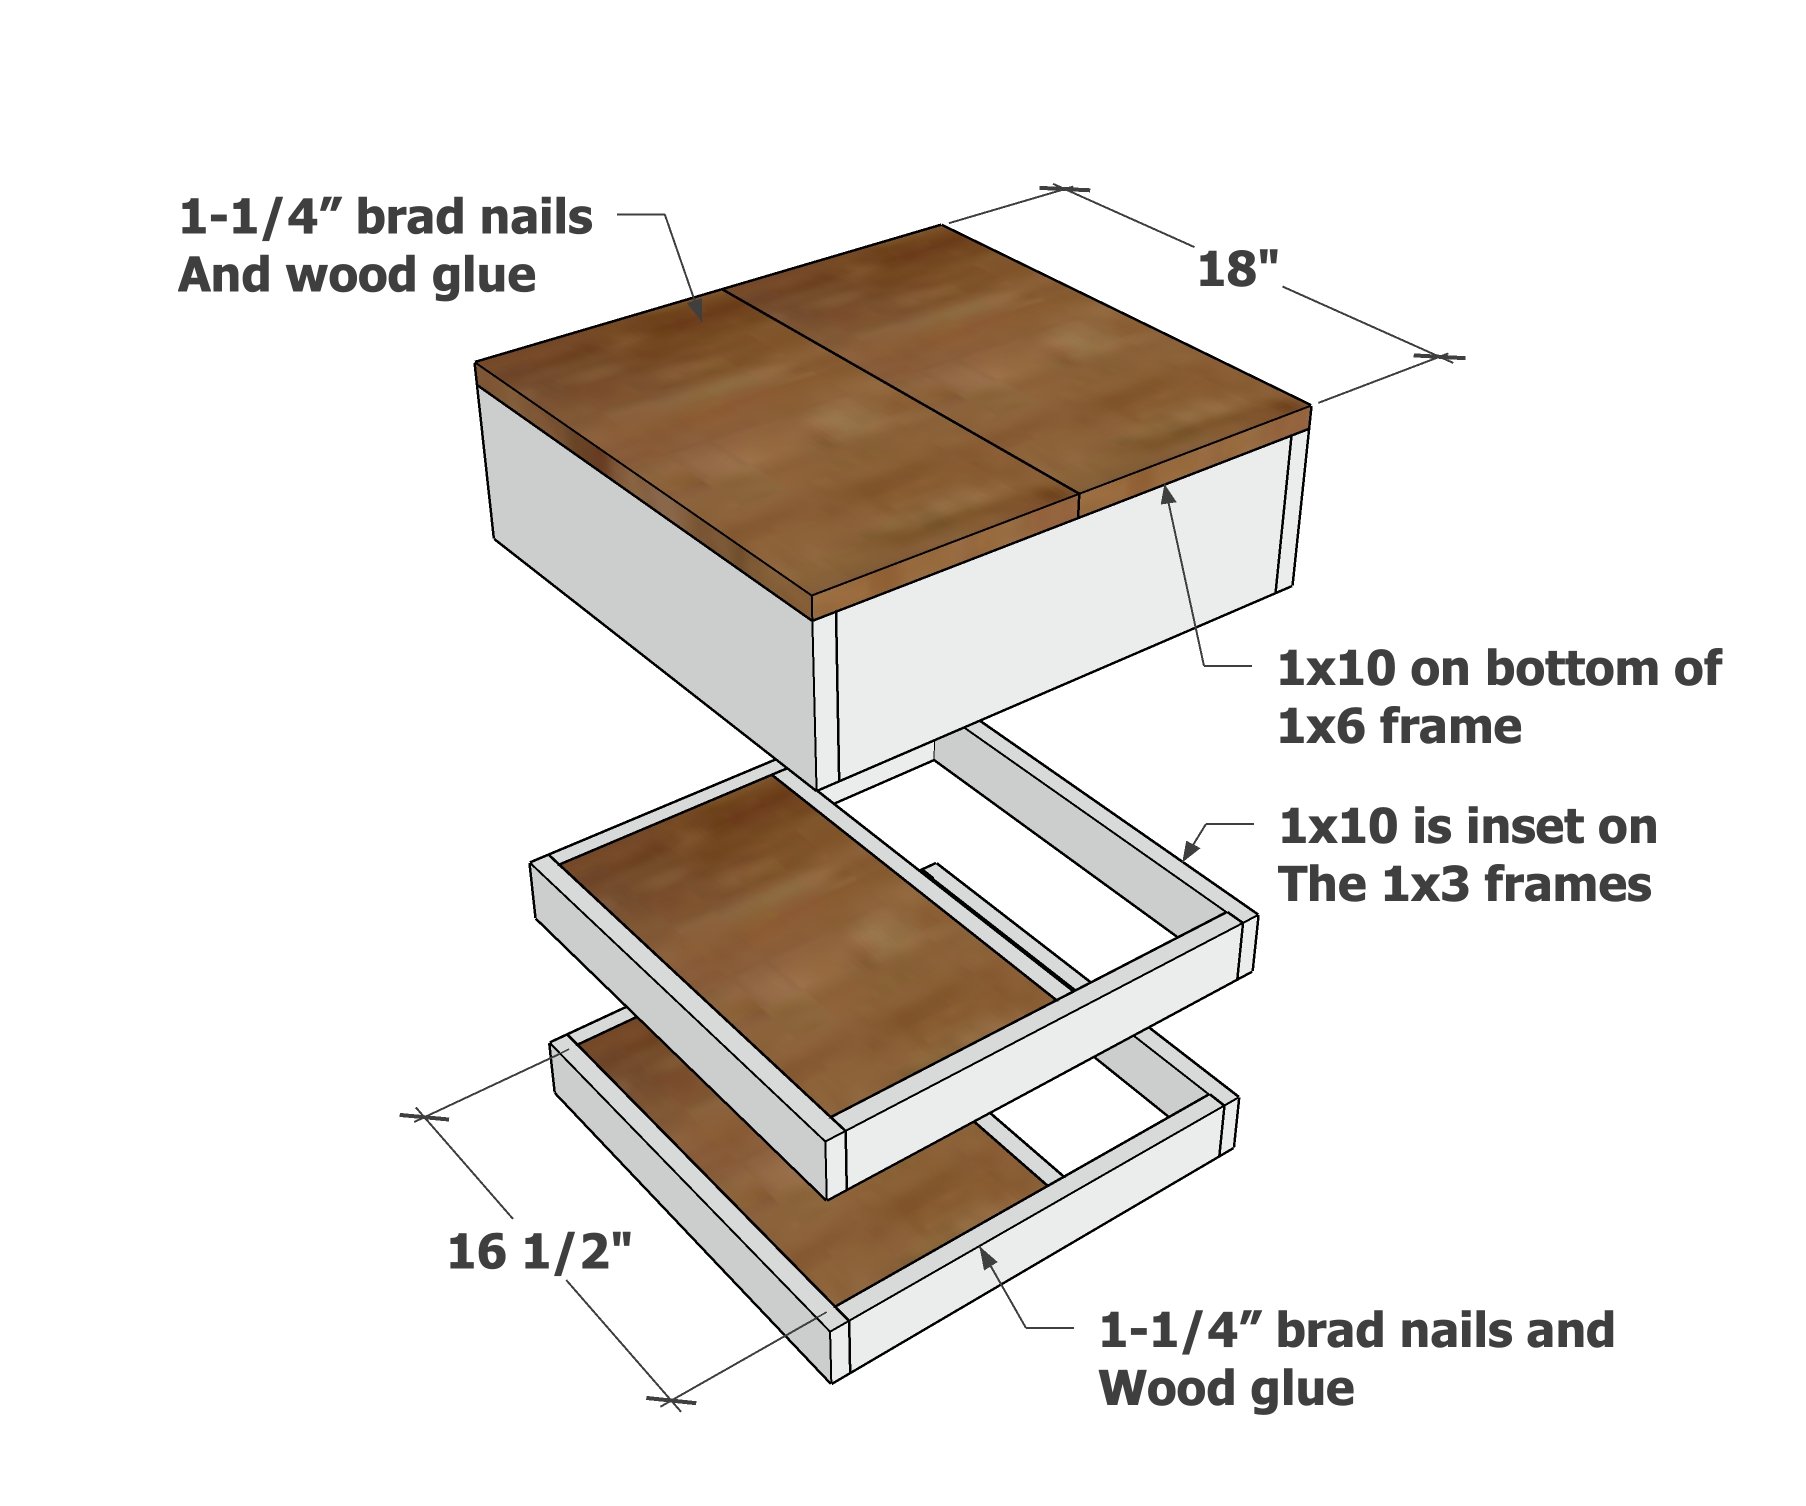
Attach 1x10 pieces inset on the 1x3 frames.
Attach 1x10 pieces on the bottom of the 1x6 frame.
Step 3
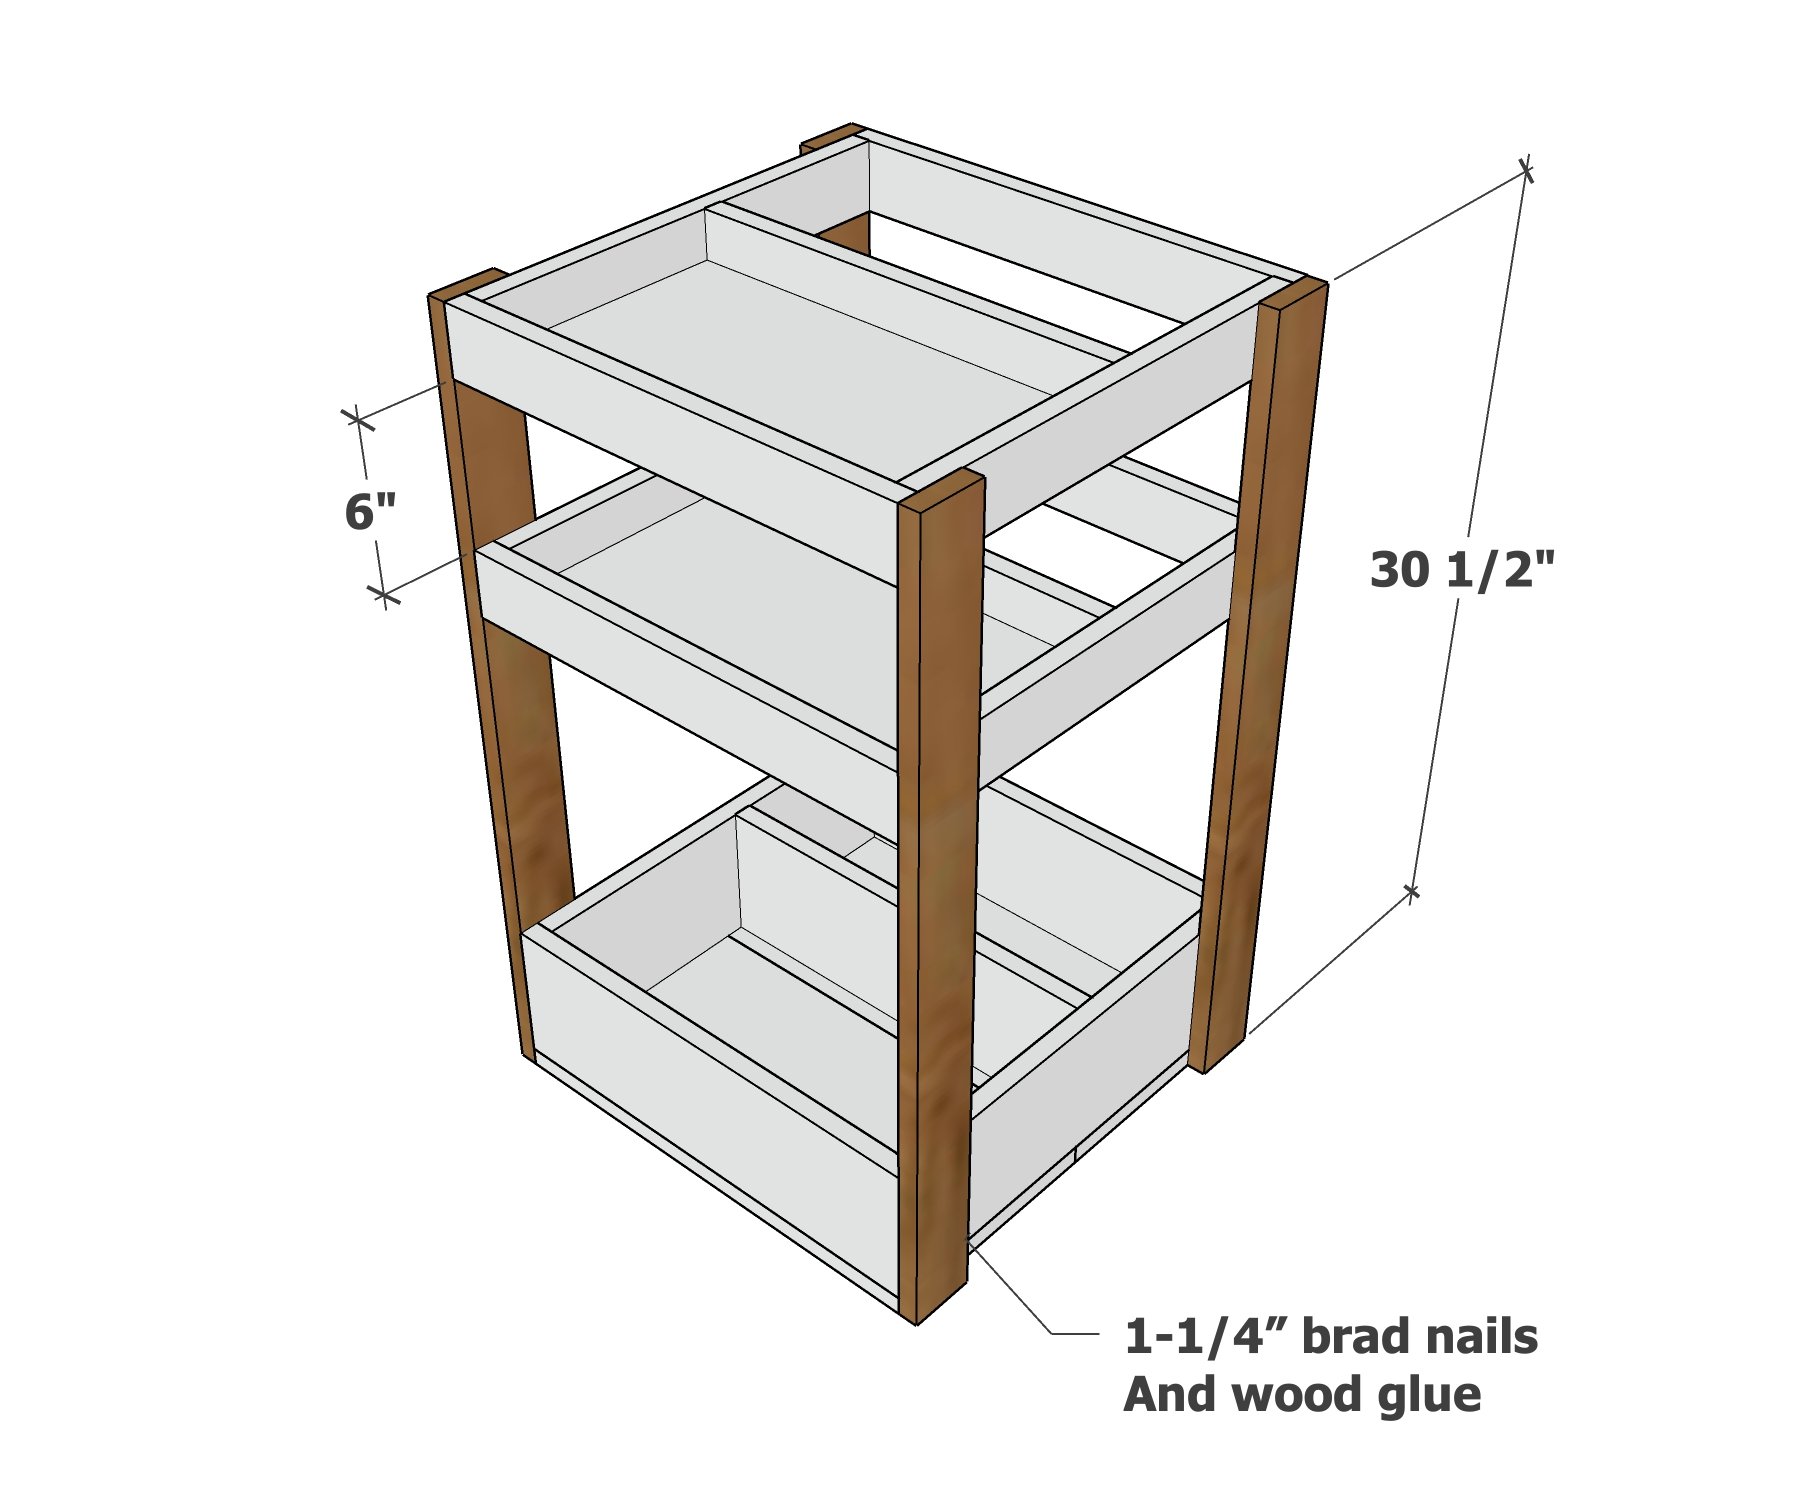
Attach legs to the sides of the trays.
Step 4
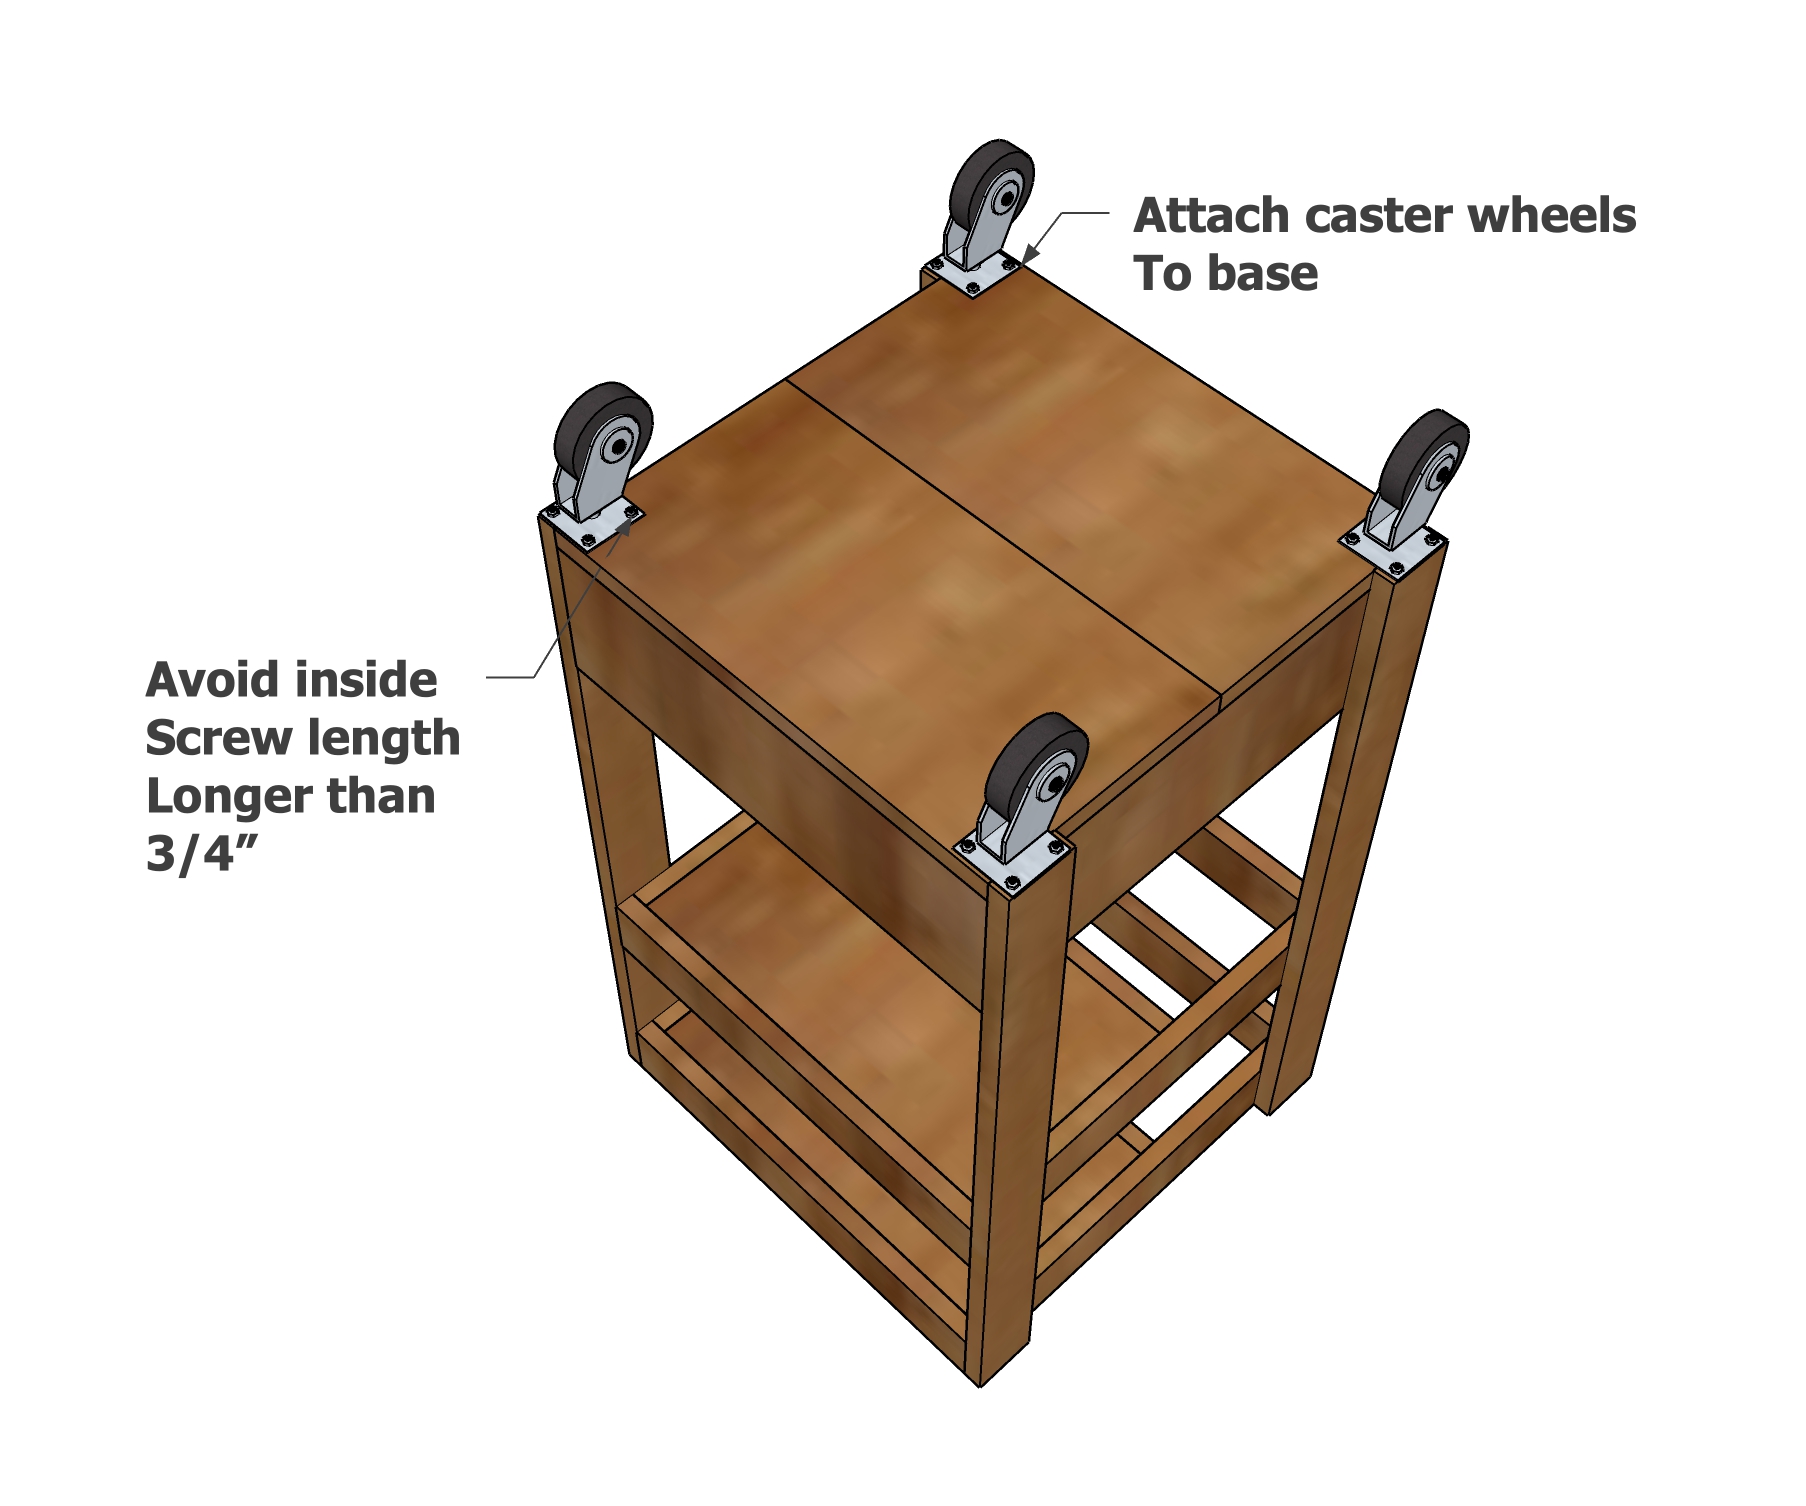
Screw caster wheels to the base.
Project Type
Seasonal And Holiday