
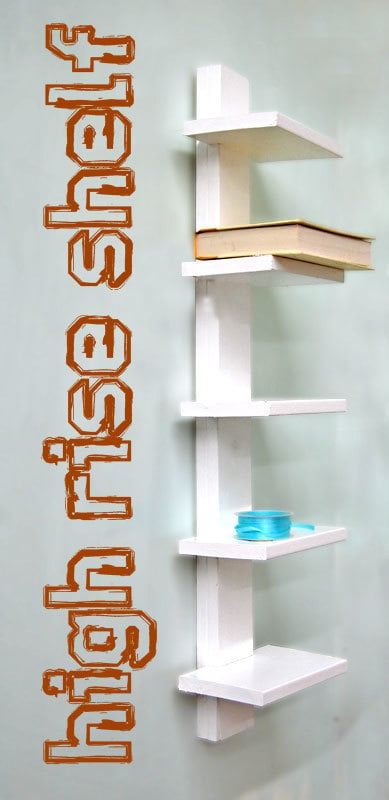

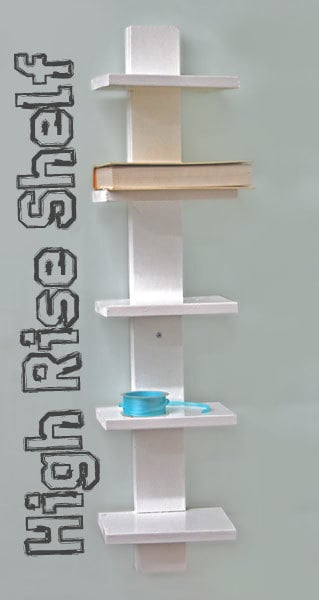
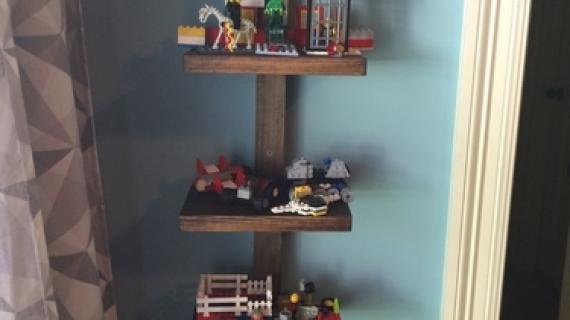
A simple wall shelf that works great for storing CDs and DVDs, towels, or even books.
Preparation
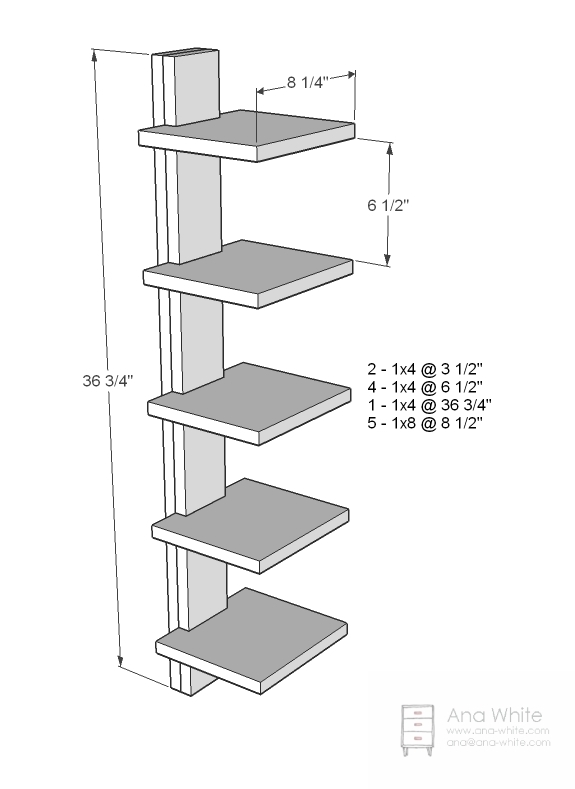
1 – 6 foot long 1×8
1 – 6 foot long 1×4
1 1/4″ screws
2″ screws
1 – 1×4 @ 36 3/4″
2 – 1×4 @ 3 1/2″
4 – 1×4 @ 6 1/2″
5 – 1×8 @ 8 1/2″ (you can use a 1×6 or 1×12 and go a little longer)


Instructions
Step 1
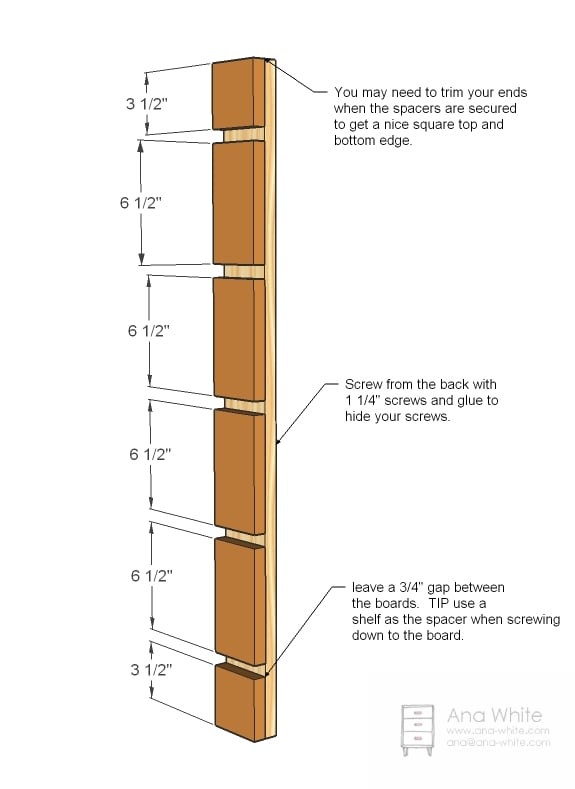
Add Spacers
Layout spacers and mark. Then apply glue to the uglier side of the spacers and screw to the back board. I screwed from the back to hide all of my holes. Predrill holes. Yes, you can use a nailer here.
Step 2
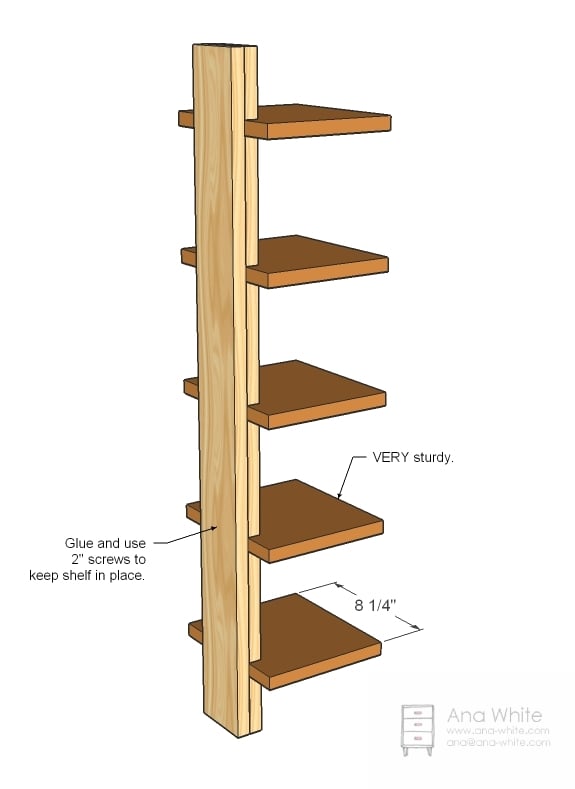
Shelves
Now add the shelves, center (or not) and screw in place.
Step 3
Hanging
I screwed directly through the front of the shelf right into a stud in the wall. No stud? Just use a drywall anchoring system. The shelves are very sturdy, makes a nice, interesting display piece.


Comments
Laurie V (not verified)
Thu, 12/23/2010 - 01:14
No way.... I just put up the
No way.... I just put up the Ikea version of this last night. I knew I should have just waited for you!
Loren (not verified)
Thu, 12/23/2010 - 03:33
I'm sure it wouldn't be TO
I'm sure it wouldn't be TO hard to scale this up to match the CB2 Array bookcase.
http://www.cb2.com/family.aspx?c=118&f=702
Which I love.
Tsu Dho Nimh (not verified)
Thu, 12/23/2010 - 04:24
Great for narrow spaces! I
Great for narrow spaces! I know exactly where to put this.
Jim Reeves (not verified)
Thu, 12/23/2010 - 05:12
Hi Ana, as always looks
Hi Ana, as always looks awesome, l think l will make one of these, and then make 2 slightly shorter ones to hang on each side of the large middle shelf very cool.
Jim, Ontario, Canada
Danielle (not verified)
Thu, 12/23/2010 - 05:31
Oh my gosh. I am creating a
Oh my gosh. I am creating a new sewing room and this would be perfect, I mean perfect, to hold all my quilting books. Oh I am so gonna make those and will send pics when they are done. Will be a while, the room is being built. heehee
Danielle (not verified)
Thu, 12/23/2010 - 05:32
Ohh, I like that idea. I
Ohh, I like that idea. I might have to steal that idea from you. :-)
Michelle (not verified)
Thu, 12/23/2010 - 07:01
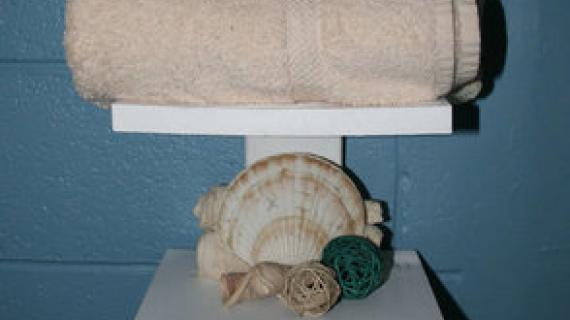
Love, love, love the CB2 shot
Love, love, love the CB2 shot with the towels! This shelf has a million and 1 uses and I am going to have to make more than one! Thanks again Ana.
squiremouse (not verified)
Thu, 12/23/2010 - 07:08
Ohhh perfect for displaying
Ohhh perfect for displaying all the Lego creations my kids are getting for X-mas. And they will still be able to reach them to take them down and play with them!
Lisa (not verified)
Thu, 12/23/2010 - 08:07
Another idea for this would
Another idea for this would be to extend it to make a modern looking shelving unit that can be attach to the wall studs. Make two of the back braces and lengthen the shelves. Then notch the shelves where they go into the braces so they are flush with the wall. Just a spin on floating shelves using this amazing design. :)
Christy (not verified)
Thu, 12/23/2010 - 13:48
Cute! I can see this being on
Cute! I can see this being on a narrow bathroom wall with bathroom accessories on it.
Tina Garza (not verified)
Thu, 12/23/2010 - 14:15
Ana you read my mind. This
Ana you read my mind. This is exactly what I wanted to build for my bathroom to hold rolled up towels. Make it spa like. Thank you!
Allison (not verified)
Thu, 12/23/2010 - 20:45
Ana, I have been missing the
Ana, I have been missing the bragging board, too! This is perfect. It's so helpful to be able to look at other people's projects, ask questions, and see how they tweaked their specific project (cuz we all do, right?!). You rock.
Also, I hope you have a totally amazing holiday! We appreciate what you do on this site SO much. You made my Christmas one of the best ones of my life because I made myself a Farmhouse Bed for Christmas. May you reap all the goodness you have sown in to so many other people's lives. Thank you!
Sunny (not verified)
Sun, 12/26/2010 - 13:47
Just finished this one from
Just finished this one from scraps! Can't wait to paint & post in the bragging board.
Atticus Finch (not verified)
Sun, 01/02/2011 - 08:06
Superb Ana! I like the idea
Superb Ana! I like the idea from Lisa of extending the shelving... I might have to give this one a go as my son's room is partly decorated.
Melissa (not verified)
Tue, 01/18/2011 - 04:13
Great idea!! Do you think
Great idea!! Do you think that these shelves would hold a DVD player and a gaming system?
Inspire Me Heather (not verified)
Tue, 02/01/2011 - 03:04
Hi Ana - I've seen a few
Hi Ana - I've seen a few people now making these and posting them on their blogs, they look fantastic! I linked this up to my "bookshelves" project post too, come on over and check it out!
PMSandaGun (not verified)
Sat, 02/12/2011 - 13:57
So I just made one for my
So I just made one for my bathroom...and then I realized it would be great in one corner of the dining room where my son's books are...which then made me realize it would be PERFECT in this little 20" span of wall in my son's room, lol. Oh, where to put it now?!
Guest (not verified)
Wed, 04/13/2011 - 15:55
I made one, thanks for the plans
This is exactly what I needed for my very small main bathroom.
tedson22
Sun, 01/29/2012 - 19:21
Hide my Flat Panel TV wires
I am going to build this shelve to go under my wall mounted TV. I am going to add 1x2 on each edge down the back to create a channel to hide my wires. Thanks for the great plan!
Evil Empryss
Thu, 07/18/2013 - 12:19
Modified for Glass Shelves?
I have two dozen glass shelves I got from a department store -- the thick, heavy duty glass used for their display shelves. Does anyone think this plan might be workable for supporting them if I upped the thickness of the 1x4 to 2x4? I was thinking that I could screw them to the wall studs and have two of these shelf supports to support each end of the glass. I'd like to have a wall-mounted entertainment center, but individual brackets are too expensive. I don't have anything heavy to put on it, so I know the glass will hold... it's the brackets I'm most concerned with. Any advice would be great!
Tomstar
Mon, 07/29/2013 - 22:14
Decorate Glass shelves
If you are an artist, you can custom design your glass shelves Manchester before installing them, because your home decoration should speak about your personality.