
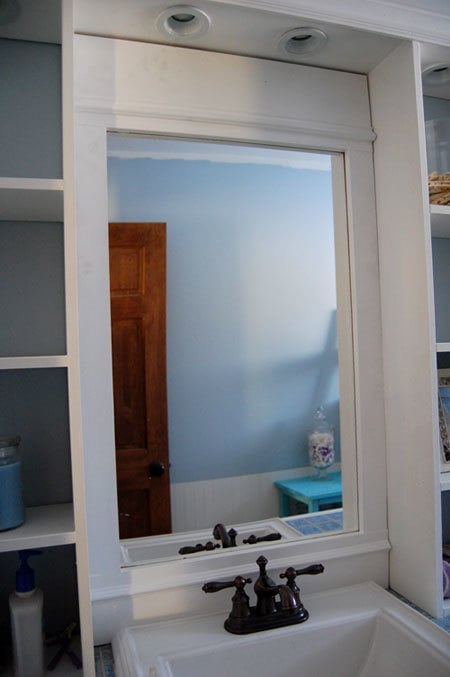

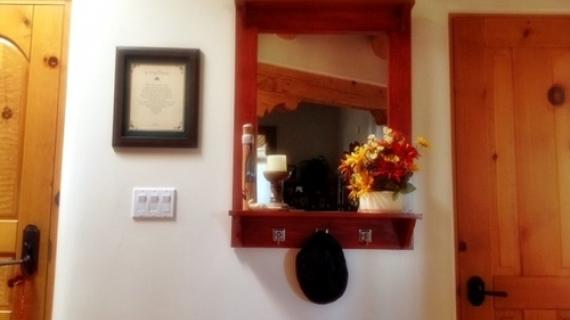
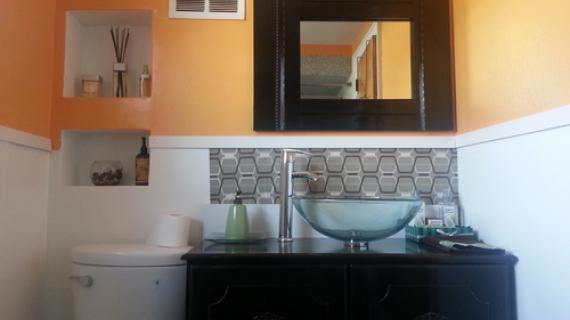
How to fancy up a builder grade mirror. Completed mirror can be mounted on any wall. Shown in a custom vanity hutch.
Preparation
1 – 24″ x 36″ Mirror Mirror clips with 3/4″ screws to match
1 – 1×8 @ 28 1/2″
1 – 1×6 @ 28 1/2″
1 – 1×3 @ 8 feet
2 – 1×2 @ 8 feet Heavy duty picture hanging kit
1 1/4″ Screws or nails and glue
Cut List 1 – 1×8 @ 28 1/2″
1 – 1×6 @ 28 1/2″
2 – 1×3 @ 35″
2 – 1×2 @ 48″
2 – 1×2 @ 25 1/2″
Optional Shelf 1 – 1×4 @ 28 1/2″ (Shelf)
2 – 1×4 @ 6 1/2″ (Shelf Supports – cut out at an angle) Shelf hooks


Instructions
Step 1
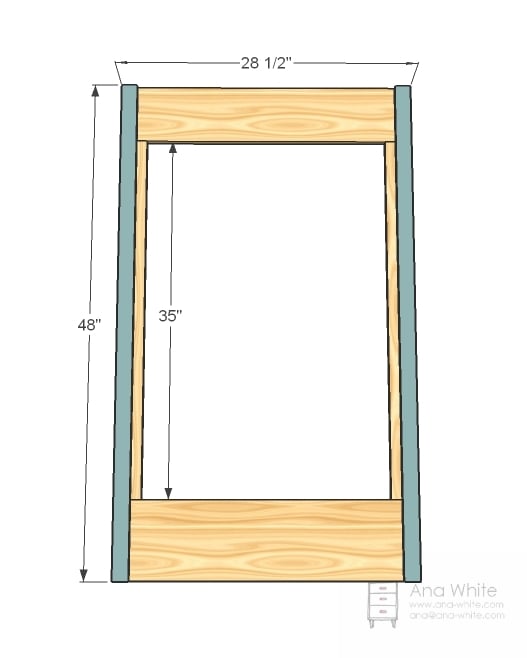
Build the Mirror Frame
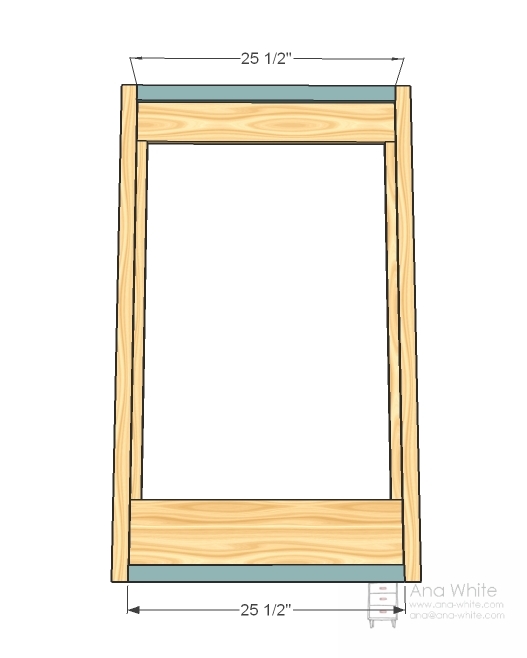
Lay your 1x3s, 1×6 and 1×8 down and arrange for square. If you have a Kreg Jig™, screw the 1x3s to the 1×8 and 1×6. Lay the long 1x2s on top, to the outside, and screw and glue with 1 1/4″ screws. Adjust for square.
Step 2
Step 3

Mirror
Add the mirror to the back of the frame with the mirror clips. You can also glue the mirror in place. Also add the heavy duty picture hanging kit. Hang use the picture hanging kit and a screw into a stud in the wall or with an appropriately weighted drywall anchor system.

Comments
laracohran (not verified)
Wed, 02/16/2011 - 02:27
Love it! Is there a plan for
Love it! Is there a plan for that vanity? I am in need of building a total of 3 and love the one here in the pics. Thanks :)
Debbie@http://… (not verified)
Wed, 02/16/2011 - 04:10
It looks great! and I love
It looks great! and I love the tile!!
Tiffany (not verified)
Wed, 02/16/2011 - 04:17
Mirror for bathroom! Pshaw!
Mirror for bathroom! Pshaw! You've proved that we don't need one right? JK- really this is a great step for me to get a mirror in my living room/voice studio! Thanks for the plan!!!!
Lea (not verified)
Wed, 02/16/2011 - 04:24
Stop it, stop it, stop it!
Stop it, stop it, stop it! Ana, you're killing me! I already have more of your projects on my to-do list than I could build in a month of Sundays with eight arms! And then you have to go and give me the plans for the perfectly proportioned and incredibly affordable mirrors I desperately need to hang above the bedside tables that are impatiently waiting to come to life. Do you have any idea how wonderful you are? You inspire me to beautify my spaces, and you put that inspiration within the reach of both my limited budget and my even more limited talents. I adore you!
Rhonda (not verified)
Wed, 02/16/2011 - 04:41
Love the mirror and I would
Love the mirror and I would love the whole design (including hutch) for our bath. Do you have the building plans for it as well?
Rhonda (not verified)
Wed, 02/16/2011 - 04:42
I totally agree with Lea!
I totally agree with Lea! I'm new to this building thing and my husband is going to freak when he realizes I'm actually going to take over his work space. :-)
IAMSNWFLAKE (not verified)
Wed, 02/16/2011 - 05:04
Ana: I hear you, I spend
Ana: I hear you, I spend almost 4 years without a bathroom mirror because in my mind I knew exactly what it looked like but could not find it anywhere. I wish I was as talented as you are (or that I'd found your blog sooner). Yours looks awesome! so perfect with the rest of the furniture. Thanks for sharing!
bhoppy (not verified)
Wed, 02/16/2011 - 05:15
Ditto:-)
Ditto:-)
Lang (not verified)
Wed, 02/16/2011 - 05:40
Ana~You inspire me! I love
Ana~You inspire me! I love ALL of your projects! I have gutted my entire bathroom, with exception of my turquoise porcelain tub, which I am in the process of sanding and scuffing, so that I can repaint it. (Hope that goes good!) I couldn't help but notice your beautiful sink. I LOVE it! Do you happen to remember where you got it? I've seen some square ones in my area, but nothing that beautiful. Thanks!
orangesugar (not verified)
Wed, 02/16/2011 - 05:47
Is that base cap that you
Is that base cap that you used for the molding?
StephT (not verified)
Wed, 02/16/2011 - 06:24
AWESOME!! just what I needed.
AWESOME!! just what I needed. I am redoing our main bathroom and I asked DH to put a frame around a smaller mirror we have. This is just what I need. I am so building everything.
Jennifer (not verified)
Wed, 02/16/2011 - 06:29
Yay!!!!!!!!!!!!!!!!! I'm
Yay!!!!!!!!!!!!!!!!! I'm dying to make one of these with a little shelf and key hooks! I have the perfect spot right by my back door to the garage! SO EXCITED to see this plan!!!!! You are awesome!
Stevi (not verified)
Wed, 02/16/2011 - 07:48
Just tore out our nasty
Just tore out our nasty master bath! I am going to use this ...thank-you so much for adding this to your awesome site!
Annalea (not verified)
Wed, 02/16/2011 - 08:14
Lovely! Isn't it great how
Lovely! Isn't it great how things can happen so fast when it's finally the right time?
Have you thought about painting it a fun color? Another blue, or gray (which is really hot right now), or . . . (you get my drift). :o) With molding as pretty as that, it's a shame to let it fade into the surrounding hutch so much.
Great job!
Laurie Lozano (not verified)
Wed, 02/16/2011 - 09:03
Love this! I also love the
Love this! I also love the hutch! Do you have plans available for the hutch as well? I've been dieing to do something like this in my bathroom instead of the huge ugly mirror they have attached to the wall.
Thanks so much for all your easy to follow directions!
Jody (not verified)
Wed, 02/16/2011 - 11:22
I'm glad Im not the only one
I'm glad Im not the only one that gets side tracked while cleaning!;) The mirror is beautiful, just like all of your plans are!
Theresa (not verified)
Wed, 02/16/2011 - 13:00
Very nice. I will pass this
Very nice. I will pass this on to someone that could use it. Love your colors.
Ana White (not verified)
Wed, 02/16/2011 - 13:04
Laurie, thank you (and thank
Laurie, thank you (and thank you everyone else too for your beautiful comments!)
I plan to add the hutch plans soon - want to finish the crown moulding and stage it a little better. It just adds so much storage!
Love a Bargin! (not verified)
Wed, 02/16/2011 - 13:28
PLEASE PLEASE PLEASE, add
PLEASE PLEASE PLEASE, add hutch plans. This would work perfectly in my master bath. I was a little dissapointed when I realized it was just for the mirror after I clicked on it. = ( The side cubbies/shelves I can figure out, its the top part with the recessed lighting that im hung up on. Any idea on when you will post these? I love it the minute I seen it. Thanks for all the great ideas.
Tracie (not verified)
Wed, 02/16/2011 - 16:47
Super Cute!!! Would love that
Super Cute!!! Would love that for the kids bathroom!
http://cleverlyinspired.blogspot.com/2011/02/2-candleholder-meets-tiffa…laura lehman (not verified)
Thu, 02/17/2011 - 03:12
Lea has summed up my thoughts
Lea has summed up my thoughts exactly......
Dave Le Marchand (not verified)
Fri, 02/18/2011 - 02:38
Great work... another one for
Great work... another one for my 'To Do' list. I need to get off this site and do some real work :)
Robin (not verified)
Sat, 02/19/2011 - 03:33
Ok, so I know you love the
Ok, so I know you love the mirror, but I am lovin the hutch you built above the sink! I hate how bathrooms typically don't have the storage space for all of the stuff we keep in there. I've got this one bookmarked! Thanks Ana!!!
Holly (not verified)
Sat, 02/19/2011 - 04:27
Hi Ana! Did you build the
Hi Ana!
Did you build the vanity too? I love the mirror but I think I need the whole thing! I love it!
LenaLoo (not verified)
Mon, 02/28/2011 - 22:56
Nice! I have had a mirror
Nice! I have had a mirror sitting around frame-less for, I dunno, 5 years or so... I never would have thought it was so simple!
Malinda (not verified)
Sun, 10/23/2011 - 22:53
A friend of mine told me
A friend of mine told me about your site and I absolutely love it! I have a bathroom in desperate need of the custom vanity and hutch shown in your pic. Did you post these plans on your site or will they be available soon? Thanks!
Miabee
Fri, 01/13/2012 - 18:20
Hutch
Any word on when we might see the hutch plans? I would love them for our bathroom!
Ali_R (not verified)
Fri, 01/27/2012 - 18:25
Treat the mirror edges
I used to work in a stained glass shop as a teen, whenever we worked with mirror we always applied a coat of clear nail polish to the edges to prevent future corrosion/peeling. Something to keep in mind, particularly in a humid bathroom... but I think that's an oxymoron... humidity + Fairbanks.