
DIY lighted holiday chalkboard sign, "All is calm, all is bright" tutorial by Ana-White.com


Here's a fun and easy to make holiday decor project. Free tutorial for my light up All is Calm, All is Bright DIY chalkboard sign is below!

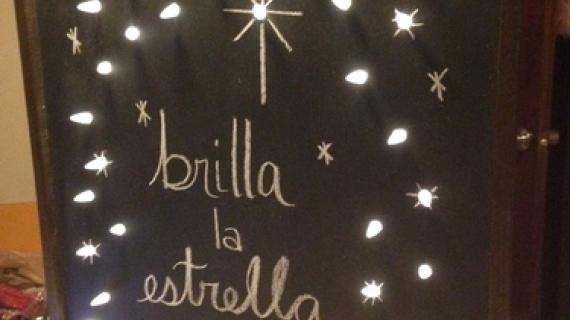
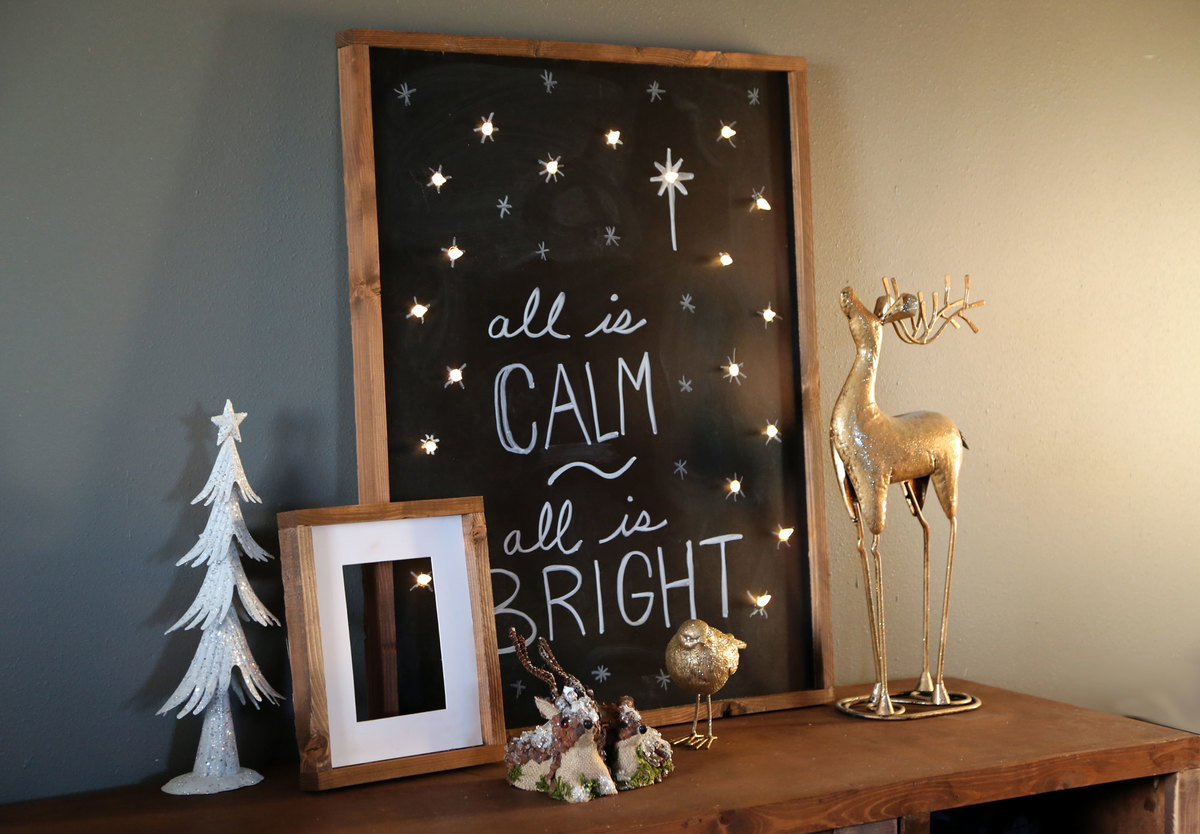
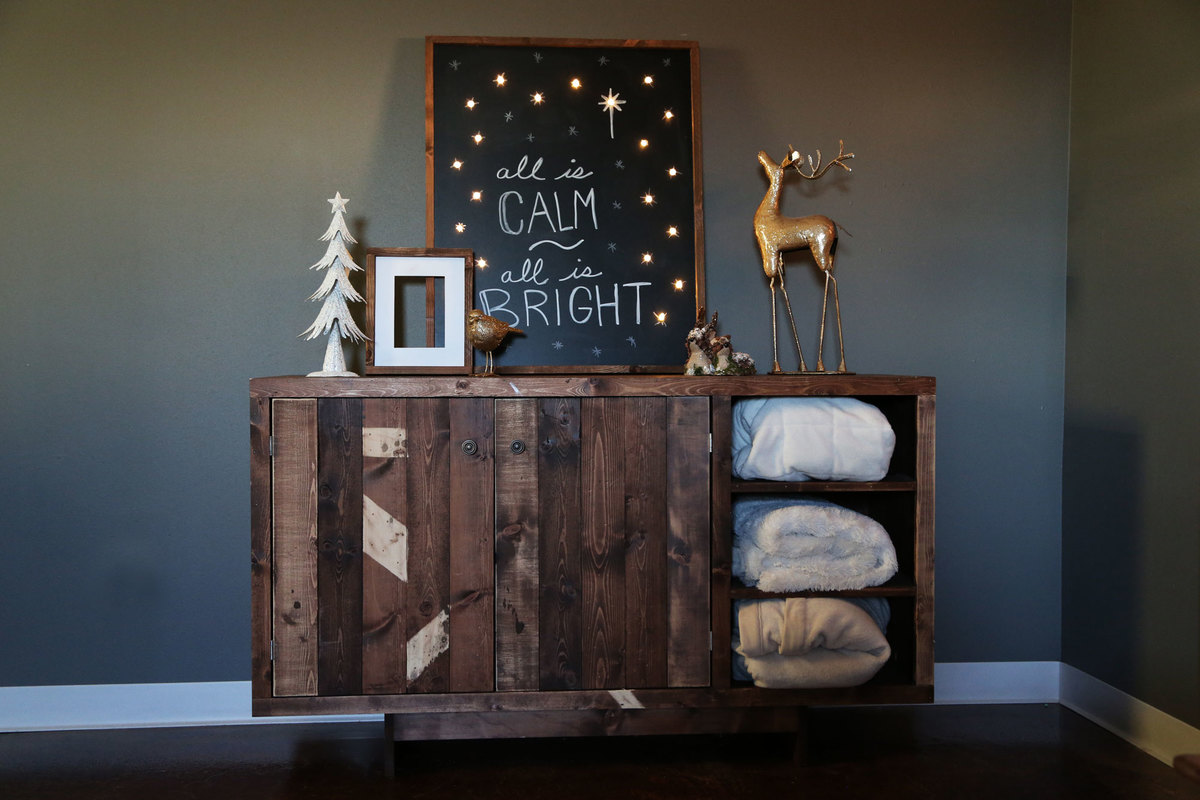
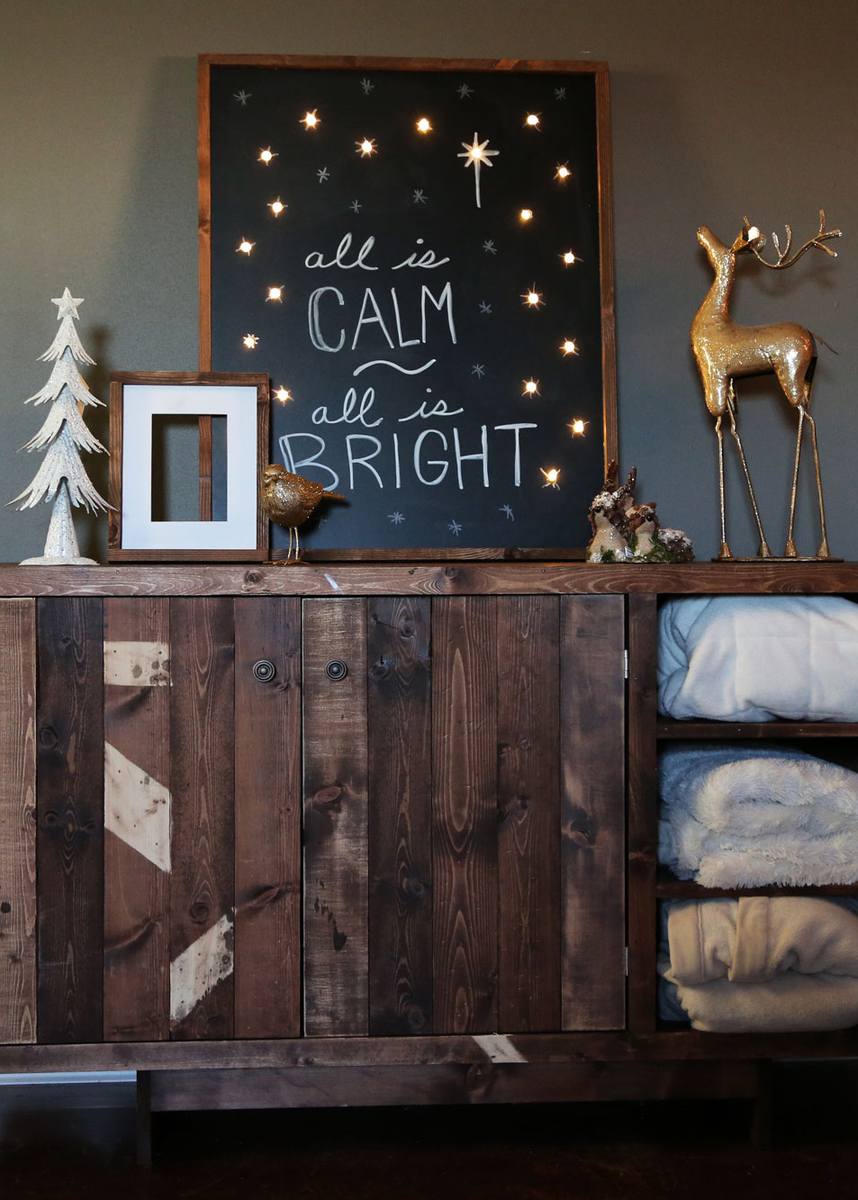
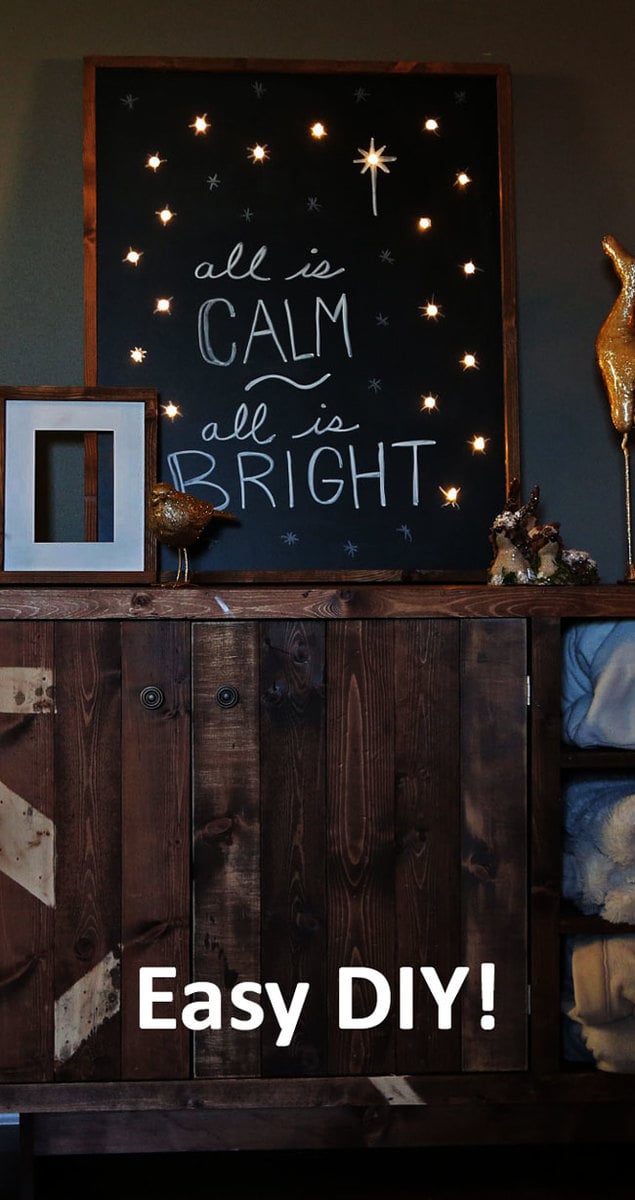
I made this lighted sign using a $9 off the shelf chalkboard panel and just drew on it with chalk.

I love how the lights on the dark background are like stars in the night sky! And it's such a unique but easy to customize piece!
I'm sharing below the plans for this lighted Holiday Chalkboard sign - it's really easy to make!
And we also put together a video while I was making it - so check that out too:
The free plans follow! Enjoy!
Ana
PS - The cabinet is also DIY - you can get the plans here.
Preparation
3 - 1x2 @ 8 feet long
1 - 24x30" chalkboard panel (I purchased a 24x48" one and cut it down to size)
1 pack of cordless LED christmas lights (I used a 20 pack but 30 might have been nicer)
4 - 1x2 @ 24"
2 - 1x2 @ 30"
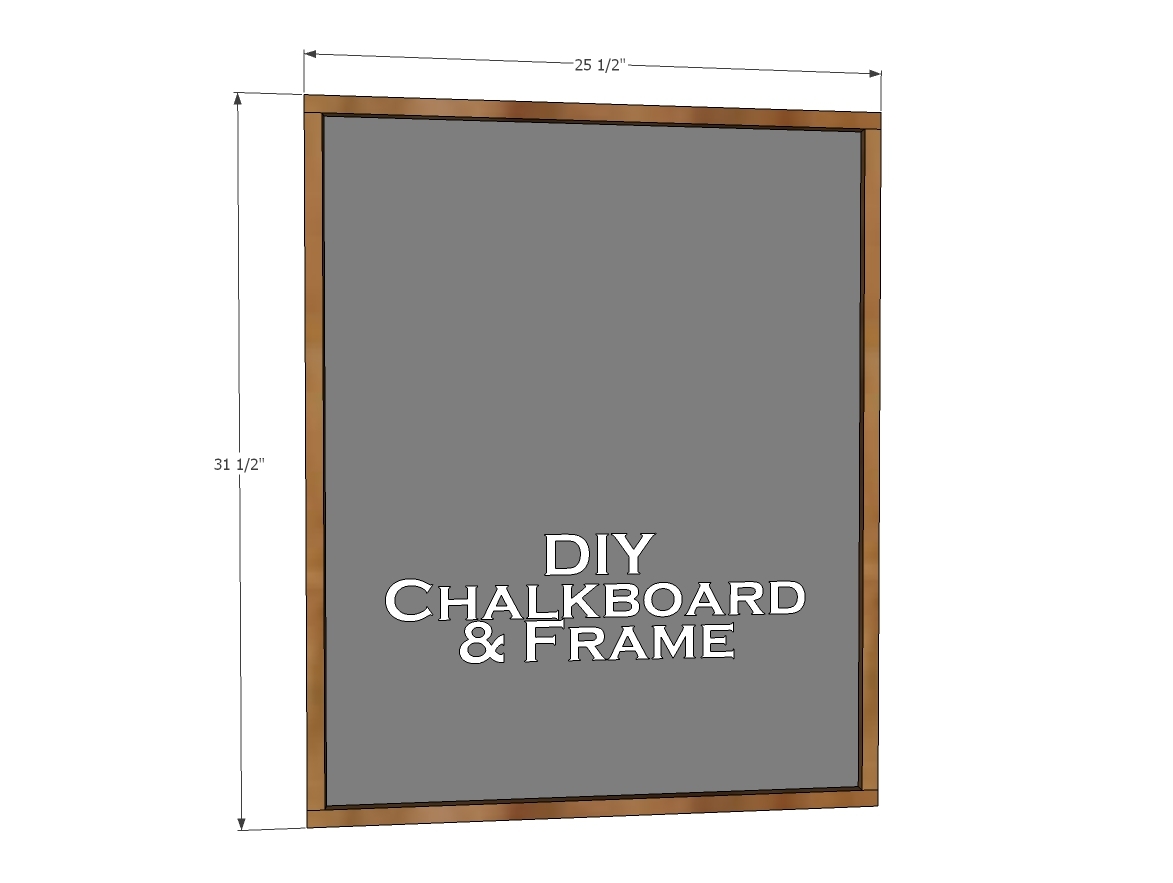
2 - 1x2 @ 25-1/2" (cut these to fit)
1 - 24" x 30" chalkboard panel


Please read through the entire plan and all comments before beginning this project. It is also advisable to review the Getting Started Section. Take all necessary precautions to build safely and smartly. Work on a clean level surface, free of imperfections or debris. Always use straight boards. Check for square after each step. Always predrill holes before attaching with screws. Use glue with finish nails for a stronger hold. Wipe excess glue off bare wood for stained projects, as dried glue will not take stain. Be safe, have fun, and ask for help if you need it. Good luck!
Instructions
Step 1
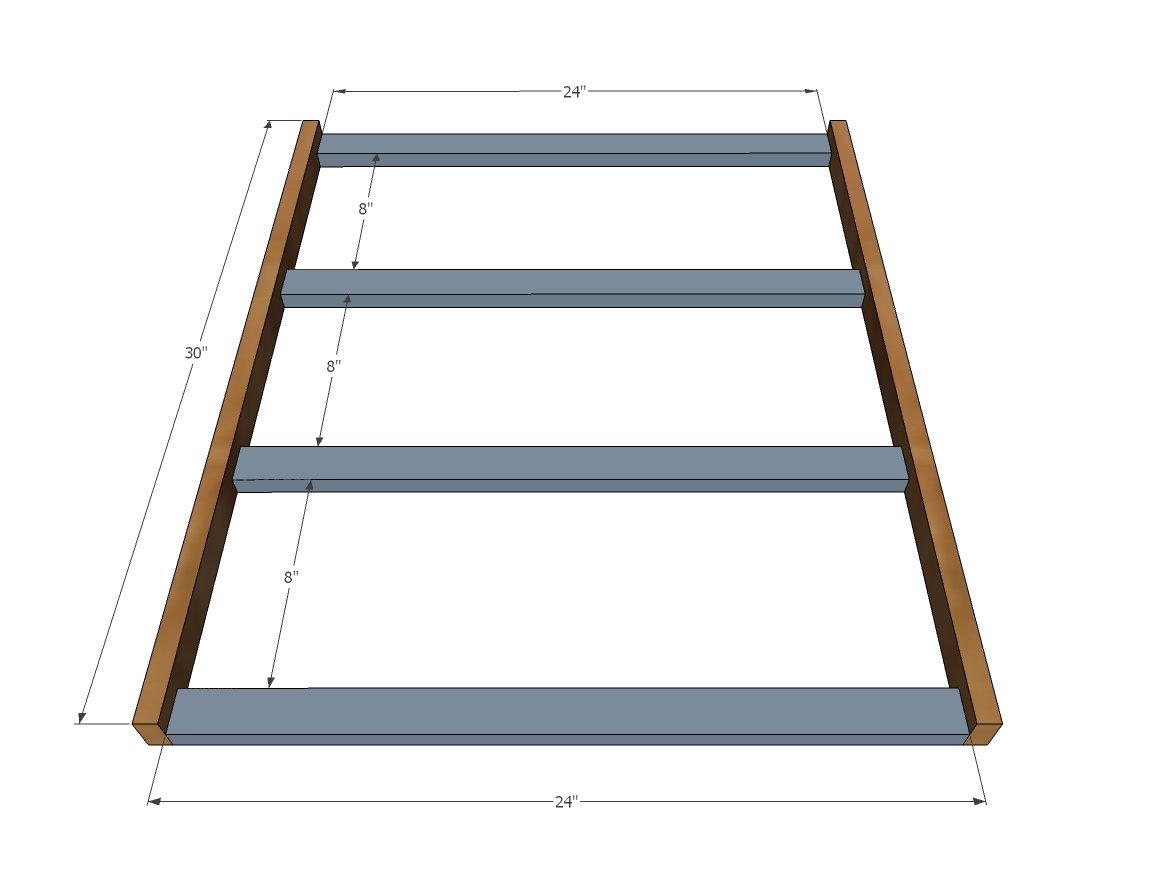
Attach the 30" long 1x2s to the 24" long 1x2s, with the 24" long 1x2s laying flat. Leave about 8" spacing in between. Use glue and 1-1/4" finish nails.
Step 2

Measure the remaining frame side and cut a board to fit (will be around 25-1/2" long). Attach with glue and 1-1/4" finish nails.
Step 3
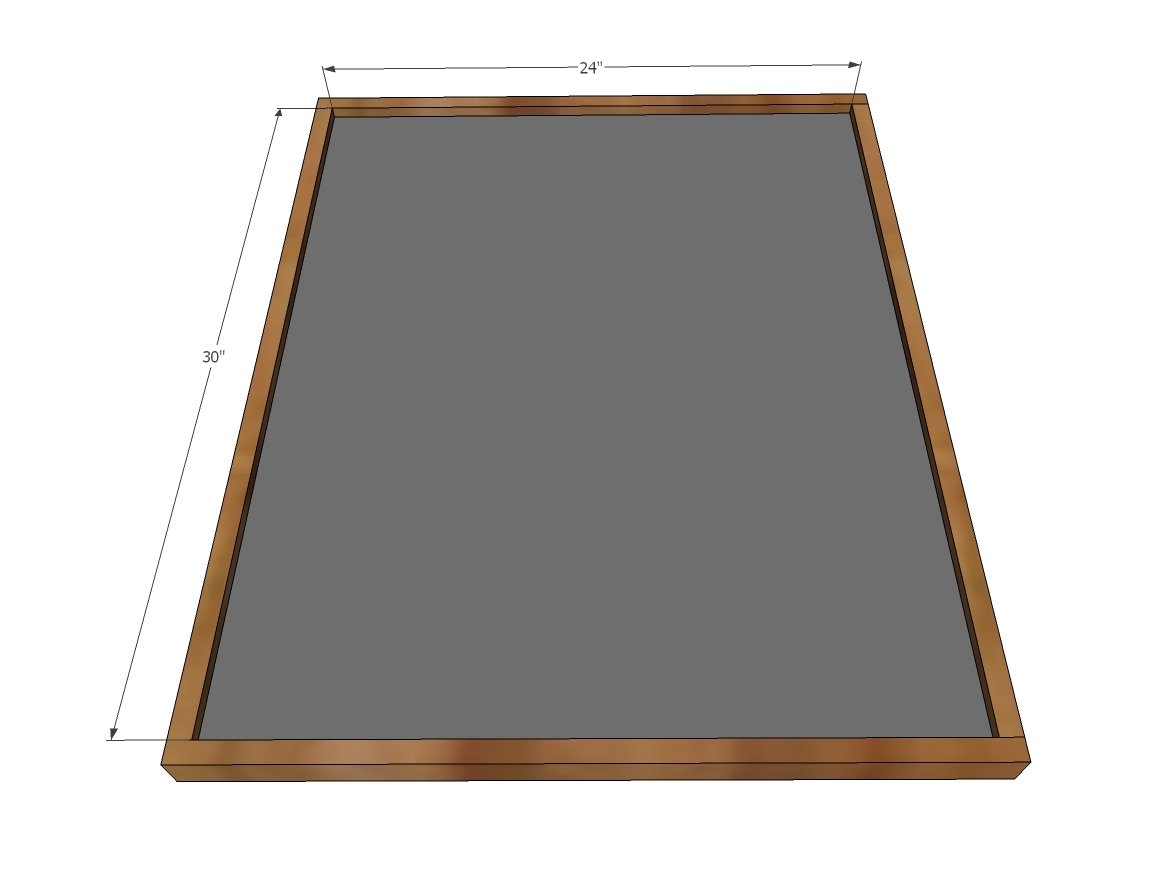
Insert the chalkboard panel inside the frame.
Draw the words out in chalk (I used a chalkboard marker) and space stars close enough together that your string lights can hop between the stars. Drill out the stars with a spade bit sized big enough for the lights to pass through. Secure lights to back with tape.
I acknowledge that The Home Depot is partnering with me to participate in this DIH Workshop program (the “Program”). As a part of the Program, I am receiving compensation in the form of products and services, for the purpose of promoting The Home Depot. All expressed opinions and experiences are my own words. My post complies with the Word Of Mouth Marketing Association (WOMMA) Ethics Code and applicable Federal Trade Commission guidelines. - See more at: http://ana-white.com/node/13302#sthash.GNX6PSEe.dpuf
It is always recommended to apply a test coat on a hidden area or scrap piece to ensure color evenness and adhesion. Use primer or wood conditioner as needed.