

How to build a modern paver planter out of concrete blocks and 2x2s!
More Planters Made with Concrete Pavers
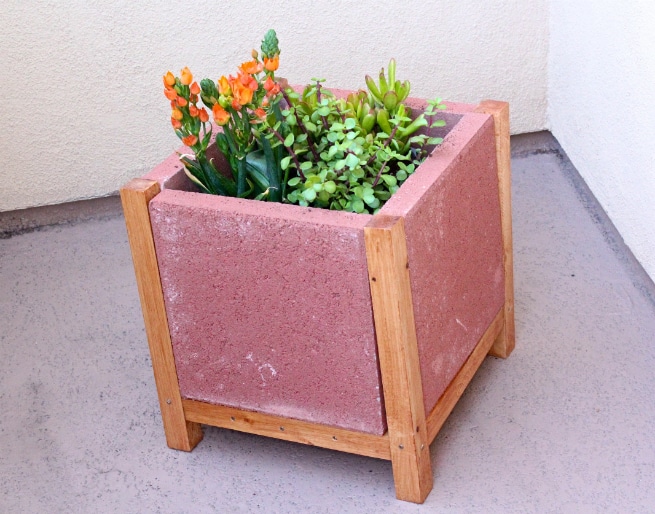
Colorful concrete from Brite and Bubbly

Elegant and tiled from The Wood Grain Cottage
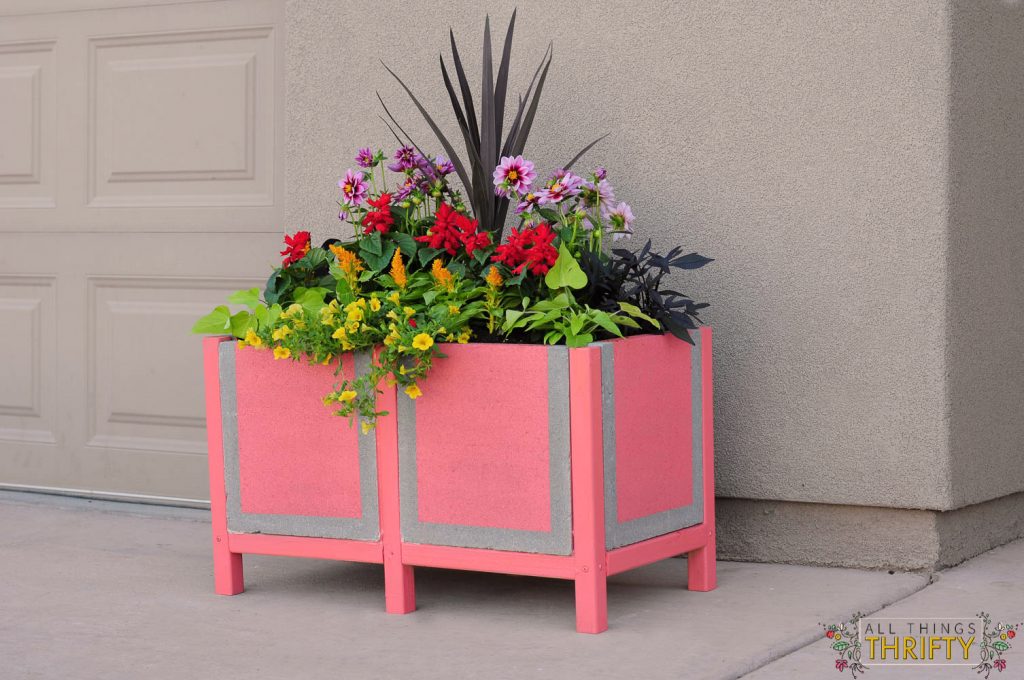
Creative from All Things Thrifty

Classic monogramed by The Yellow Cape Cod
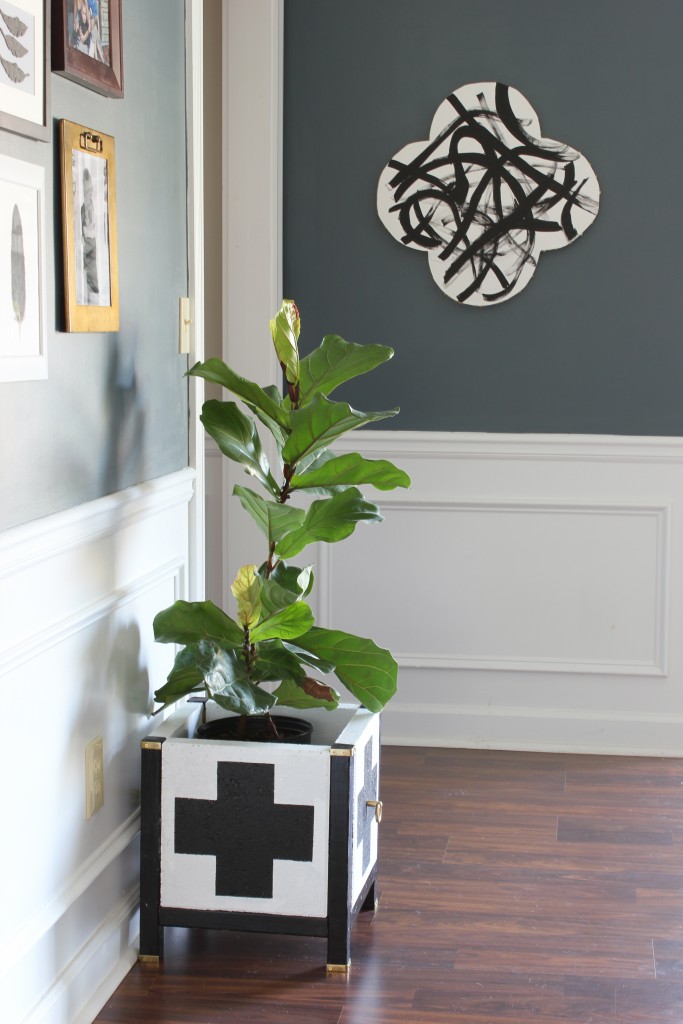
Swiss Cross painted planter by DIY on the Cheap
Gold paint glam by Our Life is Beautiful

Mini and modern tiled planter by Damask Love
These planter are all so beautiful and creative, I'm almost afraid to share mine!
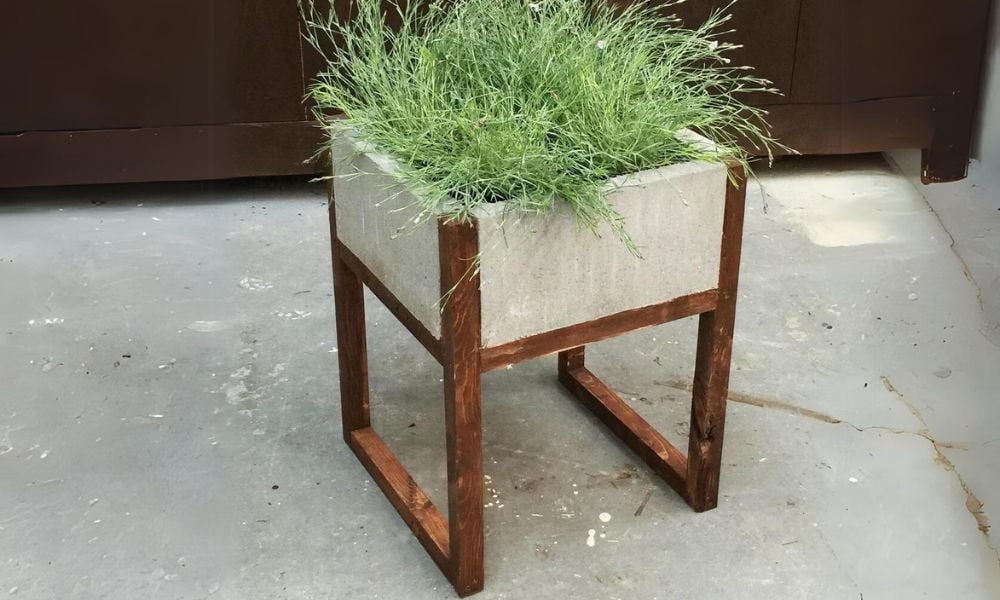
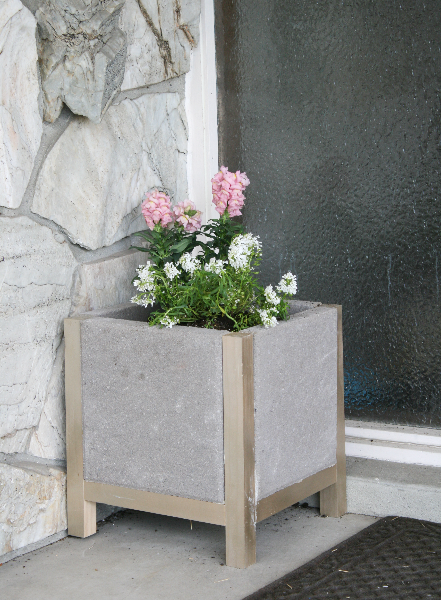
Since it's still winter in Alaska, I couldn't get the 12x12 paver blocks used for landscaping yet in my Home Depot. There was still several feet of snow in the outdoor section. So I headed over to the concrete section and found 16x8x2 concrete block caps, and decided to use them instead. And here's what I came up with!
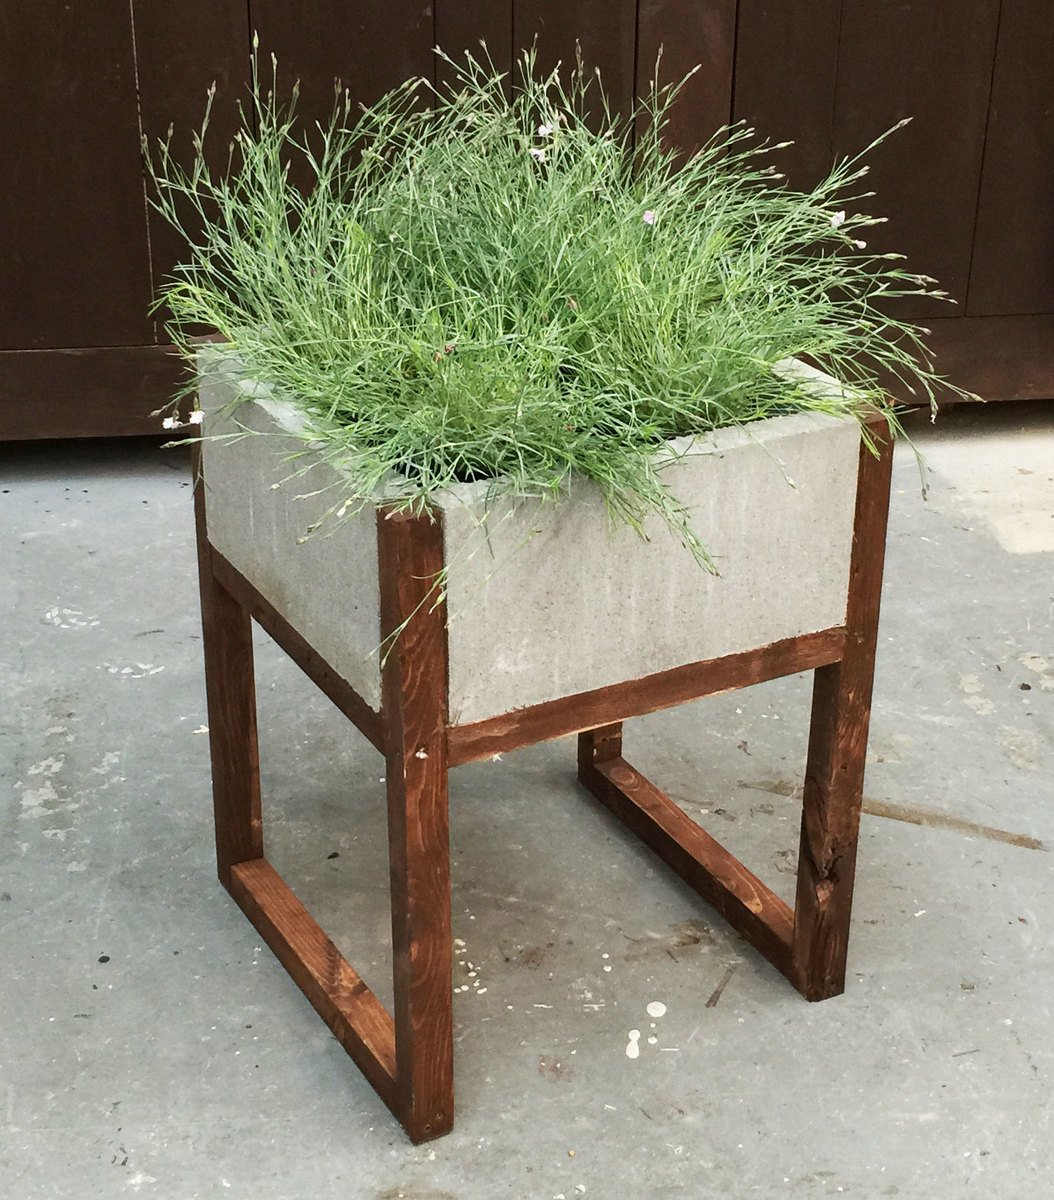
The rectangle concrete pieces just seemed to fit a more modern shape, and I love the results!
It's also suprisingly sturdy (that landscape adhesive is the real deal) and very heavy - great if you live in a windy area.
I put together a quick video of all the steps - check it out below for more details:
A couple of suggestions to make building yours easier
- - Measure your blocks first, and build the openings about 1/4" bigger to allow for the landscape adhesive and for the blocks to slide in place.
- - Use your Kreg Jig (if you have one) for joints, it will hide all screw holes
- - Stain your wood before adding the concrete in place
- - For exterior application, use treated or other exterior grade wood, and use an exterior stain or paint and top coat
Preparation
- 4 - 8x16x2 concrete top caps
- 3 - 2x2 @ feet long (cedar or outdoor treated perferred for exterior use)
- 2 -1/2" exterior deck screws or pocket hole screws (depending on joinery type)
- Landscape adhesive suitable for concrete block and wood
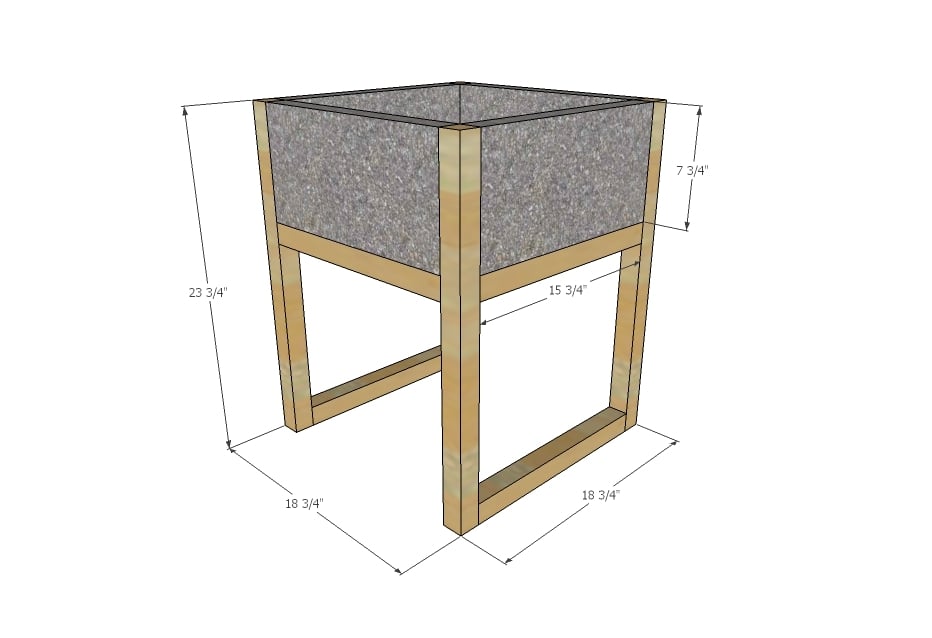
- 4 - 2x2 @ 23-3/4" (legs)
- 8 - 2x2 @ 15-3/4" (cut to fit length of blocks, cut a little long to allow blocks to fit in)
NOTE: Measure your blocks first and adjust to give enough room for blocks to slide in place - about 1/8"- 1/4" will be enough


Please read through the entire plan and all comments before beginning this project. It is also advisable to review the Getting Started Section. Take all necessary precautions to build safely and smartly. Work on a clean level surface, free of imperfections or debris. Always use straight boards. Check for square after each step. Always predrill holes before attaching with screws. Use glue with finish nails for a stronger hold. Wipe excess glue off bare wood for stained projects, as dried glue will not take stain. Be safe, have fun, and ask for help if you need it. Good luck!
Instructions
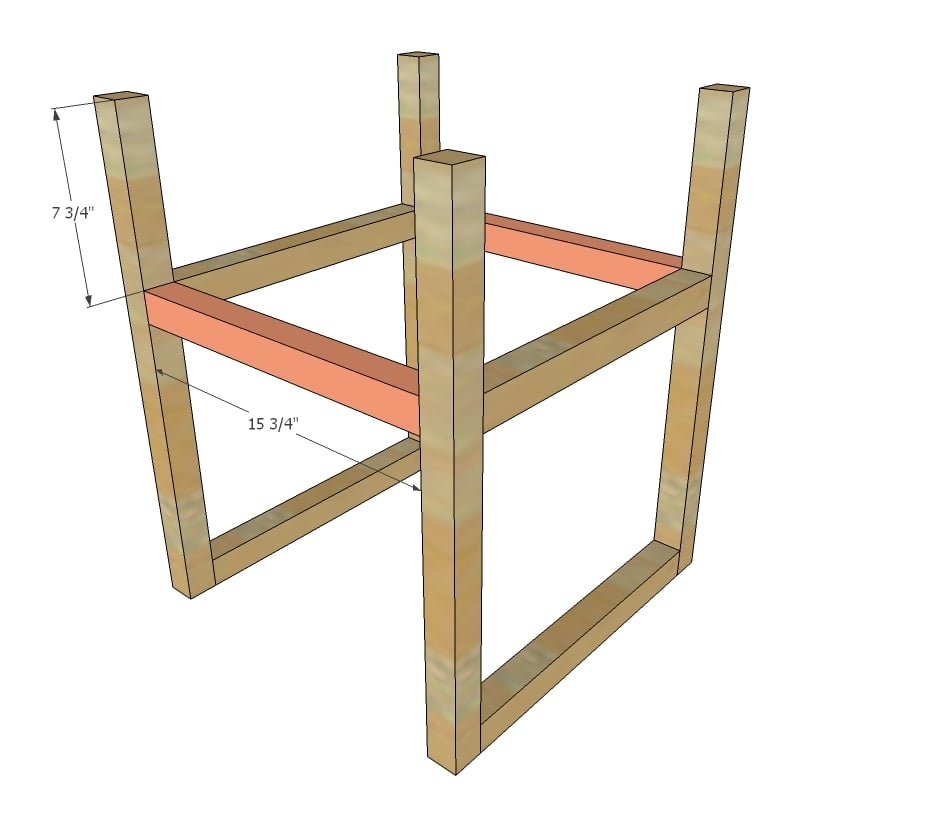
Step 1
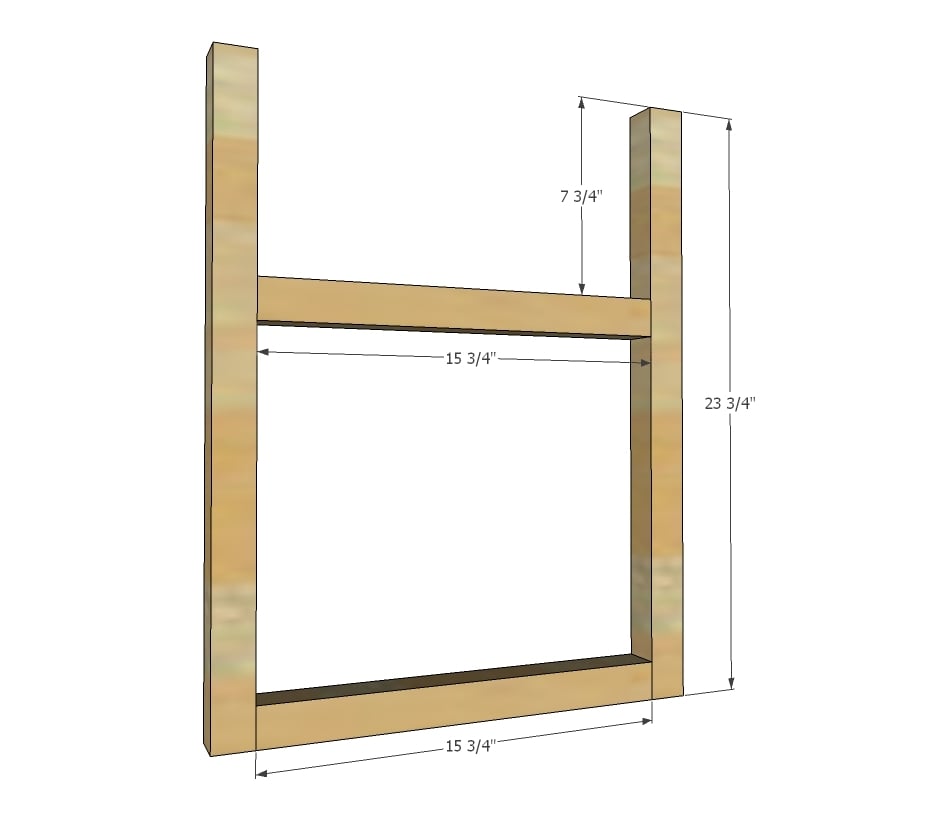
Build the two side frames, either with 2-1/2" deck screws predrilled and glue or set your Kreg Jig for 1-1/2" stock and drill pocket holes, and attach with 2-1/2" exterior pocket hole screws.
The top 2x2 needs to be set down the distance to match the width of your blocks.
Step 2
Tie the two sides together with more 2x2s, joining in the same manner as you did in step 1.
Step 3
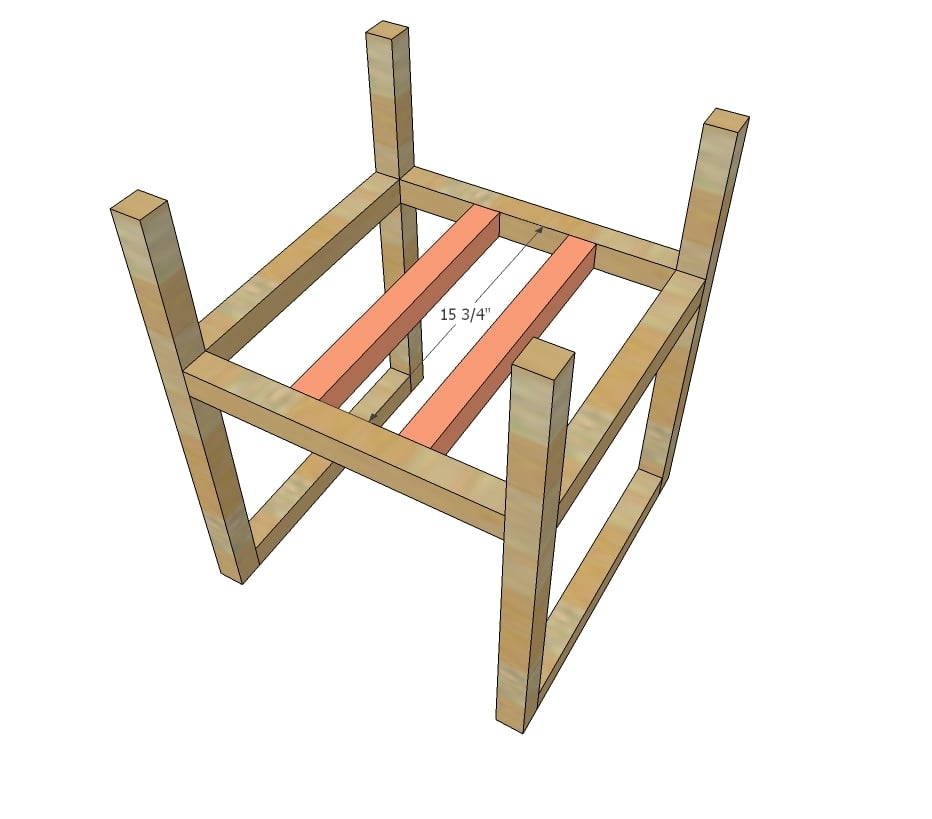
Repeat steps to add support inside - you can add additional 2x2s here too.
Step 4
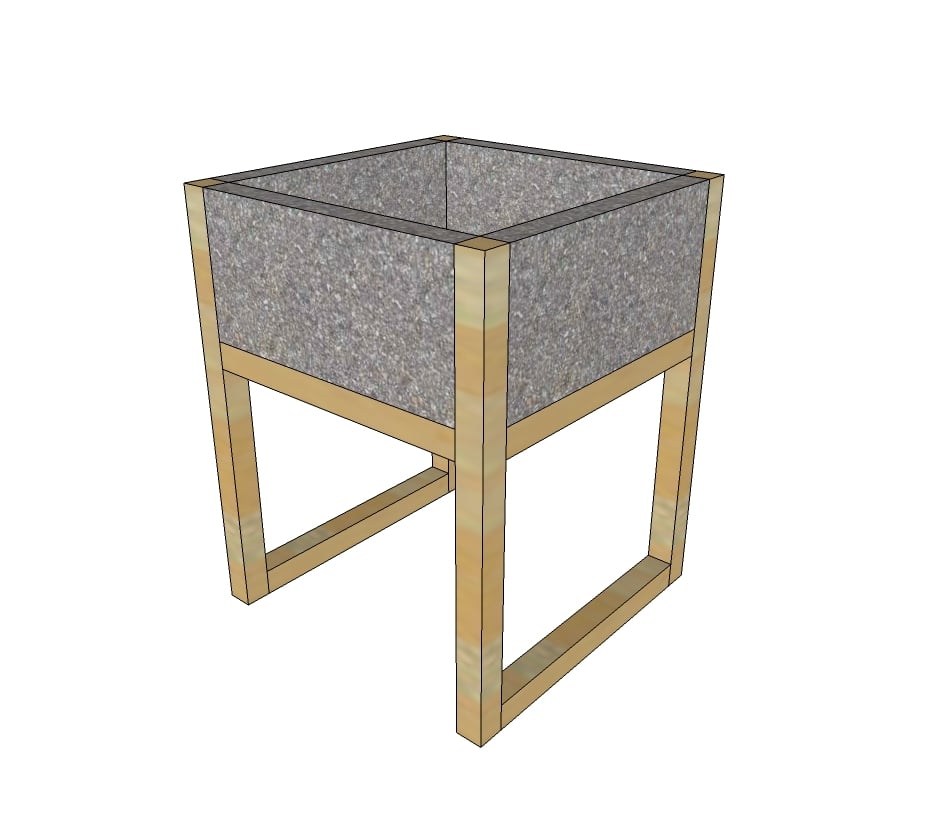
Apply landscape adhesive to wood and slide blocks in place. Use a rachet strap or rope to tie entire project together, and allow to set overnight for landscape adhesive to cure (follow directions with landscape adhesive).
When complete, use landscape fabric to line inside of planter, add soil and plants, and enjoy!
It is always recommended to apply a test coat on a hidden area or scrap piece to ensure color evenness and adhesion. Use primer or wood conditioner as needed.

Comments
Lady Goats
Wed, 04/15/2015 - 11:05
Loving this.
Is there really still snow there? Brrr! We just poured a quikrete walk maker patio, and now I need to think of things to FILL it! Love the look of all of these (but yours hits the right note for me!). We should do like... wood and concrete paver TABLES!!??!!
Clang
Wed, 05/06/2015 - 17:02
For the house or camper
For the house or camper
alyssa.hays
Wed, 05/06/2015 - 20:57
Happy Mothers Day to me
i know what I'm building myself this Sunday! Thanks for the modern lines
Corporate Carpenter
Fri, 06/12/2015 - 15:08
1.5" wood frame vs. 2" concrete caps
Since 2x2x8's are actually 1.5x1.5, I don't see how the 2" concrete caps can fit flush in the frame and make a perfect square when they're 0.5" thicker. This means they should be bulging out of the wood frame by half an inch to clear the corners. Are you using 2x2's that are truly 2" by 2" thick?
scothershman
Thu, 06/30/2016 - 08:28
I believe the cap actually
I believe the cap actually measured 1.75' so there is a slight overhang.
patriciatruel
Thu, 06/11/2020 - 17:48
2X2 length for concrete planters?
Hello Ana. Im brand new to registering, but I have been following you for years and i Love your stuff!
On the concrete planters, in regard to the shopping list, (i am assuming they 2x2’s are 8ft) but, there’s no mention to the length of the 2x2. Just thought I would let you know. Thanks.