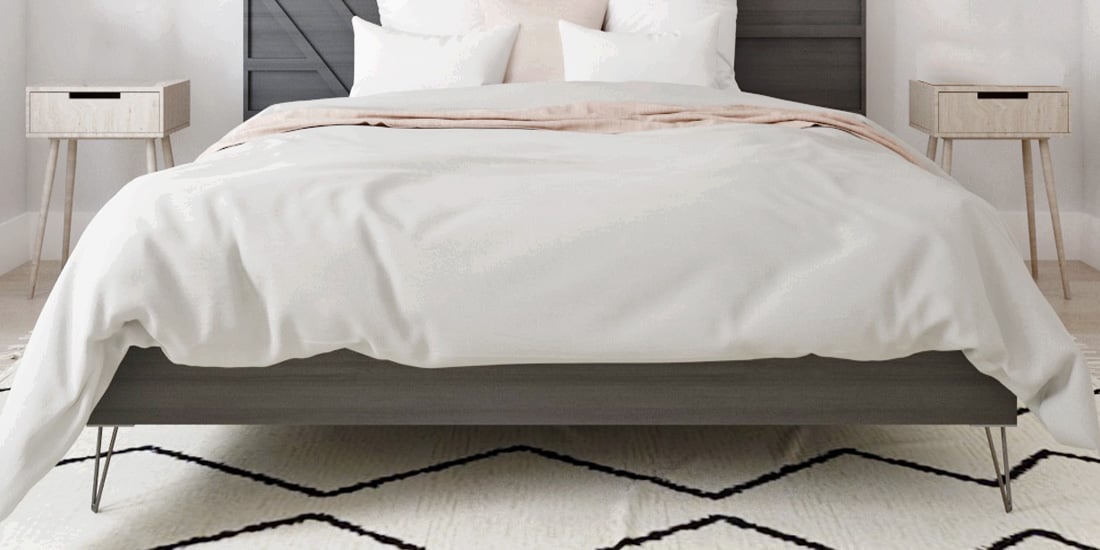
Get that mattress up off the floor in style, for about the cost of buying a box spring. Our free plans make it easy. Step by step diagrams, shopping list and cut list from Ana White
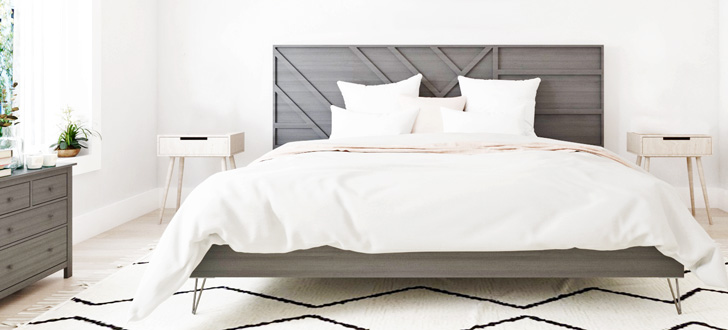
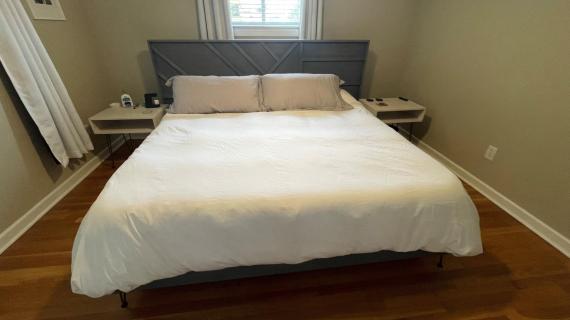
Can be used without a headboard, or pair the king sizes with our Modern Geo Headboard.
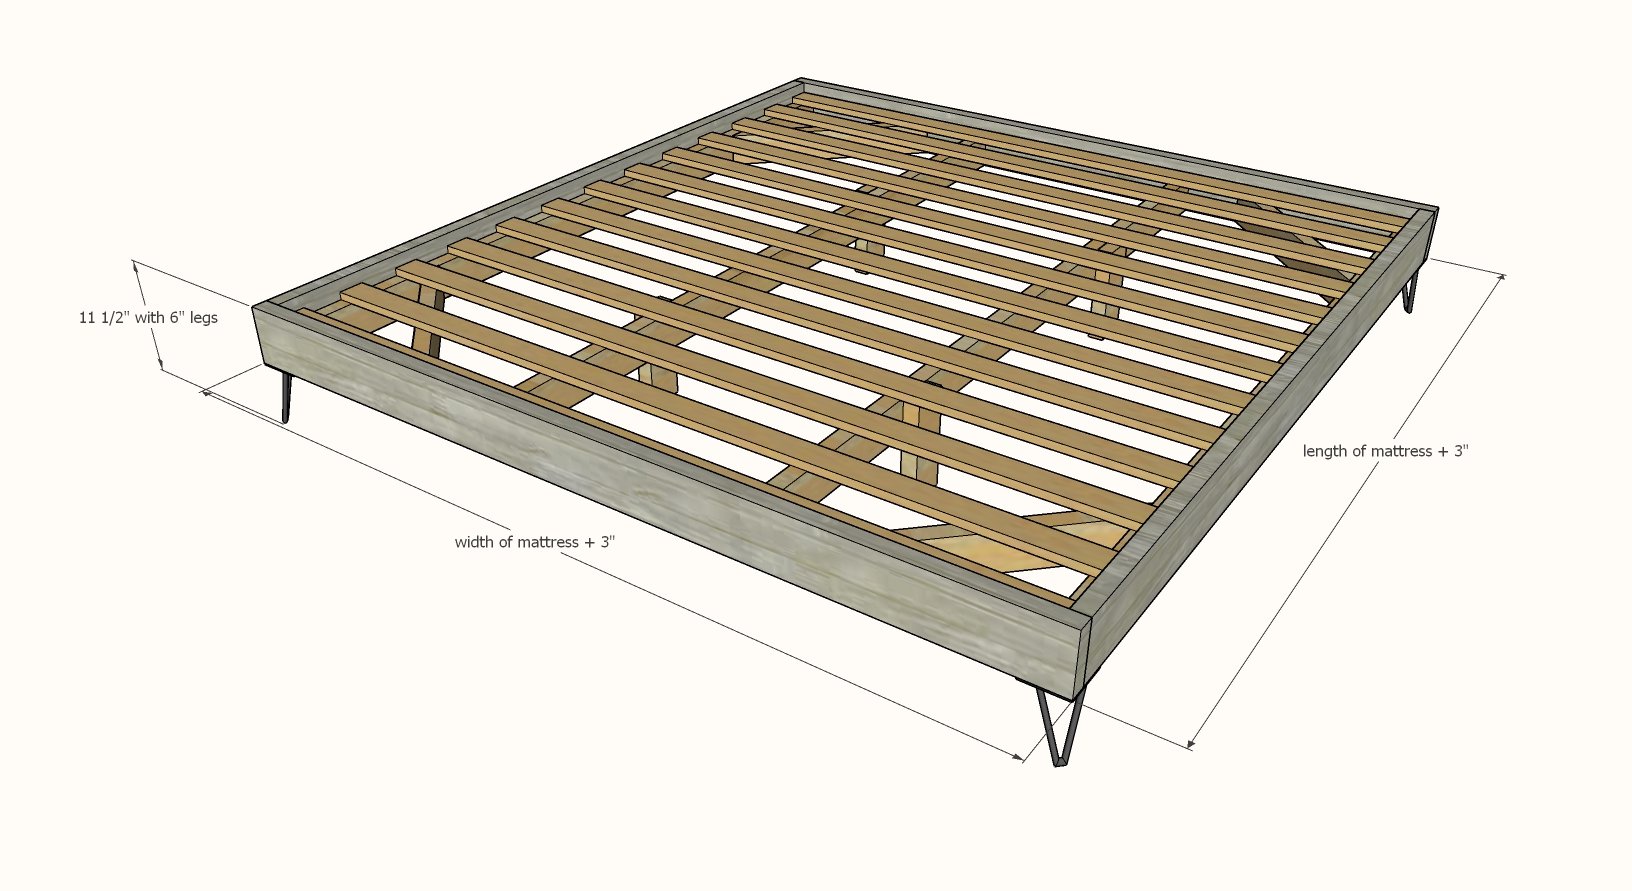
Preparation
TWIN BED FRAME SHOPPING LIST (38" x 75")
- 3 - 2x6 @ 8 feet long or 92-5/8" stud length
- 3 - 2x4 @ 8 feet long
- 6 - 1x3 furring strips
- 40 - 2-1/2" self tapping wood screws
- 25 - 2" self tapping wood screws (for screwing mattress slats down
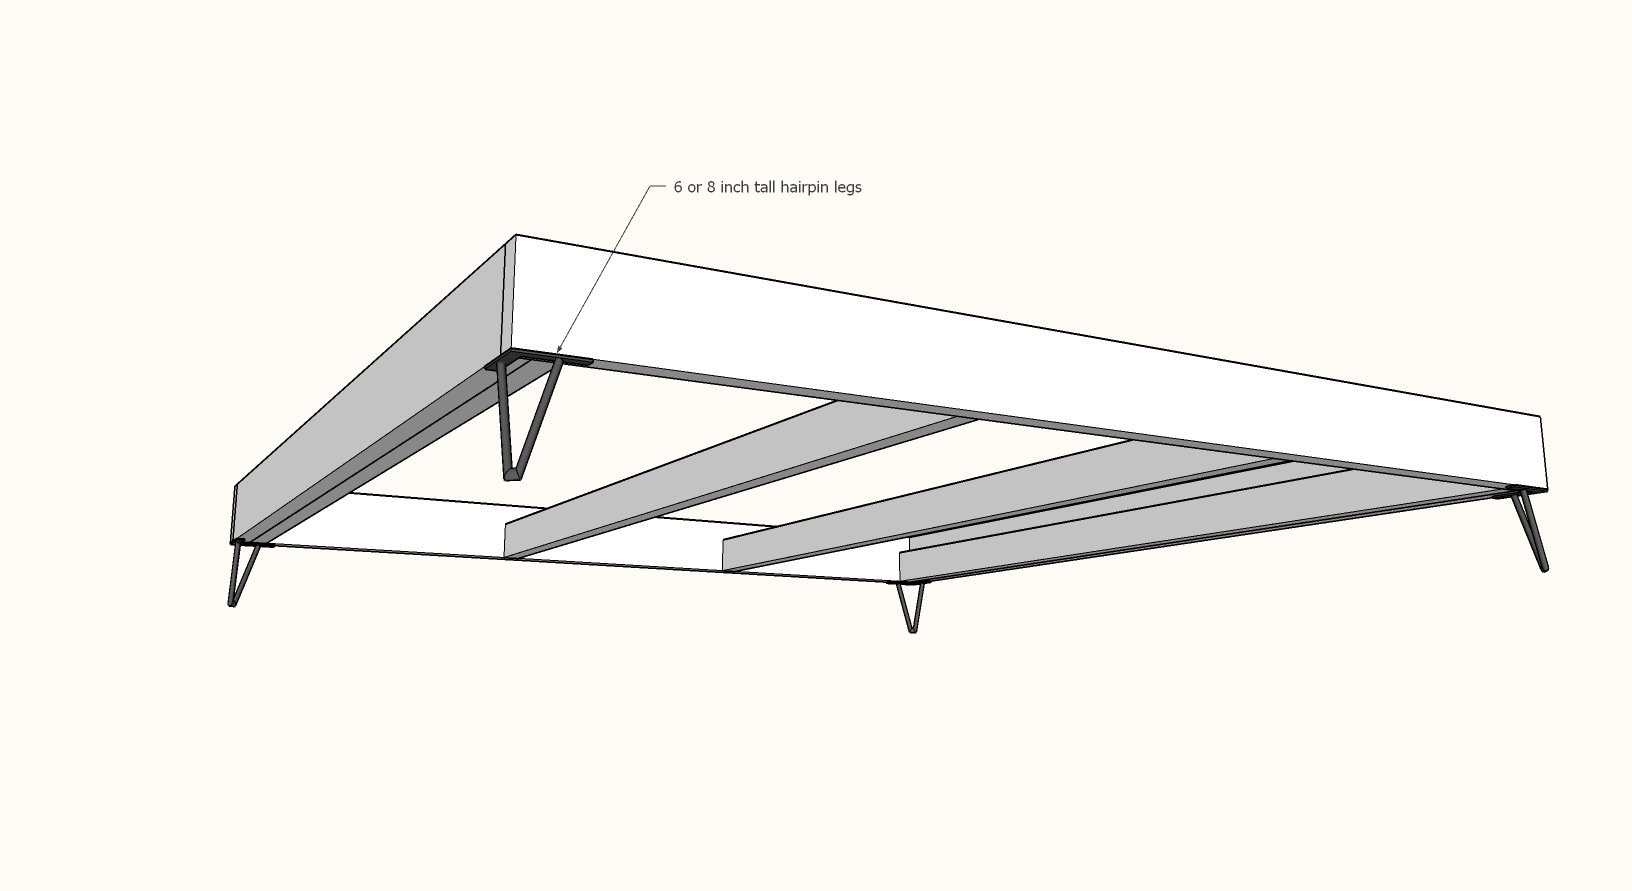
- 6" or 8" hairpin legs with screws for attaching (Amazon affiliate link to 6" hairpin legs)
FULL BED FRAME SHOPPING LIST (54" x 75")
- 2 - 2x6 @ 12 feet long (can cut into 5' and 7' pieces to transport)
- 4 - 2x4 @ 8 feet long
- 7 - 1x3 @ 8 feet long
- 50 - 2-1/2" self tapping wood screws
- 50 - 2" self tapping wood screws (for screwing mattress slats down
- 6" or 8" hairpin legs with screws for attaching (Amazon affiliate link to 6" hairpin legs)
QUEEN BED FRAME SHOPPING LIST (60" x 80")
- 2 - 2x6 @ 12 feet long (can cut into 80" and 64" pieces to transport)
- 4 - 2x4 @ 8 feet long
- 7 - 1x3 @ 8 feet long
- 50 - 2-1/2" self tapping wood screws
- 50 - 2" self tapping wood screws (for screwing mattress slats down
- 6" or 8" hairpin legs with screws for attaching (Amazon affiliate link to 6" hairpin legs)
STANDARD KING BED FRAME SHOPPING LIST (76" x 80")
- 4 - 2x6 @ 8 feet or 92-5/8" stud length
- 5 - 2x4 @ 8 feet long
- 13 - 1x3 @ 8 feet long
- 60 - 2-1/2" self tapping wood screws
- 50 - 2" self tapping wood screws (for screwing mattress slats down
- 6" or 8" hairpin legs with screws for attaching (Amazon affiliate link to 6" hairpin legs)
CALIFORNIA KING BED FRAME SHOPPING LIST (72" x 84")
- 4 - 2x6 @ 8 feet or 92-5/8" stud length
- 5 - 2x4 @ 8 feet long
- 14 - 1x3 @ 8 feet long
- 60 - 2-1/2" self tapping wood screws
- 50 - 2" self tapping wood screws (for screwing mattress slats down
- 6" or 8" hairpin legs with screws for attaching (Amazon affiliate link to 6" hairpin legs)
TWIN BED FRAME CUT LIST (38" x 75")
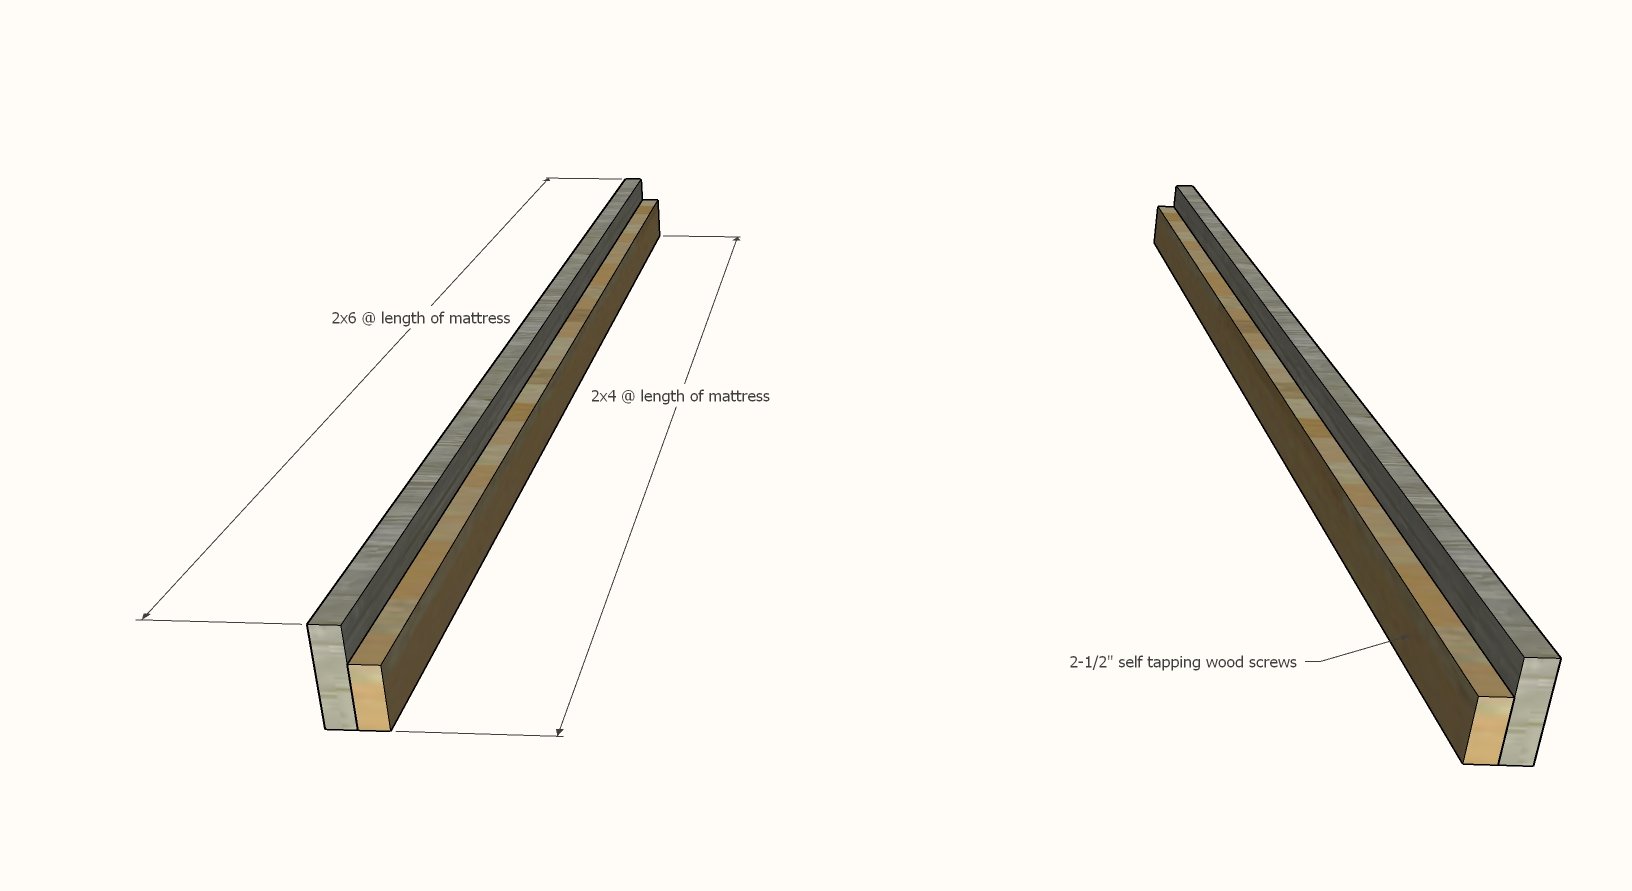
- 2 - 2x6 @ 75" - Siderails
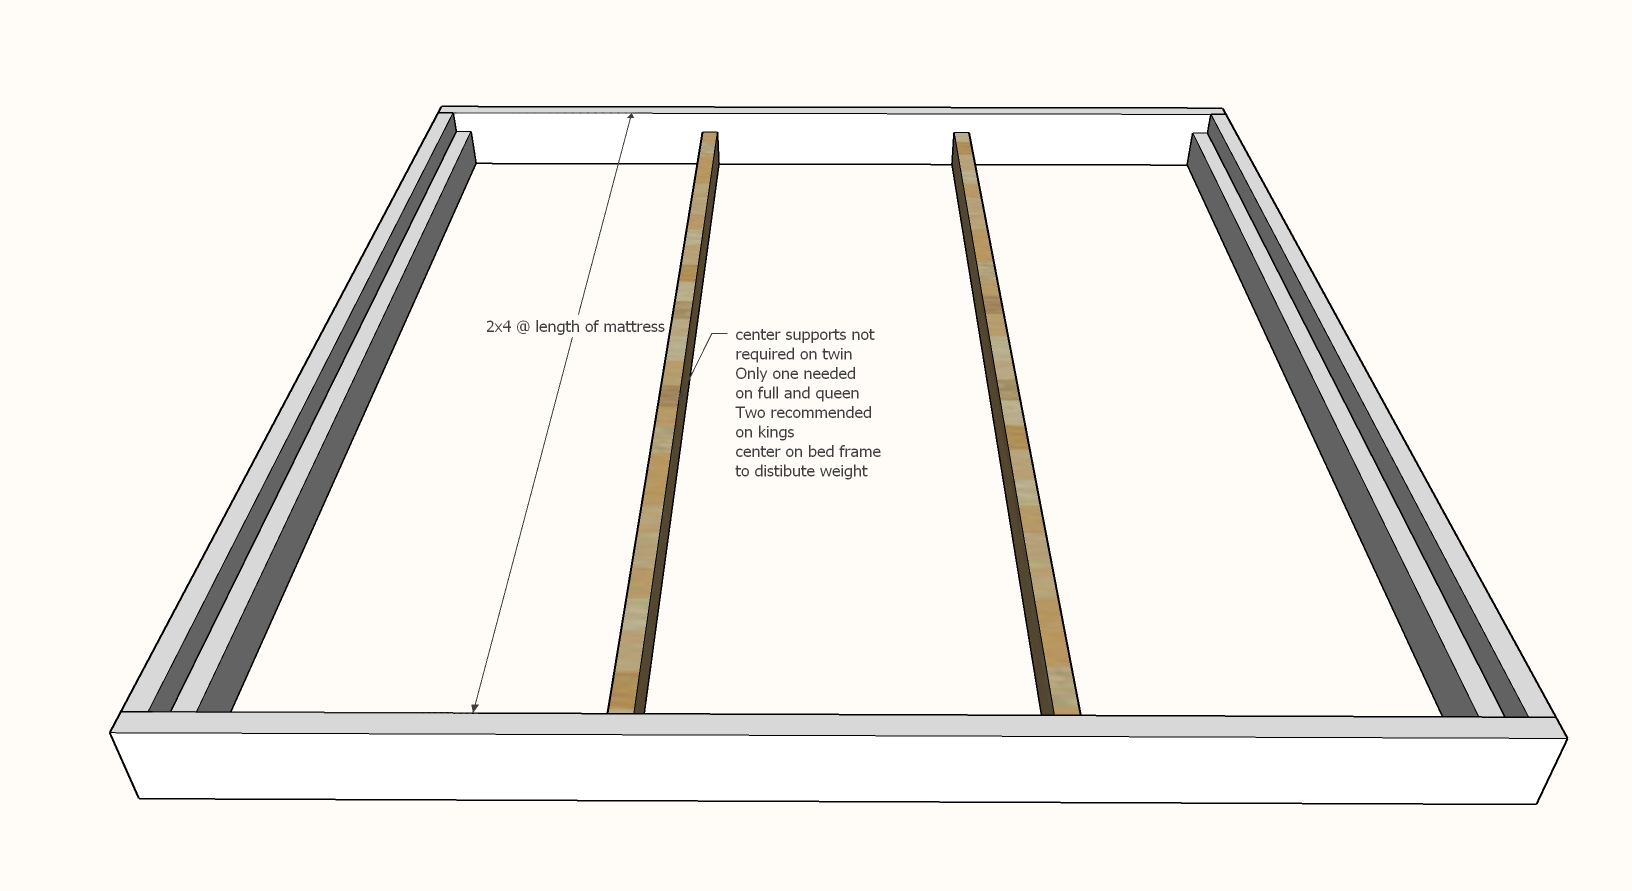
- 2 - 2x4 @ 75" - Center Supports
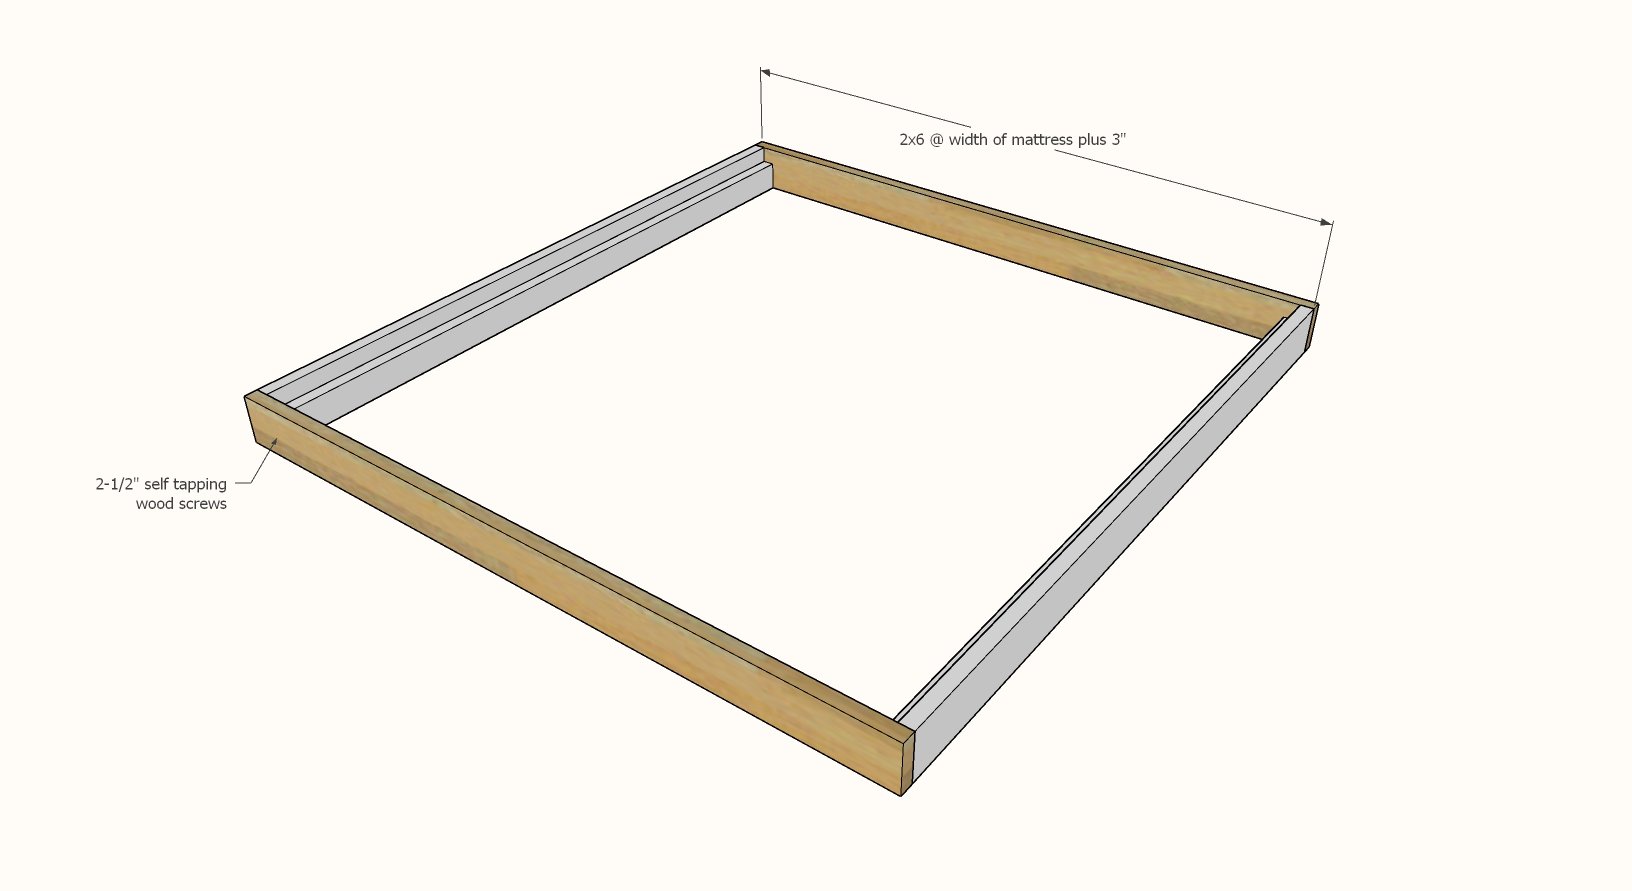
- 2 - 2x6 @ 41" - Top and Bottom
- 4 - 2x4 @ 24" - Ends cut at 45 degrees bevel, ends NOT parallel, long point to long point measurement (optional)
- 12 - 1x3 @ 38" - slats
FULL BED FRAME CUT LIST (54" x 75")
- 2 - 2x6 @ 75" - Siderails
- 3 - 2x4 @ 75" - Center Supports
- 2 - 2x6 @ 57" - Top and Bottom
- 4 - 2x4 @ 24" - Ends cut at 45 degrees bevel, ends NOT parallel, long point to long point measurement (optional)
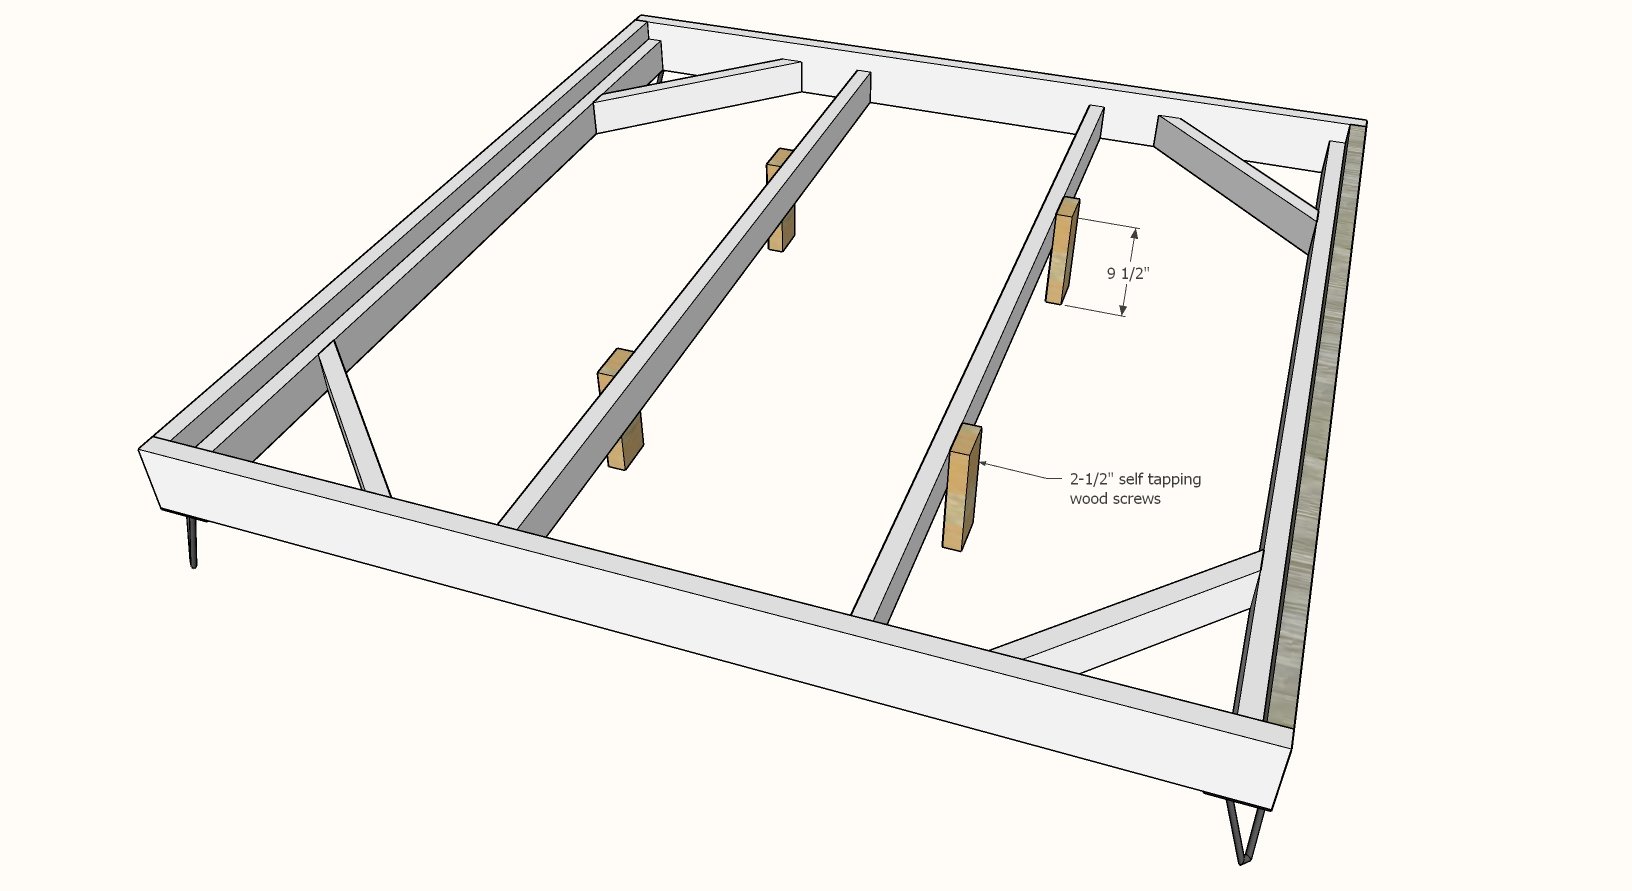
- 2 - 2x4 @ 9-1/2" (center legs) for 6" hairpin legs (for 8" hairpin legs, cut at 11-1/2" long
- 21 - 1x3 @ 32" - slats
QUEEN BED FRAME CUT LIST (60" x 80")
- 2 - 2x6 @ 80" - Siderails
- 3 - 2x4 @ 80" - Center Supports
- 2 - 2x6 @ 63" - Top and Bottom
- 4 - 2x4 @ 24" - Ends cut at 45 degrees bevel, ends NOT parallel, long point to long point measurement (optional)
- 2 - 2x4 @ 9-1/2" (center legs) for 6" hairpin legs (for 8" hairpin legs, cut at 11-1/2" long
- 21 - 1x3 @ 32" - slats
STANDARD KING BED FRAME CUT LIST (76" x 80")
- 2 - 2x6 @ 80" - Siderails
- 4 - 2x4 @ 80" - Center Supports
- 2 - 2x6 @ 79" - Top and Bottom
- 4 - 2x4 @ 24" - Ends cut at 45 degrees bevel, ends NOT parallel, long point to long point measurement (optional)
- 2 - 2x4 @ 9-1/2" (center legs) for 6" hairpin legs (for 8" hairpin legs, cut at 11-1/2" long
- 13 - 1x3 @ 76" - slats
CALIFORNIA KING BED FRAME CUT LIST (72" x 84")
- 2 - 2x6 @ 84" - Siderails
- 4 - 2x4 @ 84" - Center Supports
- 2 - 2x6 @ 75" - Top and Bottom
- 4 - 2x4 @ 24" - Ends cut at 45 degrees bevel, ends NOT parallel, long point to long point measurement (optional)
- 2 - 2x4 @ 9-1/2" (center legs) for 6" hairpin legs (for 8" hairpin legs, cut at 11-1/2" long
- 14 - 1x3 @ 72" - slats
TIP: Paint or stain the 2x6 boards prior to assembly. They are the only boards that need a finish.
Instructions
Step 1
Step 2
Step 3
Step 5
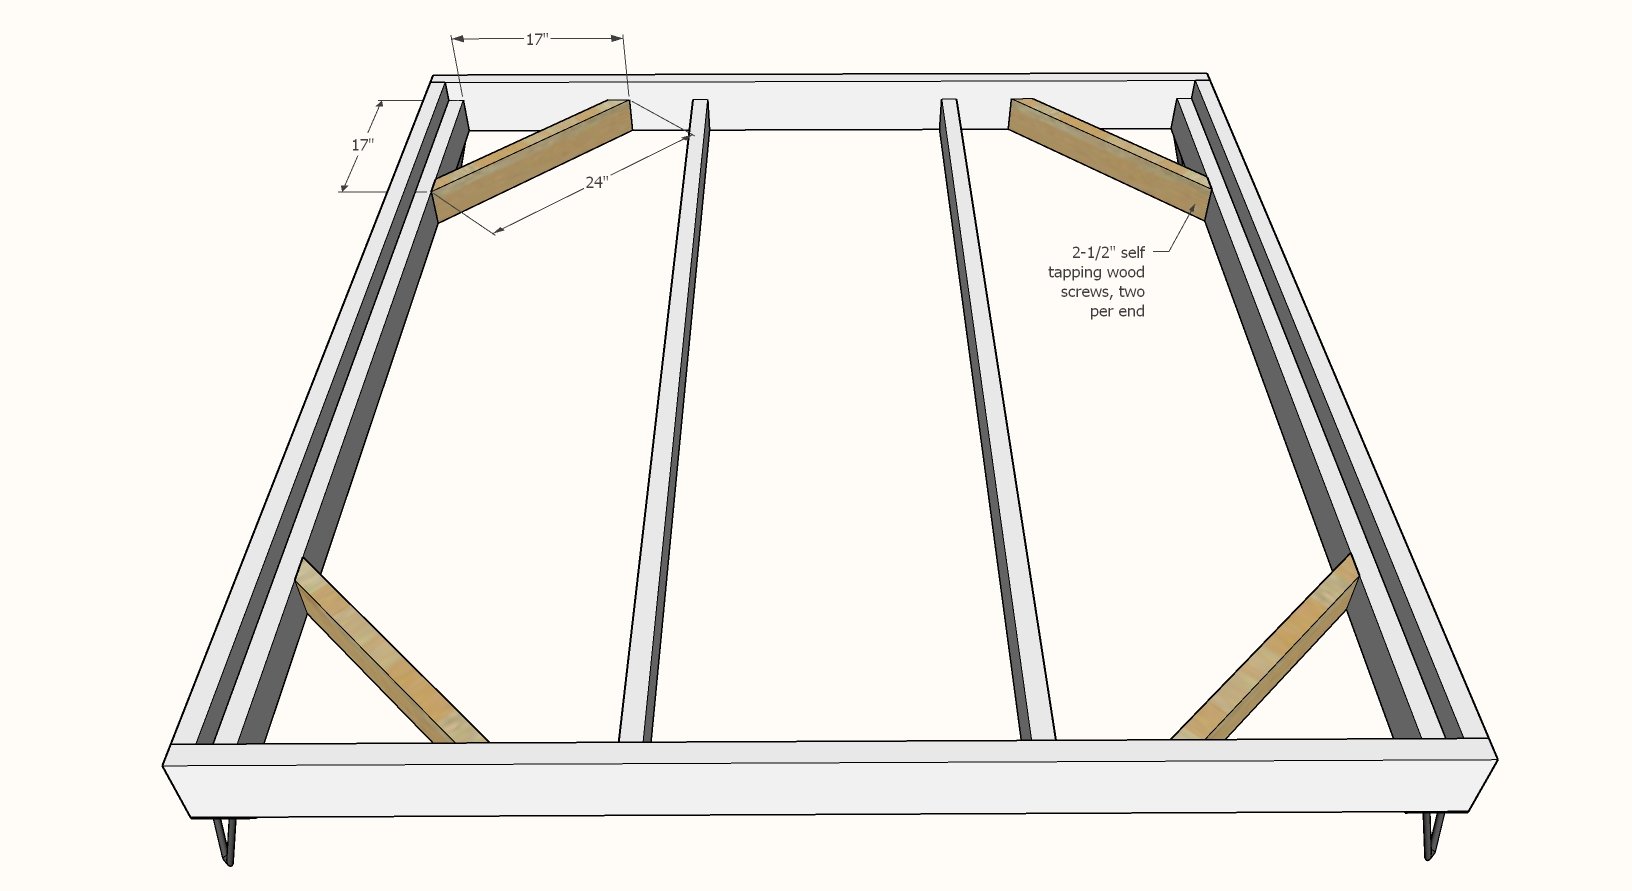
Angled supports can help strengthen up your bed and will help it last longer (but not required)
Cut the angles at 45 degrees with either a miter saw or setting your circular saw blade to 45 degree bevel and cutting.
Make sure your bed frame is square by taking opposite diagonals, and adjusting the bed until the diagonals match.
Attach with 2-1/2" self tapping screws.
Step 6
Step 7
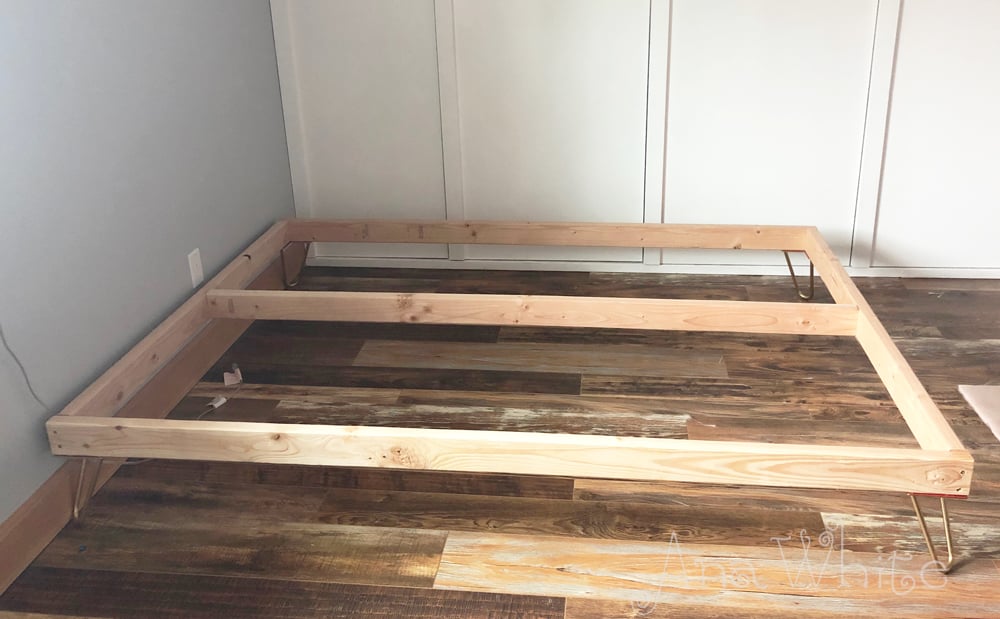
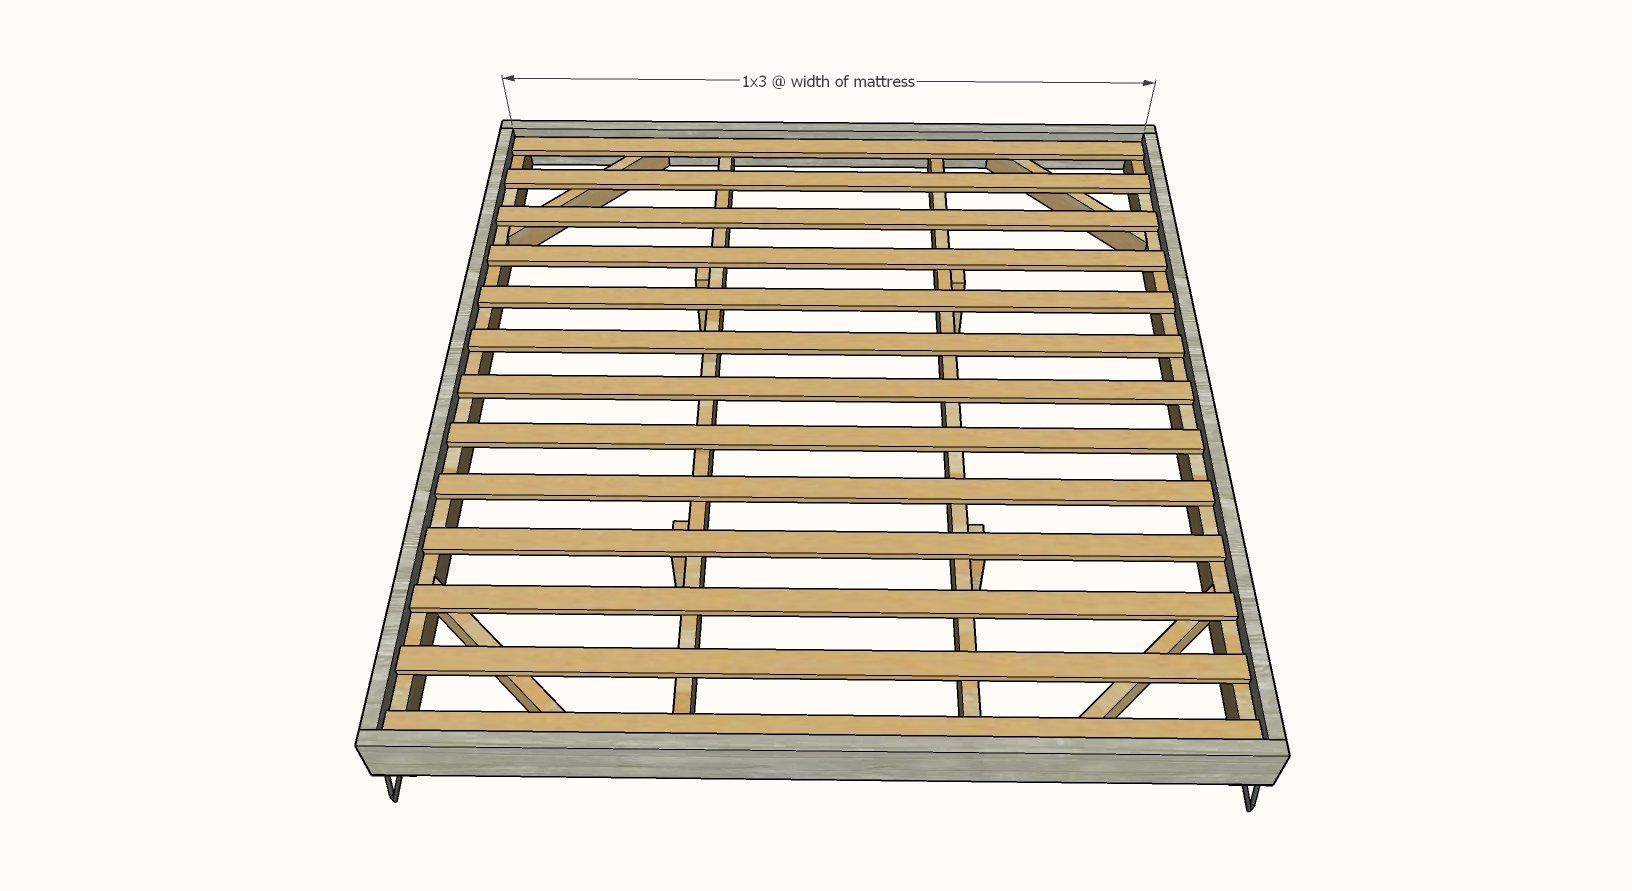
Lay slats down in the bed, about 4" apart.
For the full and queen slats, alternate as done here (this reduces waste and conserves lumber)
Screw down with the shorter screws.





Comments
Skaterdawn
Wed, 01/01/2020 - 19:16
Wish we hadn’t cut our slat…
Wish we hadn’t cut our slat boards before putting the bed together. The full size plans call for 21 32” slats. It’s totally wrong. Maybe this was for the twin? We’ll stagger the boards until we go back to the lumber yard. Bummer, since this was our first build from your plans.
Andi2347
Tue, 01/07/2020 - 17:03
It says that for a full or…
It says that for a full or queen size bed that you put one support down the middle and stagger the slats. Unfortunately it has a link to what that is supposed to look like but the link doesn't work. From what I understand from reading the plans and your comment, you did it the correct way. I'm going to try building this bed frame pretty soon as well.