


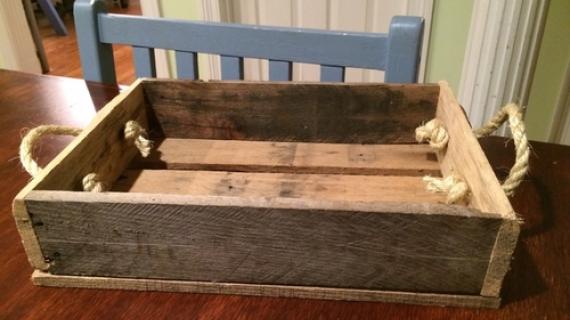
Make decorative storage boxes out of pallets! Free tutorial from Ana-White.com
Last night, my hip started hurting, so I sat up, careful not to step on Grace who was snoring on the floor using my coat as a pillow, and looked out the window.
The northern lights were blazing across the sky, and the moon glimmered, reflecting off a light dusting of snow on mountain tops. For as far as I could see, there was not a single light, even on this clear night.
I looked closer, wondering if anyone lived down there. The window was cold and I knew we were close to home. I live here, I thought. This is my home.
30 minutes later, I was glad I packed a knee length down jacket around the country - even to places like Atlanta and Houston, as we found our bags, and climbed in a freezing cold car and made our way home in the dark night.
The temperature is -15 degrees below zero, and while we were gone on book tour, winter has come to stay up here in Alaska. We are so glad to be home.
On our book tour, we saw beautiful places and met amazing people. We learned so much, and know the trip was well worth it, and are grateful to have had an opportunity to tour the country and meet so many of you. A very special thank you to those of you who were able to come meet us at a book signing. We are most appreciative.
But there is no place like home. I was so glad to see our little DIY house. This is the longest I've ever left it. And so thankful to snuggle up in our Farmhouse bed and finally get a full night's rest. We are indeed happy to be home.
Living up here in remote Alaska definitely has it's drawbacks thought. It can be very difficult to find the right décor items for my home. That’s one of the big reasons I go the DIY route.
One of the great challenges of putting this book together is getting beautiful photos when I do not have local access to accessories and decor items. When I finished the Storage Shelf with Hooks, and also went to photograph the Lego Coffee Table for the book, I knew I needed something - baskets or boxes to fill up shelves and cubbies.
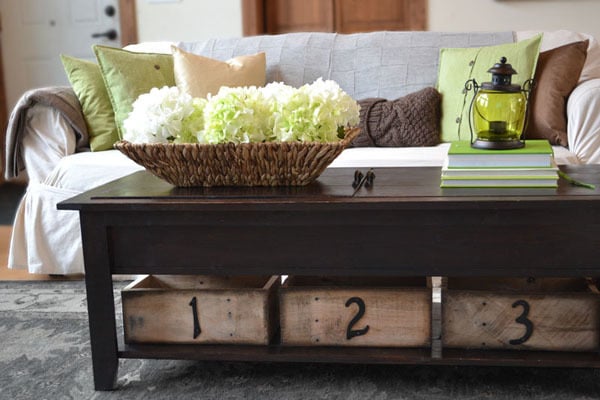
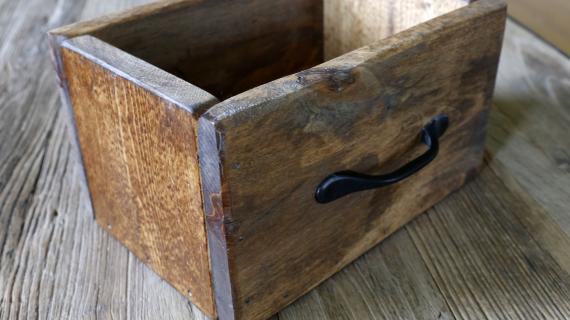
I can always count on DIY. I made these wood boxes with reclaimed pallet board faces, but are mostly made of new materials. If you don’t have a pallet board, don’t worry – you can use a new board too! I loved the character the house numbers brought to the boxes, but metal handles would be refreshing and useful too!
Customize the size to fit your requirements. For the Lego Coffee Table, I recommend using a 1x12 for the bottom and sides, and for the Storage Bench, a 1x6 works perfectly! I've put together a quick plan below.

For the purpose of these boxes, I just nailed and glued. But if you want a stronger box, definitely go the screw/glue route.

I actually used here 1 1/2" long nails because my pallet boards are only 5/8" thick, and I suspected 2" nails would split out the sides. Just a hunch!
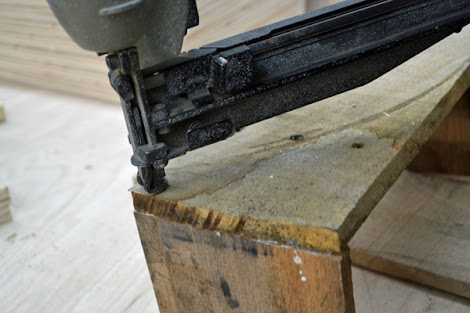
You could use regular nails and a hammer too!
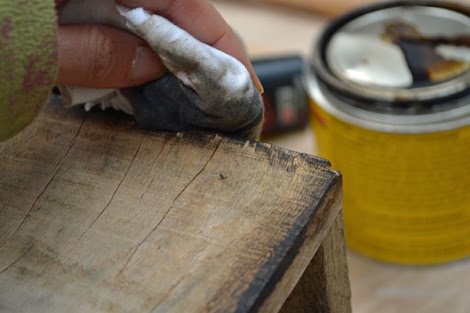
Here's my trick on getting the dark edges. I start with the darker stain first, and apply it very carefully to just the corners. I used Minwax Dark Walnut.

Then I took a lighter stain - Minwax Early American - and rubbed it over the darker stain and blended it into the wood. This made the edges have a more subtle contrast.

Handles would be cute, but we went the house number route.

These nails were a little long, so what I did was attach the numbers with the nails, and then go back on the inside and pound the protruding nail ends flat.

The house numbers were a buck each. The pallets were free. Can't beat that for a cute and functional storage box!
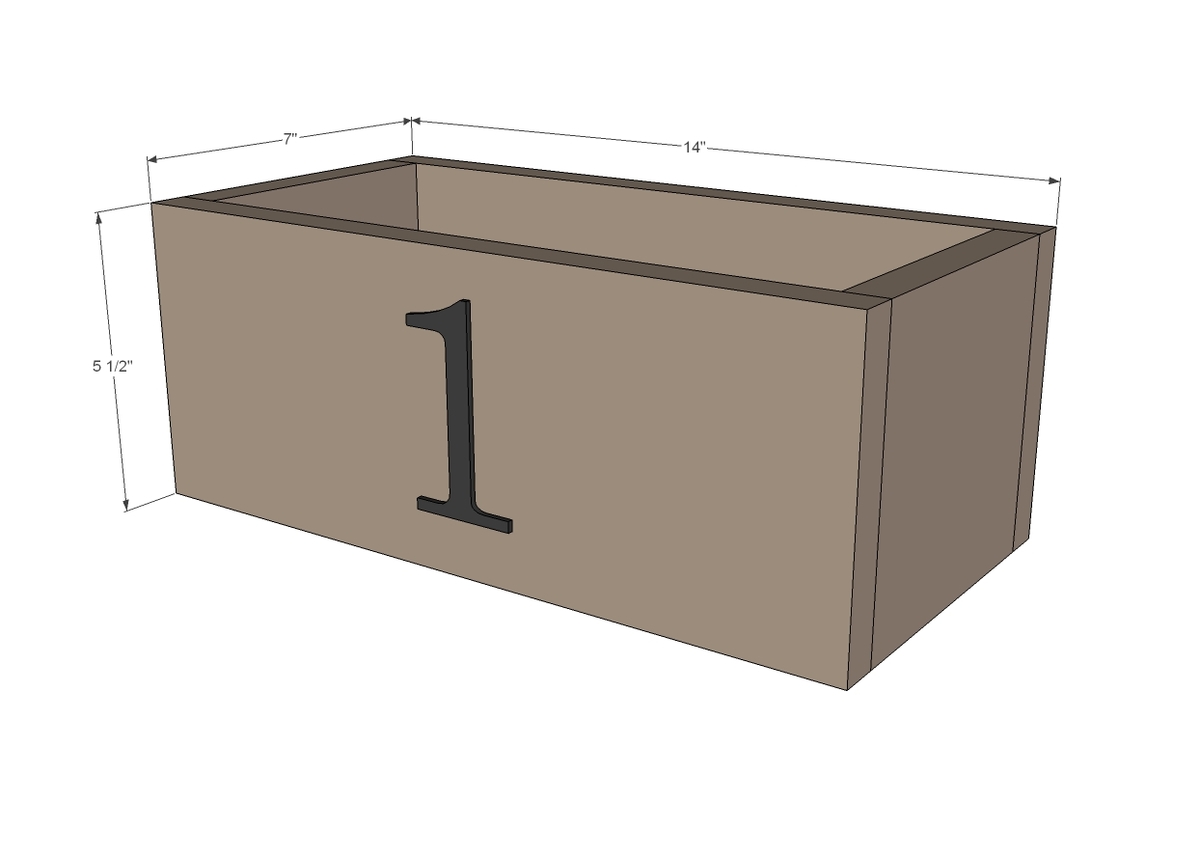
If you prefer diagrams, I put some together for you as well below.
Preparation
• 3 feet of pallet boards OR 1x6 boards
• 2 feet of 1x boards in desired width (1x6s used in plan)
• 1 1/2” finish nails
• Wood glue
1 - 1x6 (or other board width) @ 12 1/2” (bottom)
2 - 1x6 (or same board width as bottom) @ 5 1/2” (sides)
2 - 5 1/2” wide pallet boards OR 1x6 boards 14” long (front/back)


Please read through the entire plan and all comments before beginning this project. It is also advisable to review the Getting Started Section. Take all necessary precautions to build safely and smartly. Work on a clean level surface, free of imperfections or debris. Always use straight boards. Check for square after each step. Always predrill holes before attaching with screws. Use glue with finish nails for a stronger hold. Wipe excess glue off bare wood for stained projects, as dried glue will not take stain. Be safe, have fun, and ask for help if you need it. Good luck!
Instructions
Step 1
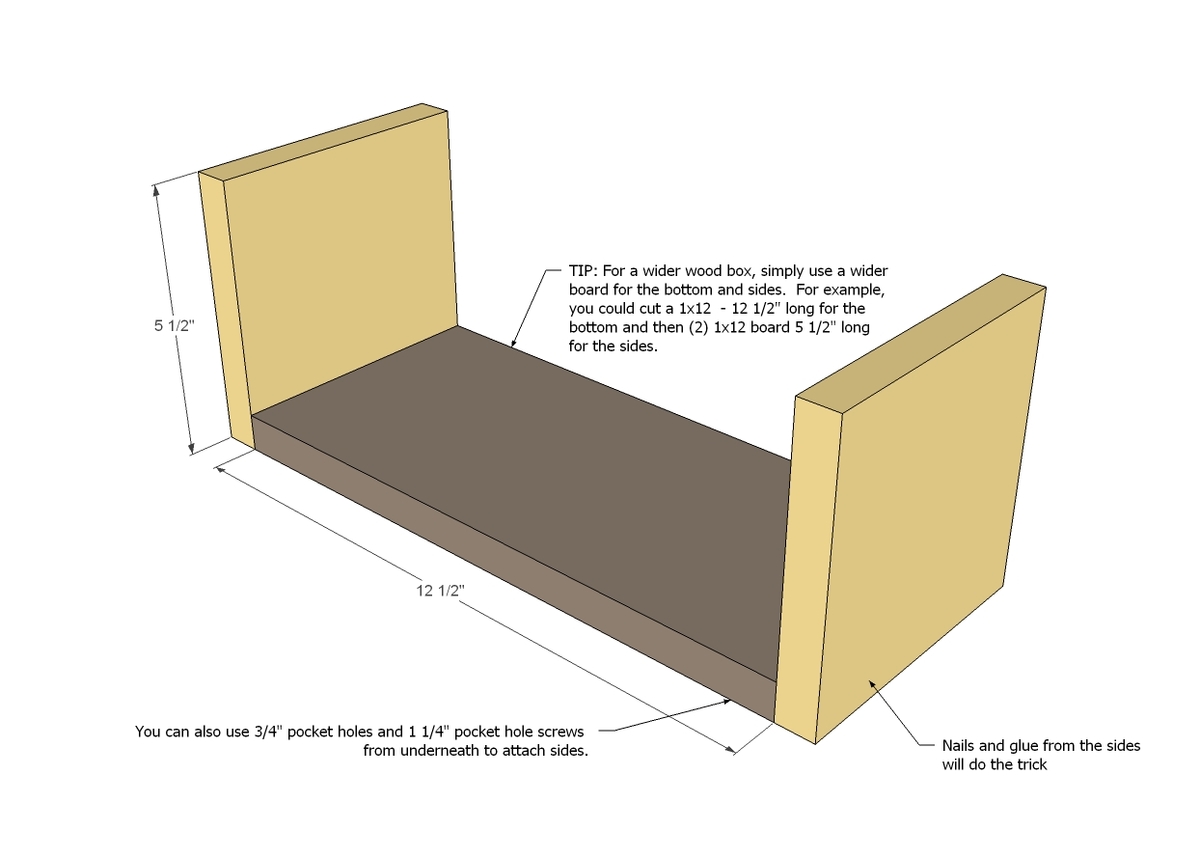
You can easily adapt this plan for a wider box by simply using a wider width board. Just make sure you use the same board for the bottom as the sides.
Attach sides to bottom with glue and 2” nails. You can alternatively use 3/4” pocket holes and 1 1/4” pocket hole screws on underside.
Step 2
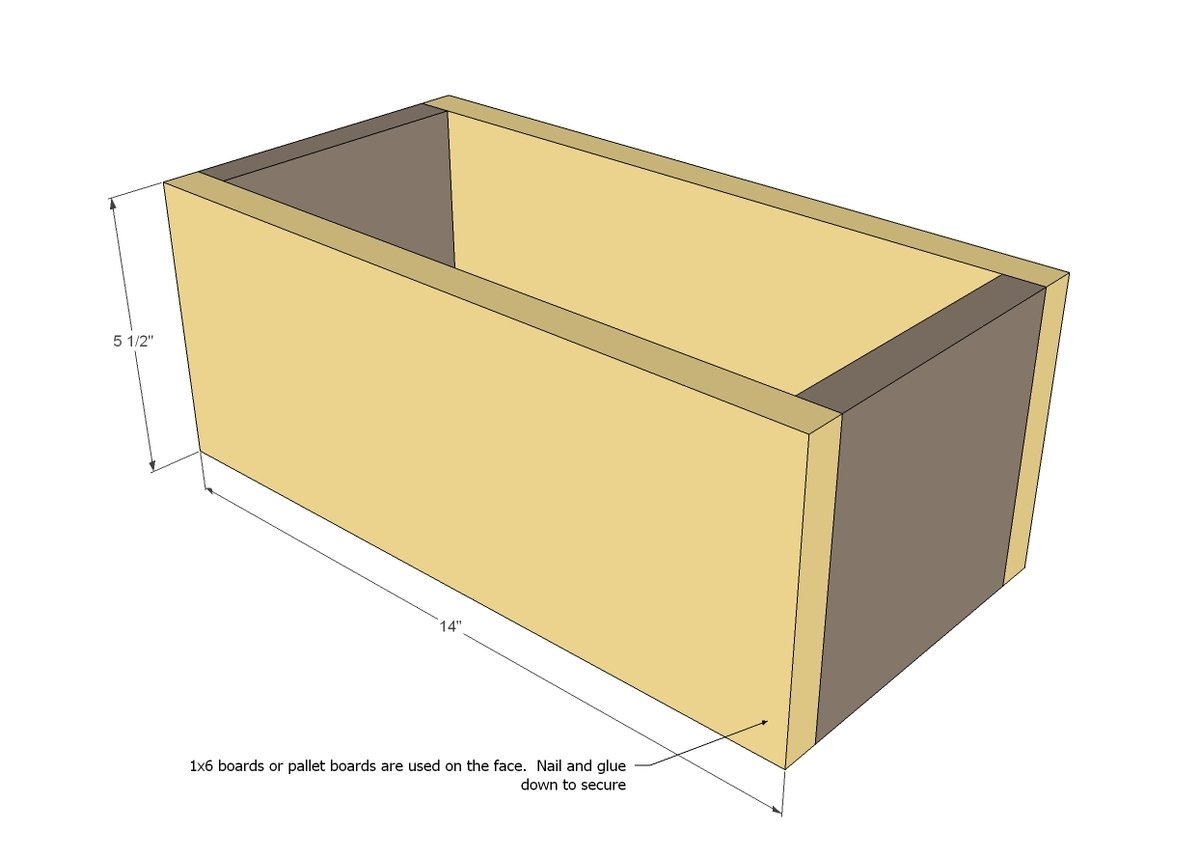
Apply glue to exposed edges of front and back of box. Attach front and back with 2” finish nails and glue.
Step 3
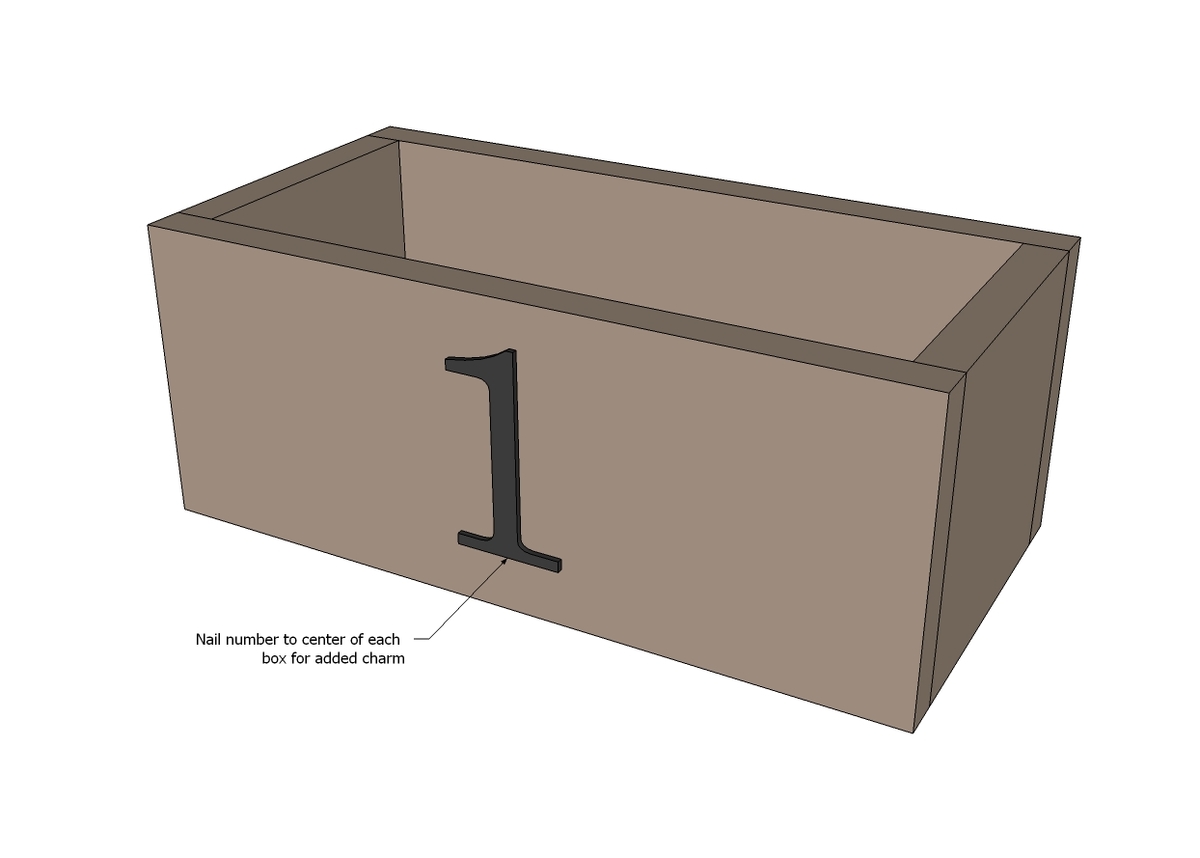
For added charm, nail a house number or handles to front. Trying to stay low budget? Drill two holes and loop rope through to create beautiful rustic handles without much added cost!
It is always recommended to apply a test coat on a hidden area or scrap piece to ensure color evenness and adhesion. Use primer or wood conditioner as needed.

Comments
dmcarwin
Wed, 10/24/2012 - 14:20
Yay!
I am so glad you posted these, I had been admiring them in your book! I especially like the finish.
Jaime Costiglio (not verified)
Wed, 10/24/2012 - 14:31
Glad you're home
Ana I bet you're sooooo happy to be home, a well deserved snuggle back in your own bed safe and sound. It was truly an honor to meet up in NYC and I'm looking forward to many, many future projects together.
TBENNE
Thu, 10/25/2012 - 08:49
Just got the book over the weekend!
So glad you posted this because I totally had box envy when I opened up to those projects!! I just finished building my 1st project (the closet organizer) and will be posting a brag once I finish paint. Next will be the living room storage project from the book (sorry I forget what is called) and the side table you posted just recently.
So excited!!
whitney_smith
Thu, 10/25/2012 - 11:52
Happy Homecoming!
Happy to hear you are back home safe and sound.. and cold :)
Love these boxes! Gotta think of where I could use them.
Jen @LM (not verified)
Mon, 10/29/2012 - 10:26
Beautiful
I love those boxes, what a great addition to your space!! My husband and I are inspired by your projects and want to start woodworking together, this would be a great beginner project!
Paula Vanduynhoven (not verified)
Wed, 11/14/2012 - 20:07
storage boxes from pallets
I love your idea, I have been collecting a few pallets from the curb of one of my neighbors. He gets huge deliveries for cell towers ...lol. I originally was going to do a few mailbox conversions but this storage ideal is going to be first on my list. We have 2 dogs with lots of accessories that come falling out of the closet every time we grab a leash or sweater. I think this would be so cute to open the door and see a couple of adorable recycled storage boxes.