
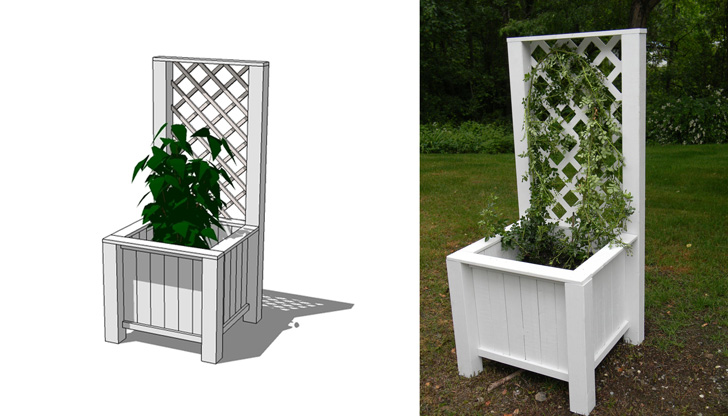

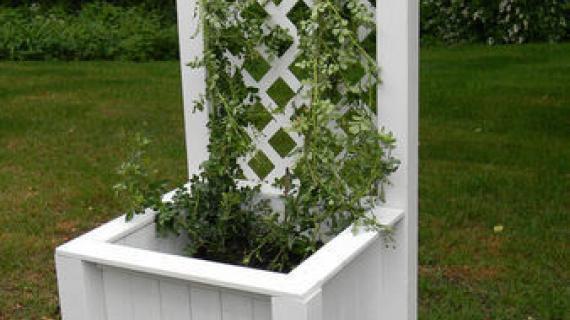
Build your own planter box with trellis. Free step by step plans with diagrams, shopping list and cut list.
Steps may vary per automated plan system.
Preparation
168" of 1x2 (2@8' total OR 1@8'/1@6' OR 1@14')
706" of 1x4 (59' total)
172 1/2" of 4x4 (14' 6" total OR 2@8')
21" x 37 1/2" trellis (or furring strips or yardsticks)
14-20 L-brackets
1 1/4" Nails (optional)
8-12 4" production screws (optional)
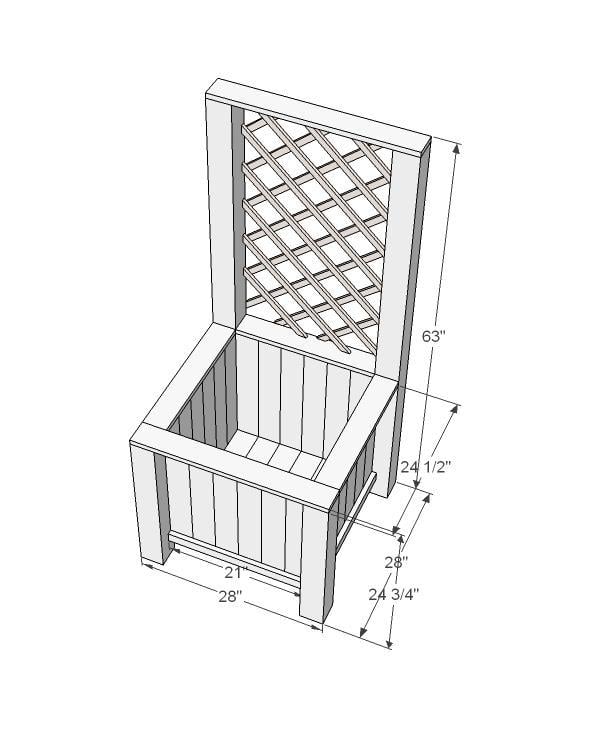
8 - 1x2 @ 21" (Box Wall Trim)
1 - 1x4 @ 28" (Box Trim, Front)
3 - 1x4 @ 21" (Box Trim, Sides & Back)
6 - 1x4 @ 22 1/2" (Box Bottom)
24 - 1x4 @ 20" (Box Walls)
2 - 4x4 @ 24" (Front Posts)
2 - 4x4 @ 62 1/4" (Back Posts)
21" x 37 1/2" piece trellis (or yardsticks or furring strips)


Please read through the entire plan and all comments before beginning this project. It is also advisable to review the Getting Started Section. Take all necessary precautions to build safely and smartly. Work on a clean level surface, free of imperfections or debris. Always use straight boards. Check for square after each step. Always predrill holes before attaching with screws. Use glue with finish nails for a stronger hold. Wipe excess glue off bare wood for stained projects, as dried glue will not take stain. Be safe, have fun, and ask for help if you need it. Good luck!
Instructions
Step 1

Step 1) Build front wall of box. Line 6 1x4@20" side by side. Line up 1 1x2@21" trim piece perpendicular to the wall boards ensuring the edge of the wall boards are lined up with the trim piece. Attach each board with 1 1/4" nail or screw and glue. If you don't want to see the fasteners from the front/outside of the box, attach them from the wall boards into the trim piece.
Step 2
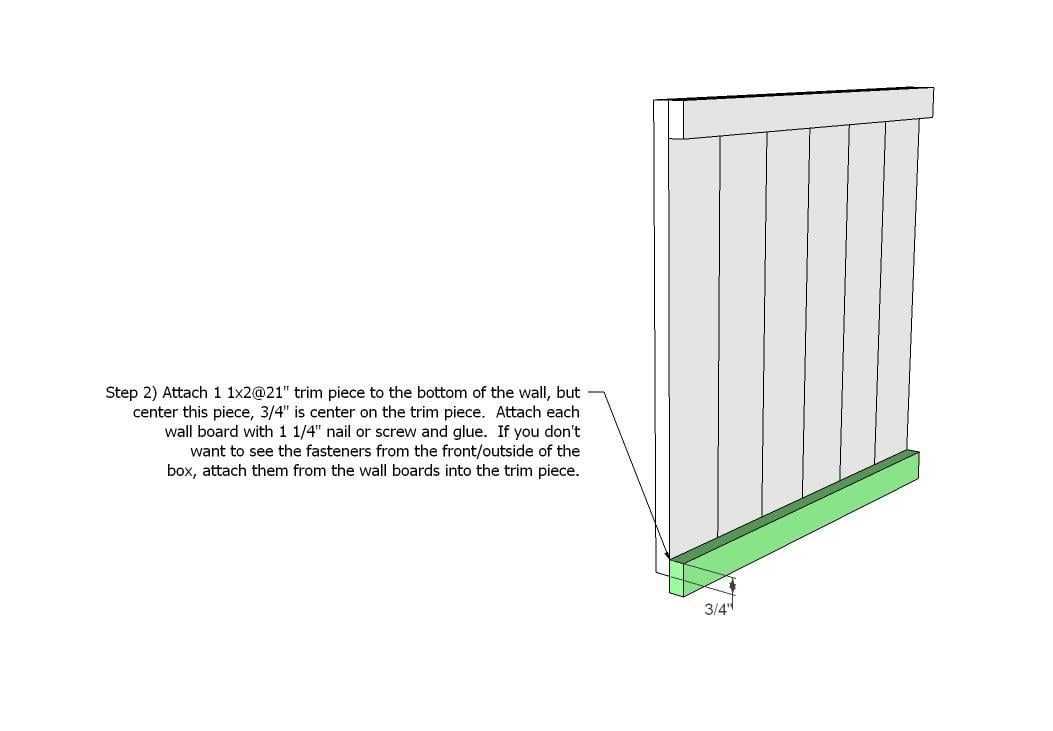
Step 2) Attach 1 1x2@21" trim piece to the bottom of the wall, but center this piece, 3/4" is center on the trim piece. Attach each wall board with 1 1/4" nail or screw and glue. If you don't want to see the fasteners from the front/outside of the box, attach them from the wall boards into the trim piece.
Step 3
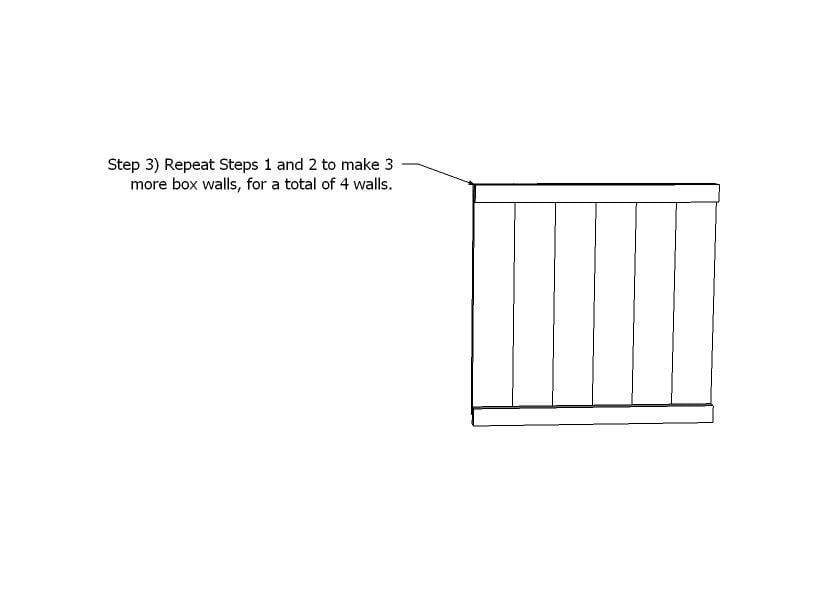
Step 3) Repeat Steps 1 and 2 to make 3 more box walls, for a total of 4 walls.
Step 4

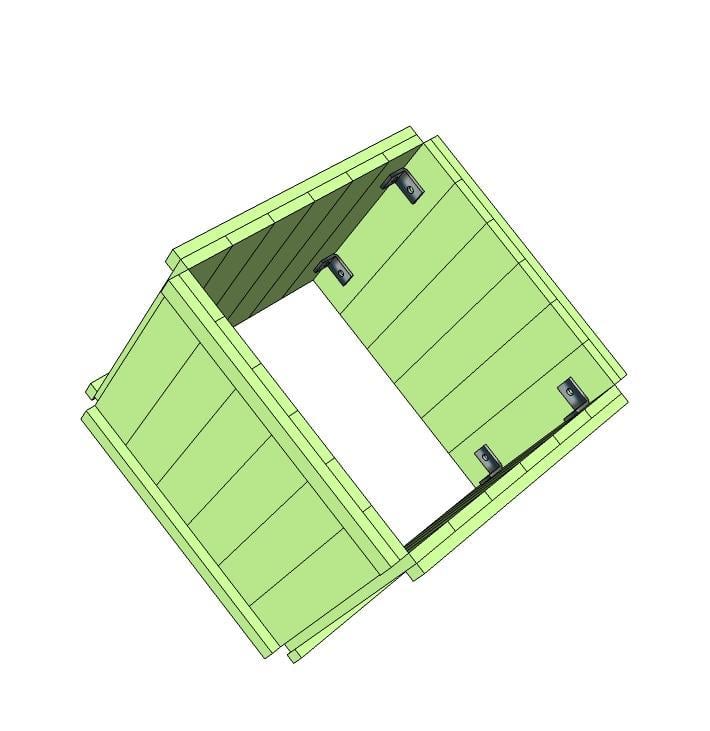
Step 4) Here's where I have to cheat a little. Attach L-brackets on the edge of each wall using 1 1/4" screws and glue, positioning each about 3" from each end, ensuring that they are attached in the correct direction to allow the other wall to be screwed in to the L-bracket. Repeat the L-bracket attachment on the back box wall, too, so that two of the four walls have L-brackets attached to them. {Continued...}
Step 5
Step 6
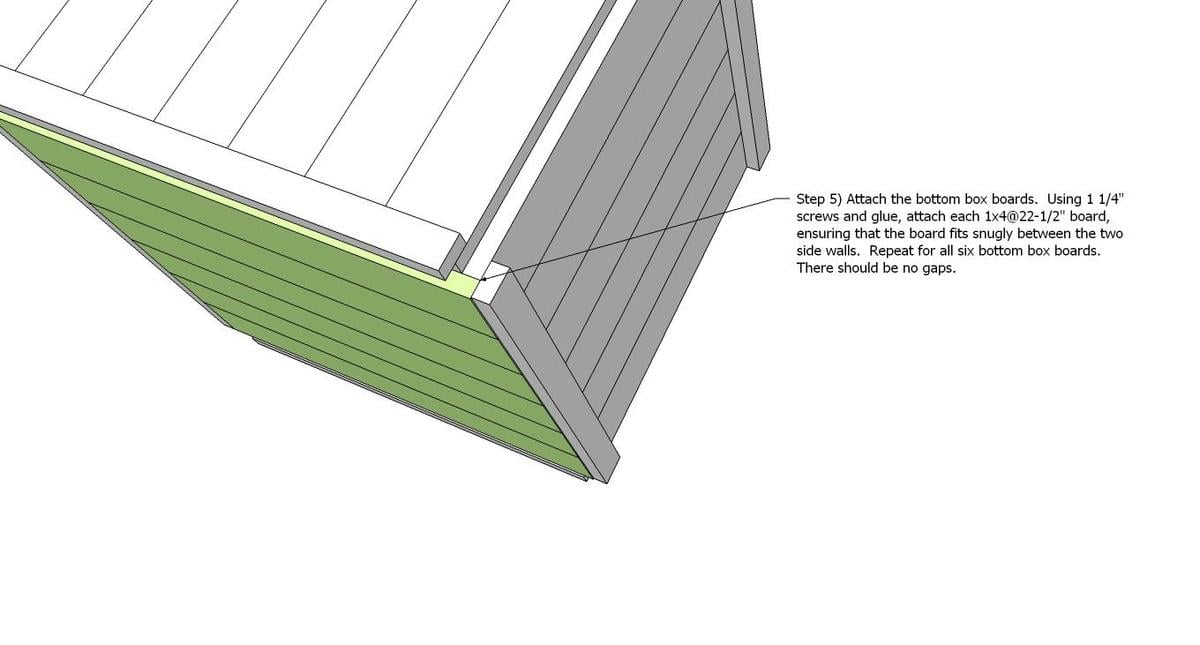
Step 5) Attach the bottom box boards. Using 1 1/4" screws and glue, attach each 1x4@22-1/2" board, ensuring that the board fits snugly between the two side walls. Repeat for all six bottom box boards. There should be no gaps.
Step 7
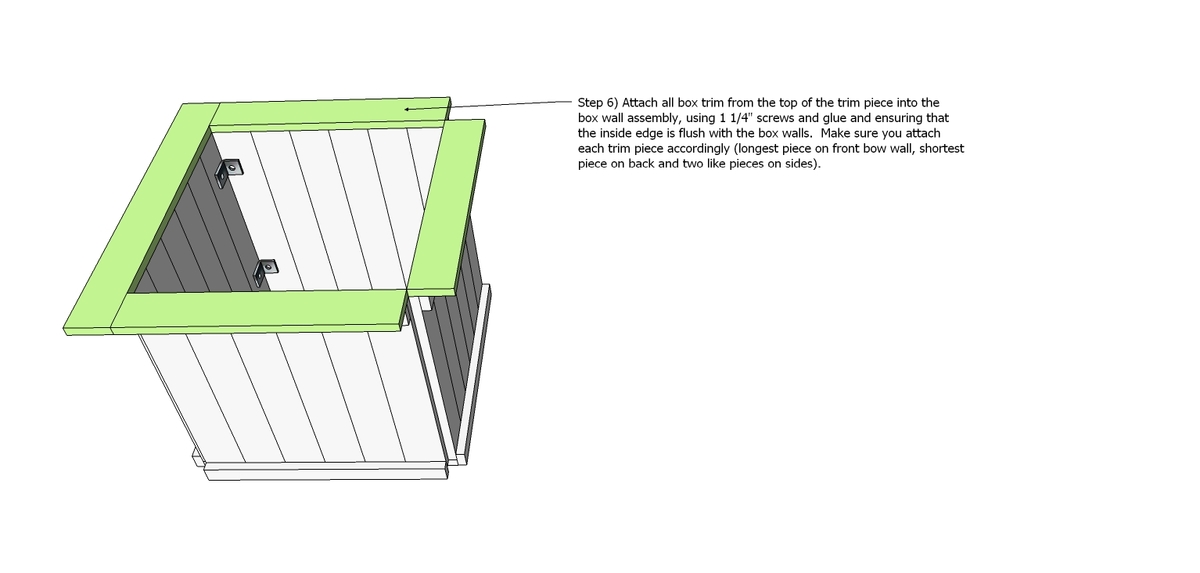
Step 6) Attach all box trim from the top of the trim piece into the box wall assembly, using 1 1/4" screws and glue and ensuring that the inside edge is flush with the box walls. Make sure you attach each trim piece accordingly (longest piece on front box wall, shortest piece on back and two like pieces on sides).
Step 8
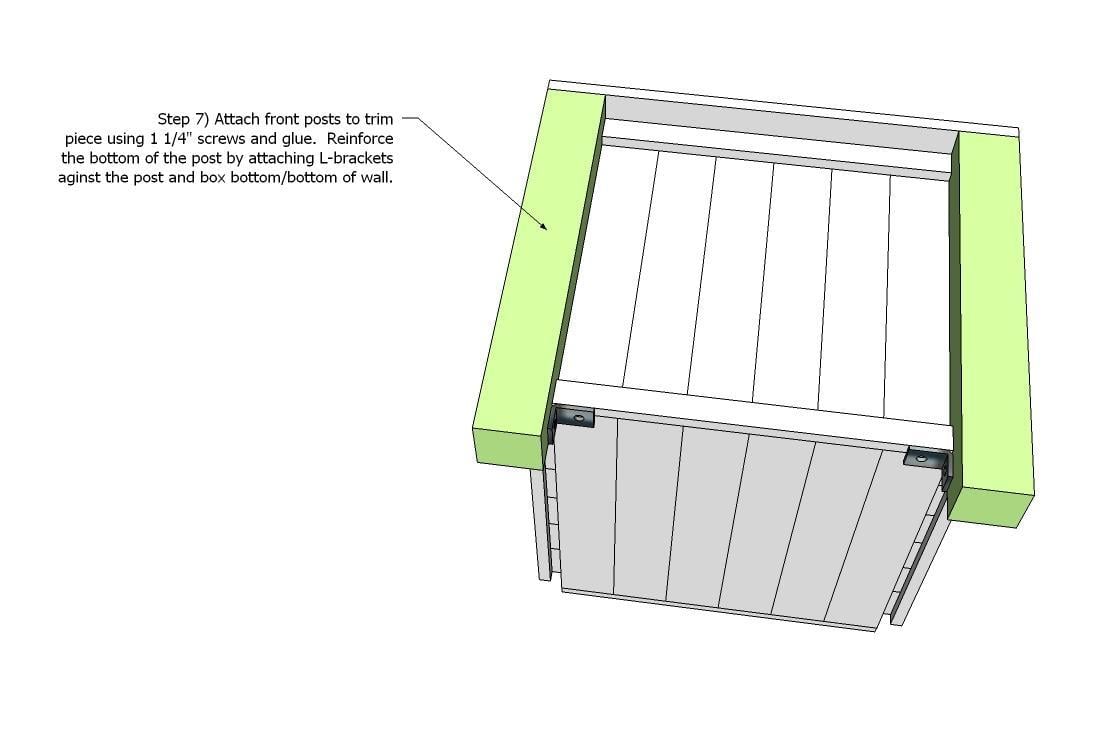
Step 7) Attach front posts to trim piece using 1 1/4" screws and glue. Reinforce the bottom of the post by attaching L-brackets against the post and box bottom/bottom of wall.
Step 9
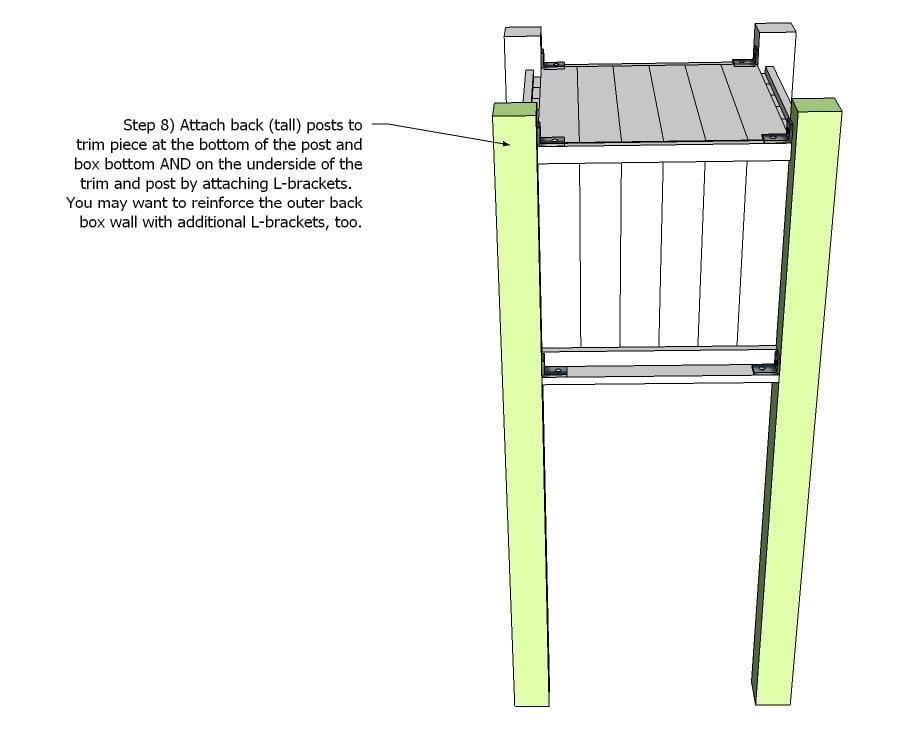
Step 8) Attach back (tall) posts to trim piece at the bottom of the post and box bottom AND on the underside of the trim and post by attaching L-brackets. You may want to reinforce the outer back box wall with additional L-brackets, too.
Step 10
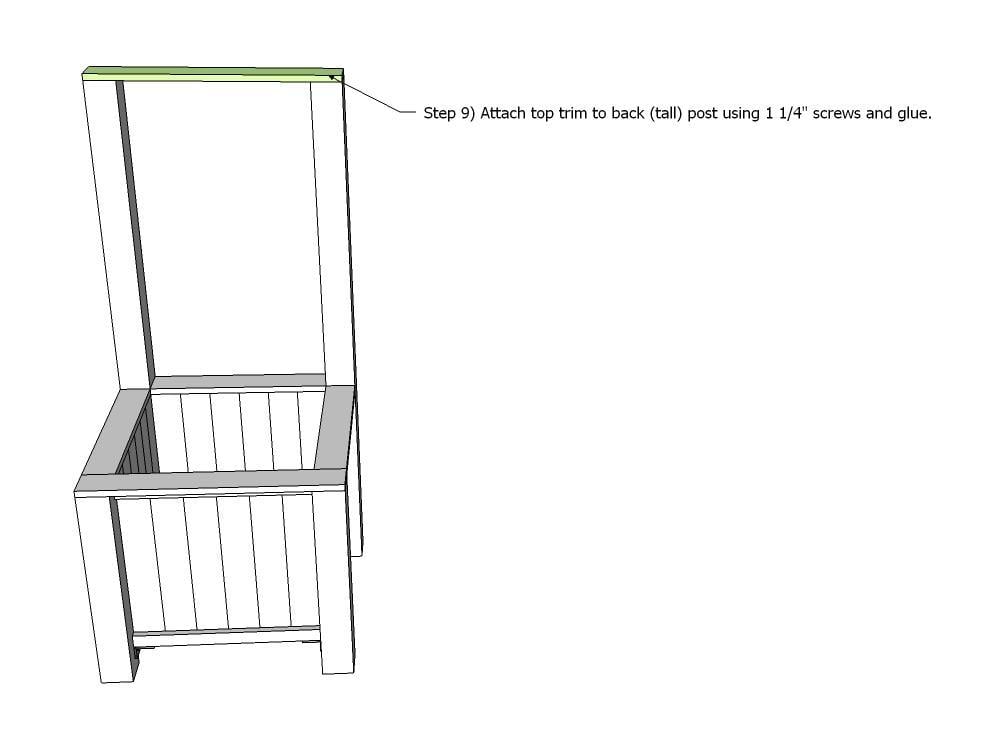
Step 9) Attach top trim to back (tall) post using 1 1/4" screws and glue.
Step 11
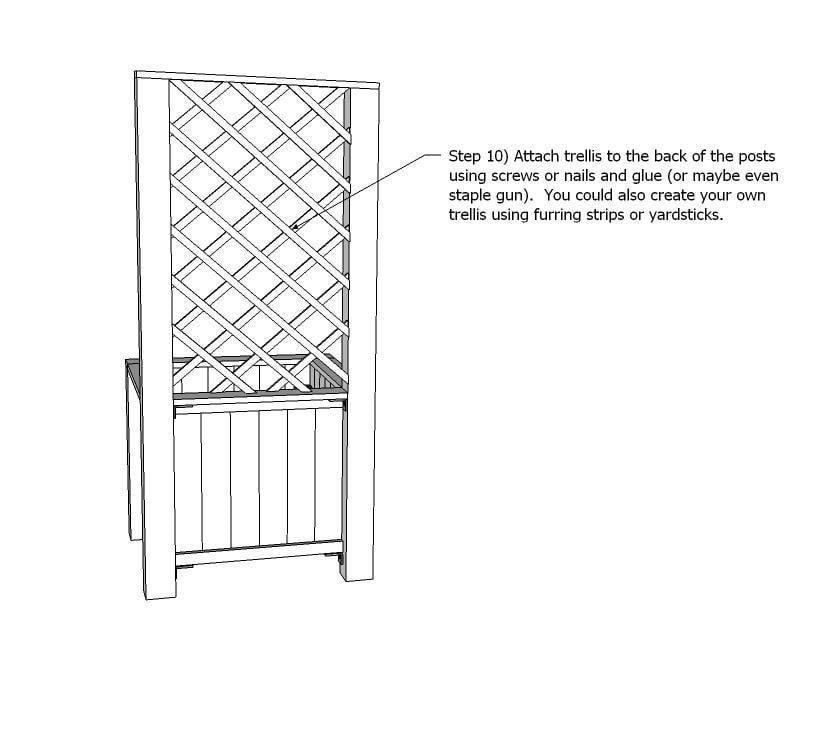
Step 10) Attach trellis to the back of the posts using screws or nails and glue (or maybe even staple gun). You could also create your own trellis using furring strips or yardsticks.
Step 12
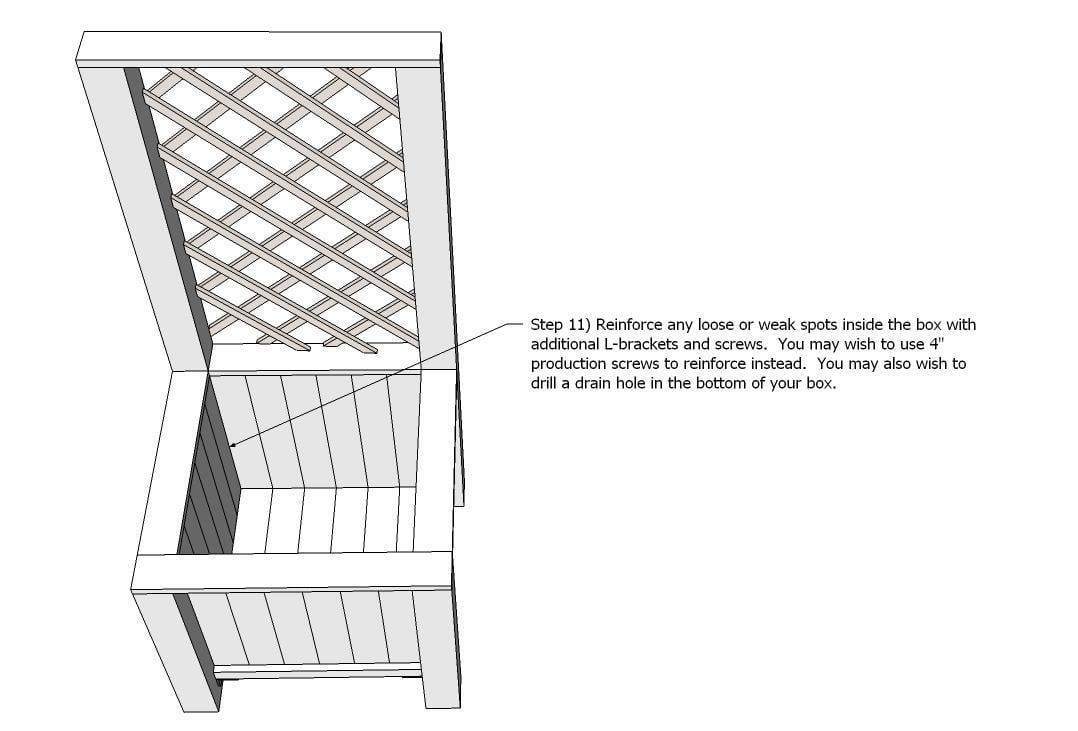
Step 11) Reinforce any loose or weak spots inside the box with additional L-brackets and screws. You may wish to use 4" production screws to reinforce instead. You may also wish to drill a drain hole in the bottom of your box. Finish as desired; use caution with finish if planting edible vegetation!
It is always recommended to apply a test coat on a hidden area or scrap piece to ensure color evenness and adhesion. Use primer or wood conditioner as needed.

Comments
viola
Tue, 05/17/2011 - 09:27
Love this planter and trellis
Love this planter and trellis design.
ACraftyCauldron
Wed, 05/18/2011 - 07:31
Fabulous!
This is fantastic! I simply MUST have two of them STAT! Look out, Blue, here I come!!!
loniwolfe
Wed, 05/18/2011 - 16:34
Love this!
This is so cute! I totally see a few of these in my future! Thanks!
(side note, if you want to build this without the brackets, take a look at the outdoor storage bench)
Great job! and Thank you again for such a cute idea!
SingleMomThriving
Wed, 07/13/2011 - 09:58
Just added it to my To Do List
I love the design. I want to make it longer, without the trellis, add legs and put it in my Breakfast Nook.
Kellyleia (not verified)
Mon, 09/10/2012 - 09:08
HUGE
My husband and I just did this as our first project (Brag post coming soon, finishing work still needs to be done). A few bumps along the way, but holy crap this thing is huge. You just don't realize how big 28 inches is until you actually put things together.
In reply to HUGE by Kellyleia (not verified)
biz_kid1
Mon, 09/10/2012 - 09:54
Planter box with Trellis
Yes, it is! If you look at the top, another user already made it, but she has a picture with her hubby and you can see how big it is! But perfect for vine-y plants!!! Do you have a picture of yours? I'd love to see it!