

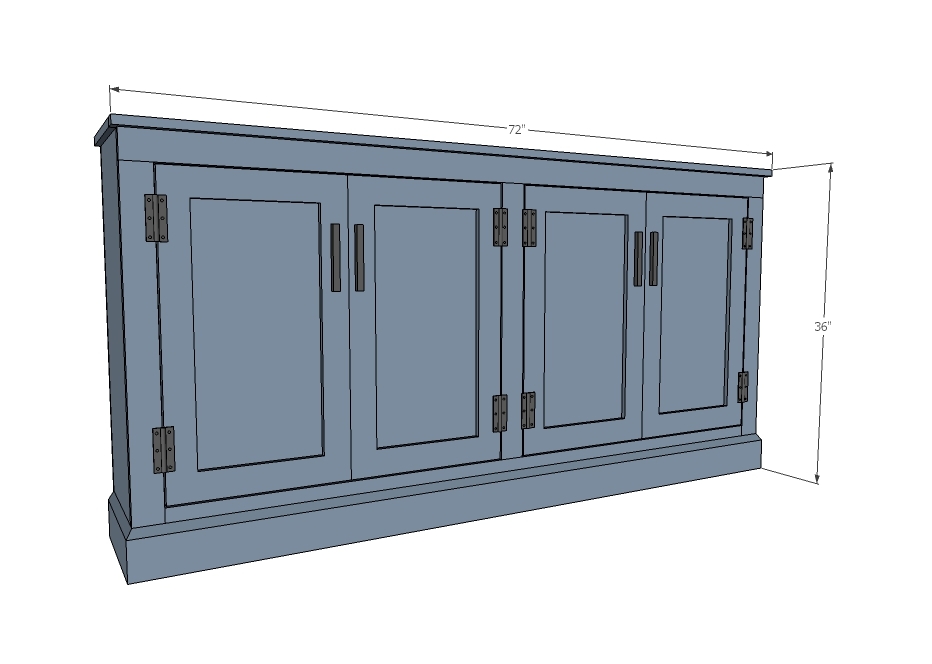
This console table features shelves and doors, so you can store and hide it all. This is a free project plan with step by step instructions, detailed diagrams, shopping and cut list from Ana White.com


More Photos and Build Post
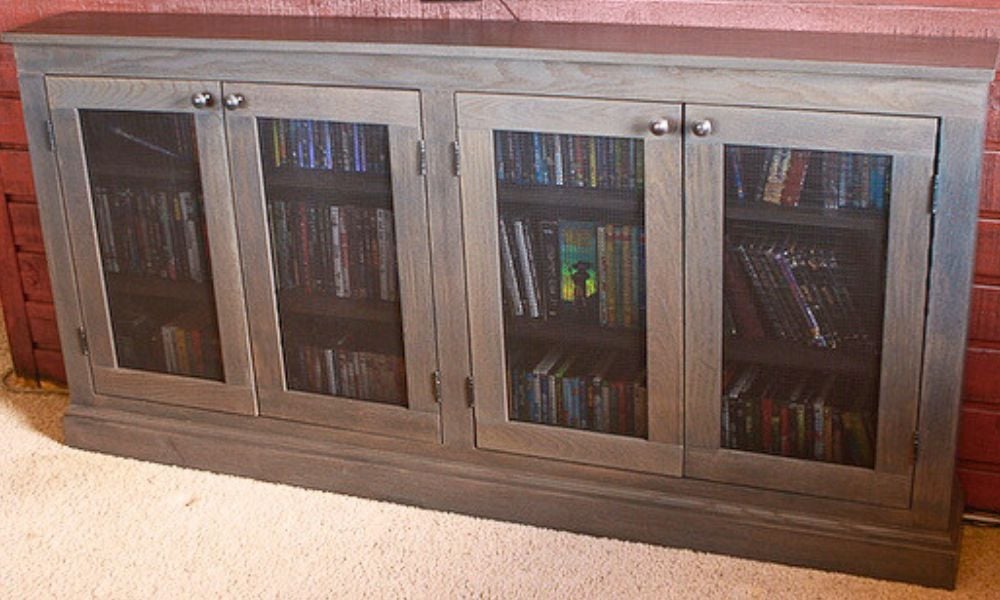
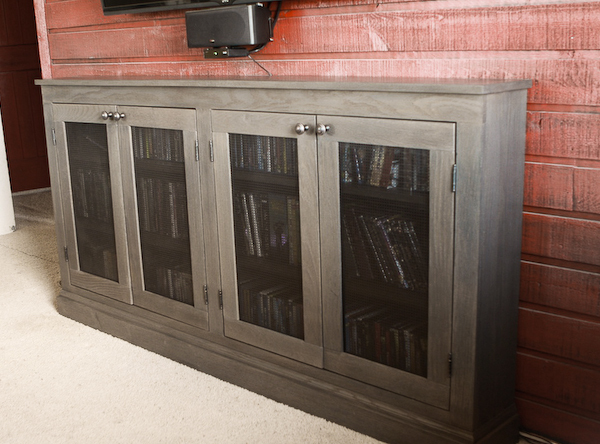
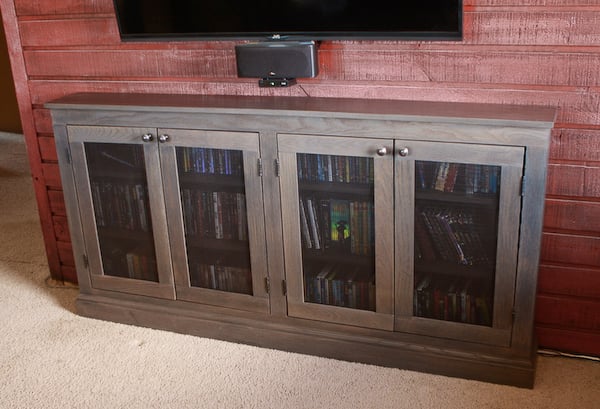
This project was built by Hillary from The Friendly Home. Check out Hillary's building post here - she's got all the details on the finish, the mods, the hardware - you won't want to miss it!
Free Plans to Build Your Own Cabinet Console Table
Preparation
- 27 feet of 1x12 boards
- 1 full sheet of 1/4" thick plywood or other hardboard for the back
- 1 - 1x2 @ 6 feet long
- 48 feet of 1x3 boards
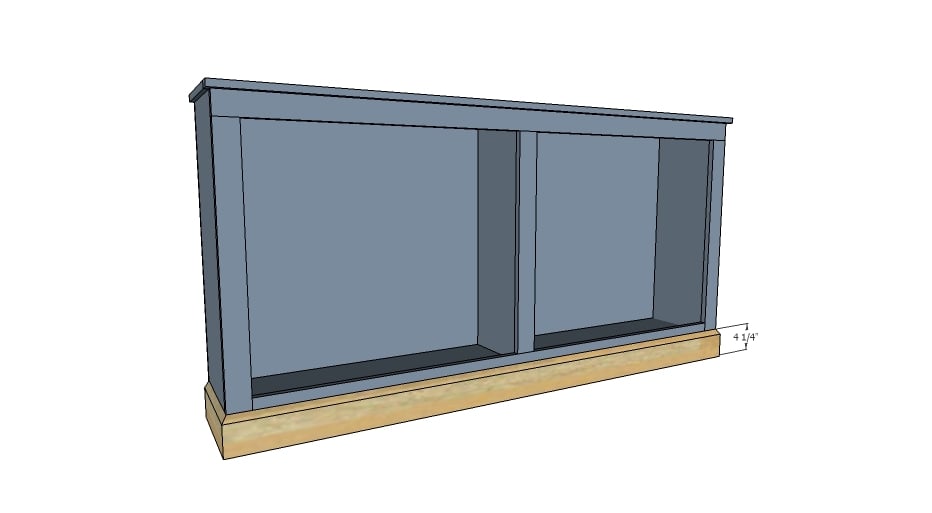
- 8 feet of 4-1/4" tall base moulding
- 4 sets of hinges
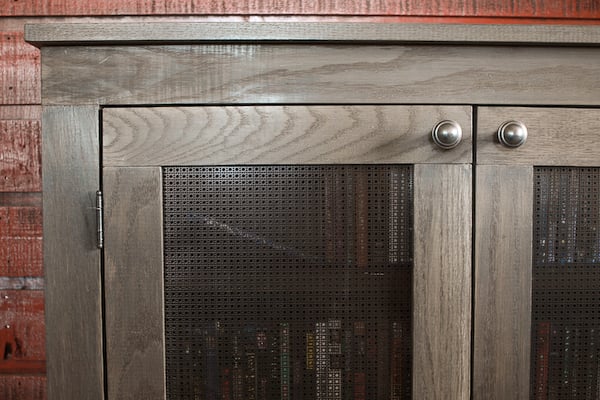
- 4 knobs or pulls
- 1 - 1x12 @ 72" (top)
- 2 - 1x12 @ 35-1/4" (sides)
- 1 - 1x12 @ 31-1/2" (center divider)
- 1 - 1x12 @ 69-1/2" (bottom shelf)
- 2 - 1x12 @ 34-3/8" (shelves)
- 1 - 1/4" plywood @ 71" x 36" (back)
- 1 - 1x2 @ 72" (top front trim)
- 2 - 1x3 @ 32-3/4" (side trim)
- 1 - 1x3 @ 71" (top header trim)
- 1 - 1x3 @ 66" (bottom footer trim)
- 1 - 1x3 @ 27-1/4" (center divider trim)
- 4 - 1/4" base moulding cut to fit
- Doors cut to fit


Please read through the entire plan and all comments before beginning this project. It is also advisable to review the Getting Started Section. Take all necessary precautions to build safely and smartly. Work on a clean level surface, free of imperfections or debris. Always use straight boards. Check for square after each step. Always predrill holes before attaching with screws. Use glue with finish nails for a stronger hold. Wipe excess glue off bare wood for stained projects, as dried glue will not take stain. Be safe, have fun, and ask for help if you need it. Good luck!
Instructions
Step 1
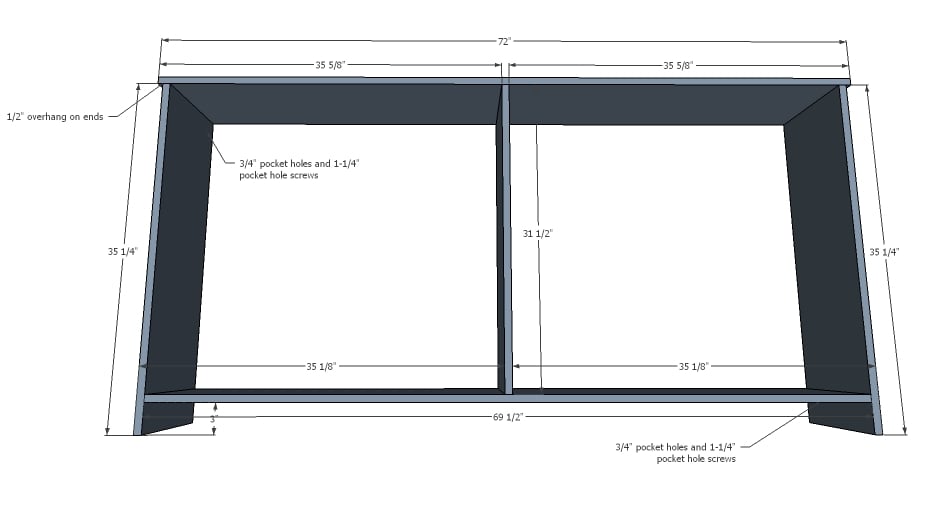
Build the carcass of the cabinet. NOTE: Face frame in step 3 can be added with pocket holes hidden on insides if desired. You will need to drill those before assemble, 3/4" setting facing forward. Add the face frame before the back so you can fit the drill inside.
Step 2
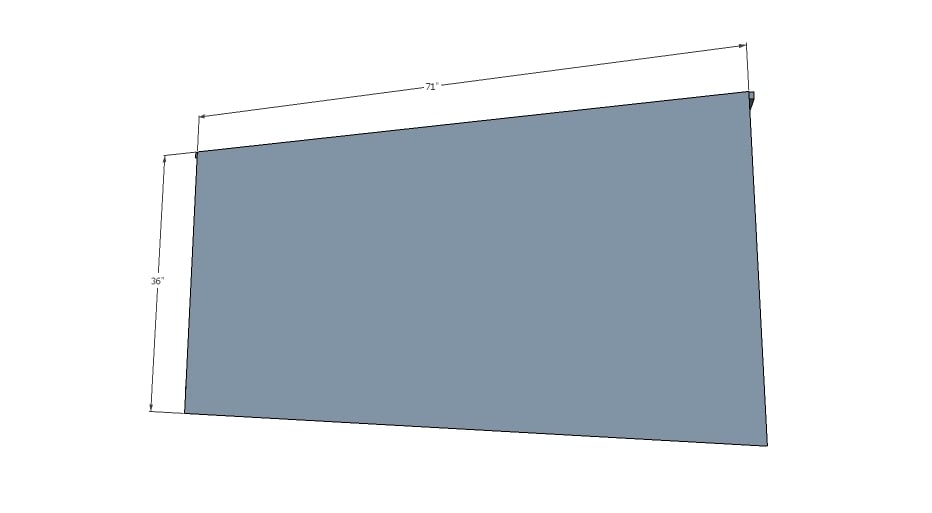
Nail the back on the cabinet with 3/4" brad nails.
Step 3
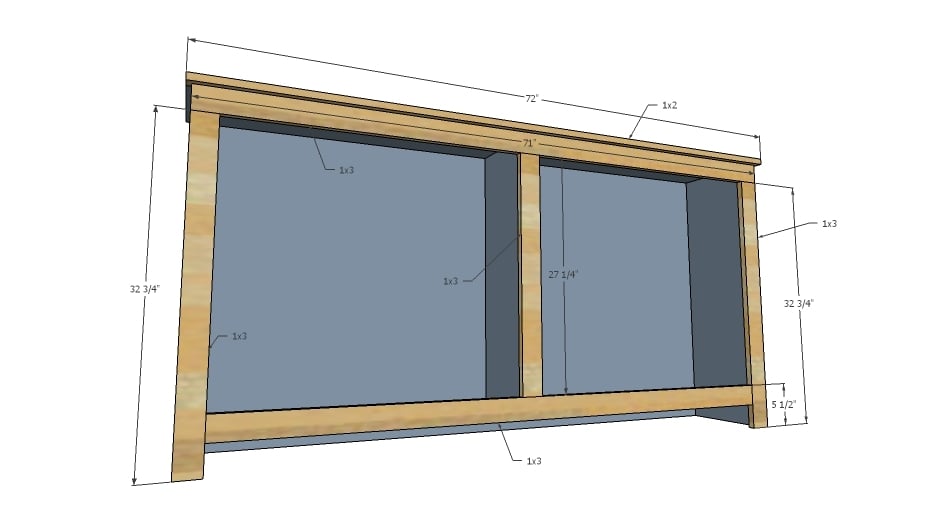
Build the cabinet face frame separately with 3/4" pocket holes and 1-1/4" pocket hole screws. Then attach face frame to cabinet carcass with 1-1/4" finish nails and glue.
Step 4
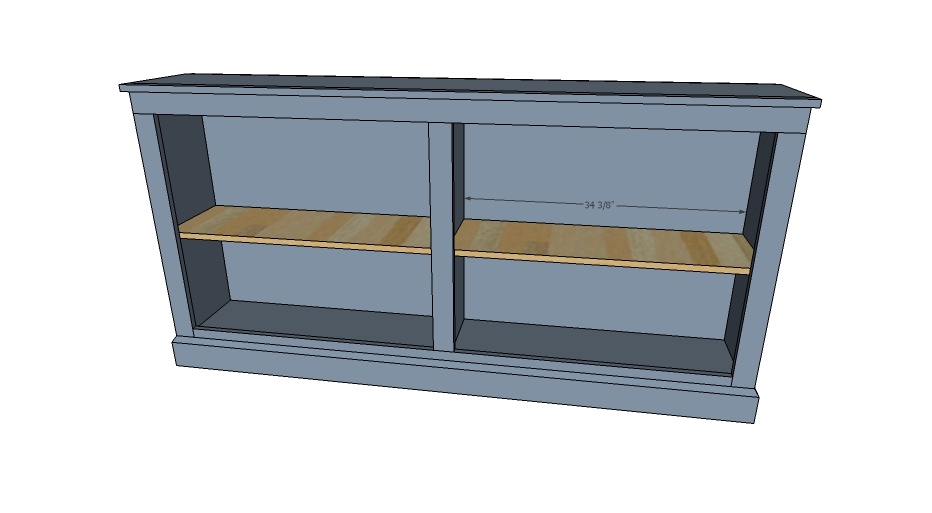
Add shelving inside cabinet. This can be done with Shelf Pins or fixed (use pocket holes on underside of shelves).
Step 5
Step 6

Measure openings and figure door sizes. I build inset doors 1/4" overall less in width and height (for an even 1/8" gap around all sides). Install doors so the gaps around all sides are even. Depending on the hinges you use you may need to add a magnetic clasp or similar to keep doors closed.
It is always recommended to apply a test coat on a hidden area or scrap piece to ensure color evenness and adhesion. Use primer or wood conditioner as needed.

Comments
meladeem
Sun, 08/11/2019 - 05:22
Ok I’ve read through the…
Ok I’ve read through the instructions a few times. I’m confused how there is overhang from the top front. You are using 1x12 for top and both sides. Then you add a face. The face would protrude out unless you are using a different size for the top than the sides. Or are you suppose to make the over handsome how when you build the carcass in step 1?
Thank you for your help
meladeem
Sun, 08/11/2019 - 05:38
Or are the sides 1x10?
Or are the sides 1x10?
annhislope
Sat, 08/15/2020 - 19:54
Media cabinet
Media cabinet