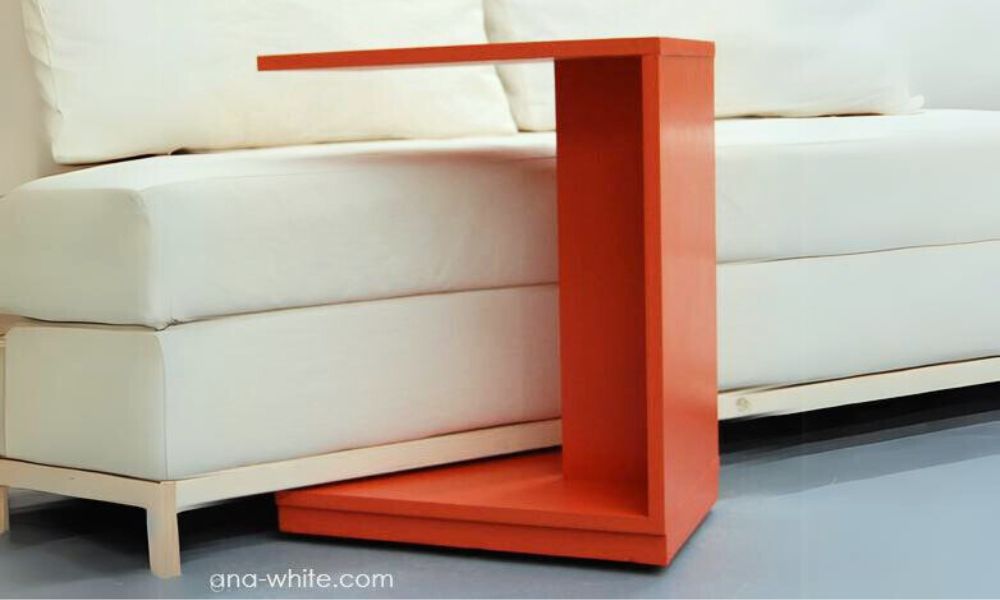
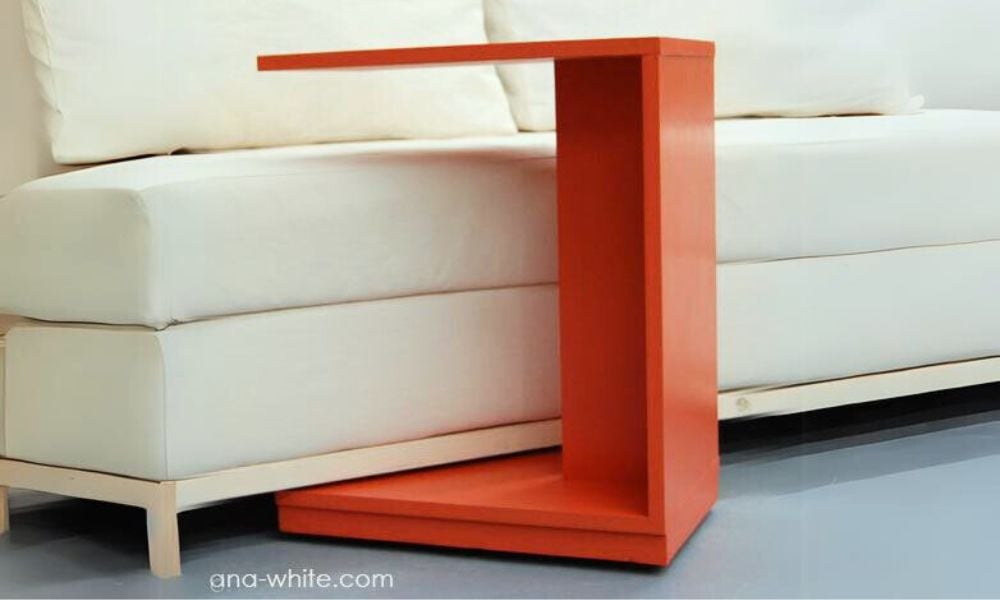
This simple little C table makes a modern nightstand or a quick snack table. Rolls under the couch to put a laptop in your lap.
This is a free project plan to build your own C table with step by step diagrams, shopping and cut list from Ana-White.com
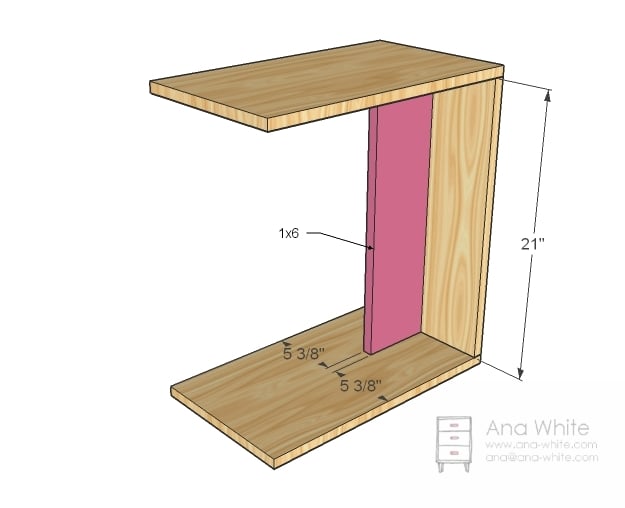
Dimensions
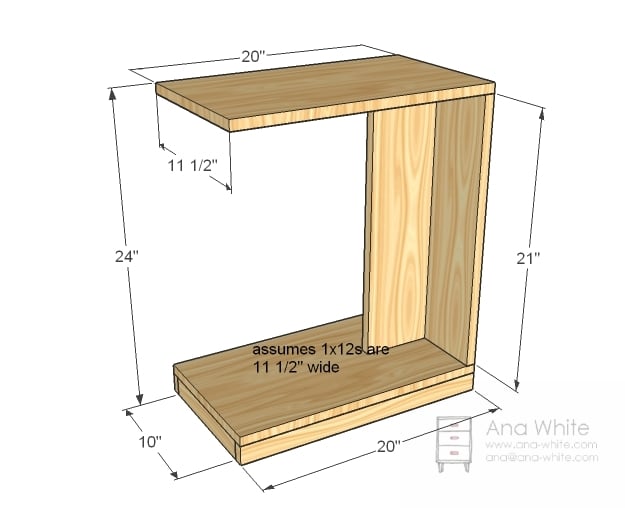
Dimensions shown above.
Preparation
Shopping List
- 1 – 1×12, 6 feet long
- 1 – 1×6, 2 feet long
- 1 – 1×2, 6 feet long
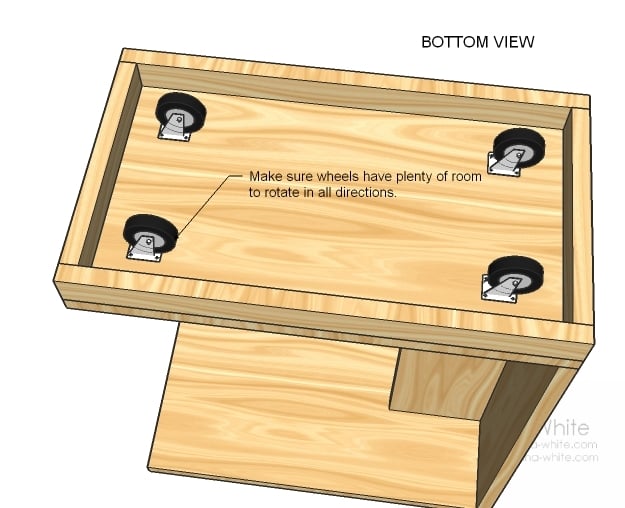
- 4 – 1 1/2″ caster wheels (wheel diameter is 1 1/2″)
- 2″ wood screws OR 1 1/4″ pocket hole screws for pocket holes
- wood glue
- paint and primer
- 120 grit sandpaper
- wood filler
Cut List
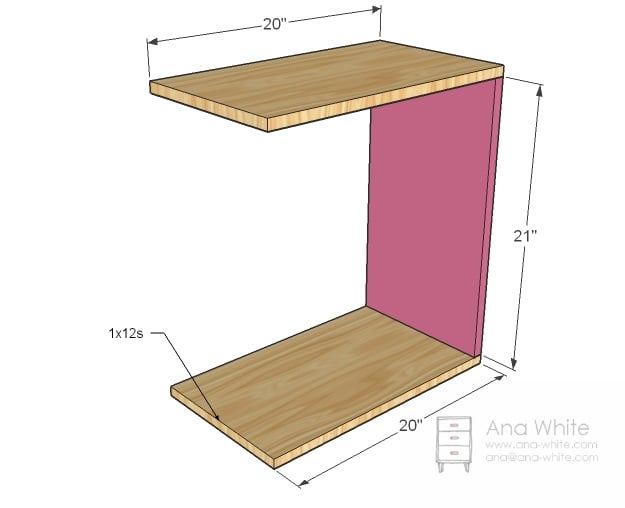
- 2 – 1×12 @ 20″ (Top and Bottom)
- 1 – 1×12 @ 21″ (Back)
- 1 – 1×6 @ 21″ (Center)
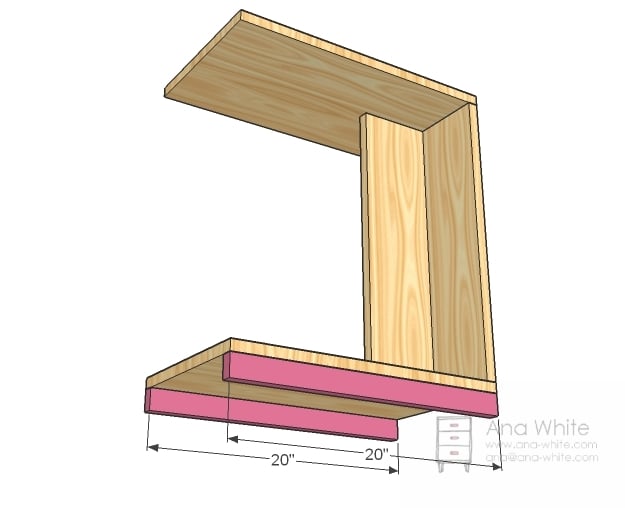
- 2 – 1×2 @ 20″ (Side Footer)
- 2 – 1×2 @ 10″ (End Footer)
Instructions
Step 1
Step 2
Step 3
Step 4
Finishing Instructions
Finish Used
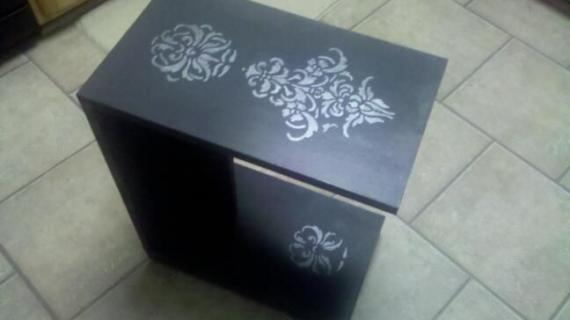
I finished my table by applying a coat of wood filler (been using Elmer’s with great success). Let that dry completely, then went over it with another coat. I also filled any imperfections, as I wanted a super smooth look. Then I sanded with 120 grit sandpaper, paying special attention to the edges. Very important to clean your work space with a vacuum and wipe clean your project to remove any sawdust. Then I primed and added two coats of oooops paint (Valspar premium satin). Done!





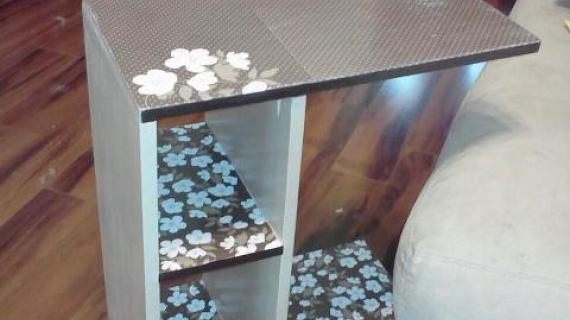
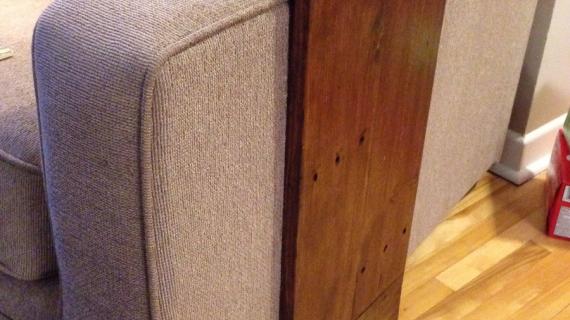
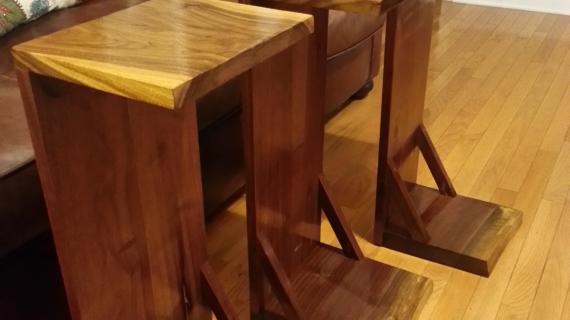
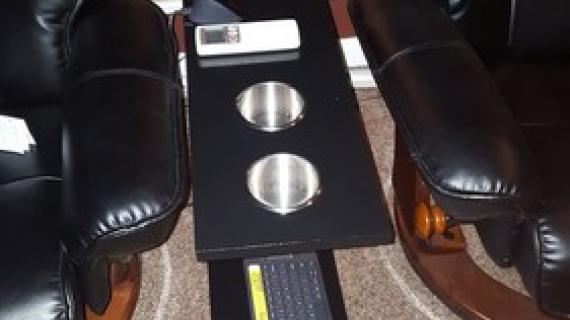

Comments
Rae (not verified)
Tue, 11/09/2010 - 19:25
This is awesome, I was
This is awesome, I was looking for something like this a few months back but wasn't sure how sturdy I could make it for my laptop.
keri (not verified)
Tue, 11/09/2010 - 19:30
ahhhhh!!! cb2 inspired much?
ahhhhh!!! cb2 inspired much? i had drawn this up and measured it based off of cb2's to make it myself....now you made my life even easier!!
muah!
Lindsay (not verified)
Tue, 11/09/2010 - 19:30
LOVE THIS! Can you tell us
LOVE THIS! Can you tell us how much this approximately costs?
thx!
Stacy (not verified)
Tue, 11/09/2010 - 19:36
Anxious to see your "other"
Anxious to see your "other" project in the works - my husband and I are trying to that very thing!
Nice table though - cute and functional!!
Theresa (not verified)
Tue, 11/09/2010 - 20:09
I love this. I need a day
I love this. I need a day off to make this. Thank you for this one Ana. Maybe I like it because my scooter was my favorite toy...
Jim Reeves (not verified)
Tue, 11/09/2010 - 21:10
Very nice anna, great project
Very nice anna, great project was wondering, would it be difficult to make a thin sliding drawer even 2-3 deep for remote, pen note pad etc when using laptop just curious if possible how would l need to design it then add to C table?
jim Ontario, Canada
ALittleBite (not verified)
Tue, 11/09/2010 - 21:14
I LOVE this!! It'll be
I LOVE this!! It'll be amazing for a laptop, too! Oh and I can't wait until you tell us about the sofa, it looks awesome as well!
Sharon Lambirth (not verified)
Wed, 11/10/2010 - 01:25
I look at your plans and
I look at your plans and always think how to modify it to what I can use. Now that my bed is on risers, I am thinking that these will make awesome nightstands that can also be used as a tray table for soup-in-bed-sick-days or whatever! A perfect solution for my too-short nightstands that I have now. And a sneaky way to keep down the clutter on Hubby's side of the bed! Heehee! THANKS Ana!
spiceylg (not verified)
Wed, 11/10/2010 - 02:15
Amazing! This is exactly
Amazing! This is exactly what I need and might be perfect for my first project! We have a group over every week and these are badly needed. Thanx for all you do, you are truly an inspiration.
Rachelle (not verified)
Wed, 11/10/2010 - 02:41
OK! Love the table, slick
OK! Love the table, slick little idea. But, YOU built that couch, didn't you? Such a teaser--I hope we get to hear about the rest of that project soon!
Rachelle (not verified)
Wed, 11/10/2010 - 02:42
+And by the way, love the
+And by the way, love the 'you can build this room' feature. It's really nice to see finished projects in finished rooms. So inspiring.
cathy (not verified)
Wed, 11/10/2010 - 02:58
Oh you tease! You designed
Oh you tease! You designed us an upholstered sofa? loveseat? chair? All of the above?? Can't wait to see the plans!
Robin (not verified)
Wed, 11/10/2010 - 03:30
OH MAN!!! I cannot wait to
OH MAN!!! I cannot wait to build this!!!! Thanks, again, Ana for coming through with another amazing plan.
Tracie (not verified)
Wed, 11/10/2010 - 03:37
Love!!!http://cleverlyinspire
Love!!!

Kate (not verified)
Wed, 11/10/2010 - 04:22
I must say, I was interested
I must say, I was interested in the side table, but now that you hint to use about the couch... I can't WAIT to see that finished!
Amy K (not verified)
Wed, 11/10/2010 - 05:31
This is PERFECT for this
This is PERFECT for this stupid laptop my husband has permanently sitting on one of the end tables! I love it...as usual! Thanks for the continued inspiration!
Tanjia (not verified)
Wed, 11/10/2010 - 06:32
First: I love it and I want
First: I love it and I want to build it tomorrow! Or maybe on payday.
Second: SHUT UP!!!! You built a couch???!!!???!! I can't believe how much you amaze me every time you post a plan!
Anna (not verified)
Wed, 11/10/2010 - 07:00
I knew it!!! I've been
I knew it!!! I've been thinking.. pretty soon she will try her hand at seating for indoor!!!!!!!!!!!!!!!!! We are buying a house this spring.. am I more excited for the house or the fact I plan on building everything for it room by room!!!! Everytime I am tempted to "pick up" storage at Target for toys or books ect. I visit your site for a better more quality DIY project!!!
Erika (not verified)
Wed, 11/10/2010 - 07:23
I LOVE this!! I'm thinking
I LOVE this!! I'm thinking that maybe I want to alter it just a little so I can use it for when I use my laptop when I'm in bed :-)
Your plans are all fantastic! I'm a huge fan!!!
aklenox (not verified)
Wed, 11/10/2010 - 07:32
Love it! Once again you have
Love it! Once again you have made something that looks complicated into such simple plans.
We have a large sectional in our family room and I desperately need to get rid of the coffee table which is not kid friendly. I figure I can make one for each section and they can be moved around as needed.
Thanks!
Lisa (not verified)
Wed, 11/10/2010 - 08:07
OMG - I cannot wait for "the
OMG - I cannot wait for "the other DIY" in the photo!! I have exhausted Google looking for some decent DIY plans for that, and I just started to give up.
AmyLynn (not verified)
Wed, 11/10/2010 - 08:09
Excellent idea using it for a
Excellent idea using it for a nightstand!!! Love it!
Alejandra (not verified)
Wed, 11/10/2010 - 11:20
Am I right to assume you made
Am I right to assume you made that couch and you're going to tell us how to make it!?!?!?!? That would be a dream come true!!!! Couches are SOOOO expensive and we don't have one yet! Haha!
mickelle (not verified)
Wed, 11/10/2010 - 11:26
Yup. We're ALL dying for the
Yup. We're ALL dying for the couch plans. It sure would be nice to build it for a family Christmas present. (Okay, maybe a Momma Christmas present. But still. Dying.)
lianatempera (not verified)
Wed, 11/10/2010 - 11:29
That is wonderful! It might
That is wonderful! It might just be perfect for my house...We don't have a lot of room for end tables, but we need some.
I can't wait to see the sofa plans! (I DESPERATELY need a new one--my husband broke ours--it had stupid legs that not only spun around and around, but were also angled on one side so when they spun, they also tilted off the base of the leg).
Peggy (not verified)
Wed, 11/10/2010 - 11:33
I always felt sheepish
I always felt sheepish (though I used a bunny!) when I stuffed a couch cushion with my abandoned stuffed animals. And yeah, the couch is amazing! You are a star! in the world of homemaking! Thanks for your generosity in sharing your good works!
HammerTime (not verified)
Wed, 11/10/2010 - 11:39
Wow! I love this! This is
Wow! I love this! This is going on my "to build" list for sure. Can't wait to see the couch! I was going to make a daybed but I'll hold out to see the couch plans first.
Heather (not verified)
Wed, 11/10/2010 - 13:28
Add me to the list of people
Add me to the list of people drooling over the couch. I see no reason to stain the legs - we can imagine them. We just want the plans! (maybe I'm a tad impatient LOL)
Jody (not verified)
Wed, 11/10/2010 - 19:48
COUCH!!!??? We need a new
COUCH!!!??? We need a new couch;) Please share! You are simply amazing Ana!!
Markus (not verified)
Thu, 11/11/2010 - 02:31
This is a great design. I've
This is a great design. I've been pricing the heavy duty metal ones online and this looks much nicer! Do pocket holes work on MDF? I've tried it on .5" with glue and patience had bad results so I'm a little hesitant to use the 1" thick variety. Coarse or fine thread screws? At any rate, I'll be building a couple.
Cindy (not verified)
Thu, 11/11/2010 - 05:57
Wow< I too was looking at
Wow<
I too was looking at buying one of these recently. Now I can build one! looks like you got your eyes into a "new" catalog to hack!! WooHooo! Thank you Ana!
Ana White (not verified)
Thu, 11/11/2010 - 06:59
Markus, I used 3/4" MDF and
Markus, I used 3/4" MDF and pocket holes with 1 1/4" fine thread screws. It's recommended to use coarse thread, but my experience is the coarse threads split the MDF. The table is very very sturdy.
Markus (not verified)
Thu, 11/11/2010 - 07:21
Thanks a lot, another KOW
Thanks a lot, another KOW project I'm looking forward to doing!
Ana White (not verified)
Thu, 11/11/2010 - 07:22
Lindsay, the 1x12 is going to
Lindsay, the 1x12 is going to be about 8 to 10 dollars, the 1x6 about 3 dollars, the wheels (if you find the cheap ones in packs of two) about 4 dollars together, 2.50 for oops paint, some screws . . . under $20. Build two and you can probably do both for under $30. Good luck, we love this little table!
Ana White (not verified)
Thu, 11/11/2010 - 07:22
Definitely inspired by CB2.
Definitely inspired by CB2. Love that store!
Kelly (not verified)
Thu, 11/11/2010 - 08:31
Looks great! How high off the
Looks great! How high off the ground is the base? I want to make sure my couch isn't sitting too low for it to roll underneath.
Ana White (not verified)
Thu, 11/11/2010 - 10:07
Kelly, the base sits about 2
Kelly, the base sits about 2 1/2" high, be safe and say 3" depending on your wheels.
Lynn (not verified)
Fri, 11/12/2010 - 01:45
I love your whole site and
I love your whole site and have been looking for plans like these. I can't wait for the sofa plan. I have been trying to figure out how to get rid of the monstrosity I have now and make something more sleek and comfy! Would be great for gift projects too! Can't wait to make your plans and share photos!
Marilyn (not verified)
Fri, 11/12/2010 - 12:13
Please share the couch plans.
Please share the couch plans. It is next on my list for our living room.
Tanya Preston (not verified)
Fri, 11/12/2010 - 14:13
Love it! Please.....can we
Love it! Please.....can we have the couch plans right away? I am desperate for a new couch but I can't stand the prices and this looks awesome!!! I would love to build it before Christmas:)
Rochelle (not verified)
Thu, 11/18/2010 - 12:23
I can't tell you how excited
I can't tell you how excited I am about this project! Our couch is too big for our space so we have no room for any end tables and our huge ottoman is in the place of a coffee table. Didn't plan well, did I? Well, we are just renting. Anyway, I've been wanting an end table so that drinks weren't accidentally spilled anymore. I have the perfect spot to roll this to when not in use but someone wants to sit there. Now, if only I could have made that couch before buying the one we have life would've been a lot simpler! Thanks!
Josie (not verified)
Fri, 12/10/2010 - 05:35
I love your site and your
I love your site and your ideas! Great job!
I am going to try and make this for my bed and see if I can add hinges so that I can fold it and tuck it under the bed when I am not using it. Will let you know how it goes!
StaceyGuest (not verified)
Wed, 03/23/2011 - 12:22
LOVE this! Color?
I love this so much, I'm excited to build it. I love the orange color too, can you tell me what color it is?:)
bubble shooter (not verified)
Sun, 01/29/2012 - 03:26
bubble shooter
This is a nice post. I will take more time researching this issue.
AJ (not verified)
Tue, 03/06/2012 - 07:55
screws/size
Hi Ana,
First I love your blog and your hard work is appreciated.
I really wanna do this as my first project, but I'm very very beginner at this so I have a few questions that may be stupid.
I'd like to adjust the size of this to make it fit my laptop & a mouse, probably 2'x2'. Do I need to make the center piece larger too or will a 1x6 work still?
And where do the screws go? On the main part, I guess from the top into the back piece right? What about the center piece? And how many screws did you use on each part to secure it? I know, I'm clueless!
Celestina (not verified)
Mon, 04/16/2012 - 14:40
Thank you
Thanks, that's exactly what I was looking for.
I saw it around a year ago and forgot to bookmark. Now I spent the last few days searching the net for that awesome endtable.
I'm very glad I found it again and will start building it tomorrow.
DIY Dork Kevin (not verified)
Mon, 06/18/2012 - 17:16
Great, Simple Design
Love this design! Ever since college, I've had a fascination with plywood & casters. And since I've been getting CB2 catalogs... my mind's been spinning with ideas. This one is definitely going on the "to do" list. :)
MAB2012 (not verified)
Sun, 06/24/2012 - 14:39
This is awesome! I can't wait
This is awesome! I can't wait to try making one for me. Just one question--where do you pre-drill the holes for the screws to attach the pieces? I'm assuming in the back piece, but I'm new to this and want to me sure! Thanks!
hoonay
Fri, 04/01/2016 - 18:36
My very first build :)
Admittedly, it LOOKS like my first build but I feel SO victorious here, I know it won't be my last. I'm a little obsessed with plywood, so that's what I used for mine. THANK YOU for your site. I have dozens of projects saved from here and now that I've purchased a small arsenal of power tools (and a kreg jig), I can finally start living the dream.
Jess carpenter
Sat, 06/04/2016 - 04:19
Love this table!
I would lile to modify this table to match your famous X tables.
I need a wedge side table and would like to keep the theme of the Xs. I can do the wedge but having trouble figuring out how to make the x in the center. My thought is, if i build the box with of space left over on the ends then I can just build and X on the end...can someone help me out? (If you can understand what Im talking about lol)