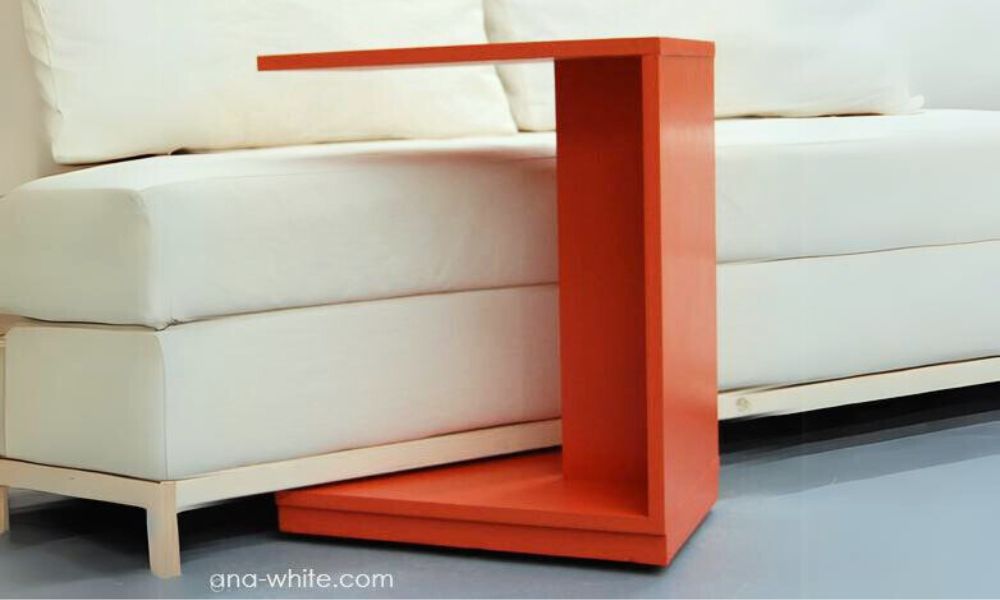
Rolling C End Table or Sofa Table

Difficulty
Beginner Projects
| Print this plan

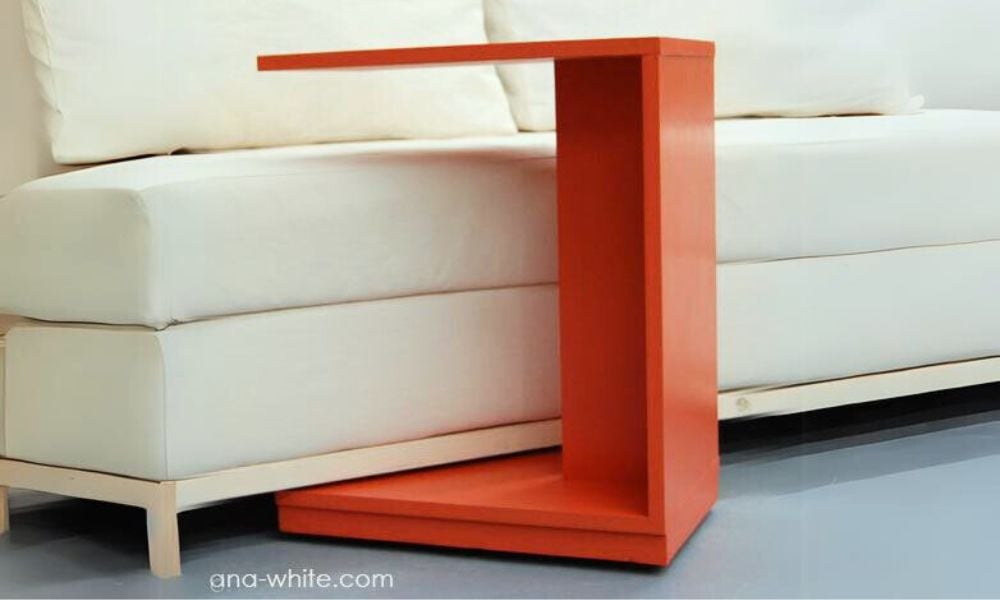
This simple little C table makes a modern nightstand or a quick snack table. Rolls under the couch to put a laptop in your lap.

Its funny how the simplest designs can take on new life with just the right shade of oooops paint.

I've had this design drawn up and even printed out and on my work bench for quite some time now, but it just seemed to simple for the smart people that read our blog.

And it is almost too simple.  But check this out.

She rolls . . .

She serves dinner.  She checks email.  She entertains laziness.  Laptop anyone?  Or chips and dip?  I must say, I LOVE this table.  I know I say that quite often, but this table took just a few minutes to build, took color incredibly well, and is super functional.  I guess I kept thinking it was too simple considering the other DIY project in the photo . . .

We'll get to that when I finish staining the feet.  (PS - this couch is special, it holds a storage compartment and is made from a paint drop cloths, an old camping pad, recycled stuffed animals, and scrap 2x4s and plywood).

Today, it's the C table, or as Grace refers to it, the scooter.  And for those of you worried about the strength, the number one reason I built this table before blogging was to test it's strength.  I can't give you a load limit, but I can tell you this: It's built of MDF and my 40 pound preschooler was sitting on the outer unsupported edge while her cousin pushed her around and there was no deflection.  (what is it with kids and wheels?) So we know it can handle a 40 pound live load.  If you have a weight limit beyond that, let me know, and I'll do some testing for you.

Dimensions
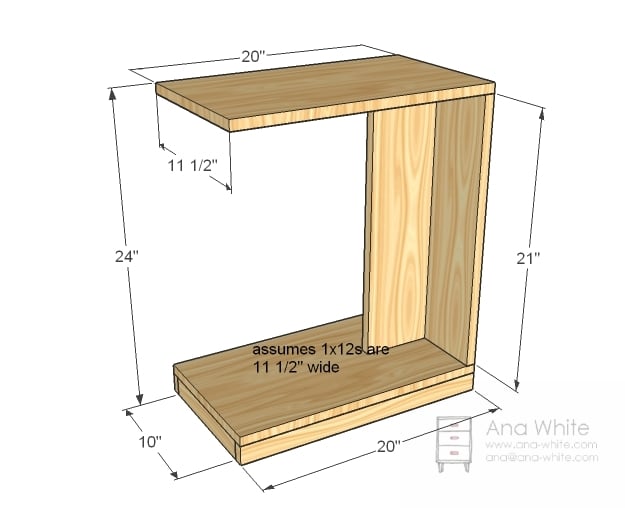
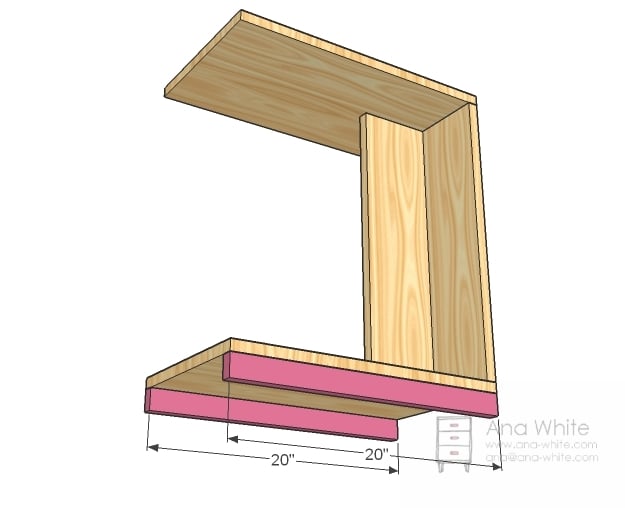
Dimensions shown above.

Preparation

Shopping List

1 – 1×12, 6 feet long (How about using a cheapo shelf that is 12″ wide?)
1 – 1×6, 2 feet long (How about a cheapo shelf that is 6″ wide?)
1 – 1×2, 6 feet long (these are a buck each – ask for MDF for the already primed ones)
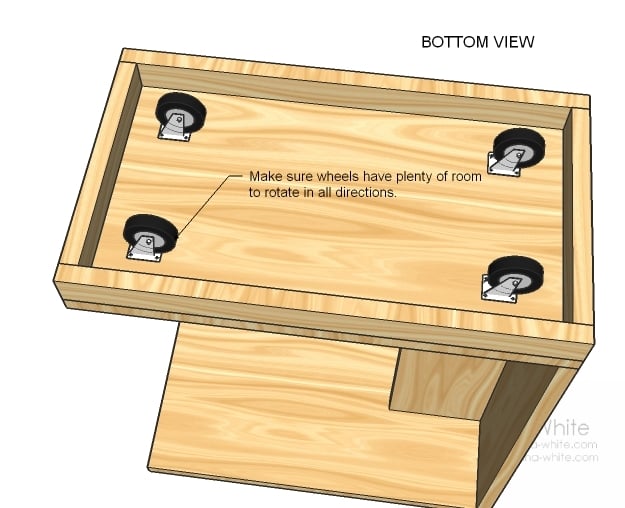
4 – 1 1/2″ caster wheels (wheel diameter is 1 1/2″)
2″ wood screws (drywall screws for MDF) OR 1 1/4″ pocket hole screws for pocket holes
wood glue
paint and primer
120 grit sandpaper
wood filler

Cut List

2 – 1×12 @ 20″ (Top and Bottom)
1 – 1×12 @ 21″ (Back)
1 – 1×6 @ 21″ (Center)
2 – 1×2 @ 20″ (Side Footer)
2 – 1×2 @ 10″ (End Footer)

Tools
Tape Measure
Speed Square
Pencil
Safety Glasses
Hearing Protection
Drill
Circular Saw
Power Sander
Level
Drill Bit Set

Instructions

Step 1

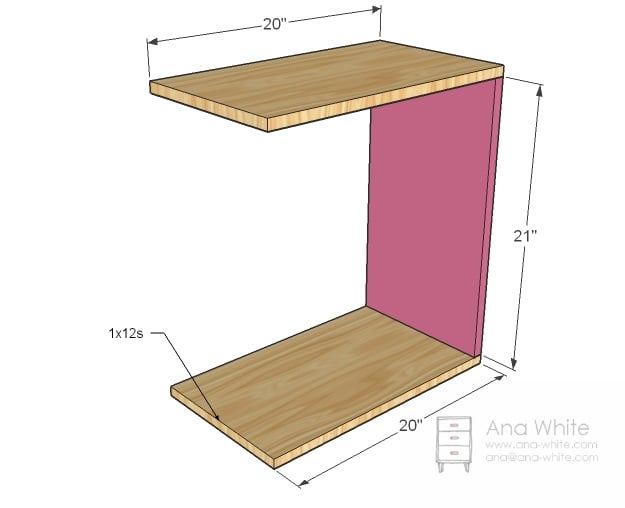
Box

After you have cut all your boards, predrill either pocket holes or countersinking holes and build the box as shown above. Keep outside edges flush. Use glue.

Step 2

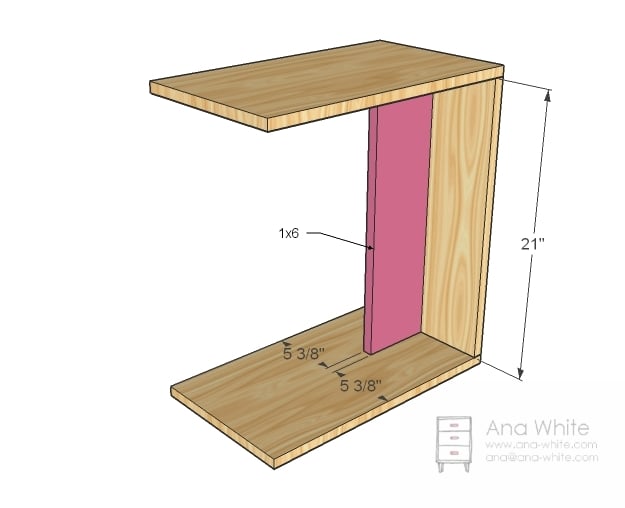
Center

Now measure at the top, middle, and bottom as shown in the diagram and mark. Position 1×6 and screw through predrilled holes to secure in place. Use glue

Step 3

Footer

The footer on this one is purely decorative. You can use finish nails or screws, and glue. Attach to the bottom.

Step 4

Footer Ends

Attach the footer ends to the bottom and the side footer. You may not be able to reach a direct screw into the back footer – don’t worry. This piece is purely decorative, and glue and screws to the side footer will be plenty.

Step 5

Finishing Instructions
Finish Used
I finished my table by applying a coat of wood filler (been using Elmer’s with great success). Let that dry completely, then went over it with another coat. I also filled any imperfections, as I wanted a super smooth look. Then I sanded with 120 grit sandpaper, paying special attention to the edges. Very important to clean your work space with a vacuum and wipe clean your project to remove any sawdust. Then I primed and added two coats of oooops paint (Valspar premium satin). Done!

Comments

Jess carpenter

Sat, 06/04/2016 - 04:22

Okay so I dont know how to edit these comments lol. But ment to type ... if I build the box with an in. of space on the outside of the center, I can put the X there.