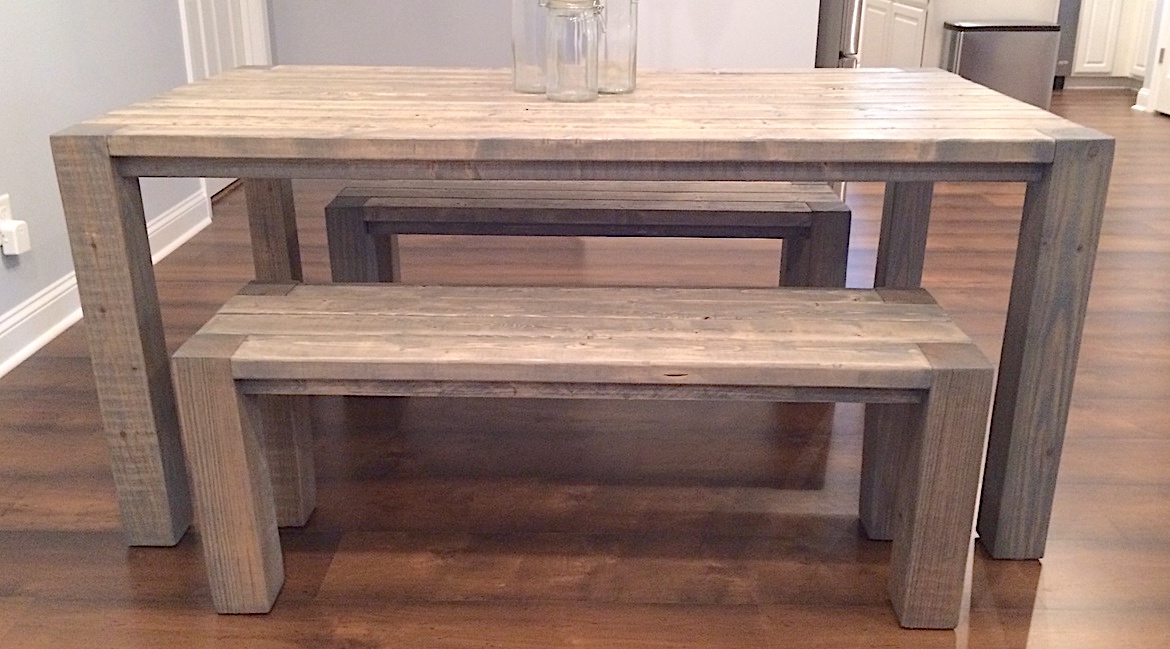
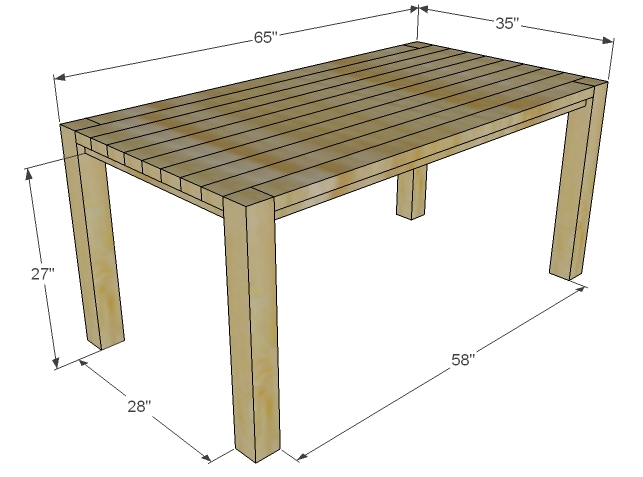
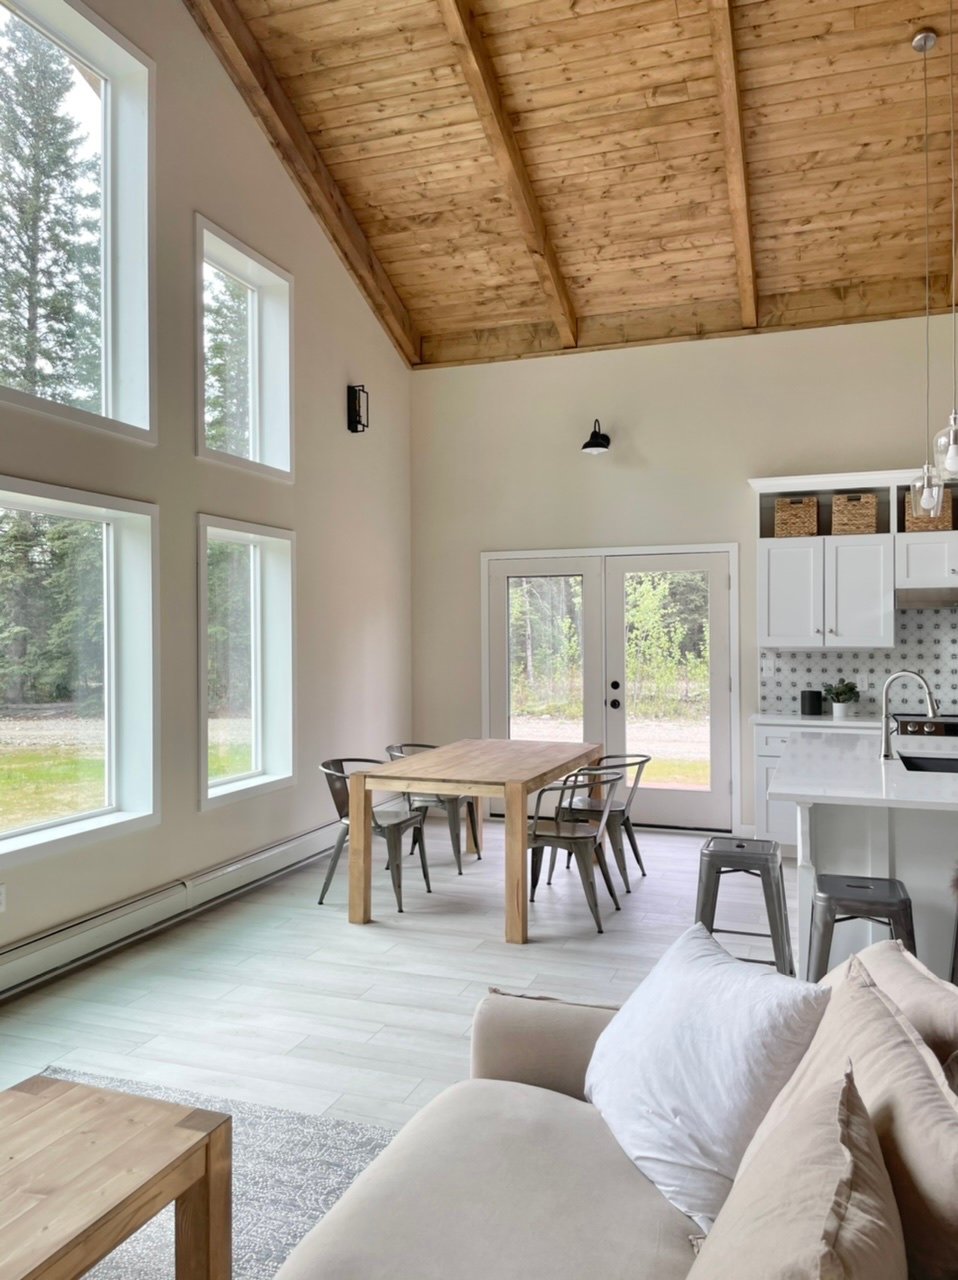
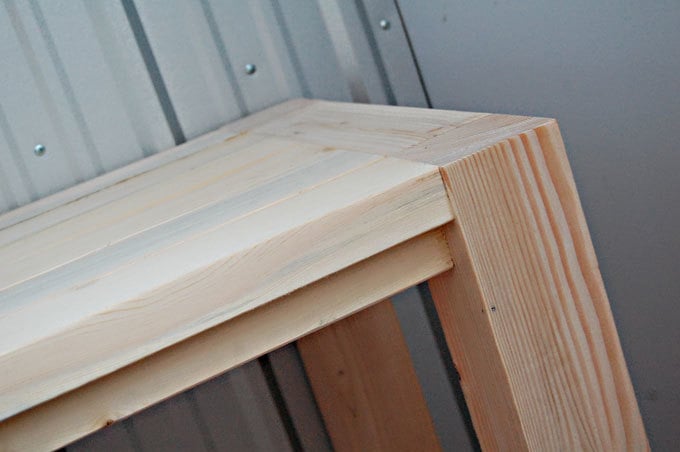
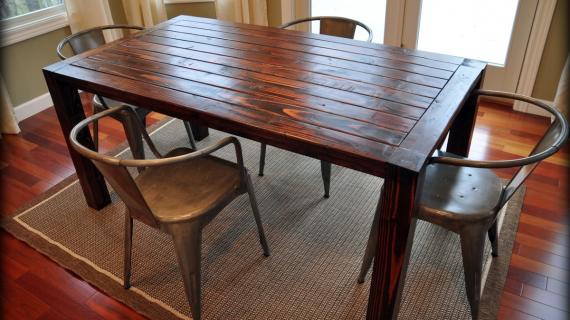
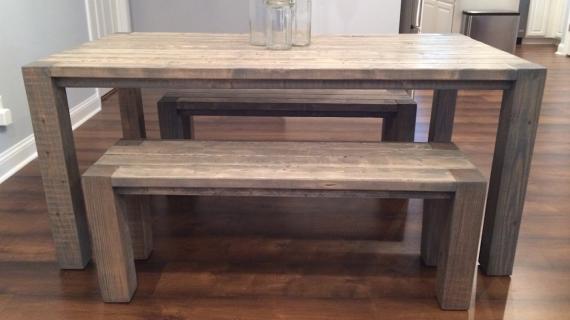
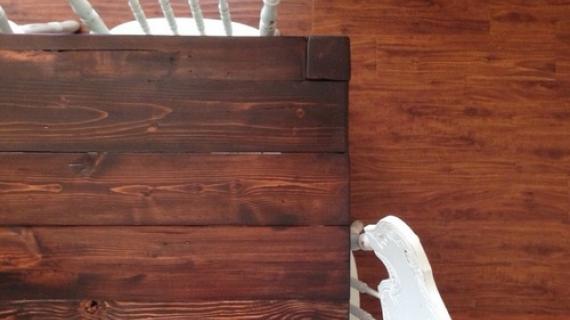
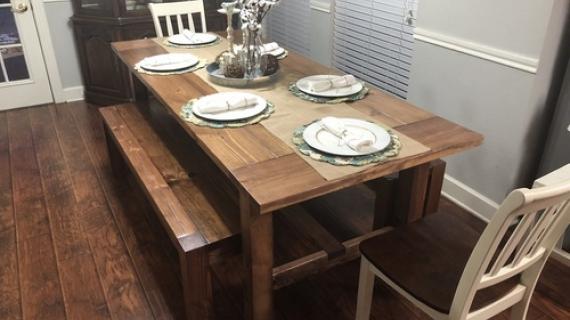
This dining table inspired by Parsons style tables features a solid, 4x4 legs, with the end grain exposed on the top. This is a free step by step plan, with diagrams, shopping and cut list.
Preparation
- 1- 10′ long 4×4 Post, cut into 29 7/8″ pieces
- 10 – 2×4, 8 foot or stud length
- 4 – 2×2 @ 8 foot long
- 1 – 2×3 @ 6 foot long
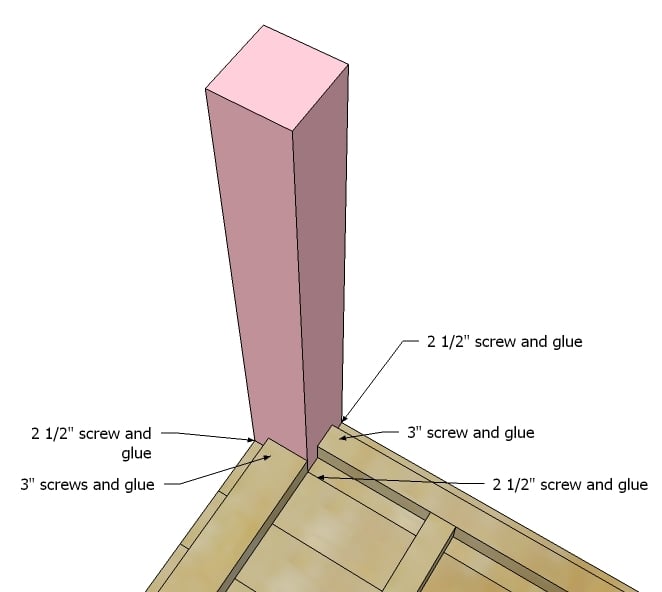
- 2 1/2″ self tapping wood screws
- 3″ self tapping wood screws
- Wood Glue
- Finishing Supplies
- 4 – 4×4 Post @ 29 7/8″ (Legs)
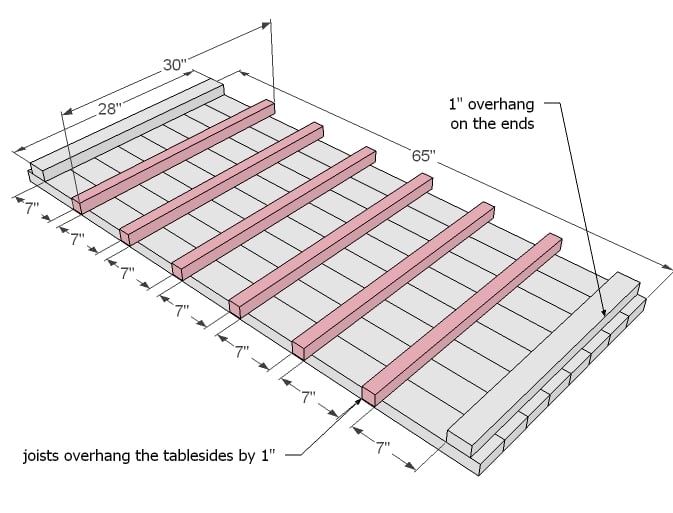
- 6 – 2×2 @ 30″ (Under Table Joists)
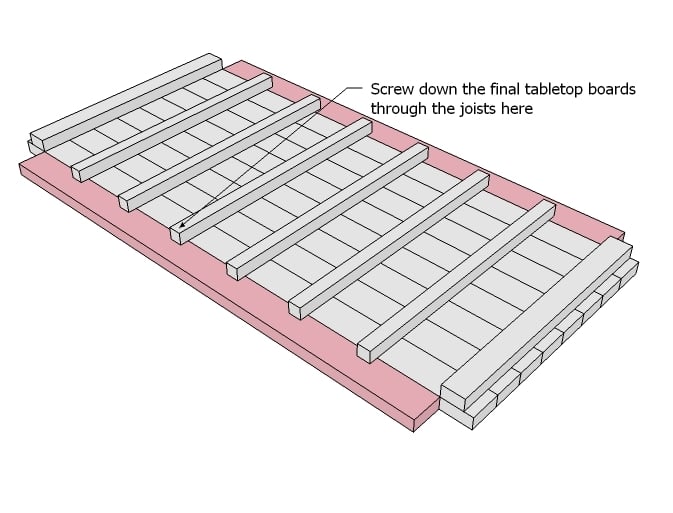
- 8 – 2×4 @ 65″ (Tabletop Boards)
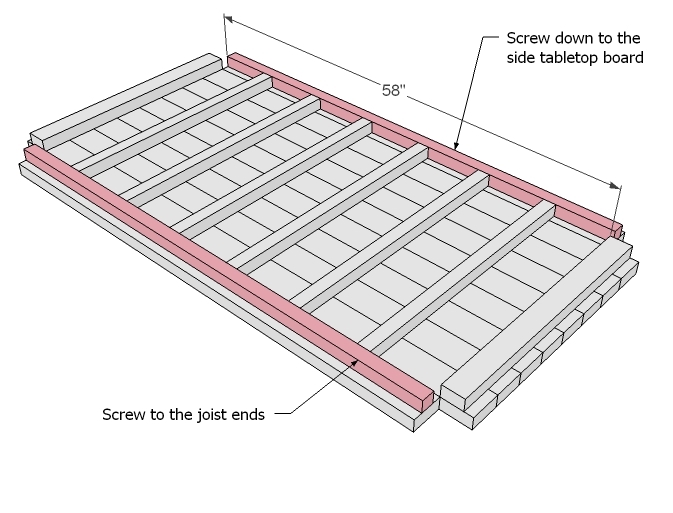
- 2 – 2×4 @ 58″ (Tabletop Side Boards)
- 2 – 2×3 @ 28″ (End Joists – you could use 2x2s here if you cannot find 2x3s)
- 2 – 2×2 @ 58″ (Side Aprons)
Instructions
Step 1
Step 2
Tabletop
If you have a Pocket Hole Jig, you will want to build your tabletop first (all 10 tabletop boards) with 1-1/2" pocket holes drilled every 8-12" and 2-1/2" pocket hole screws, and then add the supports.
Otherwise, you can screw through the supports into the underside of the tabletop boards, minimizing the gaps between the tabletop boards as you go. Use 2 1/2″ screws and glue.
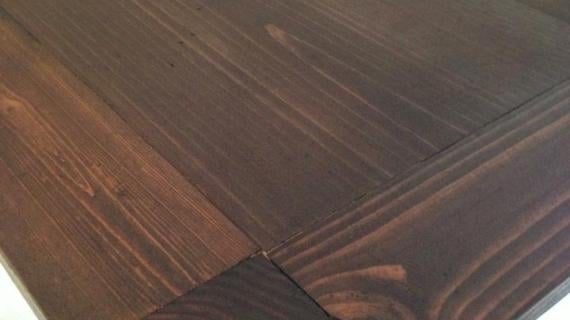
For those of you looking for that super smooth tabletop – you could run your 2x4s through a table saw and trim off any rounded edges first but beware that this will change the dimensions of your support boards. I did not run mine through a tablesaw, and think that’s what a farm table is all about – being a little rustic and obviously made of real boards. Predrill all holes.





Comments
Gina (not verified)
Mon, 02/07/2011 - 19:26
Aww man!!!! This is
Aww man!!!! This is beautiful, but I've been trying to figure out how to make a TALLER table (counter height, plus). Any suggestions on a taller farmhouse table?
Ana White (not verified)
Mon, 02/07/2011 - 19:51
Gina, I wouldn't go too much
Gina, I wouldn't go too much taller without a base support. I'll look at some bar height table plans for ya. Thanks so much! Ana
Sandra (not verified)
Mon, 02/07/2011 - 20:19
Ana- That would be awesome.
Ana- That would be awesome. We would love to build a counter top height table!! ;o) BTW You rock! We are working on finishing our first project!
mamma_joy (not verified)
Mon, 02/07/2011 - 20:47
So pretty and I'm pretty sure
So pretty and I'm pretty sure will beat out the other tables now for our new table! We are wanting a square table and prefer the legs on the outside so that it doesn't limit the seating space between the legs. A couple of questions...Your end looks a little different than the plan (the breadbox piece?). Is there a benefit to one vs. the other or just easier to have the boards extend? And I can't quite picture where the pocket holes go on the legs that you can't see them on the outside. I would have thought they screwed into the aprons but I would think you'd see them? Thanks again for another plan!
Ana White (not verified)
Mon, 02/07/2011 - 21:06
Erin, I'll post a photo for
Erin, I'll post a photo for you to look at of the ends. We did the breadboard ends because we had a bunch of 2x4 scraps that were the same length and couldn't just waste them. If you do do the breadboard ends, it'll be easy to modify, just do the ends just like the sides. Hope that makes sense. Ana
Kelly (not verified)
Mon, 02/07/2011 - 23:36
Any chance you could show an
Any chance you could show an actual picture of the finished item similar to the diagram in step 4? I cant quite picture all of the pocket holes :) thanks
Meg (not verified)
Tue, 02/08/2011 - 02:29
We love your furniture since
We love your furniture since we are always on a budget. I hope to have a corner cabinet plan to share with you soon...complete with used horseshoes:). Where can we get untreated 4x4 posts??? We are in Charlotte, NC and our Blue and Orange stores do not have those.
Matthew (not verified)
Sun, 03/11/2012 - 00:58
4X4 Posts
The blue store will custom order them for you, but it will cost you. A local lumber store will save you some, but I like to make my own. It takes 2 2X4s wood glue and screws. Take 2 premium 2X4s (not stud grade) cut to length (I like to leave them a little long so I can cut them perfectly even after) place them together so that the grain is cupped together. (should look like this (()) as opposed to this (((( or this ))(( or they will warp and pull apart) Now put wood glue in between and clamp it tight. While it is clamped pre-drill and counter sink 2 deck screws every 12" and at ends on the B side. (careful not to split your lumber) When assembling your piece turn the B side in to hide the screws or out for an industrial look.
Whitney (not verified)
Tue, 02/08/2011 - 03:03
I think I will be pricing
I think I will be pricing some cedar! We need a new table for our deck since our old one has become a workbench :)
rhilborn (not verified)
Tue, 02/08/2011 - 03:15
I'm so excited! I wanted the
I'm so excited! I wanted the farmhouse table look but with a smooth table top. I had already learned to join a table top with pocket holes when building Clara's play table and thought maybe I could try the same with the farmhouse. Is there an easy modification I can do so that the legs can be removed for moving? We're in the Army and we're looking at 2 moves by next Christmas:). I know that often the modifications involve using lag bolts instead of screws, is that applicable here? Would my legs be of sufficient heft to handle that many bolts or would I use fewer? I look forward to seeing this project in the magazine:).
Carrie W. (not verified)
Tue, 02/08/2011 - 04:24
MinnWax Whitewash/Pickling
MinnWax Whitewash/Pickling Stain it! I am making a Farmhouse bed for my sister and am using it for the finish. It looks really vintage and cool. You still get to see the grain of the wood underneath but it is obviously white colored
Ginney (not verified)
Tue, 02/08/2011 - 05:10
Ana, I love this table! I've
Ana, I love this table! I've been looking for a table without a stretcher to build for my family of 8. Do you think I could make the table a little longer and still be sturdy? I'm hoping for about 80" long? Your site and plans are amazing! Thank you for inspiring me and many others!
Ana White (not verified)
Tue, 02/08/2011 - 07:37
I can't wait to see this
I can't wait to see this stain! I've never used it!
mamma_joy (not verified)
Tue, 02/08/2011 - 08:23
Maybe you can make it wider
Maybe you can make it wider instead of longer? It would be easy to modify it to make it wider!
Natale (not verified)
Tue, 02/08/2011 - 08:46
I just finished a project
I just finished a project using Minwax Golden Oak. I am getting worn out of everything walnut or mahogany so I tried a lighter stain. This stain comes out with a beautiful "worn" look. I skipped a pre-stain to allow some parts of the wood to soak up lighter and the edges darker. It might be my new favorite color!
cannelle9
Thu, 04/21/2011 - 20:49
Love the color of Minwax Golden Oak
My brother and I routed pine boards last summer and stained them with that finish to make baseboards and door/window trims for my house. Came to the same price as MDF but looks waaaaaay better!
TheWorldMovesForLove (not verified)
Tue, 02/08/2011 - 09:22
LOVE! The pictures look
LOVE! The pictures look great! And I just love Grace's hair!
Sarah C. (not verified)
Tue, 02/08/2011 - 09:45
CANNOT wait till the table
CANNOT wait till the table gets posted. This is 100% exactly what we have been looking to build and now we don't have to chance it with amateurish revisions of a few other plans. Will probably build one for indoors and one for outdoors. LOVE.
Lisa (not verified)
Tue, 02/08/2011 - 12:04
I am right there with Gina, I
I am right there with Gina, I would love a tall design. I want to make some counter height tables for our rec room area. Long and narrow about 2x6 feet, so I can set 2 together for a 4x6 table or push them against the wall for a 2x6 drink rail. I love versatility. Thanks Ana, you rock!
Ana White (not verified)
Tue, 02/08/2011 - 12:10
The girl has a hair brushing
The girl has a hair brushing phobia! I'm always worried about someone saying something about her hair, so I sure appreciate your comment. Thank you!
spiceylg (not verified)
Tue, 02/08/2011 - 15:22
Beautiful! I prefer
Beautiful! I prefer furniture with substantial/beefier looking legs. As usual, you rock!
Theresa (not verified)
Tue, 02/08/2011 - 16:08
Thank you for saying
Thank you for saying something nice about the associate at the Home Depot. I hope you went online and entered the contest and let them know about your experiance. You could win big $. Most do a great job helping customers get what they need cut the way they want it.
I love the table and this might be just what in need for the patio, which is currently covered with ice and snow.
Lisa (not verified)
Wed, 02/09/2011 - 04:31
Hi... I am super excited to
Hi... I am super excited to make this table for my dining area. I would love to make it a bit longer. What do you suggest?
Britta (not verified)
Wed, 02/09/2011 - 10:15
Anna - THANK YOU! I have put
Anna - THANK YOU! I have put off having my husband build me a DR table from your plans becuase what I have really wanted was this one! Thanks for posting it. Do you see any support issues with making it longer, say 80-84"?
Sarah C. (not verified)
Thu, 02/10/2011 - 14:21
Question. If we're going to
Question. If we're going to make this for outdoors and want to space out the tabletop boards out for drainage (as suggested), do we just screw the boards only to the joists? Just making sure...
Thanks!
Jody (not verified)
Thu, 02/10/2011 - 15:01
Thank you for these plans! I
Thank you for these plans! I specifically came on here to look for the best way to attach 4x4 as Im trying to make 2 table like desks for our office/craft/homework space. I have two pre-laminated pine boards one 48x24 and one 72x24, so I think I am going to put a basic rectangular frame below the top with 4x4 legs using my new Kreg:). Im sure I'll be back with questions and of course pics when I finish!:)
nuthinfancy (not verified)
Mon, 02/14/2011 - 08:52
Thanks Ana, Your website is
Thanks Ana,
Your website is so wonderful, all the information is really great. I am starting the farm table and bench.
all the best to you, Berry Dean
Jenny (not verified)
Mon, 02/14/2011 - 16:17
I'm with Lisa and Britta. I
I'm with Lisa and Britta. I need a table that can seat 8. Do we need to make modifications to make the table longer, like 84 inches or so?
chaz (not verified)
Wed, 02/16/2011 - 13:21
Wow, LOVE this Website! I
Wow, LOVE this Website! I want this to be my first project! What kind of wood are the 4x4s? I can't seem to find a hardwood that size.
Sarah C. (not verified)
Tue, 02/22/2011 - 08:15
I did it! Built the table
I did it! Built the table and bench for outdoors. Some modifications including 1/4" spaces on the table.
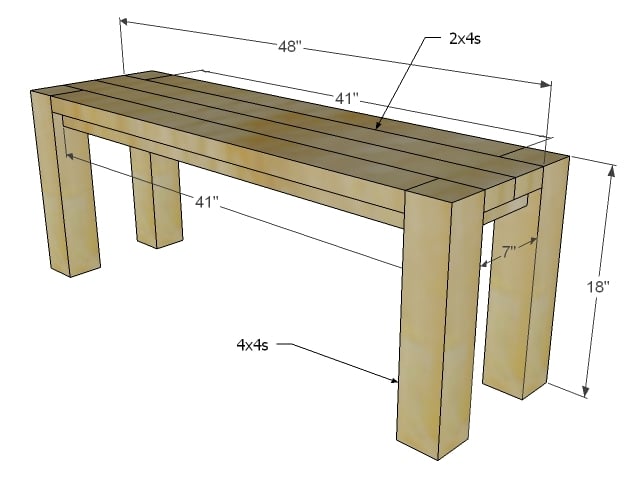
By the way - if you're going to make the bench and want to use the pocket holes to attach the legs (as I did), you'll need to use a ratchet to insert the screws because the space in between the legs is too small to fit a drill. Just an FYI. Will post pics...
Valerie (not verified)
Thu, 02/24/2011 - 12:44
What are the dimensions of
What are the dimensions of the one you photographed? It looks like the perfect size for a computer desk.
Kelly (not verified)
Sun, 03/06/2011 - 09:21
I love this table! I really
I love this table! I really want to build this and have no experience, but I do have experienced help. Is there a modification so that the top can be one piece, so it's smooth? How would I do that?
Andrea (not verified)
Mon, 03/07/2011 - 09:55
I am excited to build this
I am excited to build this table, I am hoping to start this weekend. The hubs and I even went to check it out in person recently. I have two questions - 1) I too was wondering how the table could be made longer and 2) I swore when I first found this table I saw the plans for the coordinating buffet, but now I don't see them. Was I dreaming?
sunflower1237@…
Sun, 03/20/2011 - 09:33
Just a question...
Our current table is getting a bit wobbly and needs replacing. This table seems perfect! However, I do have one question for you. The table we have now has a little routered line about three inches from the edge. This line gets filled with crumbs and other junk when we wipe off the table. Will that happen with this table in the lines between the boards?
simplyadorable
Tue, 03/22/2011 - 11:41
Square
I am making this table right now and I wanted it to fit 8 chairs. So I modified it to be square. I will make it 56 x 56 inches. I have to get 16 2x4's instead of the 10. I am so excited! I'll post pictures as soon as I am done.
Jami (not verified)
Wed, 06/08/2011 - 11:16
Those of you looking for
Those of you looking for untreated 4x4s, my local Lowes has them in white wood, currently for $10 each. They're 8ft in length and unfortunately the saw at the store is not big enough to cut them for us. I had ask at 3 different stores here in San Antonio before I was even able to find that much. Have fun building!
In reply to Those of you looking for by Jami (not verified)
Jake
Tue, 06/19/2012 - 19:19
$10 for 8 foot 4x4
My Lowes has the 4x4 at $10 for eight feet. Trouble is 8 ft is 96 inches which falls short of the needs for the legs. I can get 6 foot treated 4x4 but I don't like the chemicals.
Page Family (not verified)
Tue, 09/06/2011 - 08:51
Breadboard support
Ana,
This looks like an amazing table and one that would normally cost well ove $500 in the store. My wife and I are itching to get started.
I have a question regarding the breadboard and the support for it. Did you drill the boards into the support/apron, and then that combo into the legs? Or into the support and then put screws from both the support and the board into the legs? I think we're going to w/ that look if we can figure out how to make sure that board is fully supported and doesn't somehow separate from the rest of the planks.
Thanks for your help!
momofzander
Wed, 09/28/2011 - 08:05
type of wood
My husband and I are taking this on as our first woodworking project. We've gone to the local lowes/home depot and walked away with a few questions. What type of wood are you using for this project? Oak, pine, cedar? We also can not find any 2x2 or 2x3 boards. And to special order them it would be very expensive. I'm sure we can use 2x4 for the joist, just use less of them. But would that be okay for the apron?
rusty_shackleford
Thu, 09/29/2011 - 09:58
removable legs?
I really like the look of this table, and my wife and I are ready to tackle this table soon. We have quite a bit of steps and a landing to get to our dining room.
How would you modify these plans to allow for removable legs?
claydowling
Thu, 09/29/2011 - 12:19
Removable Legs
Rusty,
I've built a few pieces of knock-down furniture. For a table, you would need a diagonal member between the table aprons at each corner, with a hole through the center of it. You would also need to install a hanger bolt of appropriate size in the leg, such that it lined up with the hole in the diagonal member. Obviously you would also -not- screw the apron to the legs.
With this arrangement, the table legs can be secured with a washer and nut.
I have a picture of the arrangement here: http://www.knockdowndesk.com/
Polysoup
Wed, 11/30/2011 - 07:33
When is it too cold to build?
I really want to make this (and a half dozen other projects this winter). I know there's a point where it gets too cold to stain/paint (I think 65 degrees right?) But is there a point where you shouldn't cut/attach wood? I'm worried it might somehow bow or warp once it warms up. Is this a concern? I live in Austin so it's pretty unusual to get under 30 degrees but I still wonder. I'm working in my garage that's insulated but not heated.
claydowling
Wed, 11/30/2011 - 07:39
Cold not an issue
You can work in any temperature you can stand. Note however that you may see some significant wood movement when you move the finished product inside if the wood hasn't been outside drying for a while first. I'd give it a couple of weeks in the garage before building anything.
As for the paint, the manufacturer will specify the bottom end working temperature. For latex paints, painters will often mix it with a small amount of ammonia so that it will dry effectively in cold weather, and that extends the working temperature range quite a bit.
Joe (not verified)
Sun, 12/04/2011 - 14:36
Thinner Table Top
I love this table. I am going to make it for a new computer desk. Since it will be in my bedroom I have to modify this plan just a tad bit. I will only be using 6 2x4"s for the table top instead of 8. I need it a little thinner to fit in the space. I may try to extended as well. I cant wait to start building this. Have to go search out some untreated 4x4's first.
Eric (not verified)
Thu, 01/12/2012 - 10:07
Wider boards and bigger/taller table
Hi Ana - this table is awesome! I also am interested in building something like this but with wider boards (maybe 2x6), a big bigger, maybe 80", and a tad taller. What advice would you have for me there? It would be my first such project as I've never really built anything from scratch. Also, what wood would you recommend... we would be using this in our home office.
Thanks and great work!!
BJ D
Mon, 04/02/2012 - 05:36
Awesome table
I love the 4 x 4 leg look. As a heads up for anyone interested in doing this table and wanting the bulk of the legs without the 4x4 pricetag (especially if they can't find one in a decent price) I am currently building a desk for a friend who wanted 4 x 4 legs. I'm using 1x4 for 2 sides with 1x3 furring strips (found some awesome ones in great shape) cut down to 2 inches for the opposing sides. While it definitly required some care in making sure everythign went together square, after glue and scres and sanding multiple people have commented that they couldn't tell they weren't solid 4x4s. Even my wife asked "where's the seam?" wanting to know which piece was the 1x4 and which was the 1x3 strip.
Jake
Tue, 06/19/2012 - 19:16
Breadboard
I like the look with the breadboard at each end of the table. I was thinking of using a few pocket joints (one for each top board) to attach the breadboard to the table top and overlap the end joints between the breadboard and the table top 2x4s. Also glue. Does this seem reasonable to you, Ana?
AnnaAsher (not verified)
Mon, 10/29/2012 - 11:08
Big Ur at 8 feet
Hi, we want to build this table at 8 feet long vs. the noted 65". I am afraid of trying to make thr adjustments to the plans as this will be our first project! I will have to have Lowes make the cuts for me and they don't cut 4x4 so another issue is how to modify the legs to use 2, 2x4 put together. Does anyone find it simple to make thr adjustments to the plans and cut lists? I'm bewildered.
Niki Clarke (not verified)
Mon, 10/29/2012 - 13:10
I'm in love with this design
I'm in love with this design and would love to make it counter height (and possibly add a lower shelf across the bottom) to be used as a folding table in my laundry room. Can you suggest how I would go about altering the plan, or recommend a similar design that is already what I'm looking for??
Thanks!
Niki Clarke (not verified)
Mon, 10/29/2012 - 13:11
I'm in love with this design
I'm in love with this design and would love to make it counter height (and possibly add a lower shelf across the bottom) to be used as a folding table in my laundry room. Can you suggest how I would go about altering the plan, or recommend a similar design that is already what I'm looking for??
Thanks!