
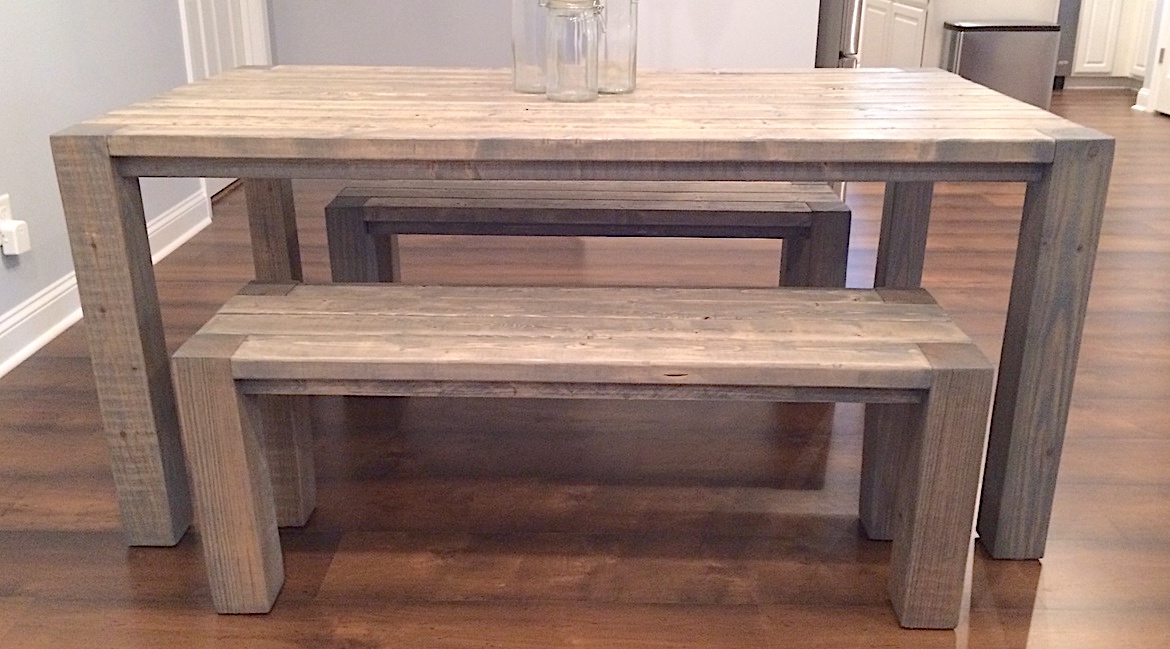

This dining table inspired by Parsons style tables features a solid, 4x4 legs, with the end grain exposed on the top. This is a free step by step plan, with diagrams, shopping and cut list.
Photo Credit: AMJOY37
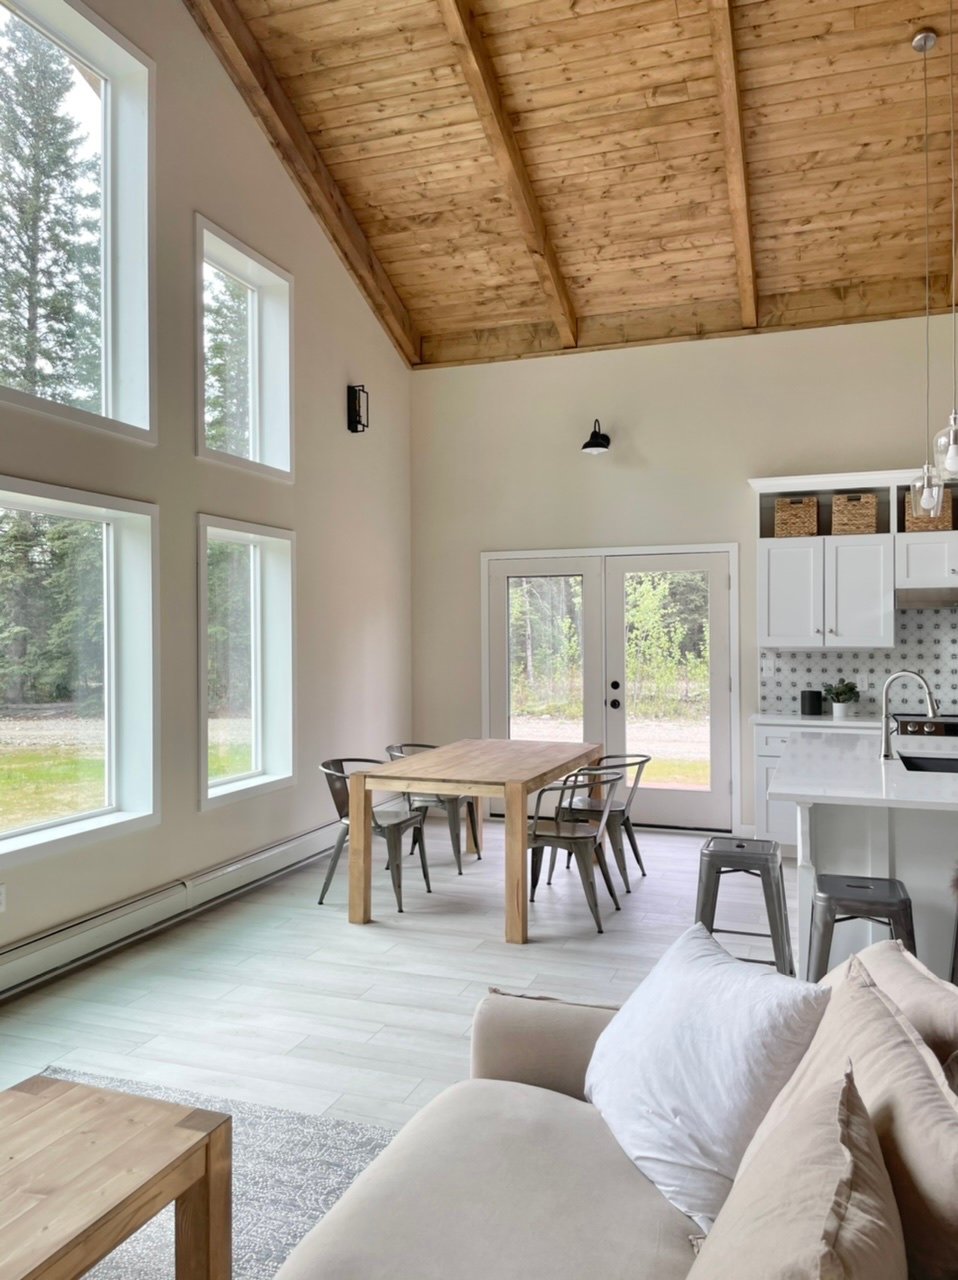
Similar Style Table with 1x Top
I loved this design so much, I did a similar build with a 1x top. You can check out those plans here.

Preparation
- 1- 10′ long 4×4 Post, cut into 29 7/8″ pieces
- 10 – 2×4, 8 foot or stud length
- 4 – 2×2 @ 8 foot long
- 1 – 2×3 @ 6 foot long
- 2 1/2″ self tapping wood screws
- 3″ self tapping wood screws
- Wood Glue
- Finishing Supplies
- 4 – 4×4 Post @ 29 7/8″ (Legs)
- 6 – 2×2 @ 30″ (Under Table Joists)
- 8 – 2×4 @ 65″ (Tabletop Boards)
- 2 – 2×4 @ 58″ (Tabletop Side Boards)
- 2 – 2×3 @ 28″ (End Joists – you could use 2x2s here if you cannot find 2x3s)
- 2 – 2×2 @ 58″ (Side Aprons)


Instructions
Step 1
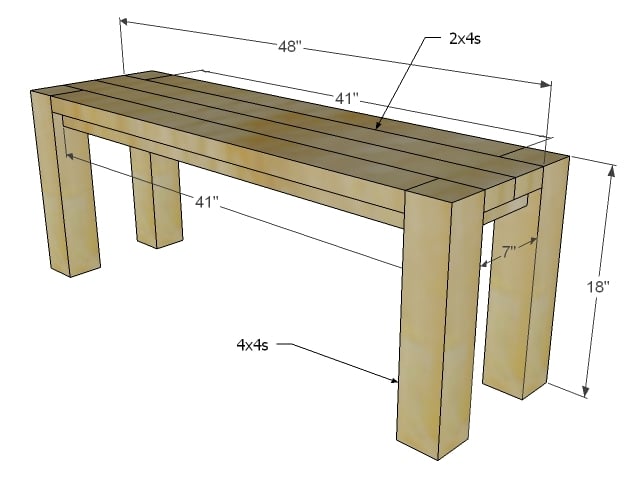
Matching Bench Plans
The matching bench can be built using the same methods. Here are the plans for it.
Step 2
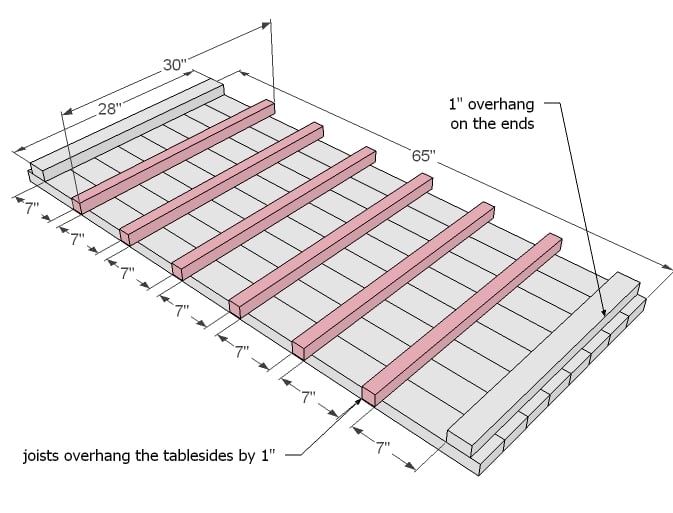
Tabletop
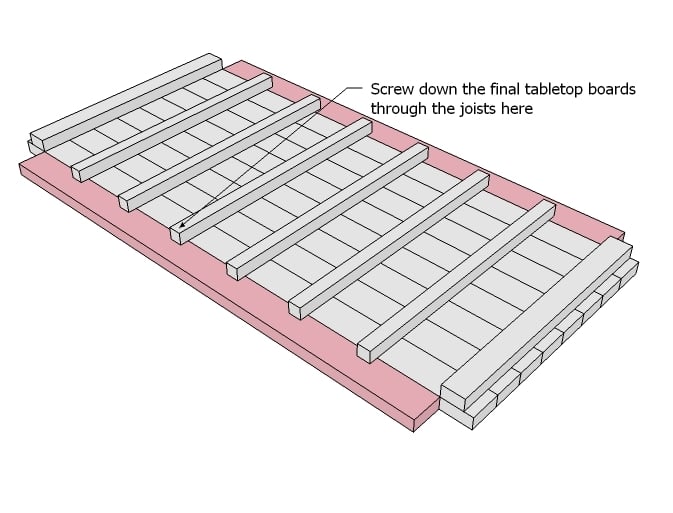
If you have a Pocket Hole Jig, you will want to build your tabletop first (all 10 tabletop boards) with 1-1/2" pocket holes drilled every 8-12" and 2-1/2" pocket hole screws, and then add the supports.
Otherwise, you can screw through the supports into the underside of the tabletop boards, minimizing the gaps between the tabletop boards as you go. Use 2 1/2″ screws and glue.
For those of you looking for that super smooth tabletop – you could run your 2x4s through a table saw and trim off any rounded edges first but beware that this will change the dimensions of your support boards. I did not run mine through a tablesaw, and think that’s what a farm table is all about – being a little rustic and obviously made of real boards. Predrill all holes.
Step 3
Top Ends
Add the top ends as shown above. Minimize the gap between the tabletop boards and predrill and screw down with 2 1/2″ screws and glue.
Step 4
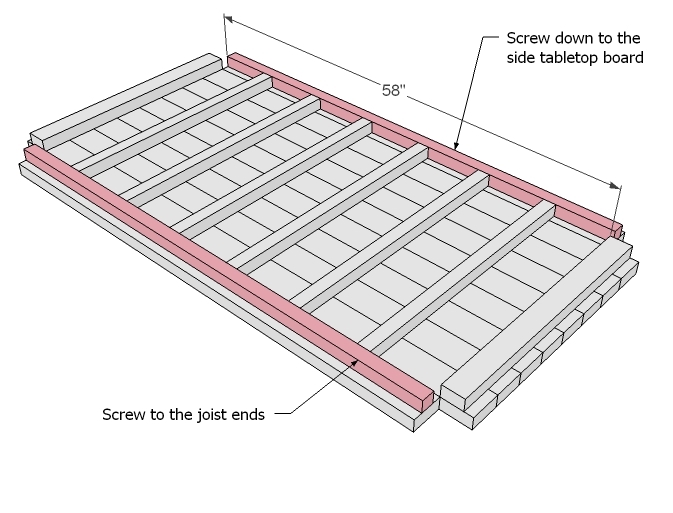
Sides of Tabletop
Now add the side aprons by screwing to both the tabletop end boards and the joists. Use glue and 2 1/2″ screws. Predrill all holes.
Step 5
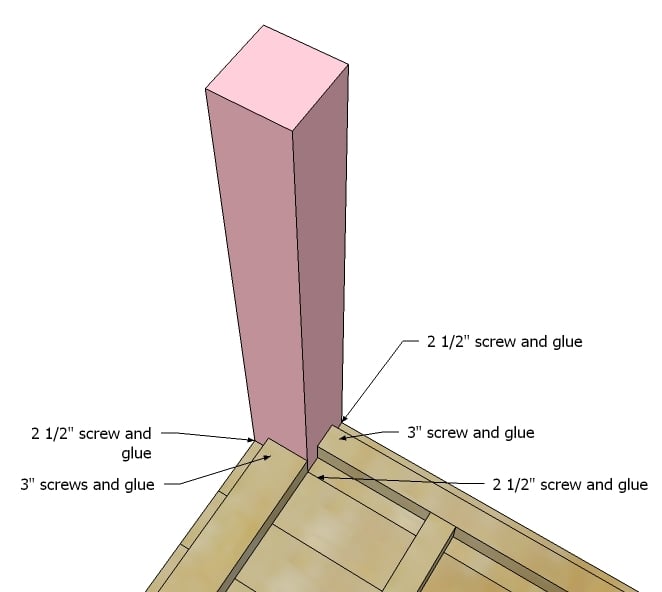
Attach the 2x2 supports to the undersides as shown.
Step 6
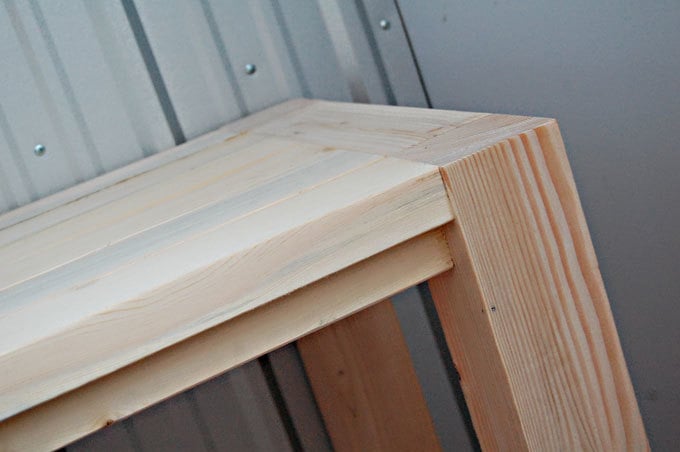
There should be no exposed holes visible on the outside of the table. I simply sanded my table with 120 grit sandpaper and vacuumed clean. Make sure you stain or seal your table to keep the wood from accepting food or other unwanted stains.

Comments
George from Boston (not verified)
Sat, 01/05/2013 - 18:33
Great table
Hi Ana, beautiful table and an incredibly handy site, thanks for sharing! I'm looking to build this table as on of my 1st projects. Could you provide some details on how you did the bead board on the ends of the table top?
Kind regards,
George
Dave8293
Mon, 09/30/2013 - 04:23
Where do the holes go?
This is site GREAT. I'm psyched to build a table, I just can't figure out where the pocket holes go(!). Can anyone help? Looking at the big ur table I can see that the joists need to be attached to the table top boards and that the legs attach to the top. Just not sure how using kreg jig pocket holes.
Thanks so much!!
DIYgirl
Mon, 05/27/2019 - 16:38
Attaching the legs
Did you use pocket holes to attach the 4x4 legs in Step 5?
[email protected]
Sun, 08/09/2020 - 20:00
Big Ur table legs
Great table and project! Struggling with fastening the 4x4s if there are any better pictures or techniques to help? Table top looks great, legs not so much. HELP...
Doug
[email protected]
Sun, 08/09/2020 - 20:00
Big Ur table legs
Great table and project! Struggling with fastening the 4x4s if there are any better pictures or techniques to help? Table top looks great, legs not so much. HELP...
Doug
caryrn
Sat, 01/23/2021 - 17:47
Plans won’t download
I can’t get the plans downloaded.??