
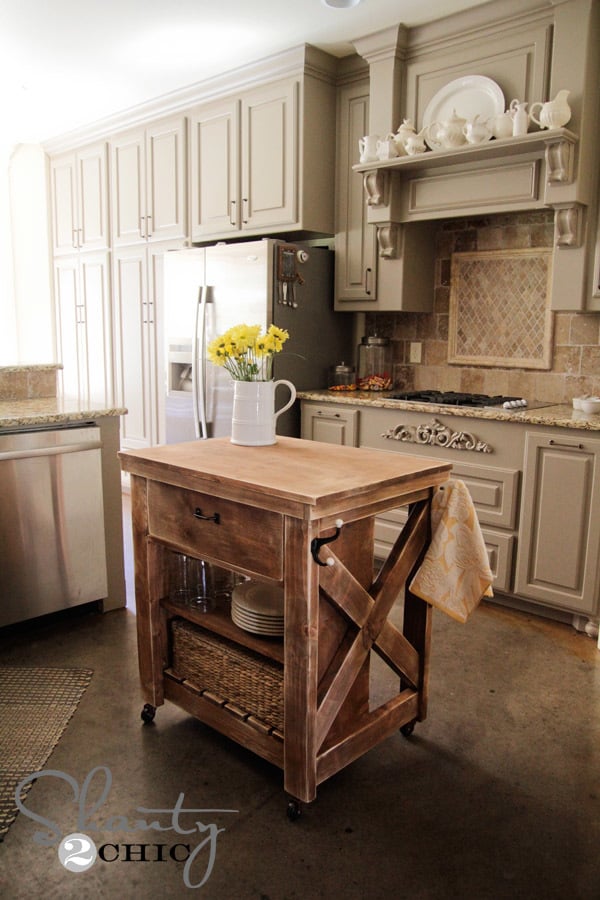

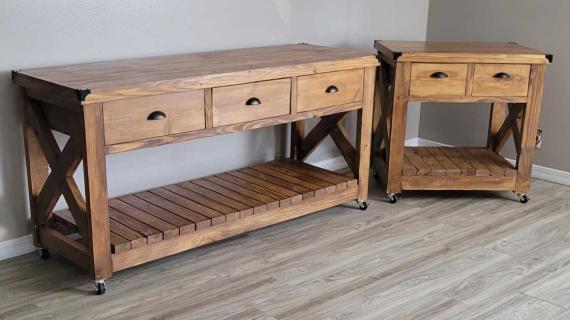
Free plans to build a kitchen island with X sides, inspired by Pottery Barn Hamiltion reclaimed wood kitchen island!
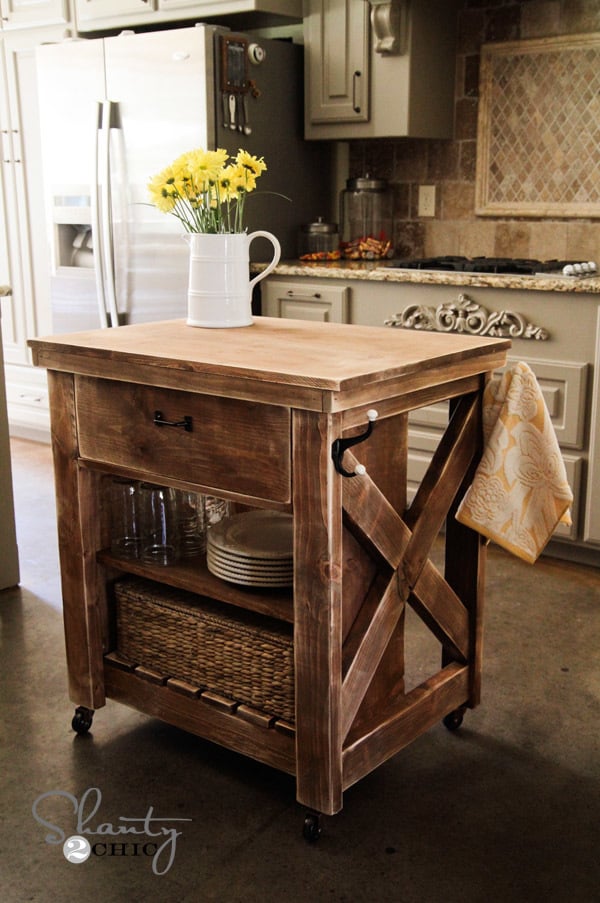
All I'm gonna say is 85 bucks.

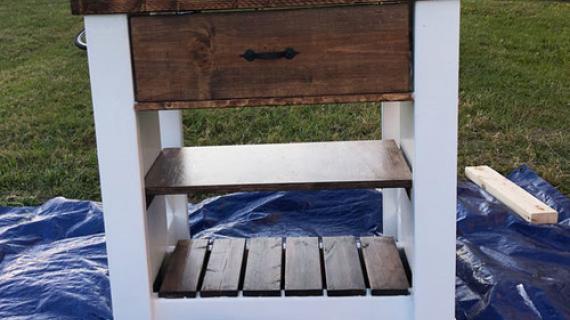
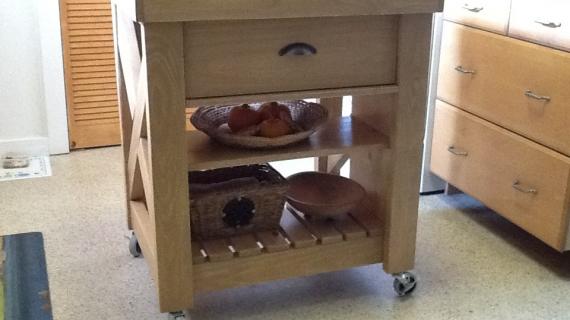
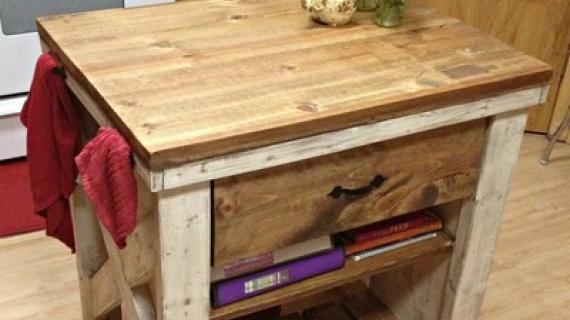
Yep ... $85 to build this solid wood kitchen island!
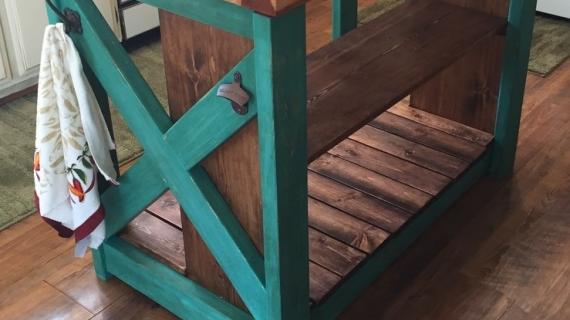
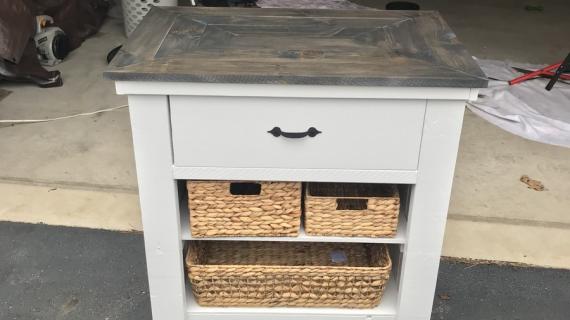
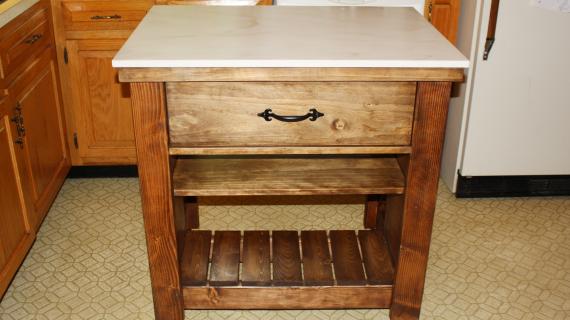
Want to see more pics - tons of building tips and tricks? This island was built by my friend Whitney from Shanty2Chic - please take a second to go check her post out for lots more photos and details!
Plans follow!
Thanks Whitney!
XO Ana
Preparation
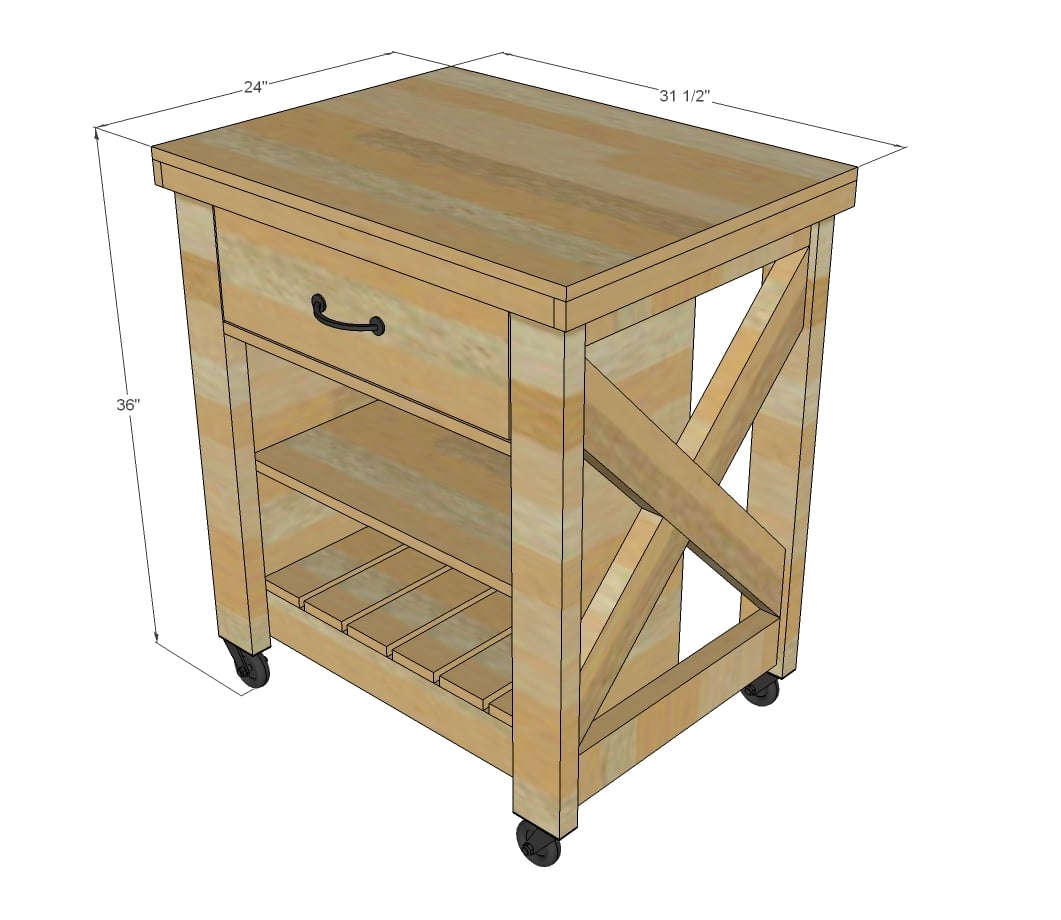
1 - Project Panel 24" wide x 32" long
4 caster wheels with overall clearance of 3"
1 handle
4 - 2x4 @ 8 feet long
1 - 1x4 @ 6 feet long
1 - 1x12 @ 8 feet long
1 - 2x2 @ 2 feet long
2 - 1x2 @ 8 feet long
1 - 1x6 @ 8 feet long
1 - 1x8 @ 2 feet long
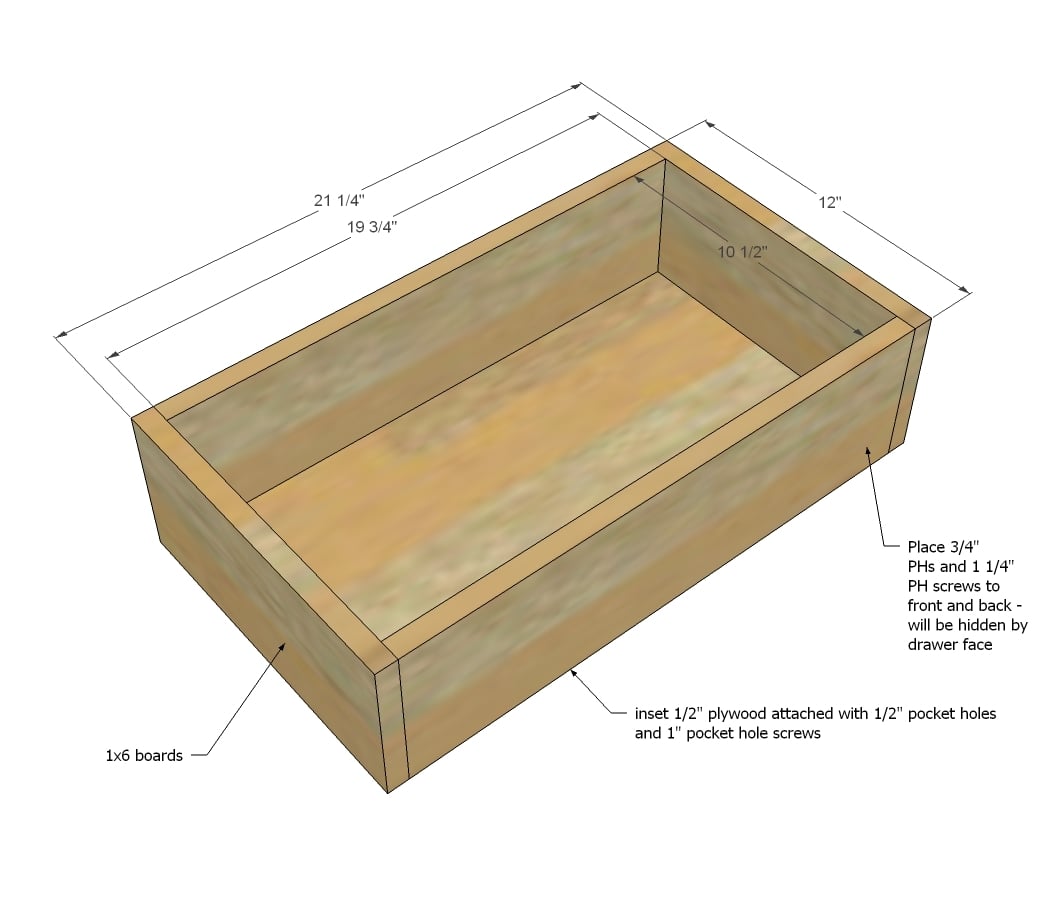
1/2" plywood piece 10 1/2" x 19 3/4" (for drawer bottom)
CUT LIST
LEGS
4 - 2x4 @ 32 1/4"
4 - 2x4 @ 19 1/2"
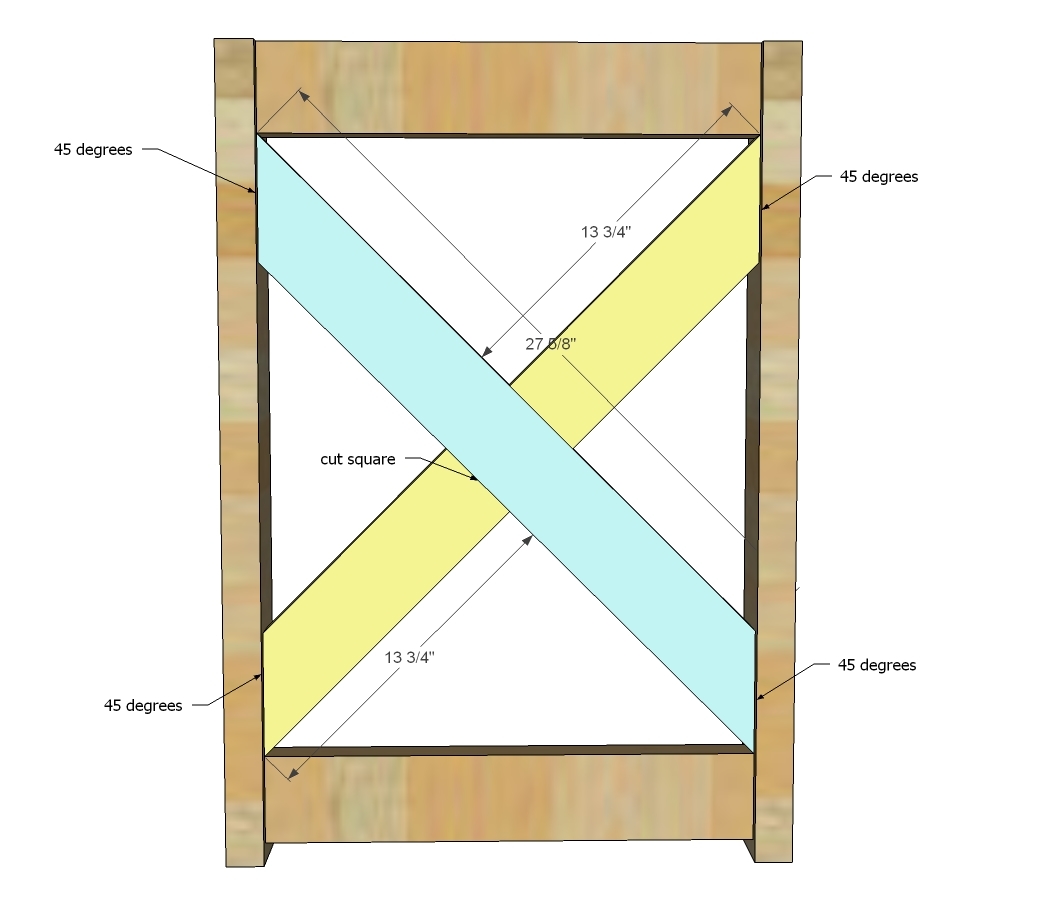
2 - 2x4 @ 27 5/8" - both ends cut at 45 degree angle, ends ARE parallel
4 - 2x4 @ 13 3/4" - one end cut at 45 degree angle, long point measurement
MIDDLE
2 - 2x4 @ 26"
2 - 1x12 @ 28"
6 - 1x4 @ 11 1/4"
2 - 2x2 @ 11 1/4"
1 - 1x2 @ 23" (drawer trim)
1 - 1x12 @ 24 1/2" (shelf)
DRAWER
2 - 1x6 @ 19 3/4"
2 - 1x6 @ 12"
1 - 1/2" plywood @ 19 3/4" x 10 1/2"
2 - 1x2 @ 12"
1 - 1x8 @ 22 3/4"
TOP
2 - 1x2 @ 30"
2 - 1x2 @ 24"
1 - project panel 24" wide x 31 1/2" long
Please read through the entire plan and all comments before beginning this project. It is also advisable to review the Getting Started Section. Take all necessary precautions to build safely and smartly. Work on a clean level surface, free of imperfections or debris. Always use straight boards. Check for square after each step. Always predrill holes before attaching with screws. Use glue with finish nails for a stronger hold. Wipe excess glue off bare wood for stained projects, as dried glue will not take stain. Be safe, have fun, and ask for help if you need it. Good luck!
Instructions
Step 1
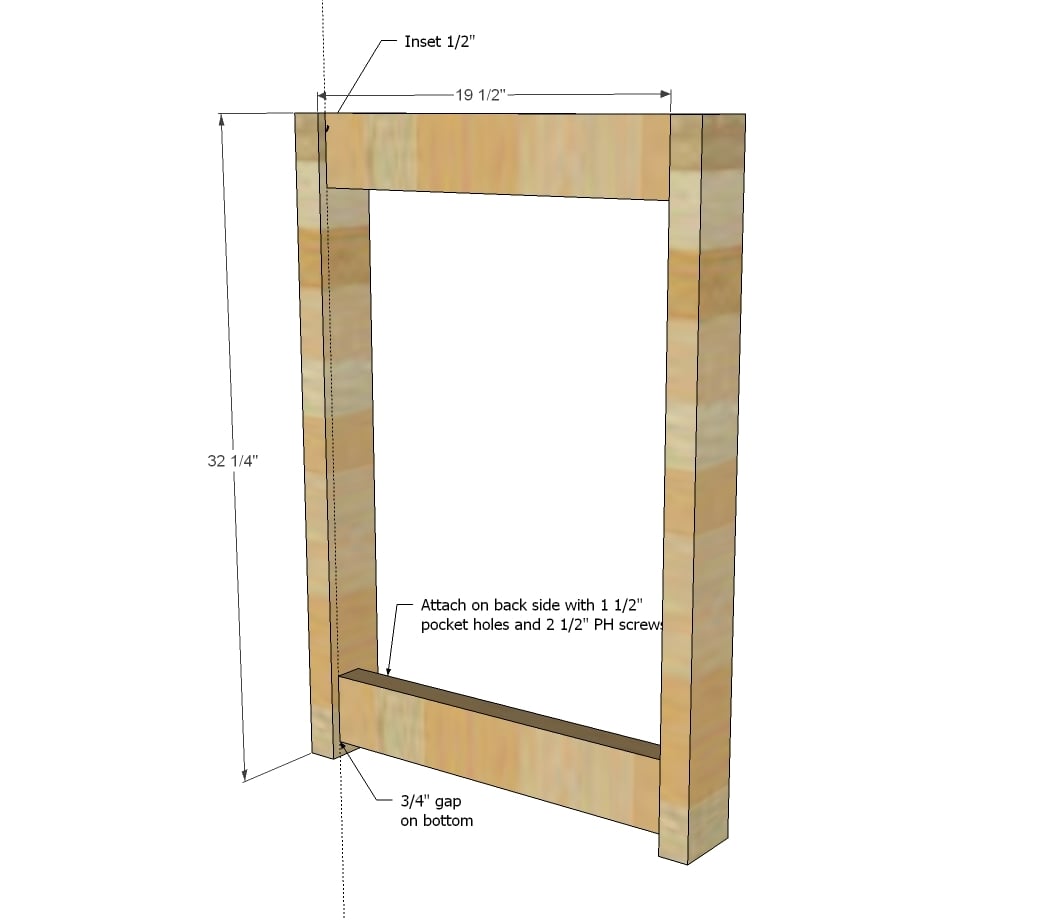
Build two of the legs frames with 1 1/2" pocket holes and 2 1/2" pocket hole screws.
Step 2
Fit the Xs in place and attach with 1 1/2" pocket holes and 2 1/2" pocket hole screws, flush to the top and bottom 2x4s from step 1.
Step 3
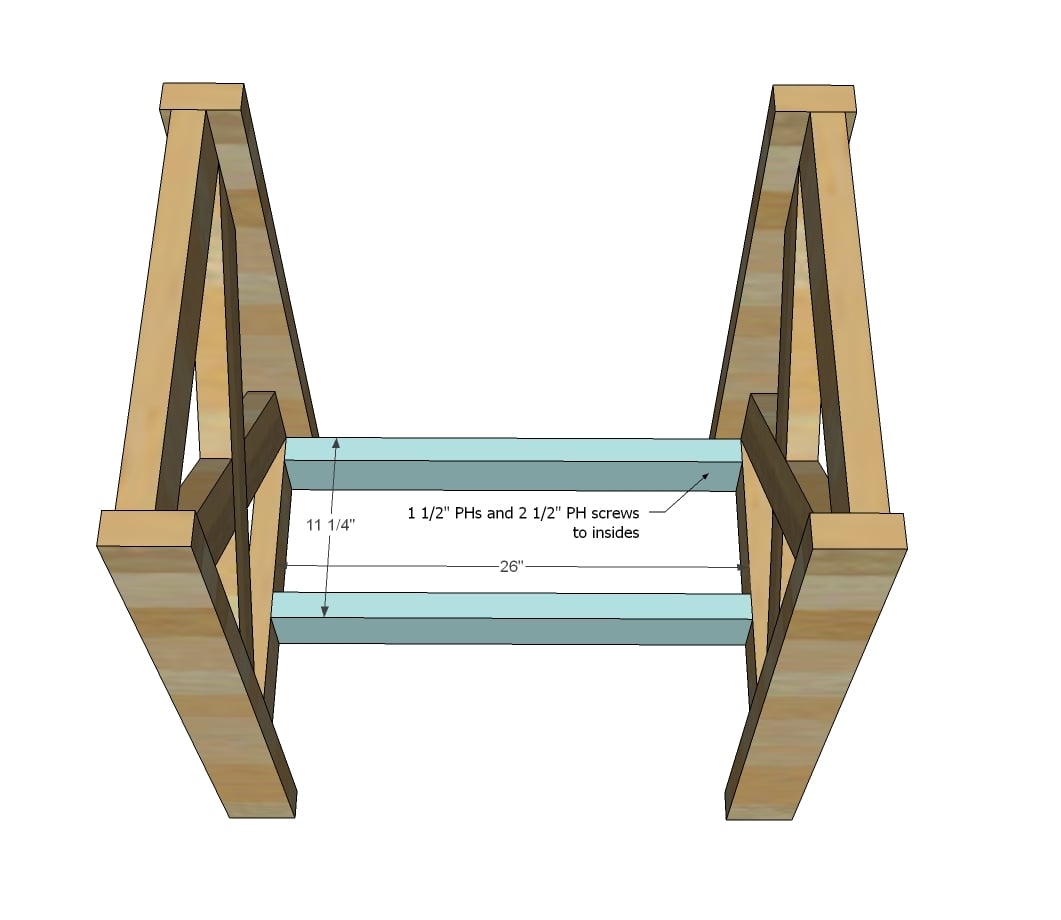
Attach the two leg sets togther with the 2x4s 26" long. Place 1 1/2" pocket holes on insides, and attach with 2 1/2" pocket hole screws and glue. Keep the 2x4 shelf supports 11 1/4" appart to match the width of a 1x12 board.
Step 4
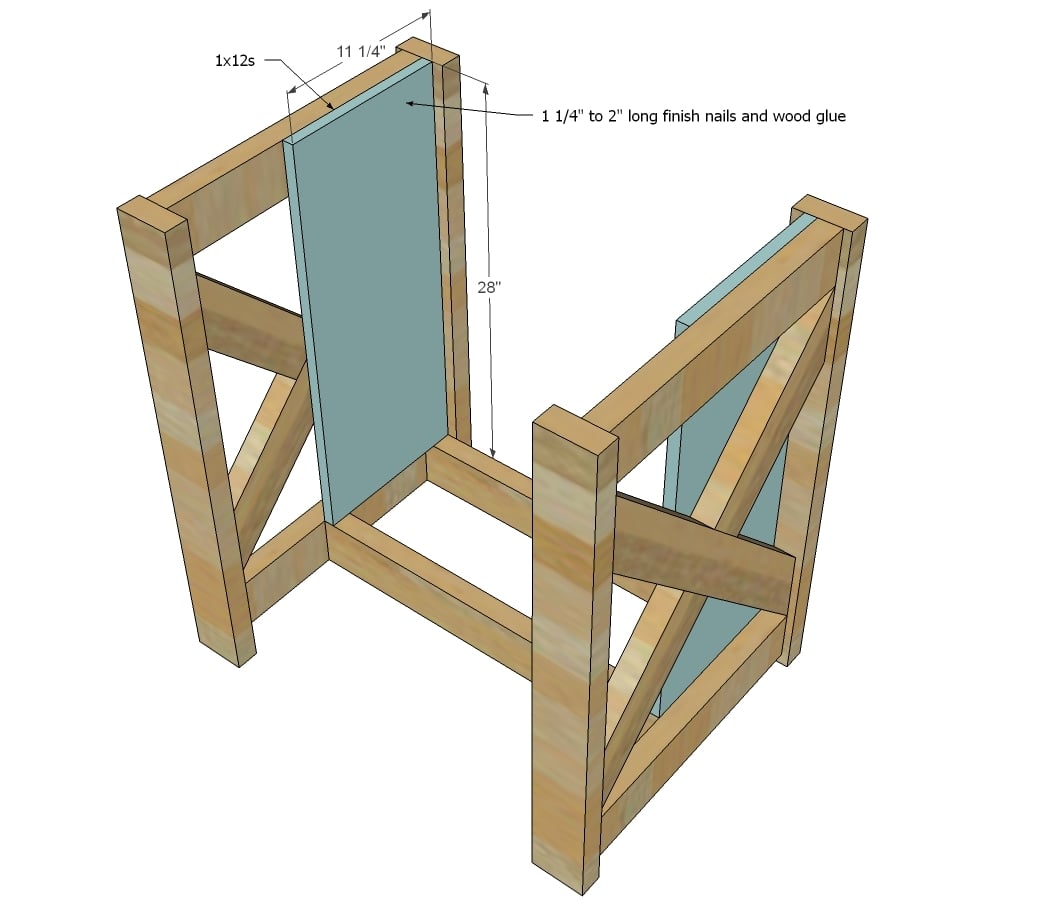
Place 1x12 boards on insides of side legs - this will create the storage area in the island. Use nails and glue to attach. You can also attach to the 2x4s at the bottom shelf supports with a 3/4' pocket hole and 1 1/4" pocket hole screw.
Step 5

Step 6
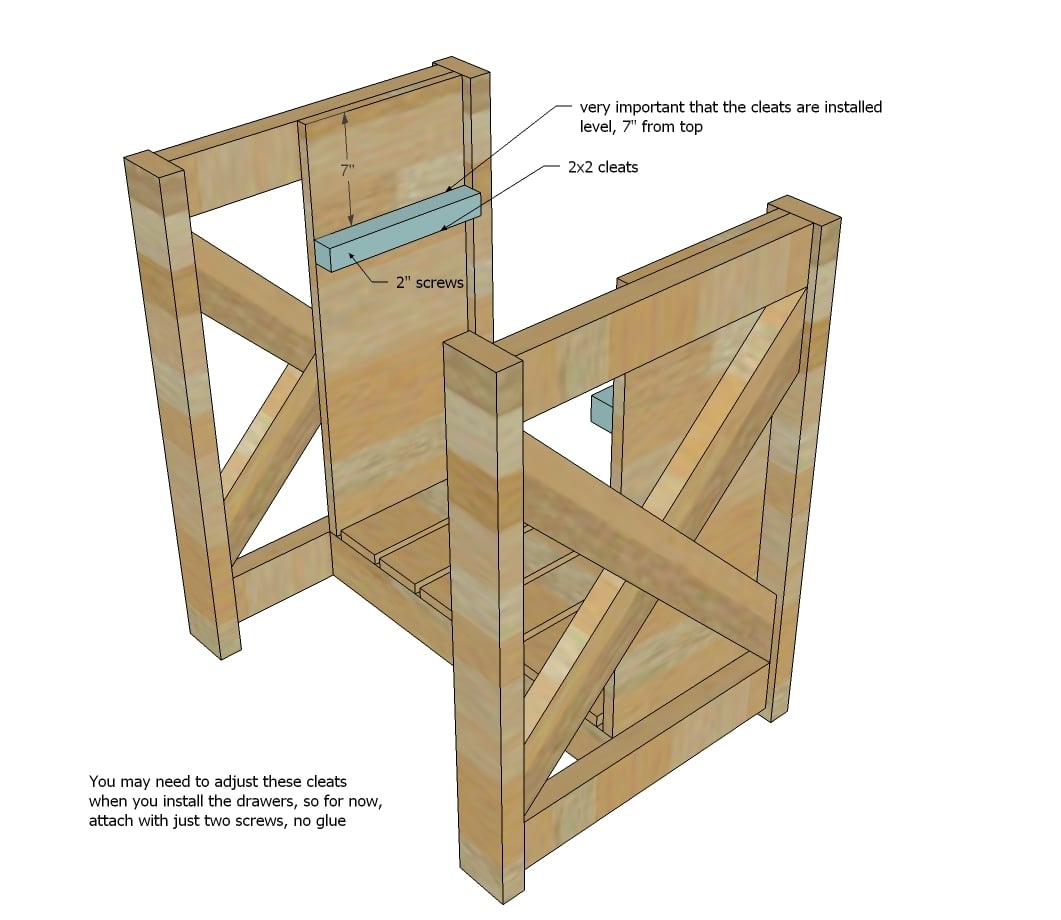
Add cleats for the drawers with 2" screws. Don't glue just yet as you may need to adjust to get your drawer just right.
Step 7

Let's move on to the top. Attach 1x2 trim to top with 2" wood screws and glue.
Step 8

Then finish out top sides with additional 1x2s.
Step 9
Build the drawer out of 1x6s, attach bottom.
Step 10
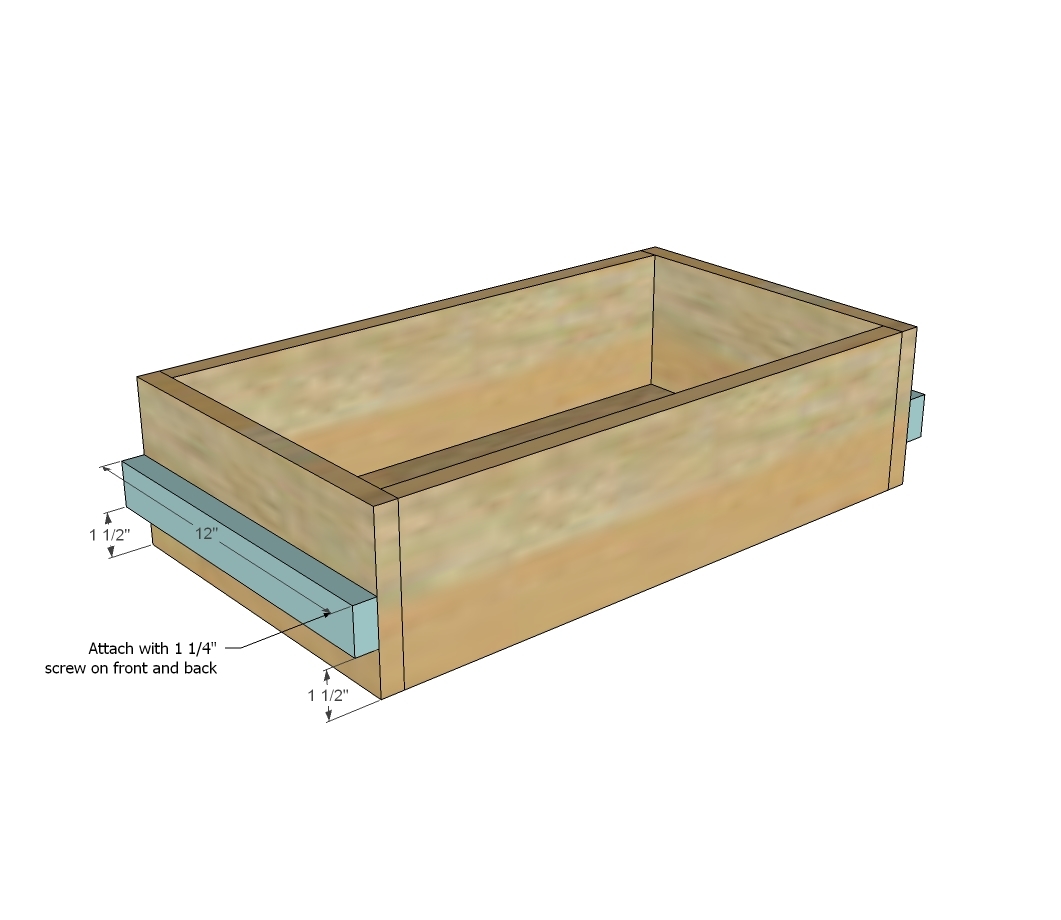
Attach cleats level and precisely to sides of drawer with 1 1/4" screws. You could get away with nails here but the issue is you may need to adjust these cleats, so screws are ideal. The screw heads will need ot be below the surface of the cleat for the drawer to slide out.
Step 11
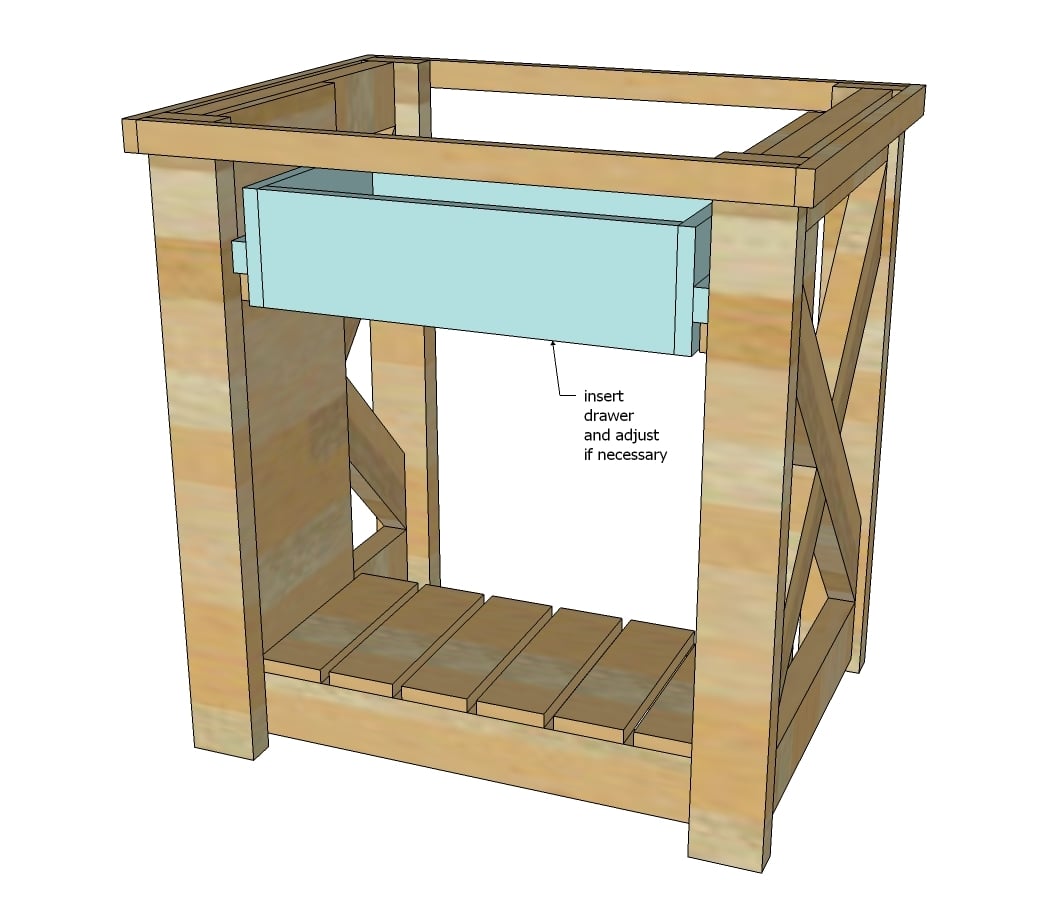
Fit the drawer in the island, on top of the 2x2 cleats from earlier. Adjust until your drawer slides perfectly.
TIP: rub a candle on the cleats to get them to slide smoother.
Step 12
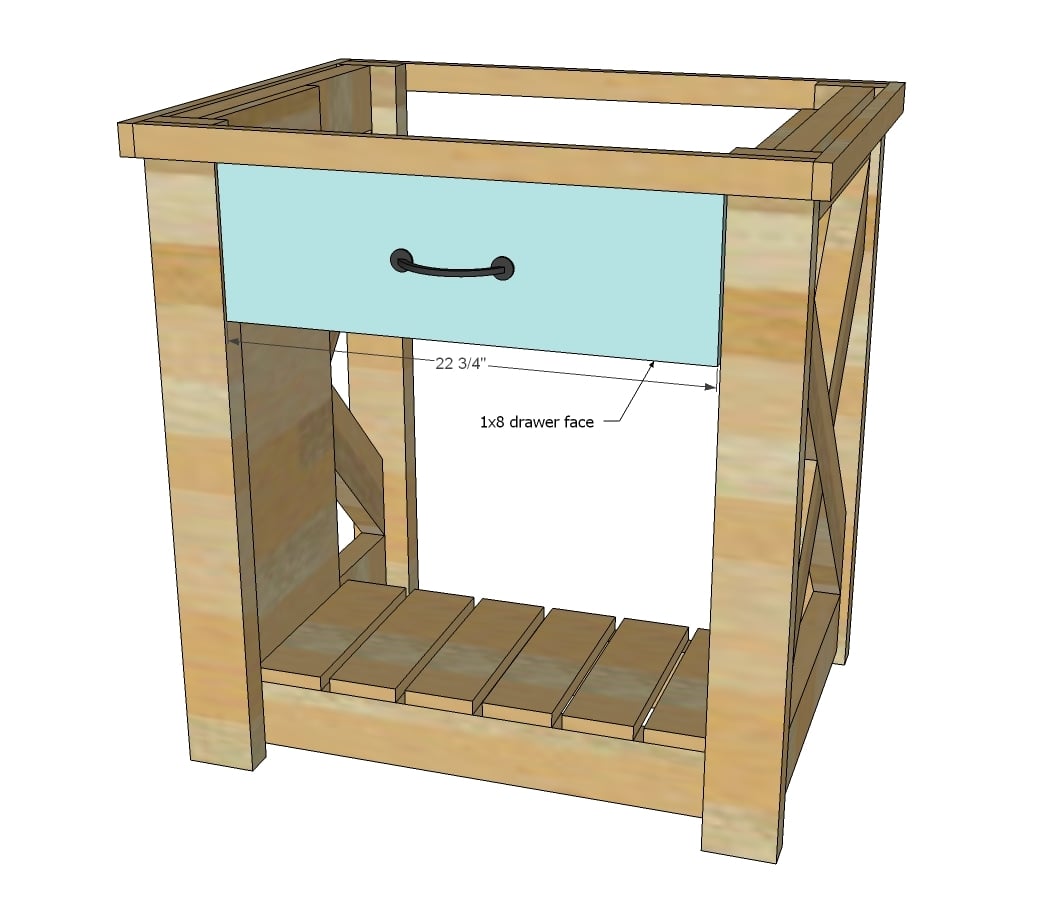
Attach drawer face with an 1/8" gap to sides and top.
Step 13
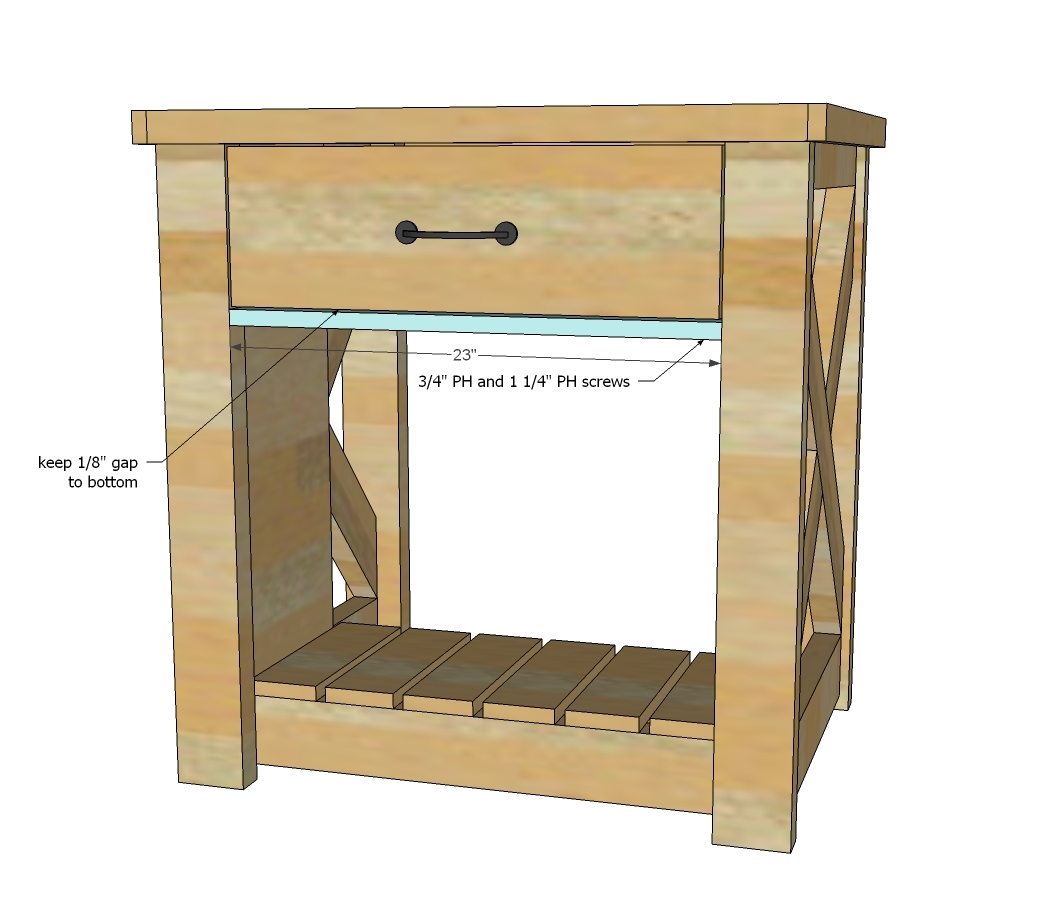
Attach bottom drawer trim with 3/4" pocket holes and 1 1/4" pocket hole screws to the legs, leaving an 1/8" gap under drawer face.
Step 14
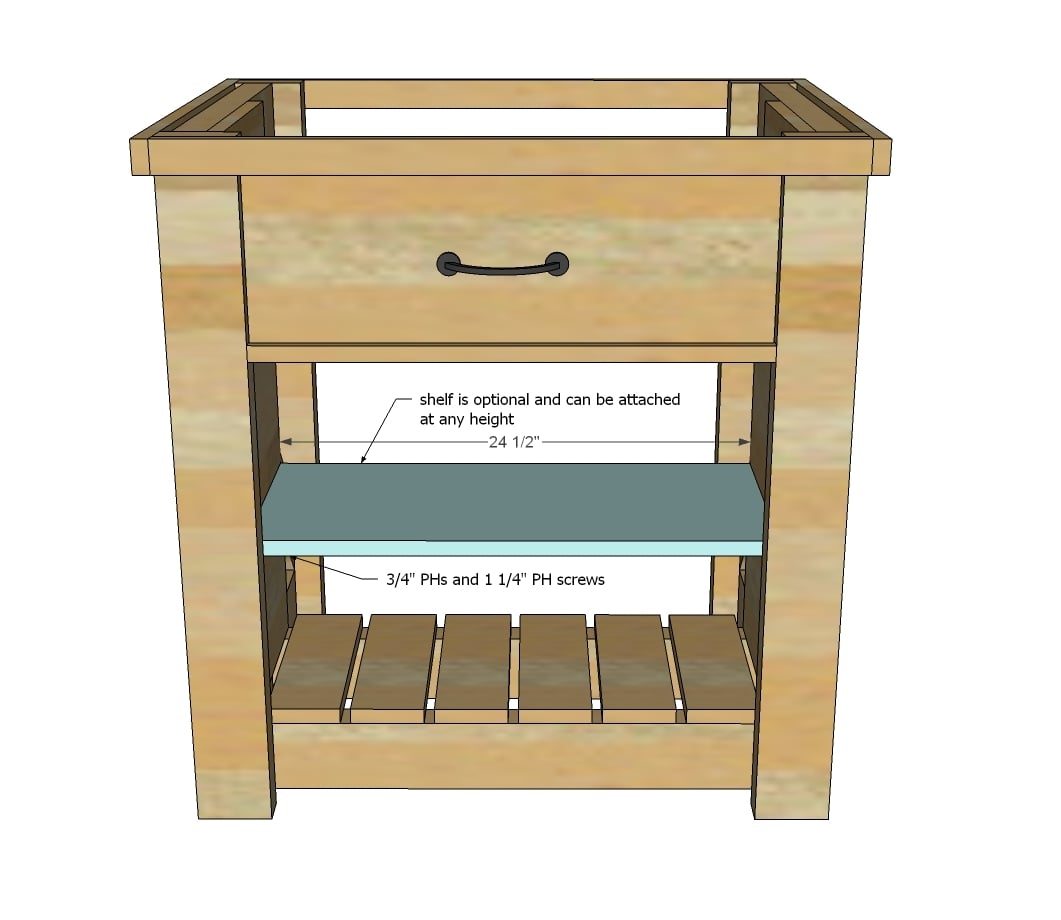
Shelf can be added at any height. Easiest way to attach is with 3/4" pocket holes and 1 1/4" pocket hole screws and glue.
Step 15
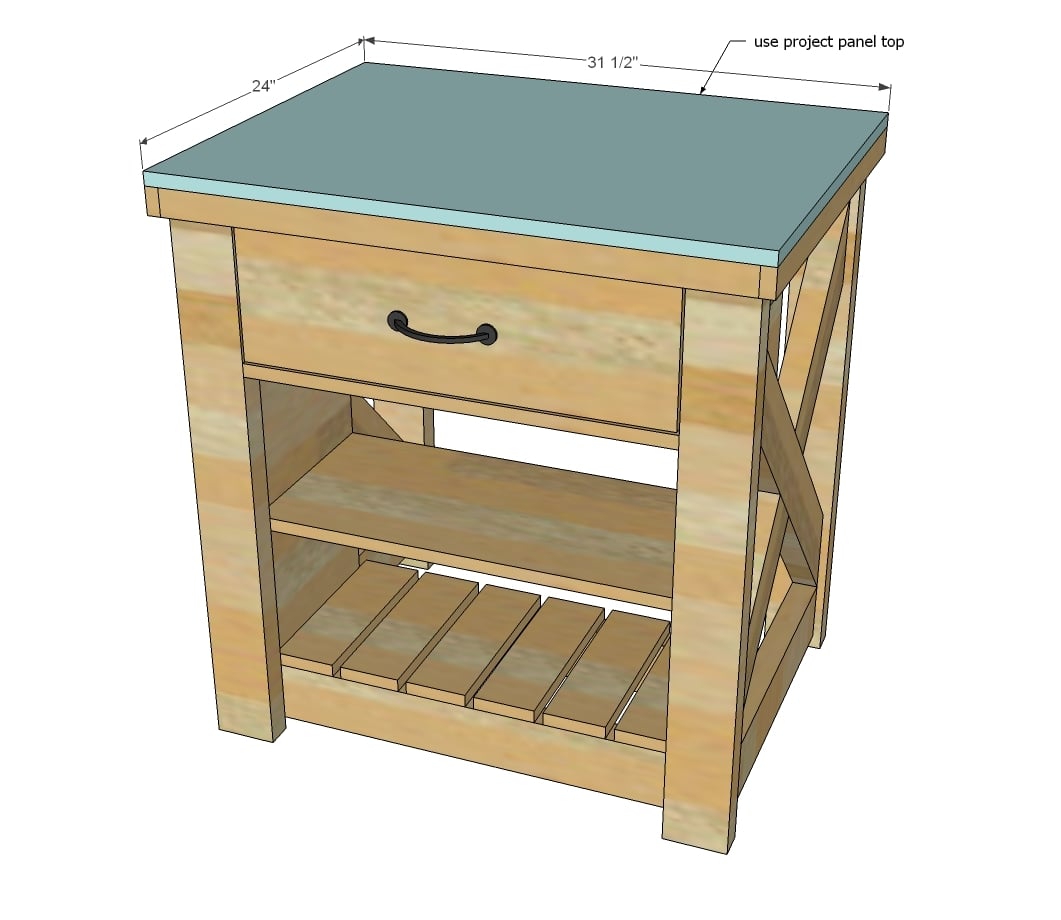
Attach premade top to island. You can hide screws by placing carefully on underside of 1x2 trim, using 2" screws countersunk. You must predrill for these screws as the 1x2s will split out on you.
Step 16
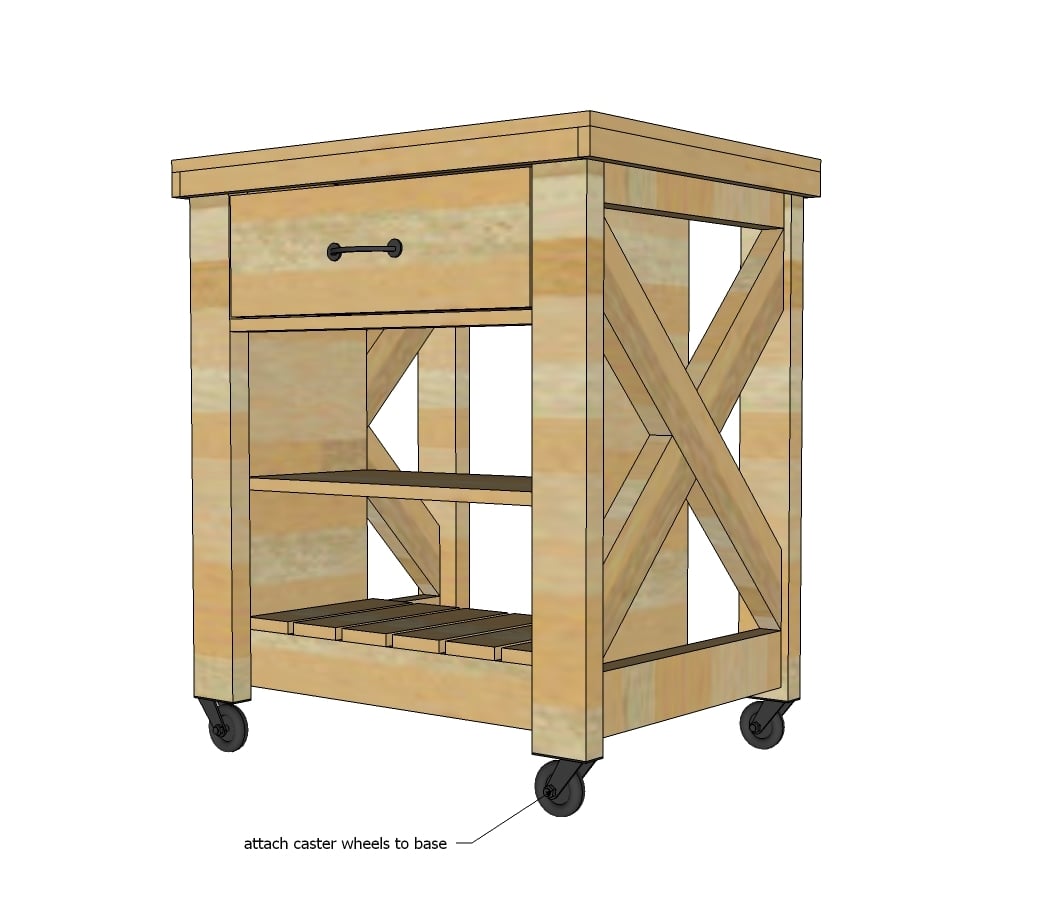
Attach caster wheels to base.
It is always recommended to apply a test coat on a hidden area or scrap piece to ensure color evenness and adhesion. Use primer or wood conditioner as needed.


Comments
JoanneS
Sat, 08/31/2013 - 10:02
Beautiful Island!
This island is so beautiful! Love the finish and the hooks, and the drawers that slide on wood cleats. (ps - the kitchen in the background is stunning!)
cassiet717
Sun, 09/01/2013 - 10:24
Finish!
I'm in love with the rustic finish. You see a lot of the "Pottery Barn" distressed paint these days (which I also love), and this is such a nice, fresh take!!
paul_spiller
Tue, 09/02/2014 - 04:37
caster wheels
Hi,
Love the project. Put it together in a weekend and then took 3 weeks to stain and finish ( clearly I don't enjoy that bit as much as the construction).
I am almost complete for the project and am really pleased how it has turned out. The last step is to fix some casters. I went down to Lowes looking and i didn't see any plate casters that would fit on the end of a 2x4 piece of wood. Does anyone have any advice / ideas which ones are best? A link would be lovely ;-)
dbizzle
Tue, 09/02/2014 - 09:29
Casters
I know the place doesn't have the best reputation, but I buy almost all of my casters at harbor freight.
For 2x4 legs, you might be better off drilling up into the leg, adding a t-nut, and using screw-in casters.
paul_spiller
Wed, 09/03/2014 - 15:25
adding a T-Nut
dbizzle,
That is an awesome idea. I thought of that but didn't know what it was called. T-Nut!!!!
Lowes has screw in casters for sure so that would be perfect if i can one with an internal thread of the same size.
Thanks
Paul
steinfal
Sat, 10/04/2014 - 07:36
Two modifications
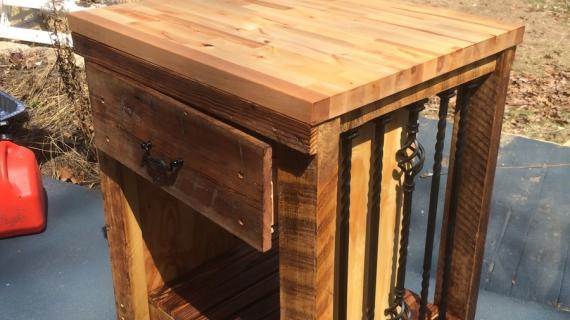
Hey, I love this plan. I did however make two modifications to the drawer. One keeps it from closing too far and the other keeps it from falling down when you pull it out. Check out the mods here, hope you enjoy...
http://www.prolificoaktree.com/2-uncategorised/10-improvements-to-rustic-x-small-rolling-kitchen-island
rwshoaf
Sat, 06/29/2019 - 15:30
plans
Trying to pring
rwshoaf
Sat, 06/29/2019 - 15:30
Still cannot print.
Still cannot print.
zannej
Sat, 11/19/2022 - 06:46
Ideas for modifications
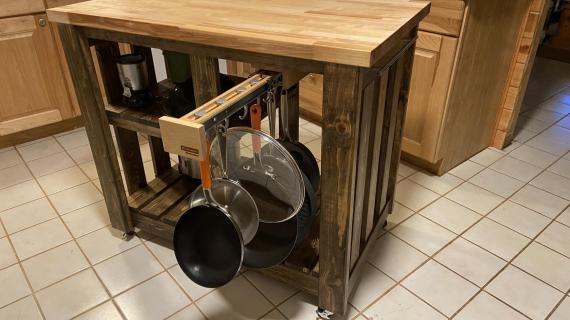
I love this idea. My friend has a small kitchen and doesn't have room for a stationary island or a large island but this would be great for his kitchen-- especially since he loves the rustic look and the X on the sides. I did want to have some modifications though. First off, I would cut the legs by 1/2" (down to 32"H) and have a sort of butcherblock top comprised of 2x2 furring strips. The long part of the X would then be 27-1/4 long. The short pieces would be 13-5/8" long.
I want to have the drawer use ball bearing full-extension glides so I'm thinking some 10" glides (having a hard time finding 11" ones) would work. The drawer could be wider that way. The glides I looked at were 1/2" thick and ~1-3/4" high. I wanted the panels behind the X to extend all the way instead of only about halfway. I found that the only 1/2" plywood I can find affordably in my area is only 2'x2' and will fit just about right. I wanted a solid bottom shelf instead of one with gaps. I also wanted a shelf on the opposite side behind the drawer. The drawer's outer length would still be 12" but the width would be around 22". I may eliminate the trim piece below the drawer to allow taller things to be placed underneath.
I'd paint the main thing gray (to match the cabinets but the inside panels under the X would be gloss black). In order to get the drawer slides to fit I'm thinking of getting some 2x4s and notching them to go around he panels. I'm still trying to figure out the full lumber list. We are thinking of using some pallet wood if we can find it. Or some old studs from a wall we are taking out.
I'm trying to figure out how to add pictures from Sketchup but its not working.