

Easy tutorial for simple shaker window trim. How to trim windows.

Don't get me wrong, I do love beautiful window and door trim.

Guilty, yet again.
Even on a remote project, we handmade farmhouse style window casings out of leftover boards.
So .... here we are, building our forever home. And guess what?

No fancy window trim.

And I can't even blame it on too many decisions or too little time.
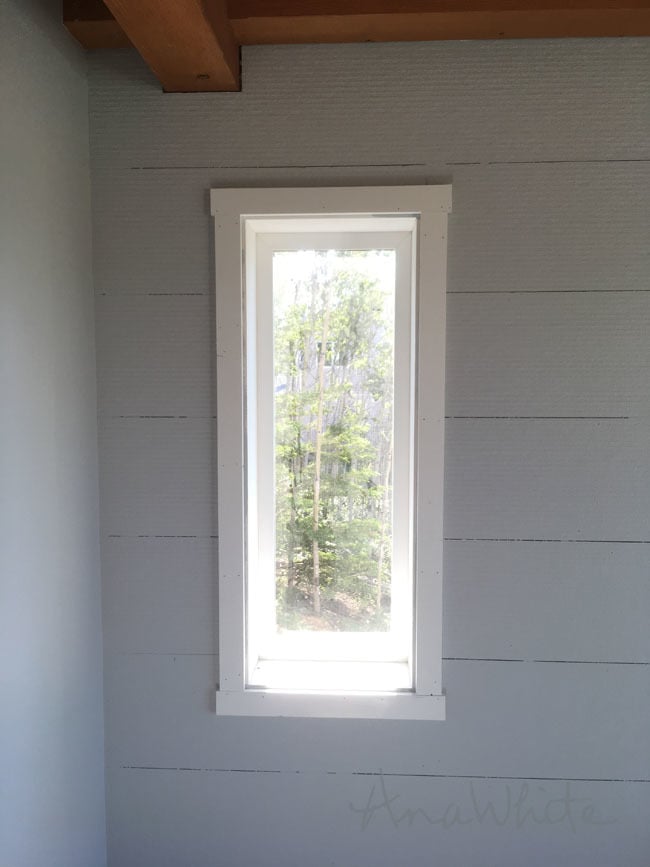
As our house is taking shape, with the beautiful wood ceilings and exposed beam work, I wanted to keep the trim simple.

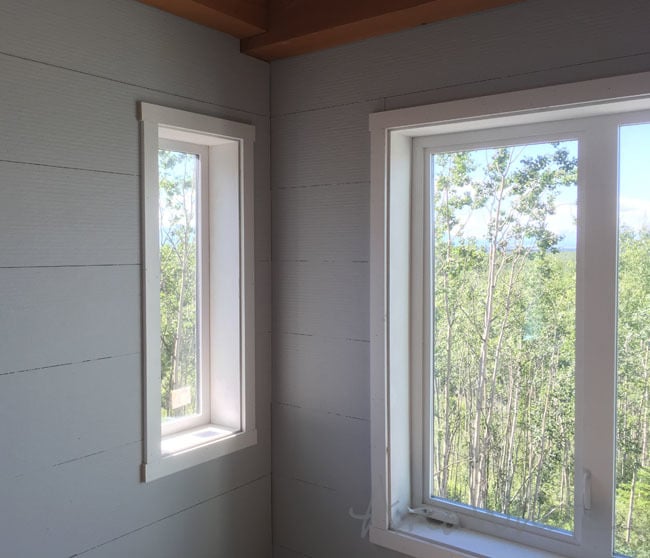
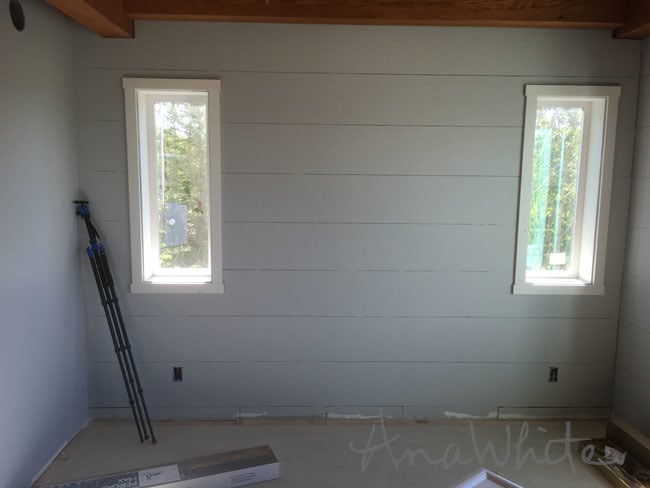
I'm so glad we did - the windows are perfect compliments to the timber work and planked walls.
In this week's episode of our house build, we trim all the windows with a shaker style trim -
But for those of you who don't or can't do video, I also wanted to provide a written tutorial on how to trim windows shaker style.
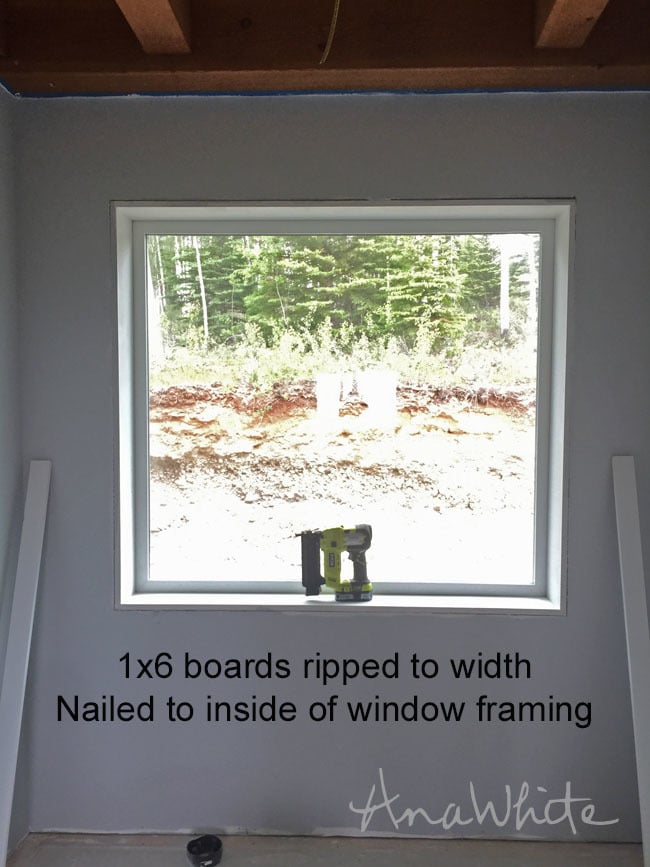
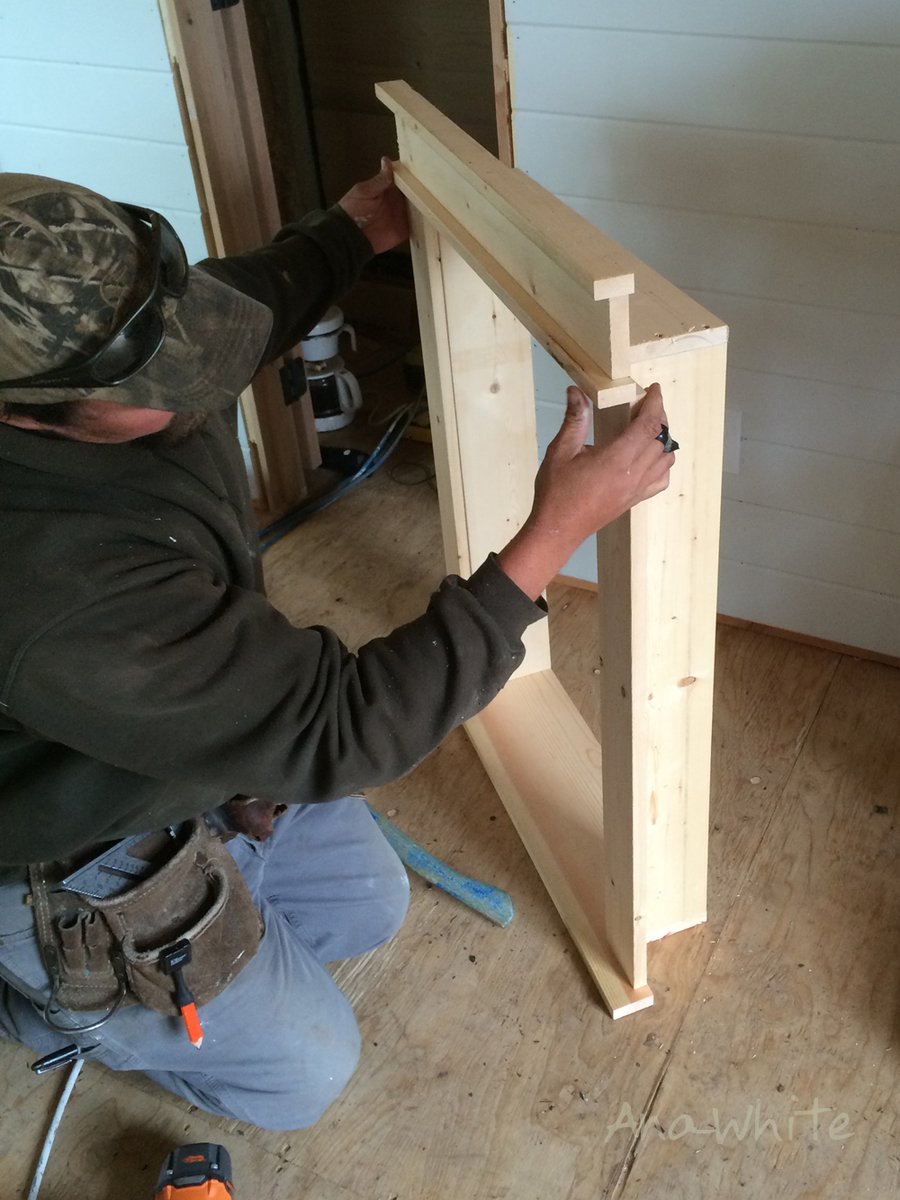
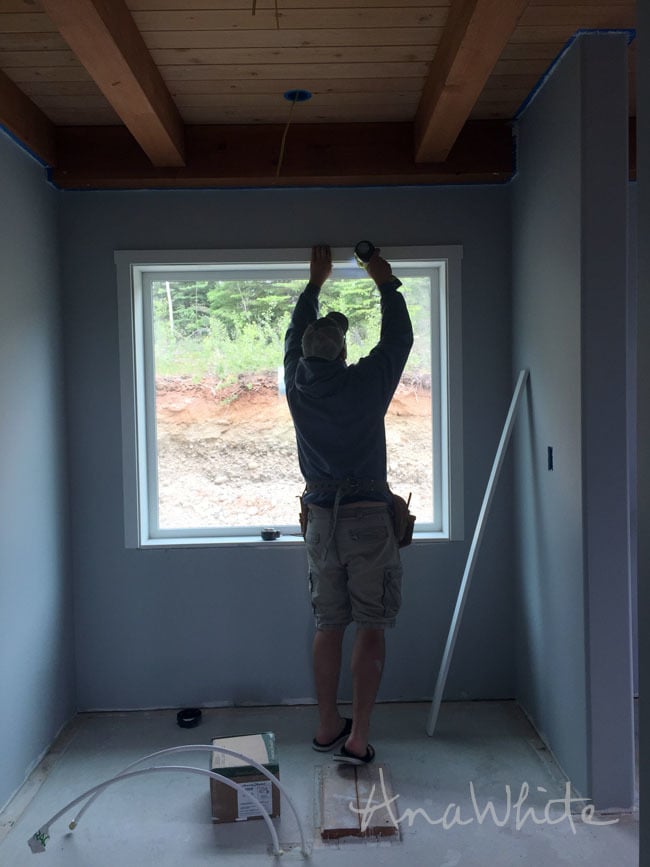
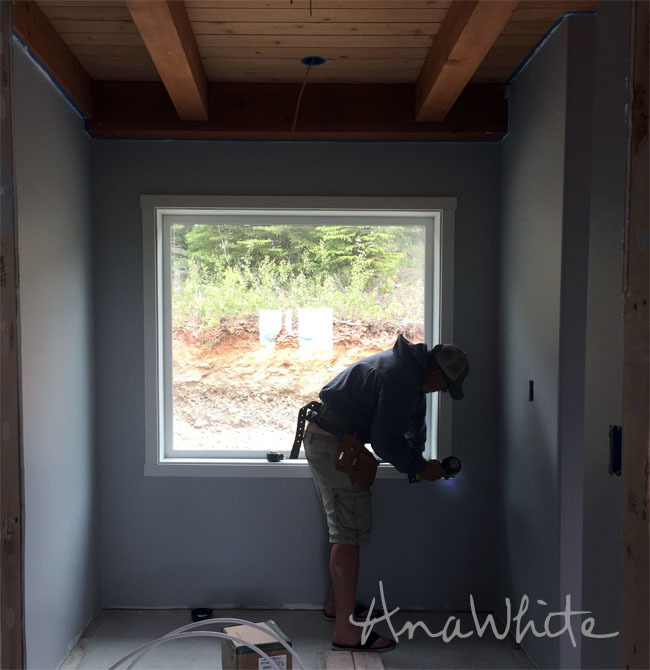
First, box out the inside of the window. We used 1x6 spruce boards, but you could also use MDF boards, plywood, exterior trim - there's alot of options. Hold the inside window trim so it is flush to the outside of your drywall. If there is a (very) small gap between the window and the trim, this can be filled with caulking later on.
The boards are simple nailed to the rough framing. I used an 18 guage brad nailer with 1-1/2" long nails.
Now for the side trim. We opted for 1x3s, but 1x4s are more common. The same steps apply as below regardless of the board size you use.
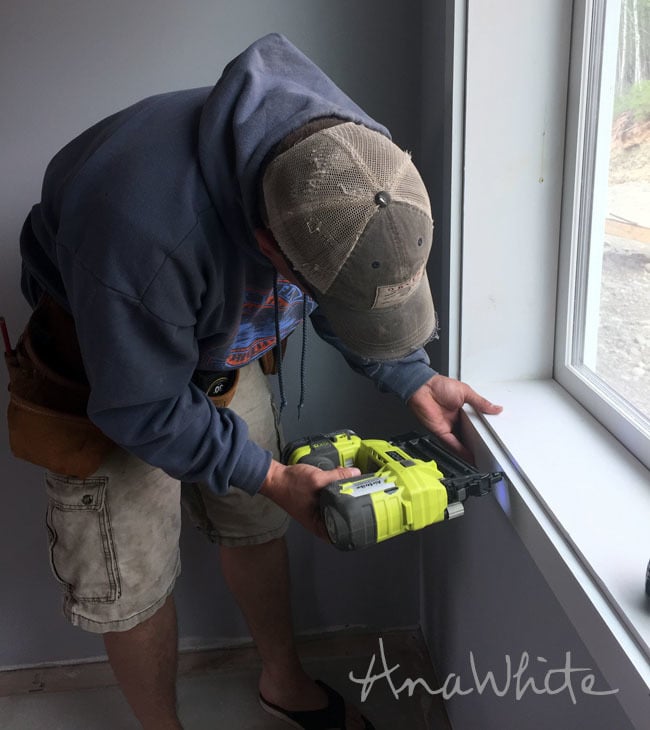
Next, measure for the side trim.
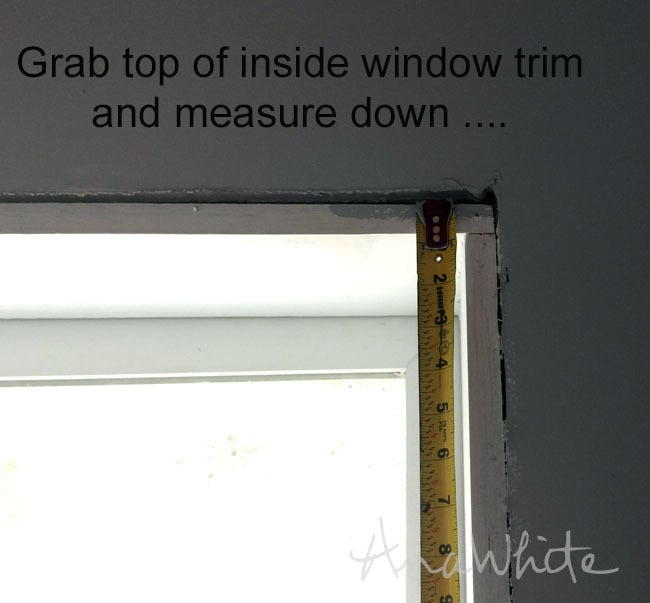
Do this by grabbing the top of your window trim on the inside. This ONLY works if your inside window trim is 3/4" thick.
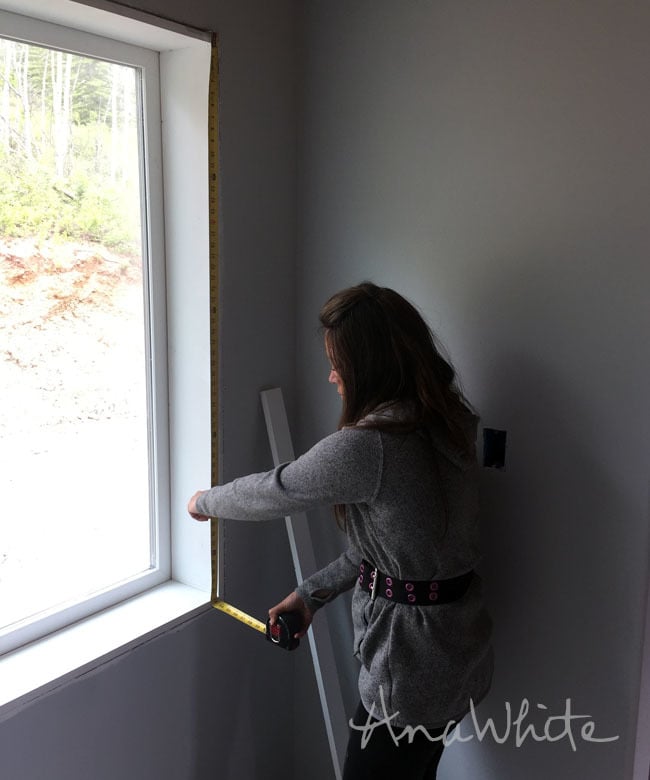
Pull the tape down the window

By grabbing the top of the inside window trim, you've added 3/4" to your measurement, to give you a reveal of 3/8" on top and bottom (3/4" divided by 2 = 3/8").
Cut the side boards to this measurement.
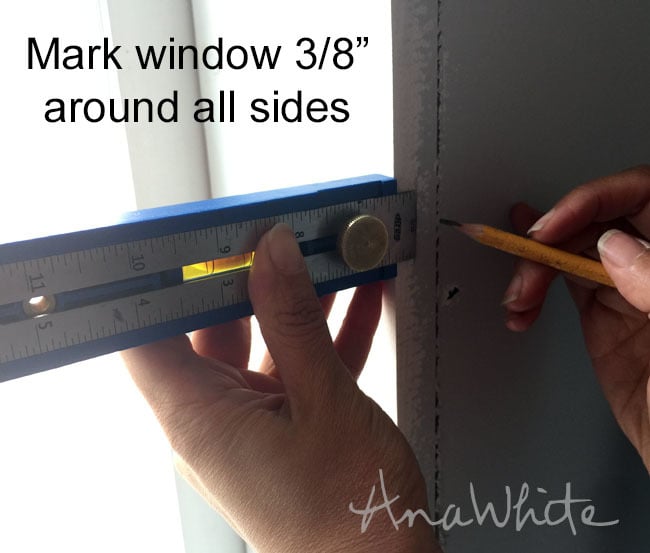
Mark around the window 3/8" in from the inside of the window - this mark should split the inside window trim edge in half.
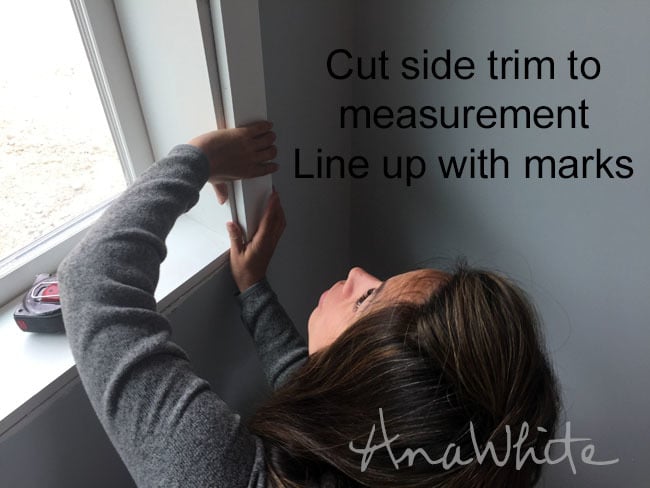
Line up side trim with marks, landing half way on the top and bottom window trim boards. There will be a 3/8" reveal on all insides.
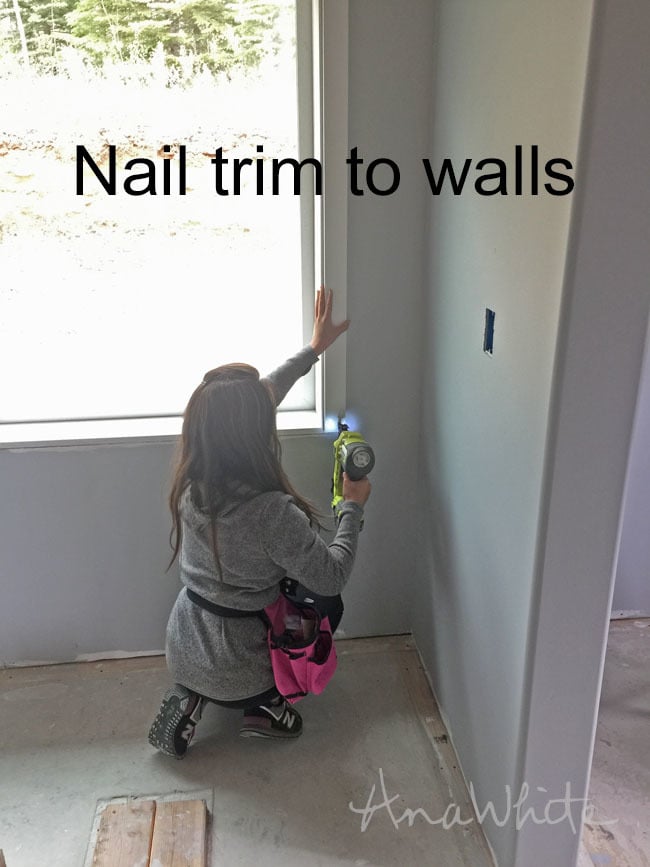
Nail trim to walls and inside window trim. We ended up using 2" nails to grab into the framing behind the drywall.
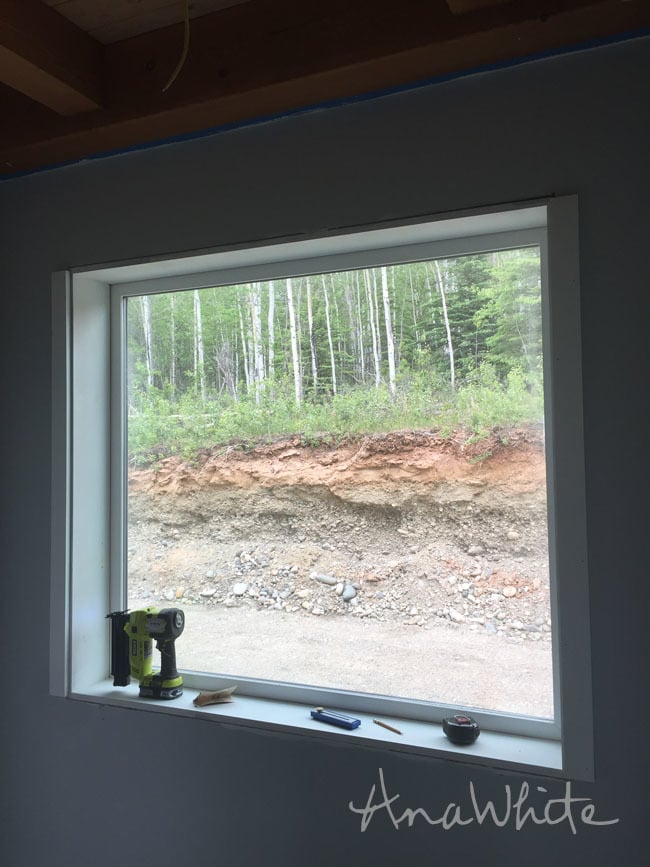
Sides are done! Notice how they extend half way past the top and bottom?
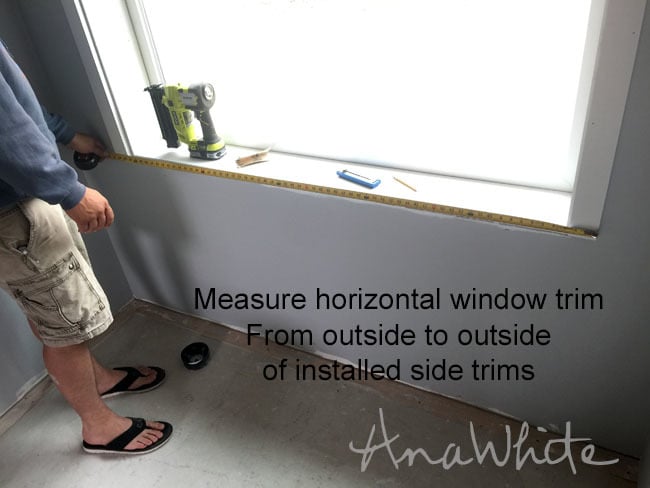
Now for the top and bottom - just take an outside to outside measurement, and add 3/4". Take seperate top and bottom measurments, because there could be some discrepancy.
Place trim on top of side trims, position so equal overhangs on both ends, and nail off, following marks made around window.
Repeat for bottom trim. Again, measure each trim seperately, as there could be a differeance in measurements.
Make sure you nail trim off adequtely around all four sides, following marks made on inside window trims.
After we finish installing doors and trimming them (which happens after flooring is installed) we'll go back and do a touch up coat of all the exposed nail holes and caulk all the joints.
So happy we went this route!
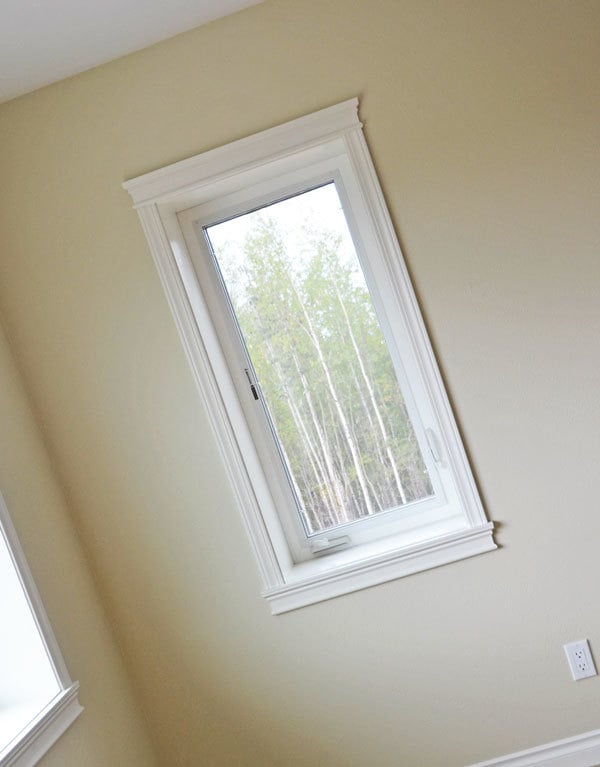
PS - want to make this window trim a little more interesting?

Try a larger header on top (1x4 or 1x6 with 1x3 or 1x4 bottoms and sides)

Or paint a fun color. Love these by Studio McGee with the white wall and gray trim.
So, what do you think of our shaker style window trim?
XO Ana

Comments
dmcclenny
Thu, 06/15/2017 - 22:53
Caulking
We're trimming our windows that were only finished with drywall. After removing the drywall, we added jambs (the inner trim) but didn't caulk the small gap between the window and the trim because I read that the caulk would get dirty over time. Have you done this on the windows you've trimmed in your other houses? If so, how did you paint over the caulk and not get paint on the window. Thanks for all the great info you share with us!