

Free plans to build your own simple sideboard from Ana-White.com Features adjustable shelves and four drawers, detailed plans with diagrams, shopping and cut list.
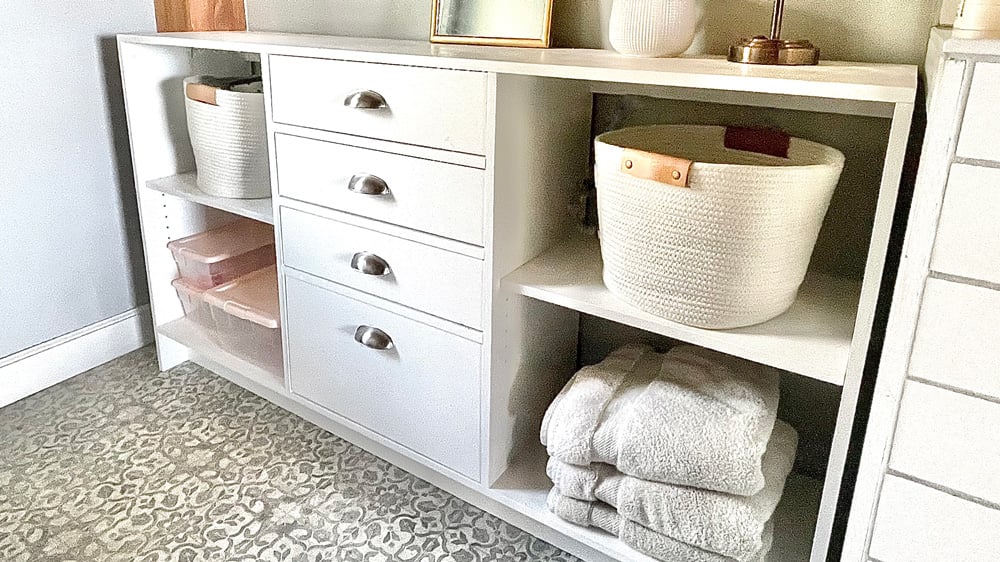
My teenage daughter Grace has been asking for more storage in her bathroom for a couple years now. If you wait long enough, they get old enough, and smart enough, to design it themselves .... yes, she did. She went on Shelf Help, designed what she wanted, the pieces showed up in my shop, and then I built it:
It took me a day, working a few hours in the morning and most of the afternoon, to finish this project. It is quite big, and there's alot of drawers - which aren't hard, but do take time.
Where to Use This Sideboard
We used this project for storage in a bathroom, but it could be used in many different rooms in the home:
- Sideboard in a dining room, store wine glasses, decorative serving ware, or baskets with dining linens
- Entryway Console dropzone, empty shelves could hold shoes or baskets with accessories
- Media Console in the living room to support a TV system
- Dresser in a bedroom or closet, the open shelves could be used for folded clothing or shoes
Customizing the Size or Functions?
This project is easy to customize in size! Use our free Shelf Help Configurator to change up your carcass size in just a few clicks!
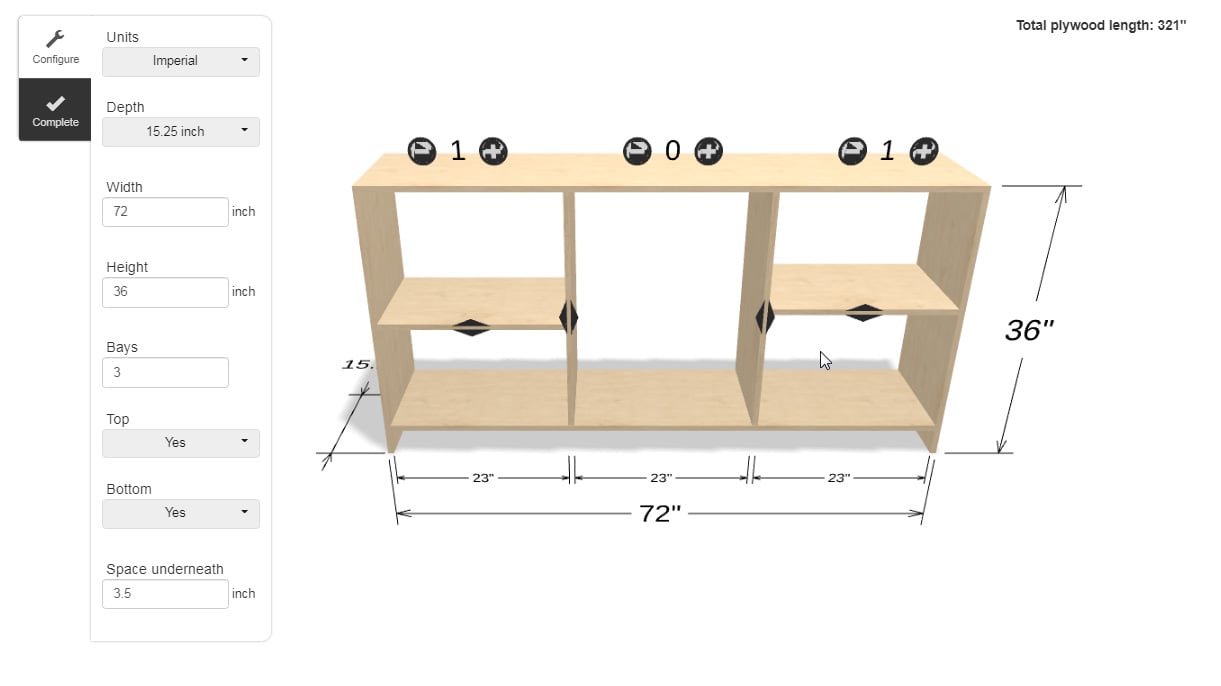
You can also change up what bay you put the drawers in, or do drawers only on the top row, and open shelves below. This project is super easy to customize - it's all up to you and what you need!
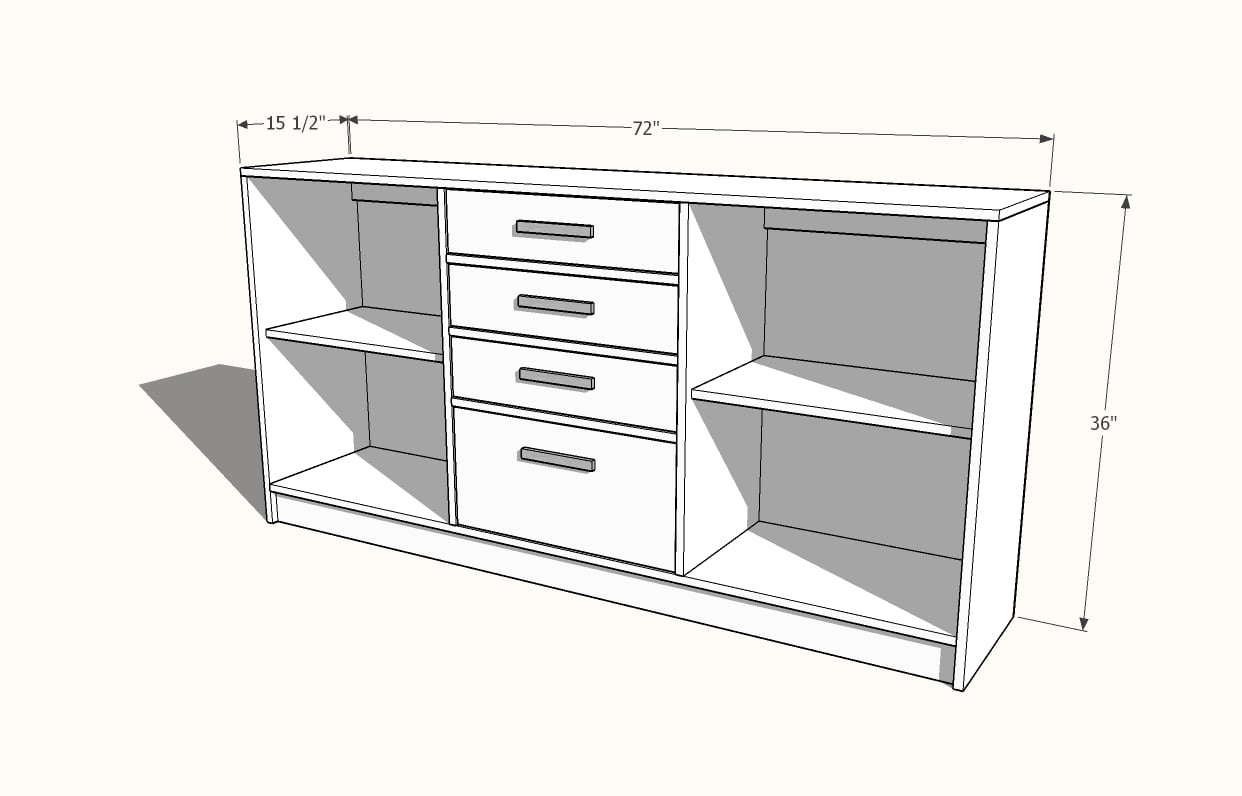
Free Plans for this Sideboard
The plans for this sideboard follow. Please share a photo if you build it, we'd love to see how your project turned out!
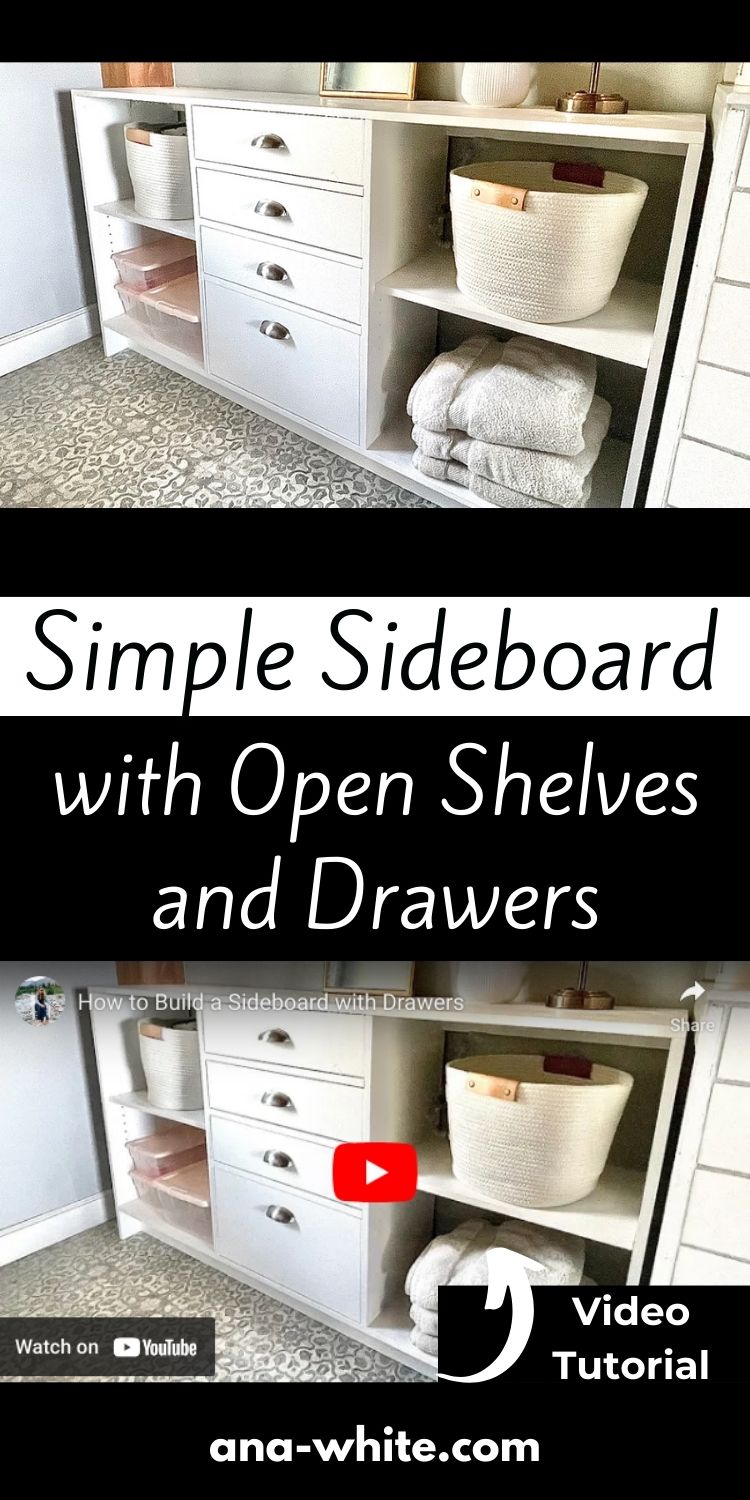
Pin for Later!
Preparation
- 2 Sheets of 3/4" thick plywood and edge banding OR Shelf Help Carcass Kit
- 1 sheet of 1/4" plywood for back and drawer bottoms
- 5 - 1x4 @ 8 feet long
- 1 - 1x2 @ 6 feet long
- 1 - 1x8 @ 6 feet long
- 1 - 1x6 @ 6 feet long
- 1 - 1x12 @ 2 feet long
- 4 sets of 14" full extension drawer slides (affiliate link to Amazon)
- About 100 - 1-1/4" Pocket Hole Screws
- 1-1/4" and 3/4" brad nails
- wood glue
- 4 knobs or pulls
- primer and paint or desired wood finishing supplies
Shelf Help Carcass Kit or 3/4" plywood panels, cut into pieces as noted below, front edge finished with edge banding
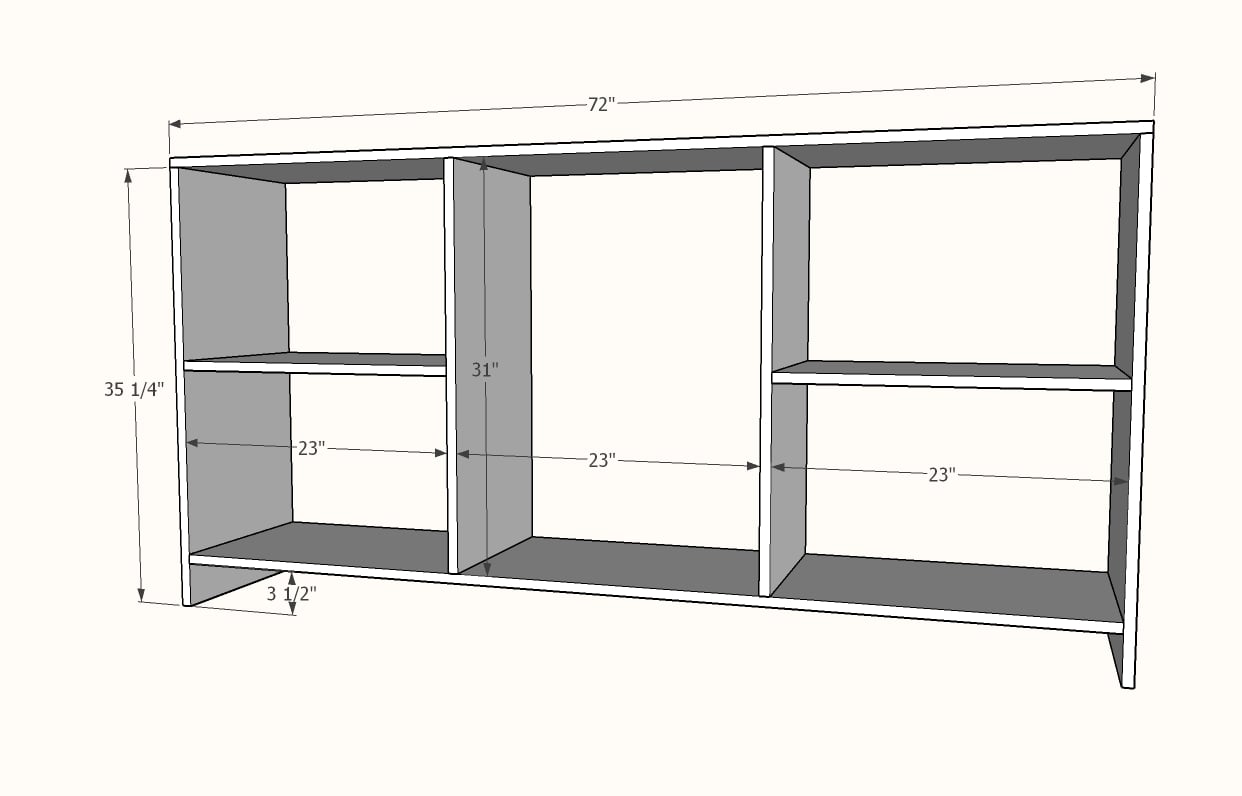
- 1 - 3/4" plywood @ 15-1/4" x 72"
- 2 - 3/4" plywood @ 15-1/4" x 35-1/4"
- 1 - 3/4" plywood @ 15-1/4" x 70-1/2"
- 2 - 3/4" plywood @ 15-1/4" x 31"
Carcass Trim
- 2 - 1x4 @ 23" (bay supports, upper)
- 2 - 1x4 @ 70-1/2" (bay supports, lower)
- 3 - 1x2 @ 23" (drawer seperators)
- 1 - 1/4" plywood @ 34" x 72" (cut 34" instead of 36" so you can get the drawer bottoms out of the scrap wood)
Drawers
- 6 - 1x4 @ 14" (drawer sides)
- 2 - 1x8 @ 14" (drawer sides)
- 6 - 1x4 @ about 20-1/2" - measure and cut to fit (drawer front and back)
- 2 - 1x8 @ about 20-1/2" - measure and cut to fit (drawer front and back)
- 3 - 1x6 @ 22-3/4" - (drawer faces)
- 1 - 1x12 @ 22-3/4" (drawer face)
- 4 - 1/4" plywood @ 14" x 22" (drawer bottoms) - cut the back for the project first, and then cut the drawer bottoms from the leftover plywood


Instructions
Step 1
Build the carcass, starting from the sides attached to the top, then the bottom attached to the sides, and finally the dividers attached to the top and bottom. The shelves can be made fixed or adjustable with shelf pin holes.
Use three 3/4" pocket holes and 1-1/4" pocket hole screws for each joint.
Step 2
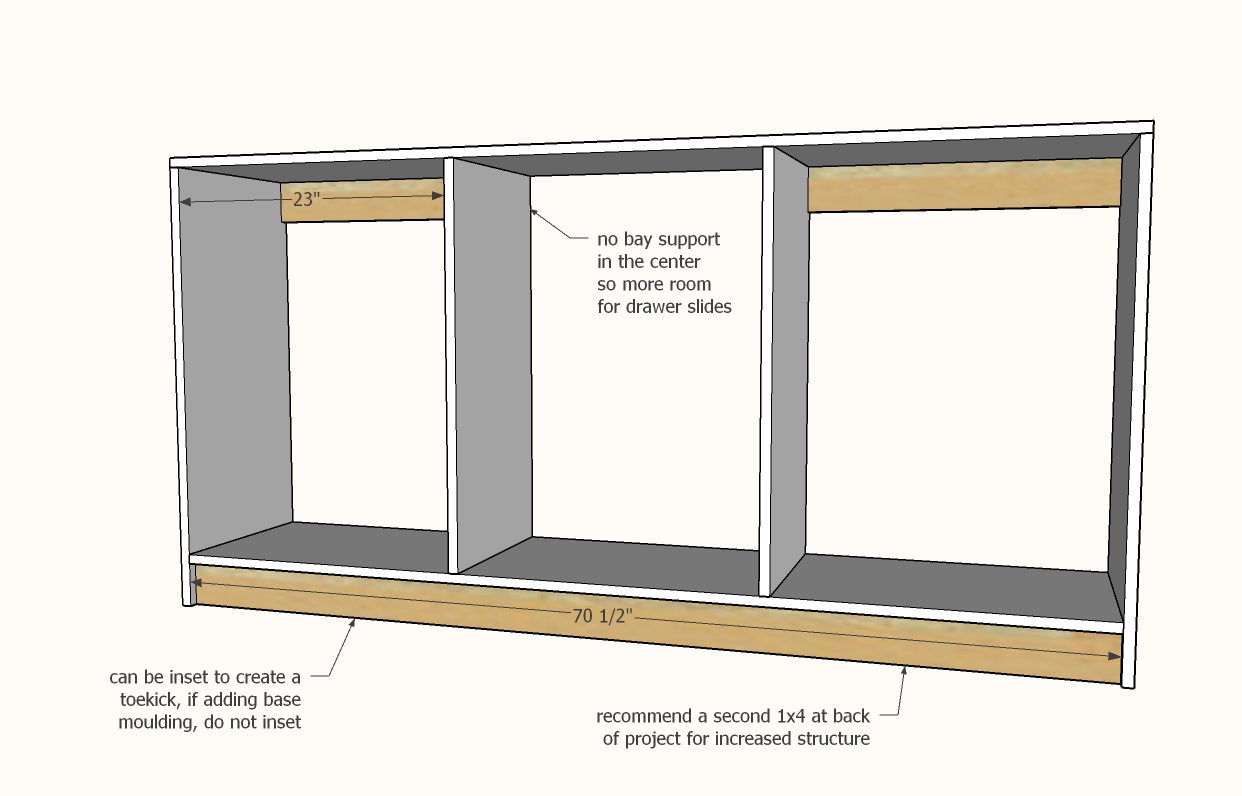
Add bay supports along the top, and at the front and back of the bottom, with pocket holes hidden on the back side. Use two 3/4" pocket holes on each end, and then pocket holes facing upward to further secure.
For the top bay supports, I found they made the space too small for the 14" drawer slides, so did not put a bay support in the center bay. If you want drawers all across the top, use 12" drawer slides, and keep the bay supports all across the top.
Step 3

Attach 1x2 drawer trim as shown, with pocket holes on undersides.
Step 4
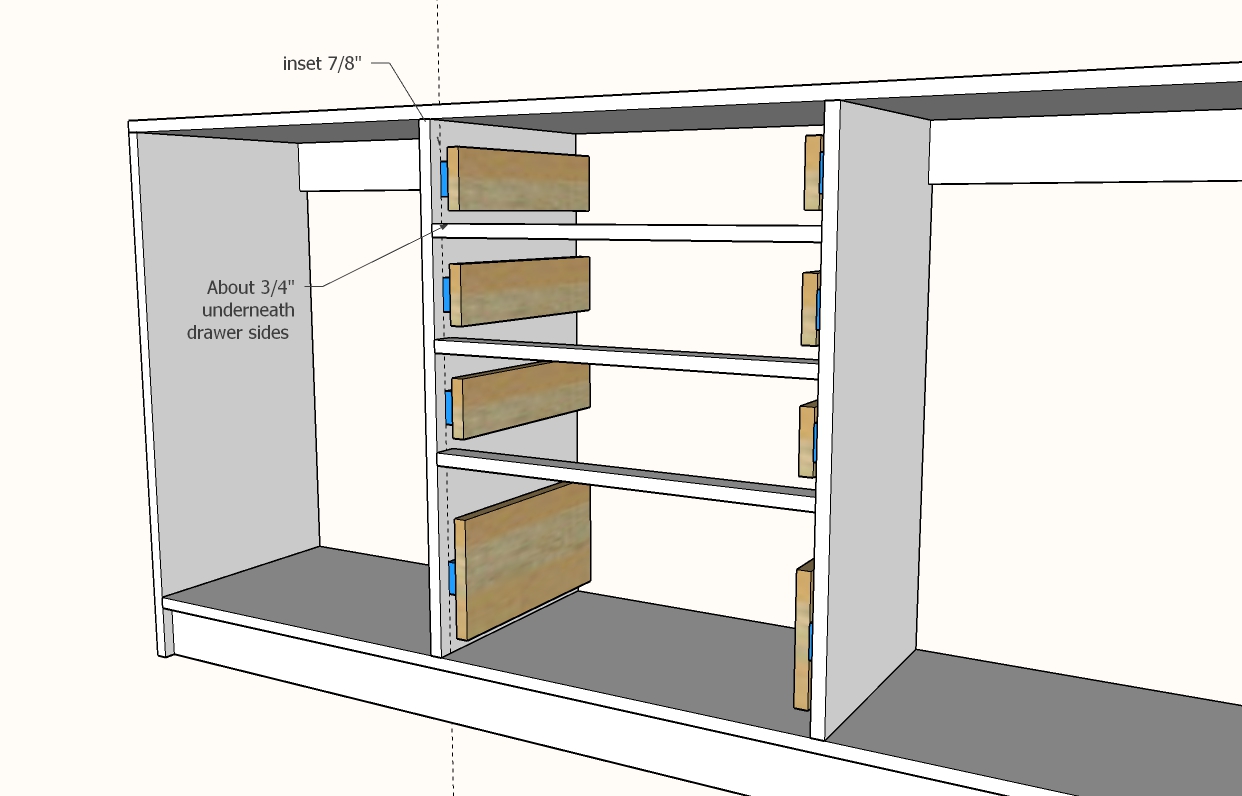
Install the drawer members of the drawer slides on the 14" drawer side pieces, so the drawer slide is centered of the drawer side.
Position the drawer side in the opening and mark approximately where the center of the drawer slide should be mounted inside the cabinet. Also mark 7/8" in from the front.
Install the cabinet member of the drawer slide inside the cabinet.
Step 5
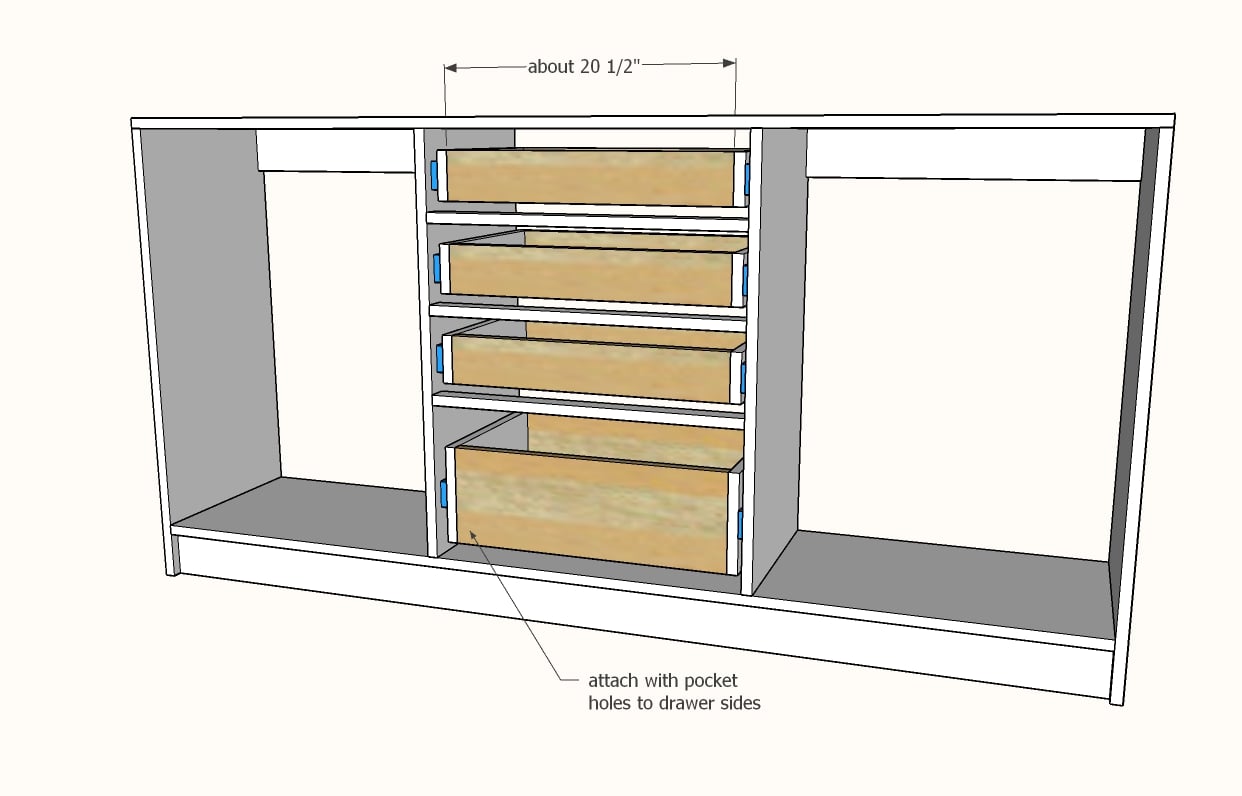
Measure in between the two drawer sides, and cut 1x boards to fit. Drill two pocket holes on each end and attach to the drawer sides.
Step 6
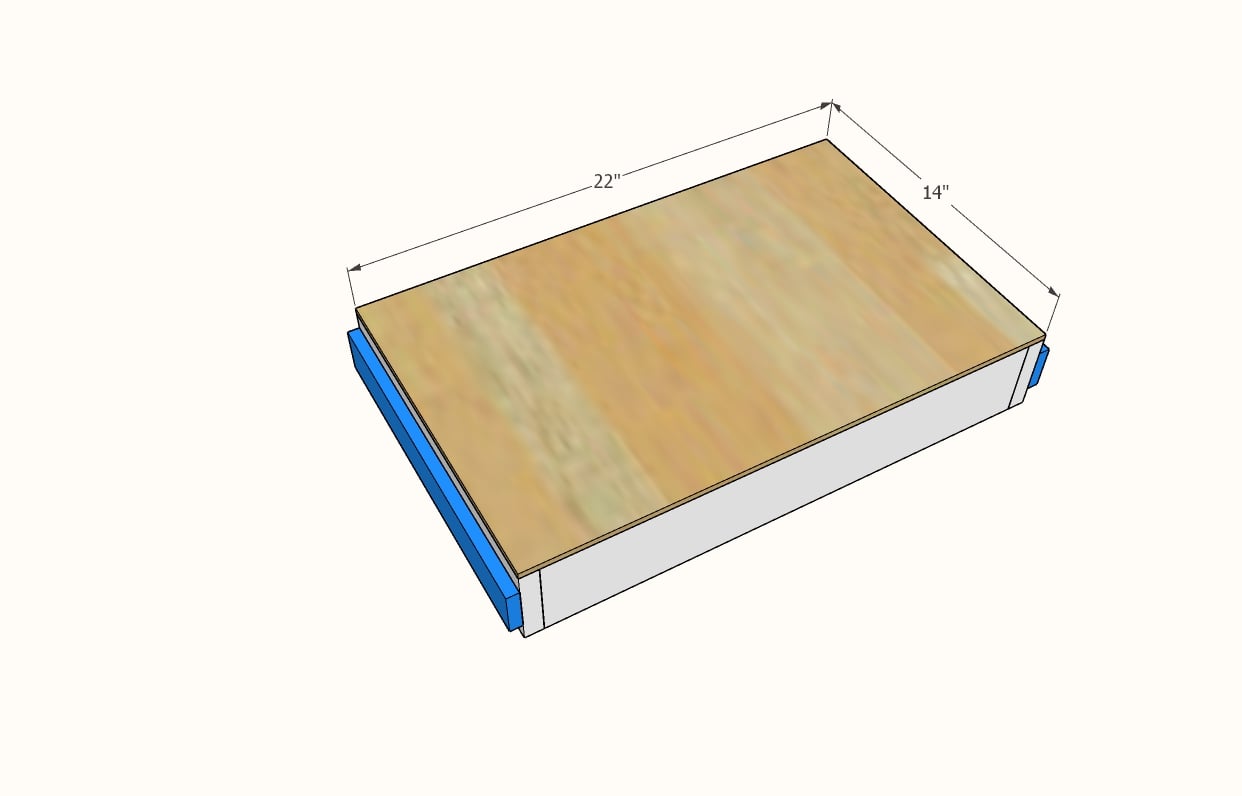
Remove the drawers, measure the bottoms of the drawers, and cut the plywood bottoms to fit. Attach with glue and 3/4" brad nails.
NOTE: Reserve back piece of plywood for back of cabinet.
Step 7
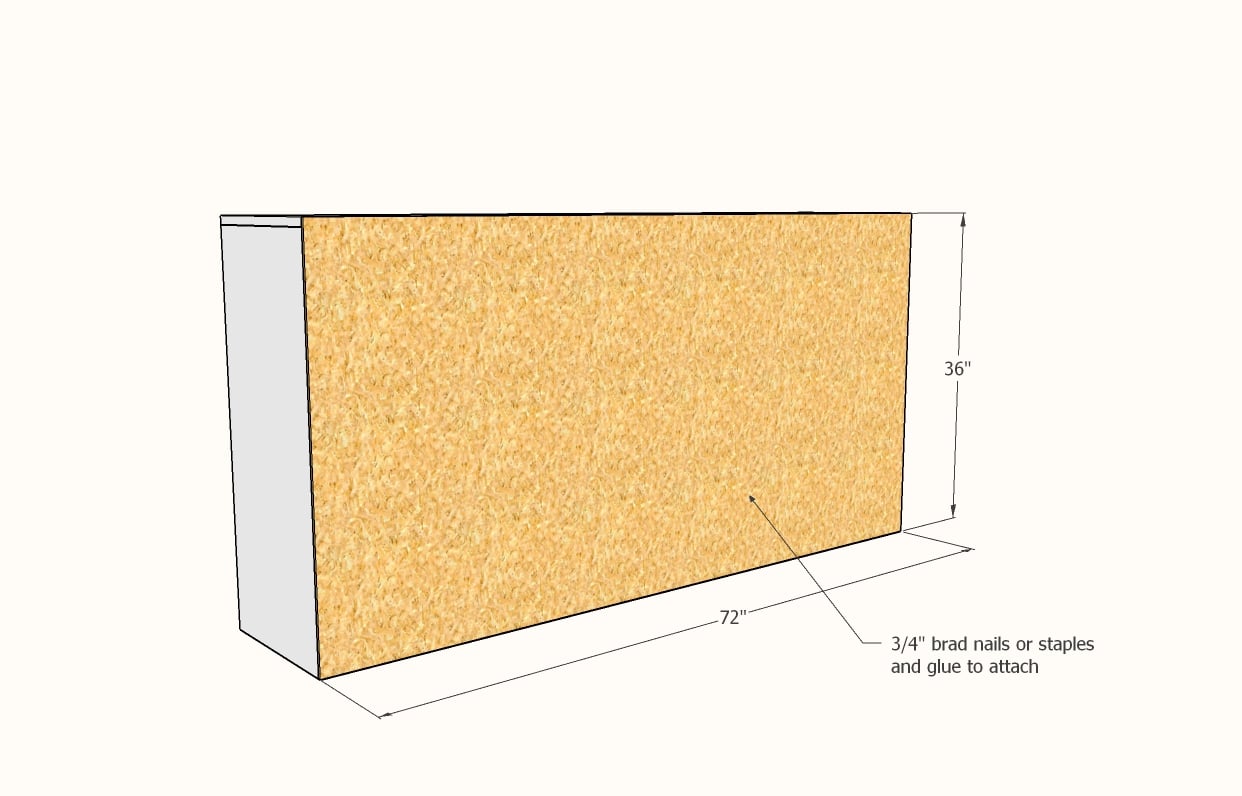
Cut the back piece for the cabinet. If cutting at 34" to fit all the pieces on a single sheet, hold the back up from the floor. Attach with glue and 3/4" brad nails.
TIP: Before attaching the back, mark with a pencil on the outside sides of the cabinet the location of the dividers. Then you can pencil between your marks on the back when it is in place to know where to nail to.
Step 8
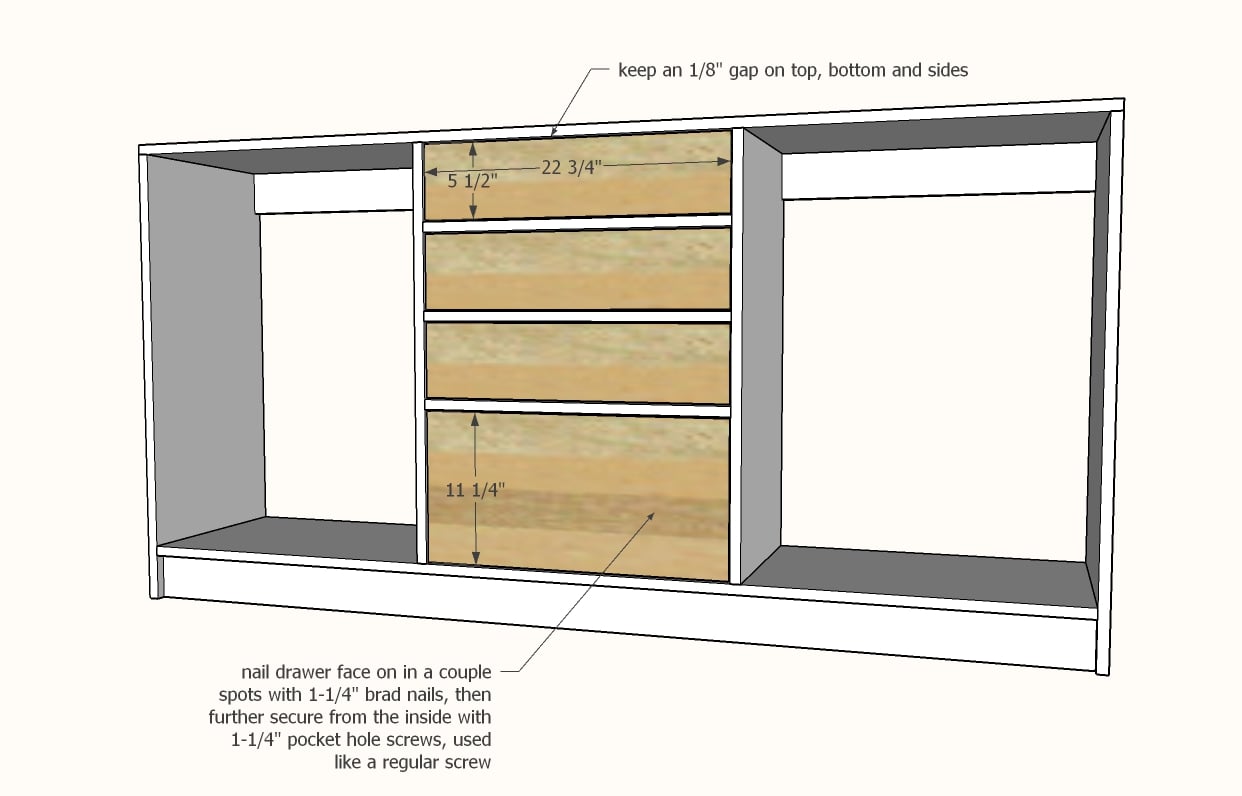
Attach the drawer faces to the front of the drawers with a couple of 1-1/4" brad nails. Avoid location of hardware when nailing.
Pull the drawer open and further secure with a couple of pocket hole screws, used like regular screws here.
Step 9

Drill holes for adjustable shelves (if desired) or install shelves fixed.
NOTE: I decided to cut 1" off the back of the shelves so they would sit inset and also not be in the way if I add doors later on. This is optional.

Comments
rc5woods
Thu, 12/16/2021 - 10:43
Paint sprayer
What kind of paint sprayer do you use?