

Storage that converts to tables with fold up doors by Ana White
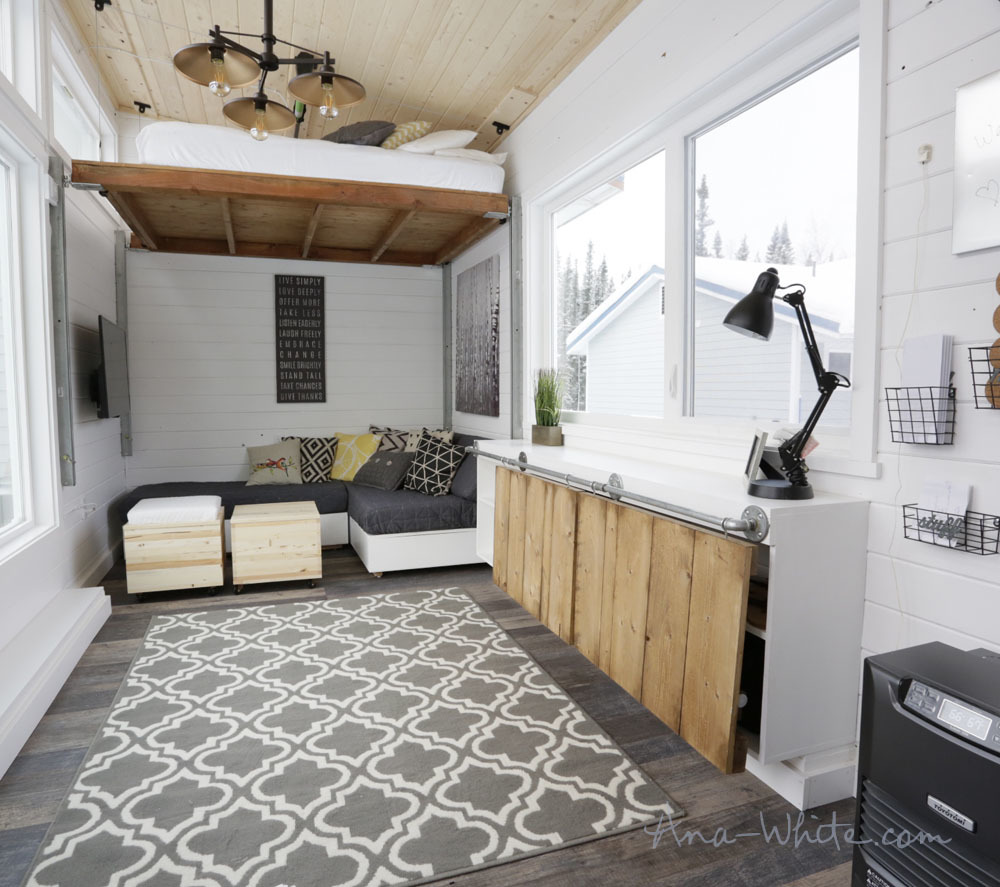
On our latest tiny house I was really stumped on the wide open space in the middle of the tiny house.
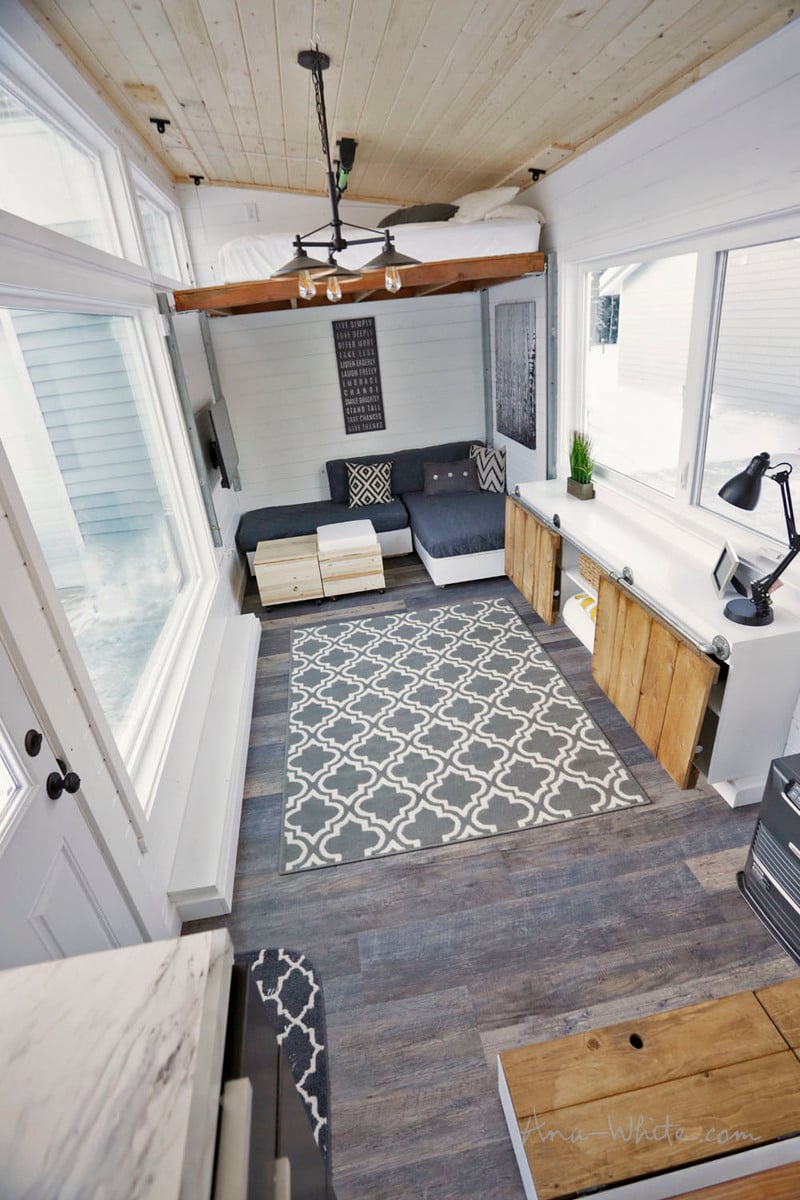
I knew we needed to add some sort of desk/table/storage solution to the mix. But the big problem I kept coming back to was not wanting to put a table in front of the big window, and also not wanting to create a permanent seating situation with your back to the great big window up front.
I wasn't really sure what to do with the space.
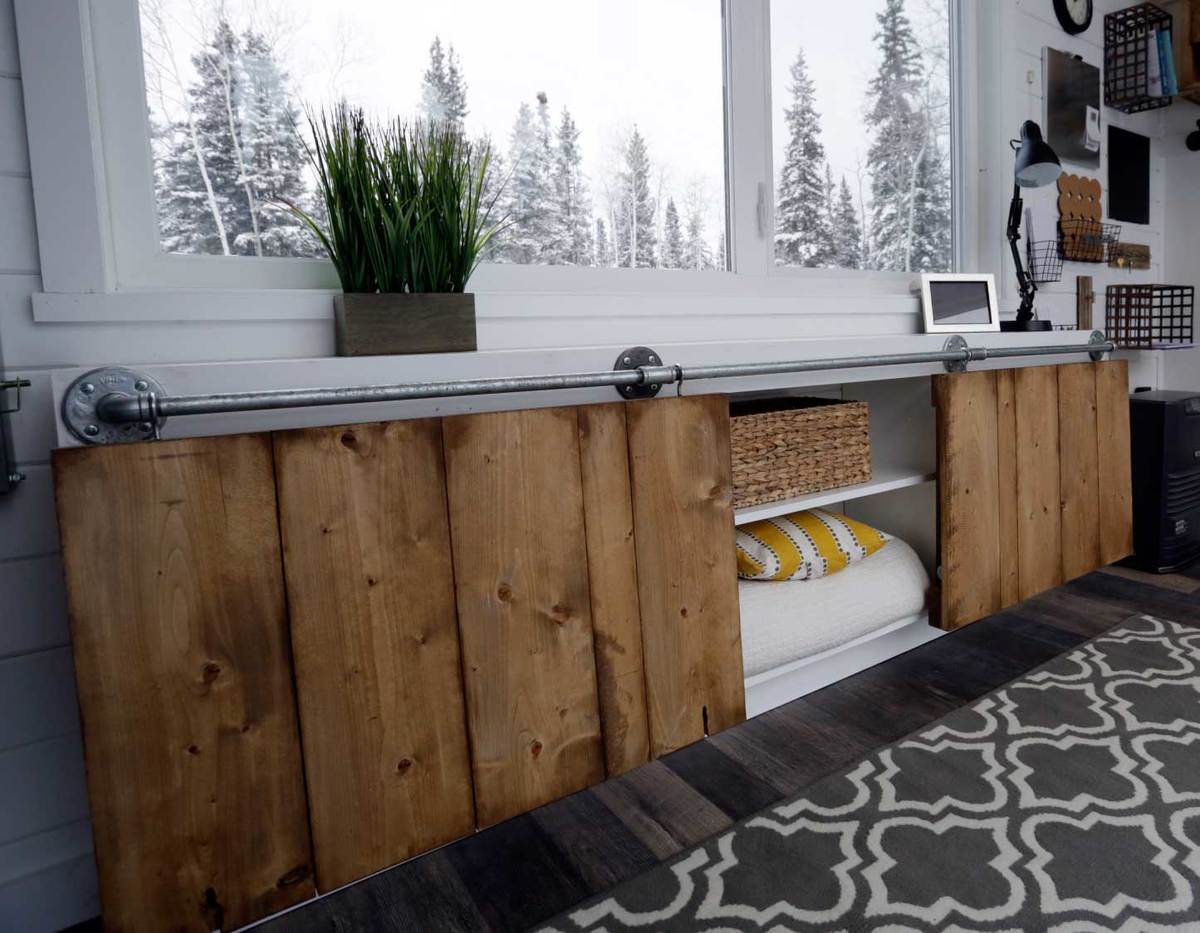
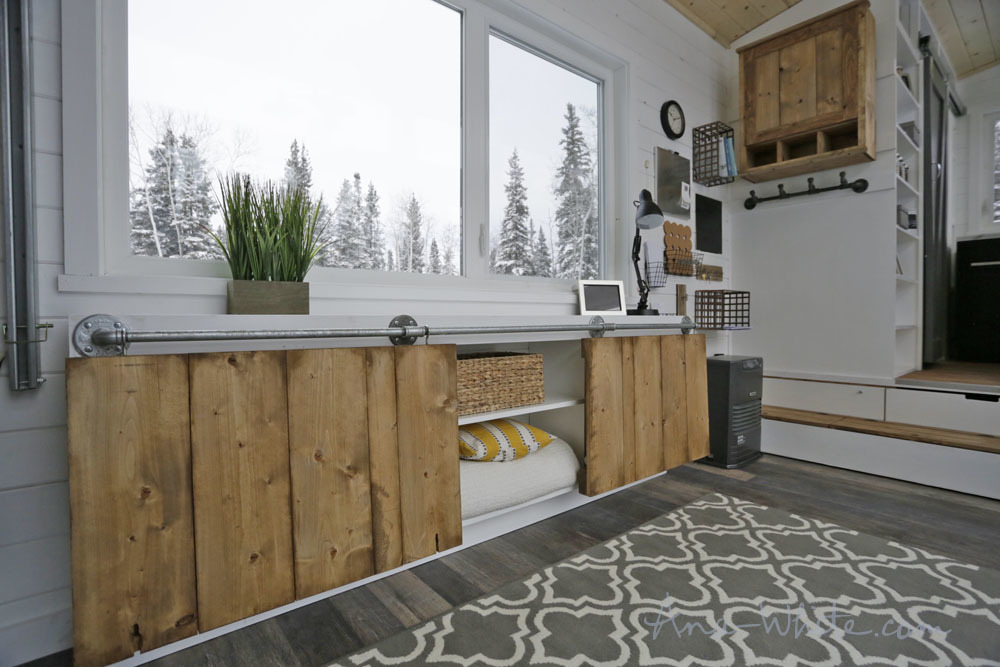
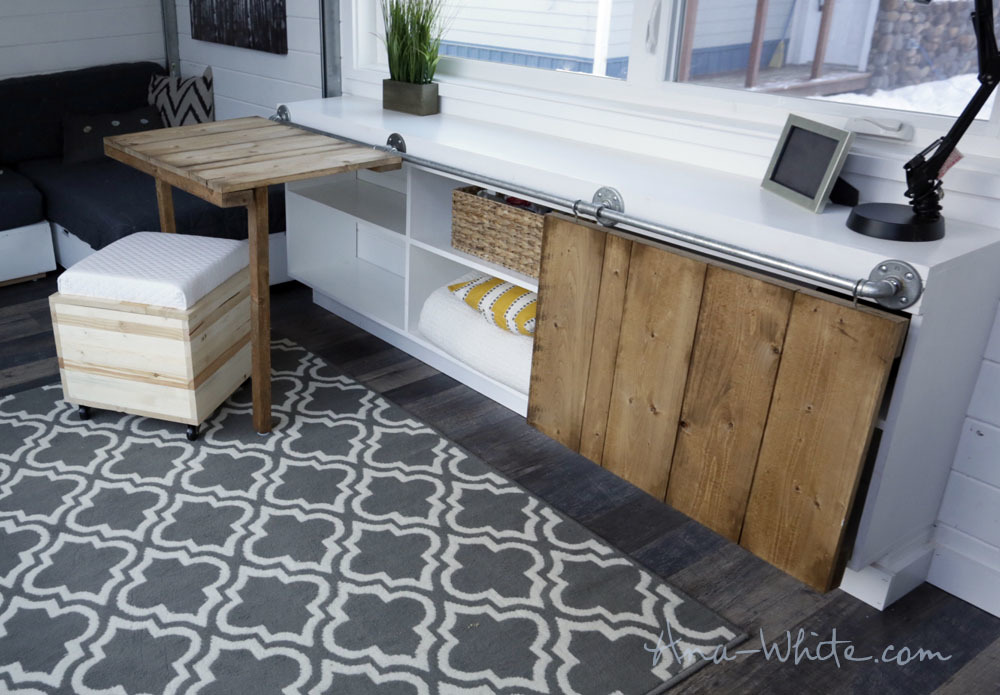
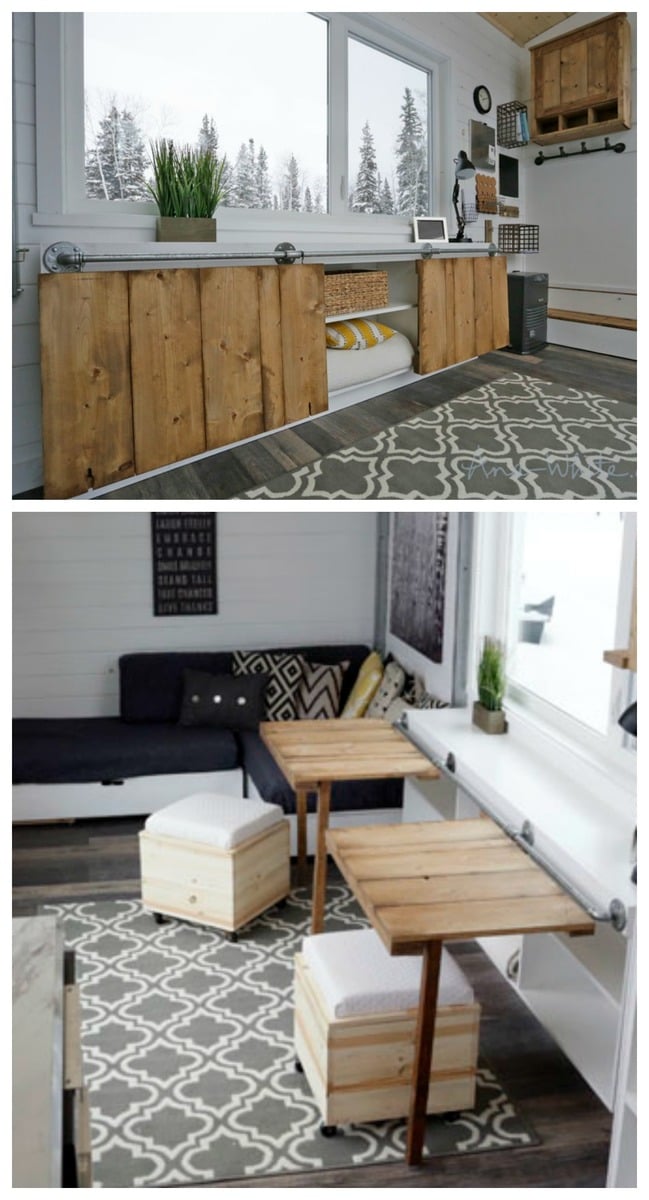
Under the pressure of trying to keep to the schedule and budget, I decided to build a storage shelf over the wheel well. I figured this space is already hard to utilize with the wheel well, and the client would need more storage. The storage piece is made with 1x12 boards, pocket holed together with a Kreg Jig and painted white. I kept the finished height to 30" - standard table height.
Then I had an aw-ha! moment ....
What if I added sliding doors to the front, to conceal contents of the cabinets, but easily slide from side to side for access -

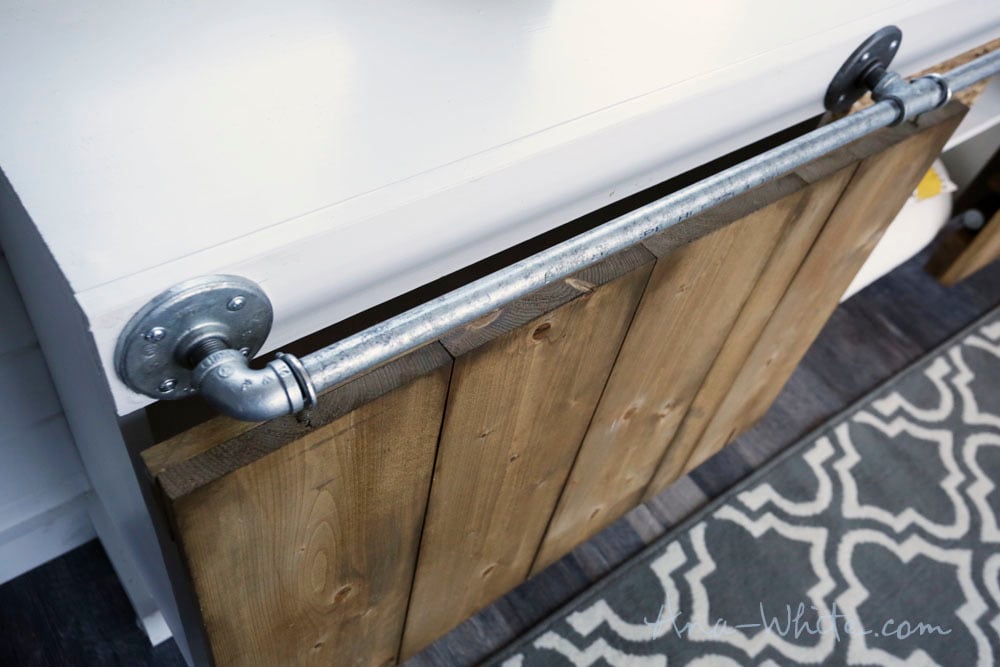
But instead of tradditional sliding door hardware, what if I used pipe fittings and eye-hooks as the sliding hardware -
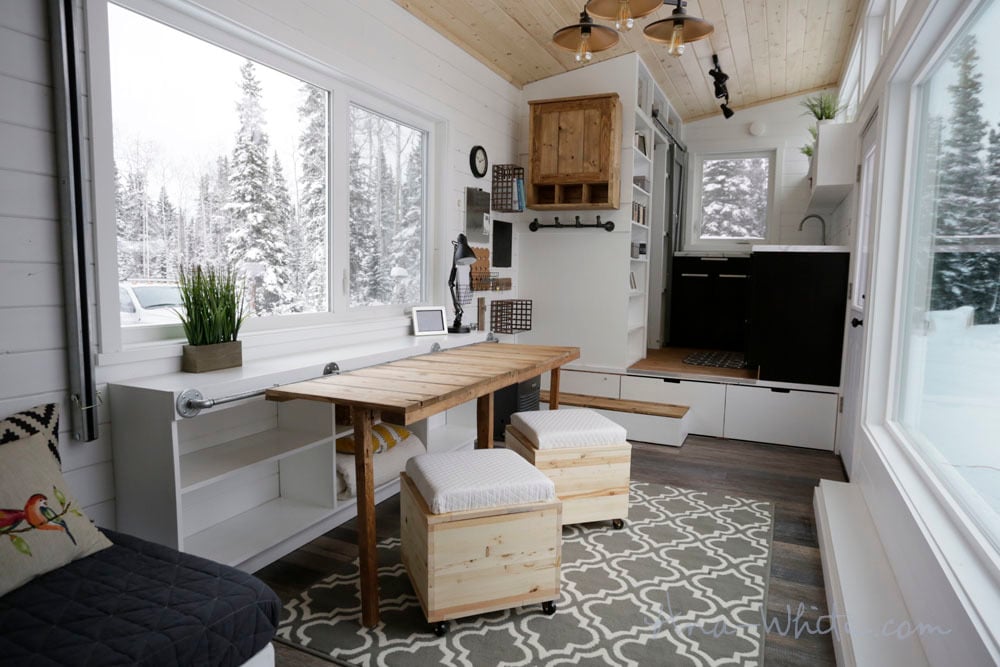
So not only would the doors slide, they could easily pivot upward -
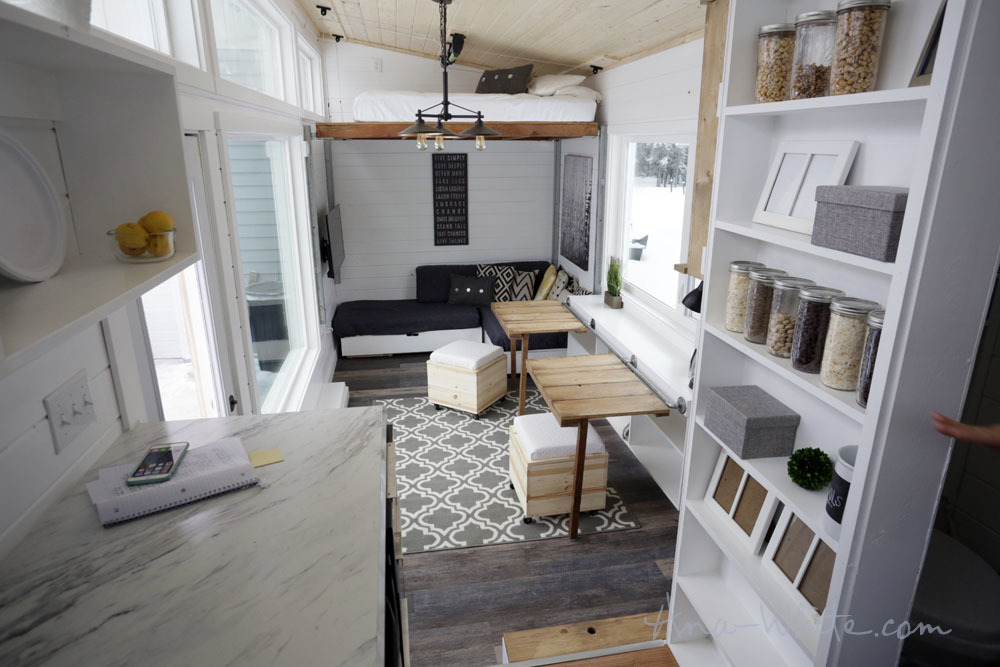
With a hidden flip down leg, and the cabinet doors could become a desk ...
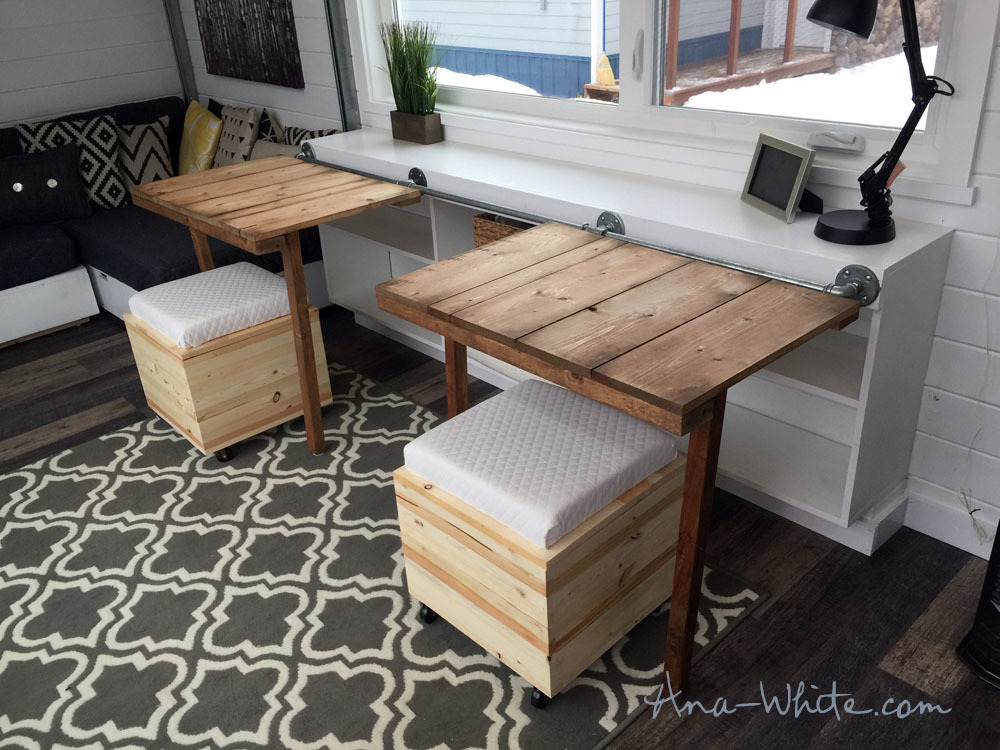
Or desks for two ...

Or half a table ...
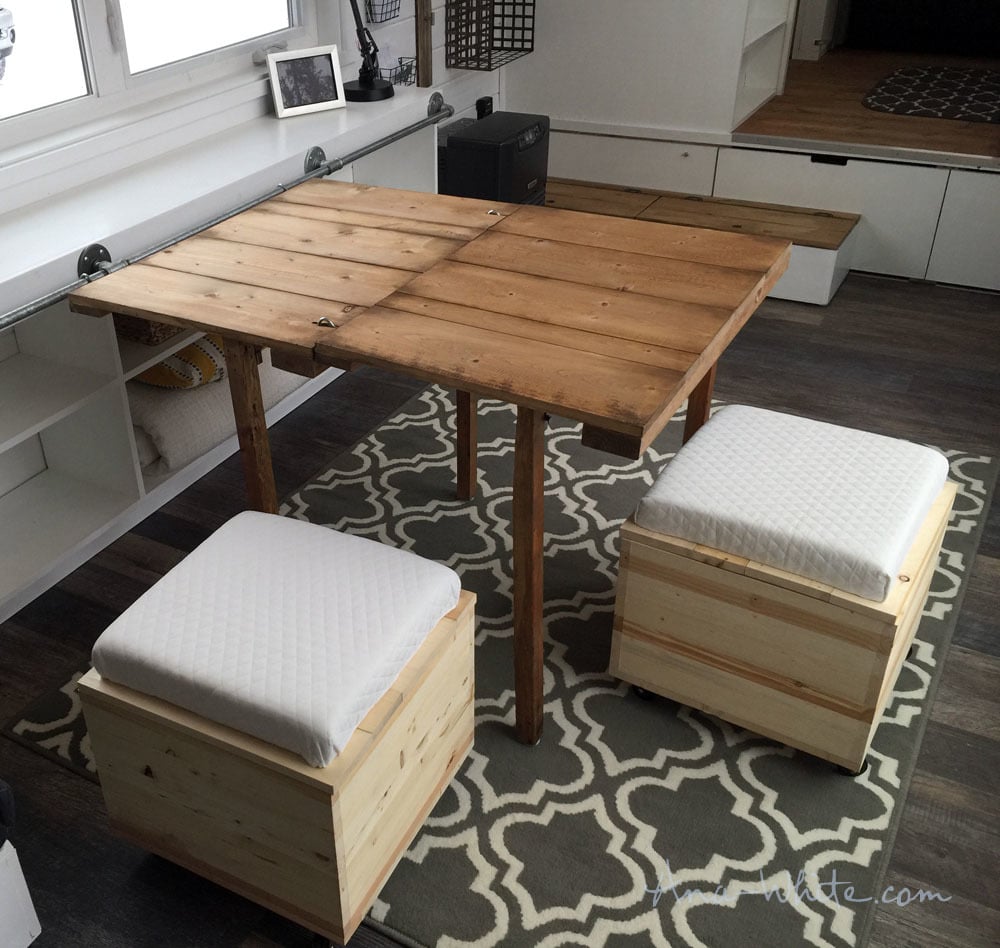
Or even a full size table.
We still can't believe this all worked out! It did take a lot of trial and error, and half a dozen trips to the hardware store but so worth it.
Many of you have been asking for more specifics, so I thought I'd share some more details.
Storage Cabinet
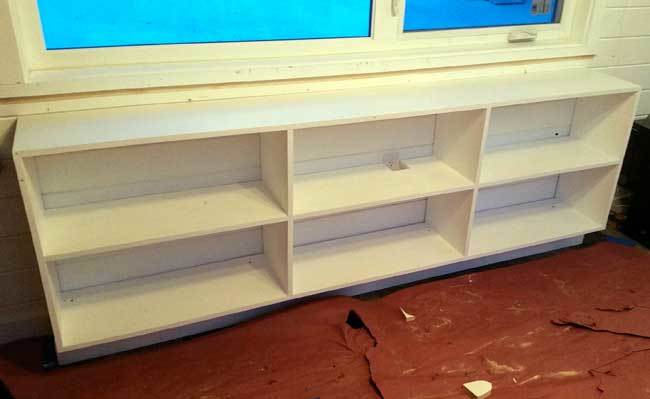
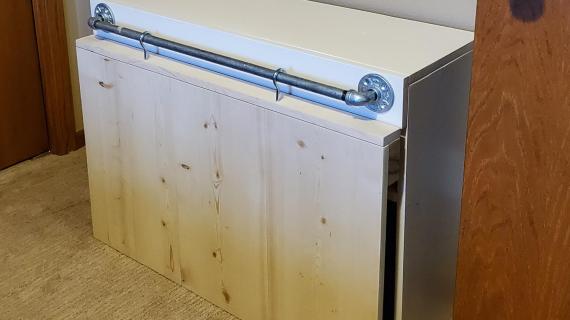
The storage cabinet is built using 1x12 boards, attached with pocket holes. It is built exactly the same size as the wheel well, and sits directly on top of the wheel well. It is overall 30" high. A 1x4 is attached to the front to support the pipe flanges. Behind the 1x4 I did block with scrap pieces of plywood attached to the top and dividers for additional strength. It is all painted a satin white, with Varathane Crystal Clear as a top coat on top to protect the top finish.
Pipe Bar
The pipe bar is comprised of 1/2" pipe fittings available off the shelf at most hardware stores. Floor flanges are used to attach to the cabinet, with elbows and tees used to connect lengths of pipe in between. Off the shelf eye-hooks are used to hang from the pipe and screw into the doors that double as tabletops.
Doors
The doors were made at least 30" wide to allow for a tableheight leg to be hidden underneath the door. When folded, the legs runs horizontal across the door. The doors are made of 1x boards, screwed to 2x4s on the back side. We used 2" screws to attach from the back side, but you can also attach from the front side, you'll just have visible screw holes. The doors are stained with Watco Danish Oil in Dark Walnut with a coat of Triple Thick Poly by Varathane.
We used a router to create the slots for the tables to hook together.
Folding Legs
We used Posi-Lock folding leg hardware from Amazon (non-affiliate link) but weren't too happy with them. There was a wobble (as also noted in the reviews) issue that we had to solve by shimming the hardware. The wobble is not such that it would cause the table to collapse, it's just movement in the hinge. But if I had to do this over again, I'd either go with a folding table leg system (non-affiliate link) or a different type of folding leg hardware - maybe these folding table leg brackets from Amazon (non-affiliate link).
To get the right height of the legs, I simply held the table up level and measured and cut the leg to fit, with the door hanging on the pipe bar. As I do with all of my furniture I added nail on glides (non-affiliate link) to protect the floors.
Finishes
I used the following finishes on this console -

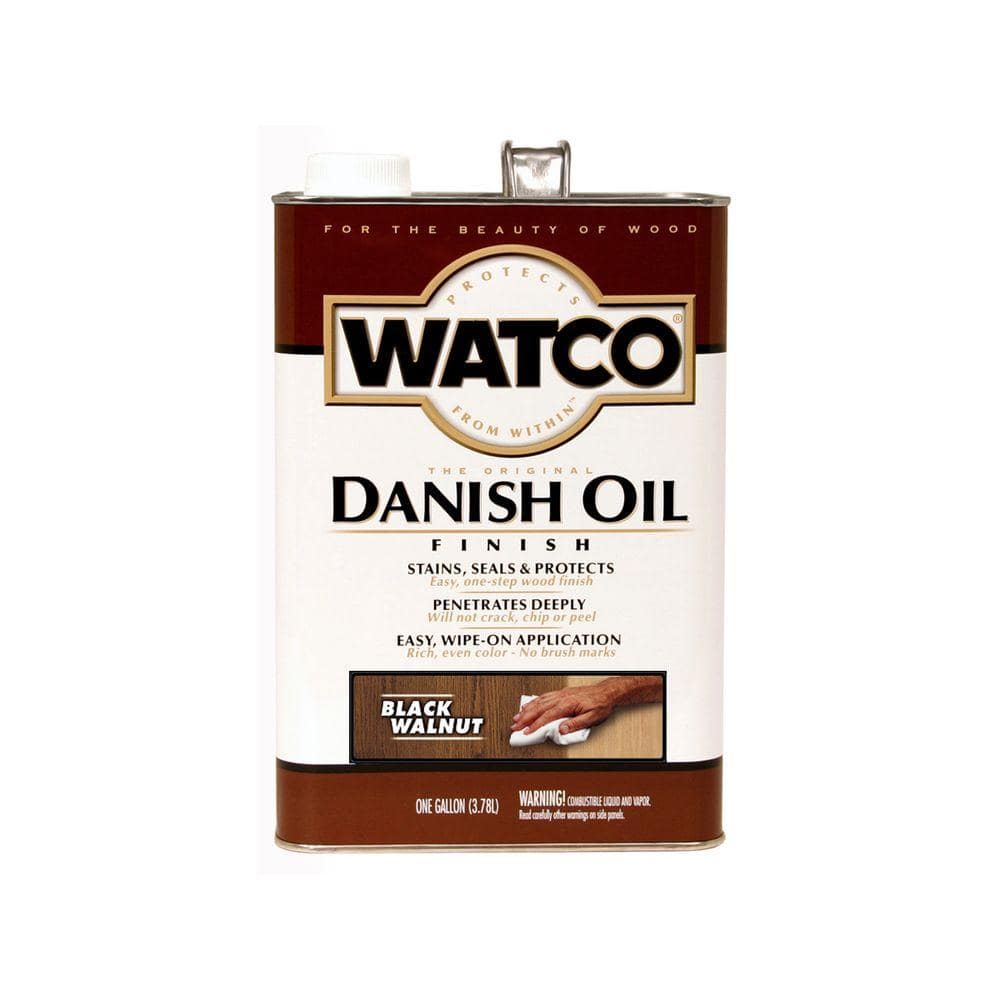

Varathane Crystal Clear Poly to protect white paint since it is non yellowing, Watco Danish Oil in Dark Walnut as a one step stain and sealer, and Varathane Triple thick over the danish oil on tabletops for added durability.
Rolling Cube Storage Stools
The rolling cube storage stool plans are available here.
With a project like this, it's all about custom. I'd love to see how you change things up using some of these ideas. Do share if you build!
XO Ana
PS - See these tables in action in the tiny house tour video
PSS - Do pin and share the love!

Comments
aubreeroney
Thu, 02/23/2017 - 20:03
I can't wait to make this!
I have been watching out for this plan in particular from the Rustic Modern tiny house! My husband and I just bought a sprinter van and are going to build it out to live in and travel around the country! My husband and I are both musicians, and plan to do arranging and freelance music work on the road, and need a great living space in the van, but also plenty of work space, especially for my husband to put his keyboard to practice. When I saw this I immediately fell in LOVE with it! I'm so excited to work this into our plans, as well as the storage stools (which I'm planning on adjusting to be a little longer so that hooked together they'll be like a bench)! I'll definitely share when they're complete!
In reply to I can't wait to make this! by aubreeroney
Ana White
Fri, 02/24/2017 - 11:00
SOUNDS AWESOME!!!
SOUNDS AWESOME!!!
aubreeroney
Thu, 03/02/2017 - 18:06
Instructions
Do you have an estimate on when the rest of the plans will be posted? We just brought our van home yesterday and and psyched to get working on it!
In reply to Instructions by aubreeroney
Gauvain
Mon, 12/11/2017 - 07:44
Tips for connecting tables
At least some details on how the two tables connect would be nice.
leonamartine
Fri, 02/24/2017 - 09:45
Table and Legs
I have been waiting for this post! What size lumber did you use for the legs? 2x2s? I'm very new to this, so could you explain what kind of eye hooks and how to drill the holes for them if you don't have a router? Any advice would be appreciated! Like I said, I've been waiting for this!