
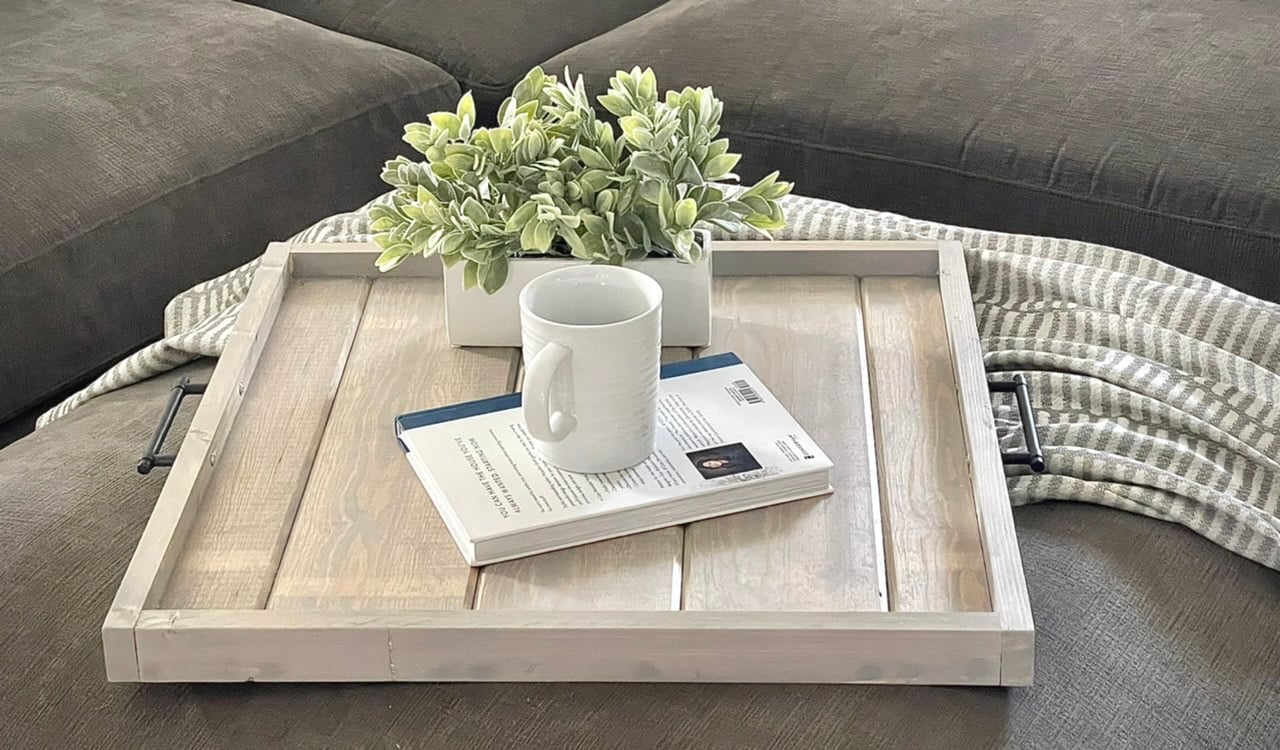

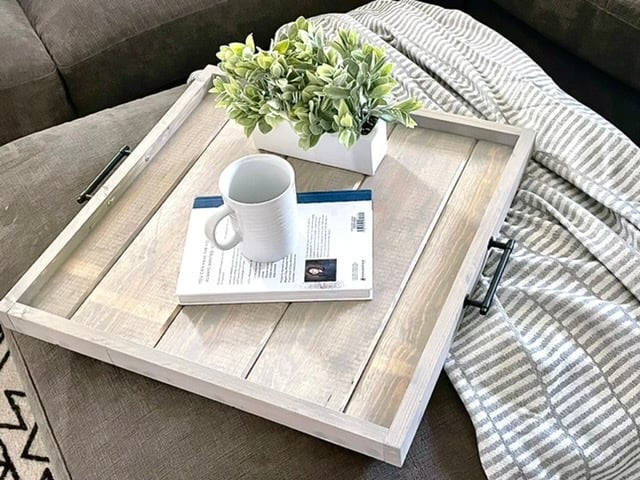
Build your own ottoman tray using free plans from Ana-White.com
This beautiful ottoman tray is solid wood and can be painted or stained any color. This project cost less than $20 to build. This is a gorgeous and functional addition to ottomans or as a serving tray.
Free tutorial includes step by step plans, diagrams, shopping and cut list and video tutorial.

How to Build this Ottoman Tray - Video Tutorial
Pin For Later!

Preparation
- 1 - 1x2 @ 8 feet long
- 1 - 1x6 pine tongue and groove board, 8 feet long
- 1-1/4" brad nails
- wood glue
- 4 - 1x6 tongue and groove boards @ 20"
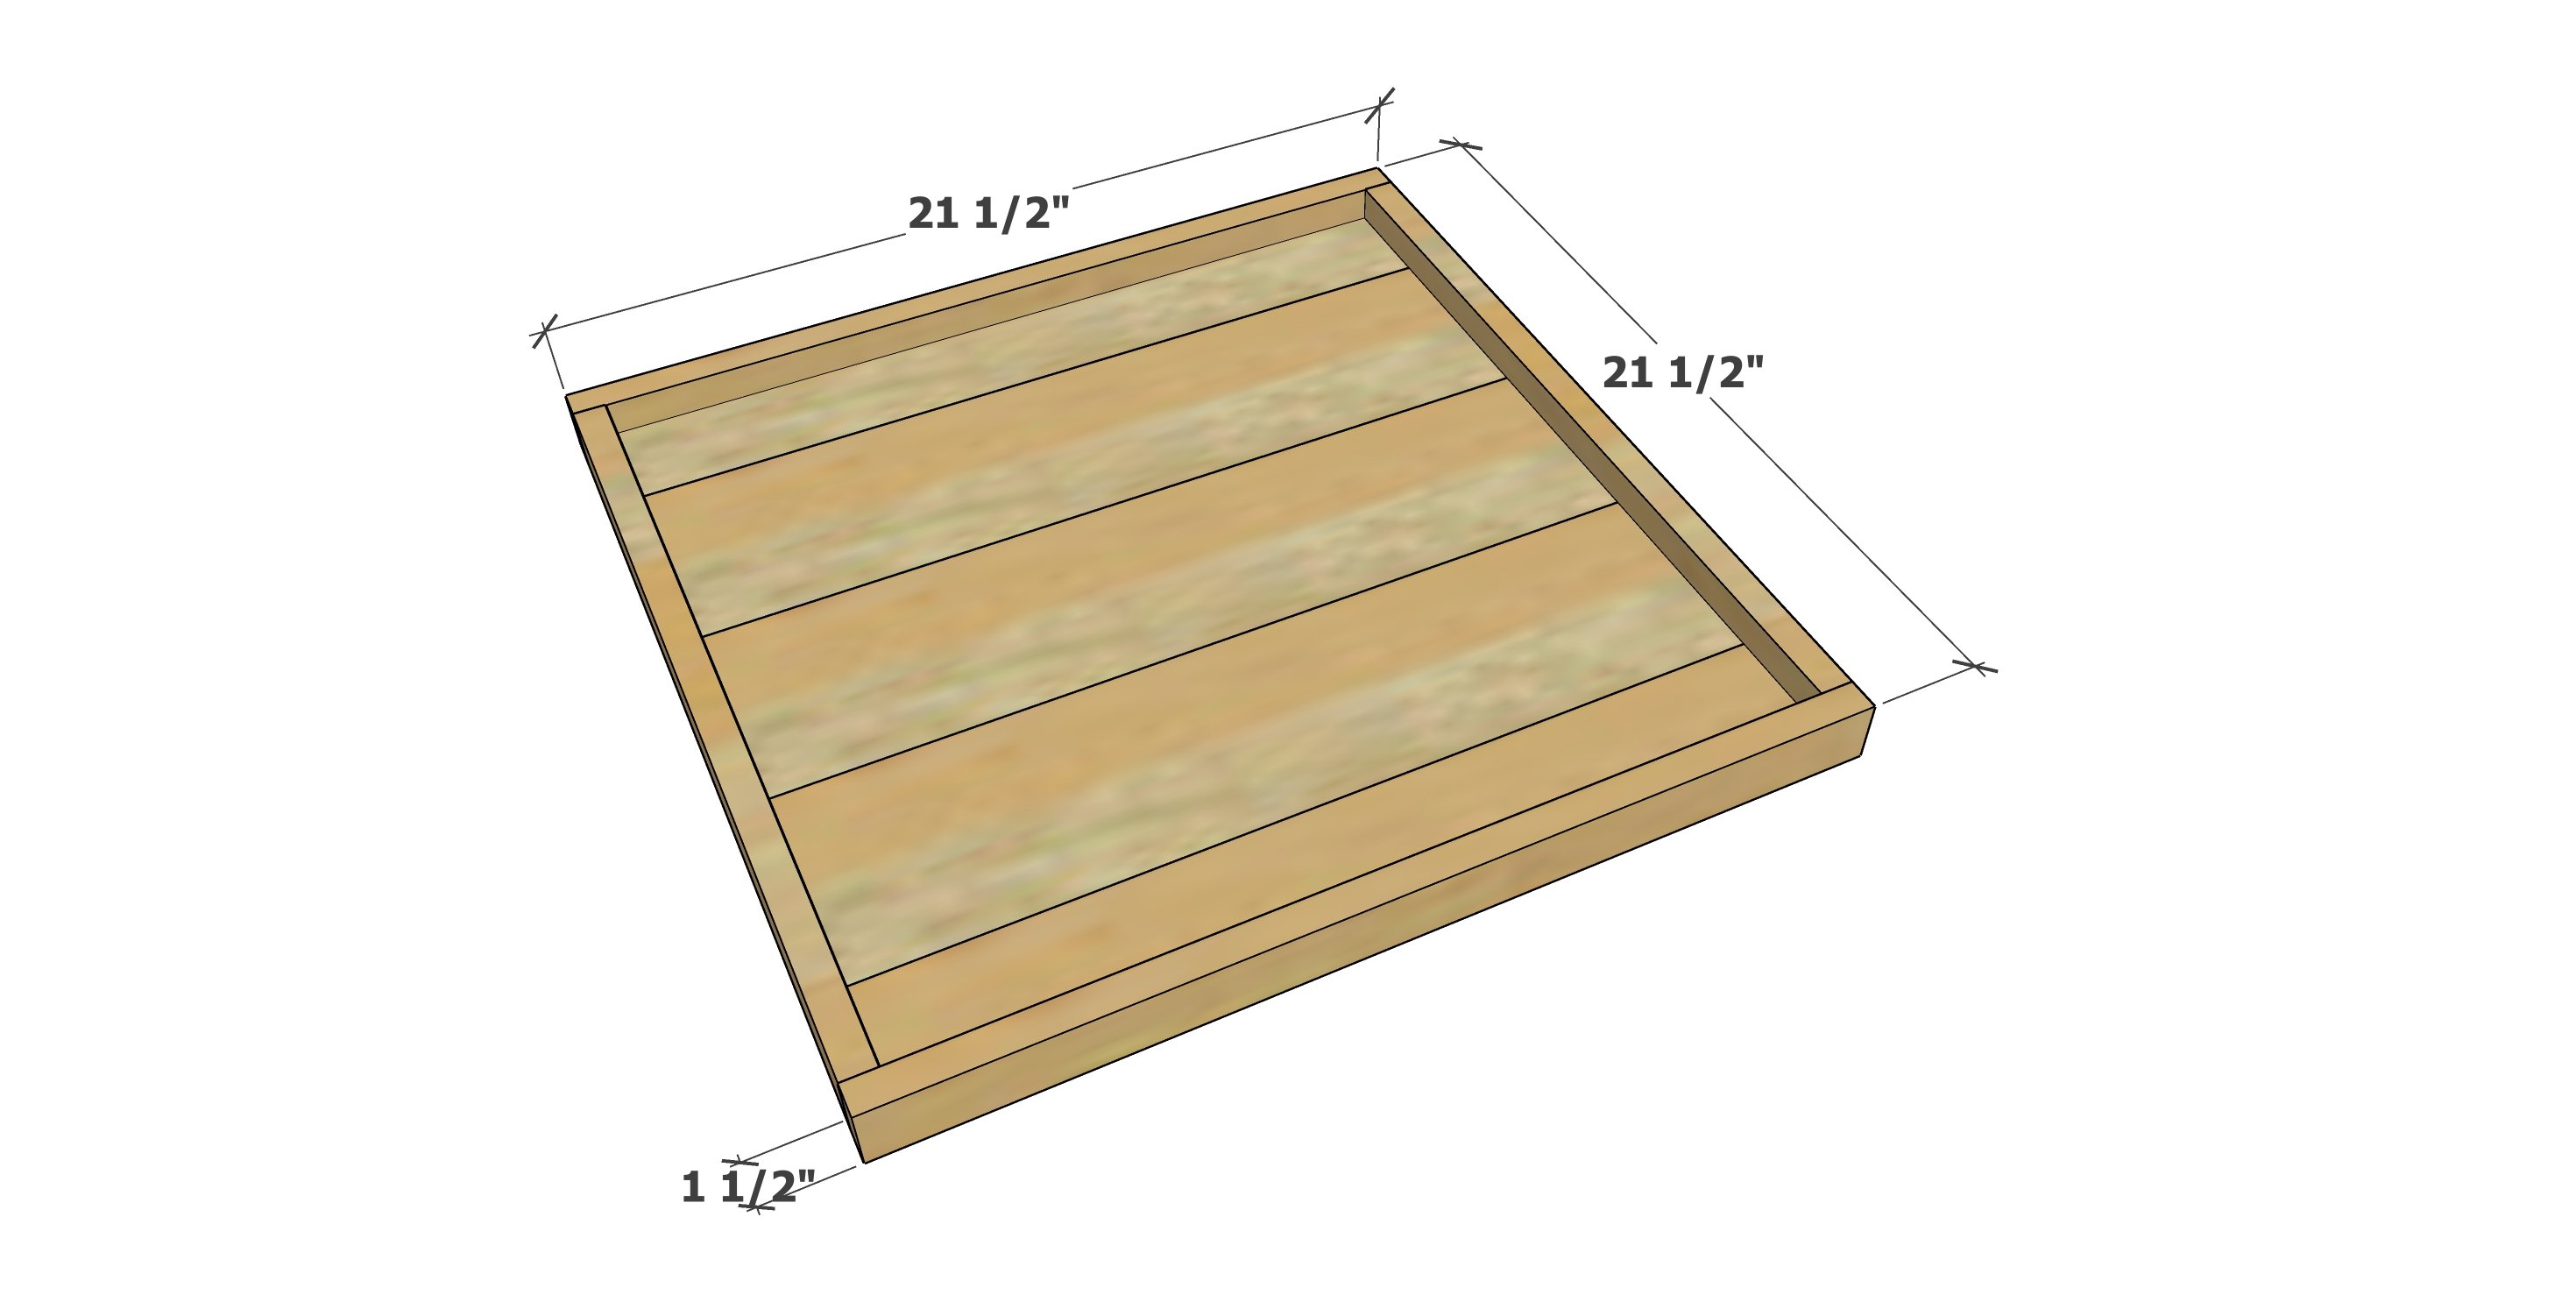
- 1x2 for the frame should be measured and cut to fit


Instructions
Step 1

One of the tongue and groove boards should be cut in half lengthwise.
The easiest way to do this is with a tablesaw.
If you don't have a tablesaw, you can use a guide and a circular saw. The guide should be clamped offset from the desired cut to match the circular saw foot offset.
Clamp the board securely to a work surface and cut with circular saw.
Step 2
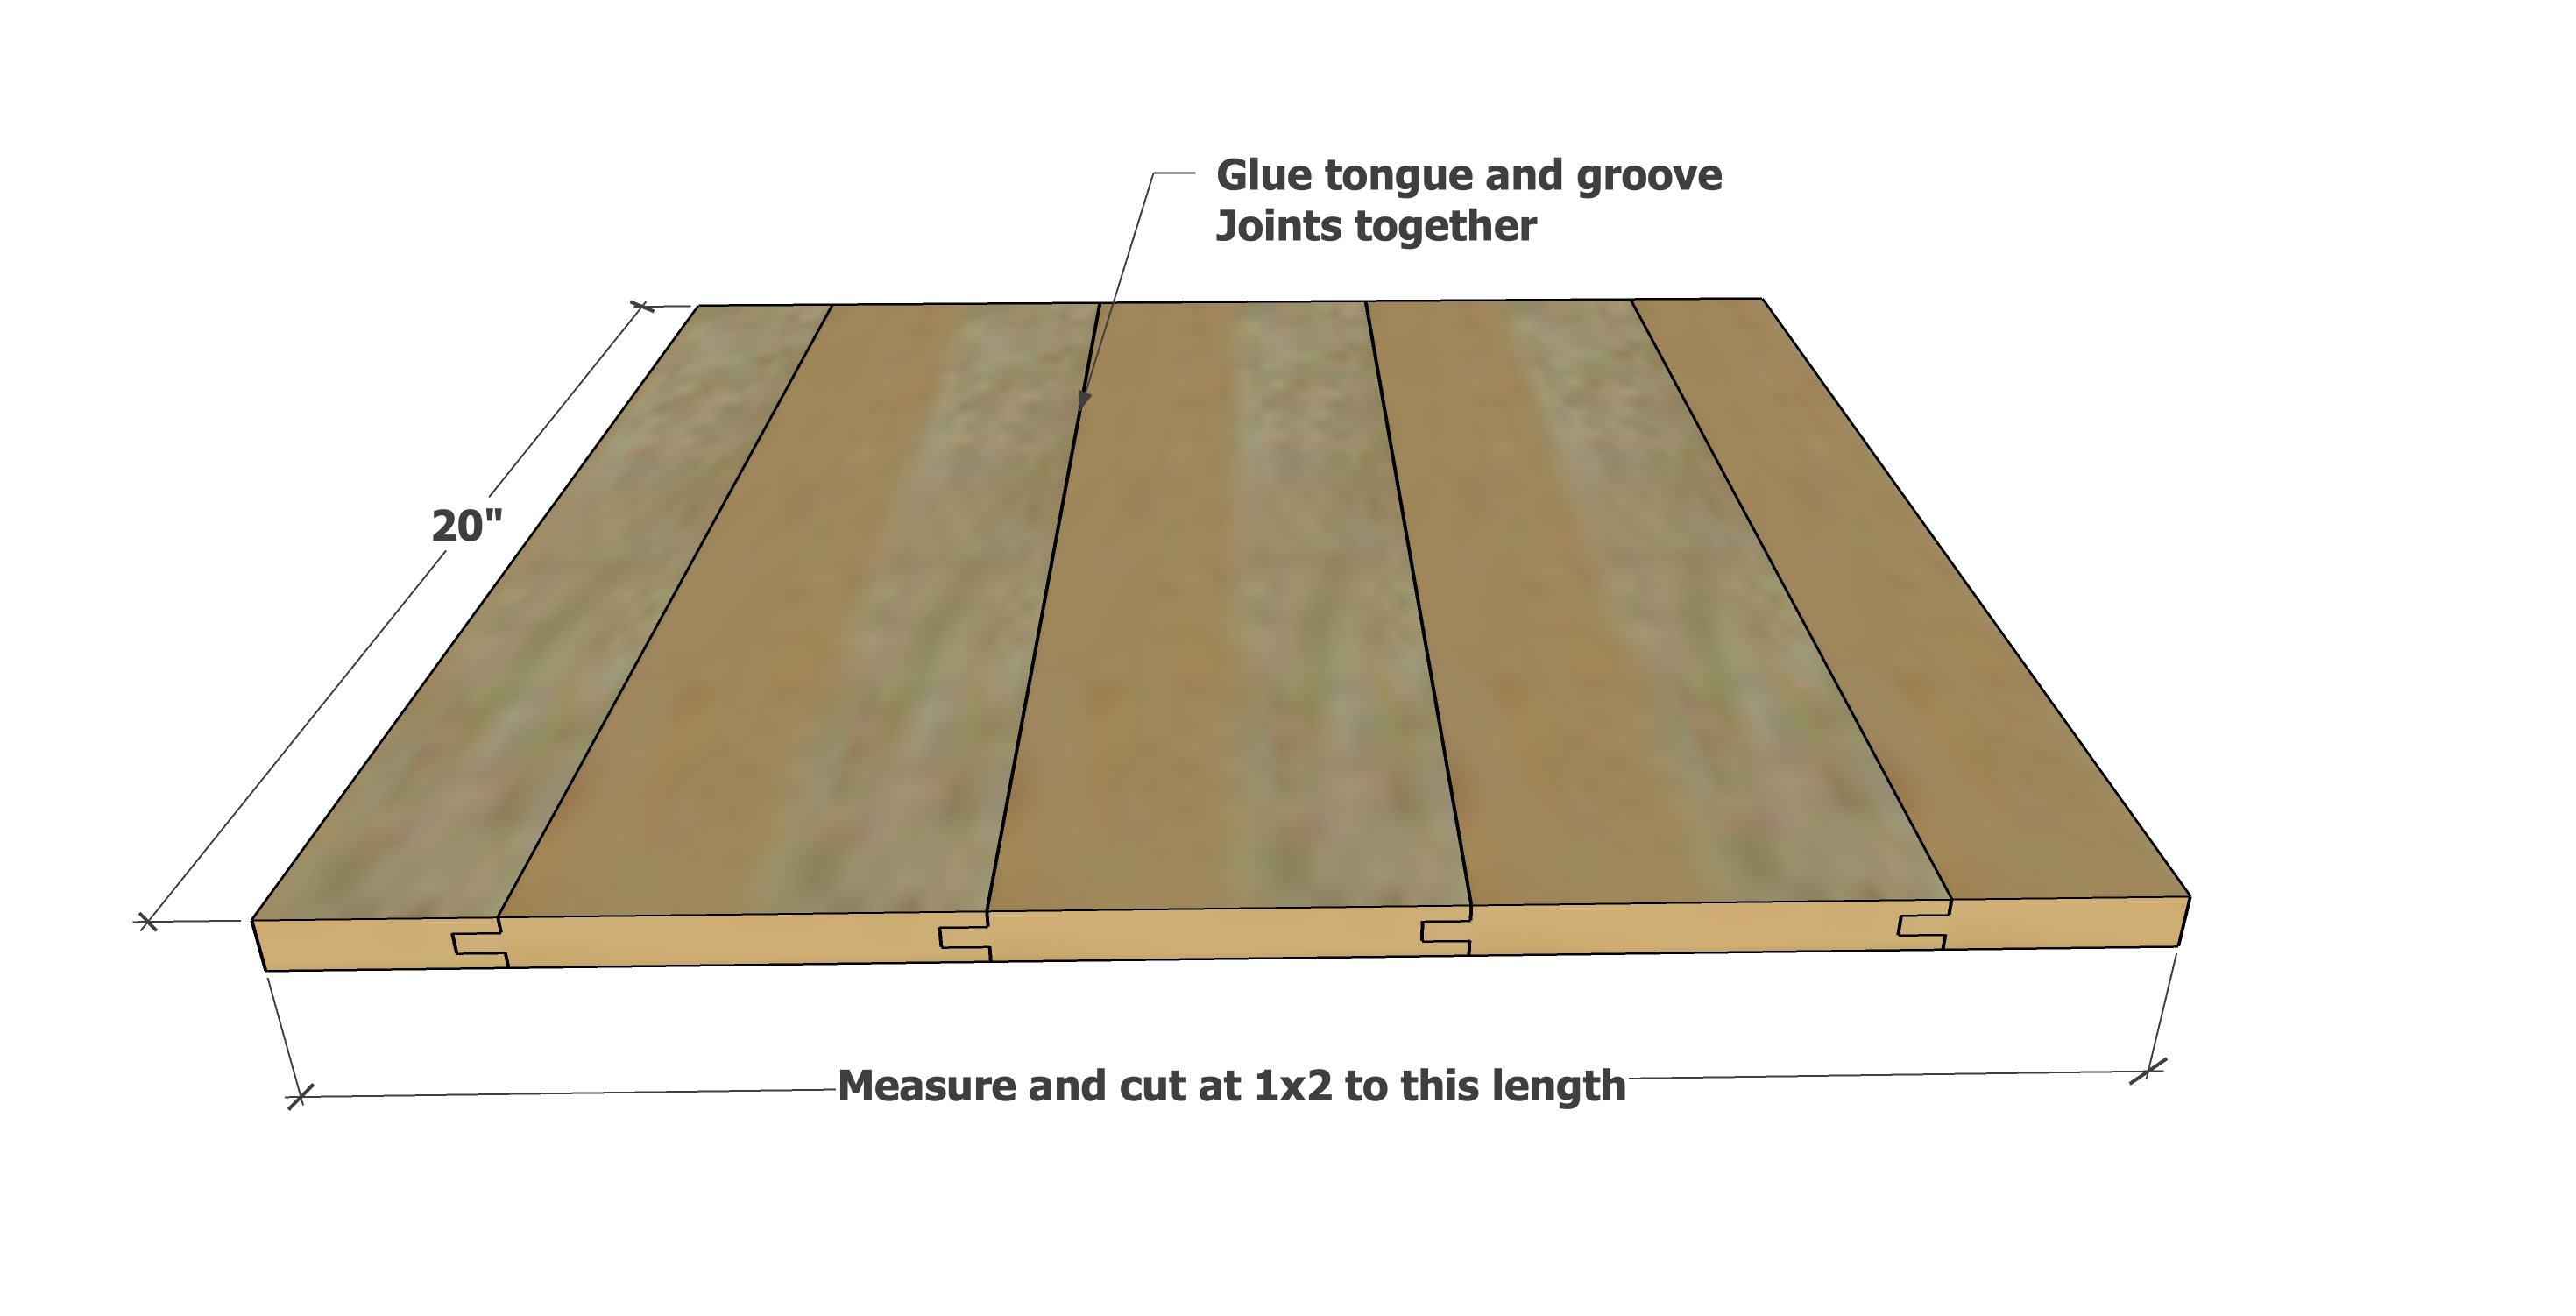
Glue the tongue and groove pieces together, with the two cut pieces on each end.
Step 3
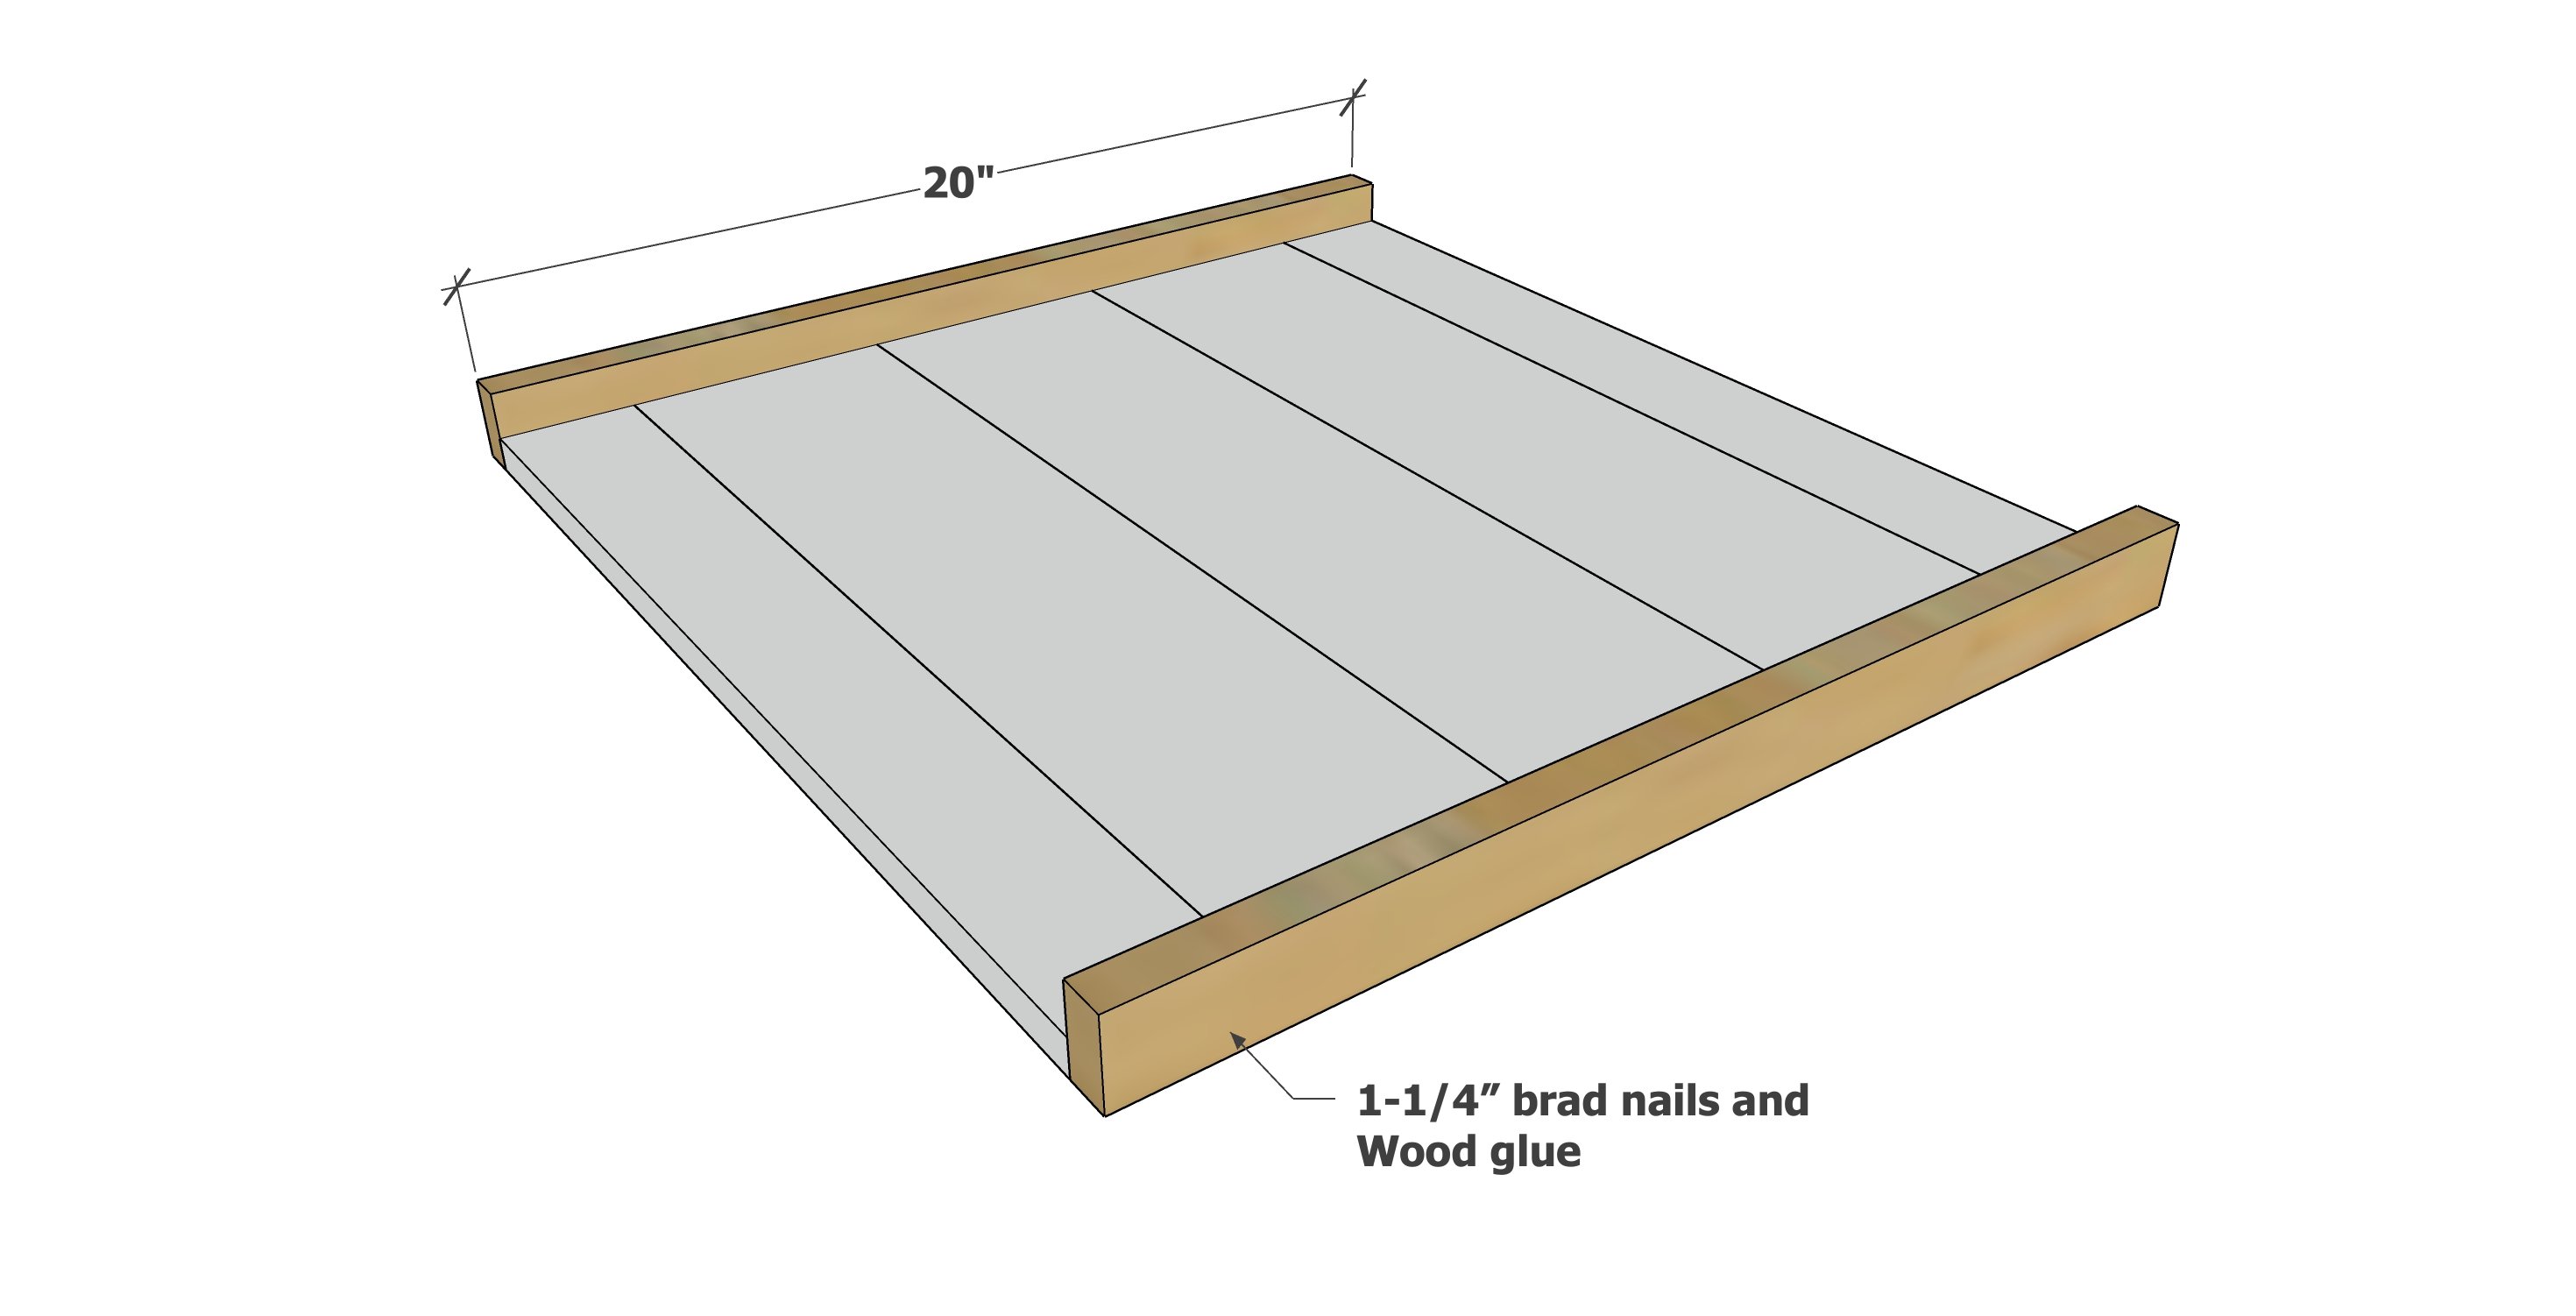
Measure the width of the tray and cut two 1x2s to match. Attach with 1-1/4" brad nails and glue.
Step 4
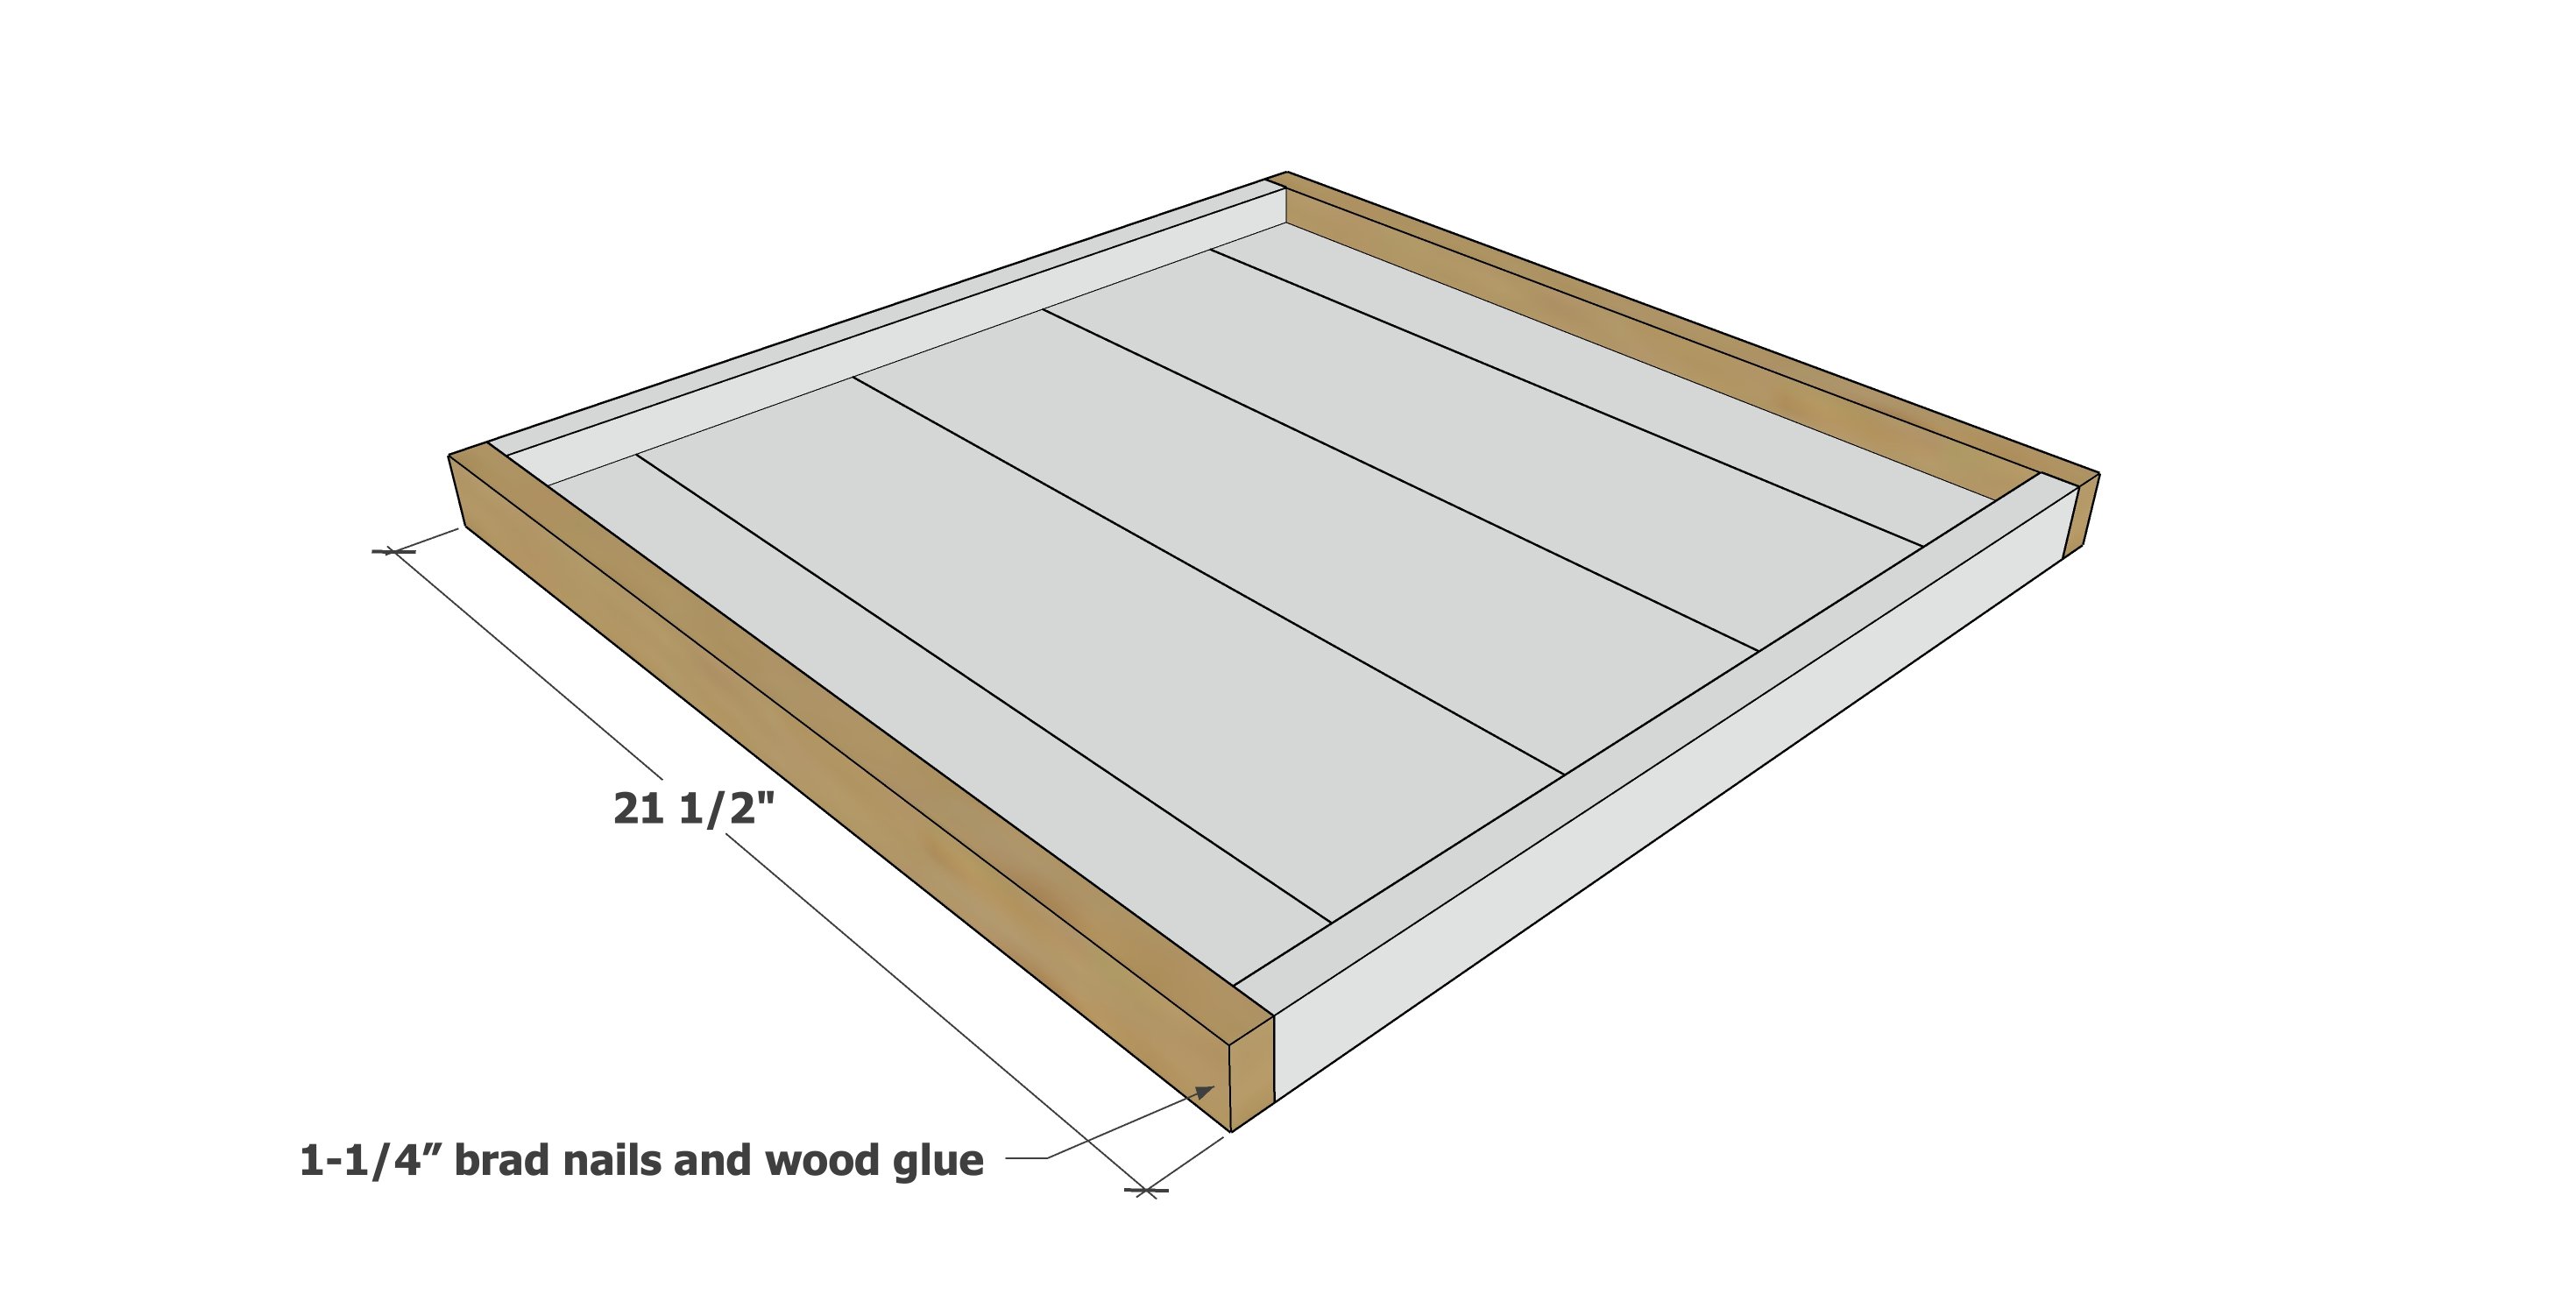
Measure the remaining edges of the tray and cut two 1x2s to match. Attach with 1-1/4" brad nails and glue.
I sanded everything with 120 grit sandpaper.
I removed sanding residue with a vacuum followed by damp lint free cloth.
I added a coat of water based polyurethane to protect.
I added the hardware handles after the poly dried.
