


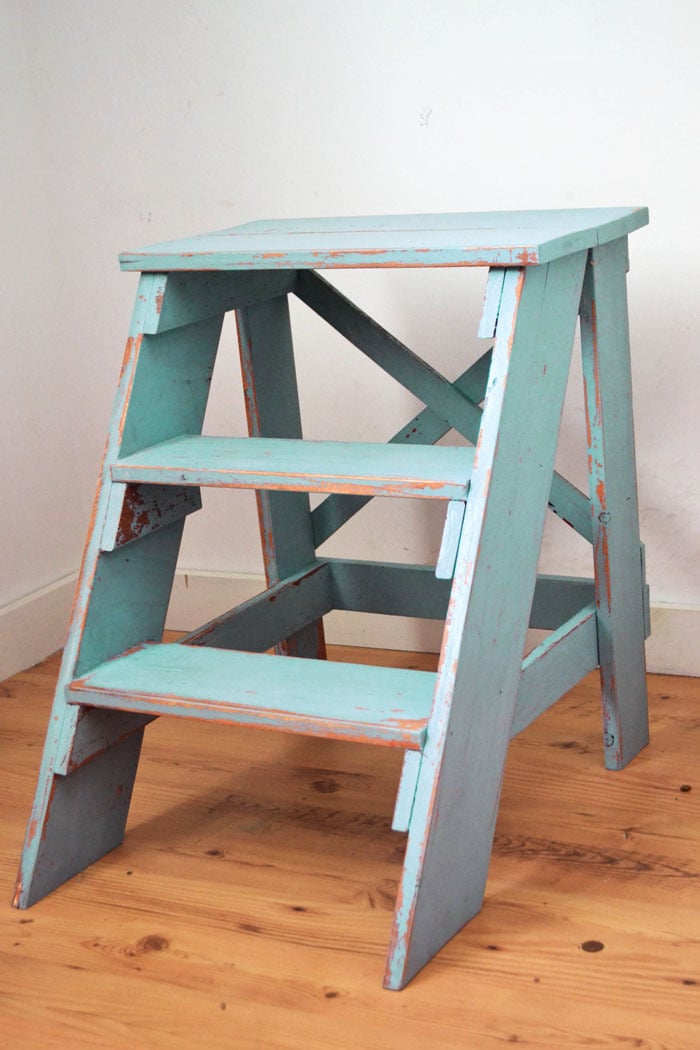
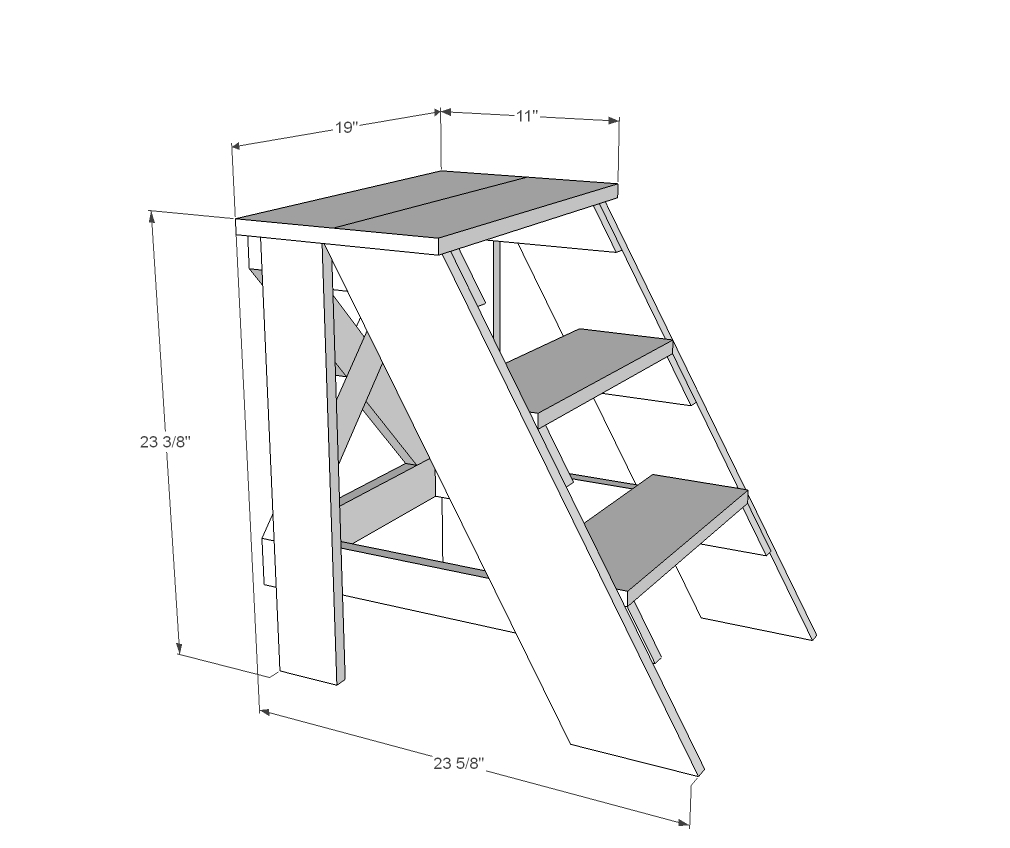
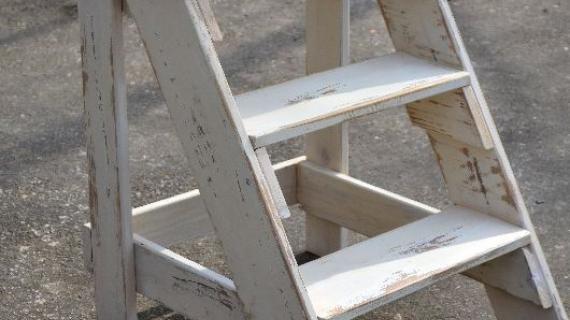
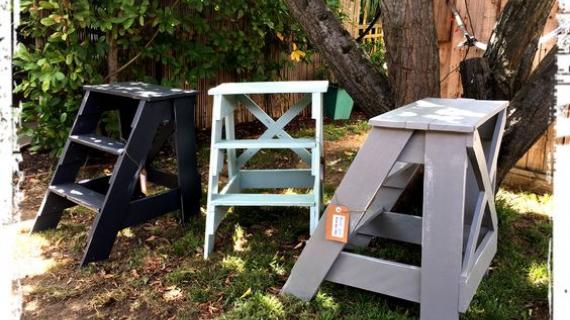
Free plans to build this vintage x back step stool from ana-white.com

Fun new plans for you today!!!
It's been a while since I've been able to just build a furniture piece with the Momplex going on, and I've been getting really ansy to make some sawdust! So the other day, I just built this!

Once I got the cuts done, it was minutes to assemble it!

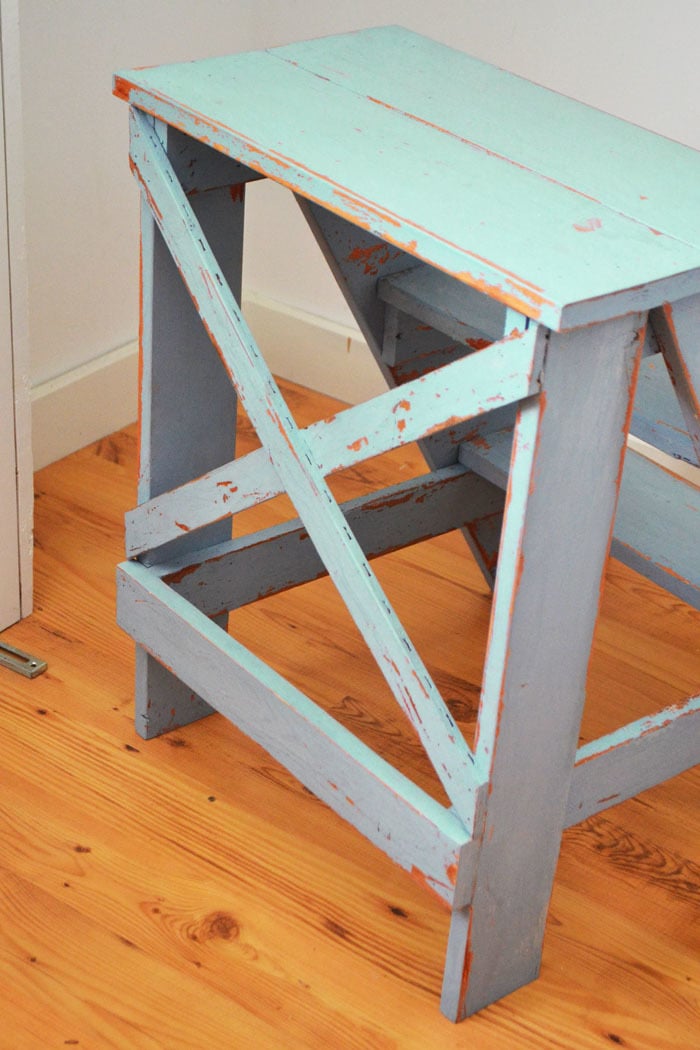
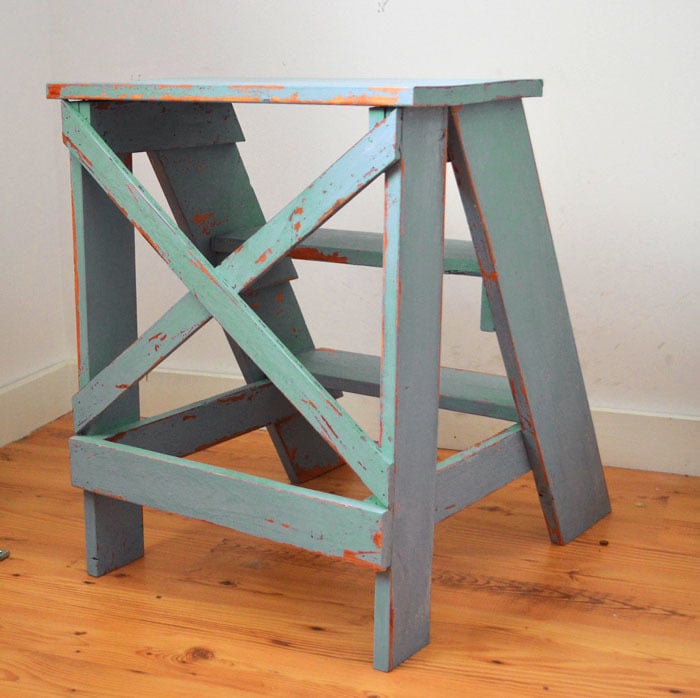
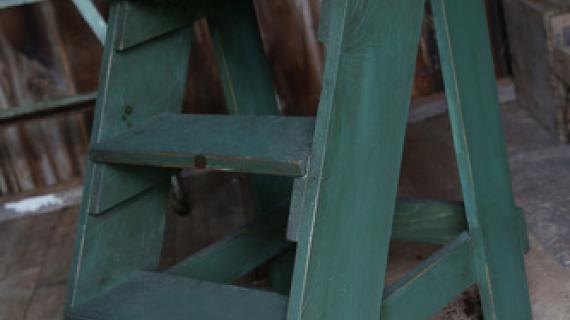
My favorite part is the back. I used leftover wood lath strips. Adds tons of character and strength!
Stools like these were built back in the day and used for reaching the top shelf. But we love it as an end table and Grace uses it as a "high" chair.
Of course the fee plans follow! And if you love the finish - I'll be posting that tute soon too! Enjoy the plans! Ana
Preparation
12 feet of 1x6 boards
10 feet of 1x3 boards
wood lathe for back cross bracing
I used 1 1/4" and 2" finish nails to construct with glue but you can also use screws or pocket hole screws
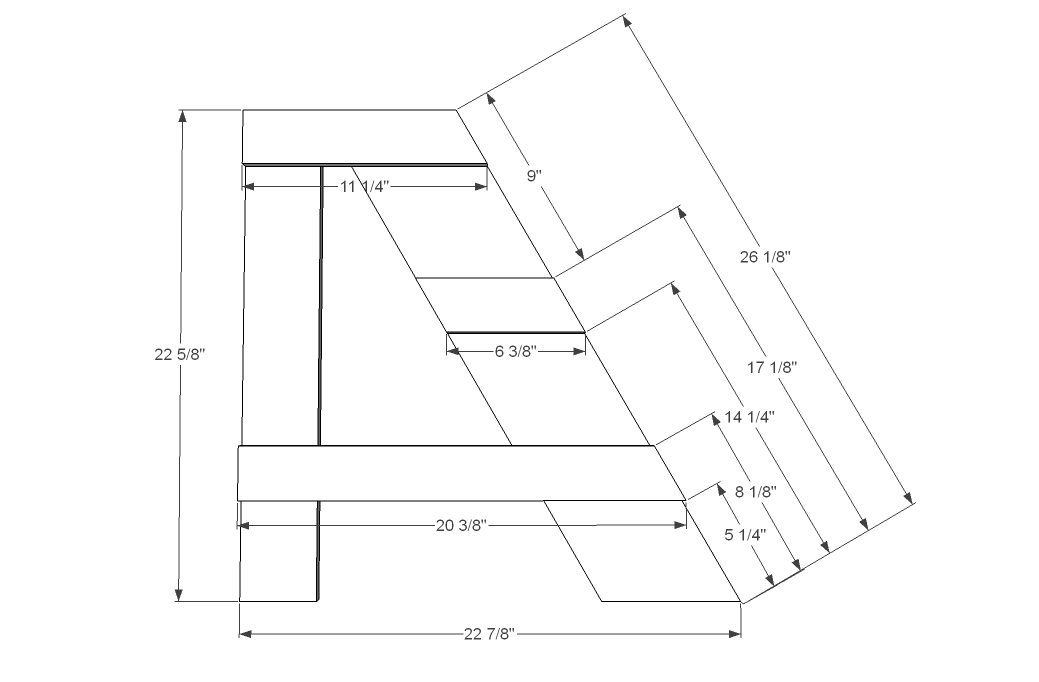
2 - 1x3 @ 11 1/4" (long point measurement, one end cut at 30 degrees off square)
2 - 1x3 @ 20 3/8" (long point measurement, one end cut at 30 degrees off square)
2 - 1x3 @ 6 3/8" (long point to short point, both ends cut parallel at 30 degrees off square)
2 - 1x6 @ 26 1/8" (long point to short point, both ends cut parallel at 30 degrees off square)
2 - 1x6 @ 15 3/4"
1 - 1x3 @ 17 1/4"
2 - 1x6 @ 19"


Please read through the entire plan and all comments before beginning this project. It is also advisable to review the Getting Started Section. Take all necessary precautions to build safely and smartly. Work on a clean level surface, free of imperfections or debris. Always use straight boards. Check for square after each step. Always predrill holes before attaching with screws. Use glue with finish nails for a stronger hold. Wipe excess glue off bare wood for stained projects, as dried glue will not take stain. Be safe, have fun, and ask for help if you need it. Good luck!
Instructions
Step 1
This part is actually a little tricky - getting everything lined up just right. Just take your time and don't forget that the two sides need to be made in mirror so the cleats are on the insides. I used 1 1/4" finish nails and glue to attach.
Step 2

Once you get the two sides done, everything else is a breeze. If you are nailing, use glue and nail from multiple directions.
Step 3
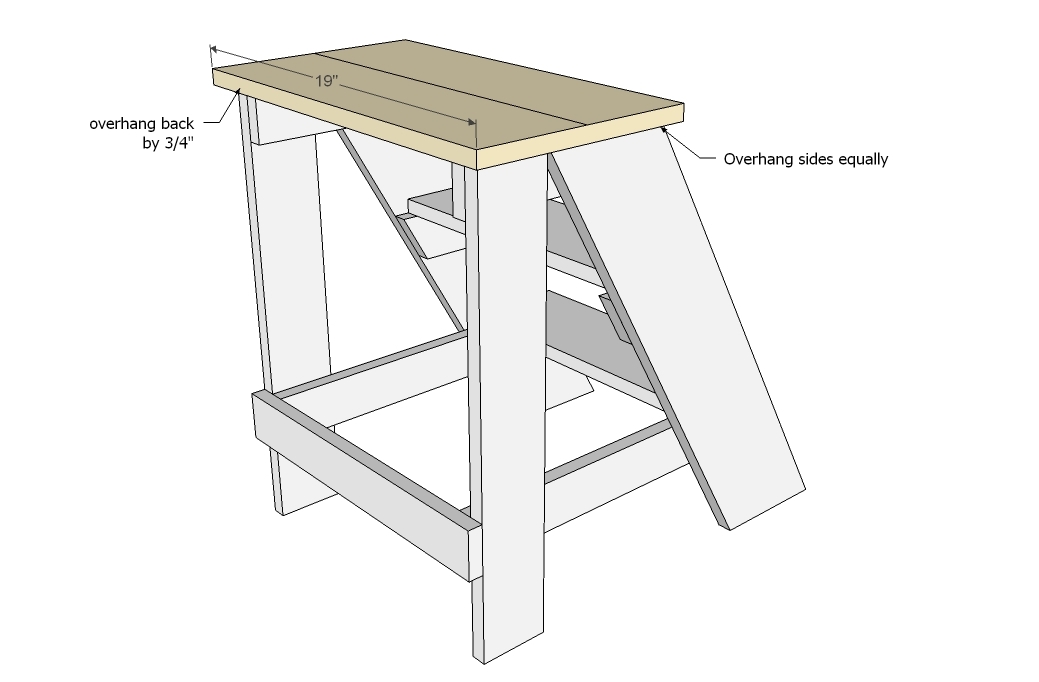
Attach top.
Step 4
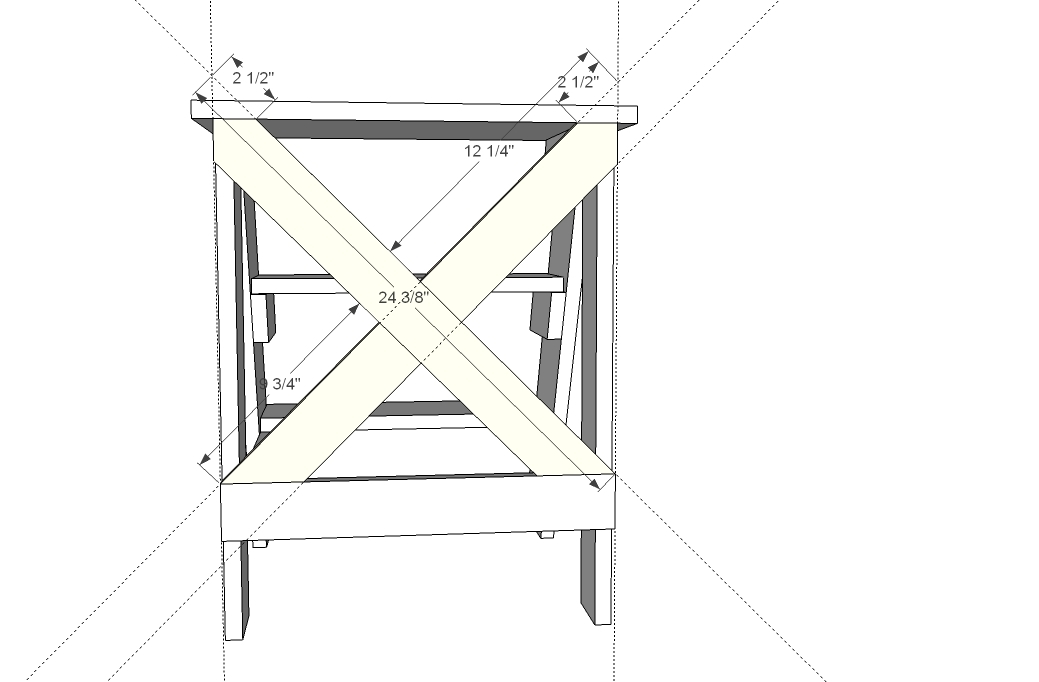
I ended up using scrap lathe strips for the x but if you had 1x3s, you can also do this. The X back actually adds a ton of strength to the back, so glue and screw or nail.
It is always recommended to apply a test coat on a hidden area or scrap piece to ensure color evenness and adhesion. Use primer or wood conditioner as needed.


Comments
jaimecostiglio
Tue, 03/19/2013 - 15:50
perfect
Ana i'm so making that for my new - old - house! It'll fit right in.
Thanks for a fun plan, I love small day projects.
LisaMarie
Thu, 03/21/2013 - 20:31
Amazing!
Love this! Perfect for my new, but vintage kitchen! Just a question, I'm assuming this could actually be used as a step stool for an adult, right?
Thank you!
designsbystudioc
Fri, 03/22/2013 - 06:03
Beautiful!
I love the style and especially love the finish! I may build one of these "just because"... Maybe out of pallet wood and use it on the porch for plants?!
Cher @ Designs by Studio C
jaallen203
Tue, 04/16/2013 - 18:05
Missing info
What size board is used for the back legs? Love the stool but some info is missing in the plans.
In reply to Missing info by jaallen203
Lady Goats
Wed, 04/17/2013 - 01:28
Back legs look like two 1x3s
Back legs look like two 1x3s at 22 5/8". No angled cuts.
jaallen203
Wed, 04/17/2013 - 08:04
Missing Info
We went with a 1x4...and that worked perfectly.
kate_veaux
Sun, 08/23/2020 - 16:54
Finishing Paint
Having so much fun building with my twin daughters!!! I missed where you posted what paint you used to finish this project. Any chance you could post again? My twin daughter and I are LOVING our new found passion. So far we have built the closet system, the farmhouse coffee table, bench, and 4 desks. About to start the stool. LOVE all your plans!! Huge fan!!!