

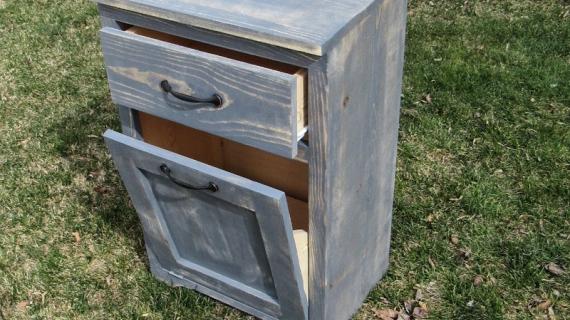
Solid wood tilt out trash cabinet or recycling cabinet plans. You'll love the step by step instructions and diagrams, shopping list and cut list.
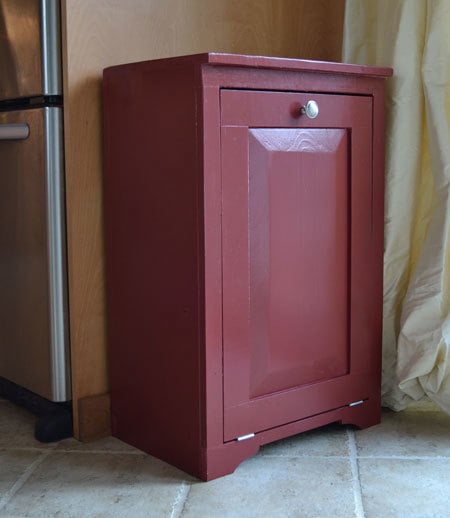

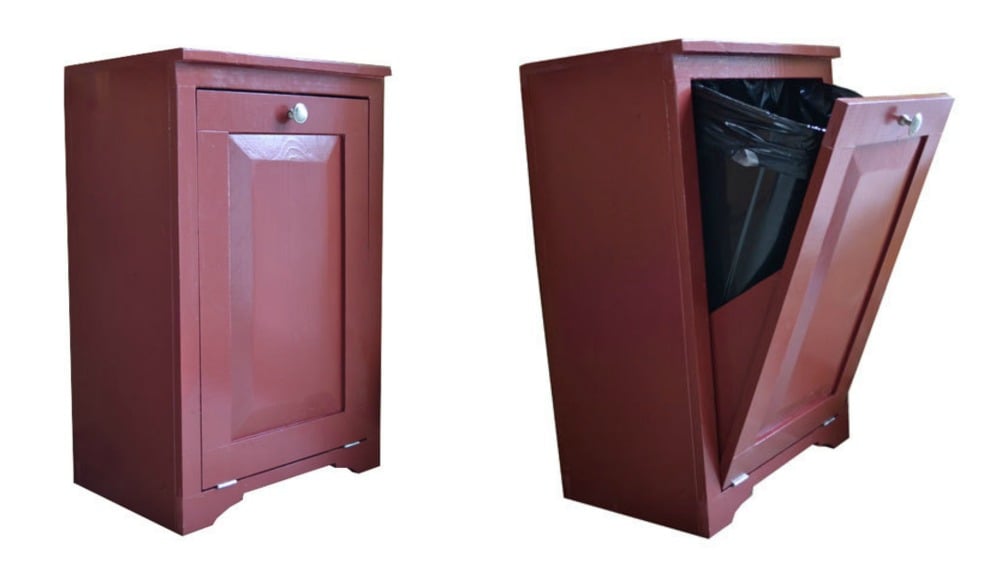
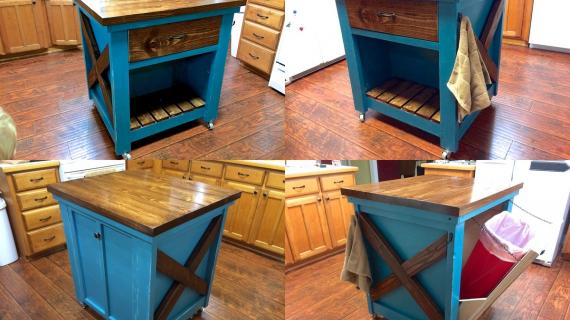
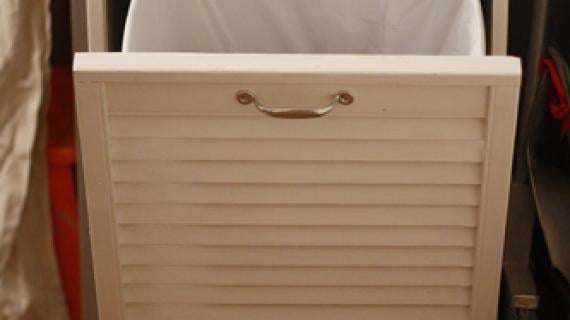
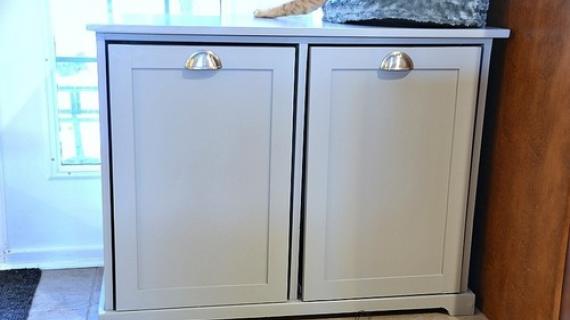
We love this wood tilt out trash bin because it's a cabinet with a counter top surface, while still providing easy access to the trash.
Updated Plans
This plan has been updated to be easier to build and use less materials. The original plans are still available here.
Pin For Later!
Preparation
2 - 1x12 @ 6 feet long
2 - 1x3 @ 6 feet long
2 - 1x2 @ 4 feet long
1 - 1/4" plywood or similar 24" x 14-1/4"
Narrow Hinges (the cheapo kind with flat headed screws)
Knob or Pull
Wire or toybox lid support hinge to keep the door from opening all the way to the floor
2 - 1x12 @ 29 1/4"
1 - 1x12 @ 18"
1 - 1x12 @ 16 1/2"
2 - 1x3 @ 16 1/2"
2 - 1x2 @ 18"
1 - 1x3 @ 18"
DOOR
2 - 1x3 @ 25"
2 - 1x3 @ 13"
1 - 1x12 @ 16"
1 - 1x12 @ 11-1/4" - cut at 45 degree angle


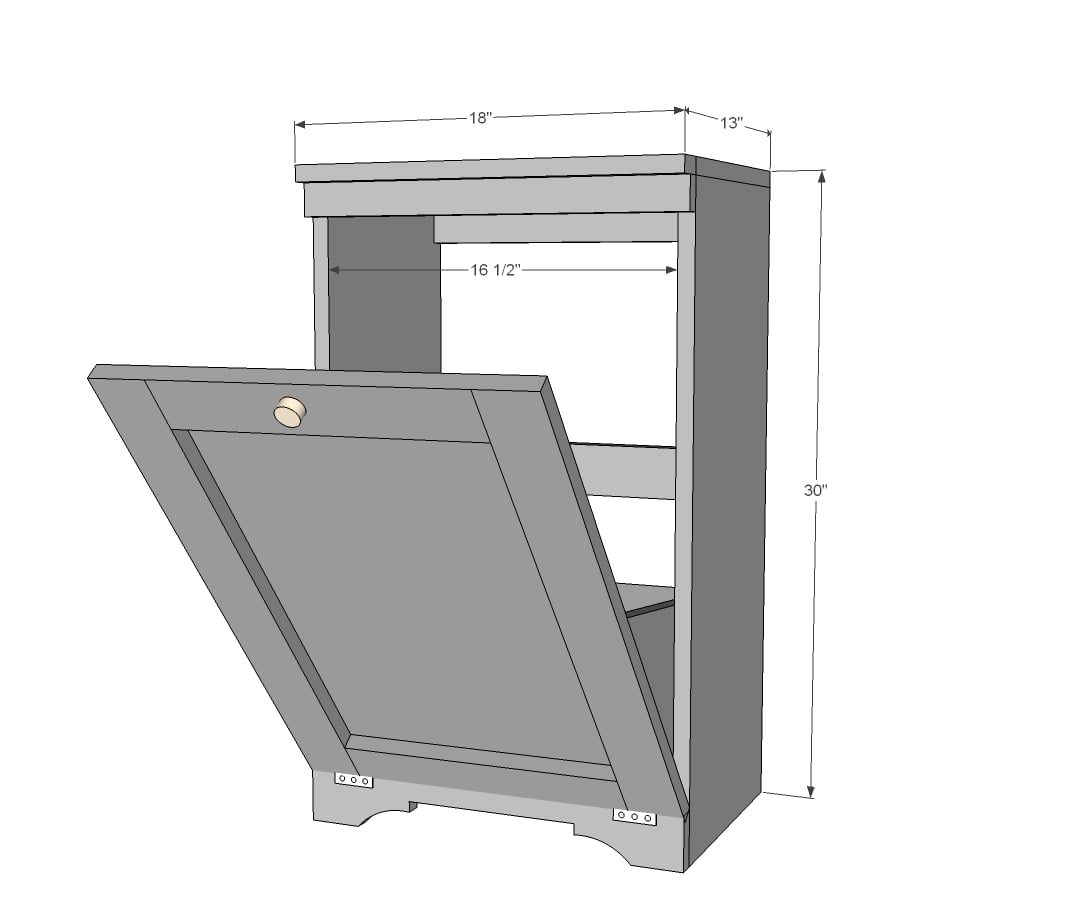
Instructions
Step 1
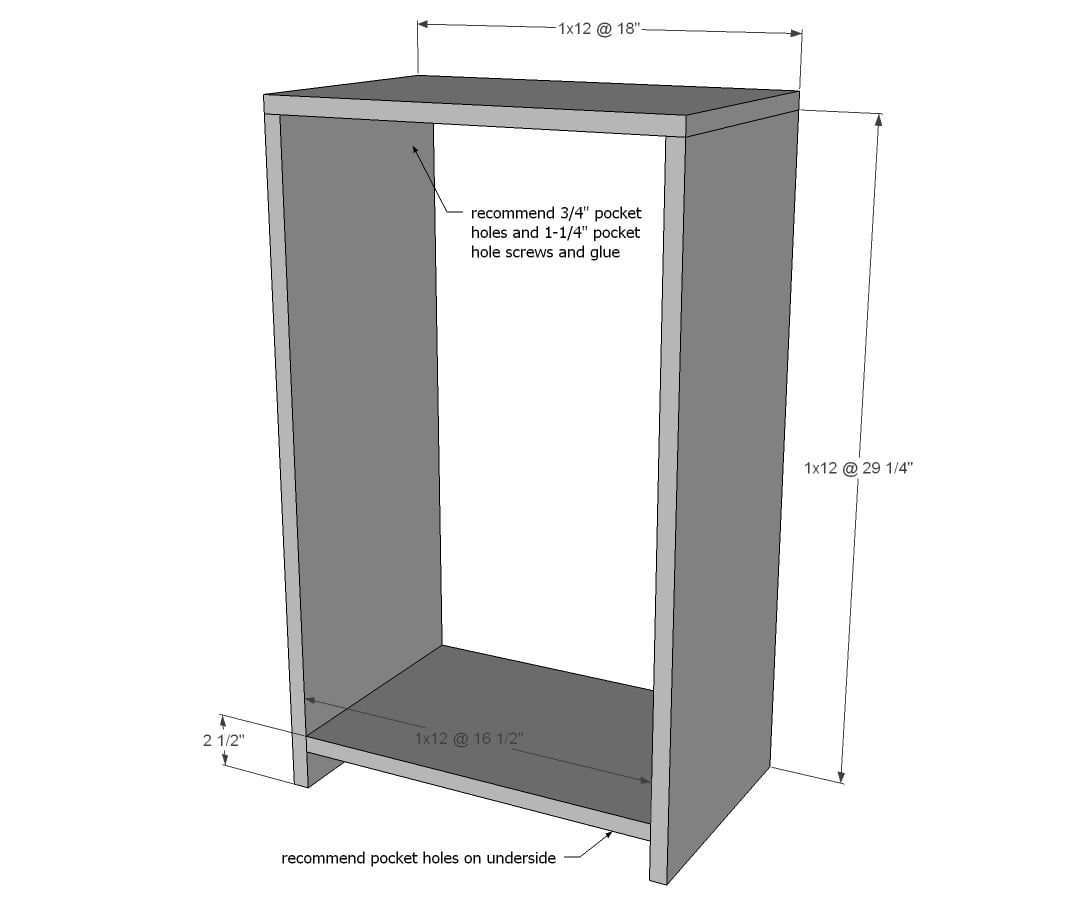
Use either a Kreg Jig or 2" screws or brad nails to build your box as shown above. The bottom shelf is 2 1/2" from the bottom, at the top. So leave 1 3/4" gap underneath the bottom shelf. Check for square.
Step 2
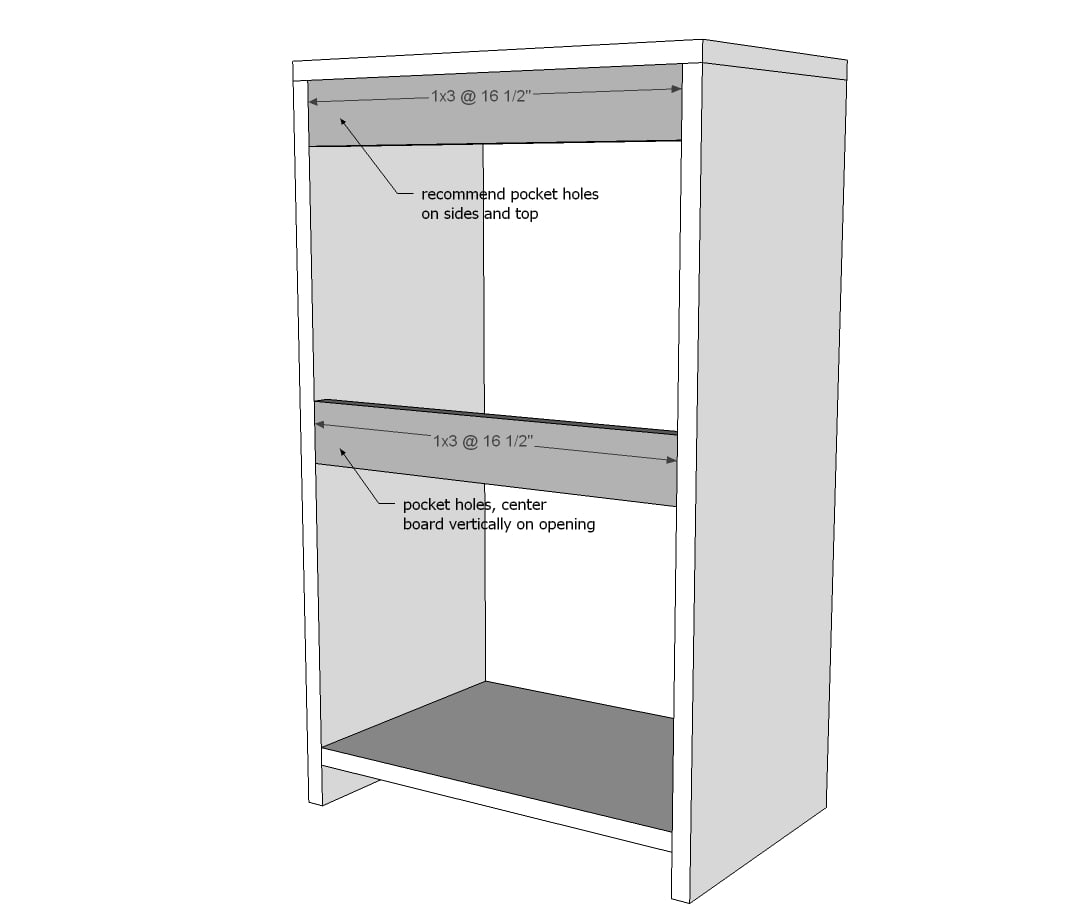
Once your box is done, attach back supports to keep the project square.
NOTE: If you would like to access your trash from the back to remove, hold off on placing the center back support until after you install the tilt out door.
Step 3
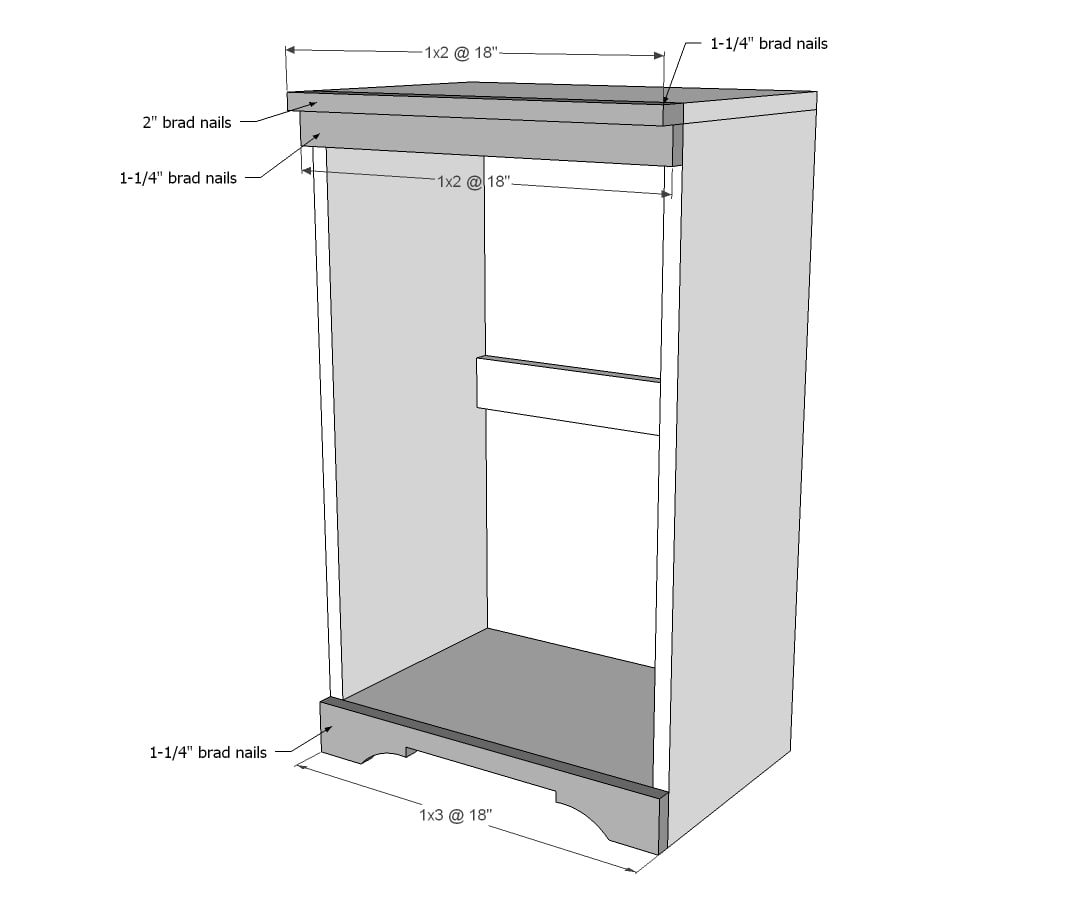
Attach front trim with brad nails to the front of the cabinet.
Step 4
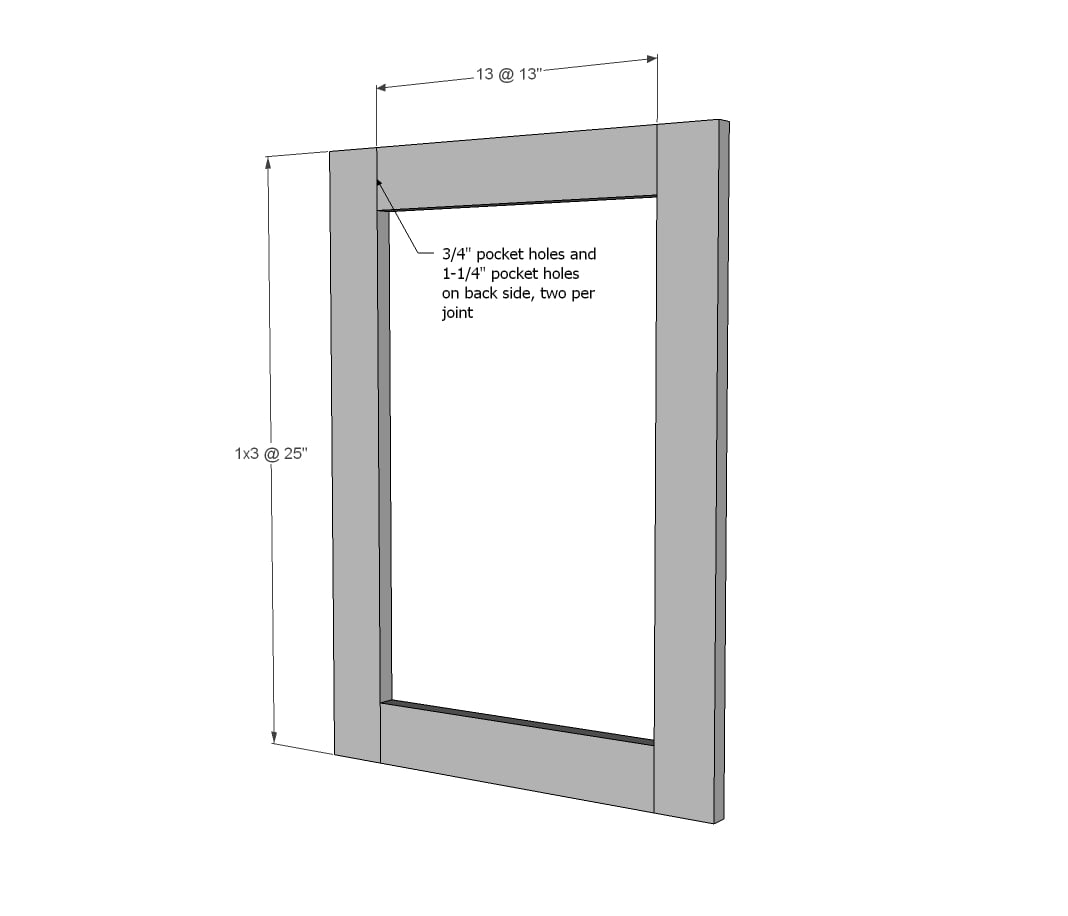
Build the door frame with 1x3s using pocket holes.
Step 5
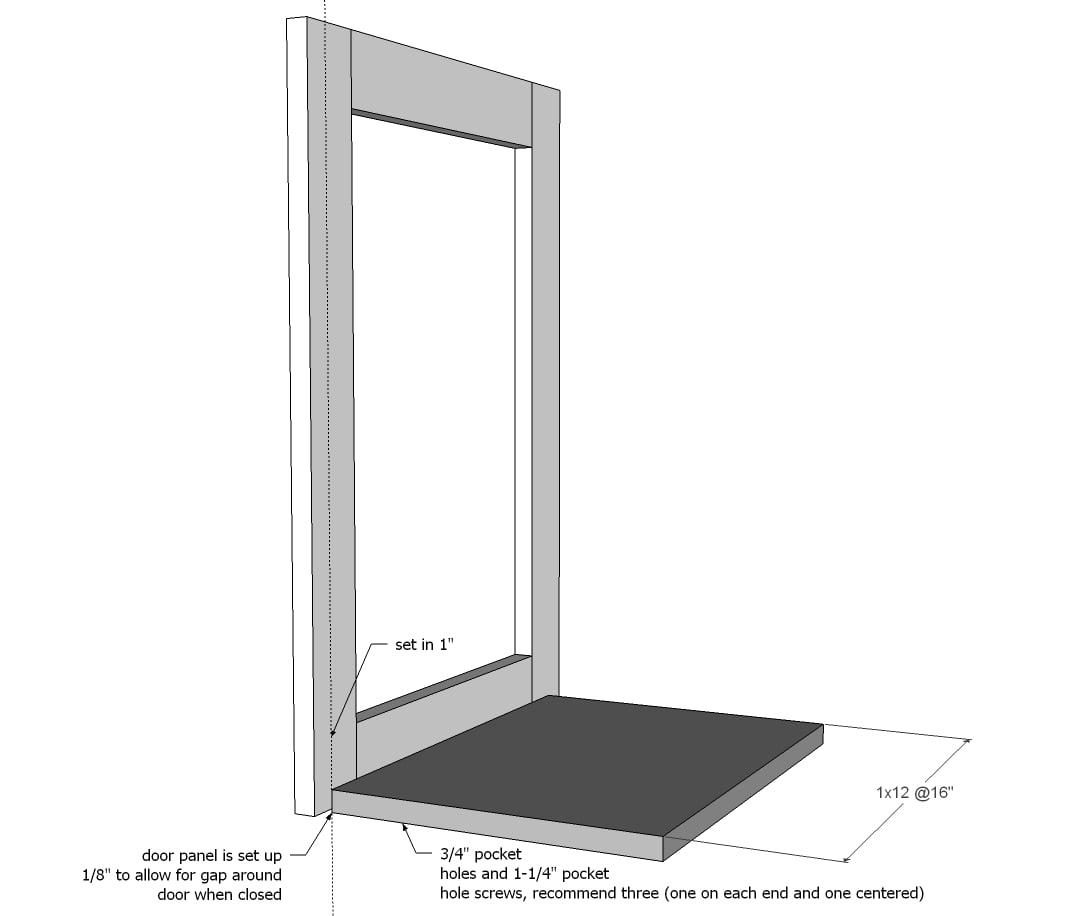
Drill pocket holes along bottom edge of 1x12 bottom piece.
Attach to the frame, inset 1" from edges, but held low 1/8" on bottom edge, with 1-1/4" pocket hole screws.
Step 6
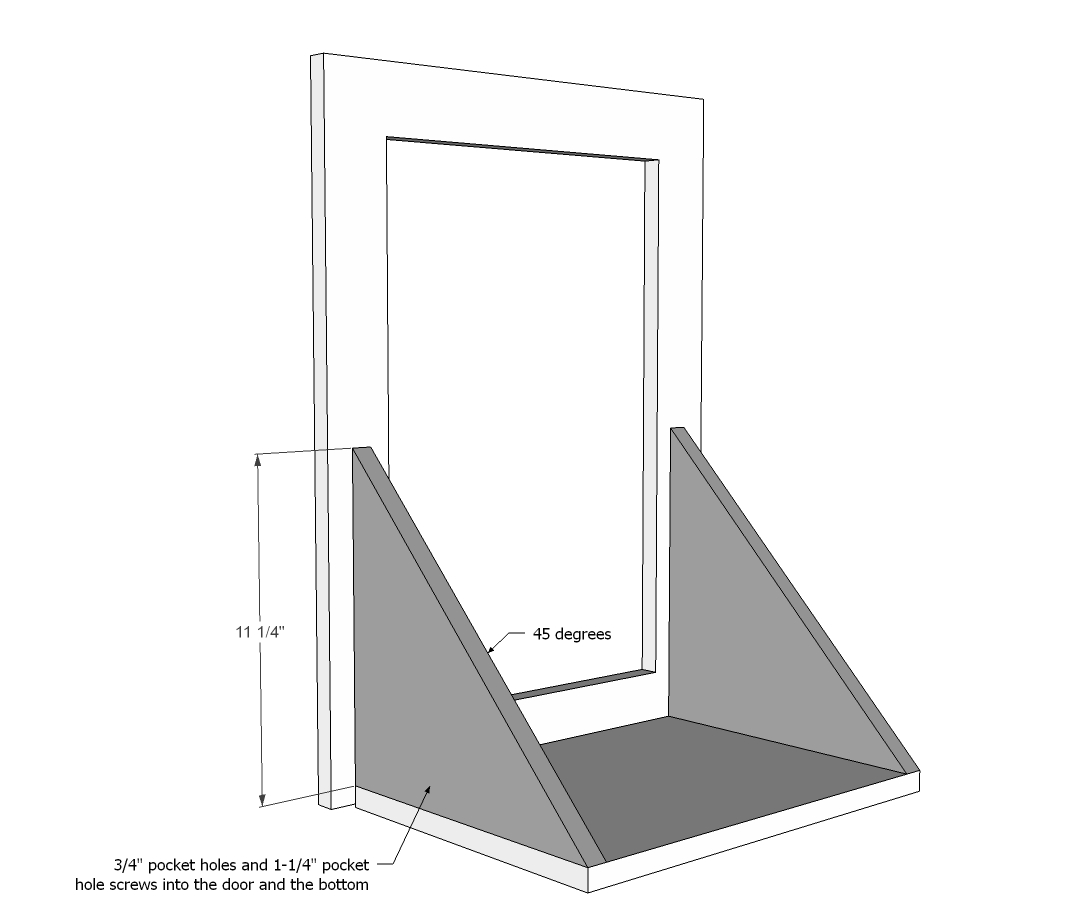
Cut the sides at a 45 degree angle.
Drill two pocket holes on sides.
Attach to door panel and to the bottom.
Step 7

Cut the 1/4" plywood panel to fit inside the door panel. Attach with 3/4" brad nails and glue.
Step 8
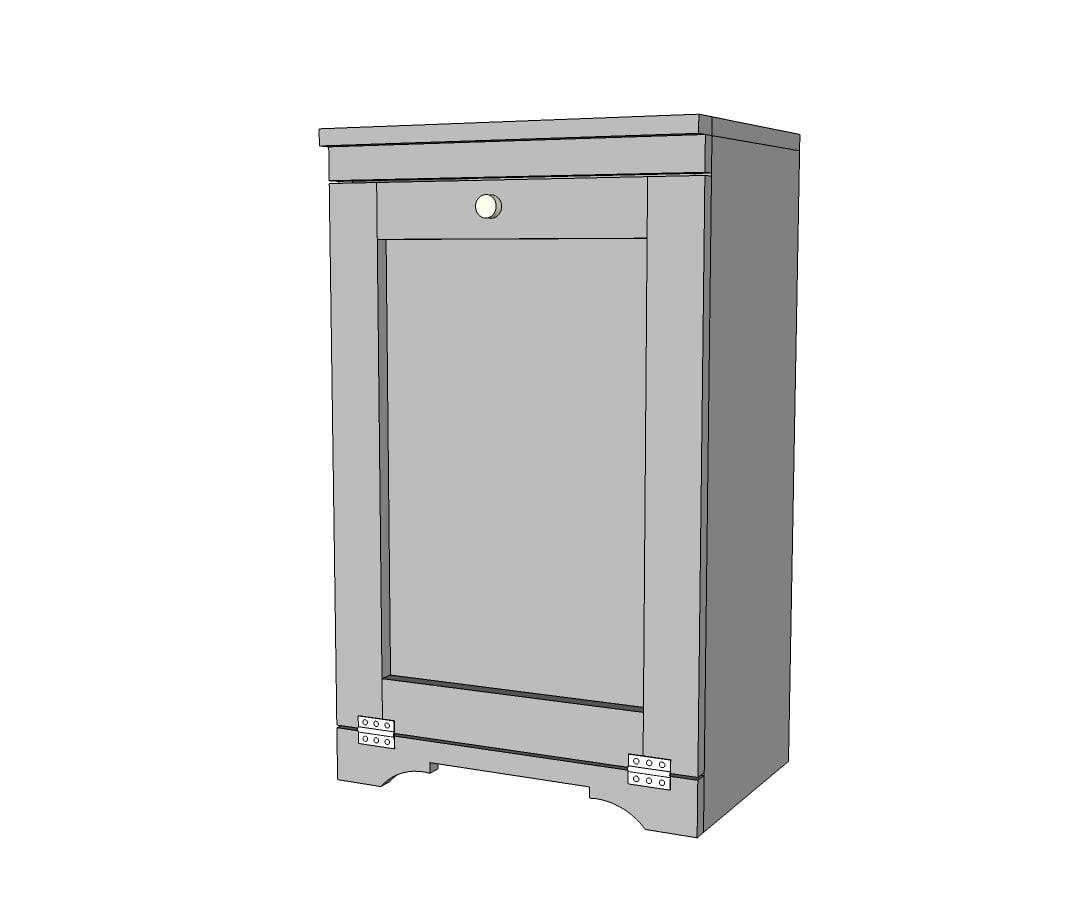
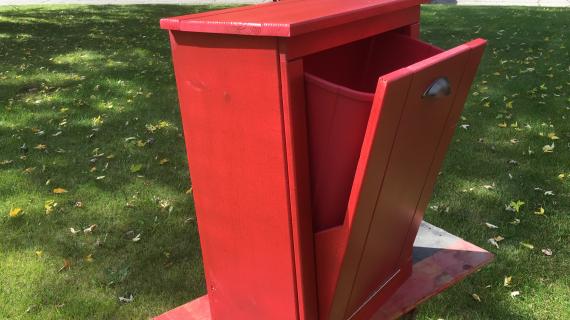
Hinge the door to the cabinet. For our tilt out trash cabinet/recycle center, we didn't even have to worry about a magnetic catch - the weight of the tilt out base keeps everything closed nicely.
However, you may need to install either hardware or a chain to keep the tilt out door from opening all the way and bruising your toes.


Comments
yotagimlet
Sat, 03/26/2016 - 07:44
Target
Funny thing is, I built before measuring the garbage can that I already had and it fit like a glove. It is a Hefty brand, base style S.
seasprite1976
Fri, 02/26/2016 - 16:25
Help!
So I built this cabinet and now I can't find a can that will fit it. Any suggestions on where to shop for one? I have tried Menards, Wal-Mart, Ace, and my local Hardware Hank.
MrOak
Tue, 05/03/2016 - 13:14
Wood Tilt Out Trash or Recycling Cabinet & Great Site
Ana,
This is a great plan. It is just what I wanted. We have a reasonably new (2 years ) home that borders the Merrimack river in NH. My wife has a bunch of bird houses and bird feeders and they are growing daily. I needed a place to store the bulk bird seed and other bird feeding stuff that I currently have in two plastic bins. This will fit the bill perfectly. I plan to make it a two unit wide cabinet. I am thinking about putting two draws above the doors for misc. small stuff. It will sit in the corner of our sunroom next to the door that goes out to the deck. I love your plans, they are inspiring me to build this and modify it to make it work for us.
On a side note in looking around your site I see a lot of great ideas. I love what you have done with your creations and how well your website is operating. Thank you for fixing my problems with creating an account. Although I resolved my problem after I sent the email to you it is nice that you took the time to help.
Jim
P.S. - The bottom border of this comment box has what I assume is a typo - "body p" and below that Disable rich text.
In reply to Wood Tilt Out Trash or Recycling Cabinet & Great Site by MrOak
MrOak
Fri, 07/15/2016 - 09:52
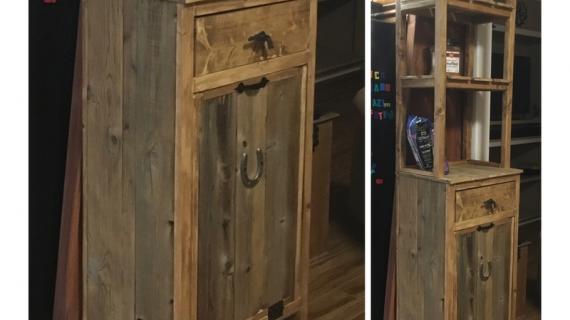
My Tilt Out Storage Unit
Ana, Well I finished my version of the Tilt Out Storage Cabinet:
I built this storage cabinet the end of June beginning of July 2016.
We needed place to store bird food and other bird related stuff. We also needed to store dog items related to the door of the deck which was the dogs exit to the outdoors.
This cabinet was going in the sunroom so it needed to pass my wife’s review as being worthy. It also needed to fit behind the door to the deck which limited the size of the cabinet. I was inspired by cabinets made by Ana White and others on Pinterest. Every time I build something I learn more about using my tools.
This cabinet is the first time I have used a Kreg jig to fasten the pieces together. Thanks Ana for pointing out Kreg to me.
I am happy with the result but I am having problems with the drawers sticking because I painted the slides. Maybe i need to sand the paint off or somehow lubricate the slides. The slides are just wooden rails with slots on the side of the draws for them to slide through.
Here is a link to pictures of my storage cabinet: http://okvist.info/TiltOutStorageCabinet/
Jim
csgtdw
Mon, 07/03/2017 - 03:51
Looking for
Howdy everyone! I'm looking to make this tilt-out. Well actually I will be making it a feature in my built in closet to be used as tilt out hampers. I agree with the other member that there should be some air circulation for laundry. What I'd like to do is use a cut out instead of a drawer pull but I'd like it to use a furniture grommet. To make it more complicated I would like to use a bronze furniture grommet so all the hardware in my home is coordinated. Any suggestions on where I might be able to find a 2-3 inch bronce gromet?
Creative Craft
Thu, 12/14/2017 - 08:52
Mine Looks Good But Plans Are Inconsistent
Now that I’ve built this cabinet, I want to share a few comments about these plans. In hopes that someone else will read them ahead of their build and not be surprised by these instructions. There are unfortunately several inconsistencies with these instructions, beginning with the shopping list.
It is not until you have cut and assembled do you then realize Ana did not include the material for building the door within the shopping list. So when you are pricing out your material, be sure to include additional cost for more material for the door, since you can’t make it from the exact scrap wood that is left over.
Another issue I found began with the first reference image. As much as I read the directions over before buying materials, before making a single cut, it took me that long to realize the diagram shows pocketholes on the wrong side of the top board. If you were to create those holes, they wouldn’t be drilling into anything, since the side legs are below where the holes are. To remedy that I’ve add my pocket holes to the legs instead, cut my own plugs to hide them.
Make sure you know what step you are on, as reading along can get confusing. Since in Step 5 she mistakenly refers to the front as the back. So you want to make sure you take it slow and create as the diagram shows, not as the words entirely say. After the first step the directions were pretty great with exclusion of the typo on Step 5. Step 7 leaves something to be desired as it is not specified the best way to make these diagonally cut. If you’ve ever done any simple woodworking before then you can get yourself to this spot with a table saw and chop saw, but how was I to cut a 12” board diagonally with those? I didn’t trust the circular saw to create a straight enough line.
Overall, for free plans, they are very good instructions. All the measurements fit really well together. I was surprised how much 1x3 stock I had left over once I completed the cabinet (excluded of the door). To make the cabinet door that is pictured in the diagrams, you will need to buy extra material because there is not enough 1x2 or 1x3 board left to frame your left over 1x12. I hope that helps everyone to realize before they actually purchase materials. Happy Building!
AtRustyNailbyKrista
Sun, 05/05/2019 - 21:18
New technique video?
hello! I am just wondering where I find your video on how to make the door to this tilt garbage cabinet you said you would post it in a few day?
kvelarde
Sun, 04/19/2020 - 14:46
newbie 😩
Did anyone have to use the support lid hinge?