
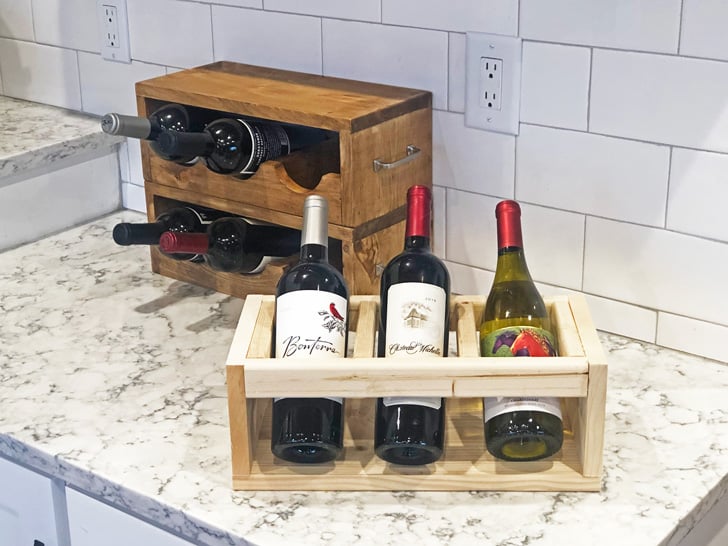

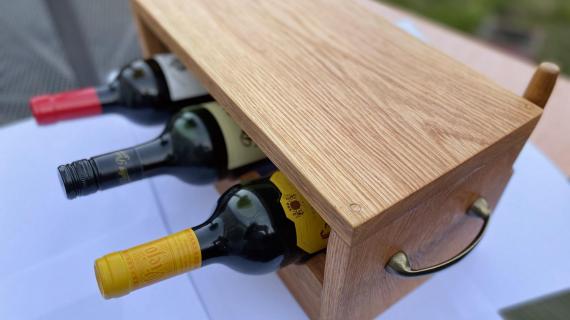
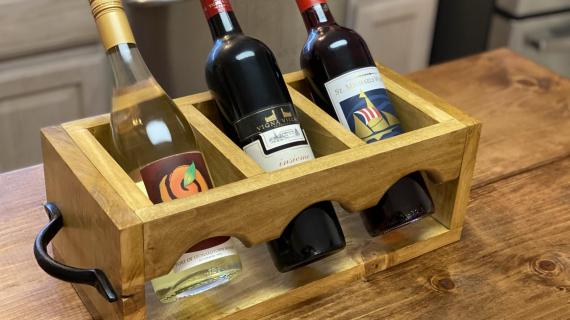
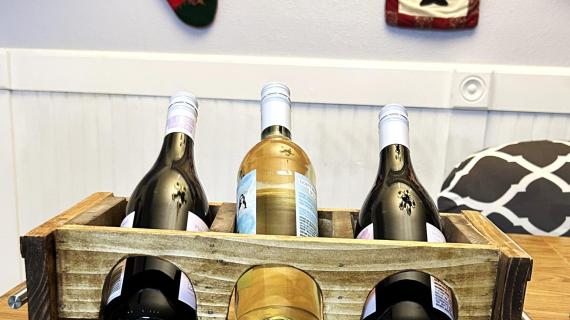
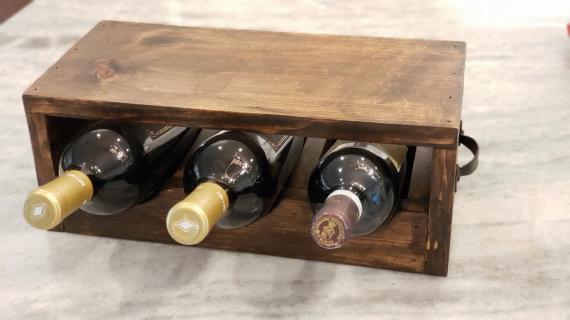
This little wood wine holder stacks, stores, and you can use the top to serve! It works as a gift box too for the wine lover. Quick and easy DIY project that you can build with off the shelf pine boards and nail together. Step by step plans from Ana-White.com
Here's a quick, easy handmade gift for under $10!
Are you searching for the perfect hostess gift? What if a wine caddy could be useful for more than just transporting the wine?
Using up scrap wood, I built this wood wine holder that does it all! It stacks, it stores, it even serves! We love it as a easy wood gift project.

Wood Wine Holder Features
- Works as a wine crate for easy transporting
- Great handmade gift for the wine lover
- Flips over to become a wine rack with useable space on top
- Can be stacked to add more wine storage
How to Build the Wood Wine Holder - Video Tutorial
This project is so quick and easy to build! We go through all the steps in the project plan video here-
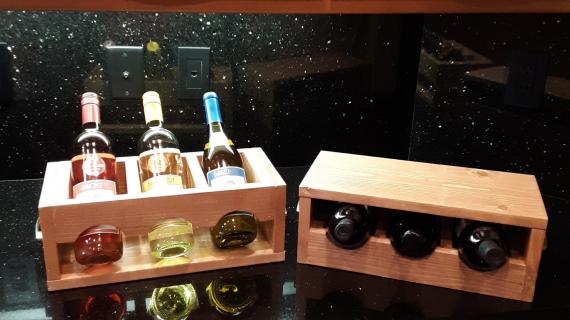
No Jigsawing Version (Even Quicker and Easier!)
If cutting the curves out with a jigsaw intimidates you, don't worry! You can skip it all together and just use 1x2s instead of the 1x3s.

It also still stacks just like the 1x3 version (see unfinished in photos)
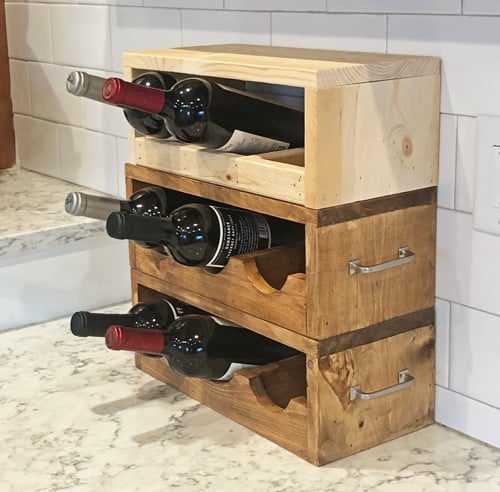
I do prefer the 1x3 version with the wine cutouts because it looks more custom and the wine is more secure in the project, but for a quick gift, the 1x2 version is just fine.
Wood Wine Holder Plans
The plans for the wood wine holder plans follow.
Preparation
- 25 inches (a little more than 2 feet) of 1x8 board (can be in smaller pieces if using up scrap wood)
- 50 inches (a little more than 4 feet) of 1x3 board (also can be smaller piece if using up scrap wood)*
- 1 - 1/4" brad nails
- wood glue
- scroll blade for jigsaw recommended
*Can substitute for 1x2s and not cut out the arches for the wine bottles
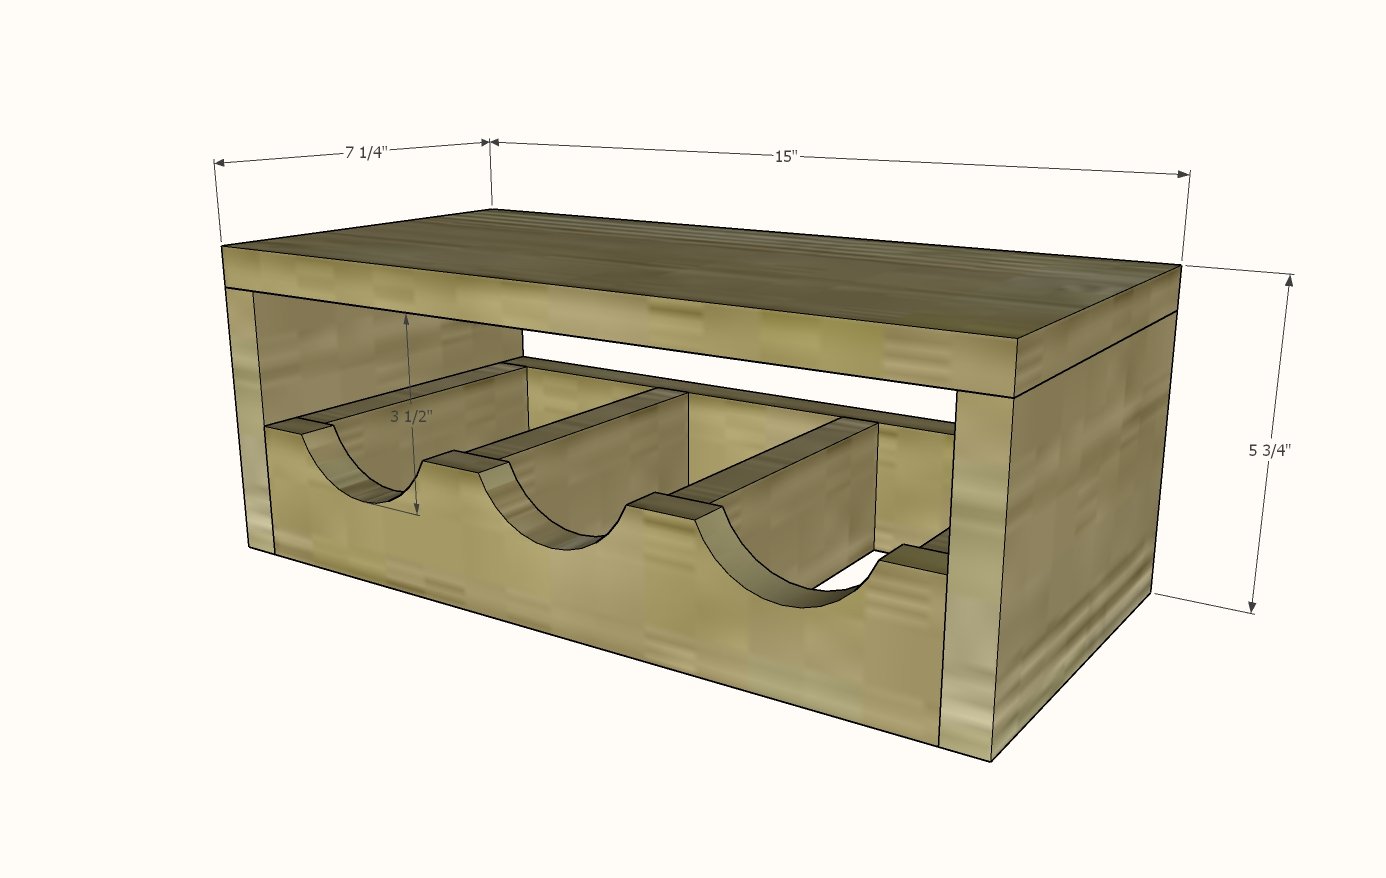
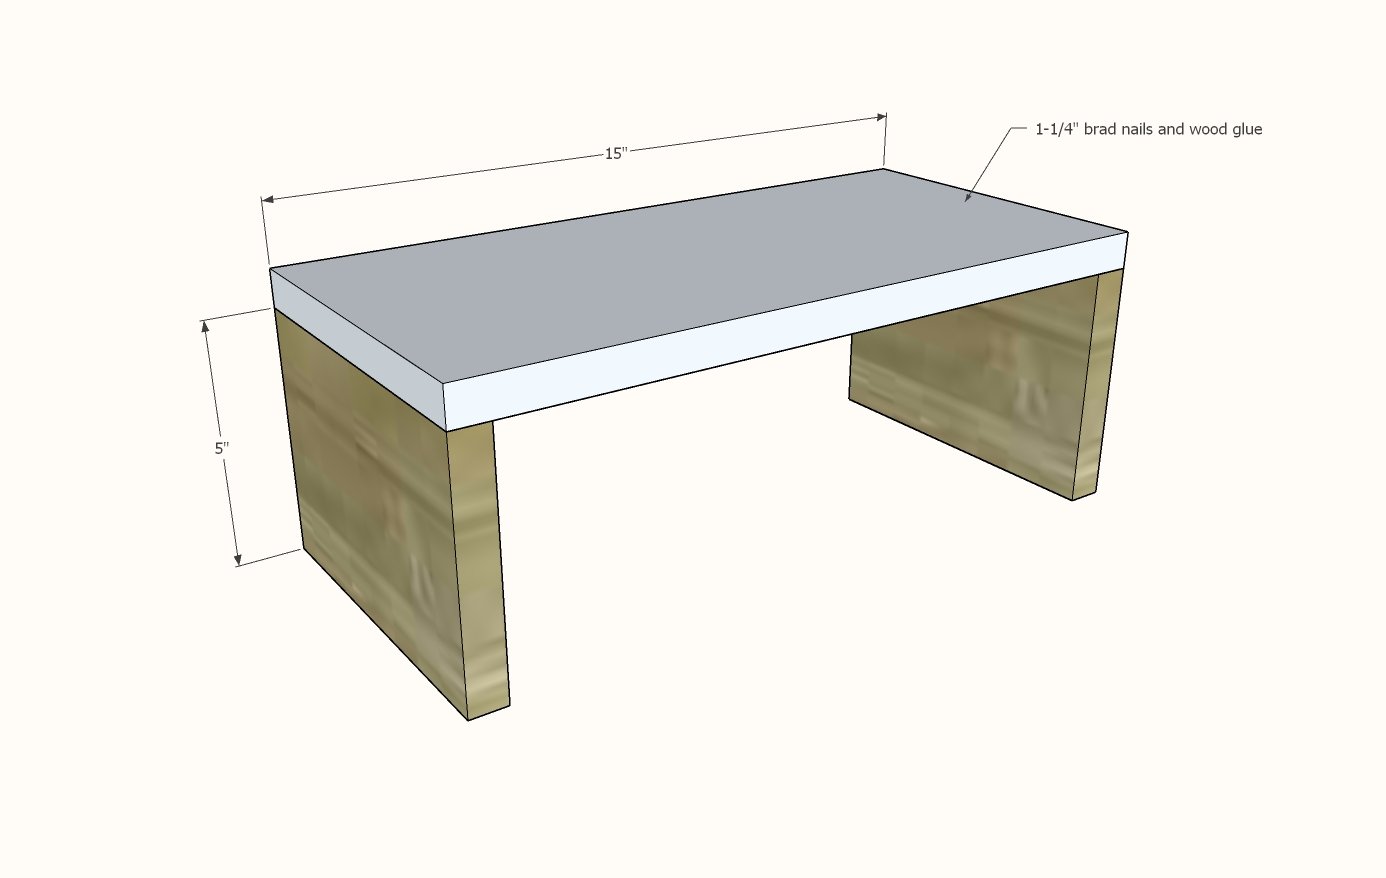
- 2 - 1x8 @ 5"
- 1 - 1x8 @ 15"
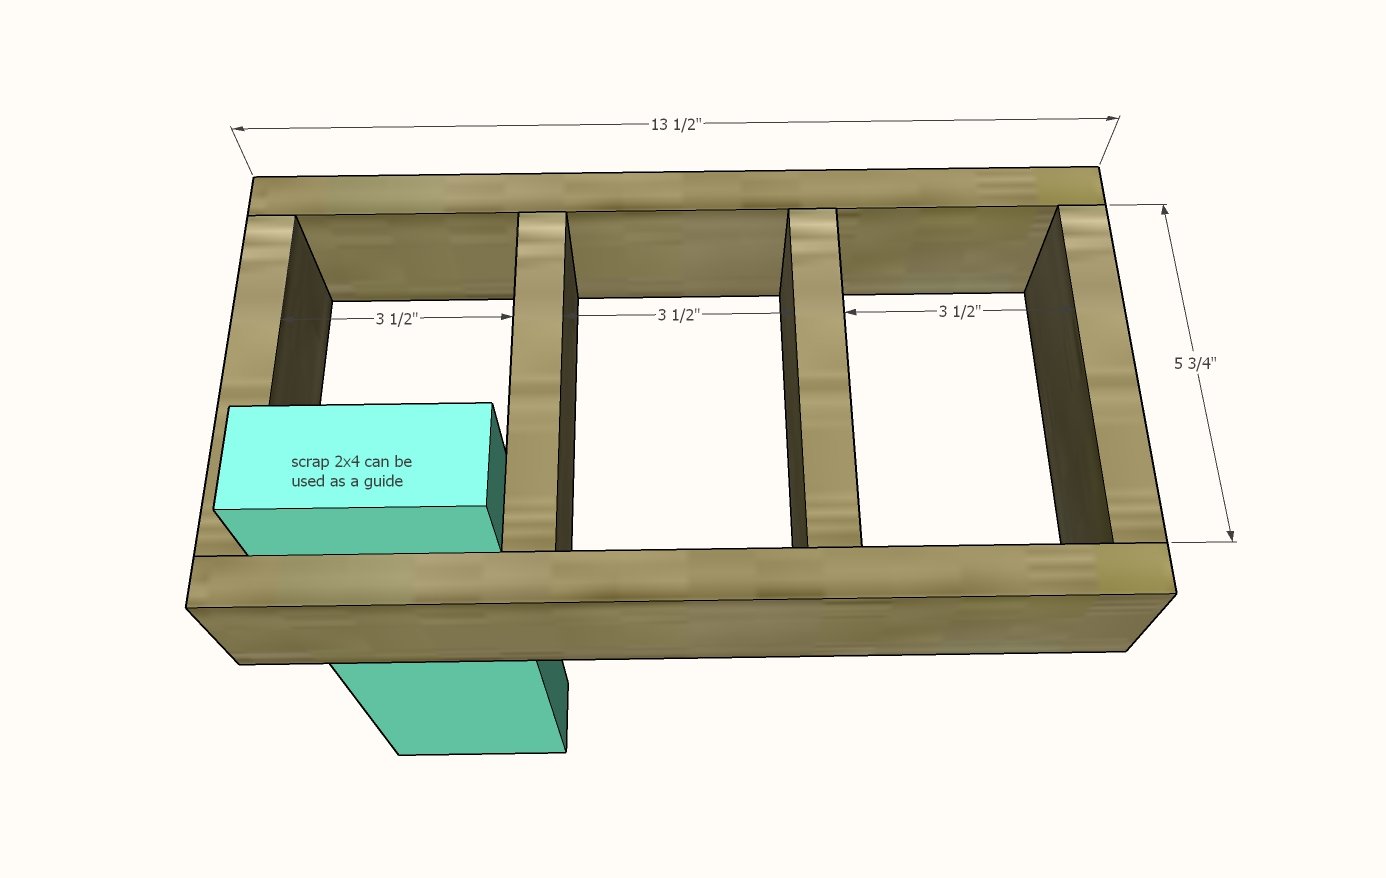
- 2 - 1x3 @ 13-1/2"
- 4 - 1x3 @ 5-3/4"
Cut boards with a compound miter saw (preferred) or a circular saw.


NOTE: This wood wine holder should not be moved when in the stacking mode (open bottom) as there is a possibility the wine could fall out the bottom of the wine holder. If you wish to transport this way, make sure you add a bottom on to the wine holder.
For permanent stacking or stacking more than two high, we recommend screwing or nailing the wine holders together for added security.
Instructions
Step 1
Attach the 1x3 (or 1x2 if using) boards together with 1-1/4" brad nails and wood glue.
Step 2

Mark the front 1x3 with a pencil. Use a round object to trace out the curves.
Clamp the lower 1x3 to a sturdy surface.
Cut out with a jigsaw.
Sand rough edges smooth.
NOTE: If using 1x2s skip this step.
Step 3
Attach the sides to the top with 1-1/4" brad nails and wood glue.
Make sure this part sets level on a level surface.
Step 4
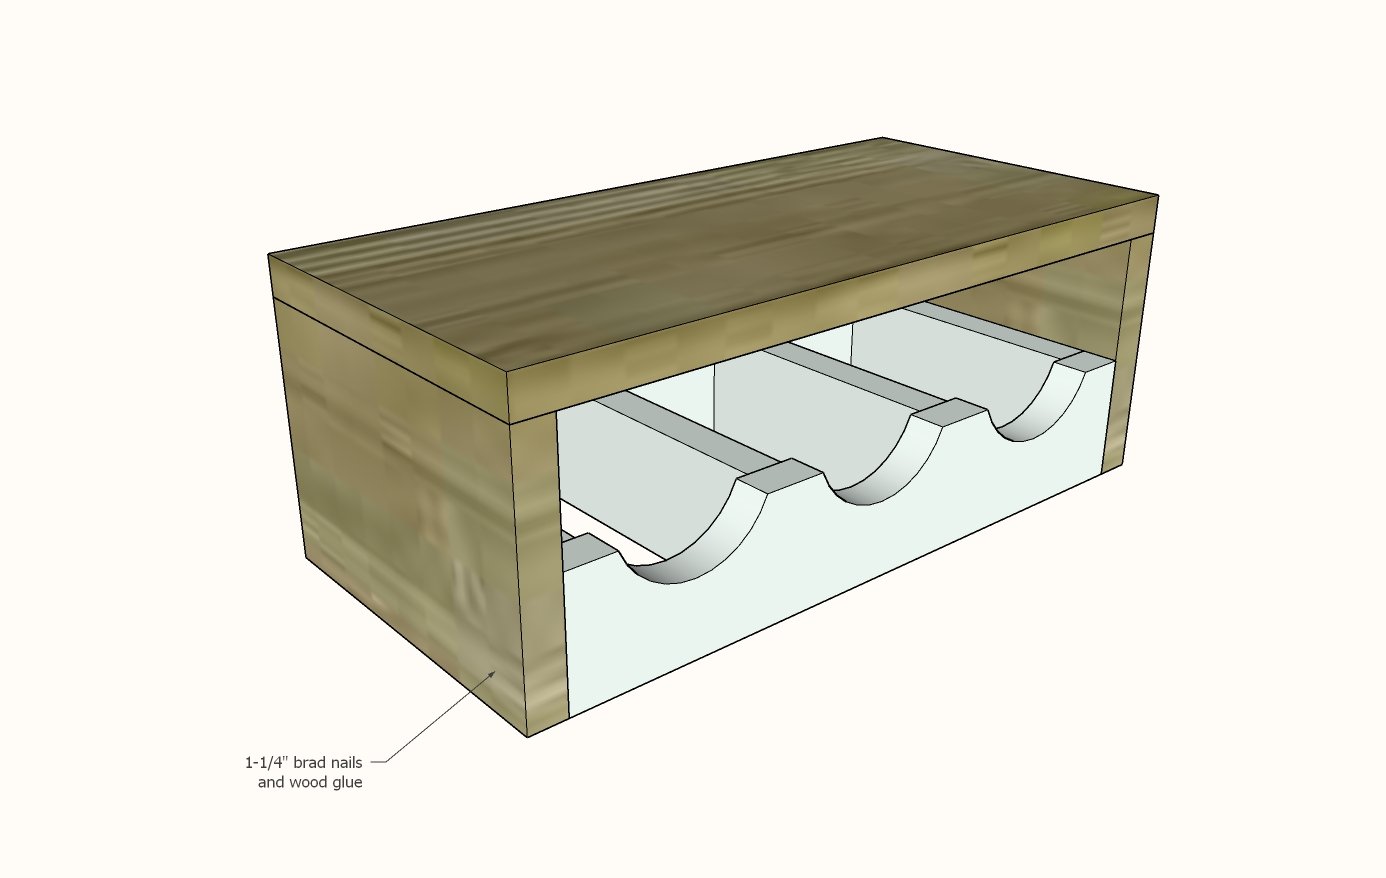
Fit the wine storage into the outer frame and make sure the project sits level on a level surface.
Attach with glue and 1-1/4" brad nails.
You can add handles at this step.
For the top to serve food off of, also add a coat of varnish.
If you are planning on cutting on the top, do not stain - just use butcher block or other food grade oil to seal.


Comments
robertj996
Sun, 12/08/2019 - 17:43
How do you download…
How do you download printable plans?
NOLAbuilder
Tue, 12/10/2019 - 07:26
Joinery
Ana what do you recommend if I don’t have a brad nailed? I plan to treat the wood with butcher block oil (no stain or paint).
SilentG
Mon, 08/31/2020 - 14:57
Can't find download button
How do you download this plan?
CRISTINA@PONTES
Wed, 02/24/2021 - 08:28
Hi! I´m from Portugal can…
Hi! I´m from Portugal can you convert the measure into a centimeter or can you tell me where to convert? Thanks my dad will love
thanks in advance