Community Brag Posts

Bigger, Stronger, Kitchen Floating Shelves
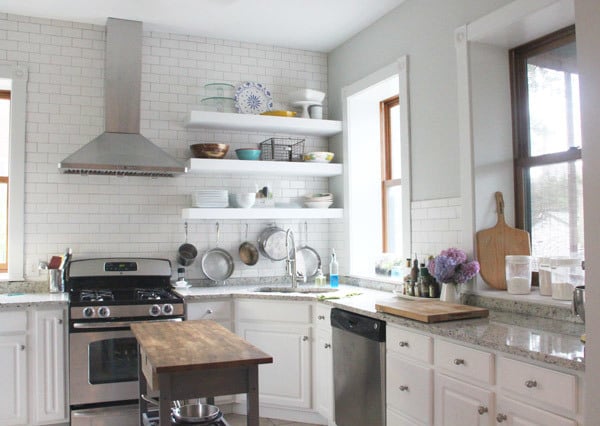
When we recently bought our 150+ year old house, we were pretty happy with just about everything (not stopping us from coming up with projects!) except the kitchen. This kitchen hadn't been updated in about 15 years, had dark brown walls, boring square white tiles with white grout, and TONS of cabinets. Everywhere. I felt like the walls were closing in!

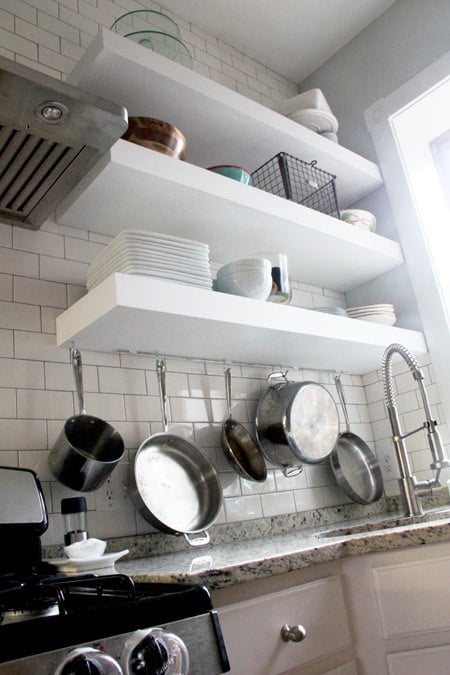
So before we ever signed a piece of paper I had a vision of open shelving. Wide, white floating shelves to put our every day items at arms reach and display the few items we rarely use but think are beautiful.

I loved Ana's plans, but I needed these shelves to hold 12 dinner plates, 12 bowls, 12 salad plates, 4 pasta bowls, and...well, right there that about 40 pounds of stuff. And the basic plans just didn't seem heavy-duty enough.

Enter our contractor, John, who I asked for help because, while they were my vision, they were his handy-work. My husband and I didn’t even attempt to build them on our own. John is a perfectionist and we knew he’d make this plan work…perfectly.

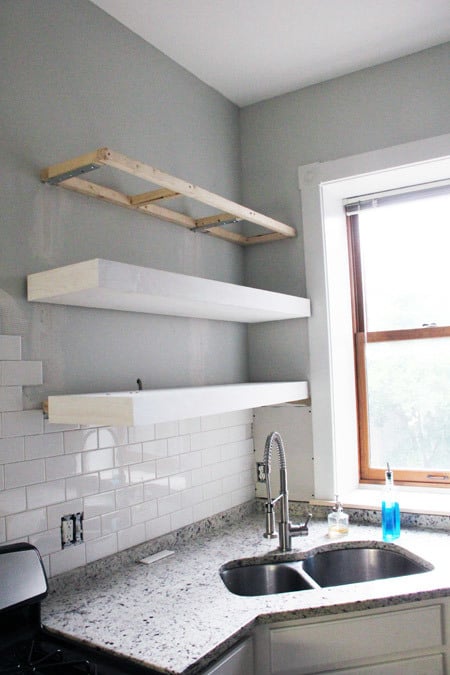
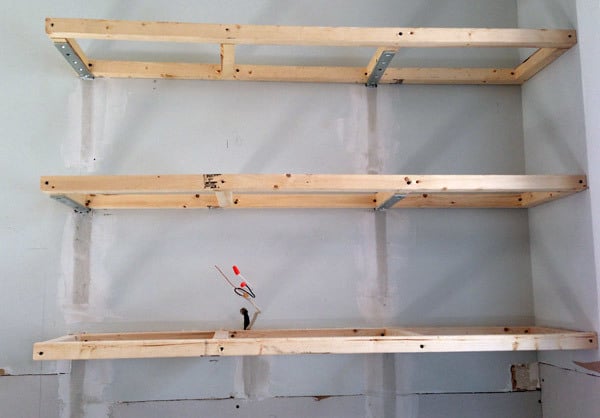
As usual, this was no sweat for John. To build the frames he used 2 x 2′s and secured them with 10 x 1 1/4″ angle brackets. During assembly, John made sure to position the center supports to match the wall studs in front of which the frame would hang. Once assembled, he removed some dry wall and attached the brackets directly to the studs.

We could store baby elephants on these shelfs, they wouldn’t budge.

Since I knew what needed to be stored on that first shelf (our every day items), we used the measurements to equally distance the three shelves (not including the first shelf of course—it needed more space above the counter top). Then we sealed up the dry wall. Another help with support was butting the shelves right up to the corner, putting another screw in another stud.

We moved the lighting electric up for new under cabinet lighting—so easy pre-tiling.

For the actual shelves—I like to think of them as “sleeves”—John used 3/4″ sanded plywood for the tops and bottoms of each shelf, then 1 x 6 clear pine ripped down to desired thickness for the fronts and one side (the other side is against the wall, so was left open). The primed sleeves spent a few days on the screened in porch while I tiled around the frames, they were pretty heavy and very solid.

I’ve made an attempt to lay out the measurements involving our floating shelf project. These are to scale and give a good idea of how our plans differed from Ana’s.

We LOVE our shelves and get so so many compliments. The seemingly small and simple changes (tile, shelves, new window trim, paint, and soon flooring) made a HUGE impact and not that huge of a cost. And we don't miss the upper cabinets at all.

Thanks for the head-start and inspiration Ana!

Built from Plan(s)
Estimated Time Investment
Weekend Project (10-20 Hours)
Finish Used
Primer and white paint
Recommended Skill Level
Advanced

Comments

claydowling

Mon, 10/21/2013 - 08:41

I'm not sure where to get big angle brackets like that, but you might want to try a local lumberyard instead of a home center. Even when they don't have a product they often know who does. The angle brackets embedded in the drywall is a clever idea I never thought of using.

Melissa015

Tue, 11/25/2014 - 20:08

What city was this work done in?  I live in Seattle and I am looking for a contractor.

Ninja Turtle Bed

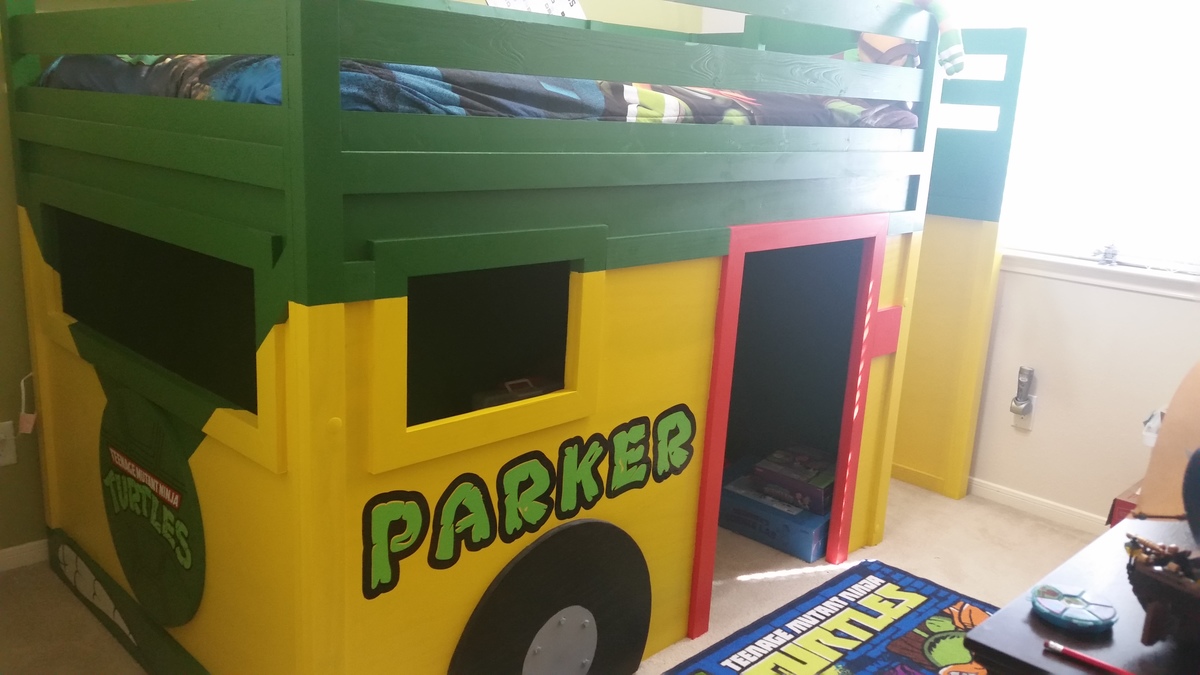
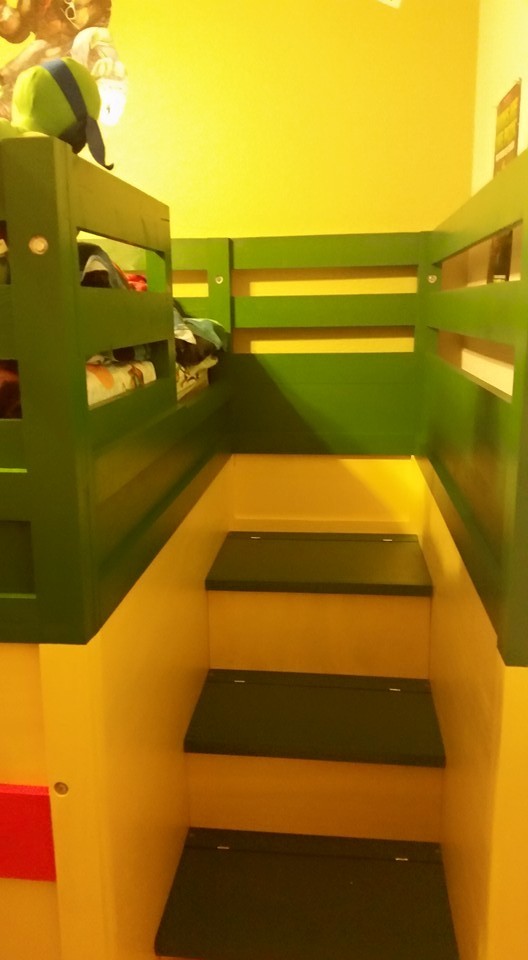
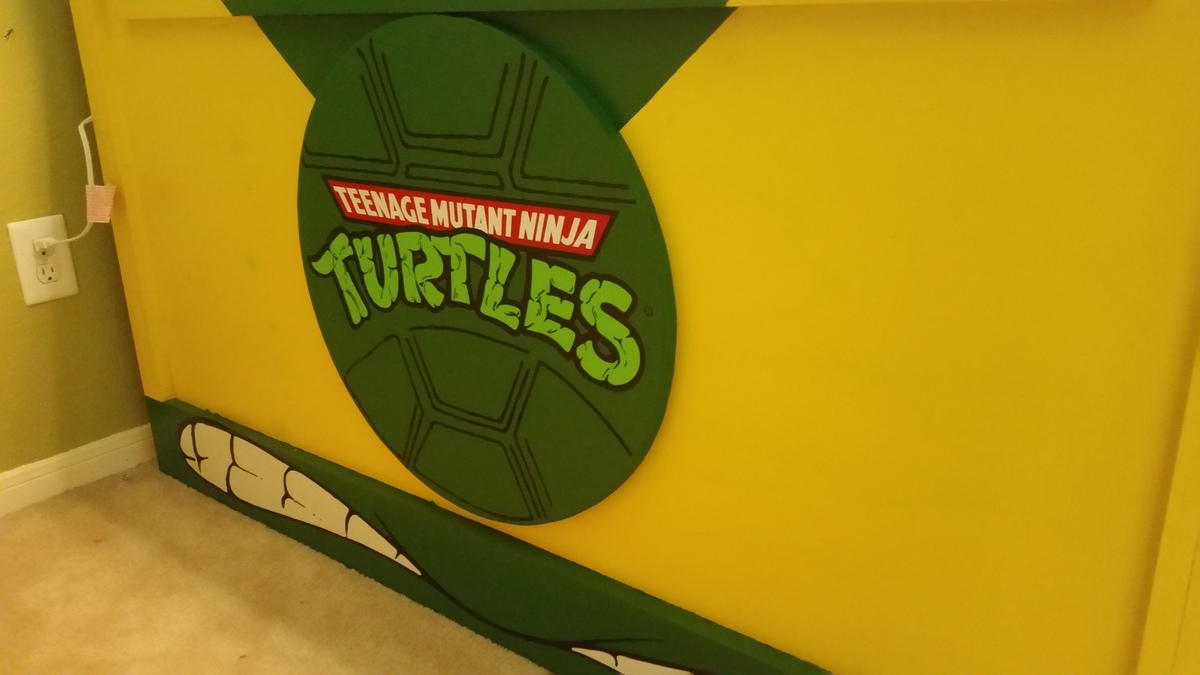
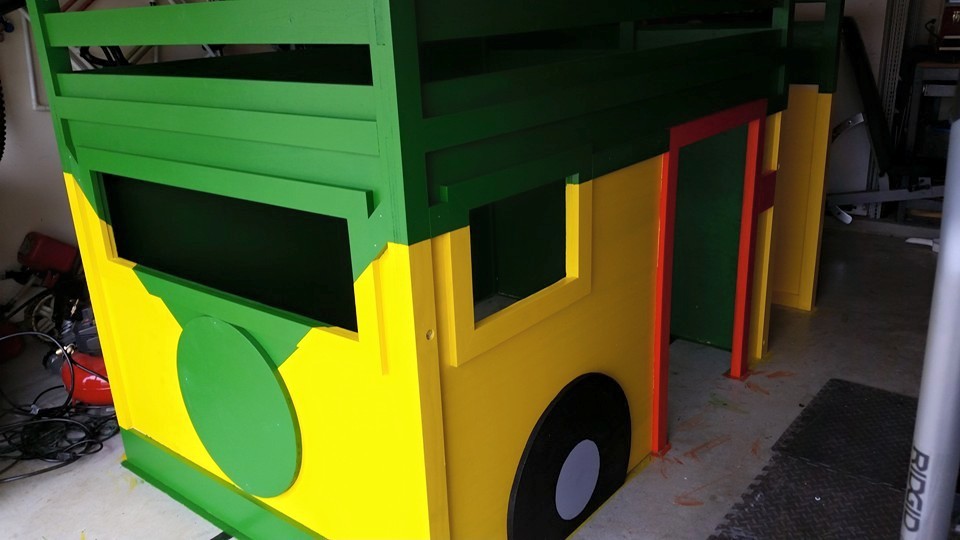
This project was a blast to build!!!! I modified the fire truck loft bed by changing a few of the exterior accent pieces. I also built it to fit a full mattress in stead of the planned twin. I did this by adding additional slates for support. I just recently was able to finish it completely when i found someone who could make the decals. Hope you all enjoy and feel free to ask any questions. Also I used cabnet grade plywood so mine cost was a lot more expensive.

Built from Plan(s)
Estimated Cost
I think total it was around $ 600 -700.
I used all cabinet grade pine and that was the reason for the cost.
Estimated Time Investment
Week Long Project (20 Hours or More)
Finish Used
Bayer paint and primer
Recommended Skill Level
Intermediate

Dog Crate (modified)

Submitted by ransom511 on Thu, 03/08/2012 - 13:52

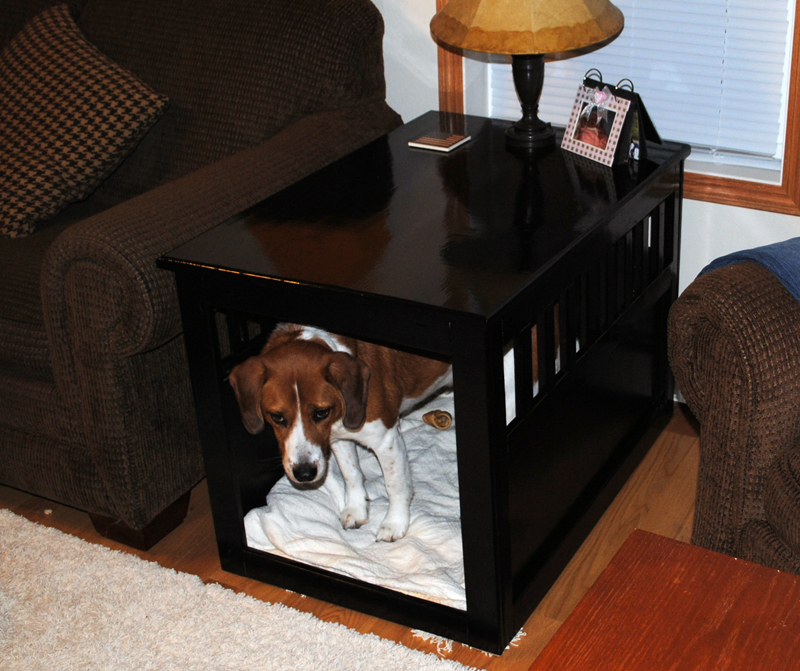
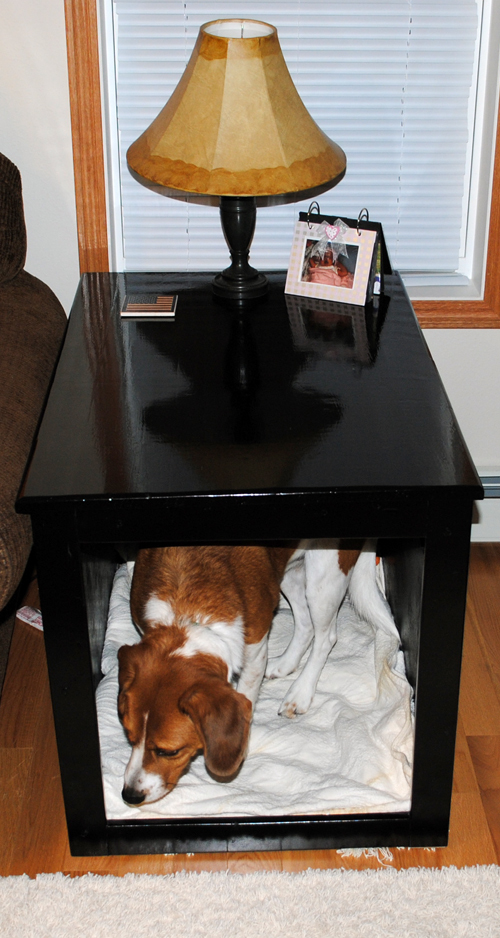
Had to have this one. I made this almost to the exact plans, but shortened it 2" in order to accomodate for the couch height, as well as the height of our furry friend. It is constructed with the 1x3 and 1x2 pine furring strips called for in the original plan. I decided to leave the door off, as my daughter has a tendancy to play with them a little too much. I finished it in a gloss black to match the rest of our furniture. This will be my first of many posts. Love this website!

Built from Plan(s)
Estimated Time Investment
Weekend Project (10-20 Hours)
Finish Used
Black Enamel Gloss, Gloss Clearcoat
Recommended Skill Level
Beginner

Rustic X Dining Table and Bench

Submitted by Anonymous (not verified) on Tue, 03/22/2016 - 08:16

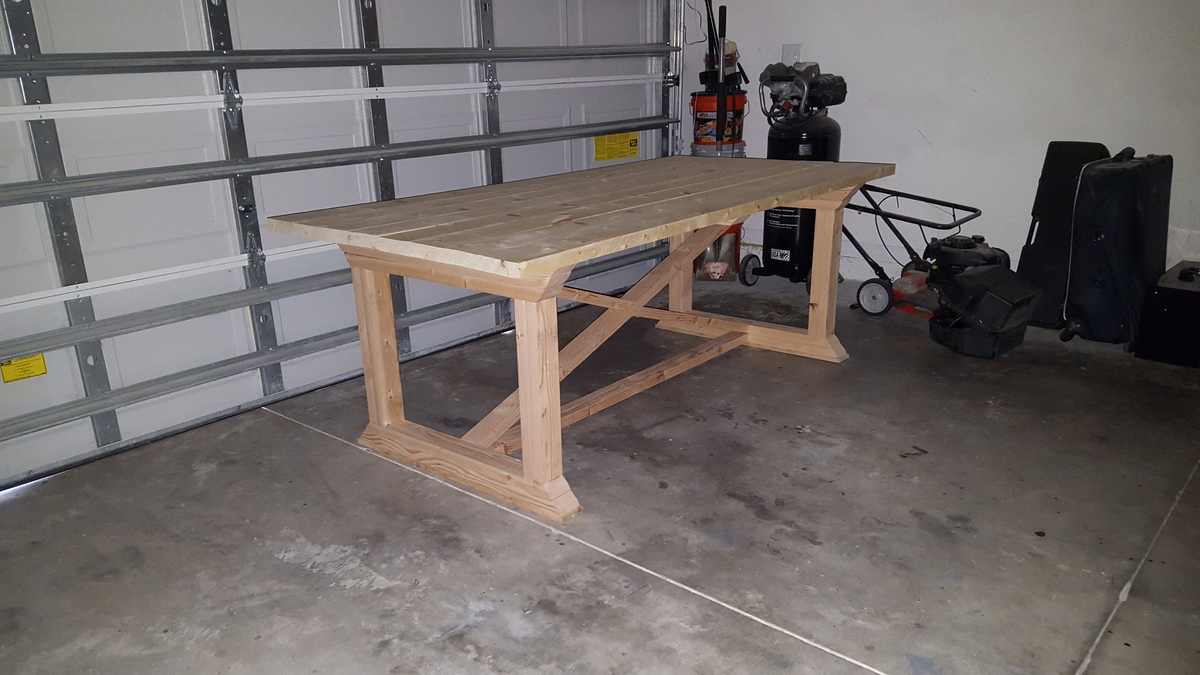
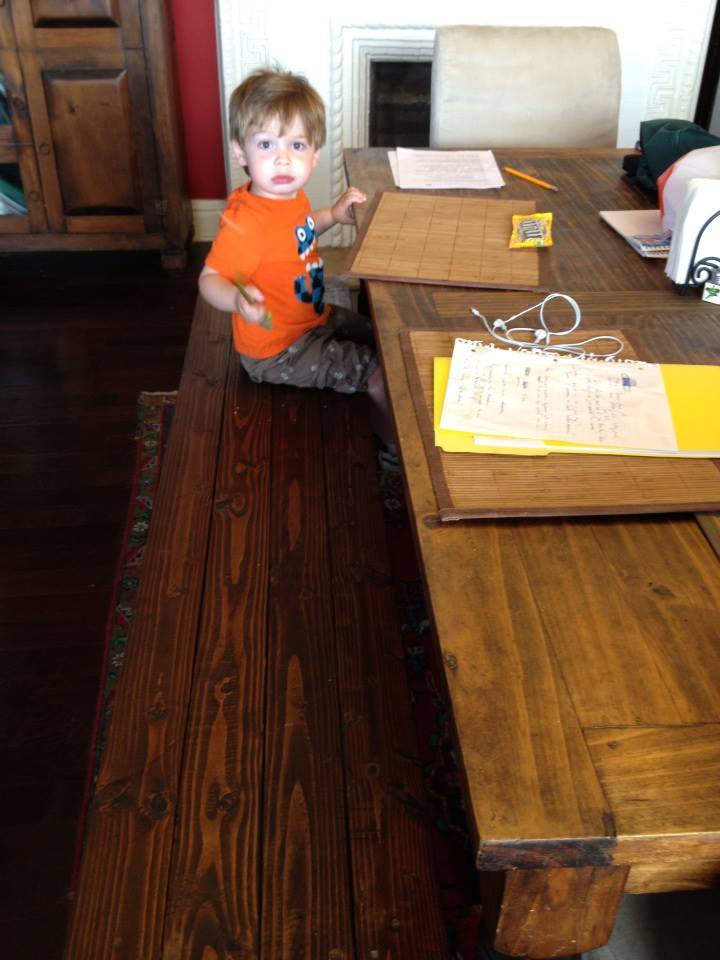
Rekourt dining room table with bench 

Built from Plan(s)
Estimated Cost
80
Estimated Time Investment
Weekend Project (10-20 Hours)
Finish Used
Varathane weathered grey top and white paint
Recommended Skill Level
Intermediate

Outdoor sofa with table and matching chairs!

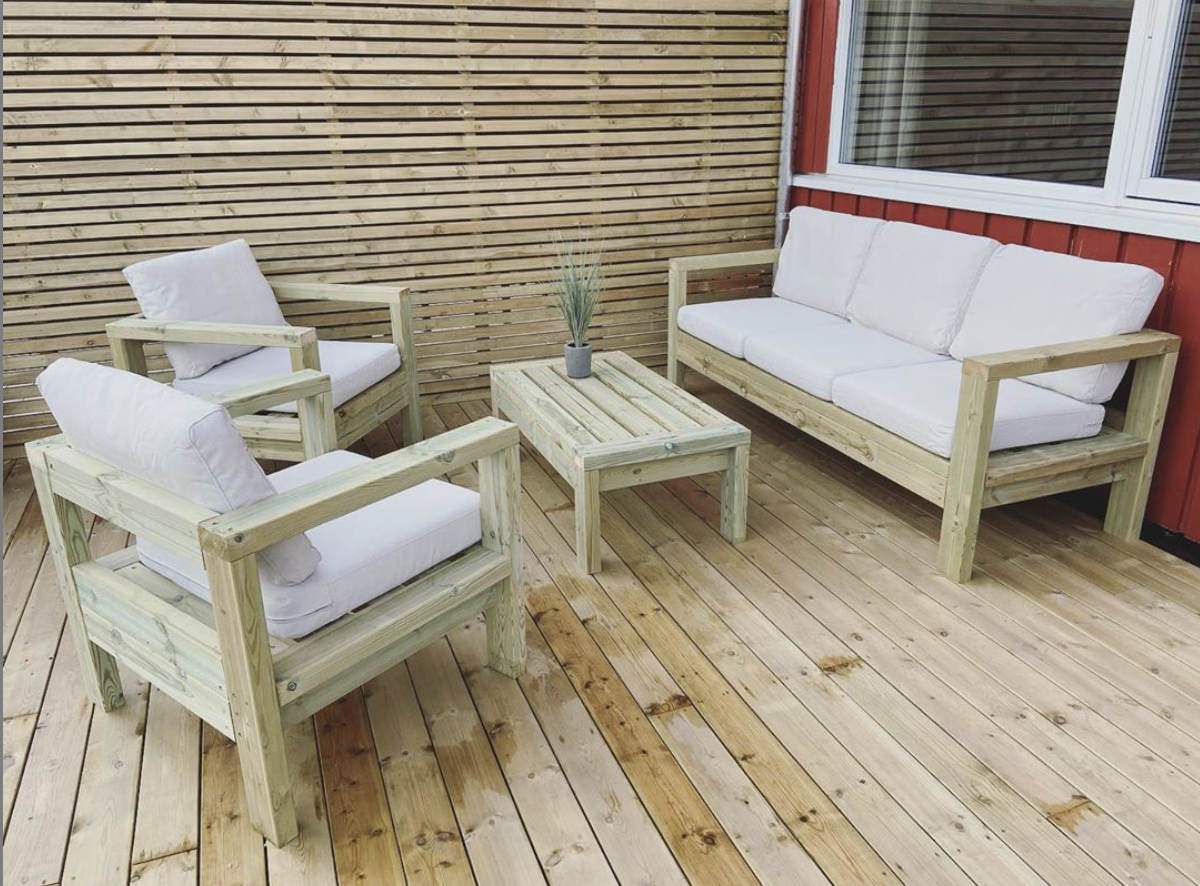
So, we decided after not finding any outdoor furniture, that why not make them! So this is the result, made a few changes to the size and measurements so the pillows from IKEA, would fit perfectly. Now we are waiting for them to be ready to oil/paint. We also made the chairs with the sofa plans, so happy we did that. Thank you so much for the plans! We are so happy! IKEA pillows name are: Sitting pillow - FRÖSÖN/DUVHOLMEN 62cm by 62 cm. Back pillows - FRÖSÖN/DUVHOLMEN 62cm by 44 cm.

Estimated Cost
$240
Estimated Time Investment
Day Project (6-9 Hours)
Recommended Skill Level
Starter Project
Seasonal And Holiday

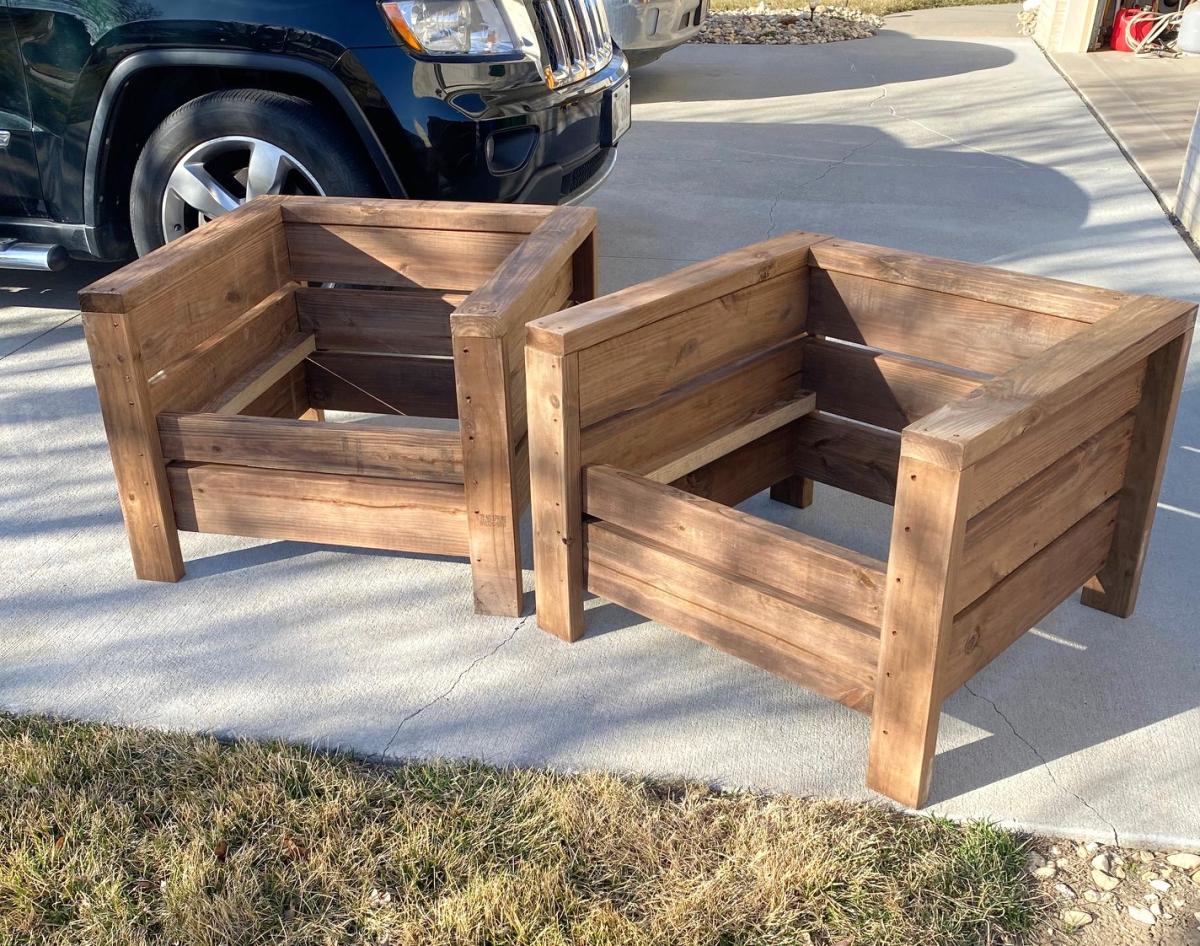
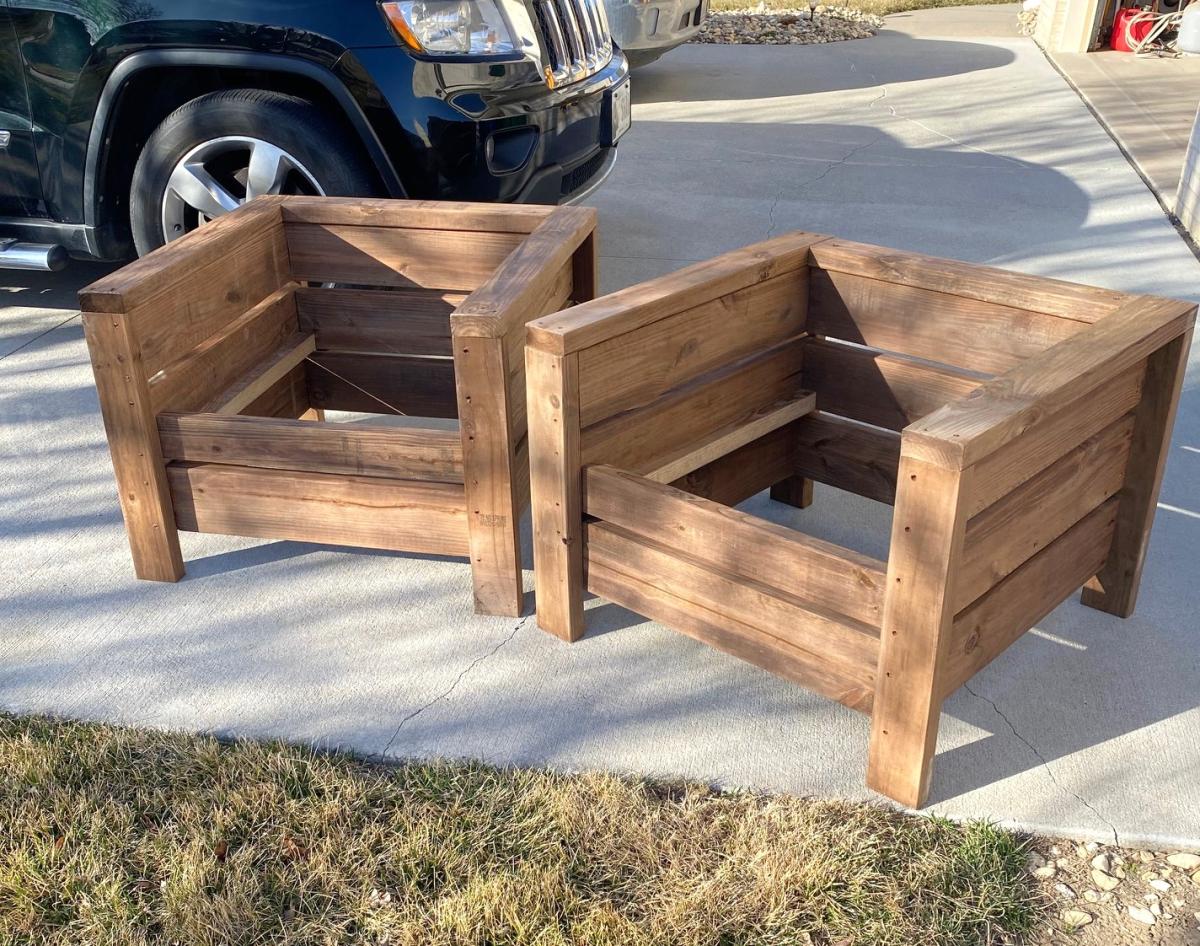
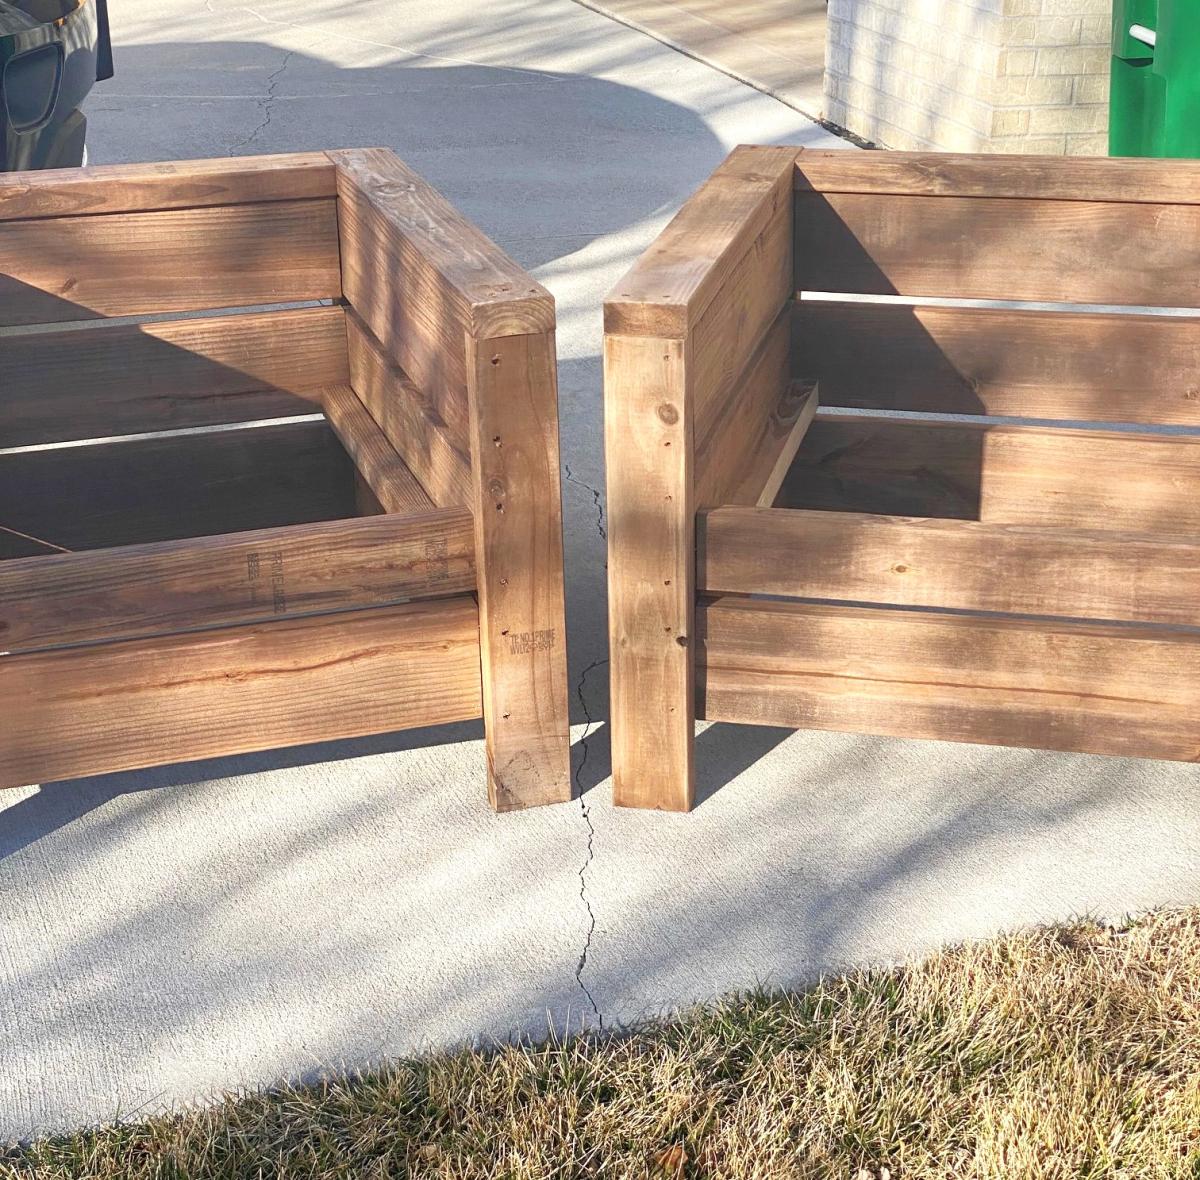
Rustic Outdoor Chairs

Submitted by Anonymous (not verified) on Mon, 03/04/2024 - 11:53

Seen these plans a couple years ago and finally have gotten around to making a set. This was a fun and really easy to follow set of instructions and I think they turned out really nice.

Jeff, with LaBrie Family Woodworking LLC

Seasonal And Holiday

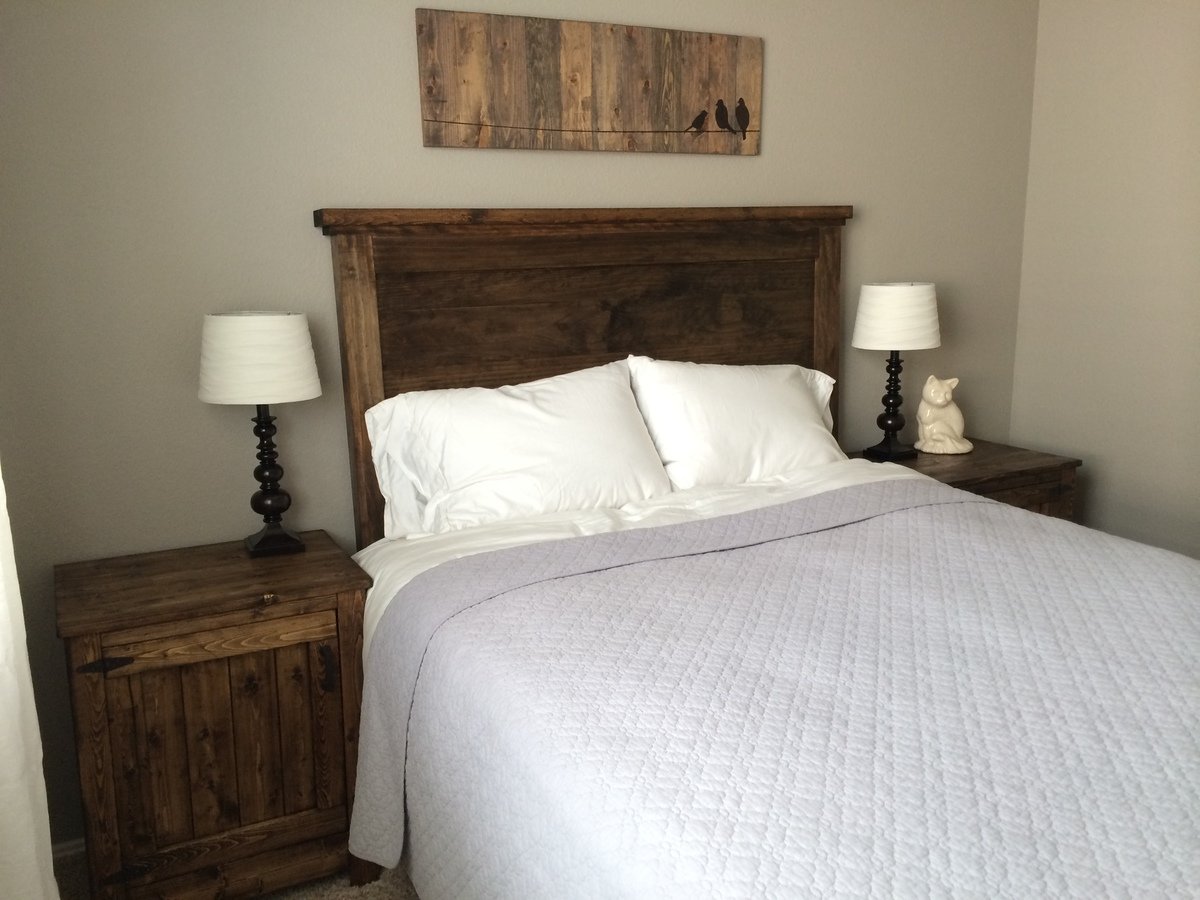
Headboard and nightstands

Submitted by kabm99 on Sun, 06/01/2014 - 14:33

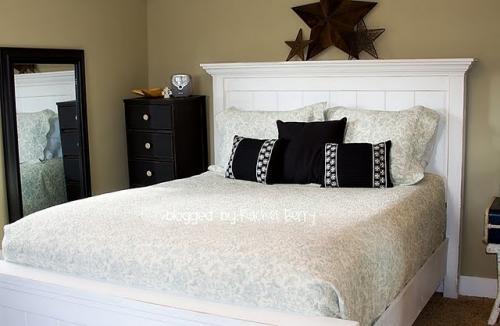
I made this headboard a year ago and it was my first Ana White project. I finally got around to making the nightstands last weekend and I just adore them. My guest room is finally complete!

Estimated Cost
Unsure since part of it was built last year
Estimated Time Investment
Week Long Project (20 Hours or More)
Finish Used
Minwax Dark Walnut with Polyurethane (satin)
Recommended Skill Level
Intermediate

California King Farmhouse Bed

This was my first wood working project, and it came out great!  

Please note - the buy list leaves out the 2x10s needed for the sides.

Estimated Cost
$200
Estimated Time Investment
Weekend Project (10-20 Hours)
Finish Used
Zinsser Bulls Eye 1-2-3 primer, Behr Premium Ultra Polar White paint.
Recommended Skill Level
Intermediate

Nesting Grill Station

Submitted by Anonymous (not verified) on Sun, 08/16/2020 - 18:26

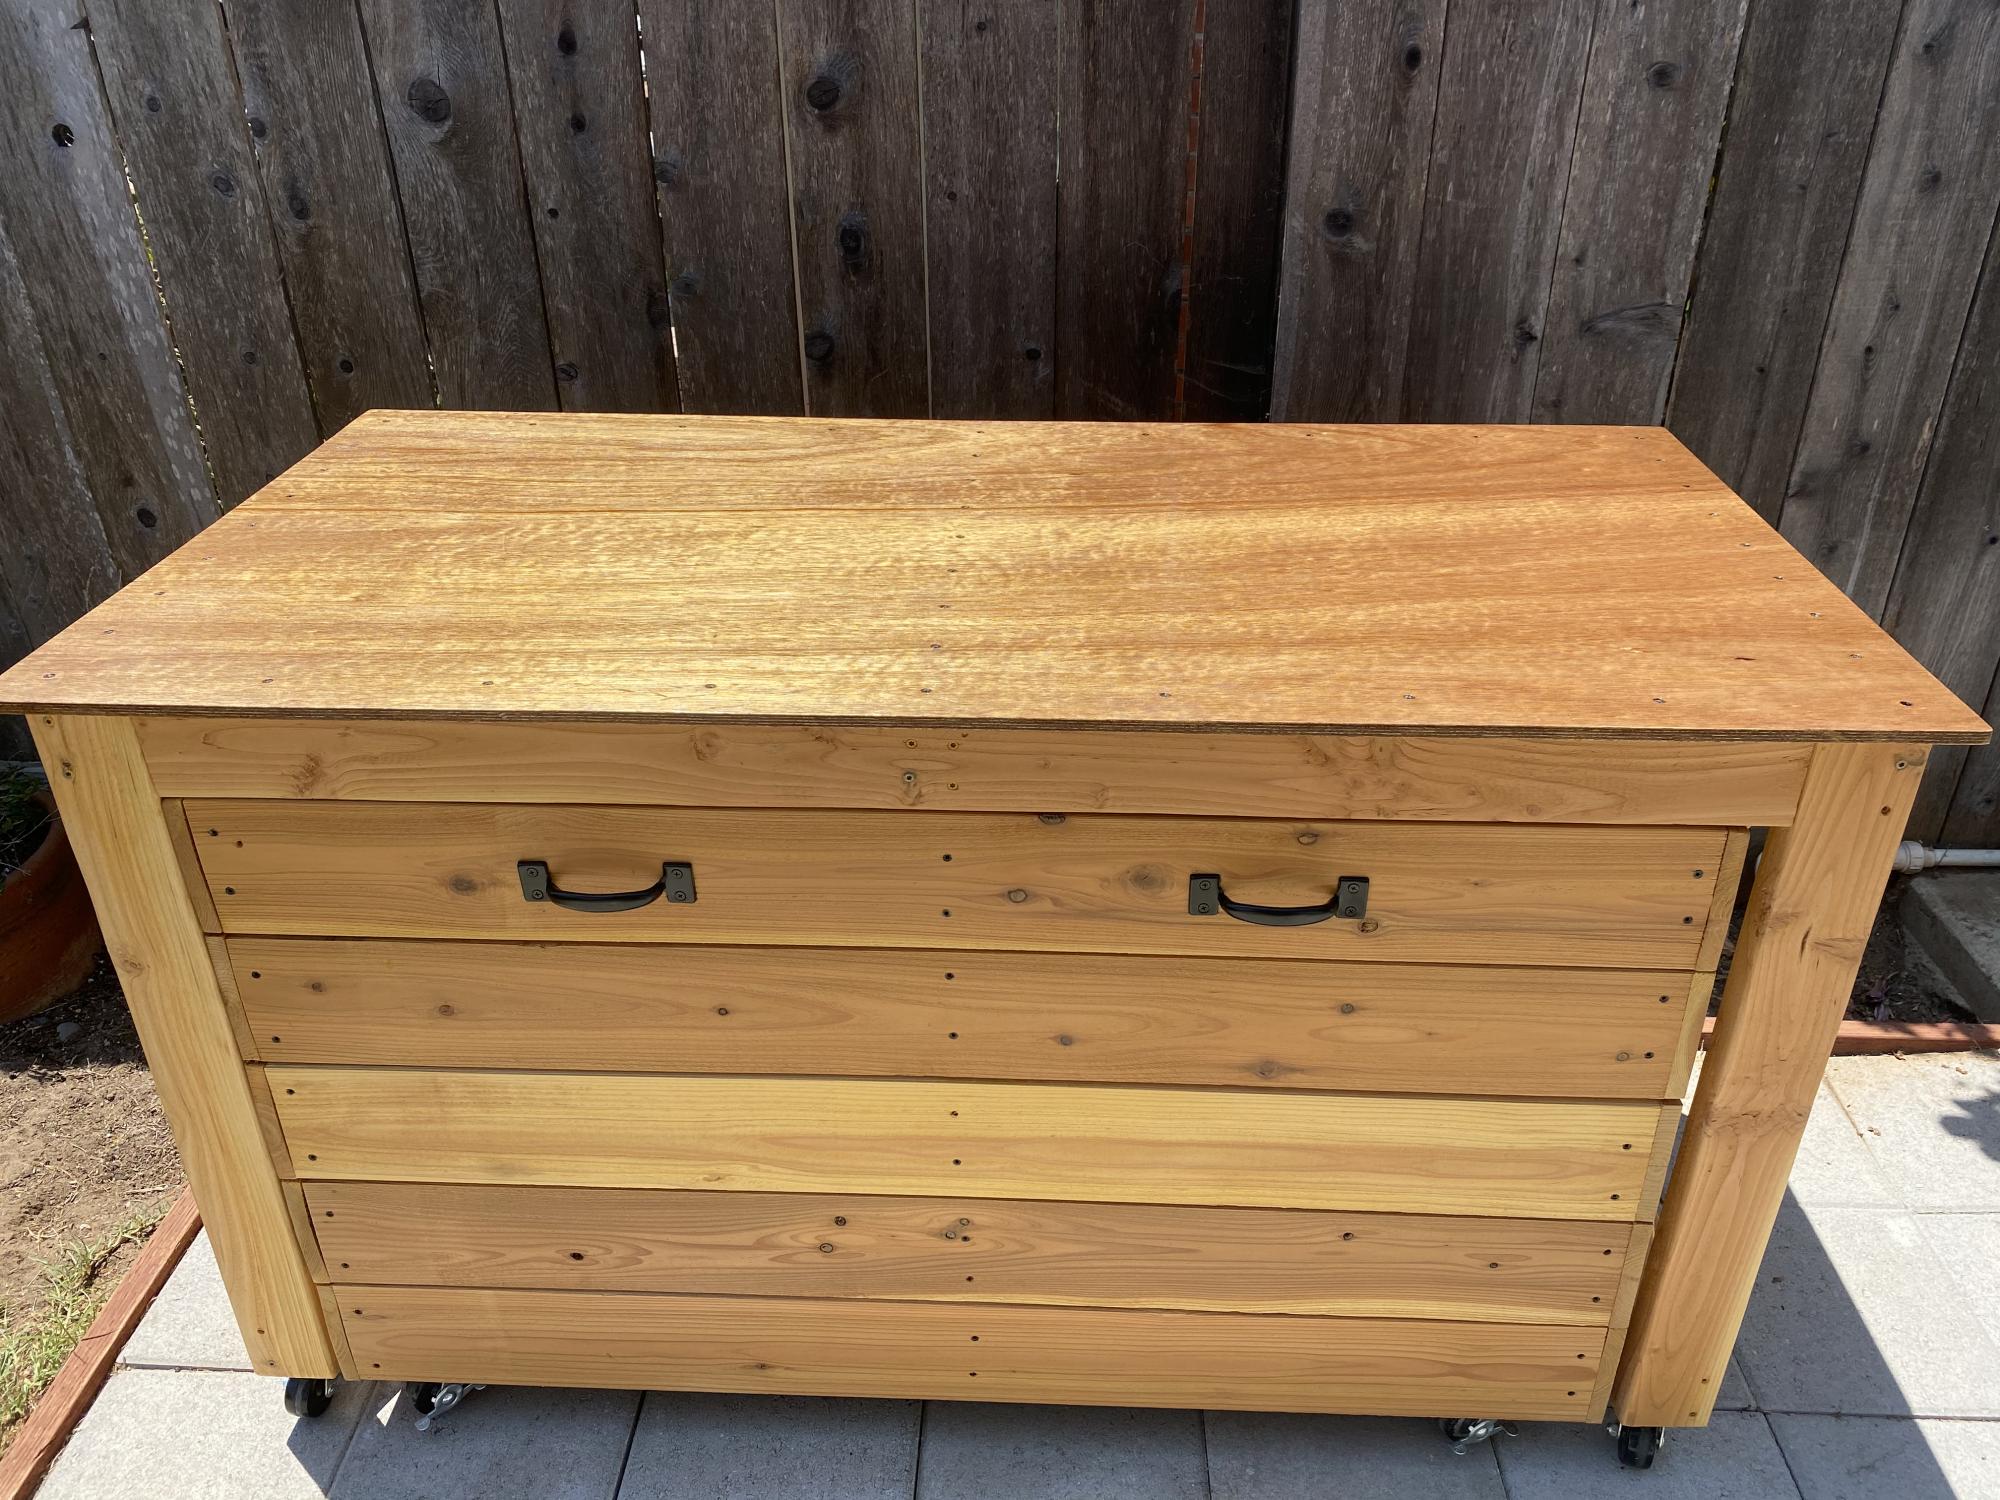
My husband and I built this Grill Station. We made the table top wider and out of 1 solid piece of mahogany. I wanted a wider table so we made it 30 inches wide. We sealed the table top with marine grade sealer and the rest with exterior clear sealer.

Estimated Cost
$150
Estimated Time Investment
Day Project (6-9 Hours)
Finish Used
Marine grade varnish on table top and valspar exterior clear sealer.
Recommended Skill Level
Intermediate

Comments

Henry Bookshelf

Submitted by ctay on Wed, 10/22/2014 - 19:36

Built this bookcase for my daughter, only modification was to add the X's on the side. She needed to be able to store all of her books on it.  Love it!  I now have another family member that wants one just like it!

Built from Plan(s)
Estimated Cost
Under 100.00
Estimated Time Investment
Week Long Project (20 Hours or More)
Finish Used
Rustoleum Wheat color with general finishes poly clear coat in semi gloss.
Recommended Skill Level
Intermediate

Three Bin Laundry Sorter

Submitted by Meyer1120 on Mon, 01/21/2013 - 21:10

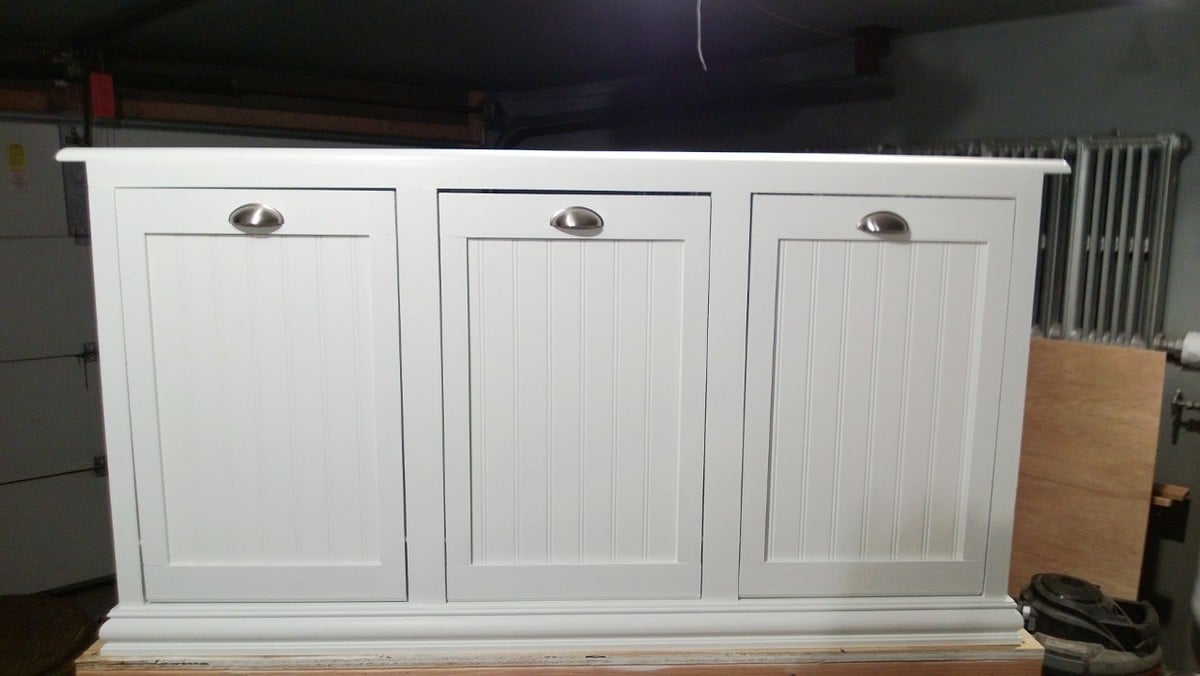
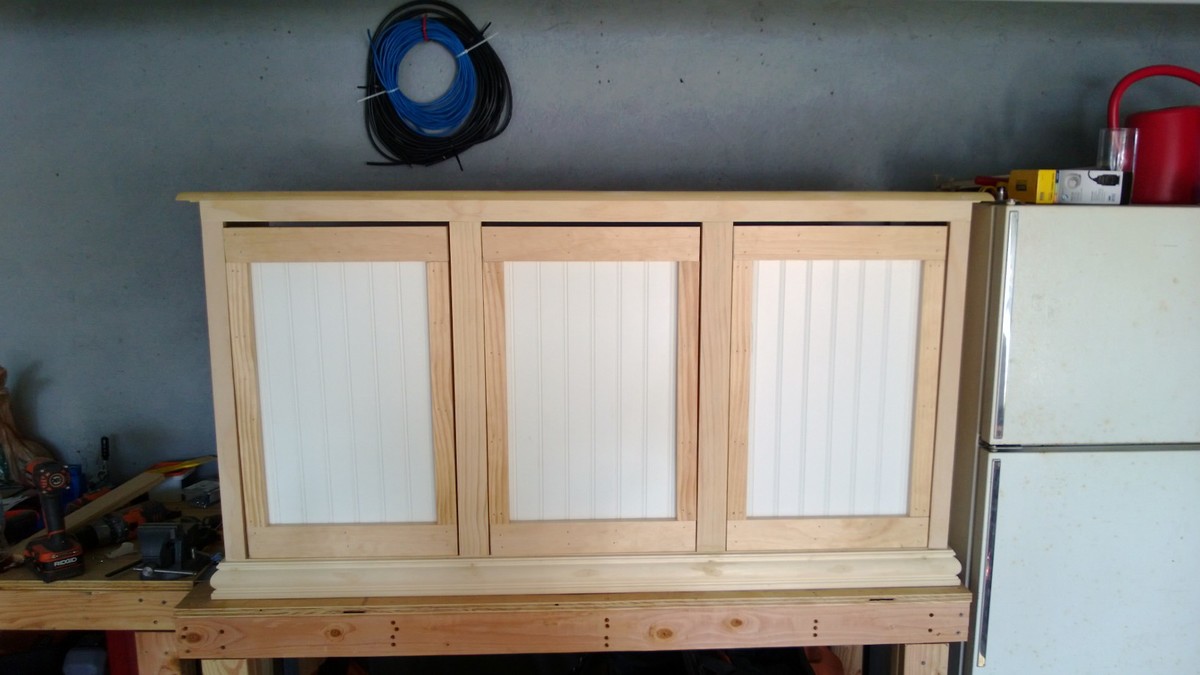
Modified the original plan to meet our needs of a laundry sorter. Had problems with the hinges so ditched them. I used dowels with a combination of a chamfer cut on the bottom of the door. Dado-ed the trim on the doors and slide the bead board panels in. The face frame is all held together with pocket hole screws, which I highly recommend because it eliminates nail holes and keeps the face frame square. This was my first wood working project, took me a little long to get it done. Thanks for looking.

Modified January 28

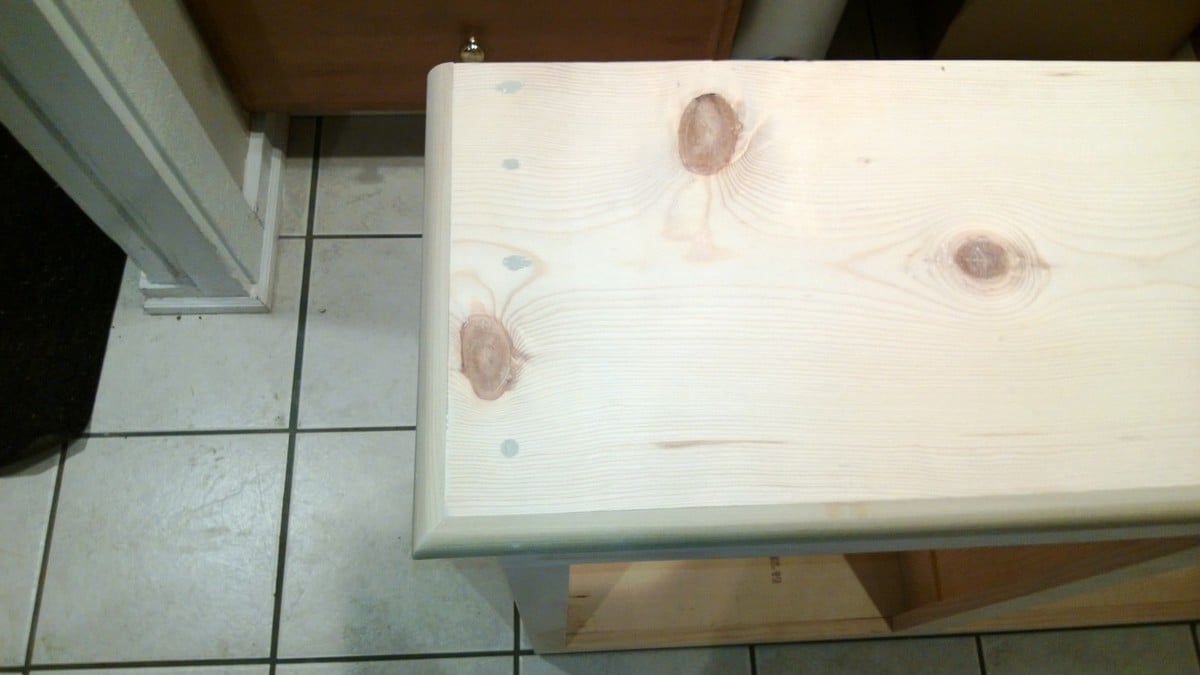
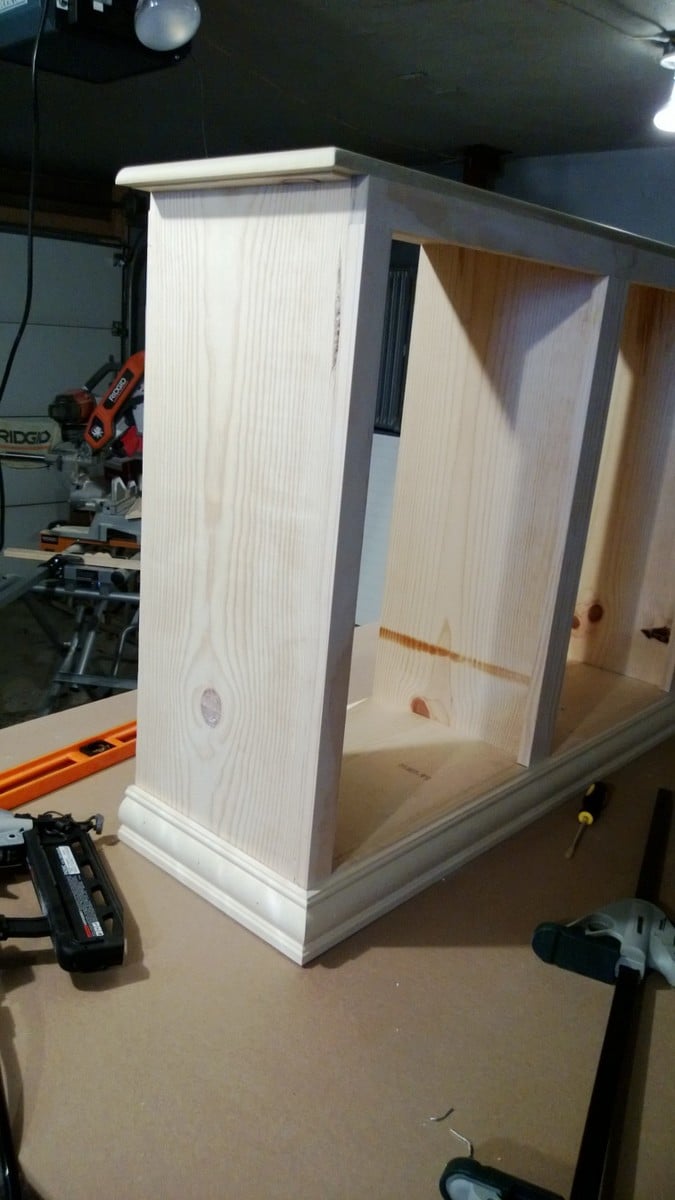
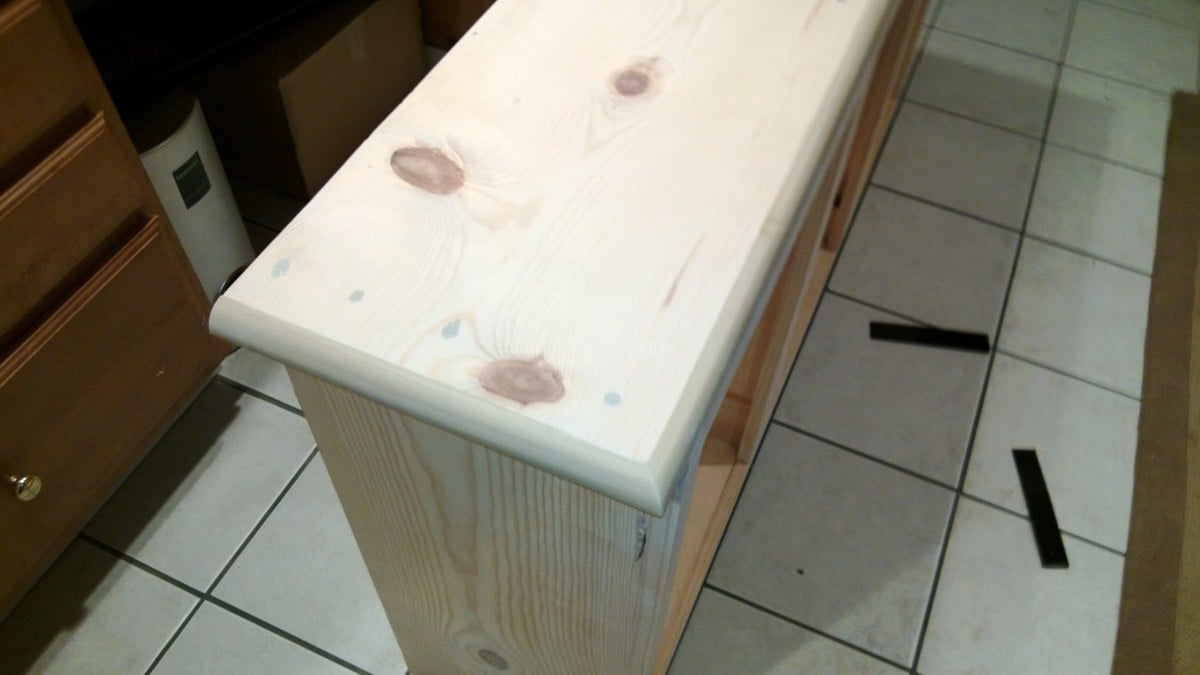
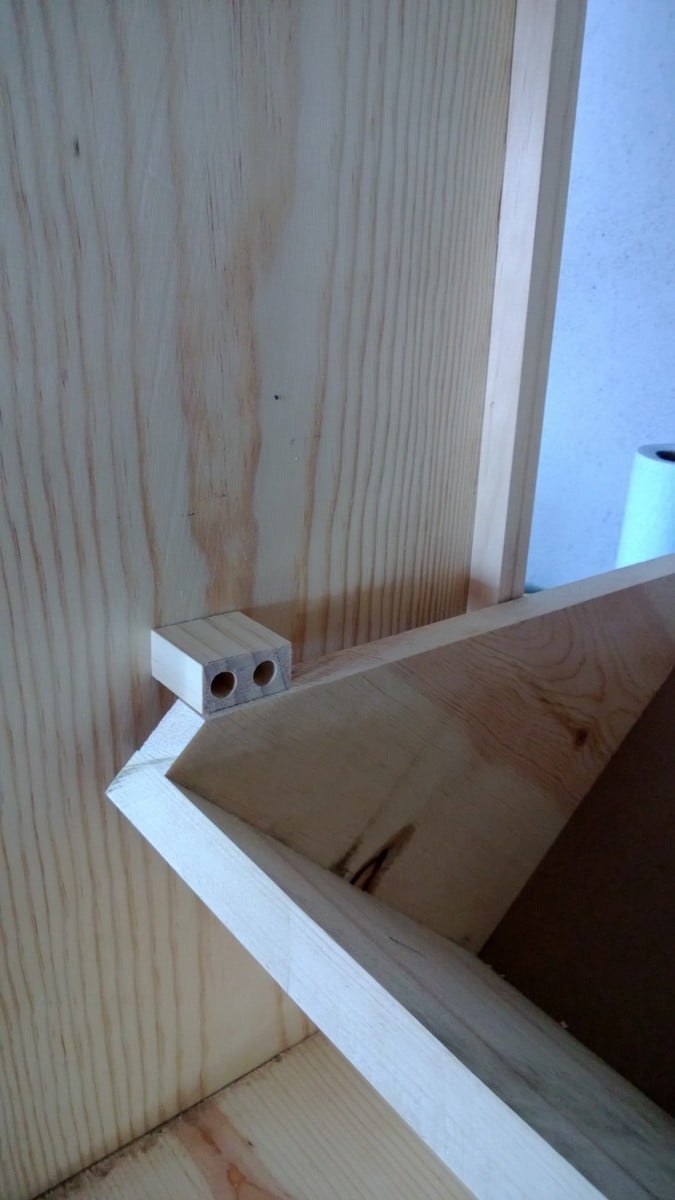
So here are some more pictures of my project. I don't really have any good pictures of the dowels. But what I can tell you is, I drilled holes through the sides of the face frame and the trim pieces and then measured where the holes would be in relation to the "drawer". I then drilled holes in the drawers at those measurements, I was careful to not go to deep. I think I went in half an inch. After that I started at one end and placed the dowels in, then put each drawer in. It wasn't easy but with a little patience it worked. The key is to wax the dowels so they will last longer as well. I also am including pictures of the top and bottom trim. On the top the original plans called for an overhang piece and I didn't like the way that looked. I ran the top board an inch long on each side and then wrapped it in quarter round trim. I did this because I plan on adding the Mimi Hutch Top. The bottom was built per the plan, but I ran into a problem with my bottom trim not being level and you could tell. So I raised the whole unit on 1 1/2 legs then placed it on a level surface and again wrapped it in a decorative trim. The key on both trims was a nice miter joint. Last picture I added was of my stoppers. I took scrap from the 1x2 trim and cut them to an inch and a half or two (can't really remember), then using the Kreg Jig drill bit drilled recessed holes. I then opened the doors until the side 45s were level then mounted the blocks on each side. I feel that it is better than a chain or string catch. Again thanks for looking and I hope I answered all of your questions.

Estimated Time Investment
Week Long Project (20 Hours or More)
Finish Used
Primmer and paint
Recommended Skill Level
Intermediate

Comments

moosmani

Tue, 01/22/2013 - 11:29

Dowels! What a great idea! Would you mind sharing how you did it? Could you possibly add some pictures showing the dowels? You did a great job. It looks beautiful.

mullid1

Thu, 01/24/2013 - 09:27

I love what you have made! Could you post pictures of the top and the bottom trim? I'm very impressed that this is your first project!

mullid1

Tue, 01/29/2013 - 09:12

Thank you for the photos and new instructions! You're awesome!!!

VLT

Fri, 03/15/2013 - 12:05

This is lovely; I like the trim job you did. Is there a way to post the plans so we can all get to them. I cannot believe this was your first project!

Liz82

Sat, 11/16/2013 - 18:23

I am a little confused. I love the three bin laundry sorter, but everyone is mentioning plans. I am not finding plans for it on the site. Also, what goes in to hold the clothes? There may be obvious answers, but I am not seeing them. I'd appreciate any help you could give.

towering inferno

Tue, 12/02/2014 - 02:58

I've been thinking of working up one very similar to this, also with 3 bins, but I didn't want to use chain either.  Those stoppers will be ideal - do you put them on both sides or is one enough?  Thanks for the share!

Karahd

Sat, 01/24/2015 - 11:29

Hi-

Im not sure if you still have the plans to this awesome project, but if you do, would you be able to share them with me? Ive been looking to make something like this forever, but just couldnt find any help!

thanks,
karah
[email protected]

petemoore

Mon, 02/08/2016 - 07:46

hi im the same as everyone can you send me the build plans with dimensions etc

many thanks

virginie D.

Wed, 03/02/2016 - 14:49

Hi

It's exactely what i need. so amazing. Someone can send me the plan please? I'm so newbie to do tat all by myself without plans. Thanks you.

virginie D.

Wed, 03/02/2016 - 14:49

Hi

It's exactely what i need. so amazing. Someone can send me the plan please? I'm so newbie to do tat all by myself without plans. Thanks you.

ajbreaux

Mon, 05/02/2016 - 14:22

My wife loves this . if its possible could i get the plans and hopefully have time to build it to give to her for mothers day ? thanks 

Kimhubbell

Fri, 12/02/2016 - 11:01

I would also love to have the plans for the 3 bin sorter. I am barely an intermediate so more specifics would be a huge help! Thanks to anyone who could help.

lworthy

Mon, 07/10/2017 - 04:19

 I absolutely LOVE your laundry sorter!!!! You did a fabulous job and the TRIM, WOW amazing!!!! I've searched Ana's website and cant find the plans' could you please email me the plans to [email protected].  I started building my own furinture back in October 2016 and the reward is amazing... Keep up the good work.

Happy Building,

Lisa

woodmama

Tue, 01/16/2018 - 22:18

I'm too new at woodworking to be able to tackle this right now, but would love to download the plans for future. My most successful project so far is a pretty standard bookshelf. I got a free plan, with lots of guidelines and explanations, at https://tinyurl.com/ydeup8lo -- it came with a 440 page guide, "The Art of Woodworking" that has tips and techniques, and am plowing through that right now.

momto3

Wed, 02/28/2018 - 12:53

This is amazing.  I am very new to woodworking.  Could you send me the plans please?  I would be most appreciatative 

Ljohns

Wed, 03/11/2020 - 23:27

I would love to have the plans for the three bin laundry sorter to build for my laundry room. Are the plans available? Awesome work!

Rustic Sideboard / Buffet Table

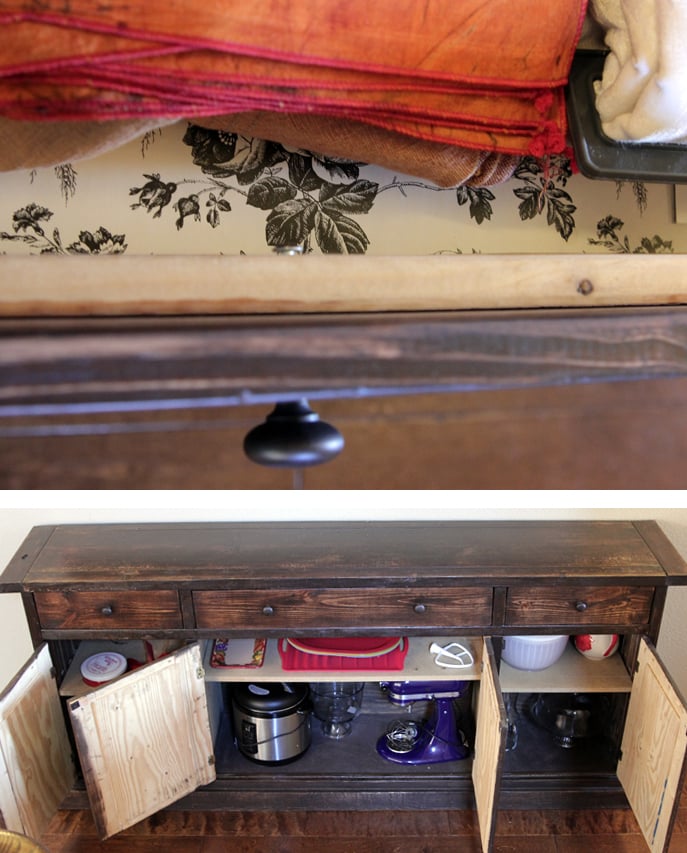
This was our second project (though I'm proud to say that I was able to put the bulk of it together all by myself...and that's because of the miracle of the Kreg Jig pocket hole kit!)

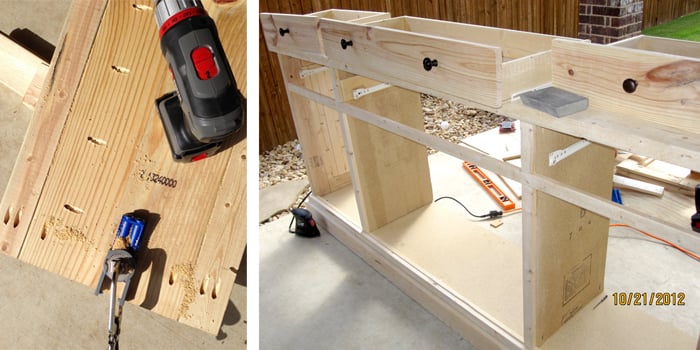
First I had to modify the plans so that the sideboard wasn't as deep (about 16" deep...so just a couple/few inches off the original plans). Then we bought the wood. My husband helped me cut most of the pieces, and then I started drilling pocket holes. It felt like it took forever! But once that was done, I was able to put it together so quick...like an IKEA furniture! BUT! I really should have checked for SQUARE better than I did, b/c once it REALLY started coming together, things were a little off kilter... Thank goodness my husband had the patience to SAND THE HECK out of the bottom of the poor thing to level it back out. :P

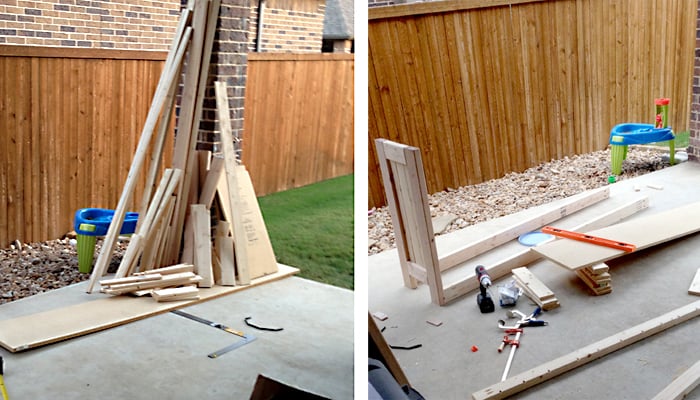
The door fronts took forever...and the drawers took a while to fit in correctly (all of which my hubs did). We had left our lumber on the patio, and the second day it got rained on. It might have helped if our lumber didn't get wet (to help keep things straight and square).

The things that took the longest: squaring, leveling, doors and drawers, and the base molding (I ended up using a 2x4 and 1x2 to build my own base along the bottom...we wanted to stain the wood instead of paint it, and didn't want to pay the $$$ for paintable molding).

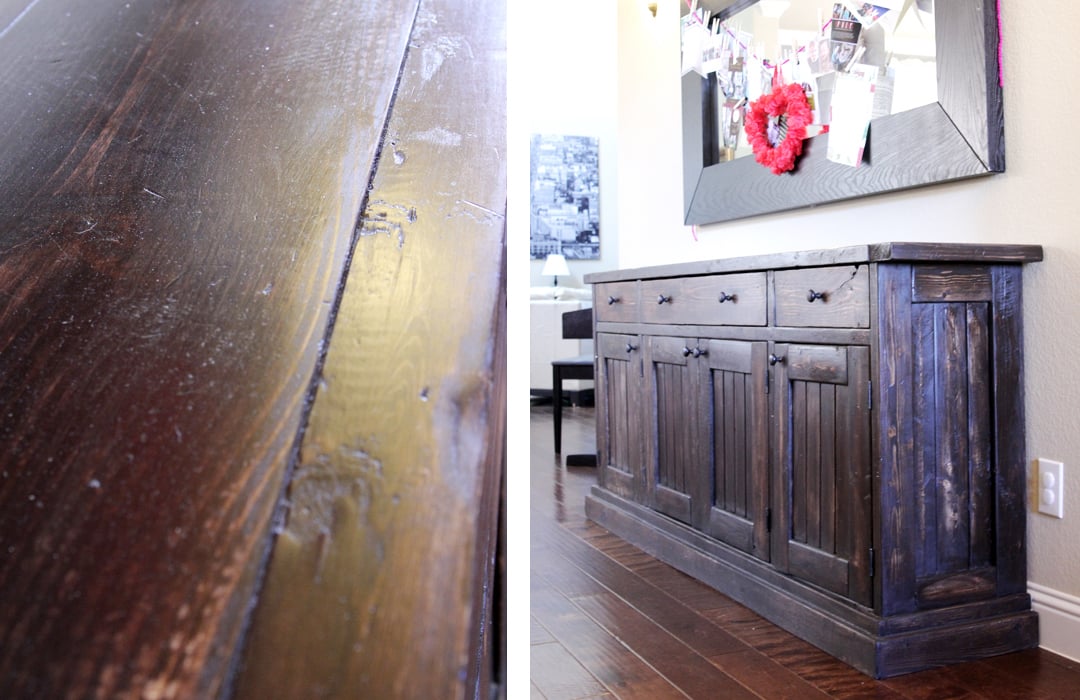
I used the same Rustoleum Dark Walnut stain that I had used on our Farmhouse Table...but I didn't shake it enough before using it, then left it on longer than I should have, so it is much darker than our table. Eventually may want to paint over it since it was so hard to get stain in all the nooks and crannies.

I didn't think to stain the inside of the doors. I will have to go back and paint it someday. We used particle board for the bottom and inside shelf (much cheaper than plywood). I tried staining the bottom piece, but it just soaked in the stain. So I used some dark brown spray paint instead. Worked like a charm. Planning on painting/covering the shelves one day, too.

OH! AND, I couldn't find the wider "bead board" (or whatever it is that everyone else used on their sideboards), so we used plywood as a backing, then attached some thin Poplar boards on the front for the appearance of planked boards. VERY painstaking. Would recommend a different method for that part.

(Timing: We started building this around the beginning of November, brought it in and used it before it was finished...then finished it a couple days before Christmas. Just the other day I added some drawer liners).

Built from Plan(s)
Estimated Cost
$200-300 for lumber.
Estimated Time Investment
Week Long Project (20 Hours or More)
Finish Used
Rustoleum Dark Walnut
Deft Clear Satin, 1 coat.
Recommended Skill Level
Intermediate

Comments

hillarylouise

Wed, 02/06/2013 - 15:20

I saw your comment on my blog and had to come take a peek! It sounds like it was a challenging project, but you did a fantastic job. Beautiful!

Fancy Jewelry Box

Submitted by mmihelcic on Thu, 12/25/2014 - 21:18

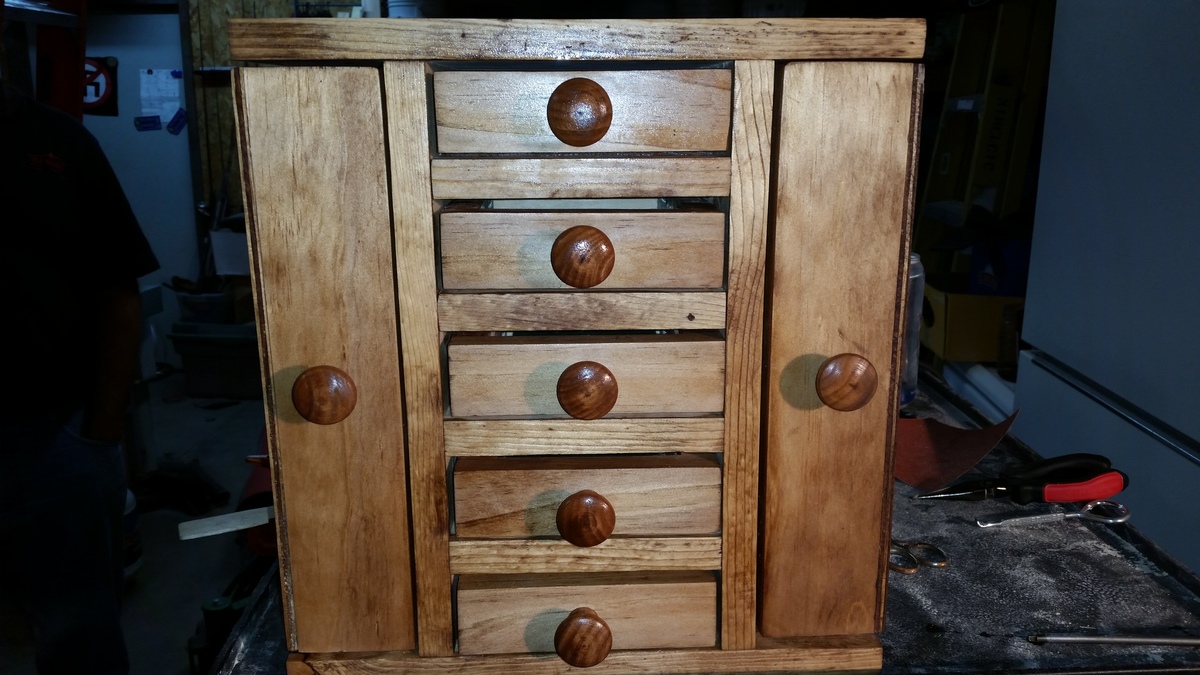
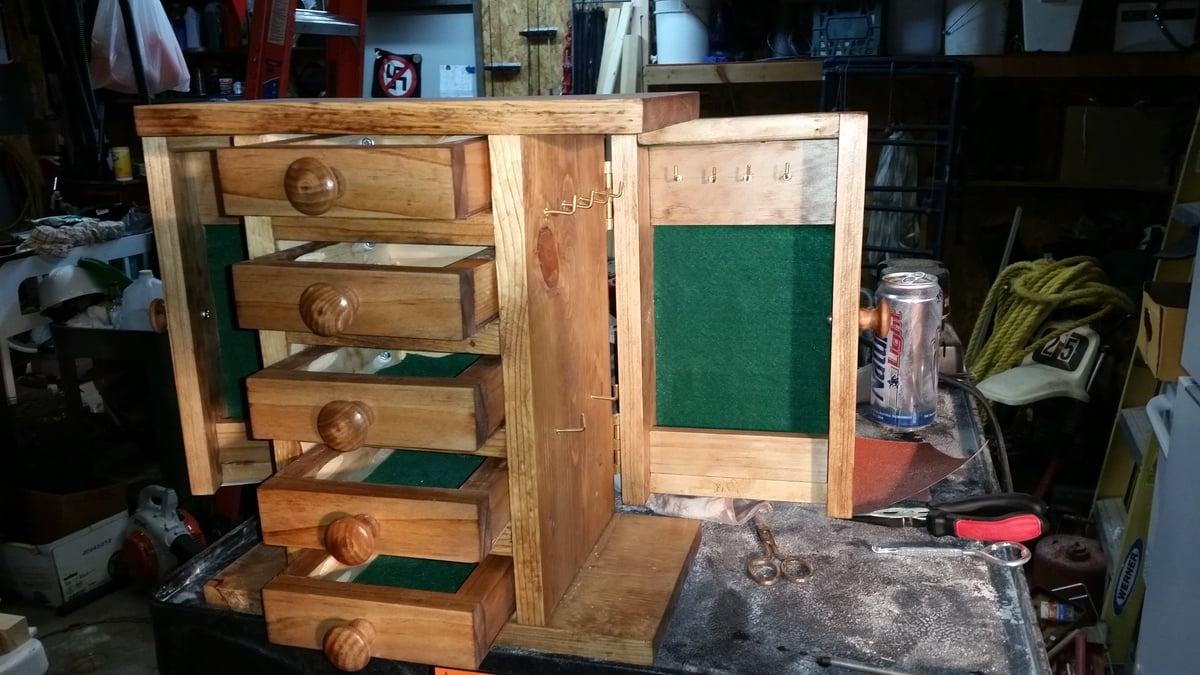
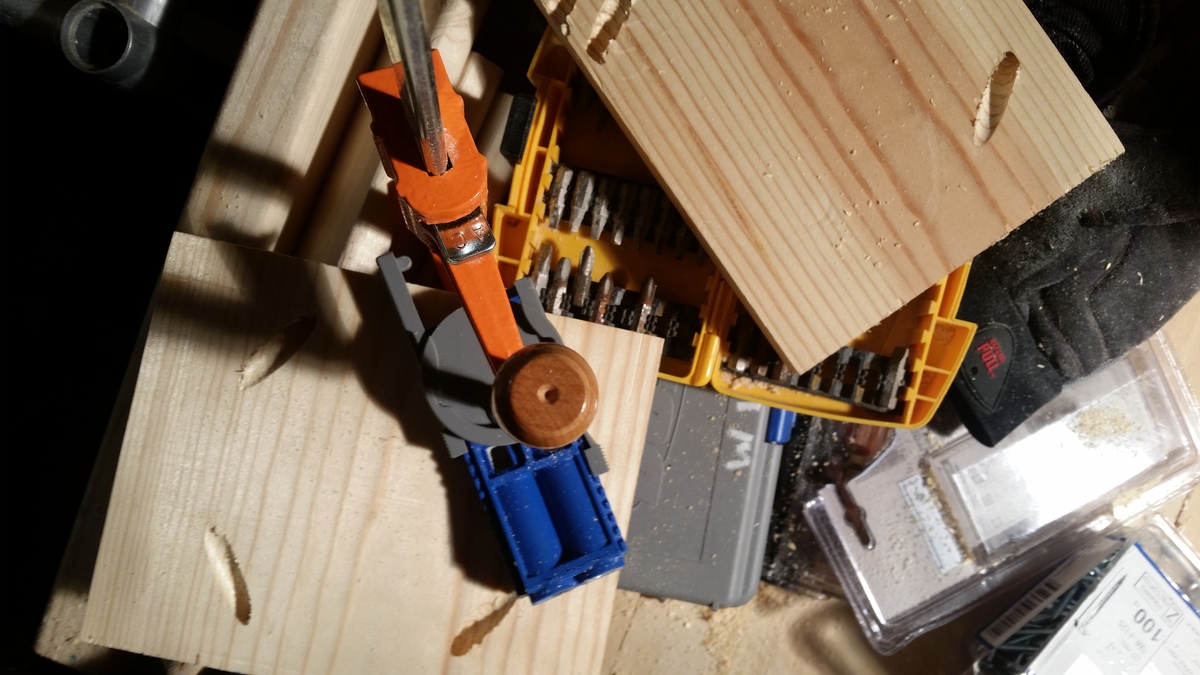
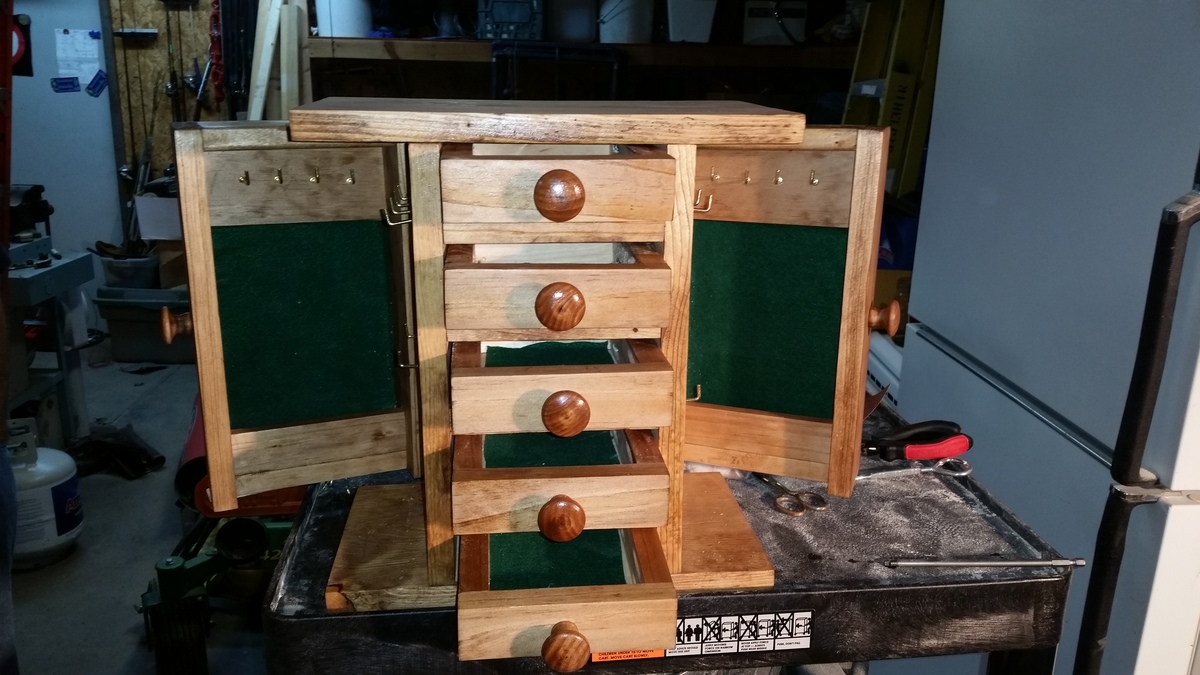
My first real wood project with no help from my father. I wanted to make this for my mother for christmas and I got it done 2 hours before church. I recently purchased a kreg jig r 3 and put it to good use. I made a few changes to the plan that helped me achieve the look that I desired. First, through trial and error I adjusted the kreg jig to be able to drill pocket holes to secure the shelves without the need to go back and wood putty the scrww heads that normal would have been exposed on the outer walls. There is a picture of this set up that I uploaded. Also, when byielding the drawers I made two changes. From what I could tell, the plans called for 1/4 inch plywood for the bottoms of the shelves and that is the way I made them at the beginning. However I was not happy with the appearance of the plywood on the nice face boards I was using for the drawers. So I decided to rip down the two side pieces and the back piece of the drawers ( should be 1 - 5 1/2 inch back piece and 2 - 5 3/4 inch pieces ) but I left the face Plate the full inch and a half that way the plywood wous not show from the front. The last change I made on the drawers was I made 2 pocket holes on each side piece to attach the face to the drawers that way the nail holes would not be showing from the front view. While these steps might not have be necessary , it worked for me. Thank
you very much for the plan my mom cried when she opened the box for the first time.

Built from Plan(s)
Finish Used
Minwax early American
Recommended Skill Level
Intermediate

Comments

JoanneS

Fri, 12/26/2014 - 16:25

Great job! What a lovely gift for your Mom! It turned out beautiful!

Frosty Garden Greenhouse

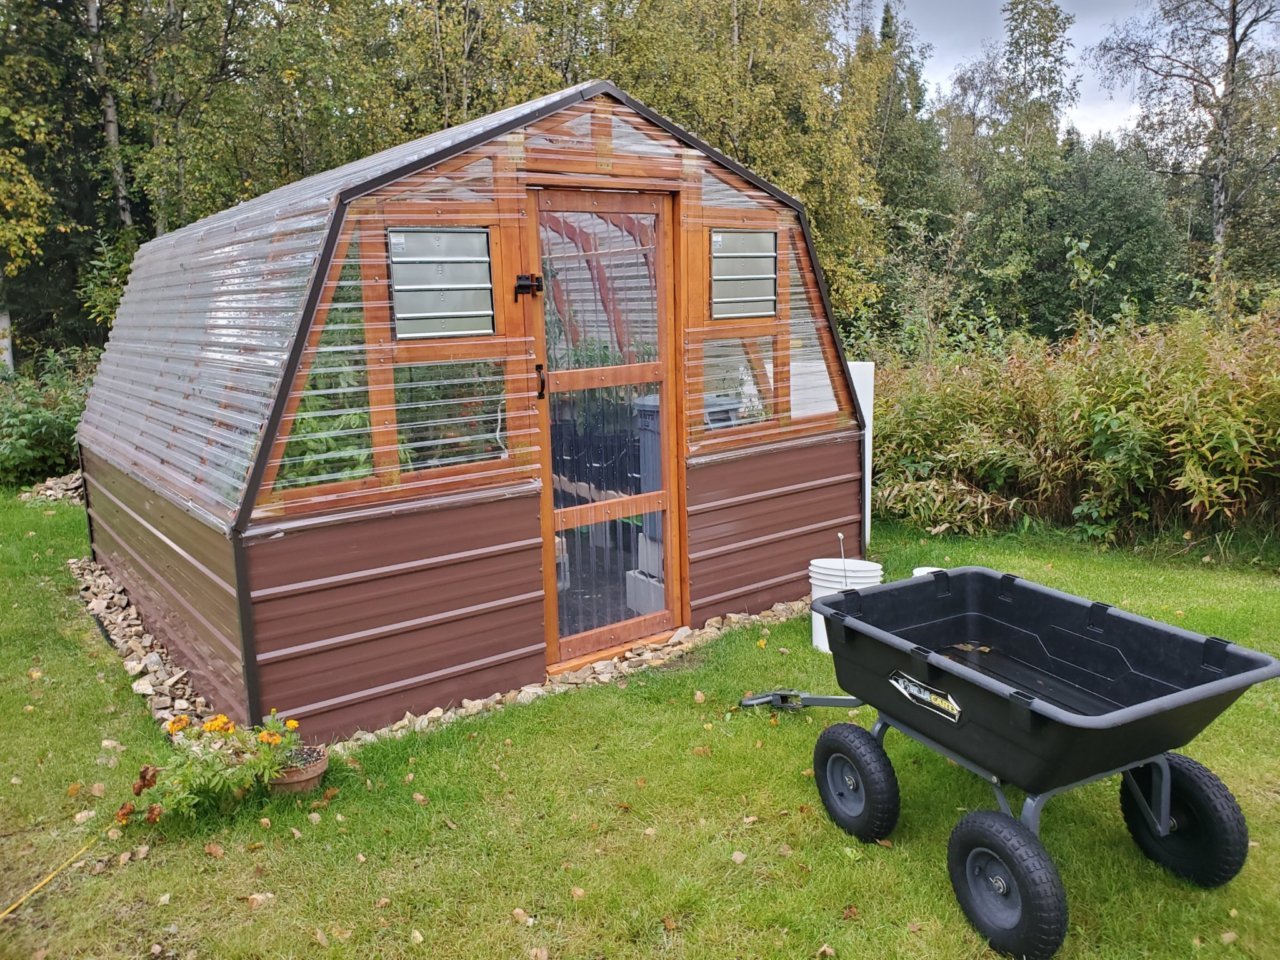
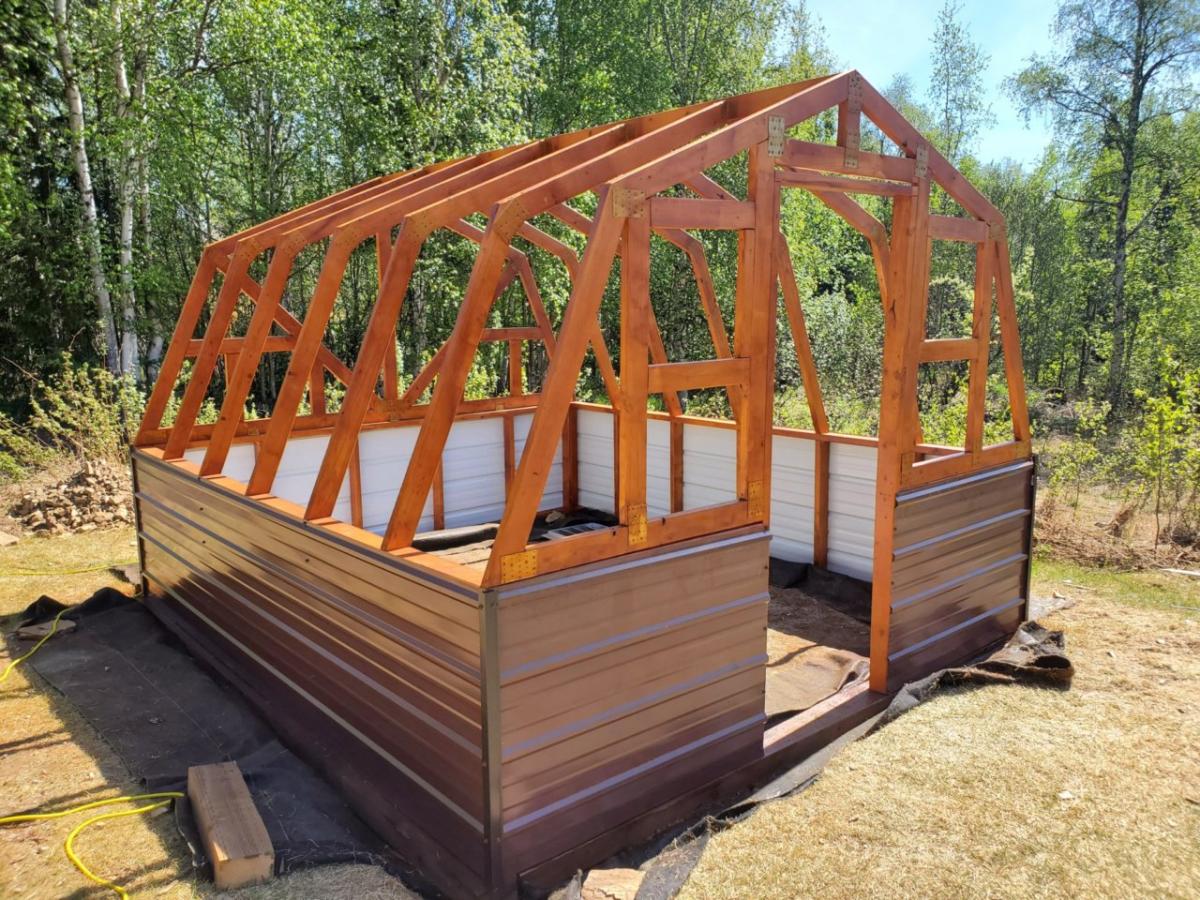
It was truly great for us to find a greenhouse design from a fellow Interior Alaskan blogger. We kept coming back to this design, enough times to where we decided to actually build it.

We would be the first to admit that tackling a gambrel style building was slightly intimidating and not what we had in mind for our very first self-built building! But, we faithfully followed the cut lists and directions. It turned out beautifully! If you're in the same boat, have confidence that you can build this too!

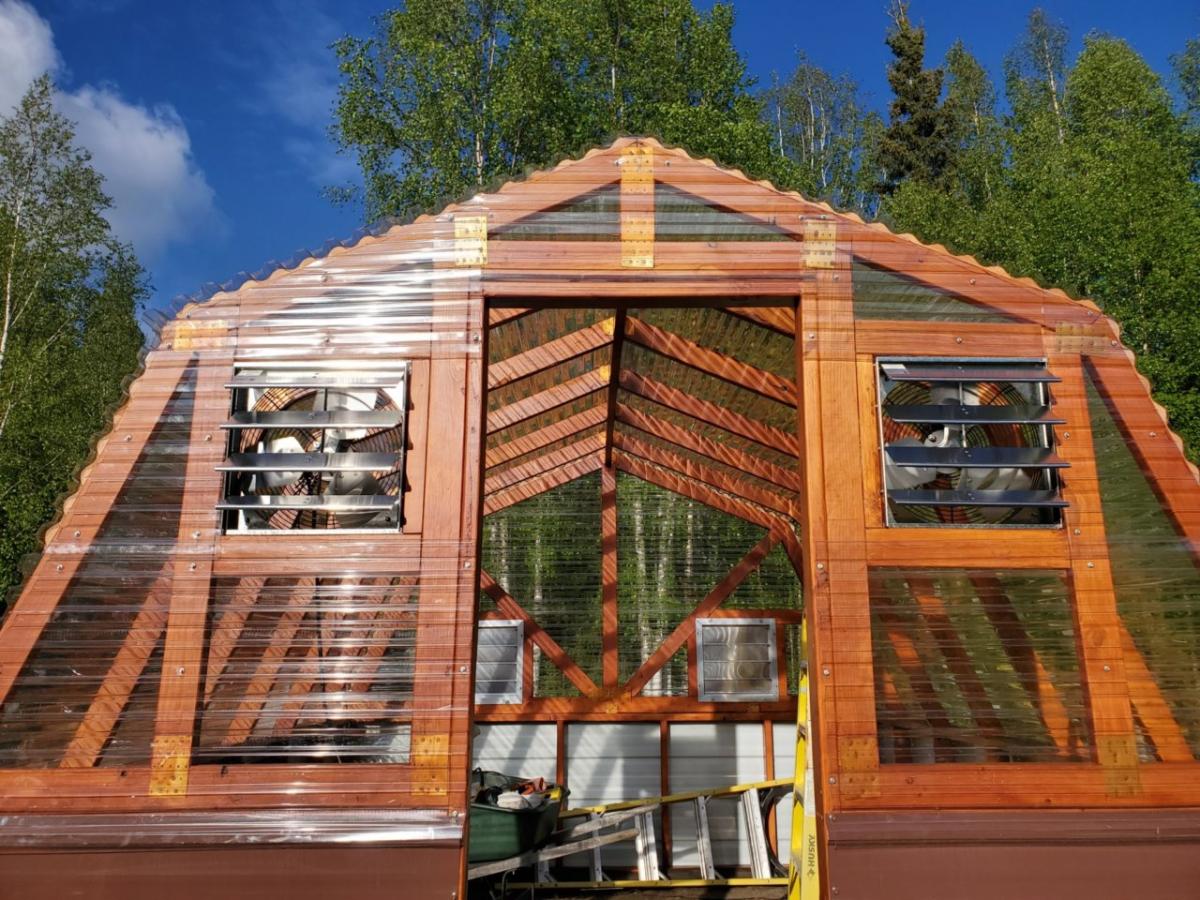
We love the options available for making it your own. We decided to stain the greenhouse lumber of ours to match our cedar sided home. We also built a semi frost-resistant foundation, since we're a little north of Ana at 65 degrees and sometimes experience frost heaving. We also added full climate controls to ours, adding both fans and louvers that keep our greenhouse at perfect temperatures.

The performance has been great! Building this greenhouse has been the single greatest thing we have done in our years of subarctic gardening. We might even consider building a second greenhouse down the road. No matter how big your greenhouse is, it's never quite enough!

Thanks for the great plans, Ana! We appreciate your work!
Built from Plan(s)
Estimated Cost
$2400
Estimated Time Investment
Week Long Project (20 Hours or More)
Finish Used
Transparent cedar stain
Recommended Skill Level
Intermediate

Comments

Outdoor Sectional

Submitted by jwhipp on Thu, 04/11/2013 - 11:38

We followed the outdoor sectional plan from Ana Whites blog to create this outdoor sectional. First we bought the cushions and custom built this sectional to fit the cushions. We used 2x4's and the kreg jig for pocket screws, then covered the base in beadboard and some pine trim, gave it a good sanding and a nice paint job.

Estimated Cost
900
Estimated Time Investment
Week Long Project (20 Hours or More)
Finish Used
bead board and pine trim
Recommended Skill Level
Intermediate

Comments

Juanita_r

Thu, 04/11/2013 - 15:12

I just want to curl up there with a book and spend the day on that lounge, so pretty & inviting. where did you get the base and back cushions, they are a great colour?

jwhipp

Fri, 04/12/2013 - 05:46

Thanks! We built the frame according to Ana's design (customized dimensions for our cushions) and then covered the base in bead board and used pine trim around the edges. The cushions are from the Frontgate Outlet in Cincinnati.

Doggy loft bed!

Submitted by Anonymous (not verified) on Sat, 06/03/2017 - 17:31

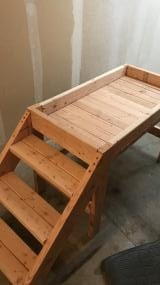
My dog loves to people watch all day while I'm at work and she needed a new bed so I took the plans for the lower platform and modified them so it would stand alone. Took the platform and put it on the bottom so that her bed would sit inside instead of on top where she could more easily fall off.

I tried building without PH screws at first and all I ended up with was a lot of cracked and wasted lumber. Got the PH jig and finished the whole build myself in 2 hours. Sanding, staining, and sealing tomorrow but I'm just so excited about it I had to post now!

Estimated Cost
With the two sets of lumber, having to buy the jig, hardware, stain, and electric sander it cost me about $130
Estimated Time Investment
Afternoon Project (3-6 Hours)
Recommended Skill Level
Beginner

Comments

Simple Outdoor Collection

Submitted by handymommy on Wed, 03/09/2011 - 05:32

The outdoor bench was my first Ana project. It was so easy and rewarding that I immediately set out to build the rest of the set!

Built from Plan(s)
Estimated Time Investment
Weekend Project (10-20 Hours)
Finish Used
dark deck stain
Recommended Skill Level
Starter Project

Comments

A bench for a future table

Submitted by Al Lulu on Fri, 05/31/2013 - 14:58

This is the third project I've done from this site and the first that came out absolutely perfect. The others were GREAT but this one....it just soared.
Took me all of 1 afternoon to build and 3 days to stain and finish. I used Early American by Minwax to match the existing dining room table.
My goal is to build the table that goes with it.
But, for now, this is the perfect addition to the house.
One thing.
The plans for this bench call for 1x4s for the breadboards and that doesn't make sense. I think it's a typo.
You will need extra 2x4s to make the project really soar. But, heck, who can't use an extra 2x4 lying around?

Estimated Cost
$40
Estimated Time Investment
Afternoon Project (3-6 Hours)
Finish Used
Minwax Early American
Varathane satin
Recommended Skill Level
Beginner

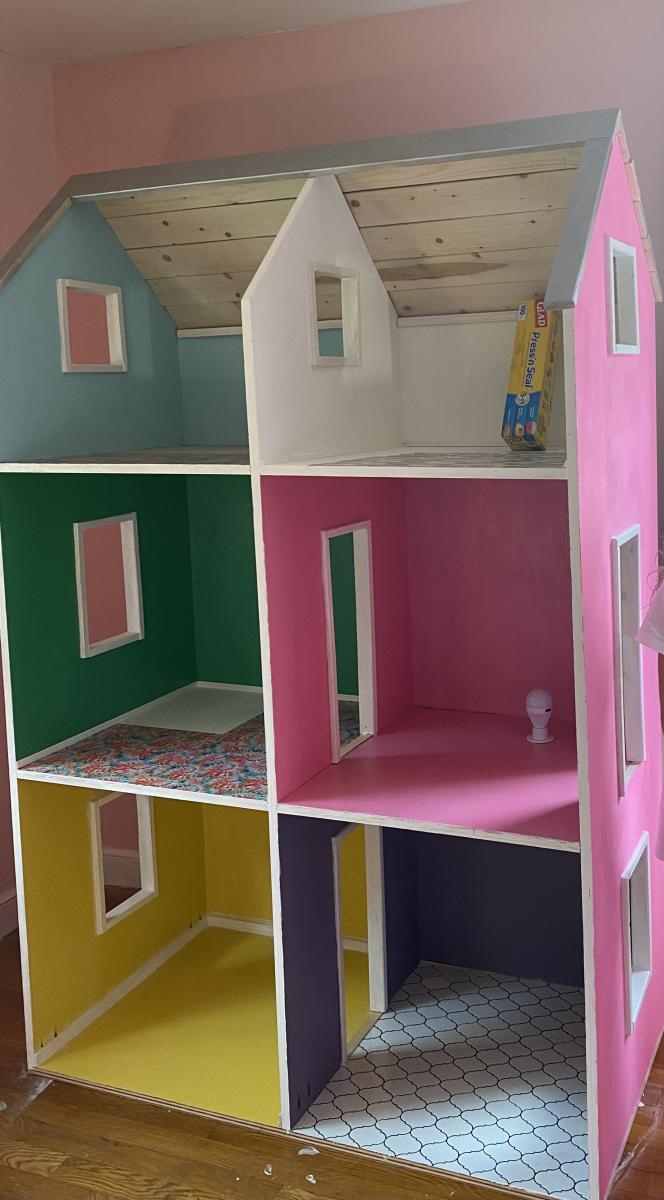
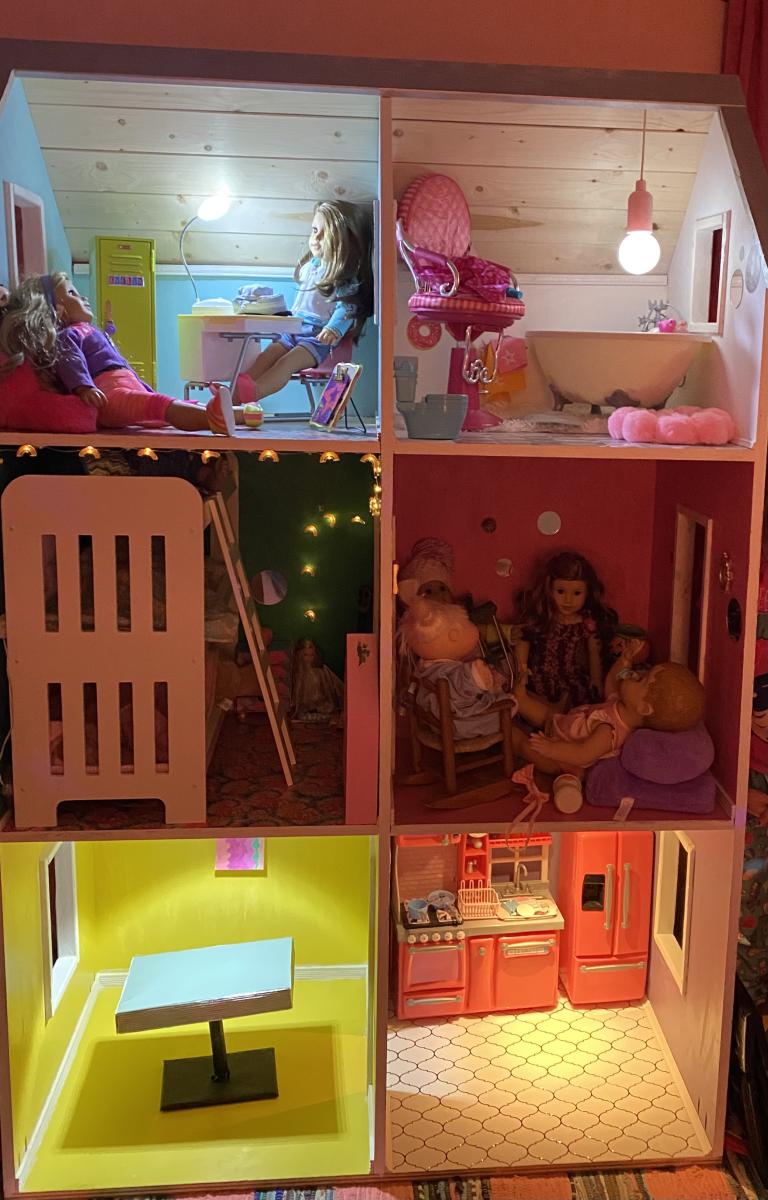
American Girl Doll House

Submitted by Anonymous (not verified) on Sat, 11/06/2021 - 08:04

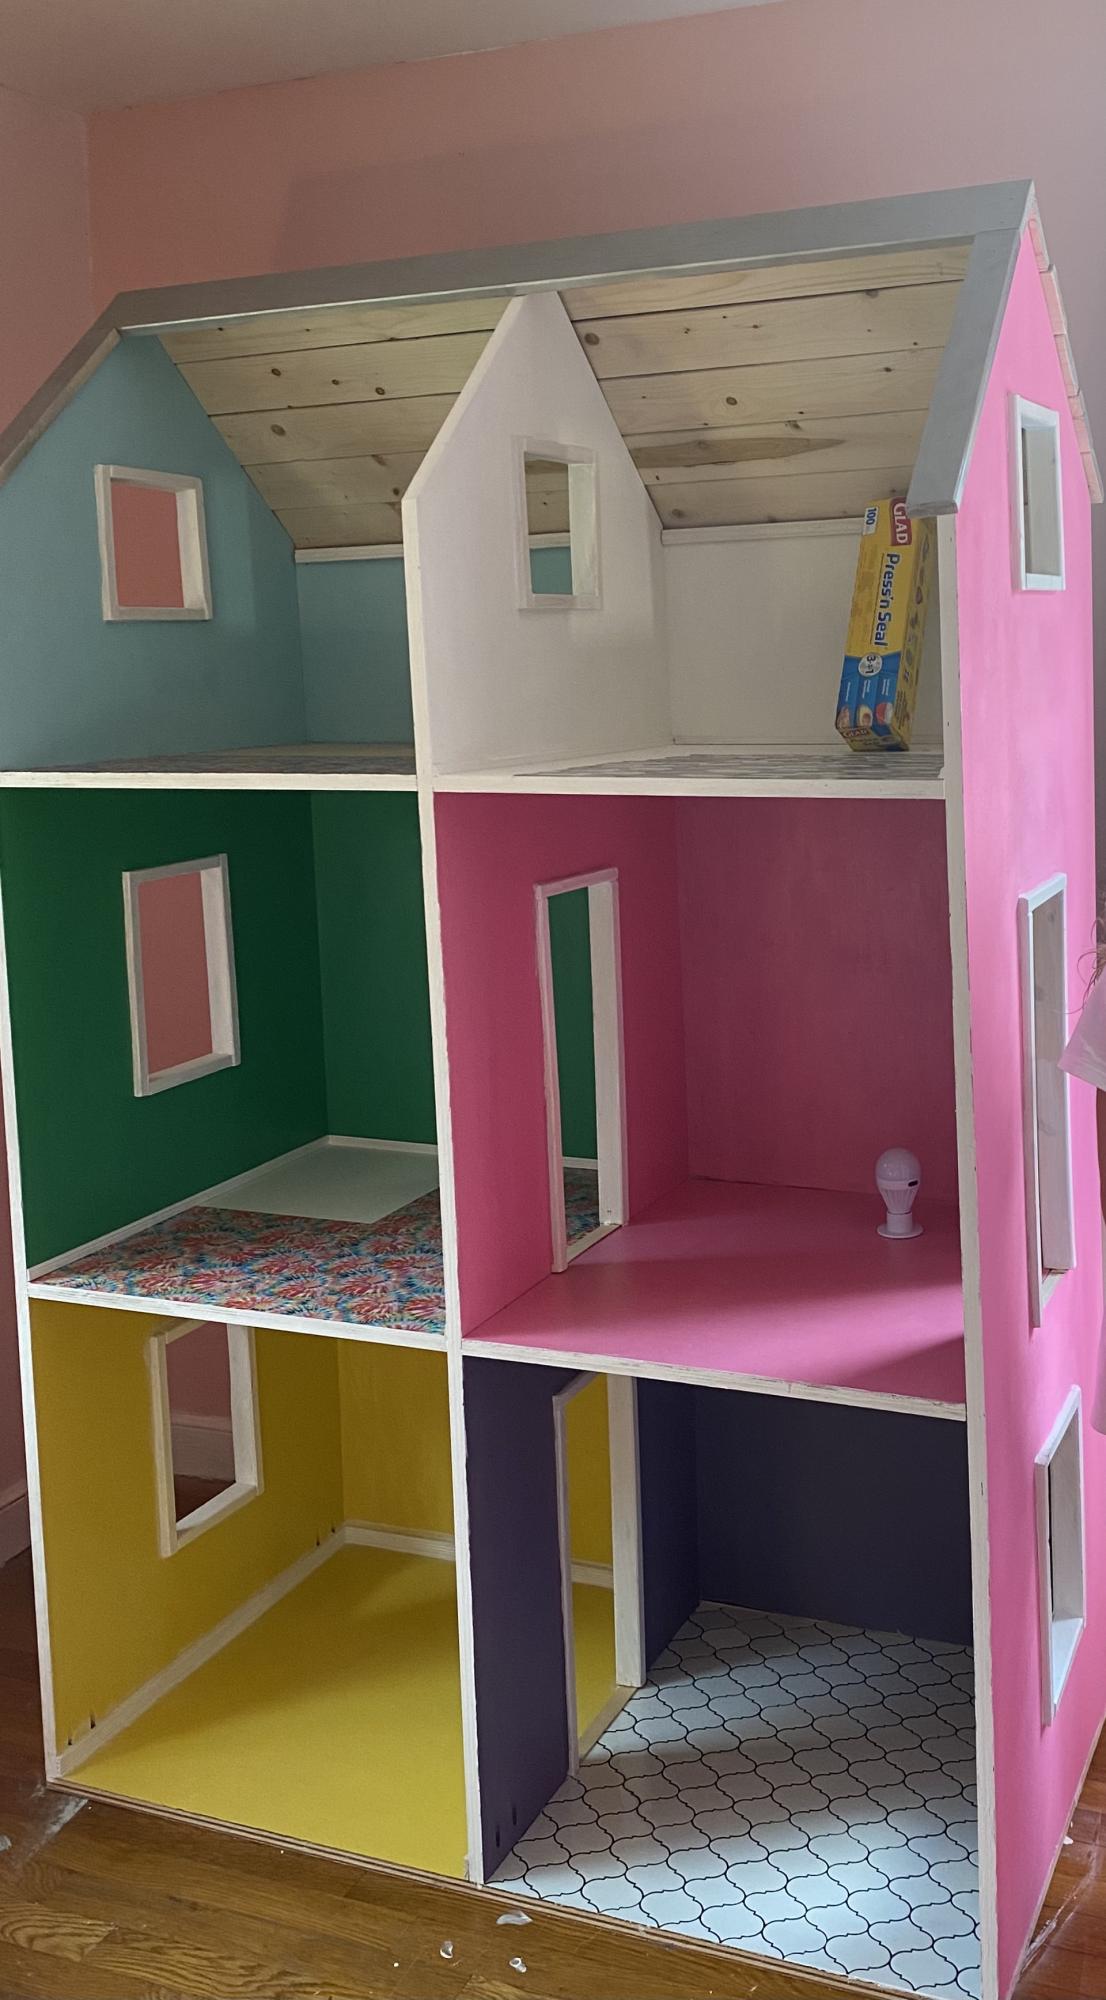
This was what I built for my daughter during quarantine! I had never used a Kreg Jig before and now I love using it!

Comments

Farmhouse Daybed

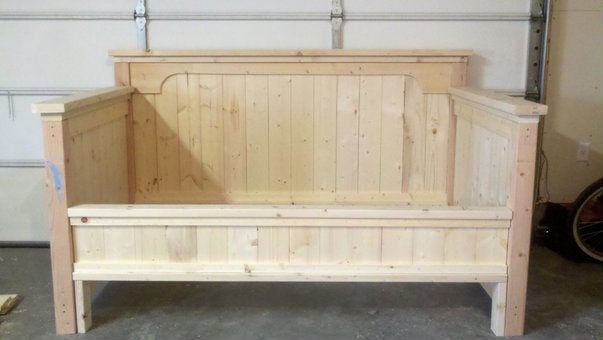
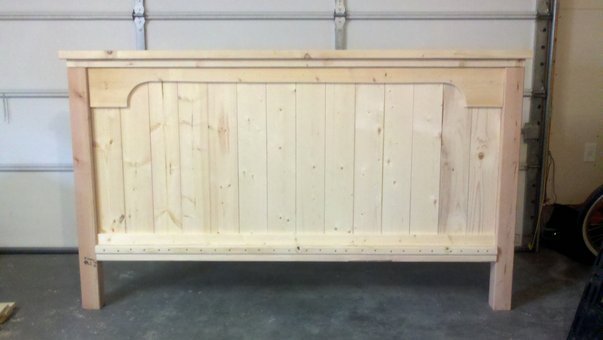
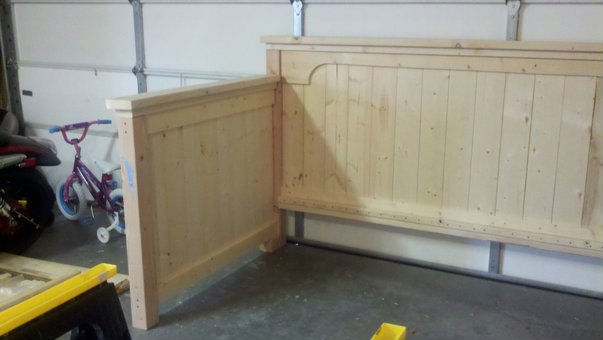
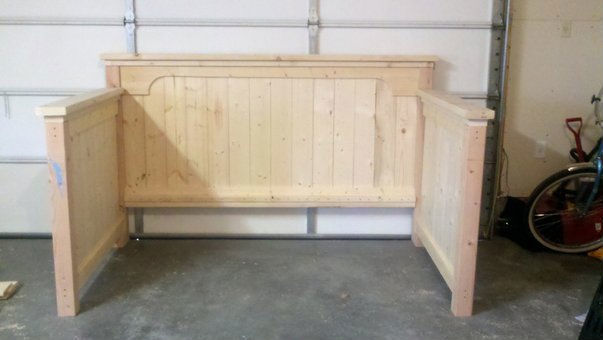
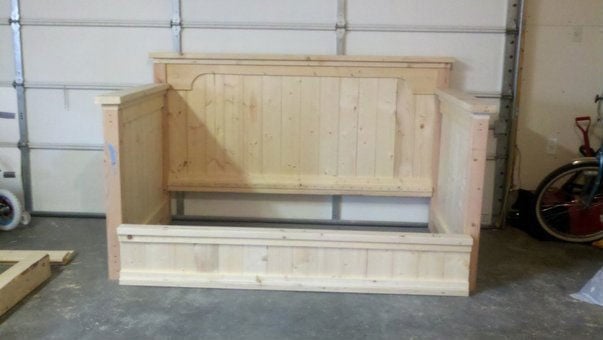
I modified the regular farmhouse bed to a daybed for my daughters bedroom. All that is left now is to fill holes, paint, distress, and glaze :) I made the height of the front and back tall enough to fit a trundle I plan on making later. It is up on blocks right now so I could see what it will look like when completed. Will post an update once it is painted and assembled.

Built from Plan(s)
Recommended Skill Level
Beginner

Comments

suziewelker

Fri, 10/23/2020 - 23:52

I love this! I would love to build a twin size farmhouse daybed with trundle for my stepsons’ room. They are only only with me every few months, so I want to have beds for them but this would save a ton of room! I have tried to modify the Haley storage daybed and the farmhouse plans, but am new to this, so I’m having great difficulty. Also, since they are teens, I have twin XL mattresses. 39x80, so again, more modifications. Any help you can provide would be greatly appreciated! Thank you!

Back