Community Brag Posts
8 foot mudroom hall tree

We had an 8' mudroom, that previously contained our laundry area as well. We moved that and had this space to fill up. We used 3/4" plywood for the most part, and some 1x2 finishing pieces in the front, as per your plan. We built the bench and then installed it, but the upper shelves had to be built in place on the wall, because we couldn't fit it in the room if we pre-built it. So that was a bit of a challence. Turned out great though. Thanks for the plans!
Built from Plan(s)
Estimated Cost
About $400
Estimated Time Investment
Weekend Project (10-20 Hours)
Finish Used
Mudroom and hall tree.
Recommended Skill Level
Intermediate
Comments
Rustic Computer desk with Shou Sugi Ban and Epoxy Top
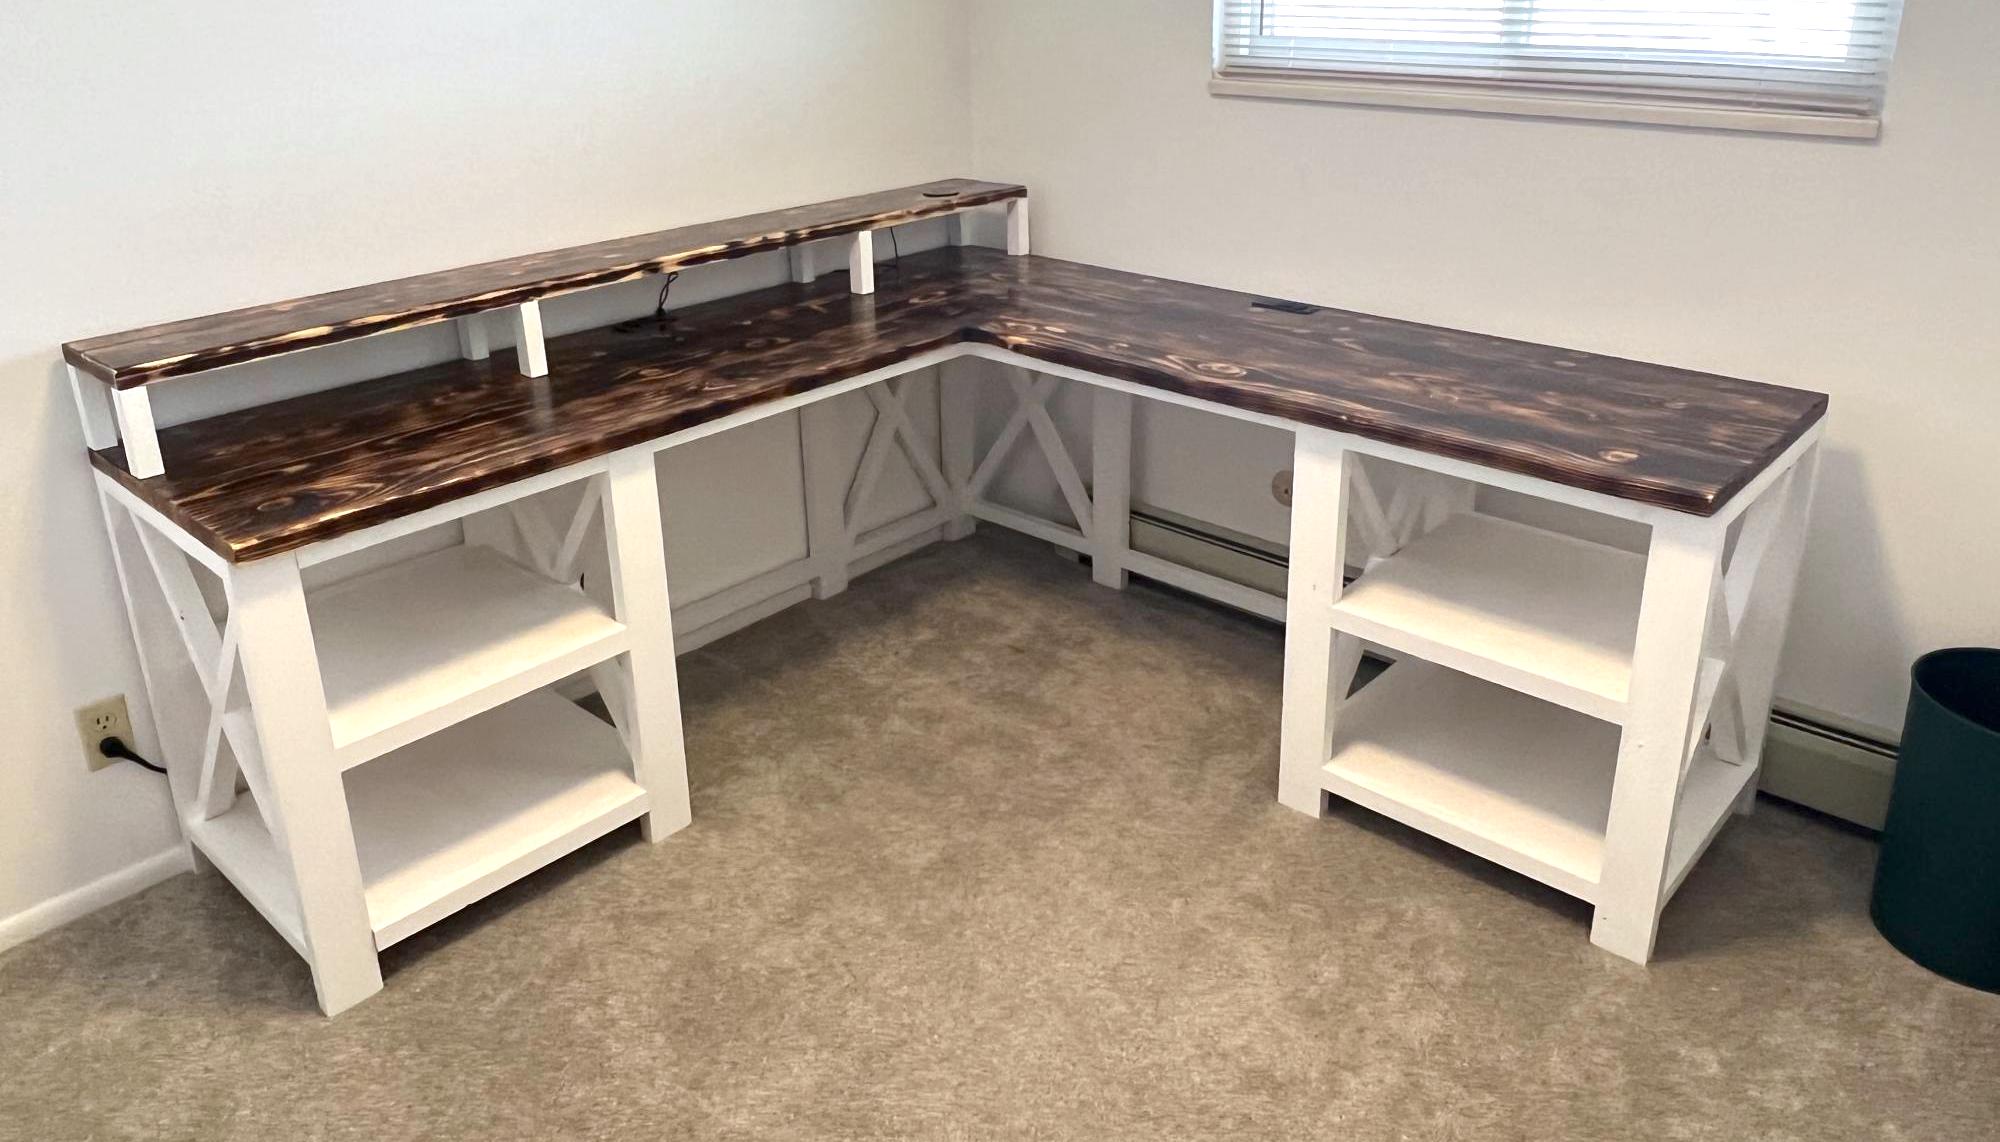
I slightly modified the Rustic X Desk plan to make my L shaped computer desk with a monitor platform! The desk surface is Shou Sugi Ban with an epoxy finish. All made from stock lumber and a lot of pocket hole screws. Thanks for posting your plan Ana to give me the idea! Construct for around $200.
Built from Plan(s)
Comments
Tue, 03/14/2023 - 18:34
Superb desk!!!
Love your modifications, additions and finish! Thank you for sharing.
Patio Furniture in Progress

I built six armless and two corner sections of the outdoor sectional but now I need to paint it and make cushions. For more details: http://www.homeandawaywithlisa.com/blog/2012/1/5/patio-furniture-in-pro…
Built from Plan(s)
Estimated Time Investment
Weekend Project (10-20 Hours)
Recommended Skill Level
Intermediate
Outdoor Planter Steps or Bench
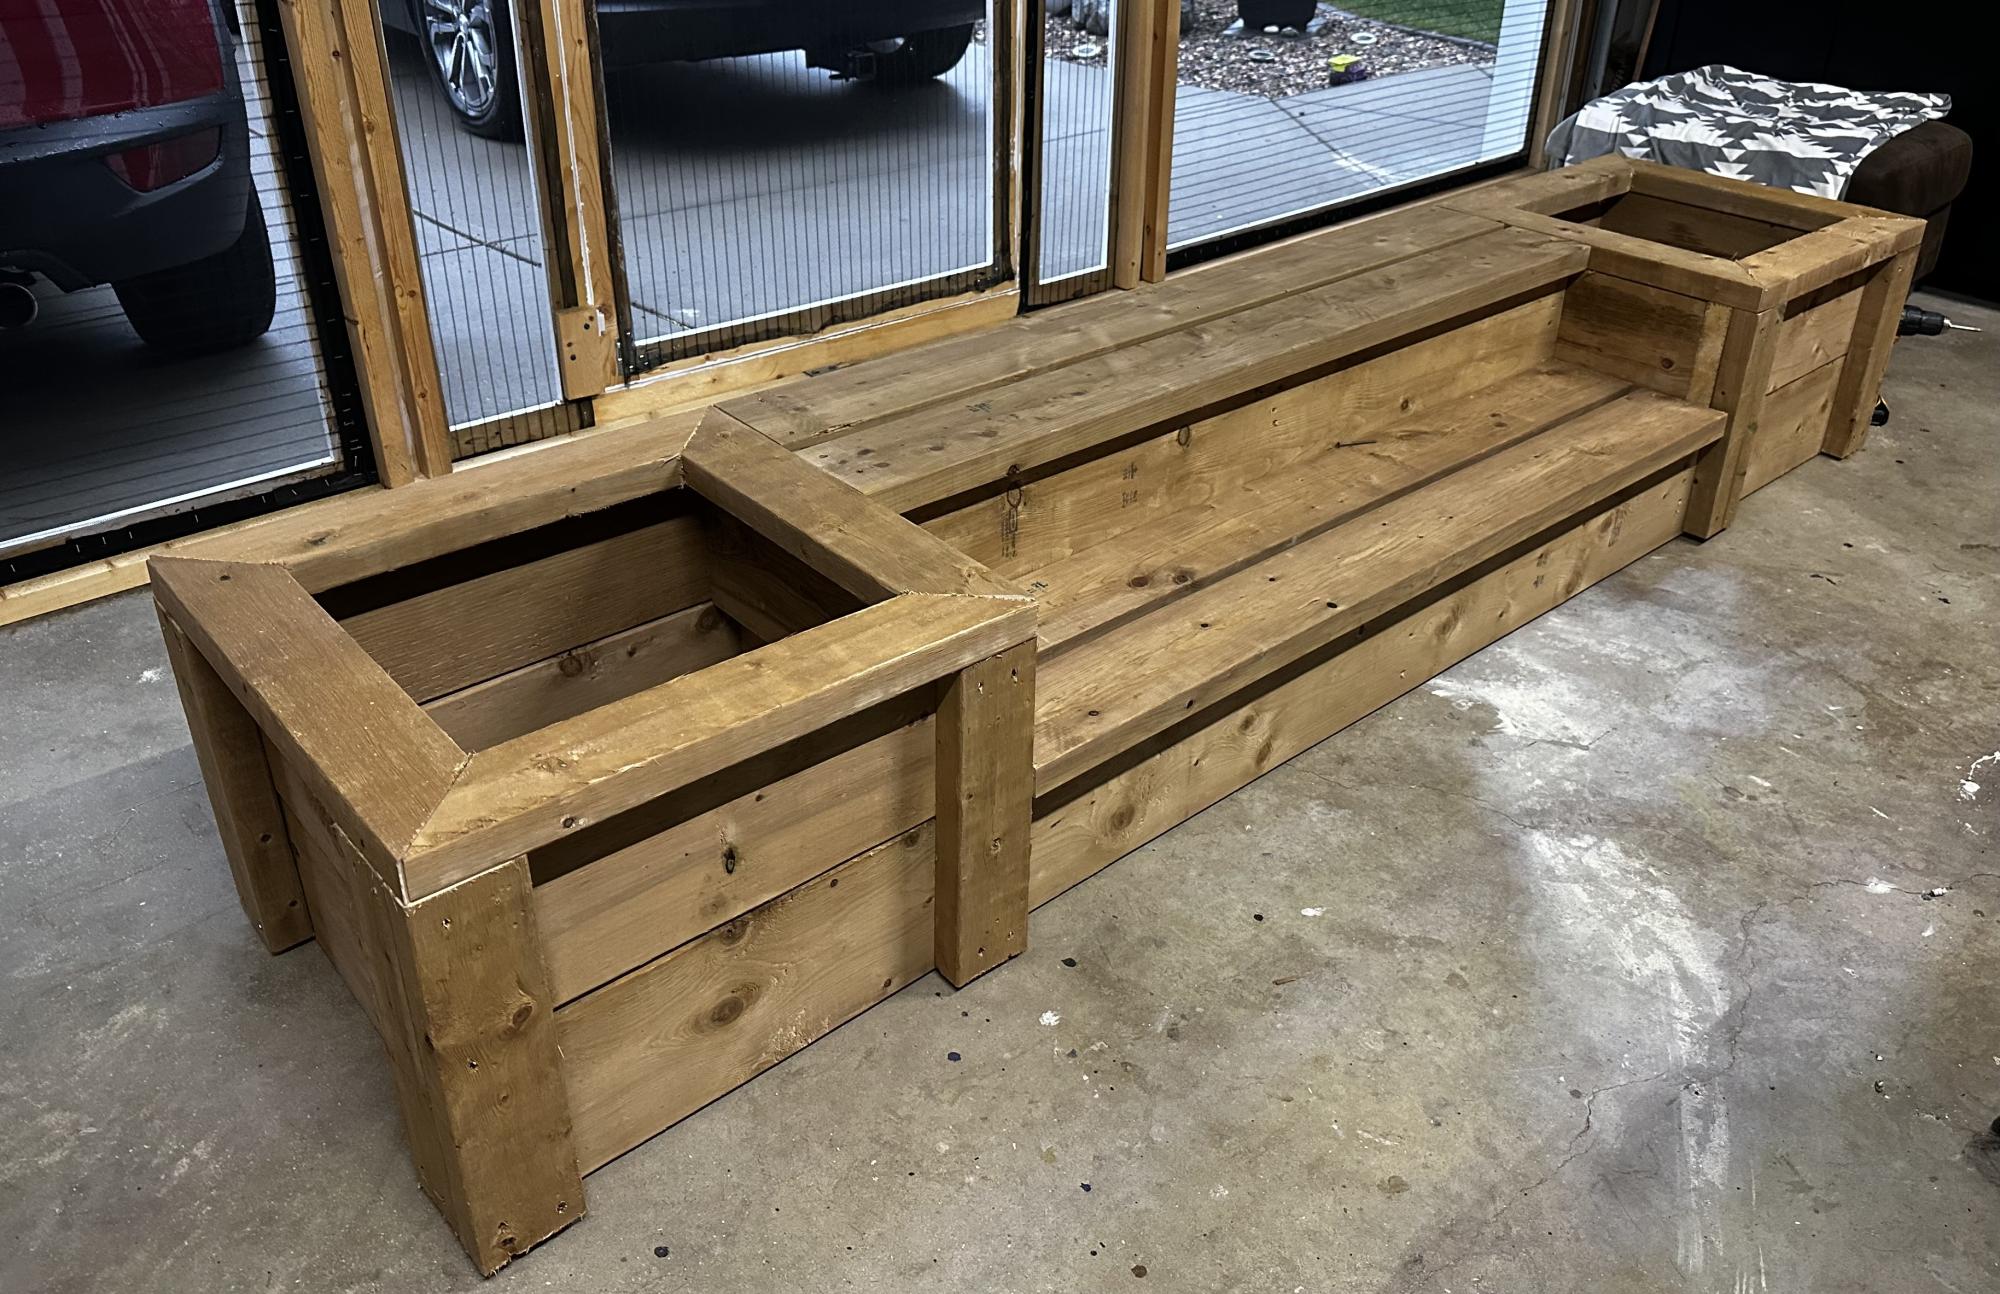
This was my first time doing a big project like this . Thank you for the plan for this.
Built from Plan(s)
Comments
Thu, 06/15/2023 - 09:19
Great planter steps!
These look awesome, can't wait to see them all in place and filled up! Thanks for sharing.
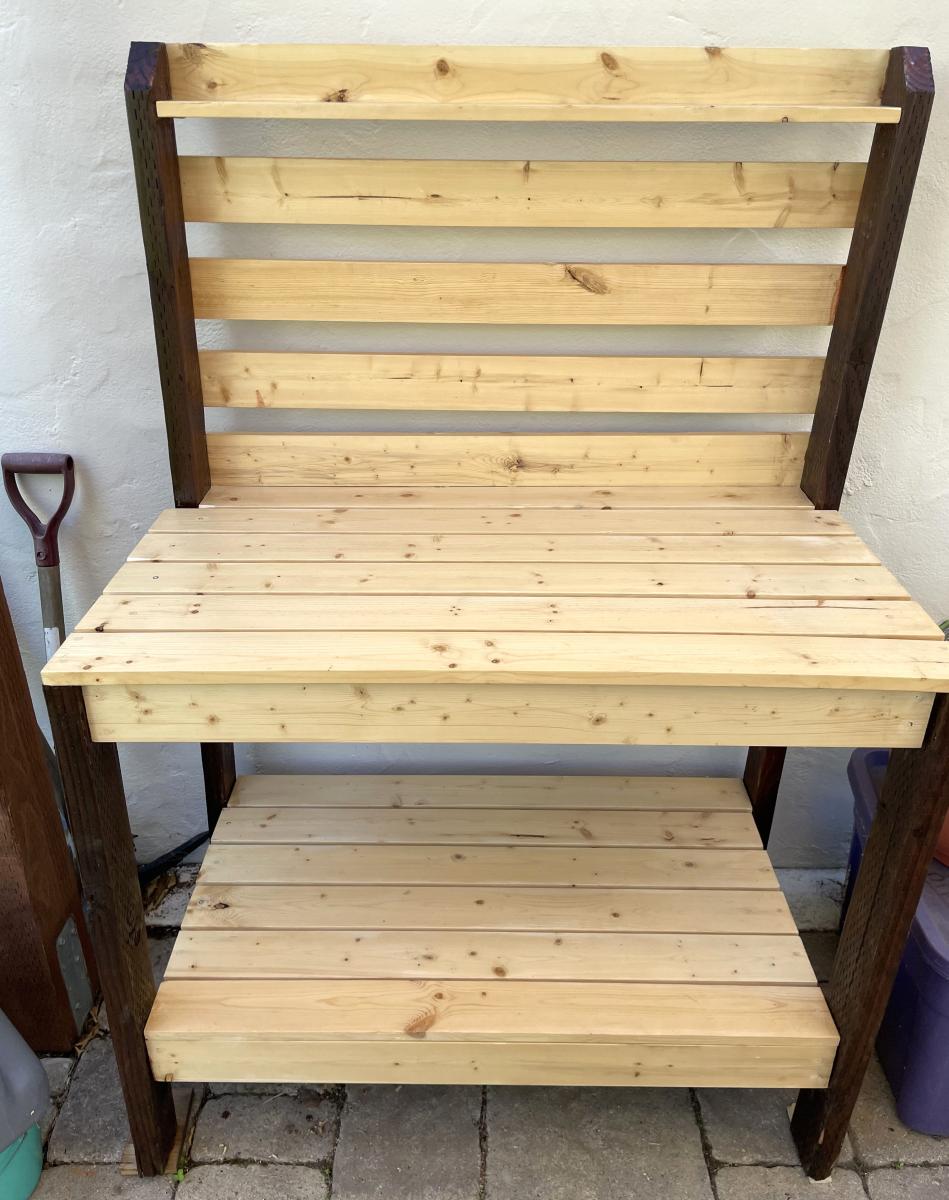
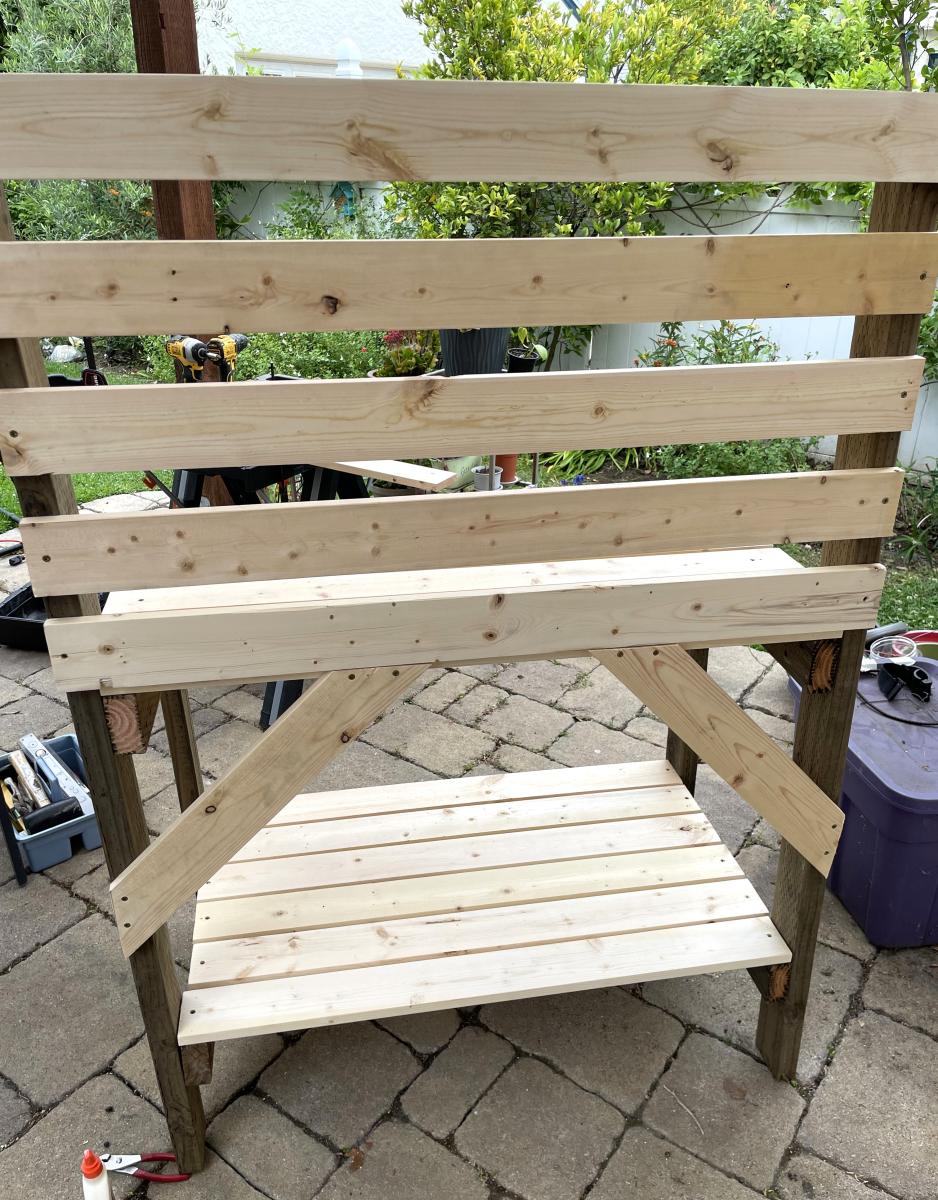
Garden Potting Bench
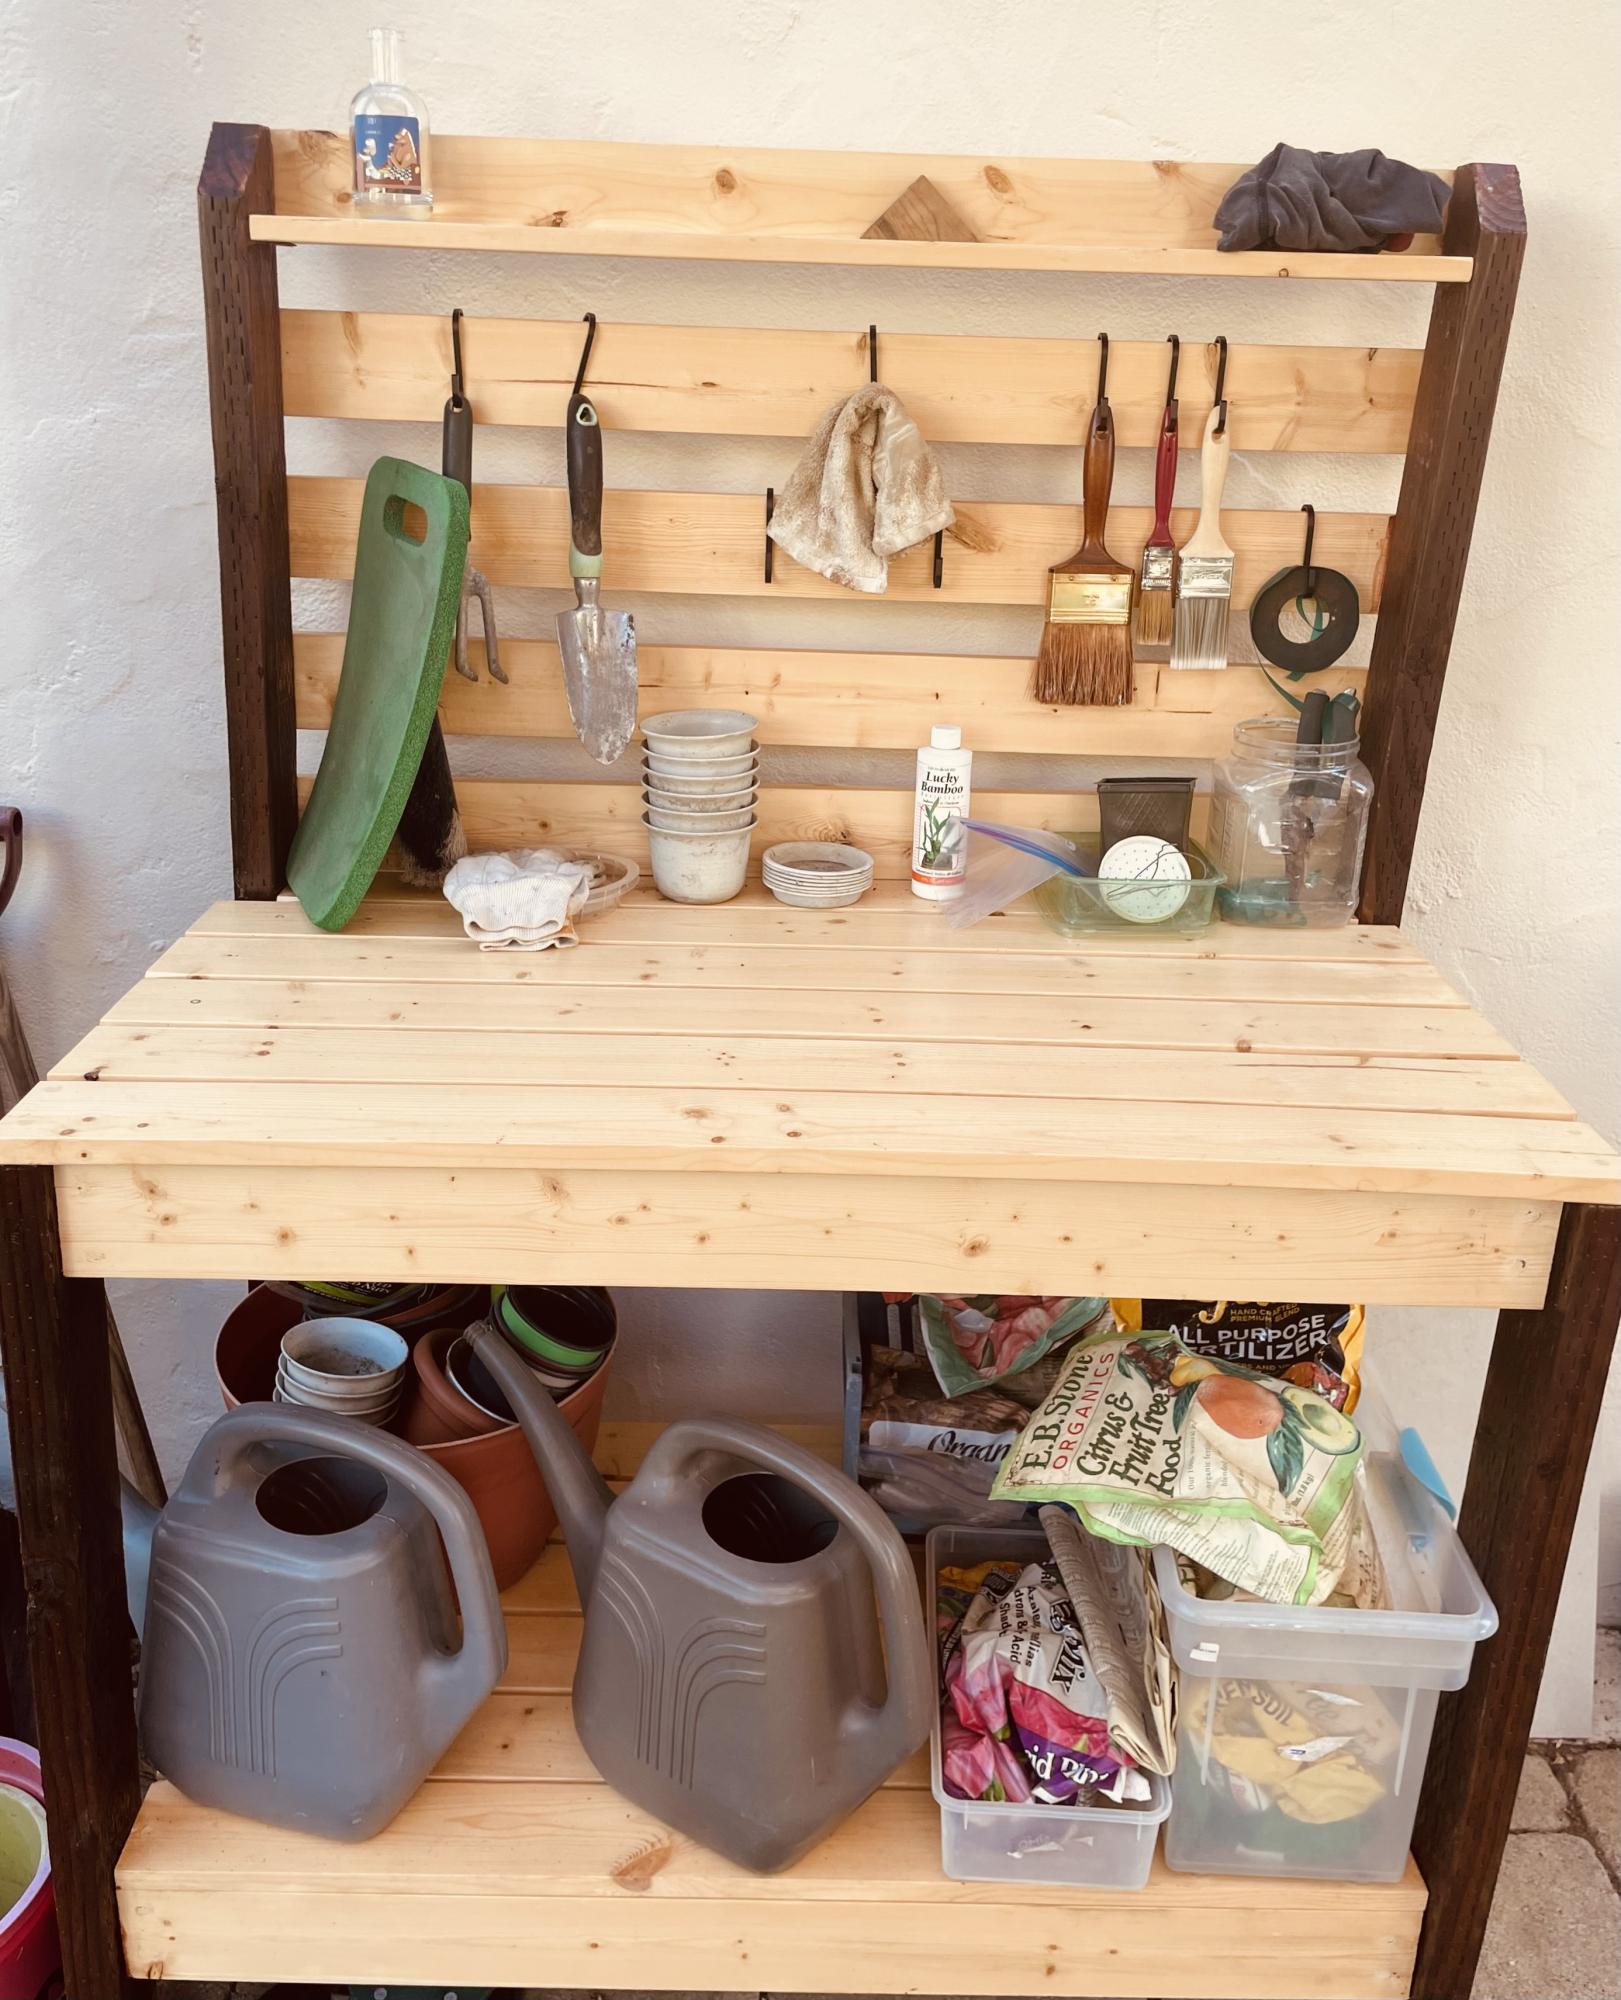
Potting bench. I had some pressure treated darker wood around and used that for the legs and frame. Pine for much of the rest. Stained the frame cherry. Polycyclic for the pine and the frame. Three times. Lots of compliments. Highly functional as well!
Built from Plan(s)
Playhouse Loft Bed

We built this kids playhouse for our 4 year old daughter for Christmas. We modified it from the playhouse loft bed with stairs, only we made it bigger and instead of stairs we installed a slide. Also rather than a ladder we put in a rock wall.
Built from Plan(s)
Estimated Cost
$400
Estimated Time Investment
Week Long Project (20 Hours or More)
Recommended Skill Level
Beginner
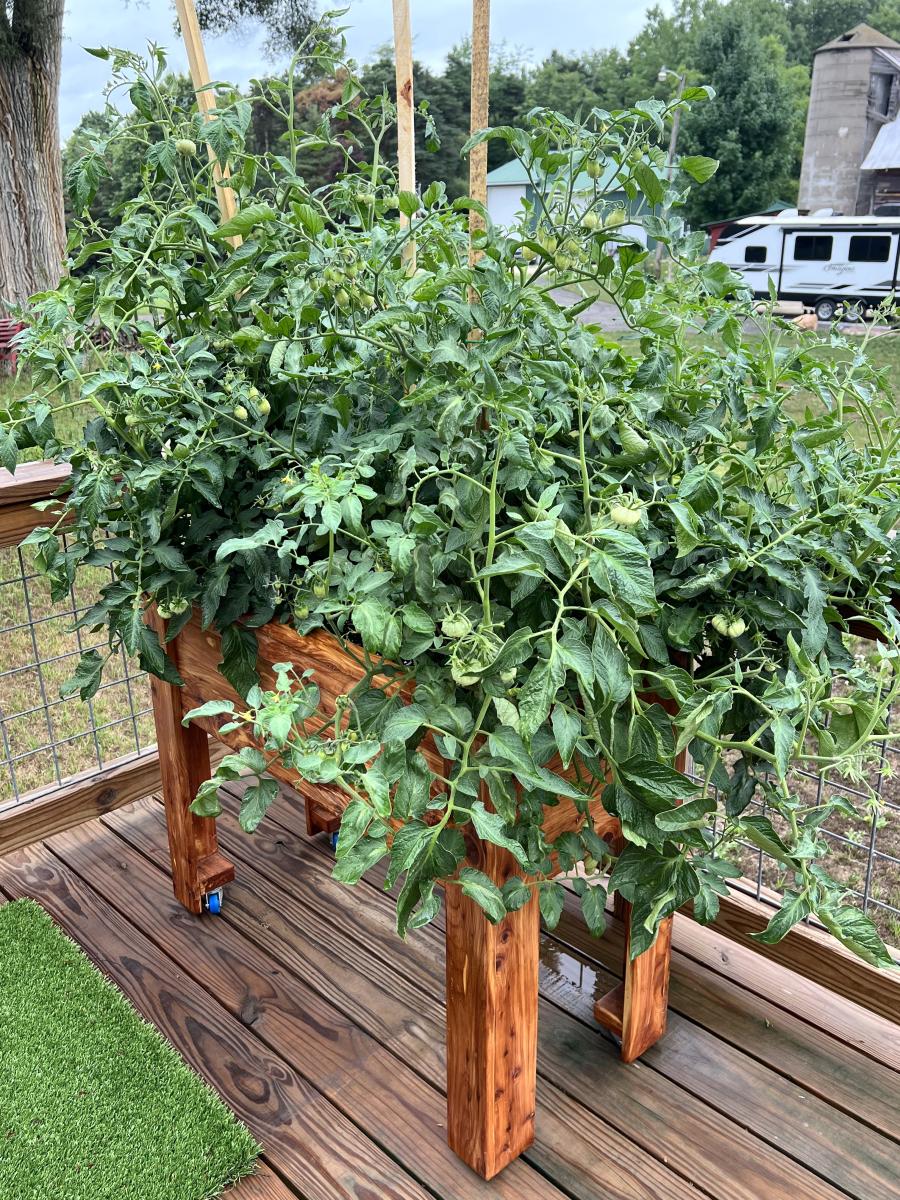
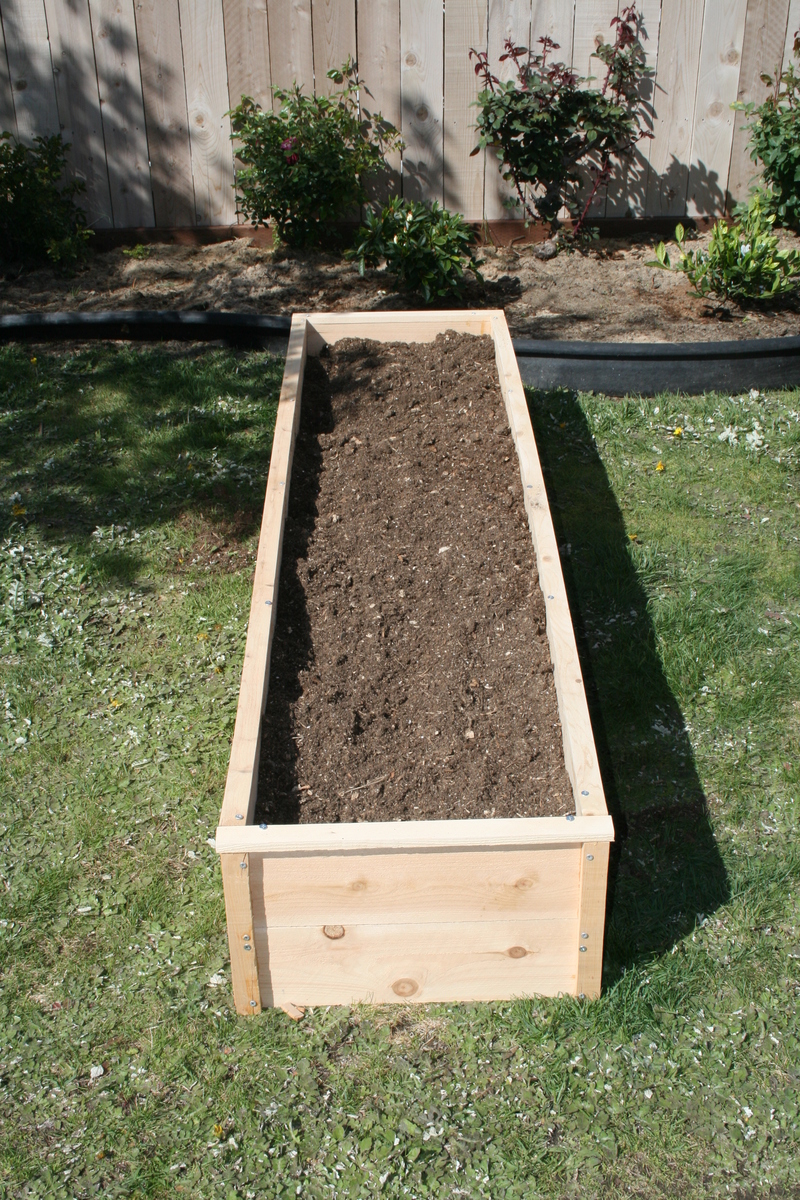
DIY Raised Garden Planter on Casters
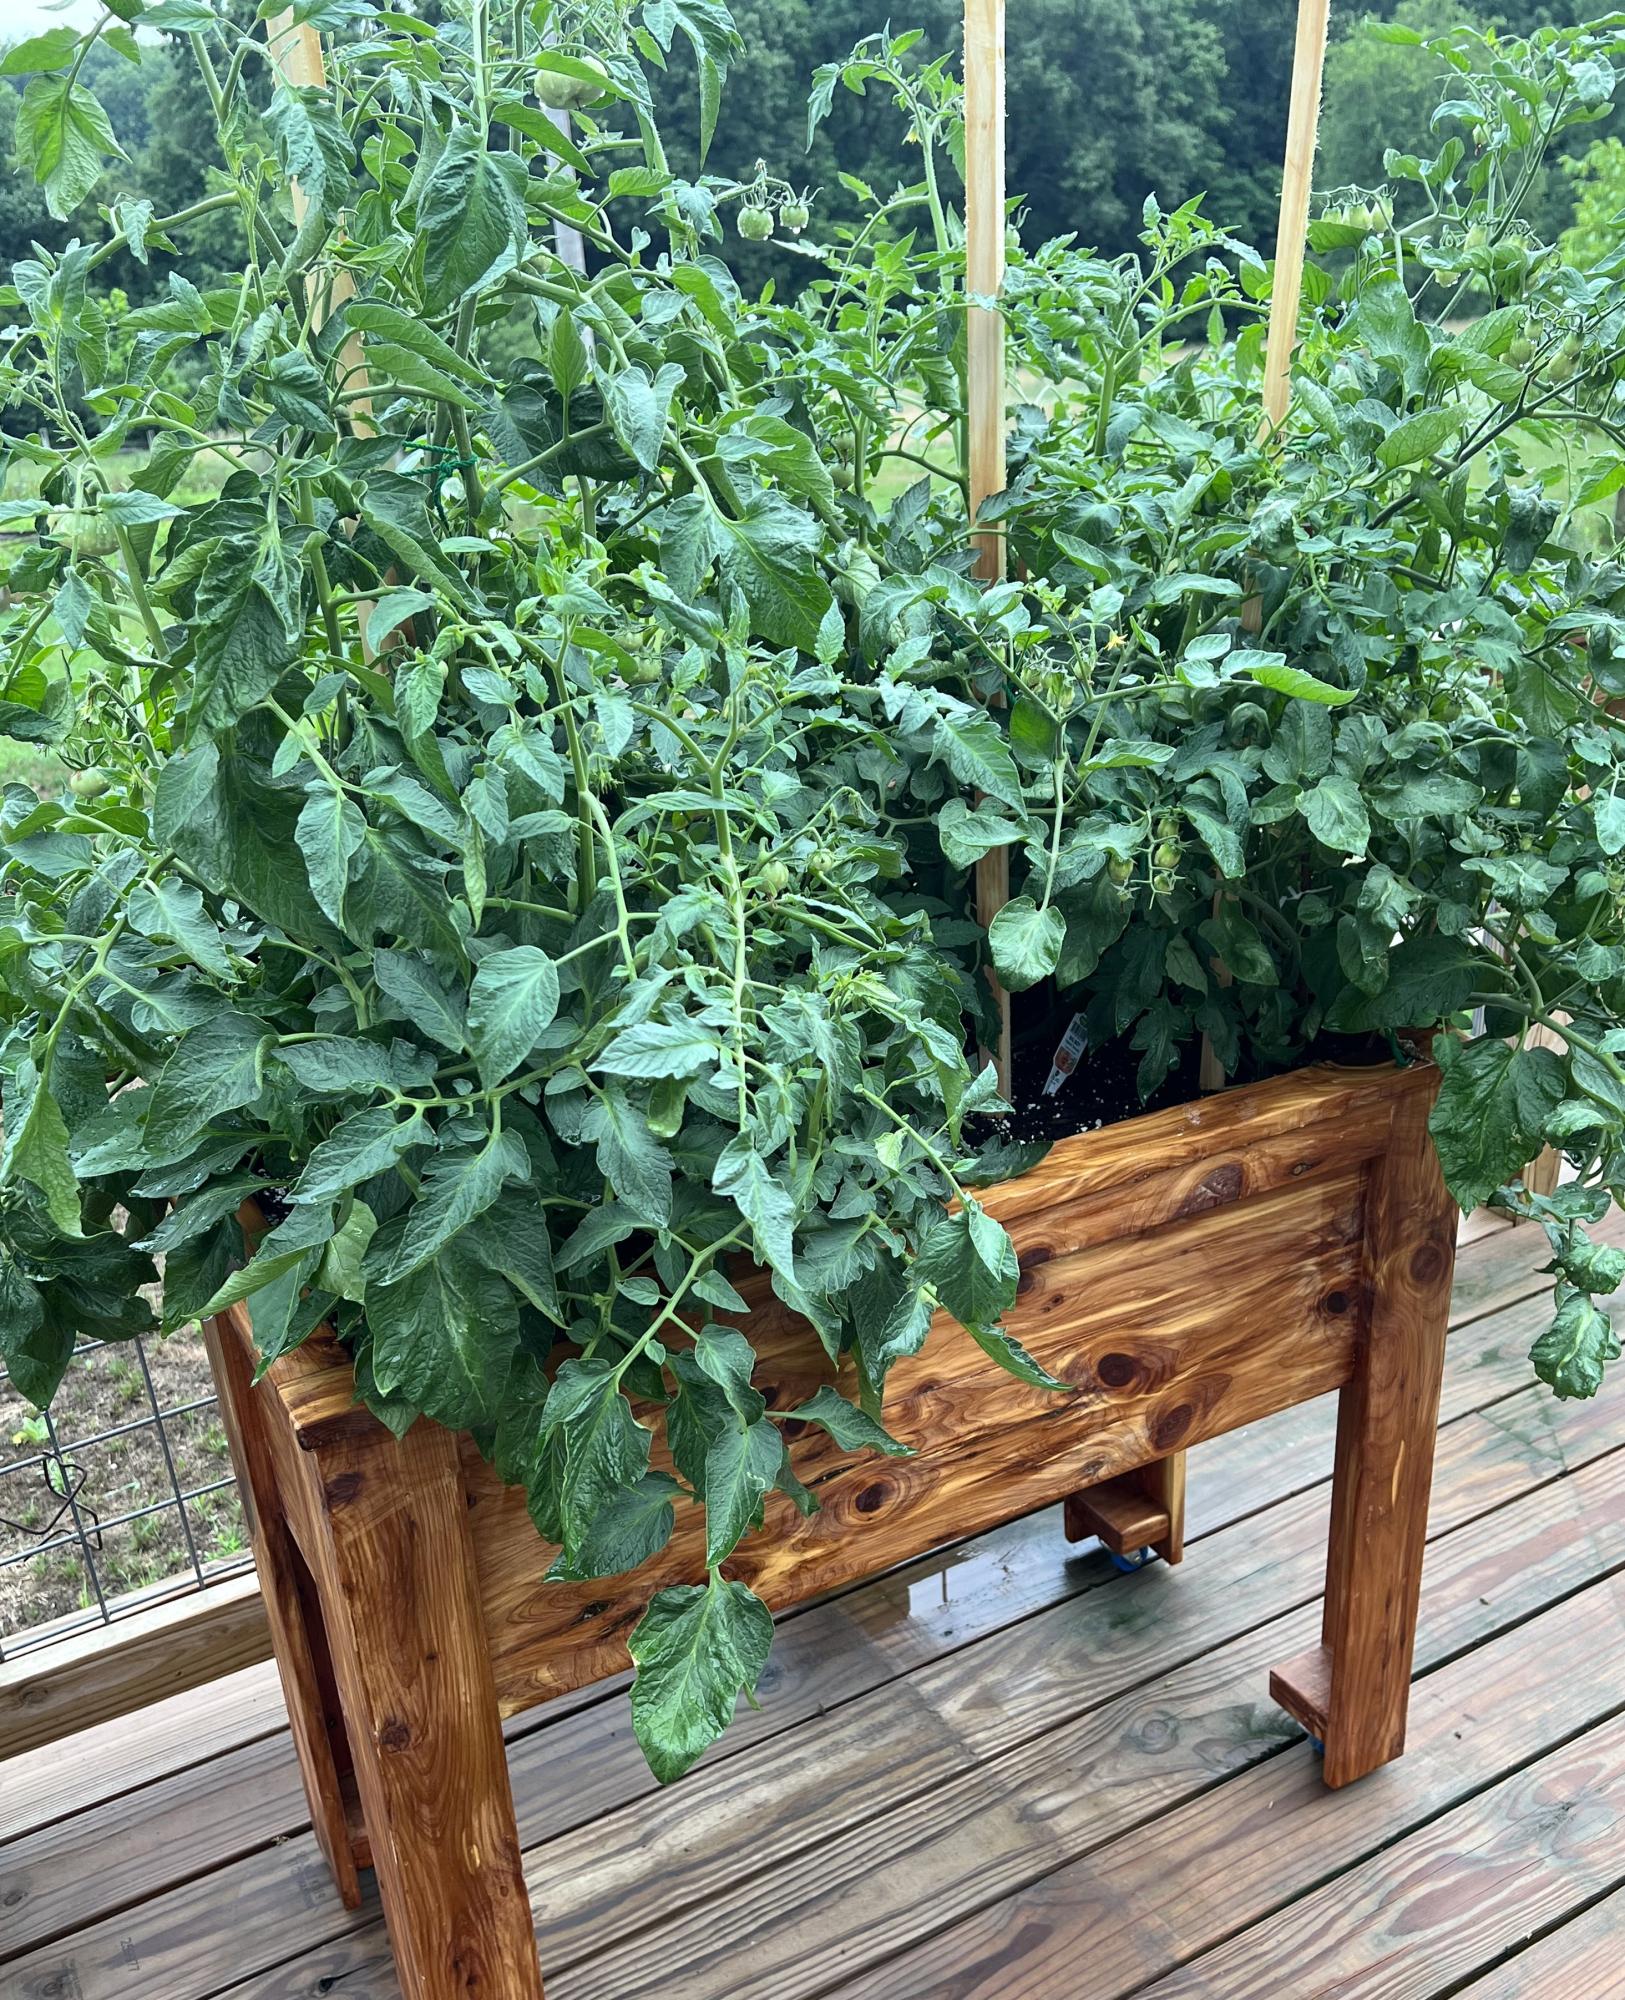
I saw your raised garden box and decided to make it for my wife so she could garden on our deck due to medical problems. She absolutely loved it.
The only thing I did different was I added casters to the legs so it can be moved easily on the deck.
Thank you very much for the idea and plans. We really enjoy them.
John Sterzick
Built from Plan(s)
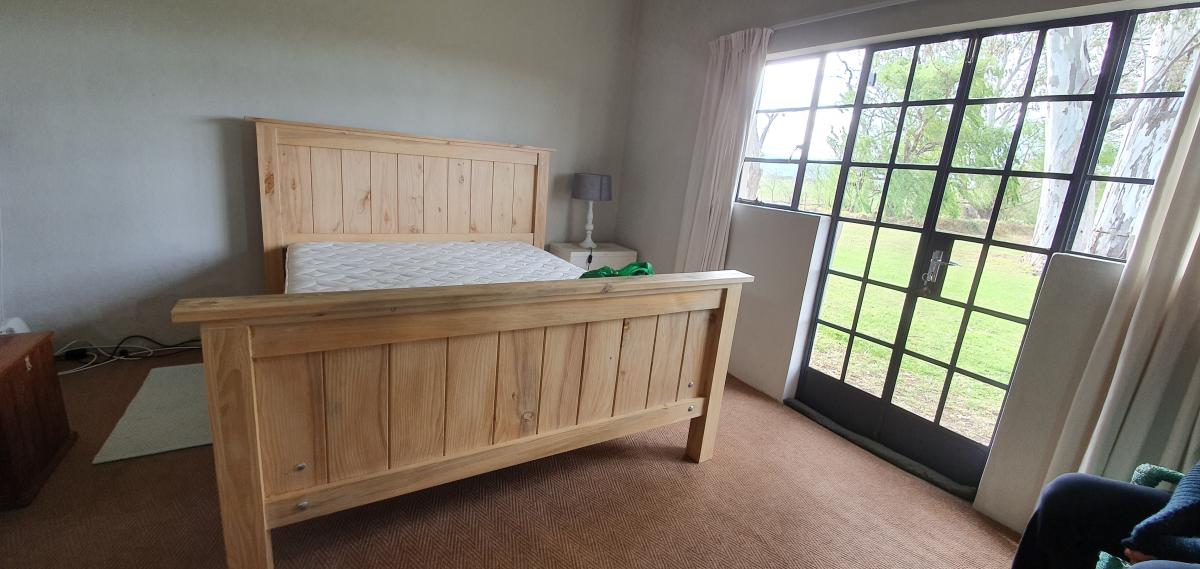
Farmhouse Queen size bed from rough saw milled pine
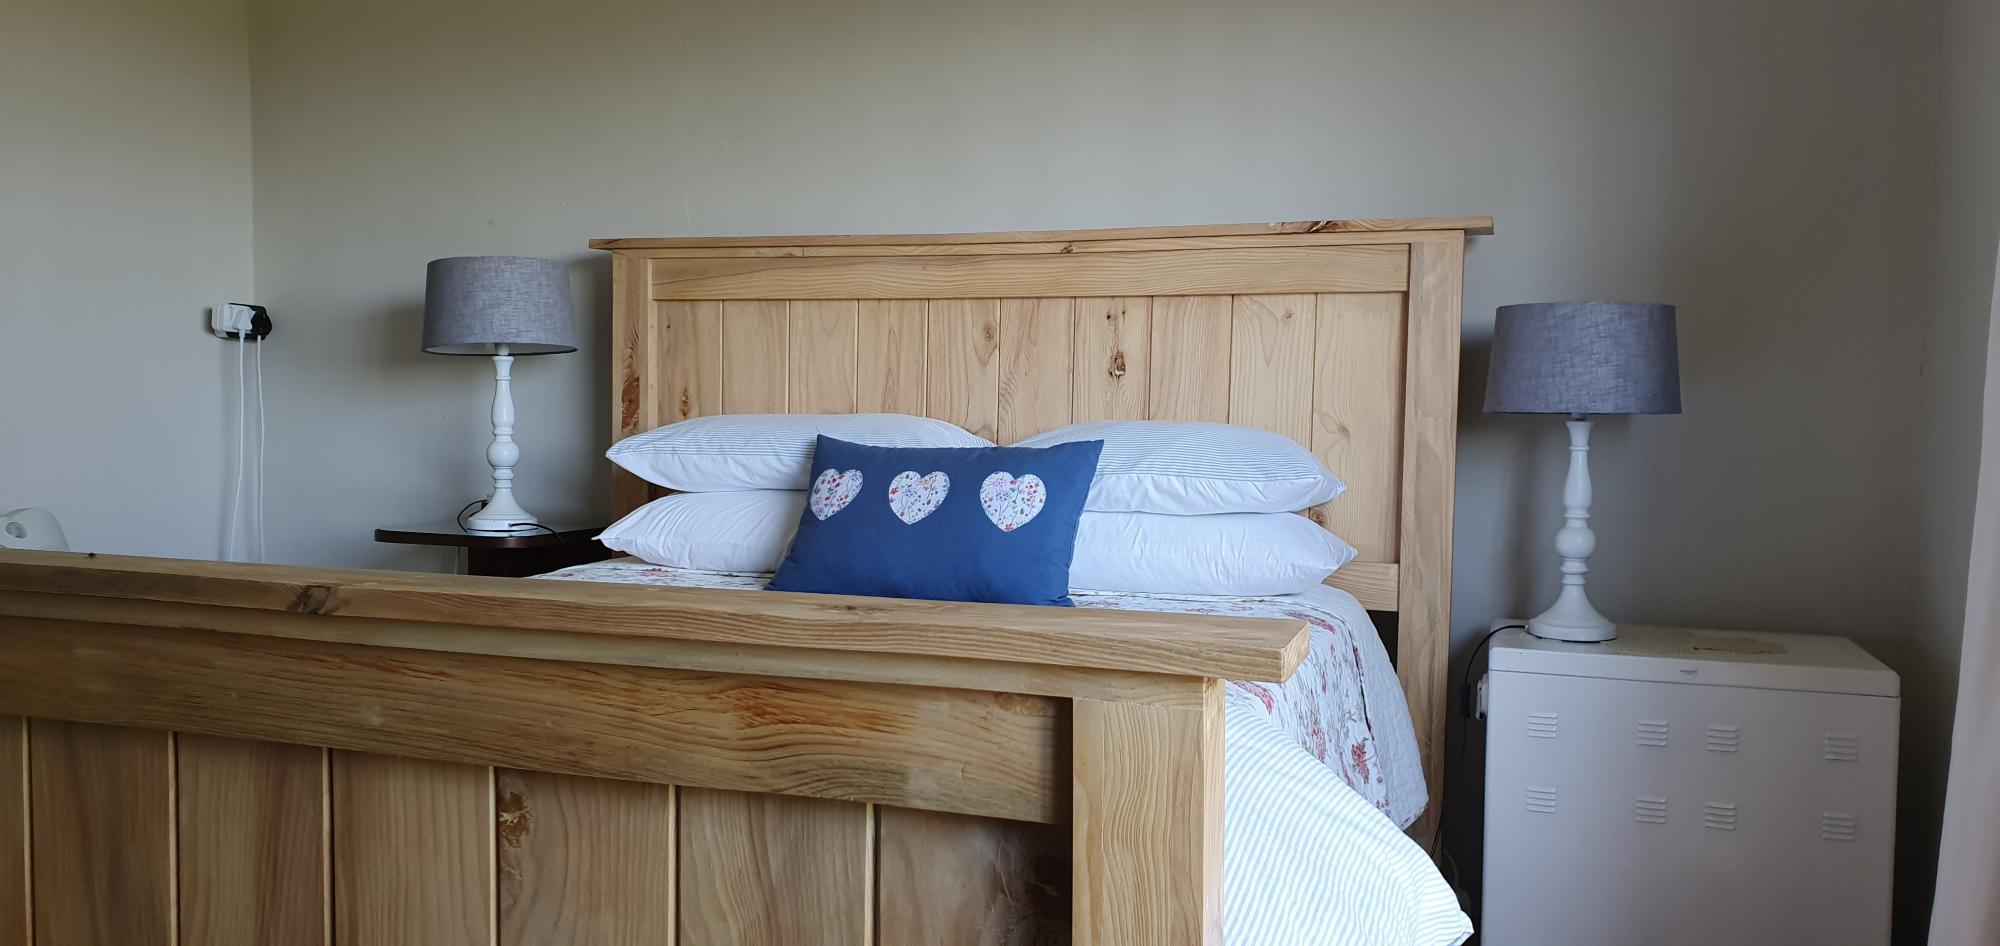
This rough milled lumber had to be planed quite a bit. and the sizes also differed. We ended up with thicker sections than on the original plan. Also used bolts to bolt the heavier headset and footrest to the base.
Screws were used instead of nails. This inland Karoo area pine is very hard and crack very easily. warps too. Well seasoned wood were used. Finish is normal sanding sealer for a mat look.
thanks for the lovely plans Ana.
this is a proven classic.
Raised Bed Garden Enclosure

With lots of deer, rabbits, coyotes, and the occasional bear, garden enclosures are a must in our area (although I am not sure they will really help if a bear decides they're interested in our food). As our old garden enclosure was falling down due to the high winds and a quite a few winters in upstate New York, my mom found a horseshoe shaped garden with rasied beds that she loved. So, after searching around for a good plan, I found Ana White's collaboration with Home Depot for this enclosure.
While the original plan was far too small for our needs, I was able to expand the length of the enclosure creating enough room to add two small beds on either side of the door and a center bed, which is perfect for herbs. The build was not difficult as I was able to do most of it by myself (with the exception of contructing the frame and attaching the door) and I am sure this would go much quicker with an extra set of hands. As I did not have a large chunk of time to devote to this project, it did take me quite some time stretched over a few weeks. Nonetheless, I am very happy with how it turned out.
After construction, my family got a little garden happy and decided we wanted to plant even more vegetables than we had originally planned. So, we created a much simpler but nonetheless less pest-proof enclosure for two more beds to the left of our original project (shown in the photos).
Although this was an expensive project (exact price is unkown), it is quite sturdy and we expect it to last a long time and provide lots of vegetables. We added some hanging baskets for decoration and decided next year we will add some morning glories around the outside corners for some extra shade during the afternoons. Some minor alterations also included a latch that allows us to open and close the door from both sides, we actually picked up a gate latch kit for this part of the project, and using welded wire fencing instead of chicken wire. While the welded wire added to the cost, it will hold up better to the wind and snow and is still protective enough to keep out our main predators.
Thanks so much for the plans Ana! In the begining, our neighbors joked we were building a guest house :). I have included some photos from throughout the build as well.


Built from Plan(s)
Estimated Cost
~$500?, we had to make some adjustments in size and swap out some materials due to the high winds we get, so this could probably be done for cheaper. The cost is also a guess as I am not completely sure what the total came to after many trips to the store. Nonetheless, our garden is twice the size of the enclosure kits Home Depot and other stores sell for what I predict to be more than twice the cost.
Estimated Time Investment
Week Long Project (20 Hours or More)
Finish Used
Unfinished
Recommended Skill Level
Beginner
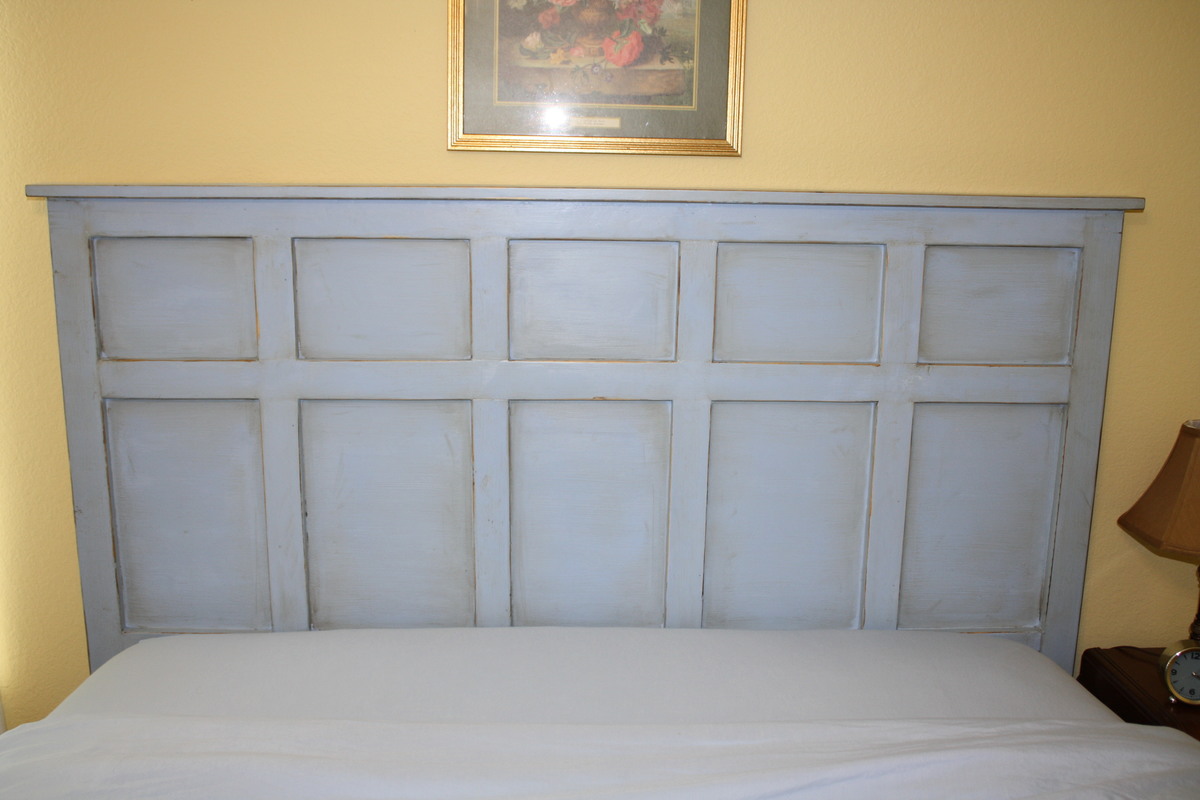
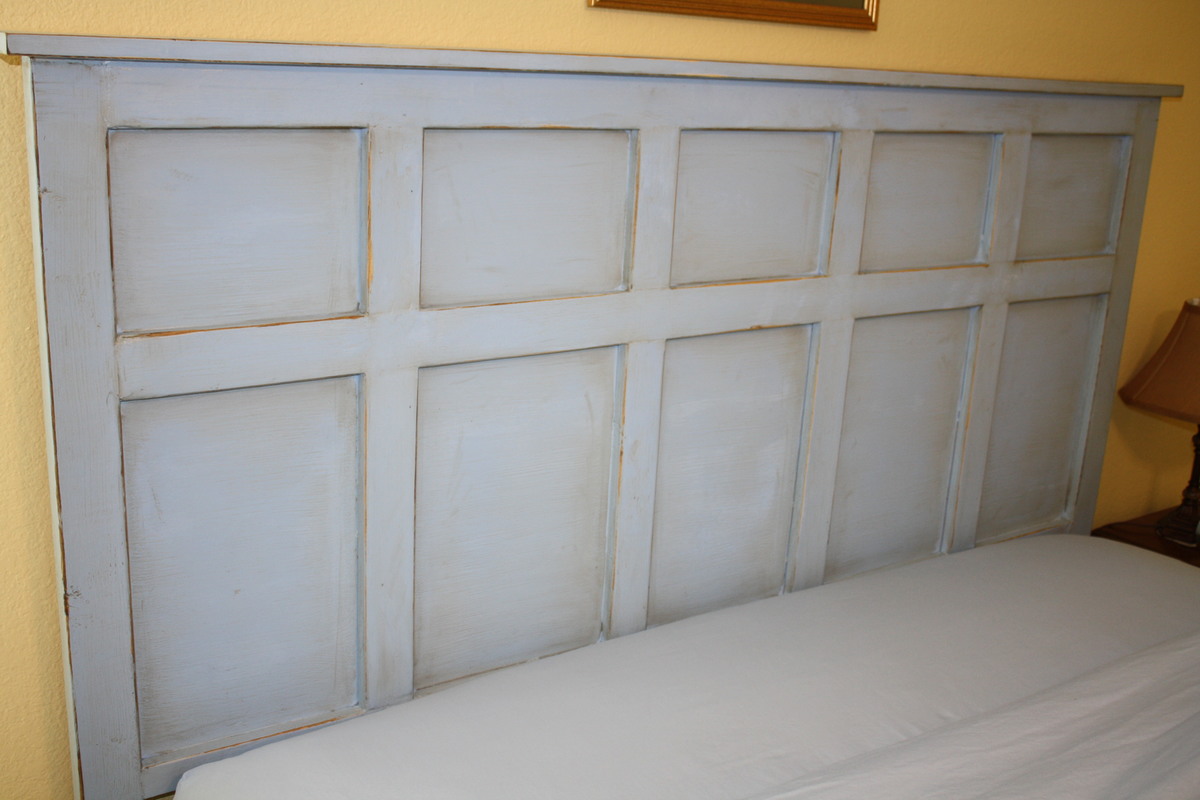
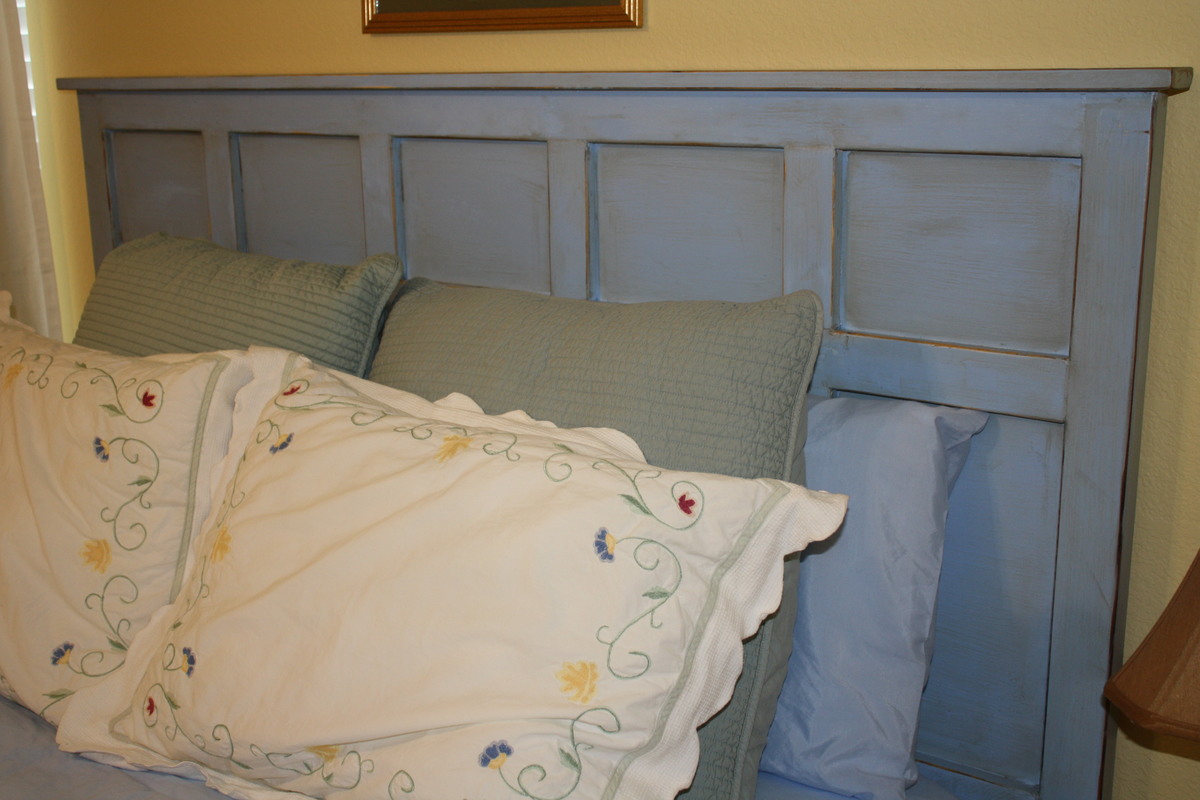
Board & Batten Inspired Headboard

Our guest room finally has a headboard! I put together this queen size headboard using what I had learned building my daughter's headboard (and consulting the plans for the Reclaimed Wood Headboard) using the remainder of the plywood sheet from her headboard project, 2x3s for the legs, a 2x4 to join the legs (and connect to the metal bed frame), furring strips, and a 1x3 to top it off.
Our plywood had been cut to fit our car, so the first vertical furring strip was placed to hide the seam where I joined the two pieces back together. Then we evenly placed them from center as just looked right to us.
We had a great time seeing this come together as we didn't follow a specific plan, but were able to be a bit more creative inspired by various plans.
Estimated Cost
$45 including hardware & paint
Estimated Time Investment
Afternoon Project (3-6 Hours)
Finish Used
We painted with Martha Stewart's Stratosphere in a flat finish, distressed and rubbed on Minwax Provencial stain. Unfortunately, the stain gave the headboard a very green tint, so after a lot more sanding, we were able to finish the project with two quick coats of Minwax water based Poly.
Recommended Skill Level
Beginner
Comments
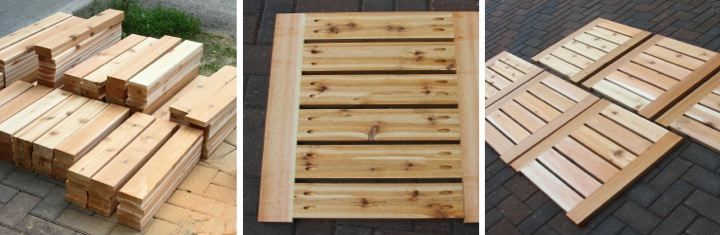
Pallet Wood Planters

Did them for a friend that owns a bakery.
I don't have access to new lumber unfortunately.
The bulk of what I make is pallet. That's why there are four instead of 3 slats.
Same plan though. Pretty easy to follow.
I did add some handles to make it easier to move
since they will be brought in and out daily.
Yun
Built from Plan(s)
Modern White Dresser with Wood Drawers
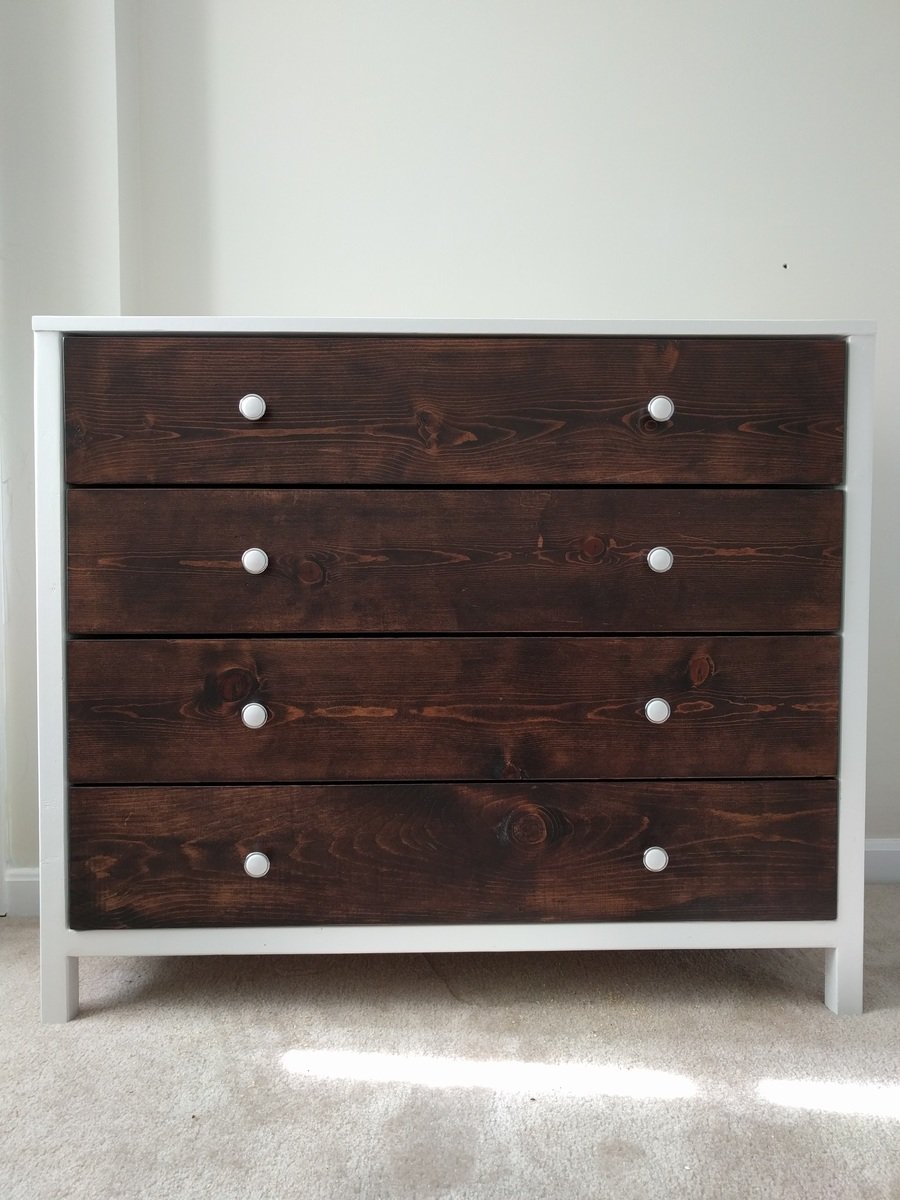
Seen here is my first personal wood working project. I loved the two tone look of this piece as the white really complements and makes the antique walnut stained drawer fronts pop! While the dresser turned out really well considering it being my first build, I learned a lot of lessons. I had a lot of challenges because like every new wood worker, you likely wont have all the right tools for the task at hand. I built this dresser with a circular saw, Kreg jig tool, a miter saw and Wagner spray gun. With these limitation, most task took 2x-3x longer than it normally would. In the end, I was pleased with the outcome.
Built from Plan(s)
Estimated Cost
$200-$300
Estimated Time Investment
Weekend Project (10-20 Hours)
Finish Used
Sherwin Williams ProClassic Alkyd Interior Enamel White Paint/
General Finishes Java Gel Stain/
General Finishes Water Based Poly
General Finishes Java Gel Stain/
General Finishes Water Based Poly
Recommended Skill Level
Intermediate
Double Trash Bin

This was based on the "Small Kitchen Island" Plans but needed to put 2 - 33 Gal Trash cans in. I used Select Square edged Pine. The depth remained the same as the plans but the width changed dramatically (52" wide). I also increased the height to match the other furniture (3' High). I added 4 - 1 X 2's to the top of the cabinet to secure the top.

Built from Plan(s)
Estimated Cost
$350-$400
Estimated Time Investment
Week Long Project (20 Hours or More)
Finish Used
The bottom was paint that matched the other furniture, the top is an Classic Oak Poly/Stain - 3 coats
Recommended Skill Level
Intermediate
Comments
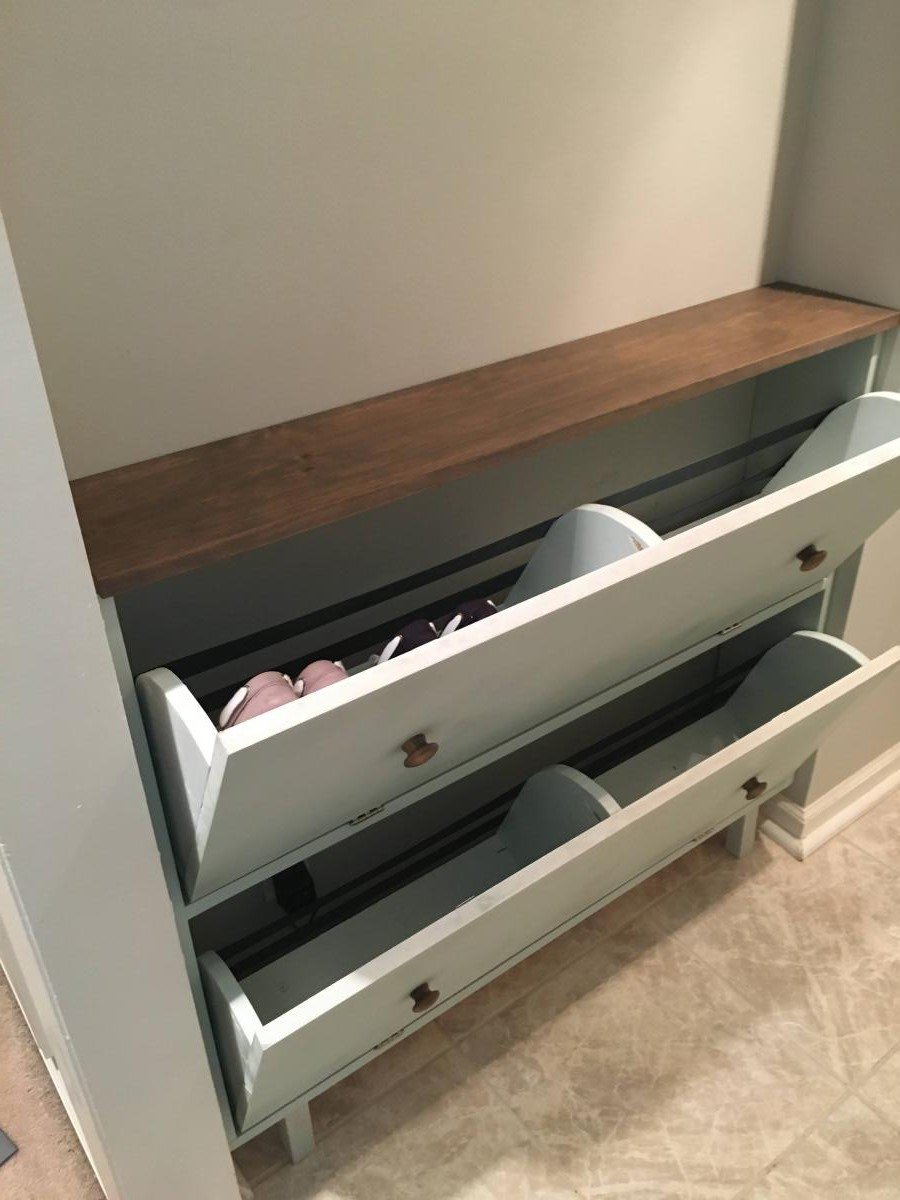
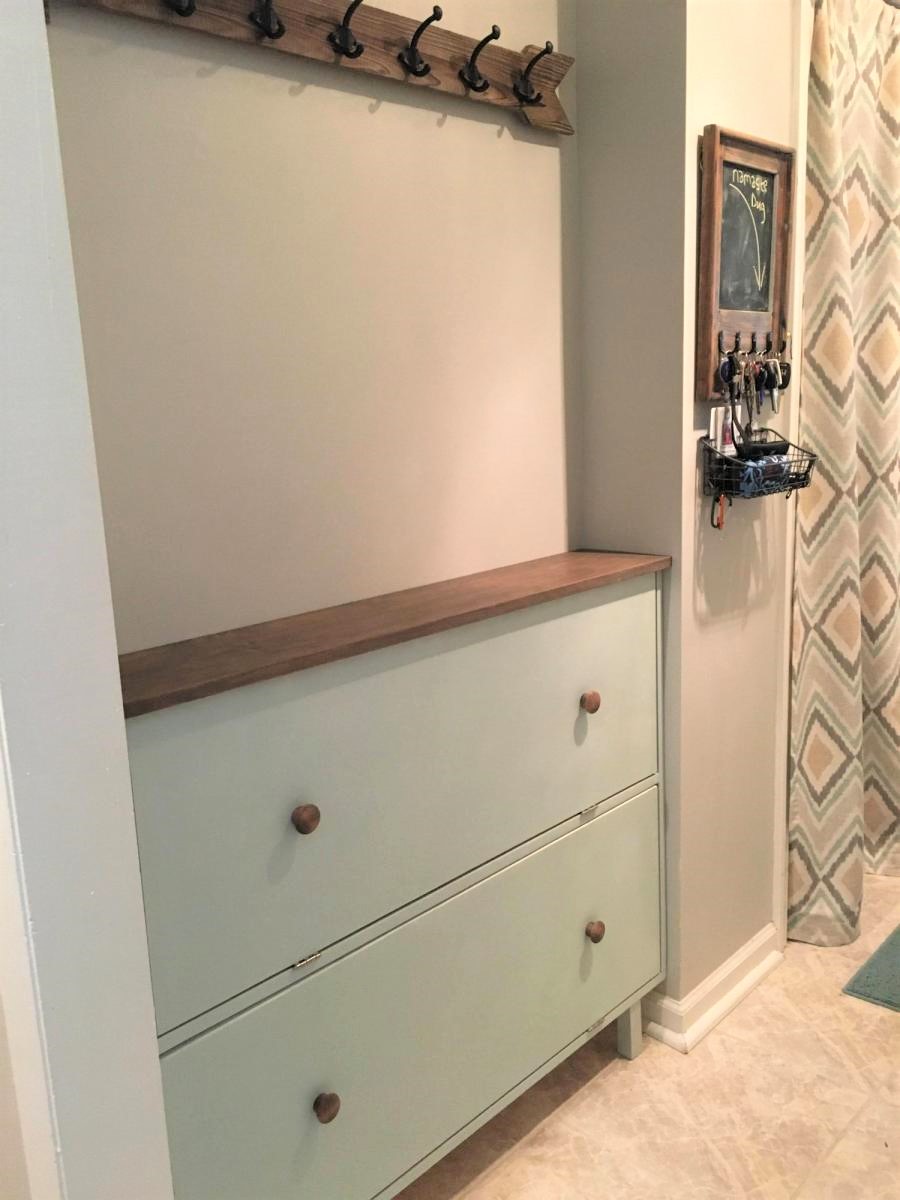
Shoe Dresser
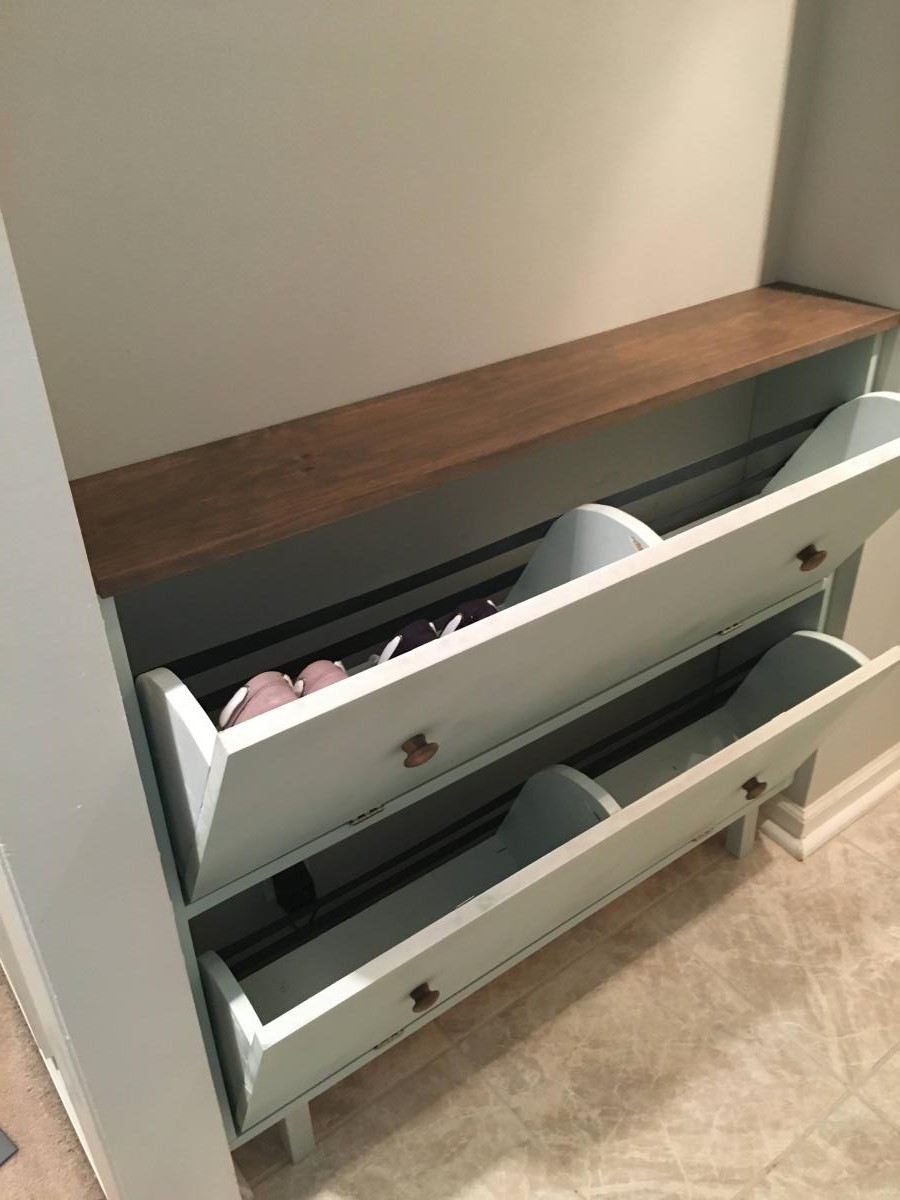
I had this space in my mudroom that was a perfect spot to make a custom shoe dresser. I adjusted the plans I found on this website to custom make storage for shoes. Now this weird little space is functional.
Built from Plan(s)
Estimated Cost
80
Estimated Time Investment
Day Project (6-9 Hours)
Finish Used
Rustoleum chalk paint Serenity Blue, classic grey and special walnut Minwax
Recommended Skill Level
Intermediate
Comments
Planked Wood Sideboard
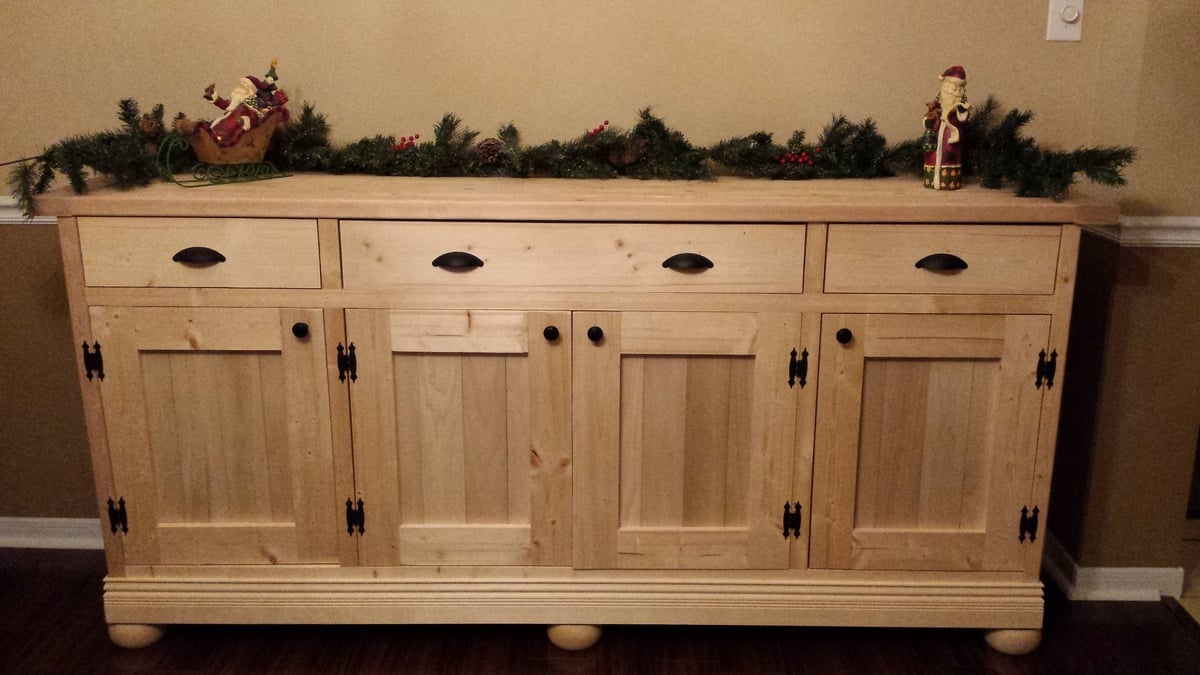
I was looking for something to hold my scrapbooking supplies. I want to use my formal dining room as my craft room but have the illusion it's still a dining room. This plan was perfect. This was my first time building anything from Ana's site. I added feet to the bottom to change up the look just a little. I also used a more detailed base molding. I also added some support to the bottom to have somewhere to attach the feet and distribute the weight of all my scrapbooking supplies. The best advice was to leave the top off until the end. I also waited to attach the back till the very end also. I thought I'd have the most trouble with the drawers but the doors ended up being the hardest part for me. Overall I'm very happy with the buffet! I haven't decided how I'd like to satin it yet. I'll eventually get that done! On to the next project. :)


Built from Plan(s)
Estimated Time Investment
Weekend Project (10-20 Hours)
Finish Used
none yet
Recommended Skill Level
Beginner
Comments

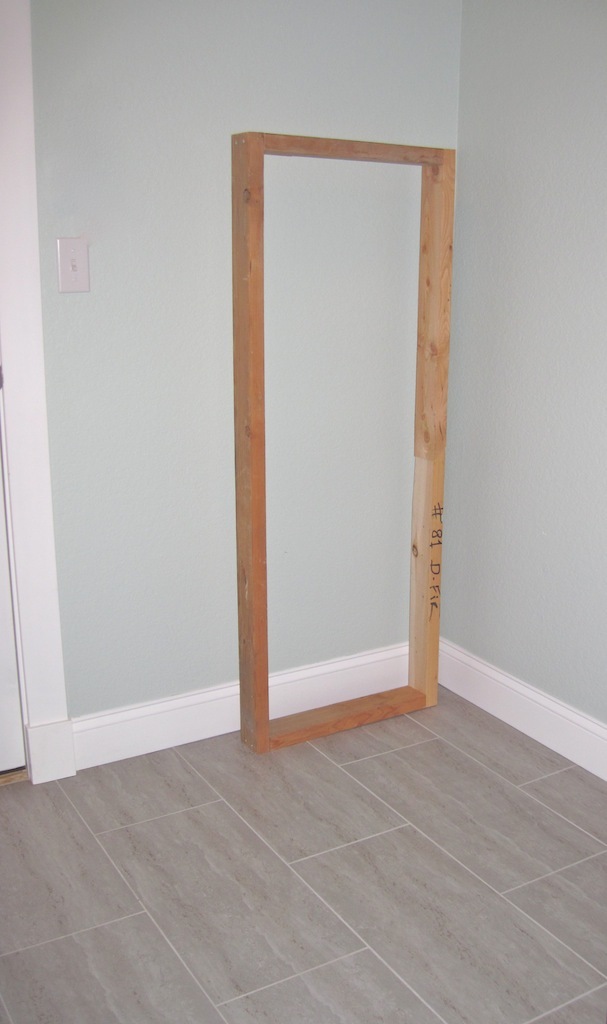
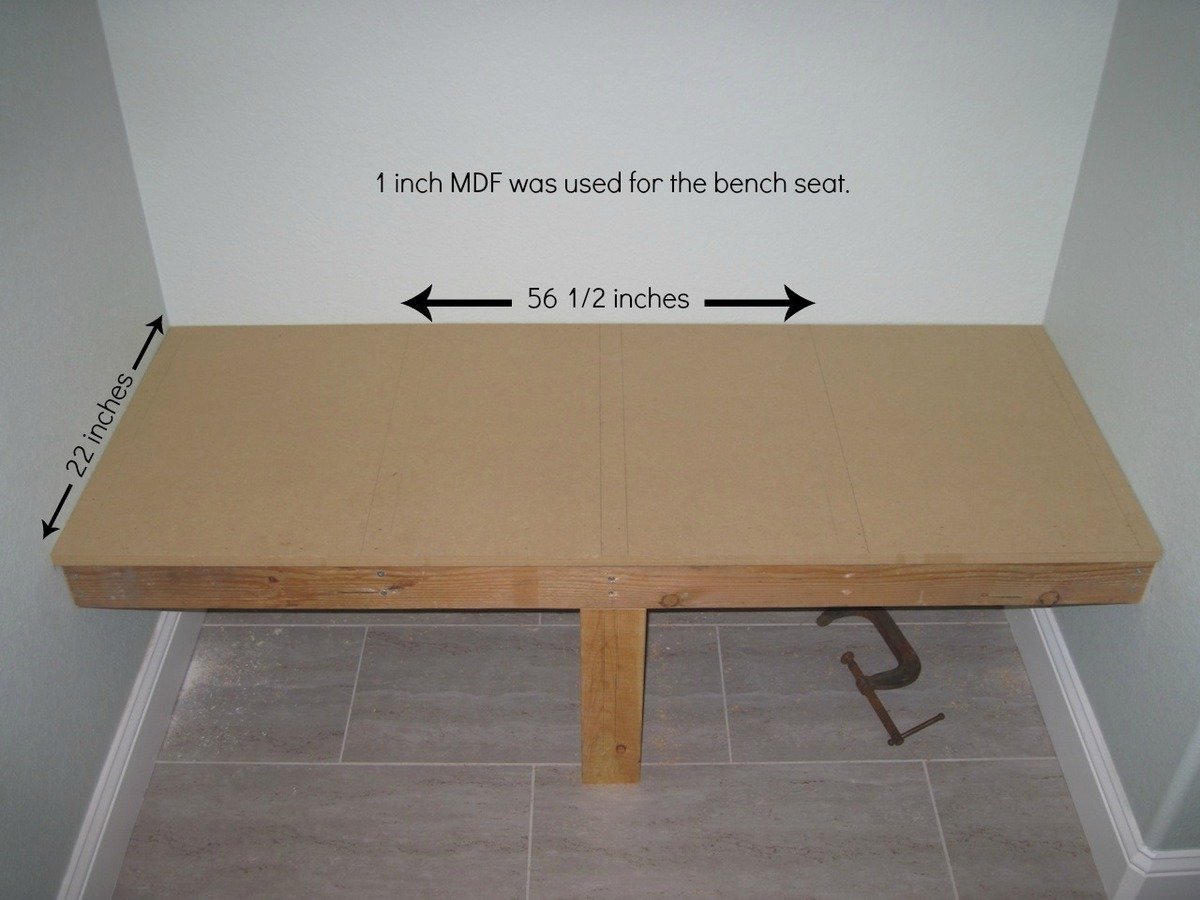
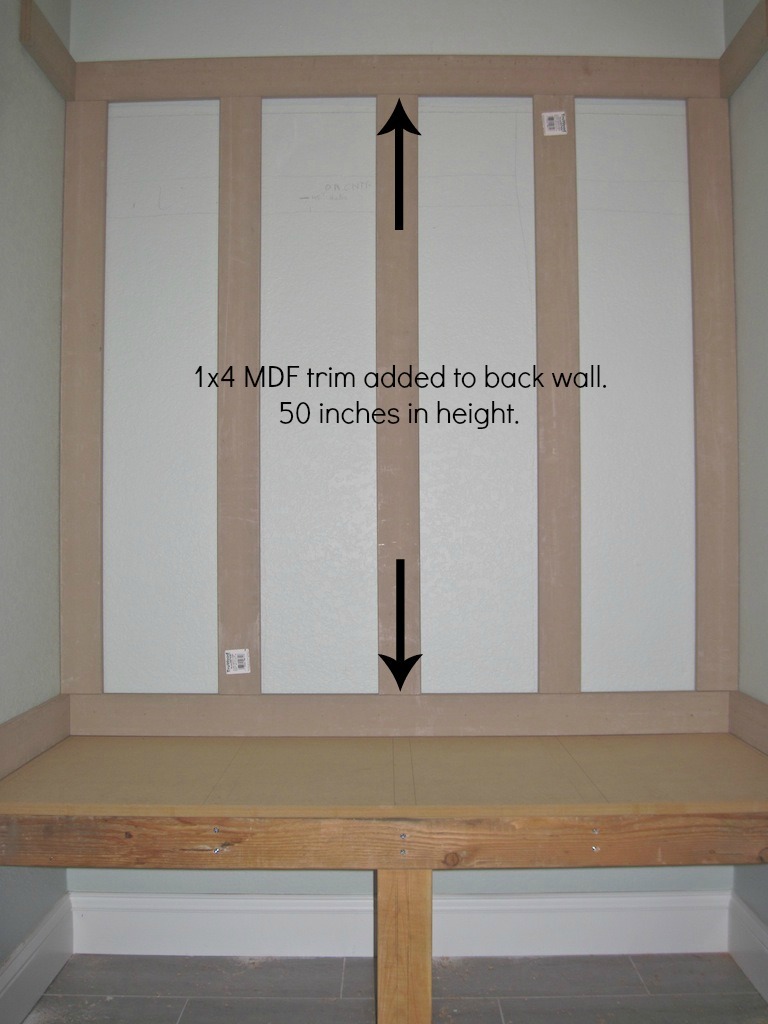
Mudroom Bench
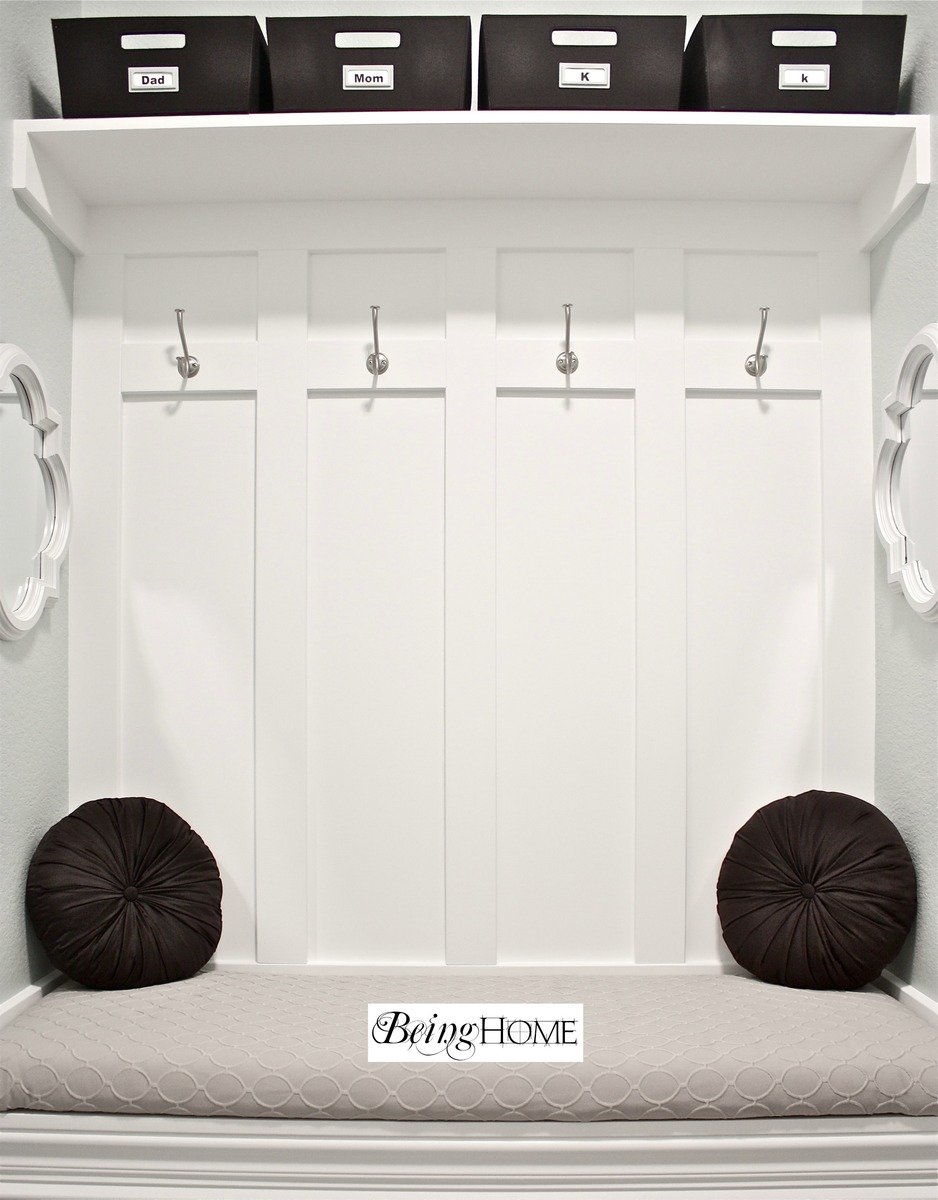
With much needed seating in the mudroom, an unused space (nook) was used to build a mudroom bench and shelf. No plans were used. I basically looked on-line and mentally drew up an idea of how I wanted the final product to look.
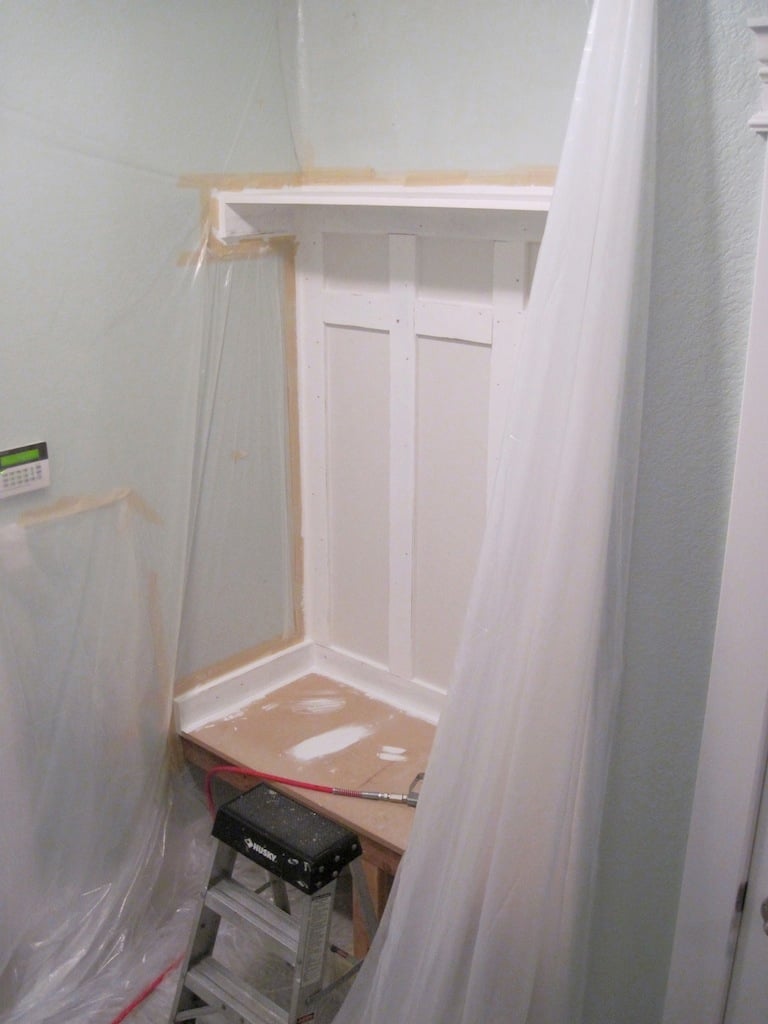
There were some setbacks such as not like the knock down textured walls (after partially painting the bench). I ended up covering the textured walls with hardboard and repainted.
A bench cushion was made for added comfort and style.
Complete tutorial for the bench is here and the bench cushion tutorial is here.
Thank you.
Julie

Built from Plan(s)
Estimated Time Investment
Weekend Project (10-20 Hours)
Finish Used
Behr Ultra (paint and primer in one) in ultra white finish.
Recommended Skill Level
Beginner
Comments
Thu, 05/16/2013 - 13:48
Mudroom Bench
Thank you so much for the idea and plan. I used it to turn an extra laundry room that we have off of our garage into a much needed mudroom. The most challenging project I have ever done before is hanging blinds. But with your help and some from the Home Depot employees, I did it! Our family is more than happy with it. Thanks!!!
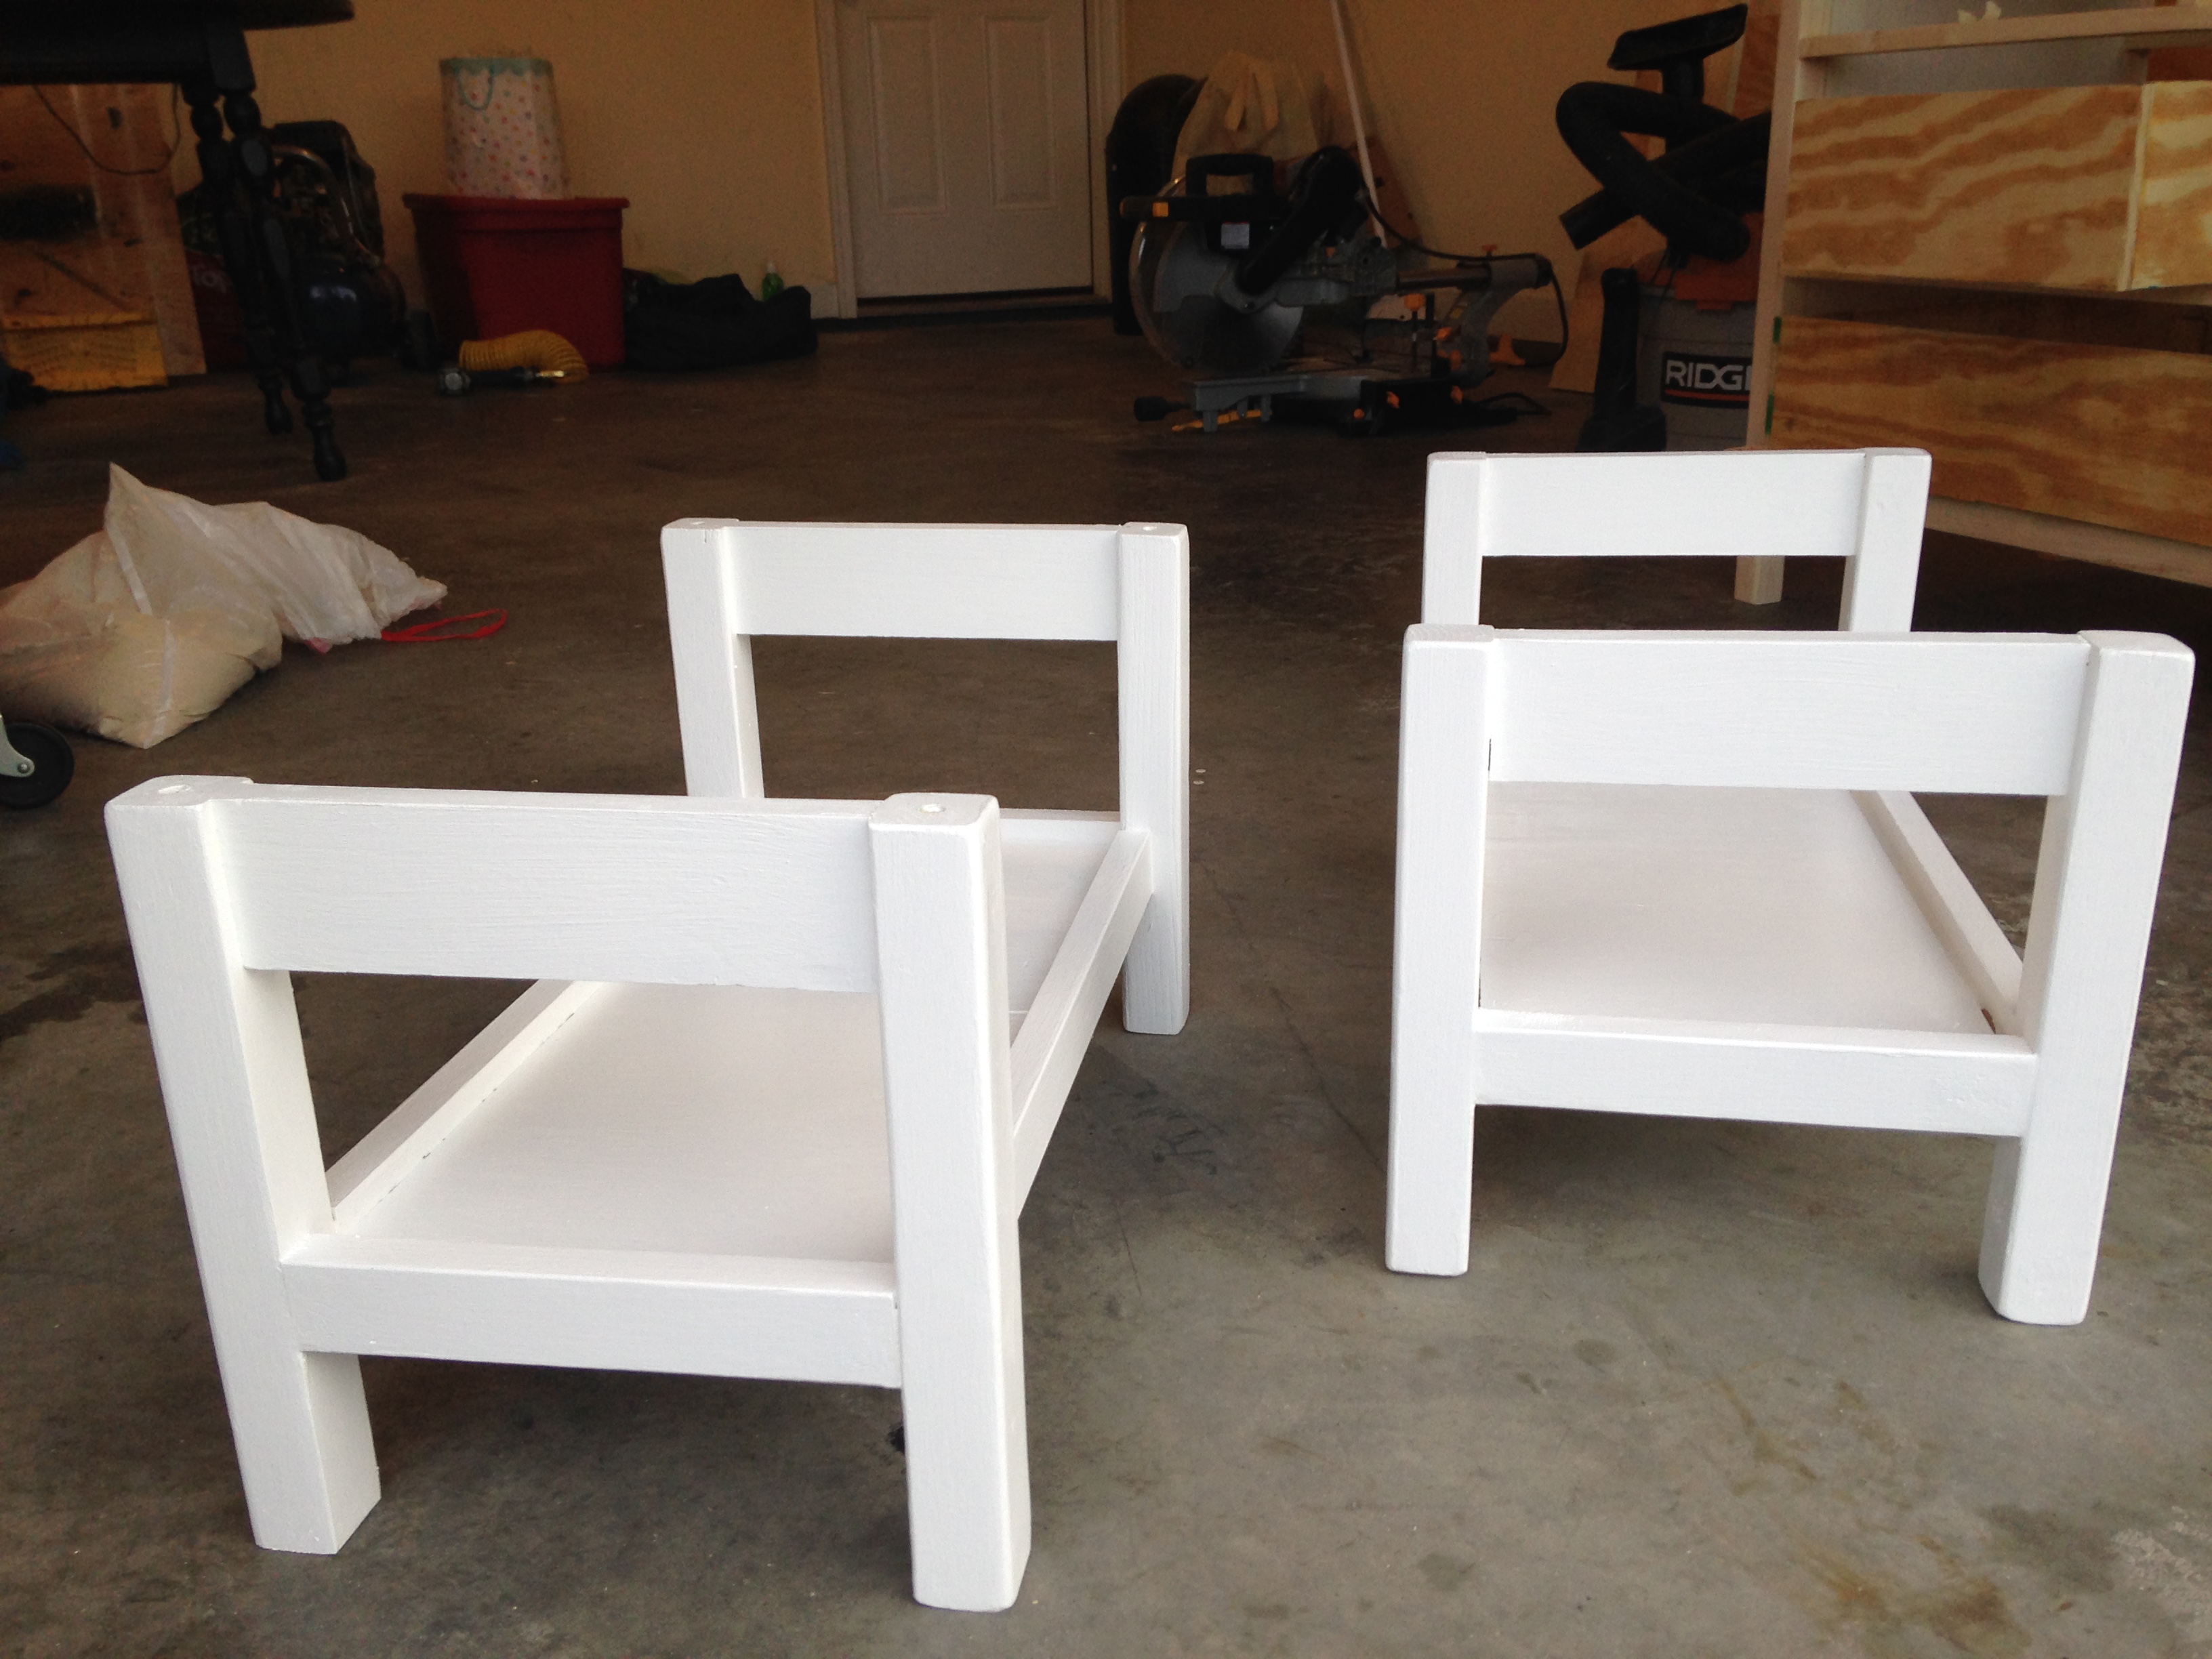
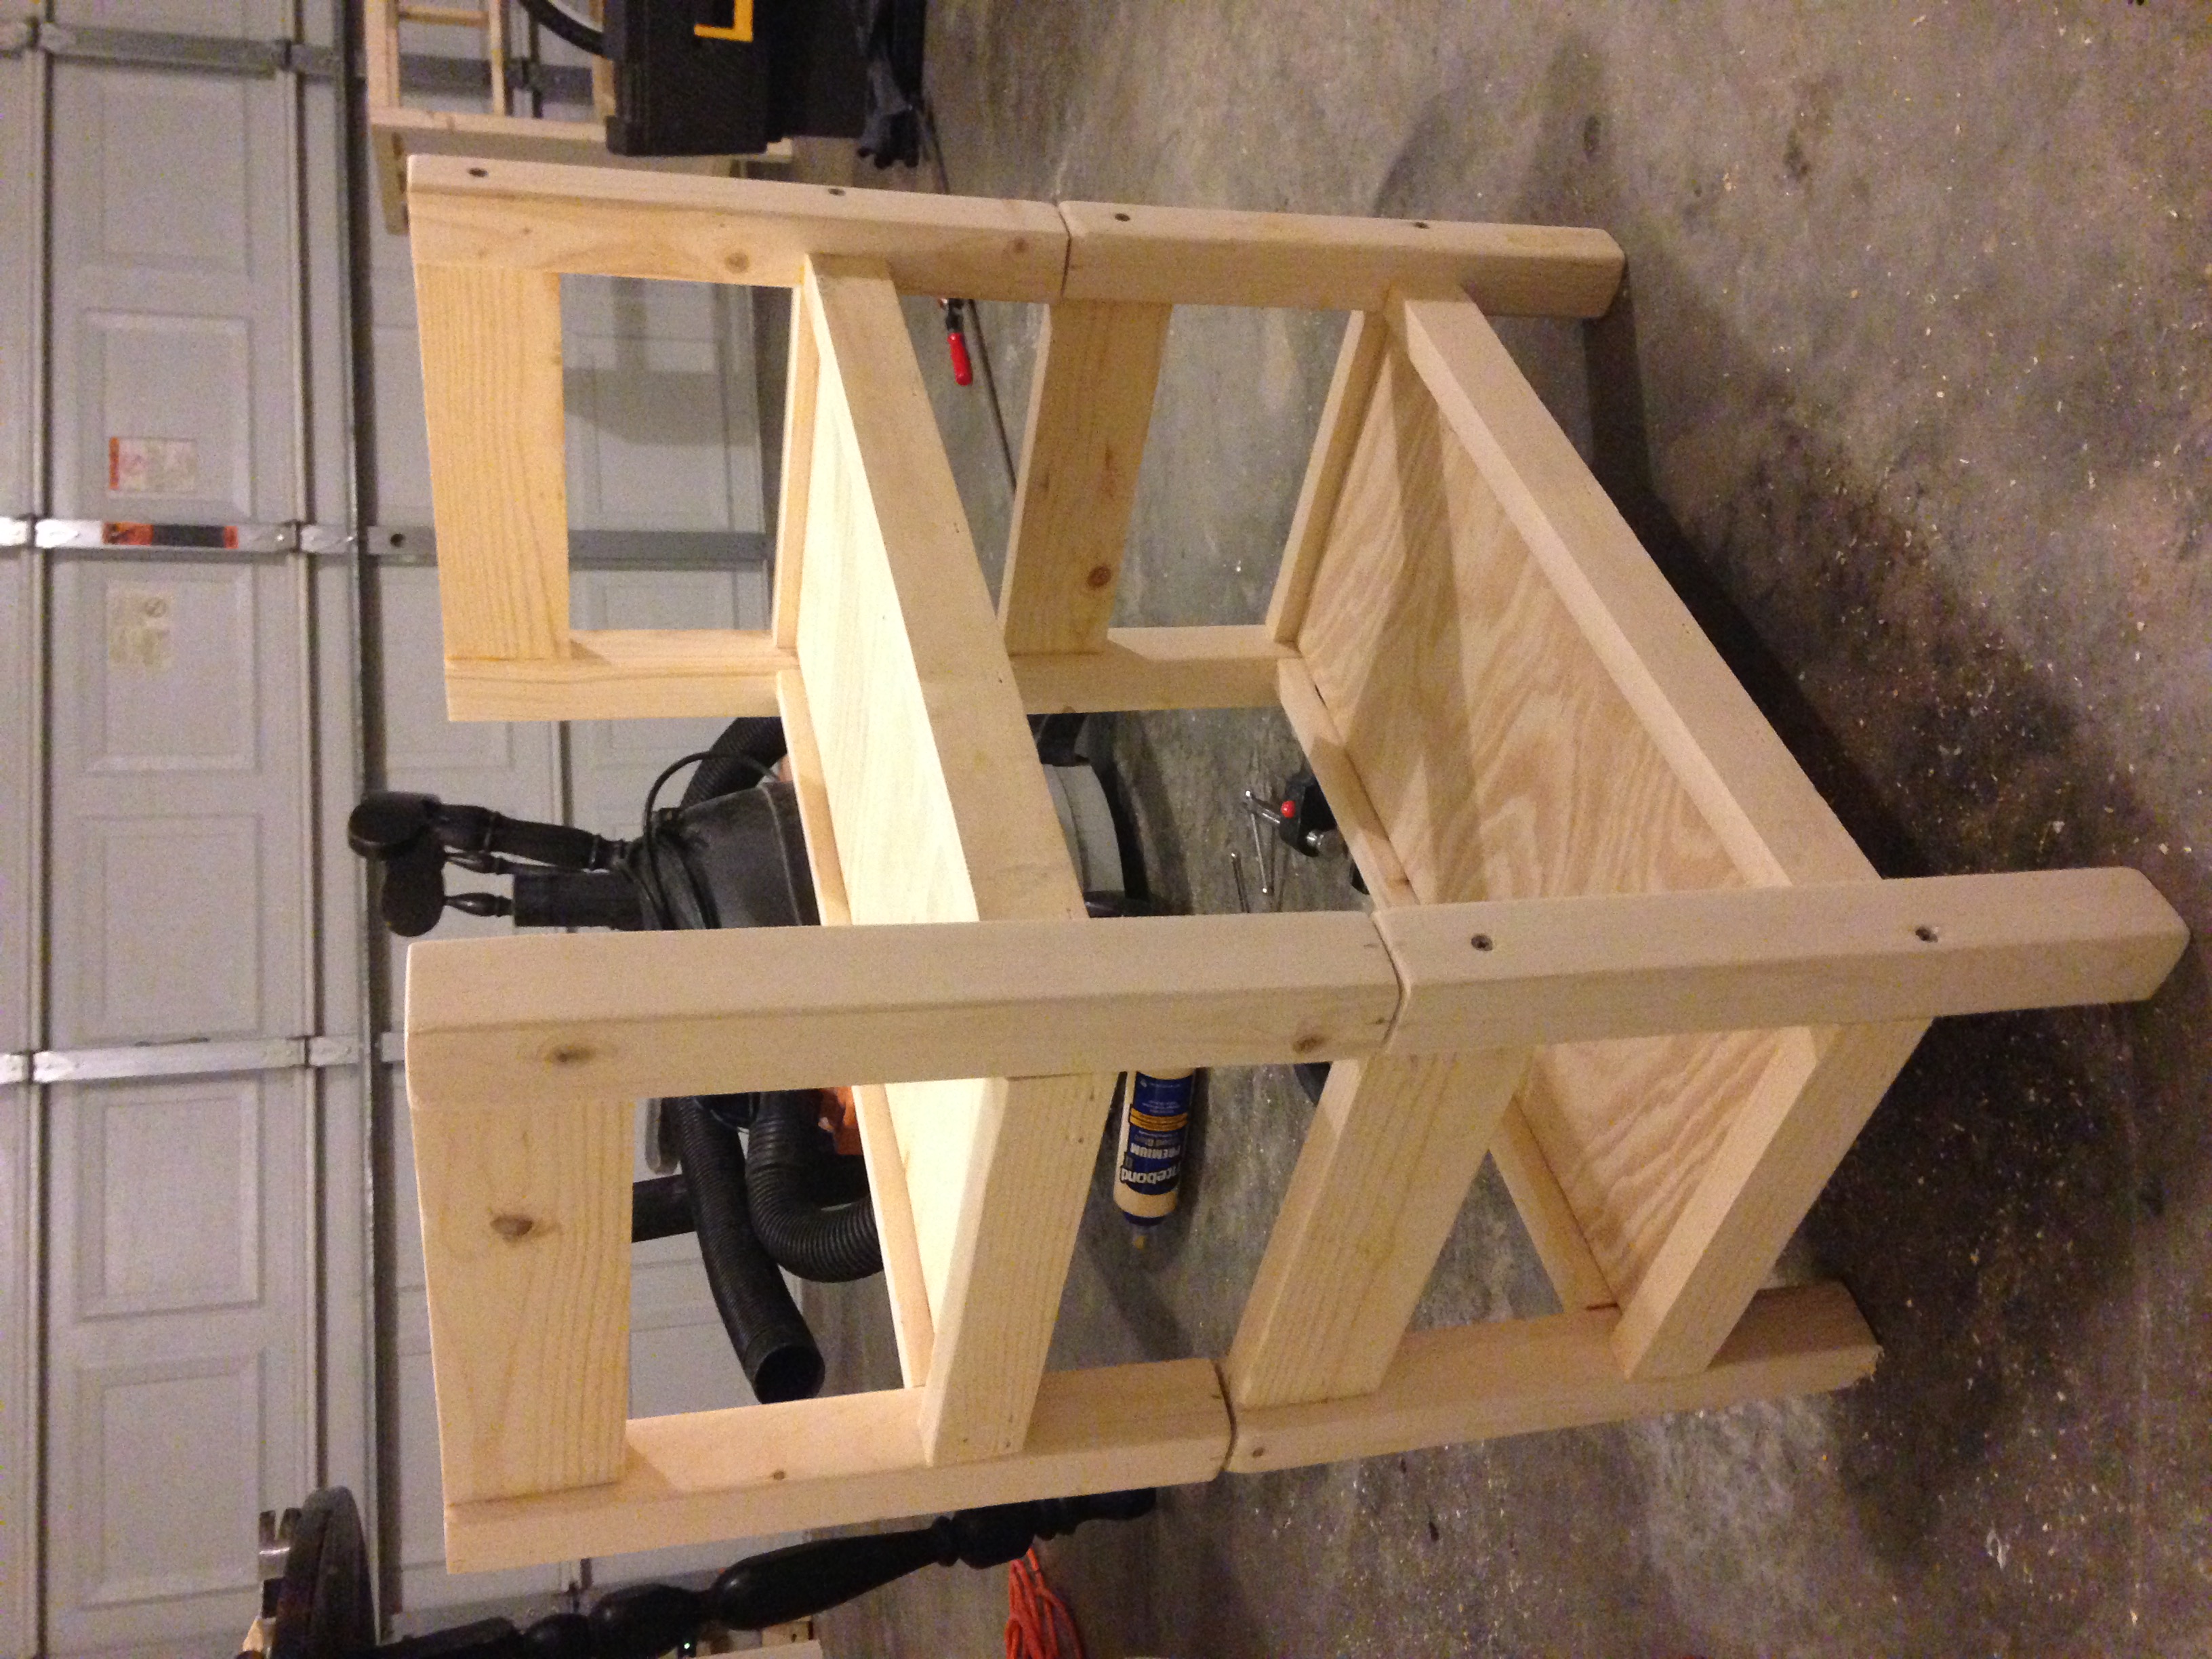
Modified Doll Bunk Bed
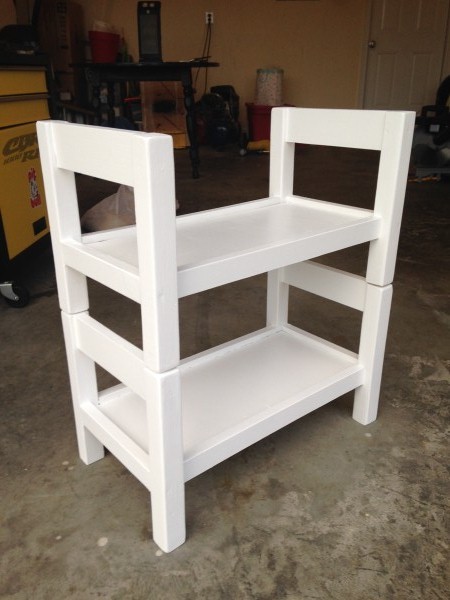
I made this bunk bed for a friend's daughters. I modified the plans by using 2x2's for the bed posts instead of 1x2's. It made it harder to hide the screws but in the end I think it looks better.
Built from Plan(s)
Estimated Cost
About $20.
Finish Used
I painted the wood with white paint.
Recommended Skill Level
Starter Project
Cedar Fence Picket Raised Garden Beds
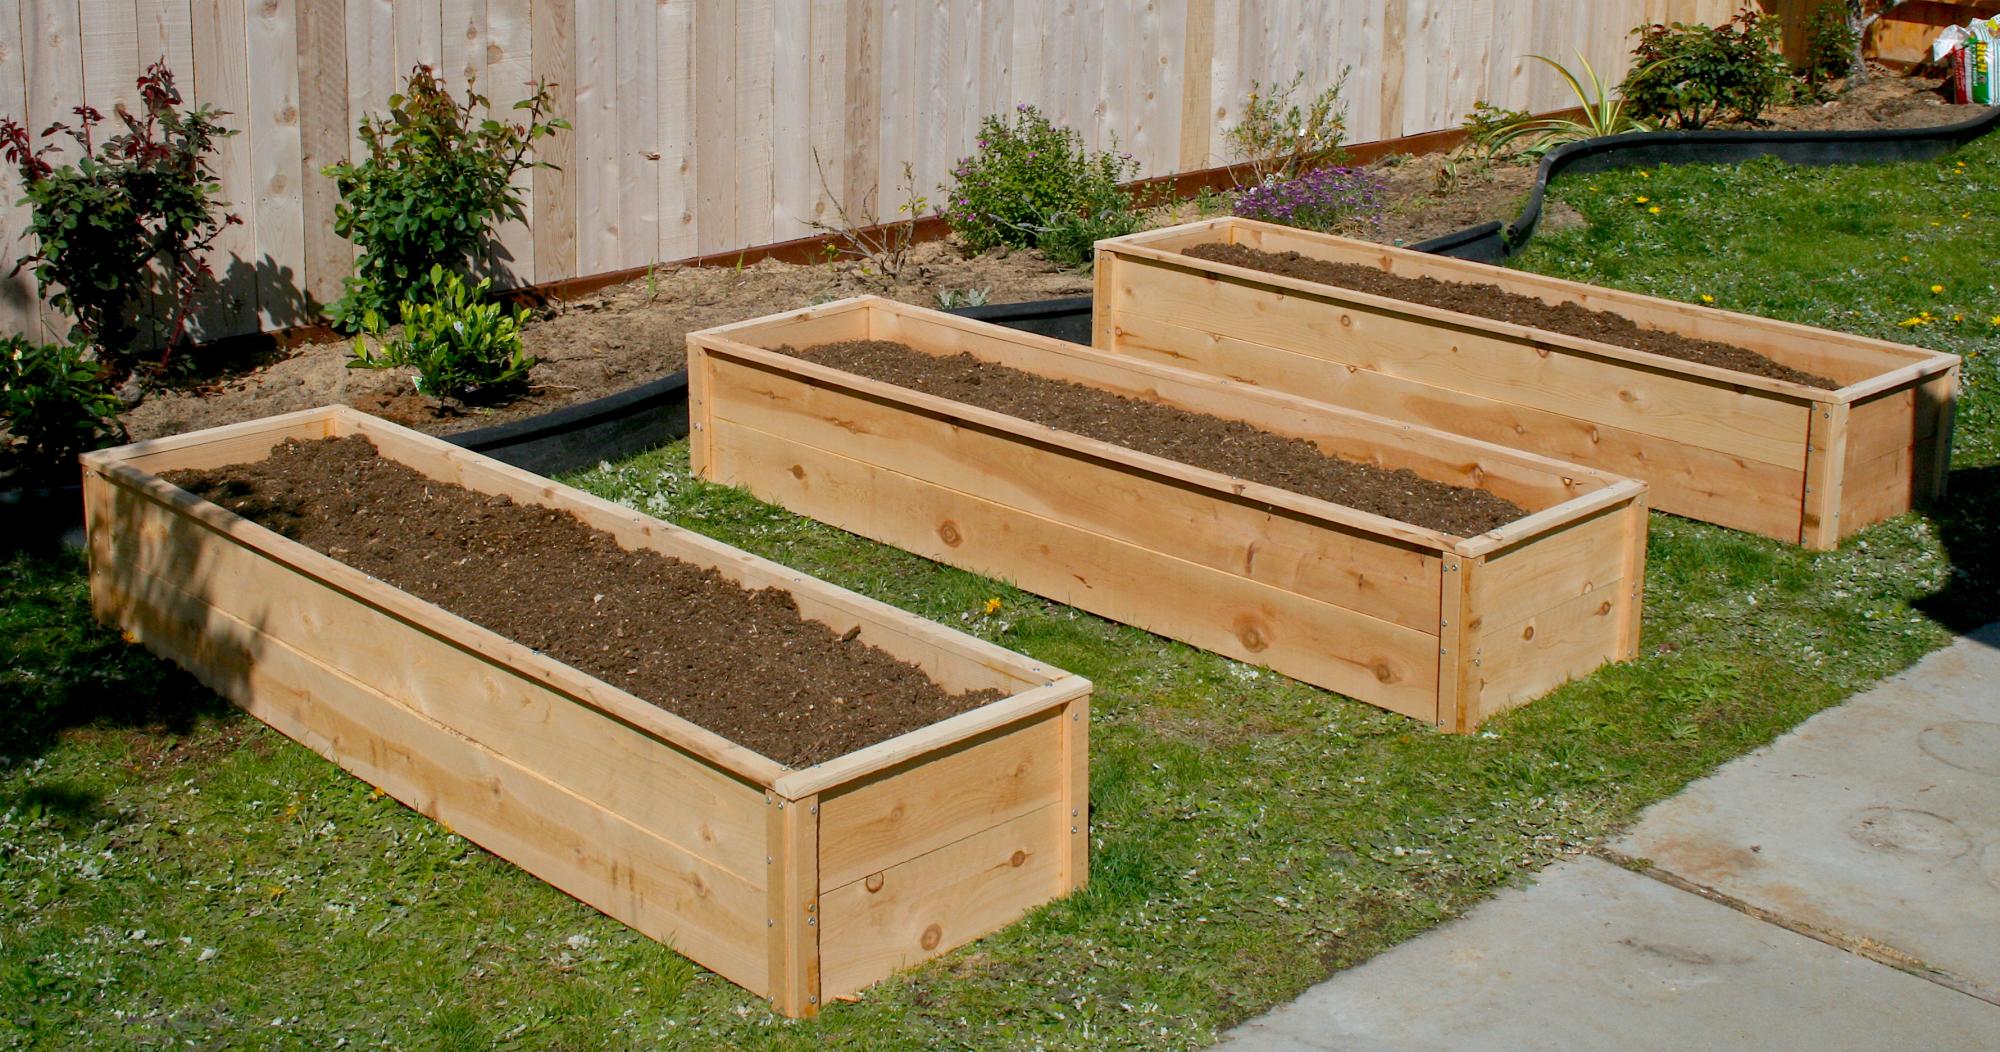
I made these for my 81 year-old Grandma, and I will be making some for my own front yard soon. I followed the plans and ripped the fence boards instead of buying the optional 1x2s. My awesome dad showed me how to use the table saw, but the rest I did all by myself! We decided to leave them unfinished for a natural look. It took me about 7 hours total broken up to make all three, but this is my first project and I was slow. Thanks Ana, for inspiring this working Mom to pick up a hammer and get stuff done!
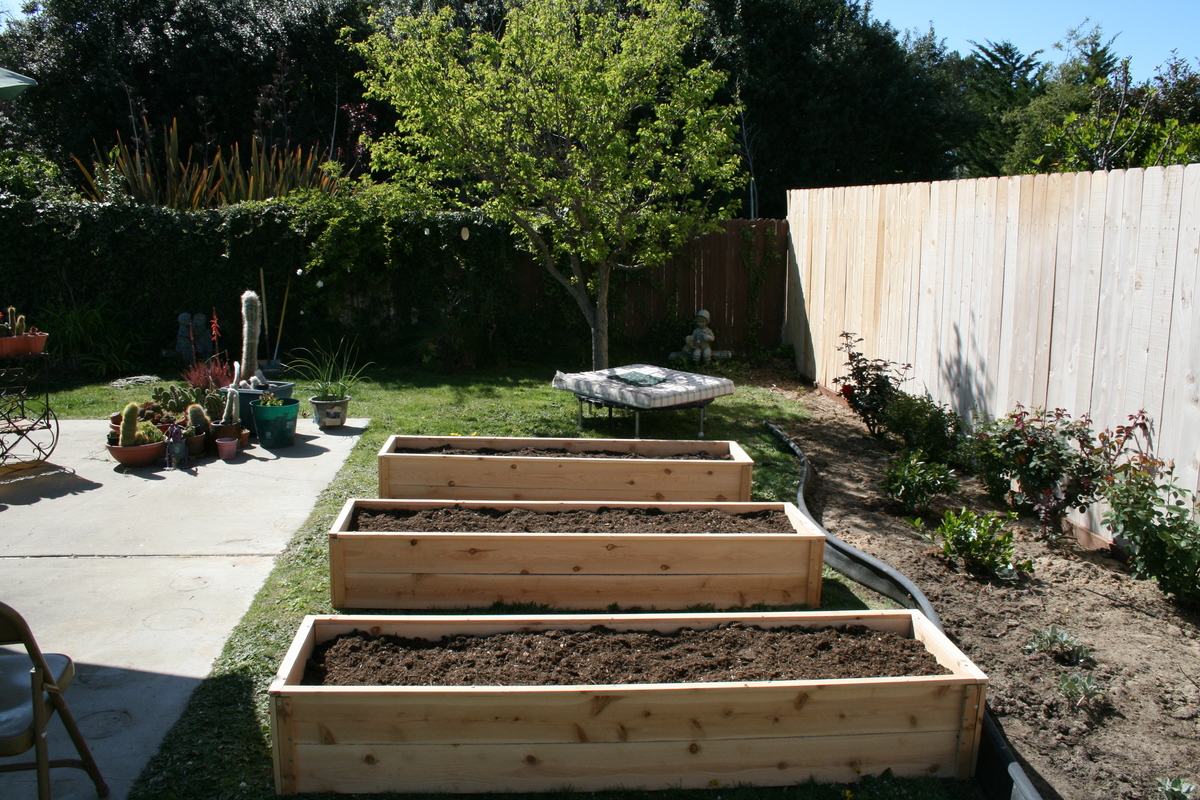
Built from Plan(s)
Estimated Cost
$13 per bed in fence boards
Estimated Time Investment
Afternoon Project (3-6 Hours)
Finish Used
Left unfinished
Recommended Skill Level
Beginner
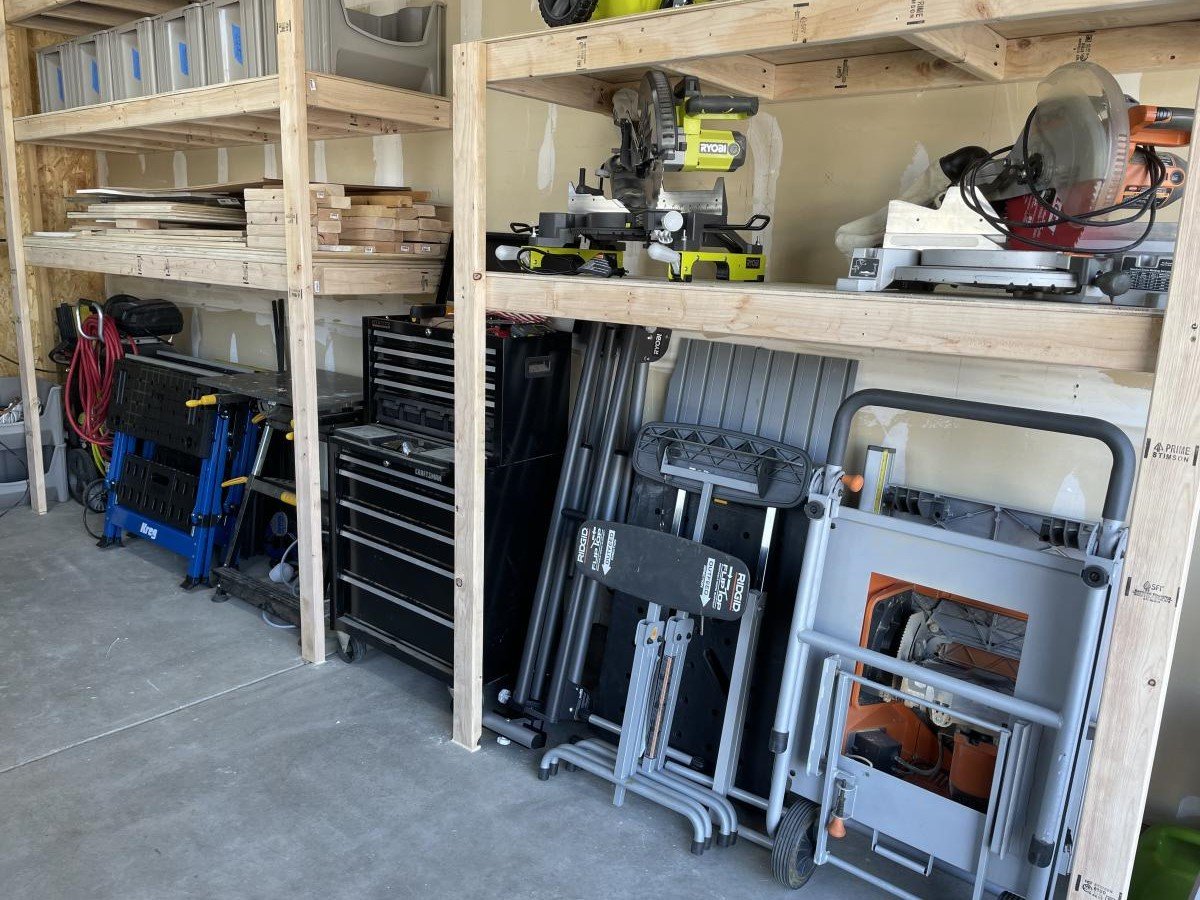
New Workshop - Let the Fun Begin!
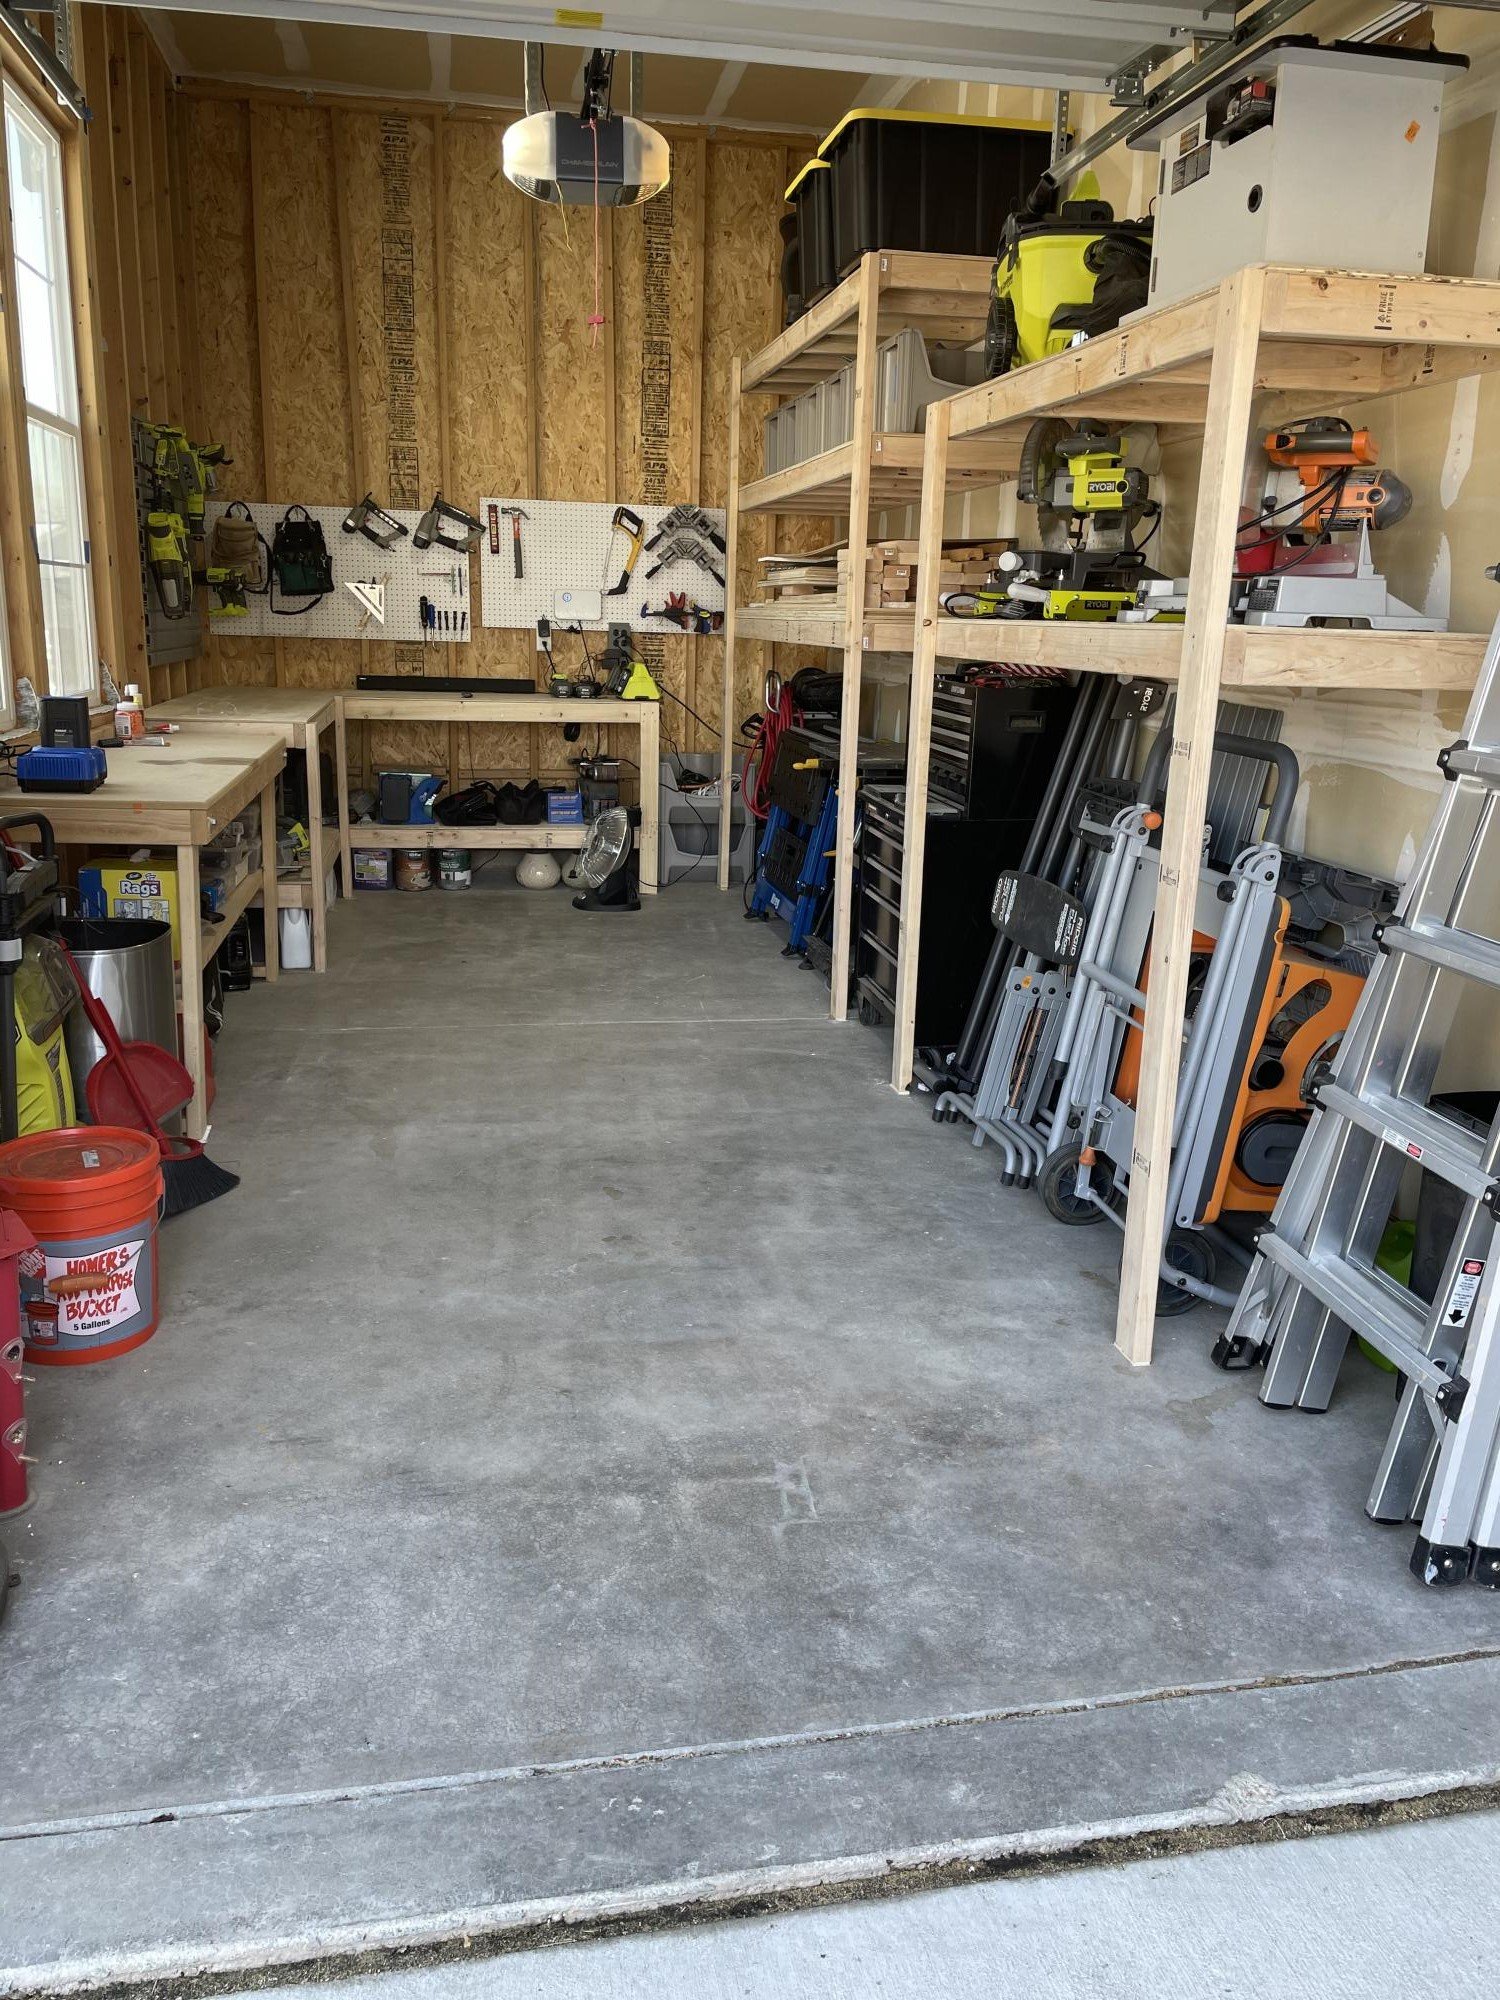
I was really into building things and DIY over 10 years ago, but due to work/life I hadn't done anything since 2009. I was going pretty crazy working from home during the pandemic, and decided to get back into home improvement to have something to look forward to. After doing some painting and building a few accent walls out of shiplap and reclaimed wood (and loving it), I decided to turn my single car garage into a shop. This is when I found Ana White, and absolutely loved the plans and videos around the wall storage and workbench. I can't believe how sturdy everything is, how straightforward the plans are, and how well this turned out. It made me want to build all the things, and I'll be taking on many projects in the future. (my apologies for the pictures being in the wrong orientation - can't seem to adjust them)
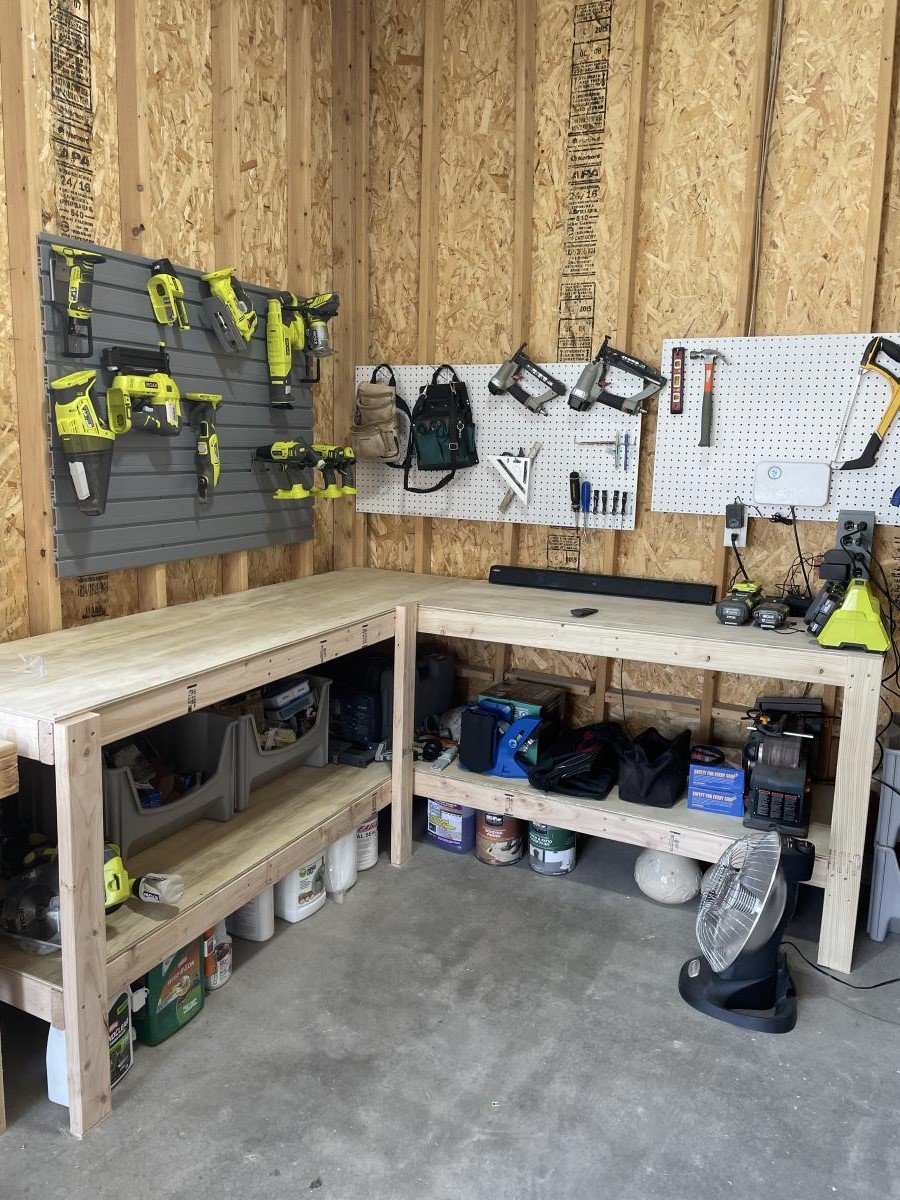
Built from Plan(s)
Estimated Cost
500
Estimated Time Investment
Weekend Project (10-20 Hours)
Finish Used
None.
Recommended Skill Level
Intermediate
Comments
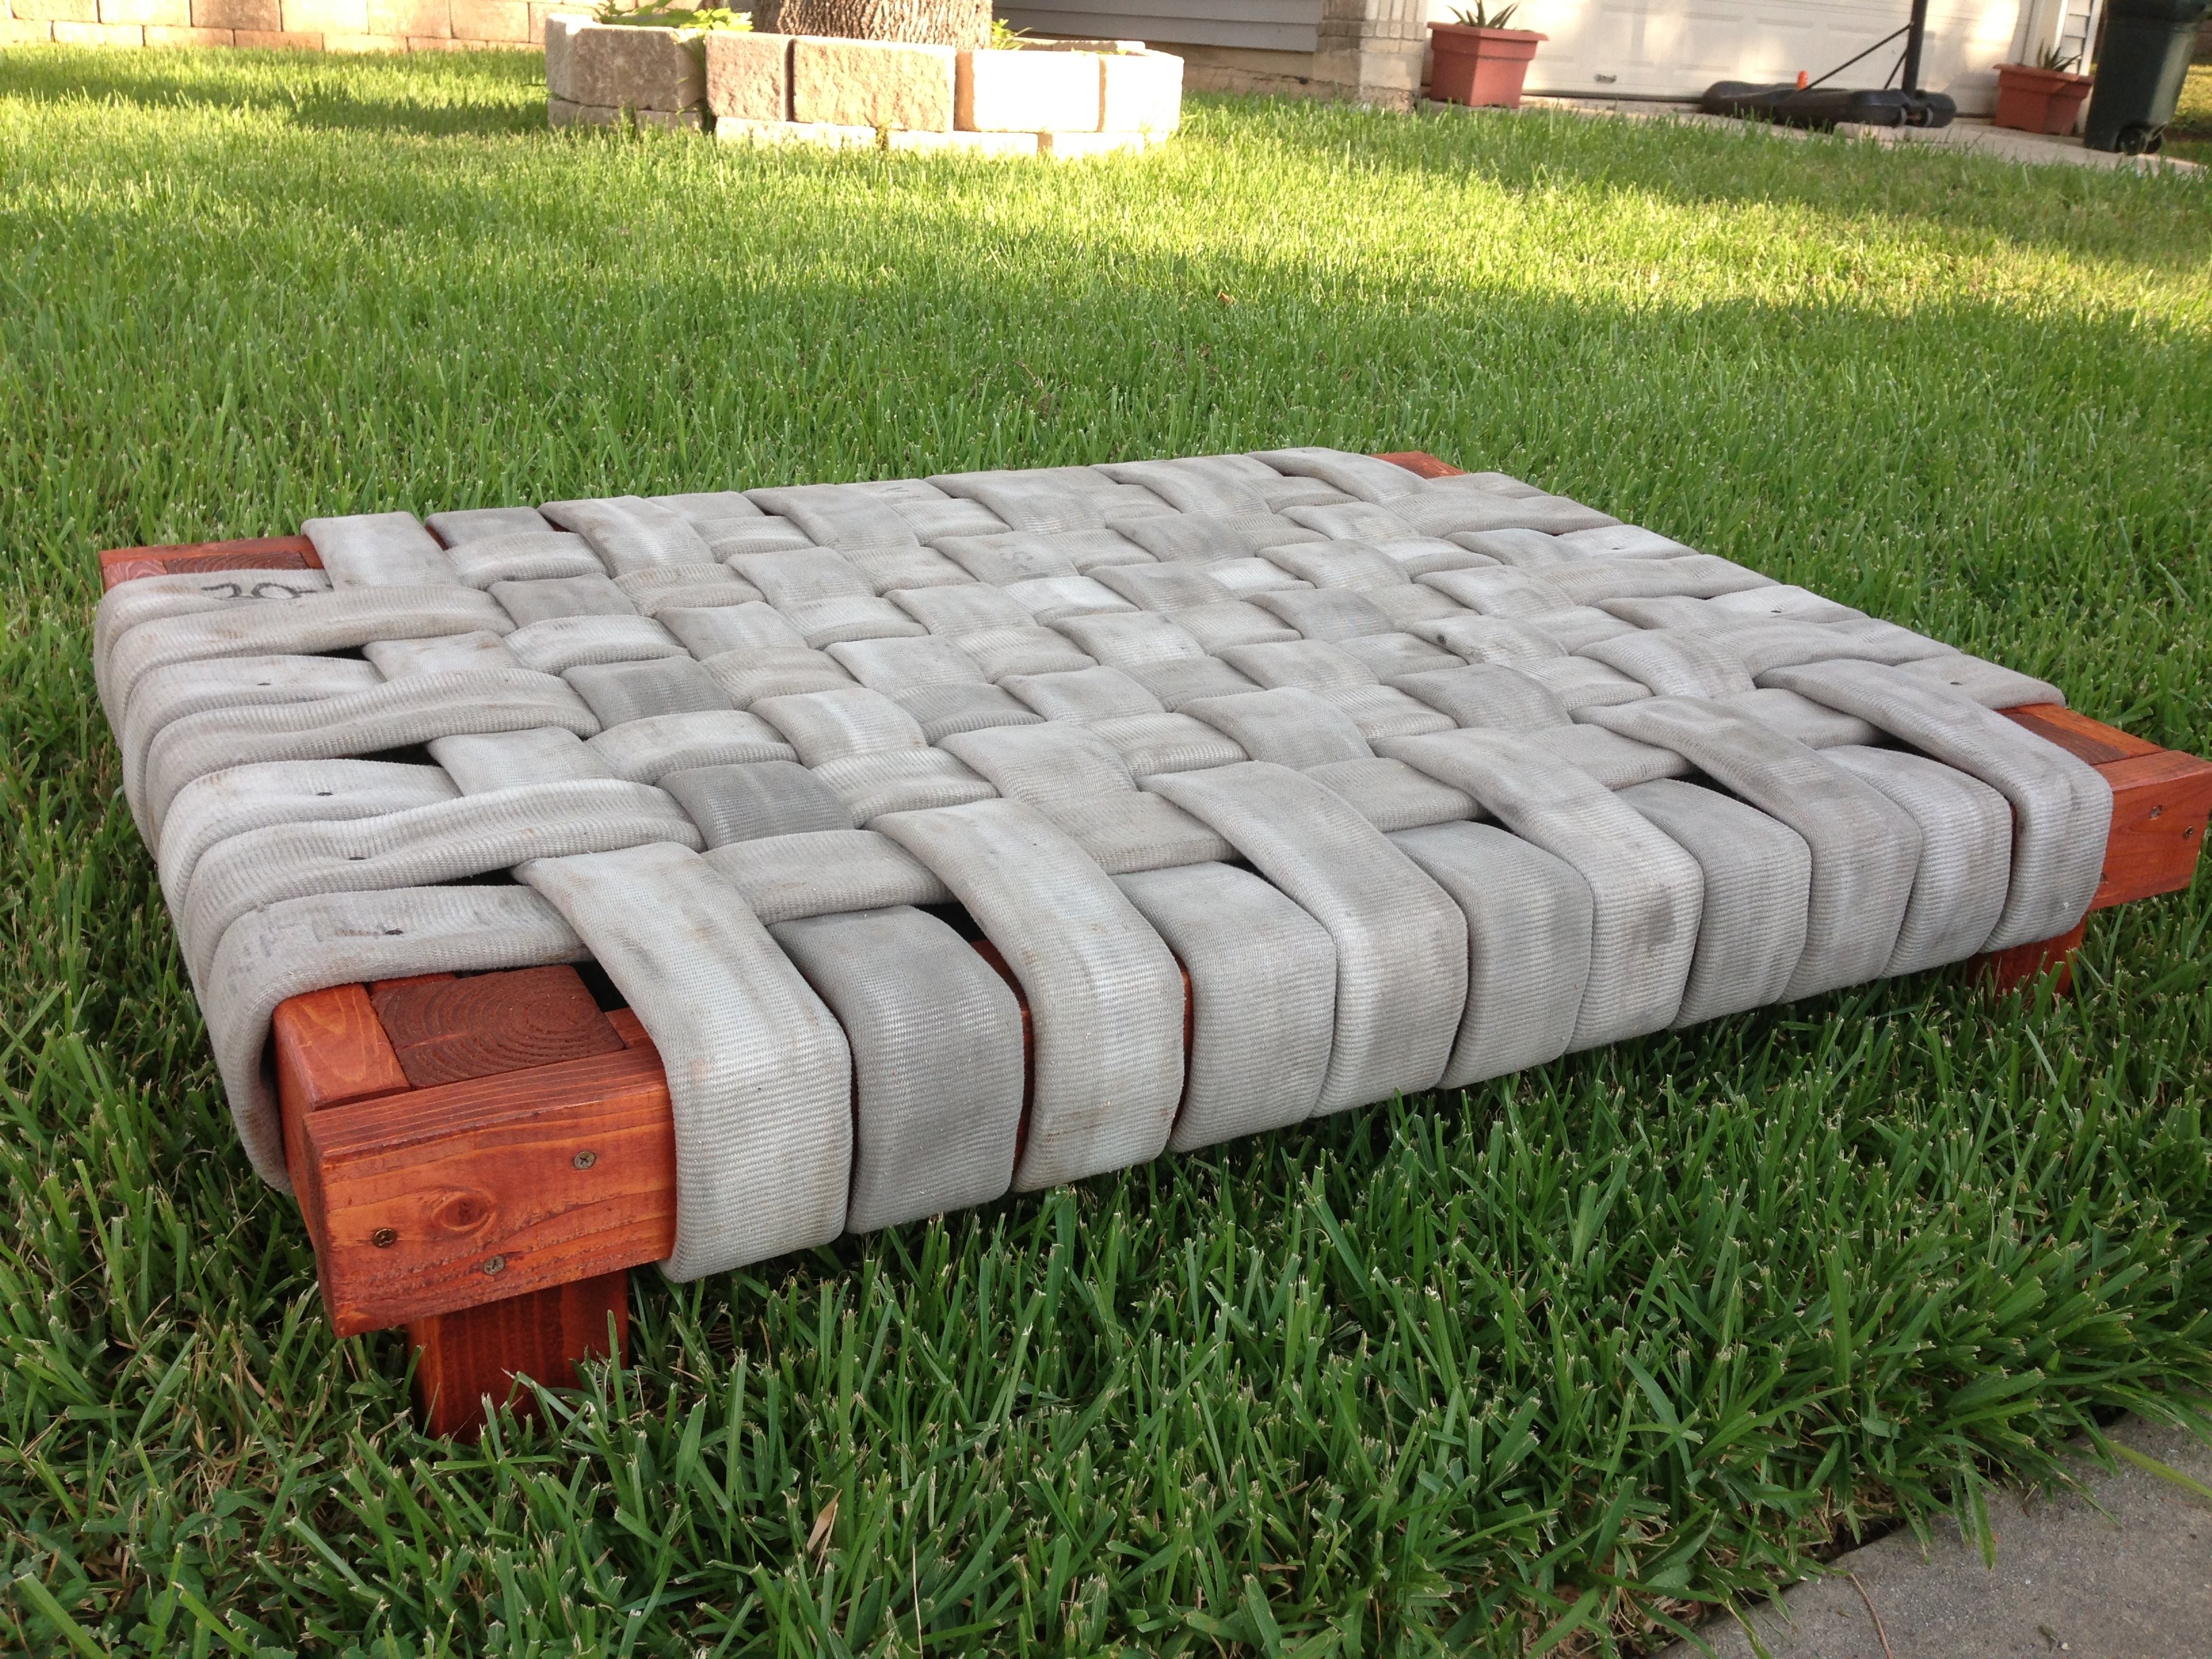
Bench
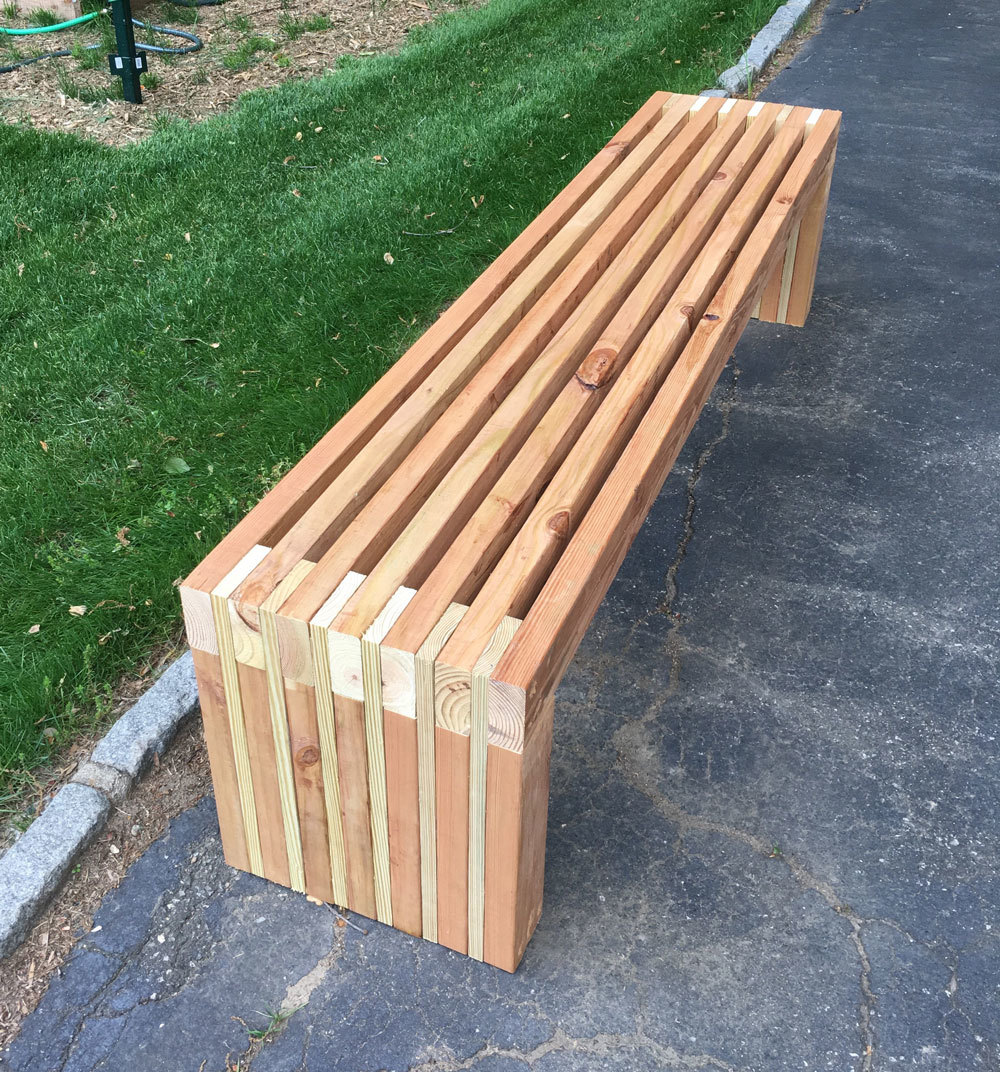
Great bench
Built from Plan(s)
Estimated Cost
$100
Estimated Time Investment
Day Project (6-9 Hours)
Recommended Skill Level
Beginner
Comments
SoCaliforniaMel
Mon, 07/08/2013 - 15:48
Cool
I have a pit bull. Shes the sweetest thing but loves to chew up her own beds. She wont chew the shihtzus bed or the cats beds just her own. I'd like to see her try this one out.
;) Now if I could figure out a way to get my dad to give up one of his fire hoses. hehe
Great job, great idea
~Melody
dr2112
Sun, 02/01/2015 - 10:41
plans
How would I go about getting a copy of the plans for this?
jrbrisby
Wed, 08/19/2015 - 11:43
Plans for bed
How would i be able to get plans for the Dog Bed